The Newton’s Nook Design Team is hopping along today to share some sweet treats – just in time for Valentines day! Make sure to scroll down at the bottom of this post to see the whole list, and hop along and comment for a chance to win!
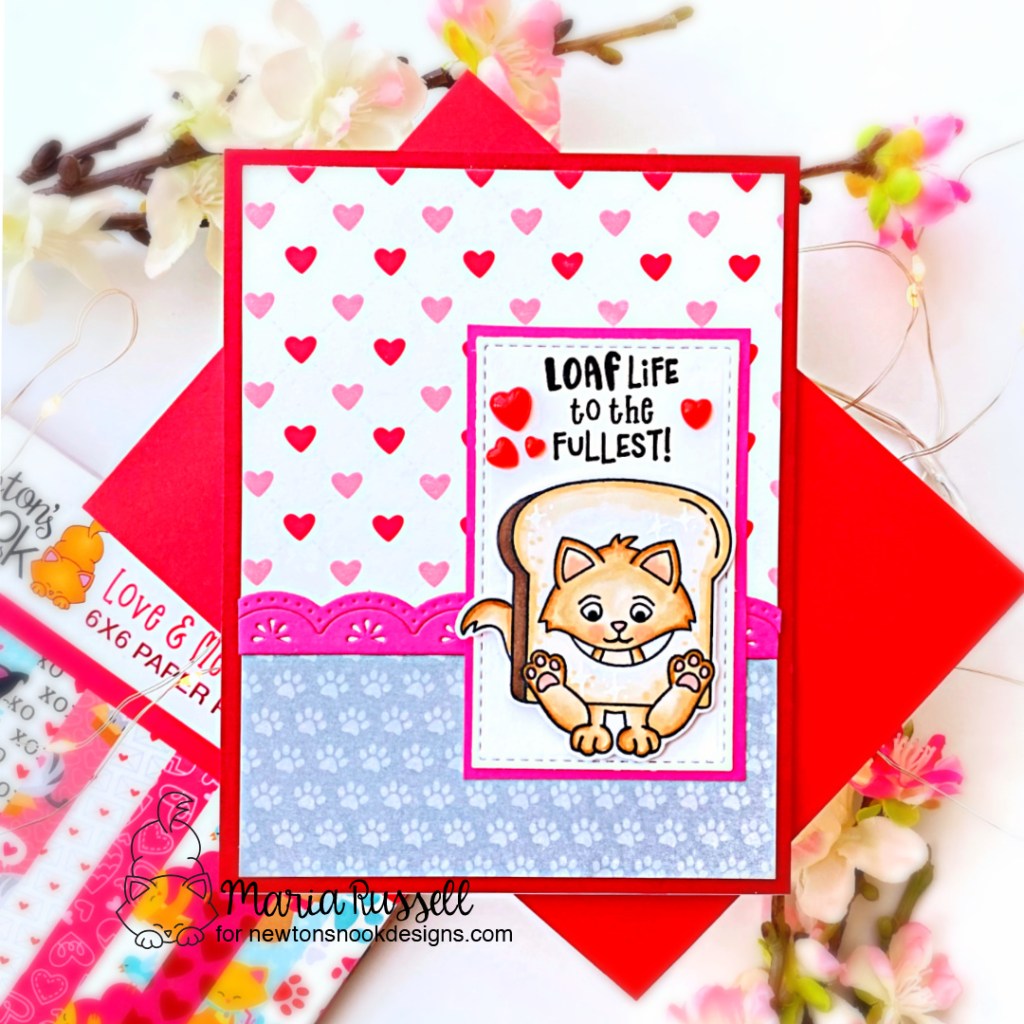
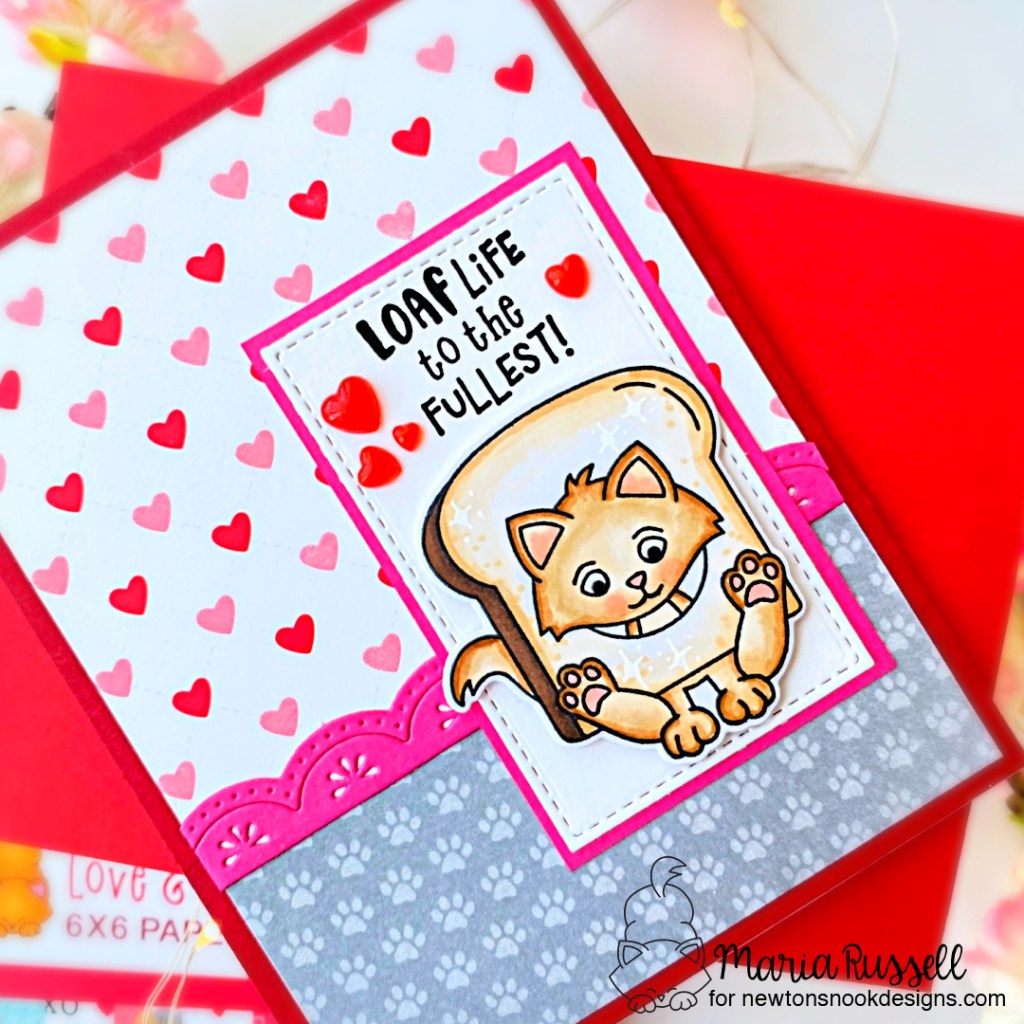
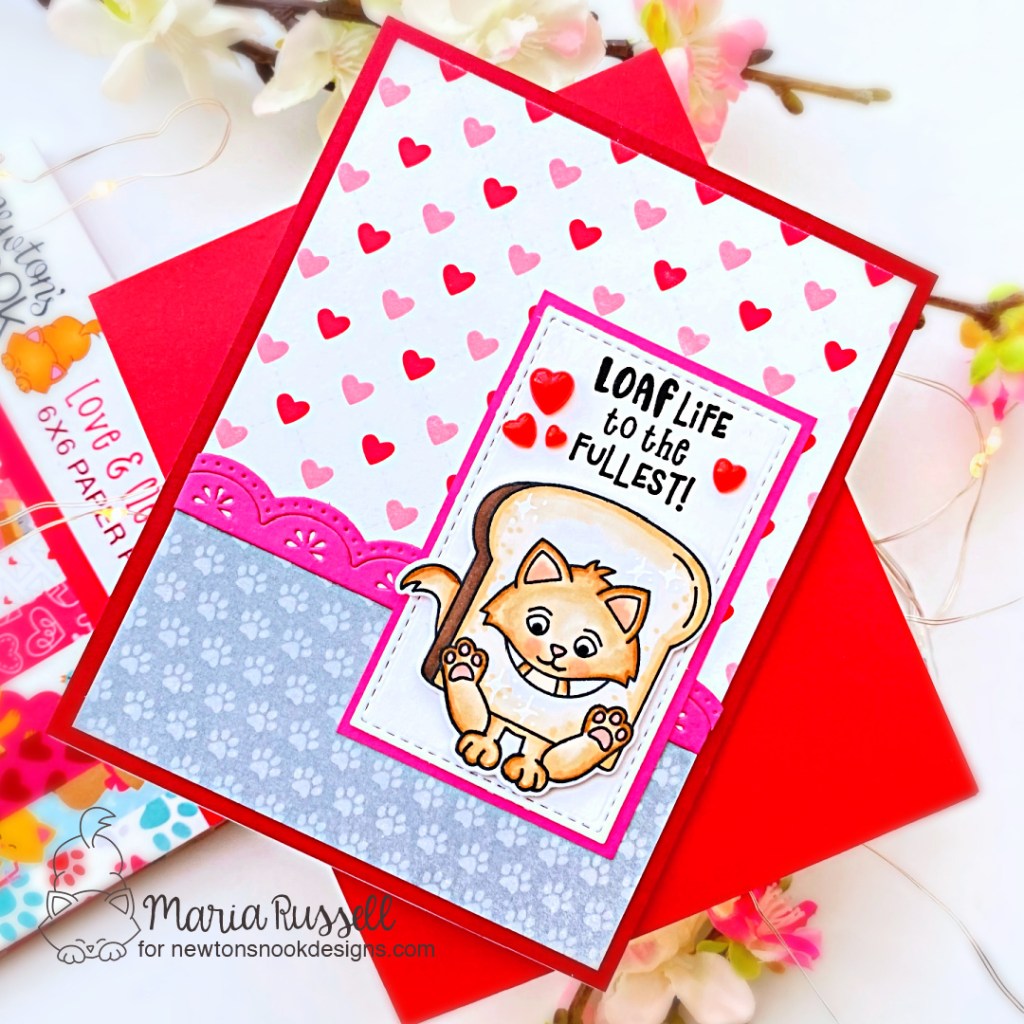
For my project today, I am showcasing the Love & Chocolate stamp set and coordinating dies with the Love & Meows 6×6 Paper Pad.

I bought a bunch of these Pink Chocolate Bars and gift cards at Michael’s and I thought I’d give them away to my friends for Valentine’s Day! I needed a cute gift bag to go with the treat so I thought I’d use the Love & Meows 6×6 Paper Pad. Here’s how I made the project:
- using a die from my collection, die-cut the gift bag on the Love & Meows 6×6 Paper Pad.
- assemble the gift bag.
- insert the chocolate bar and the gift card inside and secure with some red ribbon. I used seam-binding for mine.
- die-cut a few hearts and adhere then together.
- stamp the images on some Neenah solar white card stock and color the images in with alcohol markers.
- die-cut the images using the coordinating dies.
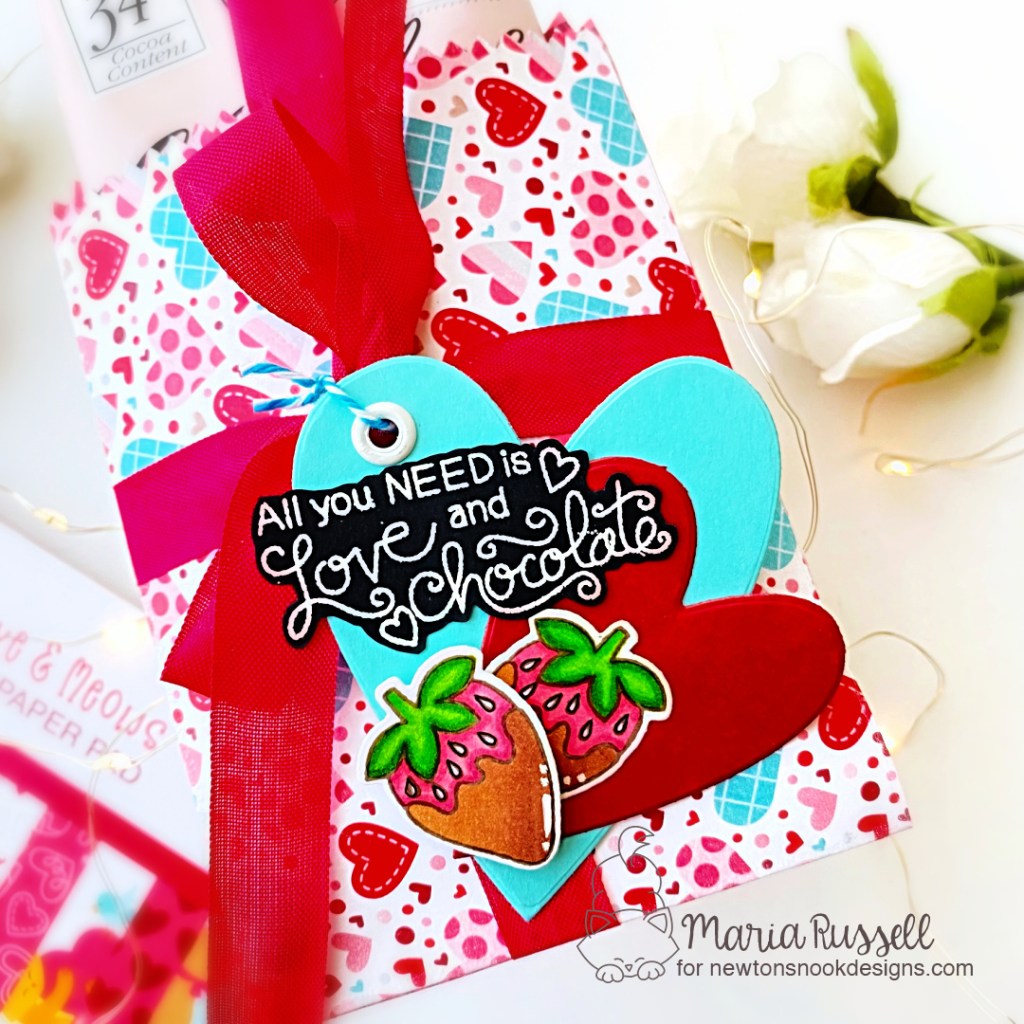
- die-cut a few hearts using some dies from your collection. Adhere them together with glue.
- to turn these hearts into a gift tag, use a Crop-A-Dile to punch a hole. Insert the eyelet and used the Crop-A-Dile again to set the eyelet in place.
- adhere the strawberry images on the hearts.
- stamp the sentiment on some black card stock with some embossing ink. Sprinkle some white embossing powder and heat-set with the heating tool.
- use precision snips to cut the sentiment and adhere on the tag.
- use some twine to attach the tag to the gift.
- finish the design by using some white gel pen for added texture and interest.

My friends are going to love this sweet surprise on Valentine’s Day! Full details about the GIVEAWAY and supplies used are listed and linked below.
Sweet Treats Blog Hop GIVEAWAY!
Would you like to win a $25 store credit to Newton’s Nook Designs online shop? Newton’s Nook is giving them out to TWO lucky winners!
Here’s how to win:
Comment on the NND blog and Design Team blogs (see list below)! The winner will be chosen at random from the collective reveal posts. Make sure to check out each of their blogs and comment for your chance to win. You will not know which blog has been chosen so the more you comment on the better your chances are of winning! You have until Monday, February 7th at 9pm EST to comment — winners will be announced on the NND blog on Tuesday, February 8th.
Check out all the awesome Design Team Blogs below to enter:
——–SUPPLIES——–