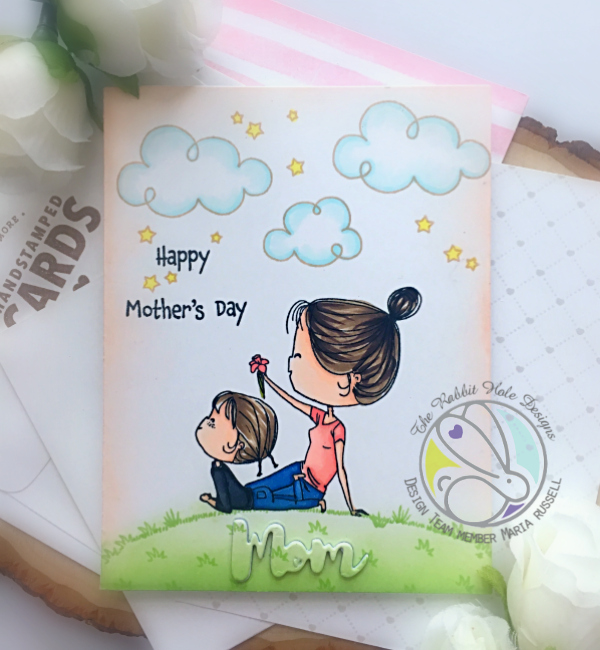
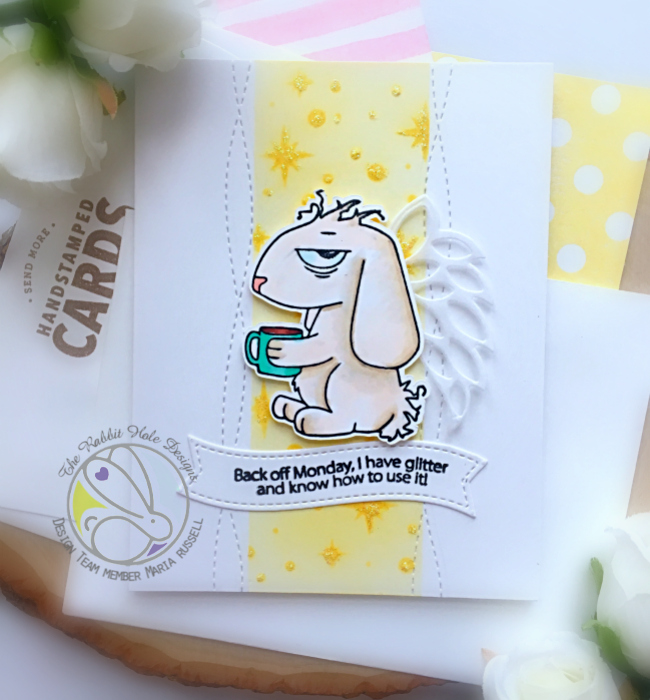
Hello The Rabbit Hole Designs fans! Maria here with you and it’s my day to take over the TRHD blog. For today’s project, I am showcasing the Caffeinated Rabbit and the Perfectly Blended stamp set.


I have a cute and simple card for you today with one of my favorite caffeinated creature.

Here’s how I made the card:
- stamp the rabbit image on smooth white card stock and color the images in with alcohol markers (or any medium of your choice).
- die-cut the image with an electronic die-cutting machine or fussy cut with scissors. I used my Brother Scan N Cut 2.
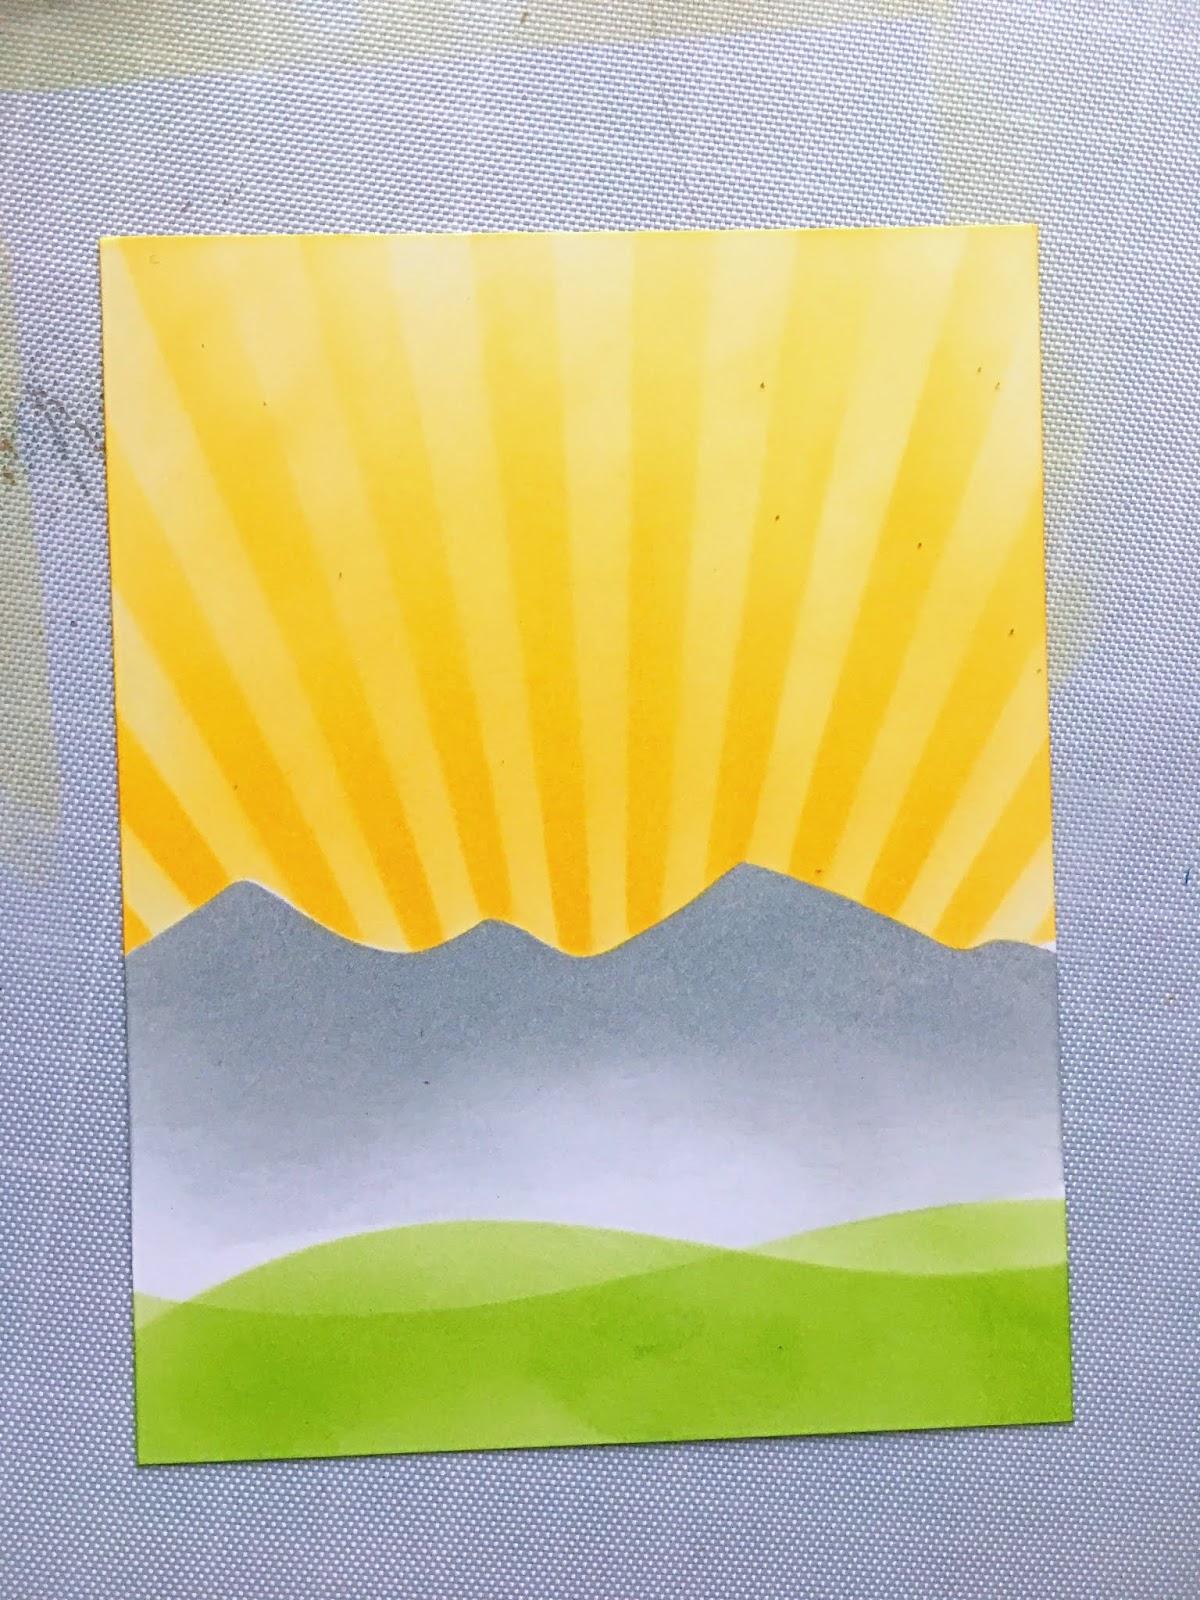
- cut an A2 size piece of smooth white card stock and use the solar burst stencil and a blending brush with Tattered Rose distress oxide ink and antique linen to add color to the background.
- use the “hello” die to die-cut the word from the background.
- adhere some fun foam to the back of the card stock and adhere this piece onto a chocolate brown card base.
- line up the negative pieces of the die-cut and adhere using liquid glue.
- adhere the bunny on top of the “hello” using liquid glue.
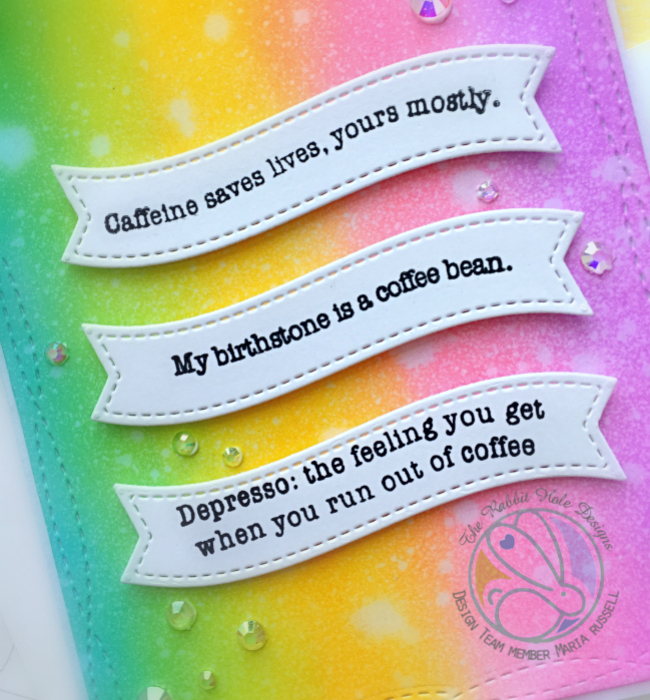
- finish the design by adding the sentiment from the Perfectly Blended stamp set.
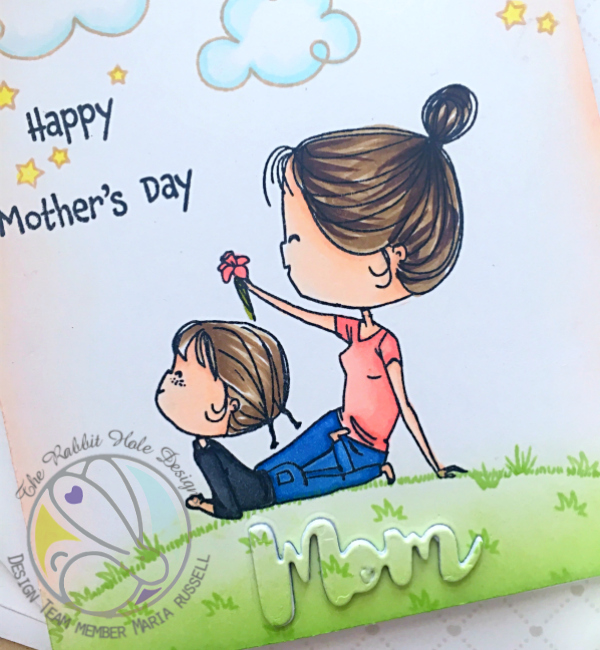
Here’s a closer look:

Another simple card but I really love how it turned out. If you are looking for further details about my project including supplies used, I would be so grateful if you can stop by my blog today at:
I hope you like my card and got inspired. Have an amazing day and happy crafting!
For more inspiration, updates, and news make sure to check out these places.

————SUPPLIES————–