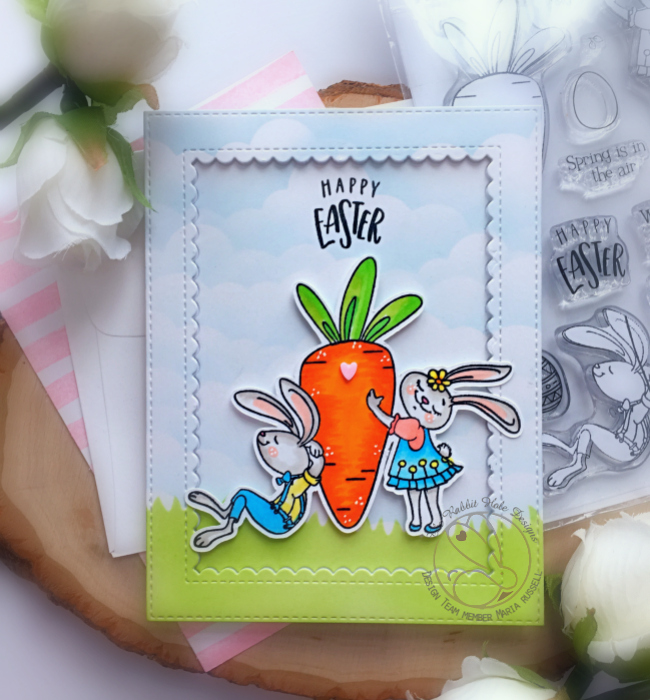
Hello my crafty peeps! I hope you are having a wonderful day so far. I am back today sharing this Easter card, showcasing the new Easter Bounty stamp set by The Rabbit Hole Designs. Here’s what it looks like:
Here’s my card:
CARD RECIPE:
Stamp the images on smooth white card stock and color the images in with Copic markers (or any coloring medium of your choice).
Die-cut the image with an electronic die-cutting machine or fussy cut with scissors. I used my Brother Scan N Cut 2.
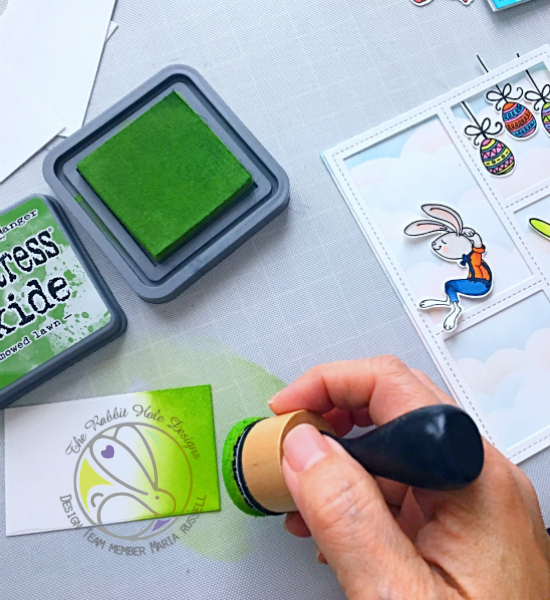
Use the storybook die and die-cut a piece using 110 lb. card stock. Keep the negative pieces to ink up with distress oxide (see photo below).
Use a grassy border die to die-cut the inked pieces.
Adhere the storybook die on the colored background with foam adhesive to give it some dimension.
Die-cut the tree using the tree die.
Start building your scene by adhering the colored images and die-cuts onto the card
Use stamping tool to stamp the sentiment.
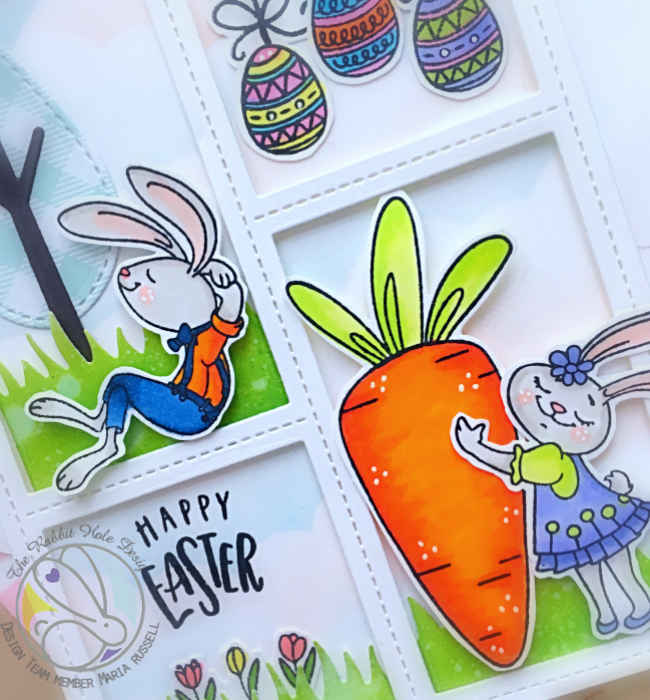
Here’s a little close-up of the card:
I used my white gel pen to add some details to the carrots, the bunny’s cheeks and on the Easter eggs. I absolutely adore this stamp set! Here’s another look:
For more inspiration, updates, and news make sure to check out these places.
Hello and welcome to the release hop. We are so excited for you to join us as we present to you our March release. The whole design team and one guest Designer will be sharing projects featuring the four new stamp sets that are available to purchase right now in the shop. We also have a GIVEAWAY so please be sure to scroll at the end of this blog post to find out how you can WIN. Don’t forget to visit the participating blogs (links are indicated below) and leave us some crafty love.
FREE SHIPPING
on orders of $25 or more before taxes and shipping
stamp the images on smooth white card stock and color the images using copic markers or any coloring medium of your choice.
fussy cut the image or use scan n cut machine.
ink up some Bristol smooth white card stock using a clouds stencil and grass stencil.
die-cut the frame using the scallop frame die.
adhere the images on the background and adhere this piece on an A2 size card base.
stamp the sentiment using versafine onyx black ink.
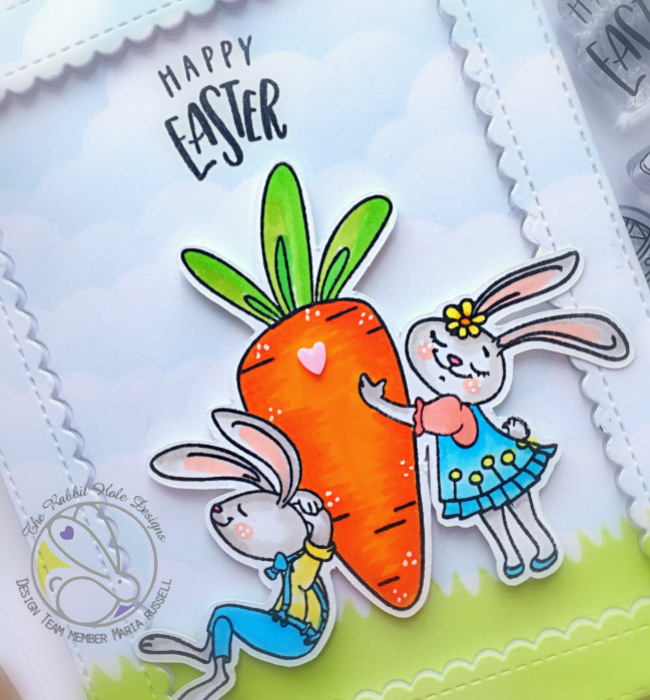
add some white dots on the carrot some white gel pen and adhere a pink heart.
Here’s a closer look:
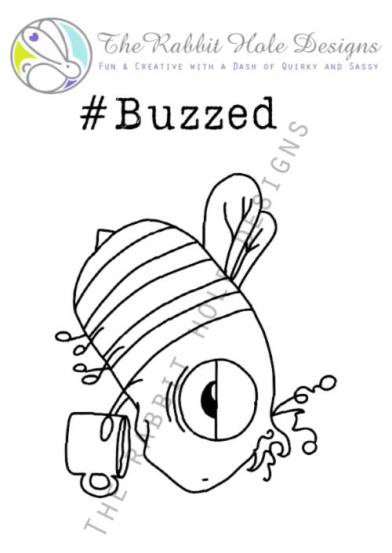
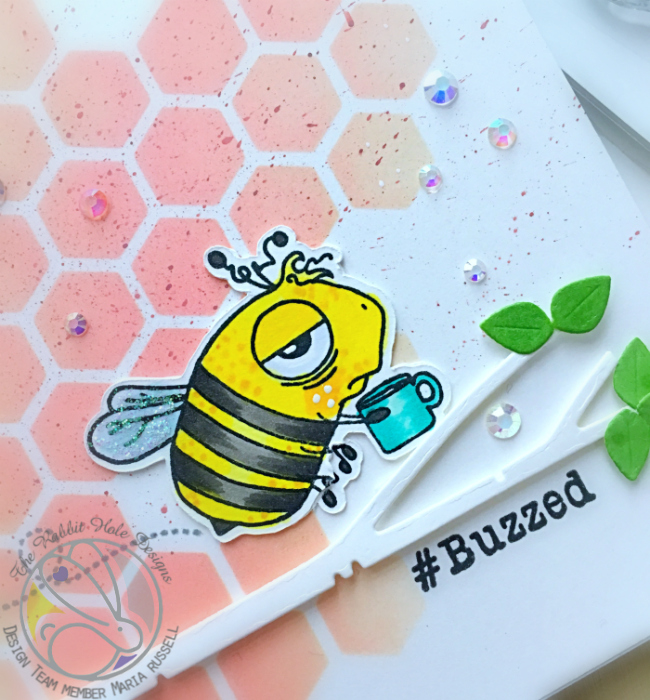
For my second project, I used the Caffeinated Bee:
How I made this card:
stamp the bee image on smooth white card stock and color him in with copic markers (or any coloring medium of your choice.
fussy-cut the image or use scan n cut 2.
Cut an A2 size Bristol smooth white card stock. Ink this up using some distress oxide inks, mini ink blending tool and a hexagon stencil.
smoosh aged mahogany distress oxide ink on an acrylic block and add some water.
use watercolor brush and flick it onto the background to add some some tiny speckles. dab it dry with some paper towel.
adhere this colored background on an A2 size card base.
stamp the sentiment using versafine onyx black ink.
die cut the birch tree branch and leaves using some dies. adhered these pieces on the colored background with some foam tape and liquid adhesive.
adhere the bee on the card.
finish the design by adding some Stardust stickles on the wings and sparkling clear jewels all over the card.
Here’s a closer look:
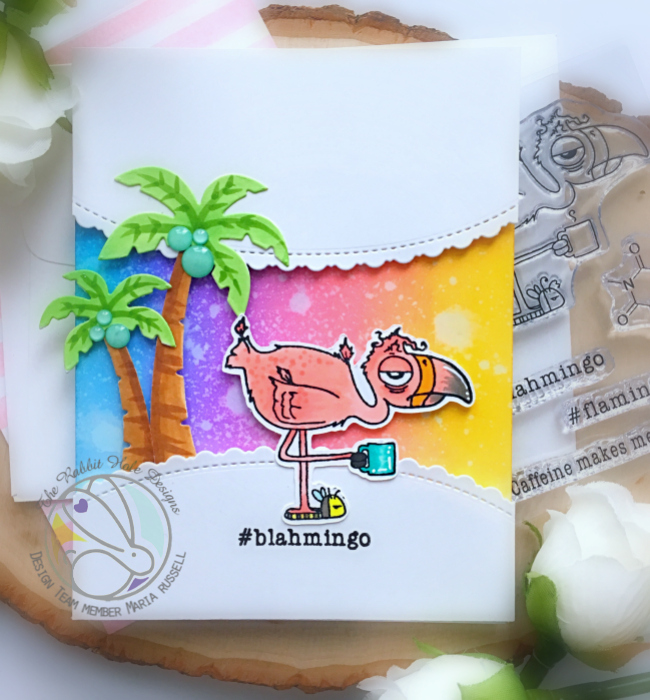
For my third project, I used the Caffeinated Flamingo:
How I made this card:
stamp the image on smooth white card stock and color it in with Copic markers (or any coloring medium of your choice.
fussy-cut the image or use scan n cut machine.
cut an A2 size Bristol smooth white card stock and ink up up the background with mini ink blending tools using distress oxide inks. I used fossilized amber, worn lipstick, seedless preserves and peacock feathers.
adhere this colored background on an A2 size card base.
die-cut two scallop frames using the fancy scalloped border die (see supply list below). adhere these pieces on the card with some foam tape.
die-cut the coconut trees using the dies and adhere these pieces on the card base with some foam and liquid adhesive.
adhere the flamingo on the middle of the card.
stamp the sentiment using versafine onyx black ink.
finish the design by adding some green enamel dots on the coconut trees and add white dot details using some gel pen.
Here’s a closer look:
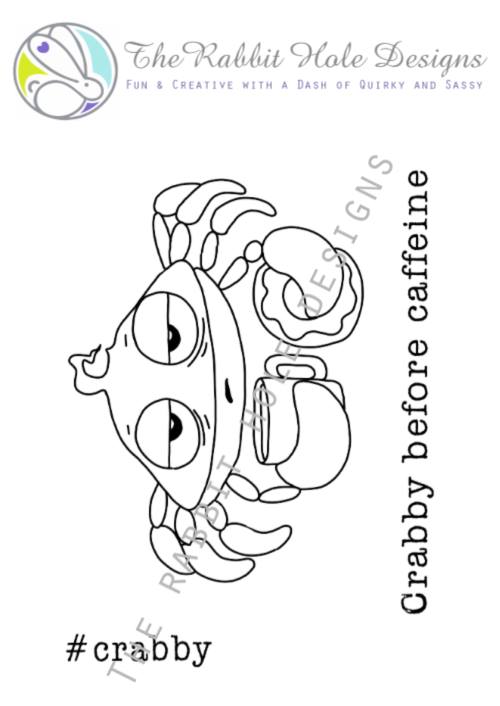
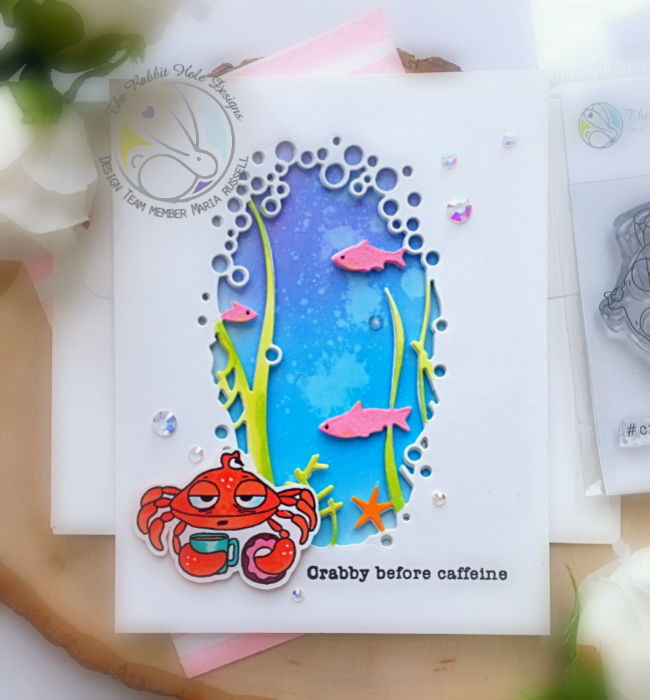
For my last project, I used the Caffeinated Crab:
How I made this card:
stamp the image on smooth white card stock and color it in with Copic markers (or any coloring medium of your choice.
fussy-cut the image or use scan n cut machine.
cut an A2 size Bristol smooth white card stock and ink up up the background with mini ink blending tools using distress oxide inks. I used salty ocean, peacock feathers and seedless preserve.
adhere this colored background on an A2 size card base.
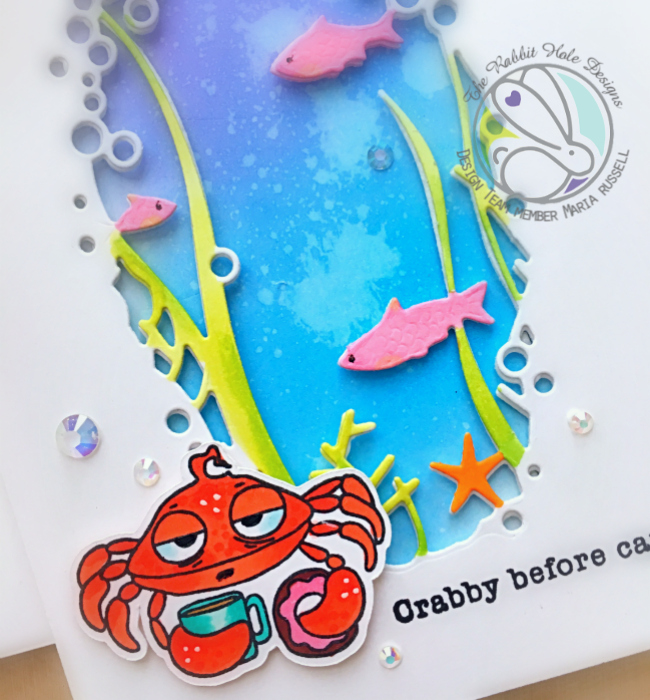
die-cut some white card stock using the “under the sea” collage die. color the seaweeds and fishes with copic markers. use the same collage die to die-cut some fun foam and adhere both with liquid glue.
adhere this piece on the colored background.
adhere the crab with some foam adhesive to give it a little dimension.
stamp the sentiment using versafine onyx black ink.
finish the design by adding some white dot details using white gel pen and adhere some sparkling clear jewels to make it look like bubbles.
Here’s a closer look:
Giveaway
Two (2) winners will be chosen at random for a chance to win a *$10.00 (US funds) Gift Certificate* to The Rabbit Hole Designs. Leave a comment by 11:59 pm PST on 03-03-2019 on all participating blogs, for the entirety of the hop, so make sure to visit each stop and leave a comment. Winner will be announced on The Rabbit Hole Designs blog 03-04-2019
*Gift certificate can be used at any time and will not expire. It is a one-time use certificate and any funds not used will not be carried over for future use.
For more inspiration, updates, and news make sure to check out these places.
I hope I have given you some great inspiration today. The stamp sets are now available for purchase at The Rabbit Hole Designs website. The rest of the supplies I used are listed and linked below. Have a wonderful day and happy crafting!
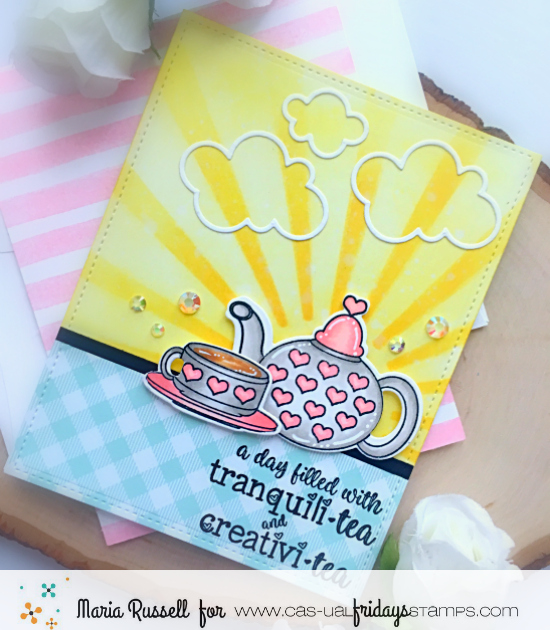
Hello CAS-ual Fridays fans! I wanted to create a cheerful card for those of my crafty peeps out there still covered in snow! For my project today, I am showcasing the Serendipi-tea stamp set and the Tea Pot Fri-Dies. Here’s what they look like:
I started out by inking up my Bristol smooth white card stock using distress oxide inks (Squeezed Lemonade and Fossilized Amber), with a sun stencil. I cut a gingham patterned paper with some black card stock and adhered it onto my colored background. I run this piece through my die-cutting machine with a stitched rectangle die.
On a piece of Neenah solar white card stock, I die-cut the tea pot and the cup using the Tea Pot Fri-Dies. I used the negative piece and aligned it on my stamping tool so I can stamp my images from the Serendipi-tea stamp set. I colored the images in with Copic markers, and adhered these on my card.
I adhered some cloud silhouette die-cuts and stamped the sentiment on my card. To finish my design, I added the Sparkling Clear Jewels. Here’s a closer look:
I think this card is so cheerful and can definitely brighten someone’s day! The sparkling clear jewels looked so pretty against the background.
I hope you like my card and got inspired to create something beautiful today! Please don’t forget to use my coupon code “MARIASENTME” for 15% off your order. I hope you have an amazing day, and happy crafting!
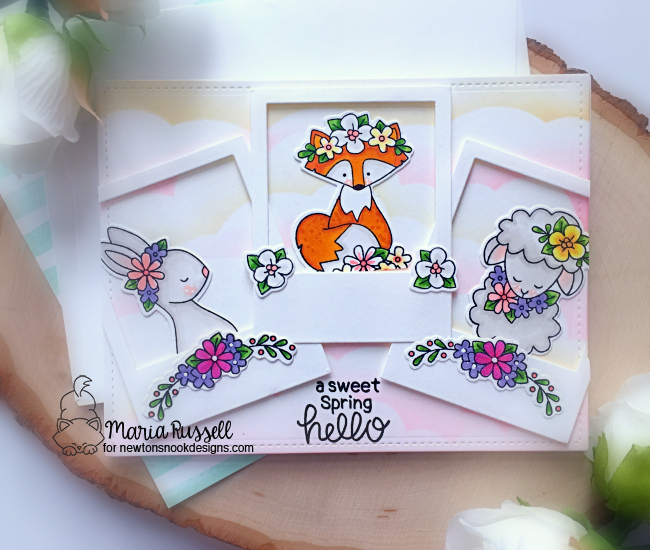
Hello Newton’s Nook Designs fans! I am back today to share with you a fun spring card, showcasing one of my favorite stamp set from the February release called Woodland Spring.
WOODLAND SPRING STAMP SET AND DIES
Here’s how I made my card:
stamp images on some smooth white card stock
color images with any coloring medium of your choice. I used Copic markers for mine because I love the vibrant colors.
die-cut the colored images with the coordinating dies.
use the handmade stencil made from the sky borders die set to create the background, using Antique Linen and Worn Lipstick distress oxide inks.
die-cut the small polaroids.
adhere the polaroids on the inked background with foam adhesive
add the critters (and flowers) inside each polaroid and adhere using liquid adhesive.
stamp the sentiment to finish the design.
Here’s my card:
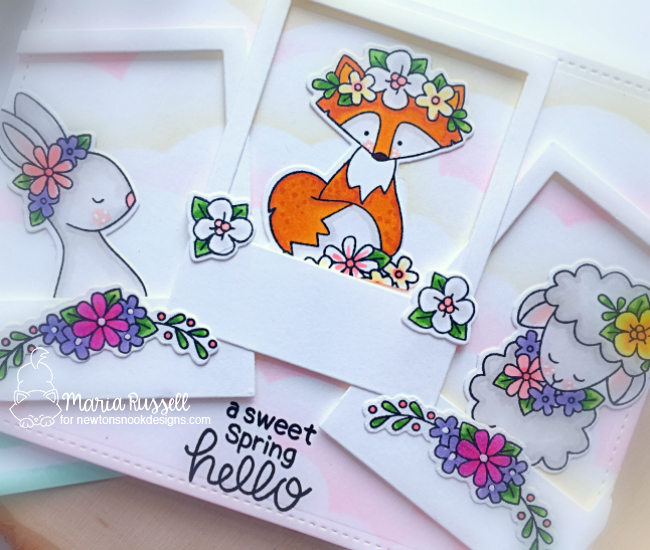
This card is really simple, but I love how it turned out. The pastel-colored sky is so subtle yet it created this dreamy look for my critters to stand out. Here’s a little close-up:
I hope you like my card today. Please visit Newton’s Nook Designs to purchase the stamp set and dies that I used today. I have also listed and linked it below. Have a nice day and happy crafting!
I am a bit bummed because it is the last day of the February reveals by Newton’s Nook Designs. Were you able to check out the first three days of the reveal? Which one is your favorite so far? You have a chance to win each stamp set during release week so check out the details I have indicated at the end of this blog post. [Just a little important note: I know some of you had difficulties finding the comments section. If you would like to leave a comment to participate in the giveaway, the “comments section” will only be ever visible when a single post on Word Press is being viewed. Please click on this particular blog post and you will be able to leave a commentbelow. Thank you!]
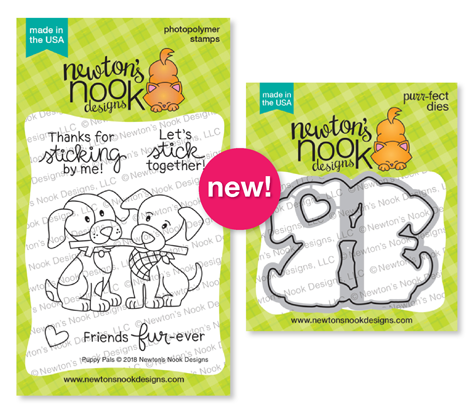
For the last day of the reveals, the design team is showcasing TWO mini stamp sets with its coordinating dies:
SPRING PILE UP STAMP SET & DIESPUPPY PALS STAMP SET & DIES
Here’s how I made my first card:
stamp and color the images with Copic markers (or any coloring medium of your choice)
die-cut the image using the coordinating dies.
use inkadinkado masking paper to mask off part of the card stock.
use the handmade clouds stencil made from the clouds border die and ink up the background.
stamp the sentiment on the colored background and adhere the image on on top.
cut the colored card stock and adhere on the card base. Also adhere a rainbow patterned paper at the bottom of the card base. Finish this piece with some black strip card stock.
I felt that the left side of the card was missing something so I added the pastel stars from Kat Scrappiness to adorn the card. I think it turned out great. Here’s a closer look:
This card is really clean and simple but I like it a lot. Here’s another look:
Here’s how I made my second project:
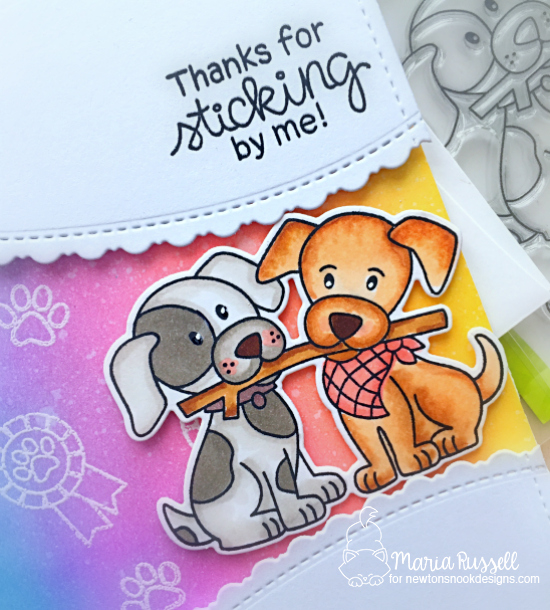
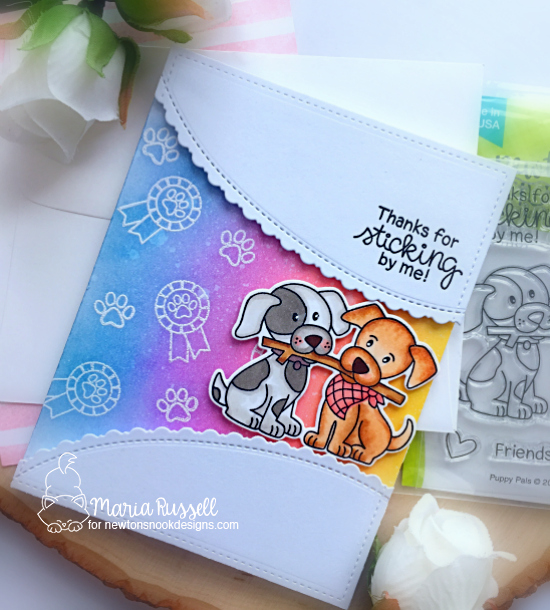
stamp and color the image on some smooth white card stock. die-cut the image using the coordinating die.
use the paw prints and ribbon images from the Terrific Terriers stamp set and stamp them using versamark ink on bristol smooth card stock.
sprinkle white embossing powder and heat-set with the heating tool.
ink up this bristol smooth card stock with distress oxide inks.
wipe the embossed images with paper towel to make them white again.
die-cut the rest of the card stock to assemble the card.
This image is sooooo cute! I also LOVE that the coordinating die, die-cuts the middle space between the two dogs! It’s a definite must-have for sure. You can use this stamp set for any occasion and the possibilities are endless. Here’s a closer look of the puppies:
Aren’t they adorable? I also love the rainbow colored background and it really made them stand out.
That is all for this week! I hope you guys LOVE the projects that we’ve made for you using the new stamps, dies and stencils.
Would you like to win the “Spring Pile Up” or the “Puppy Pals” Stamp Set? We will choose ONE lucky winner for each stamp set!
Comment on the NND blog and Design Team blogs (see list below)! Thewinner will be chosen at random from the collective reveal posts. Make sure to check out each of their blogs and comment for your chance to win. You will not know which blog has been chosen so the more you comment on the better your chances are of winning! You have until Thursday February 14th at 9pm EST to comment — winners will be announced on the blog post on Friday, February 15th.
Check out all the awesome Design Team Blogs below to enter:
It is the third day of the February reveals by Newton’s Nook Designs. Were you able to check out the last two days of the reveal? Which one is your favorite so far? You have a chance to win each stamp set during release week so check out the details I have indicated at the end of this blog post. [Just a little important note: I know some of you had difficulties finding the comments section. If you would like to leave a comment to participate in the giveaway, the “comments section” will only be ever visible when a single post on Word Press is being viewed. Please click on this particular blog post and you will be able to leave a commentbelow. Thank you!]
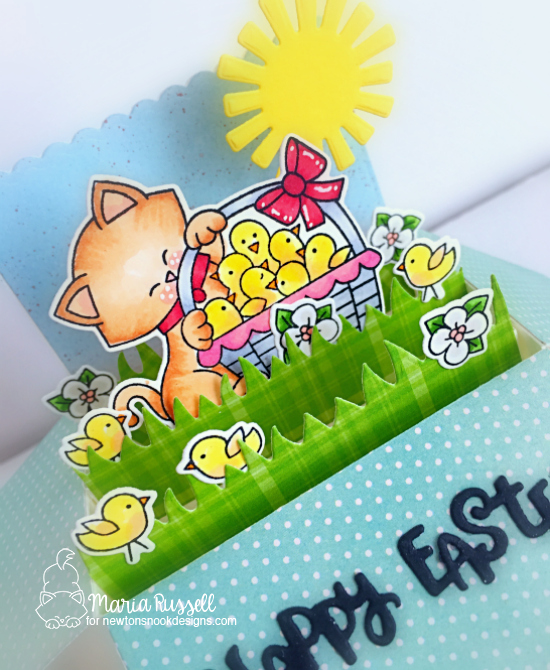
For the third day, the design team is showcasing the Newton’s Peeps stamp set and coordinating dies. Here’s what it looks like:
NEWTON’S PEEPS STAMP SET & DIES
Here’s how I made my box card:
stamp and color the images using the Newton’s Peeps stamp set.
use the coordinating dies to die-cut the images.
use the grassy hills die from the land border die set and die-cut the grass using green patterned papers.
die-cut the box die with card stock and patterned paper.
die-cut the rest of the elements to create the scene.
die-cut the “Happy Easter” from some black card stock. The happy easter die is from the Spring Pile Up die set and we are showcasing them tomorrow.
assemble the card.
I love this scene with Newton and his peeps and I think the colors are so cheerful. This card will be displayed in my studio, for sure. Here’s a closer look:
I adhered the sun with some acetate sheet. The white flowers are from the Woodland Spring stamp set that we showcased yesterday.
Would you like to win the “Newton’s Peeps” Stamp Set? This stamp set will be given away to ONE lucky winner!
Comment on the NND blog and Design Team blogs (see list below)! Thewinner will be chosen at random from the collective reveal posts. Make sure to check out each of their blogs and comment for your chance to win. You will not know which blog has been chosen so the more you comment on the better your chances are of winning! You have until Thursday February 14th at 9pm EST to comment — winners will be announced on the blog post on Friday, February 15th.
Check out all the awesome Design Team Blogs below to enter:
It is the second day of the February reveals by Newton’s Nook Designs. I hope you were able to check out yesterday’s reveal. You also have a chance to win each stamp set during release week so check out the details I have indicated at the end of this blog post. [Just a little important note: I know some of you had difficulties finding the comments section. If you would like to leave a comment to participate in the giveaway, the “comments section” will only be ever visible when a single post on Word Press is being viewed. Please click on this particular blog post and you will be able to leave a commentbelow. Thank you!]
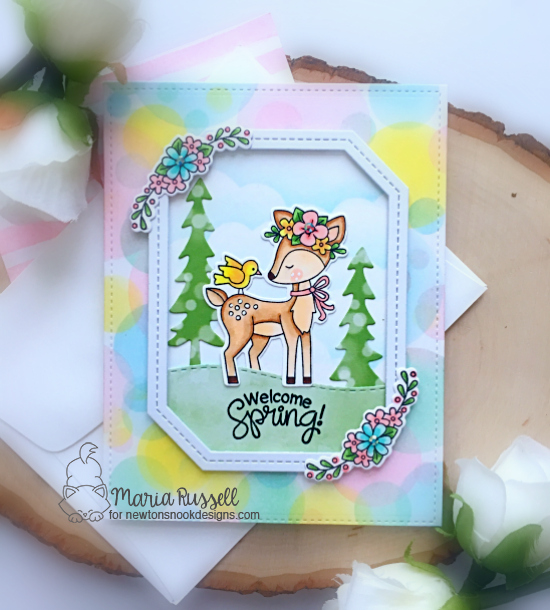
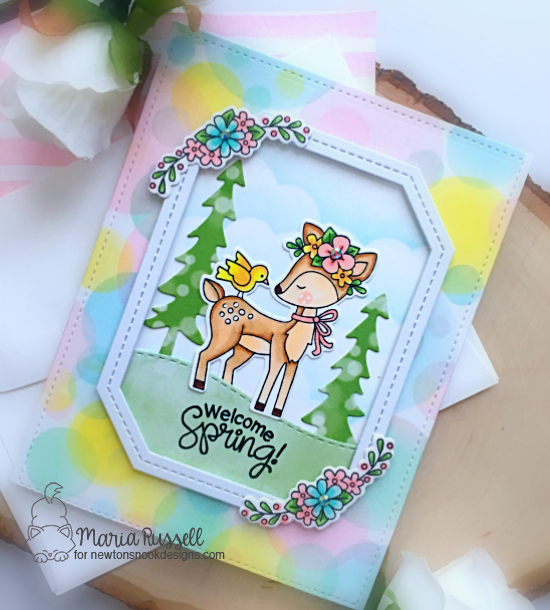
For our projects today, the design team is showcasing the Woodland Spring stamp set and coordinating dies as well as the Bokeh Stencil set. I also used the Land Border and Forest Scene Builder Dies. Here’s what it looks like:
WOODLAND SPRING STAMP SET AND DIESBOKEH STENCIL SET
Here’s how I made my card:
stamp the image on some smooth white card stock and color them in with Copic markers (or any coloring medium of your choice).
Die-cut the images using the coordinating dies.
use the bokeh stencil set and ink up the background using mini ink blending tools and distress oxide inks.
use a stitched tag corner rectangle die to die-cut the middle piece. Die-cut another white card stock for the center piece, and ink it up using the handmade clouds stencil.
die-cut a frame using the stitched tag corner rectangle frames die.
use the forest scene builder dies to die-cut the trees.
use the land border die to die-cut the hills.
assemble the card.
The Bokeh stencil set makes a perfect background to this sweet image. The stencil is definitely a must-have. The images on the Woodland Spring stamp set are too cute as well. I also added some sparkling clear jewels to finish the design. Here’s a closer look:
Who is ready for spring? I know some of you are still covered in snow and are waiting for warmer weather. I can’t even imagine what you guys are going through.
Would you like to win the “Woodland Spring” Stamp Set? This stamp set will be given away to ONE lucky winner!
Comment on the NND blog and Design Team blogs (see list below)! Thewinner will be chosen at random from the collective reveal posts. Make sure to check out each of their blogs and comment for your chance to win. You will not know which blog has been chosen so the more you comment on the better your chances are of winning! You have until Thursday February 14th at 9pm EST to comment — winners will be announced on the blog post on Friday, February 15th.
Check out all the awesome Design Team Blogs below to enter:
It is that time of the month where the entire design team get so excited to show off the new stamps, dies and stencils by Newton’s Nook Designs. You also have a chance to win a stamp set for each reveal day so please read through til the end of the blog post to find out more info. [Just a little important note: I know some of you had difficulties finding the comments section. If you would like to leave a comment to participate in the giveaway, the “comments section” will only be ever visible when a single post on Word Press is being viewed. Please click on this particular blog post and you will be able to leave a commentbelow. Thank you!]
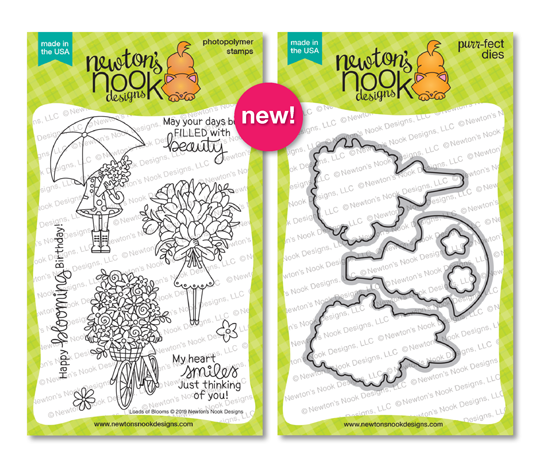
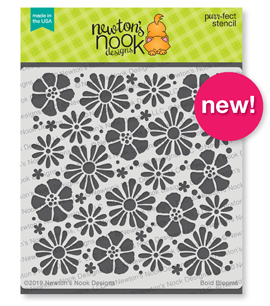
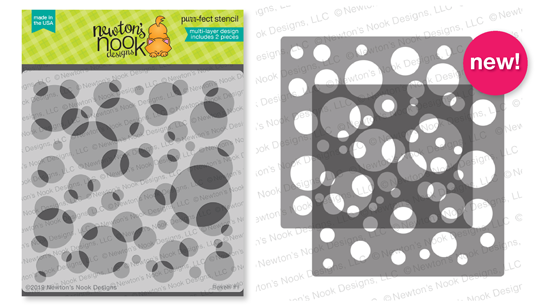
For the first day of the reveals, we are showcasing the following products:
LOADS OF BLOOMS STAMP SET & COORDINATING DIESFLOWER TRIO DIE SETBOLD BLOOMS STENCILBOKEH STENCIL SET
For my first project, here’s how I made the card:
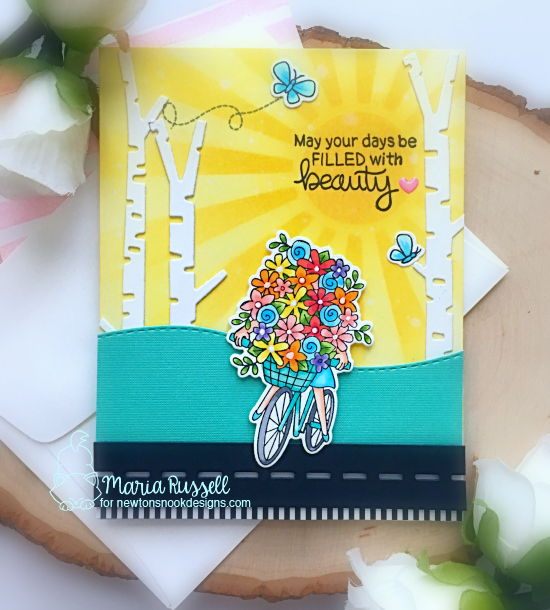
stamp the images on smooth white card stock. The butterflies I added for my scene are from the Newton’s Birdbath stamp set.
color the image using Copic markers or any coloring medium of your choice.
die-cut the rest of the elements needed to create the scene.
ink up the background on Bristol smooth white card stock with distress oxide inks using the Sunscape stencil. Spray the background with water and dab it dry with a paper towel.
assemble the card on an A2 size white card base.
Finish the design by stamping the sentiment and add a pink heart.
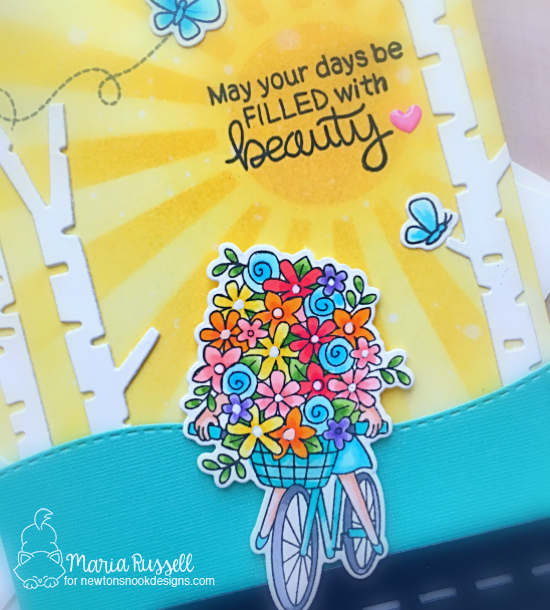
I just love this image so much! It reminds me of those times back when I was a child and my sisters and I were riding our bicycles, gathering flowers around the area. Those were simple times that I will always cherish forever. Here’s a closer look:
I would never trade in those times where my friends and I just enjoyed being kids, riding our bikes, playing games and not wanting to come home when it’s starting to get dark because of dinner. I am certainly thankful we didn’t have smart phones and computer games back then.
For my second project, I used the Flower Trio die, Bokeh Stencil set and the Bold Blooms stencil. Here’s how I made the card:
Ink up some Bristol smooth white card stock using different pastel distress oxide inks with the Bokeh stencil set.
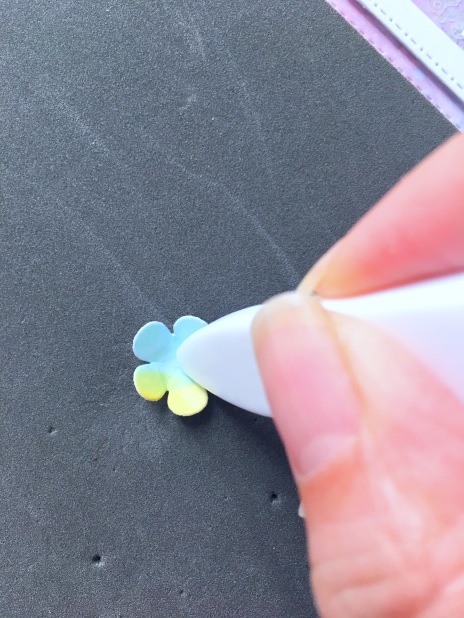
Die-cut the flowers using the Flower Trio Die.
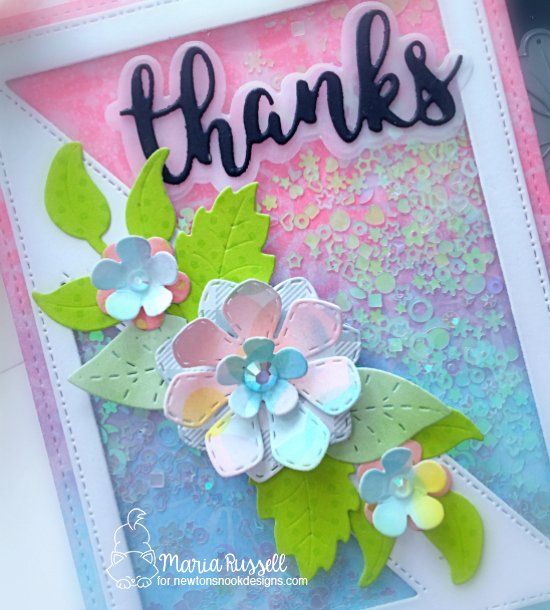
Use a stamping mat and bone folder to shape the flowers and give it a little dimension. If you have a round stylus, it’s better.
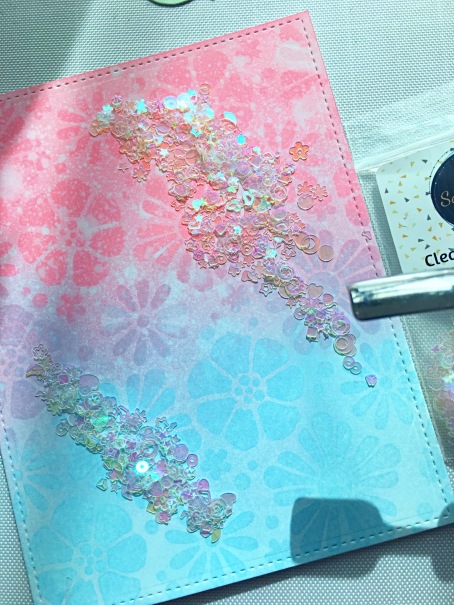
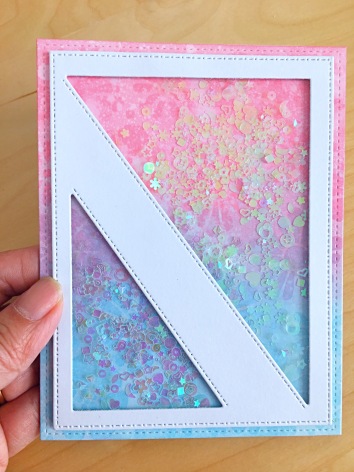
Ink up some Bristol smooth white card stock using distress oxide inks and the bold blooms stencil. Spray water and dab it dry with some paper towel. Use clear sequins as shaker element.
die-cut the diagonal die coverplate and adhere acetate sheet. Add foam adhesive to create the shaker well and adhere on top of the background.
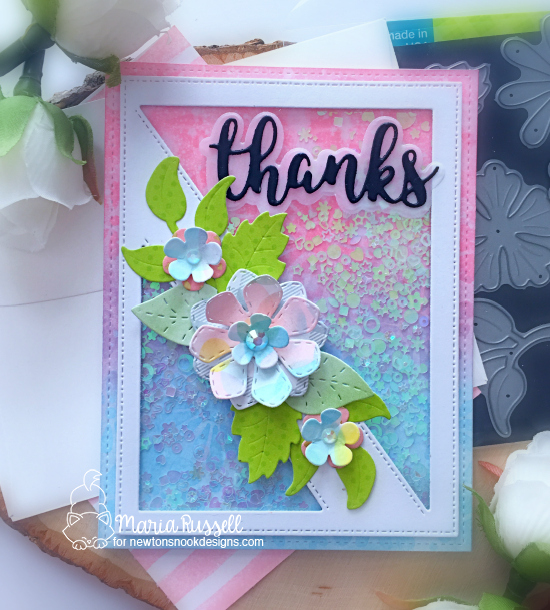
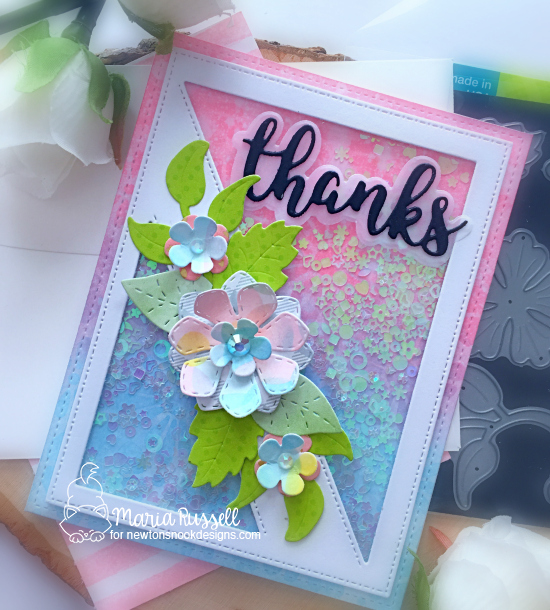
adhere the flowers and leaves on the card and finish the design by adding the script sentiment die.
Since I used clear sequins as my shaker element, the die-cut flowers really stood out on this card design. I also added the Crystal clear jewels in the middle of the flowers. Here’s a closer look:
I really LOVE how this card turned out. The Flower Trio die set is a must-have for sure. You can even decorate your Spring wreath using this die. The possibilities are endless! Here’s another look:
Would you like to win the “Loads of Blooms” Stamp Set? This stamp set will be given away to ONE lucky winner!
Comment on the NND blog and Design Team blogs (see list below)! Thewinner will be chosen at random from the collective reveal posts. Make sure to check out each of their blogs and comment for your chance to win. You will not know which blog has been chosen so the more you comment on the better your chances are of winning! You have until Thursday February 14th at 9pm EST to comment — winners will be announced on the blog post on Friday, February 15th.
Check out all the awesome Design Team Blogs below to enter:
Good morning my crafty peeps! I am so excited to share with you today’s post. I am so pleased and honored to announce that I have joined the The Rabbit Hole Designs design team. Yay! Here’s the photo of the announcement the other day!
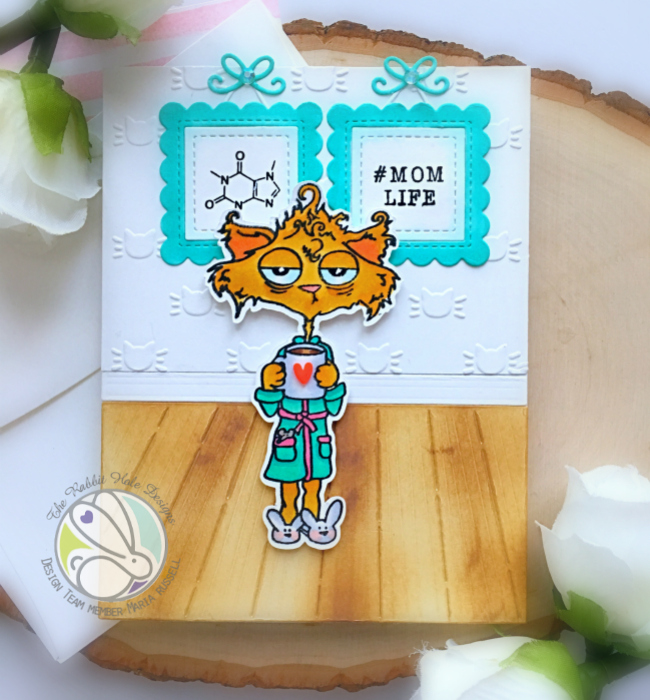
The Rabbit Hole Designs is a new stamp company. They have recently launched a couple of stamp sets and I ordered a few of them because I fell in love with the design. For my card below, I am showcasing the Caffeinated Cat 3×4 stamp set. When I saw this stamp, I knew I just had to have it. Honestly, what is not to love? I adore cats, I love coffee and I love being a mom! Okay to be honest I used to feel like this cat when my kids were little, haha! and I had a full-time job too! I don’t even know how I survived those days; I guess I had lots and lots of coffee!
Here’s how I made the card
Stamp the image on Neenah solar white card stock (or any card stock you have in stock) with alcohol friendly ink.
Color the image with alcohol markers (or any coloring medium of your choice).
Either fussy-cut or die-cut the image using an electronic die-cutting machine. For mine, I used my Scan N Cut 2.
Die-cut a piece of Neenah solar white card stock using the wood/floors dies and ink it up with gathered twigs distress oxide ink to make it look like wooden panels.
Cut another piece of white card stock and use embossing folder to create the “wallpaper”.
Adhere the floor, the moulding and the “wallpaper” on an A2 size card base. Cut the excess.
Die-cut the little decorative frame and little bows on some colored card stock and stamp the sentiment and image on both. Adhere the frames with liquid glue.
Adhere the Caffeinated Cat image (ahem, star of the show!) in the middle of the card with foam adhesive to give it dimension.
Add the heart embellishment on the coffee cup.
Add Sparkling clear jewels and bow on the decorative frame to finish the design.
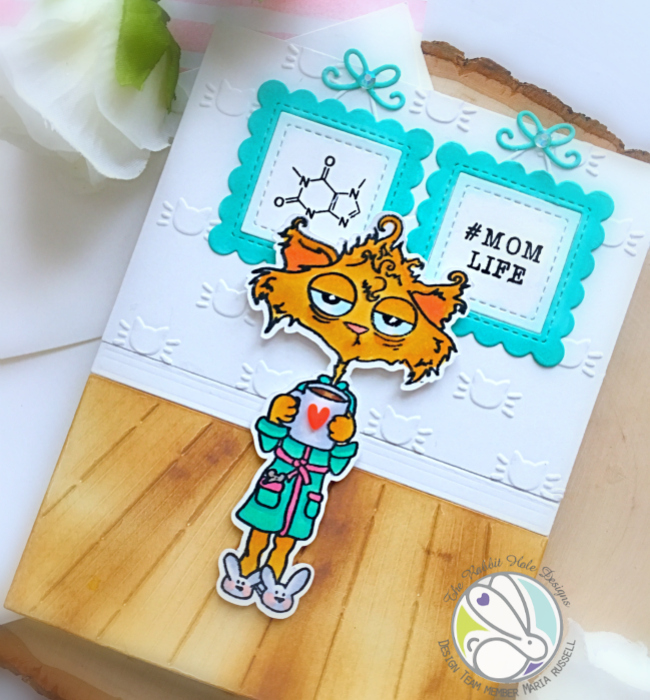
Everything about this cat just makes me giggle! The tired look on her face, the bunny slippers and the robe! I think we can all relate. Here’s a closer look:
That cat wallpaper just added more cuteness to the whole design, don’t you agree? The mom cat looked tired but her house is spotless!
What do you think of my card? Does it make you want to have a cup of coffee? I hope you like my project today. The supplies I used are listed and linked below. Note: if you are looking to purchase the Cat Embossing folder, they will be available at Kat Scrappiness next week (she is restocking them).
For more inspiration, updates, and news make sure to check out these places.
Thanks for stopping by my blog today. I hope I have given you some inspiration to create something beautiful. Have a wonderful day, and happy crafting!


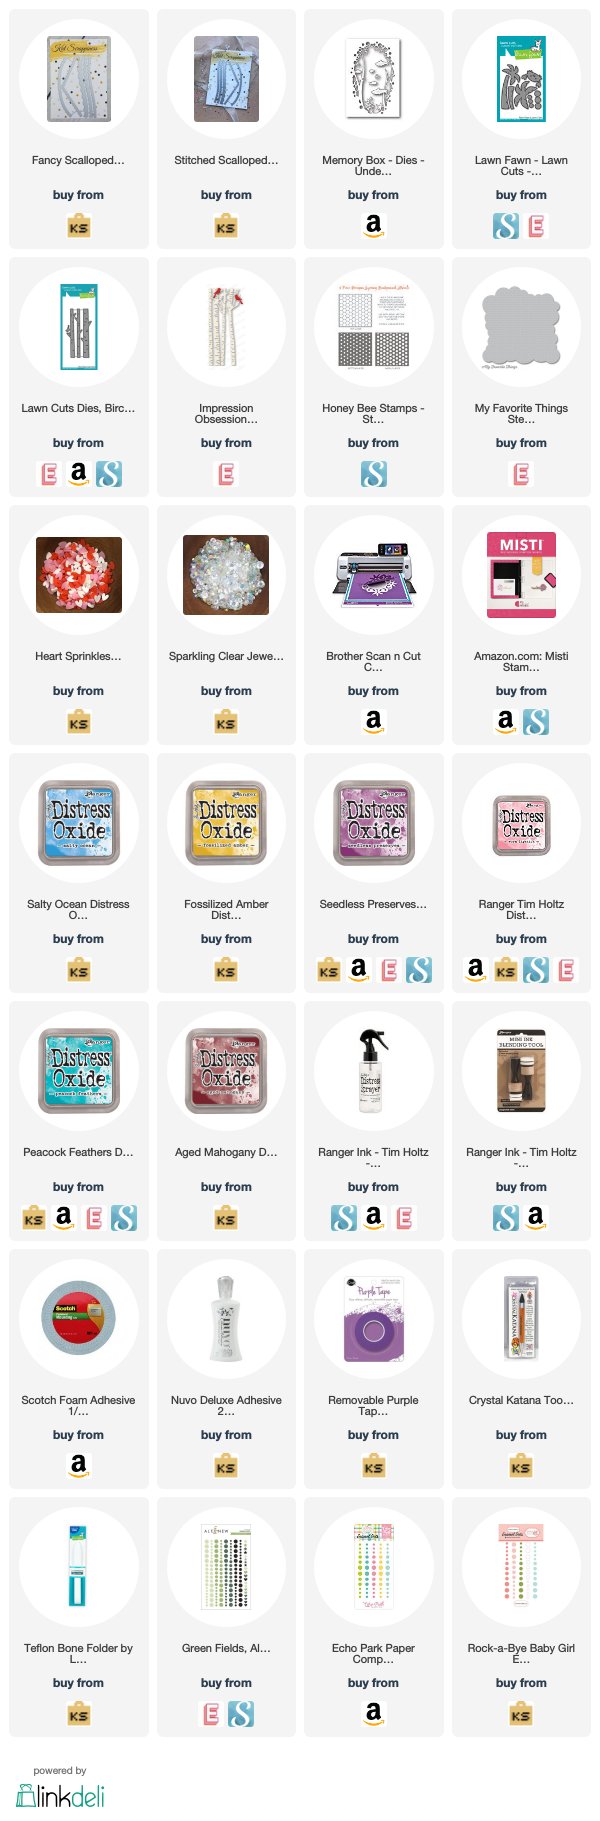
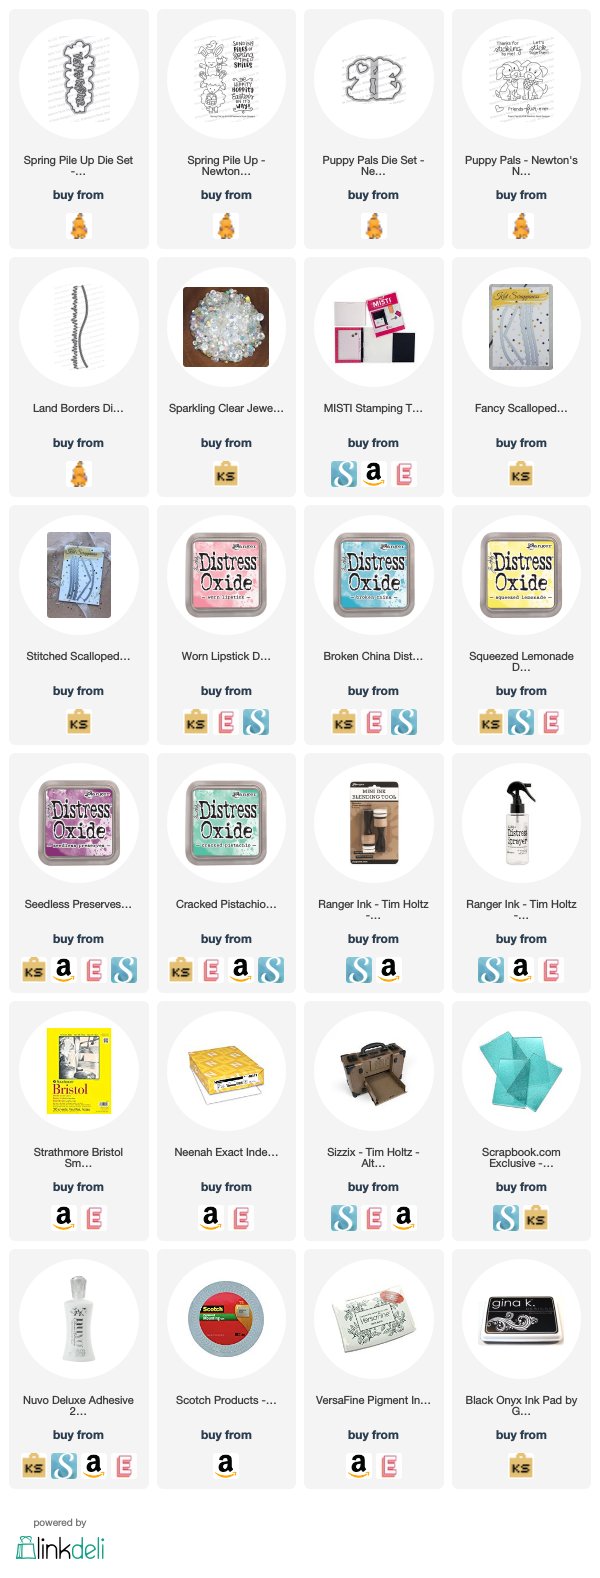
 ———SUPPLIES———