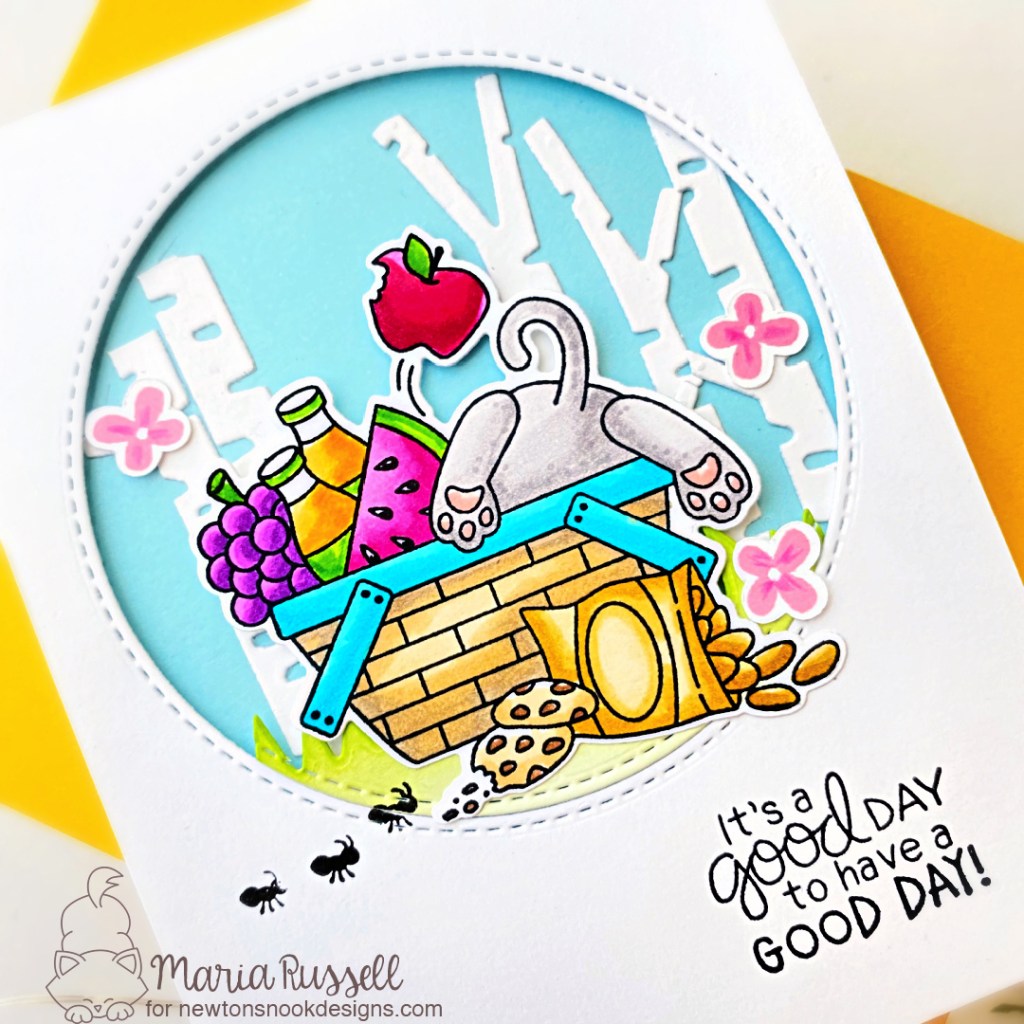
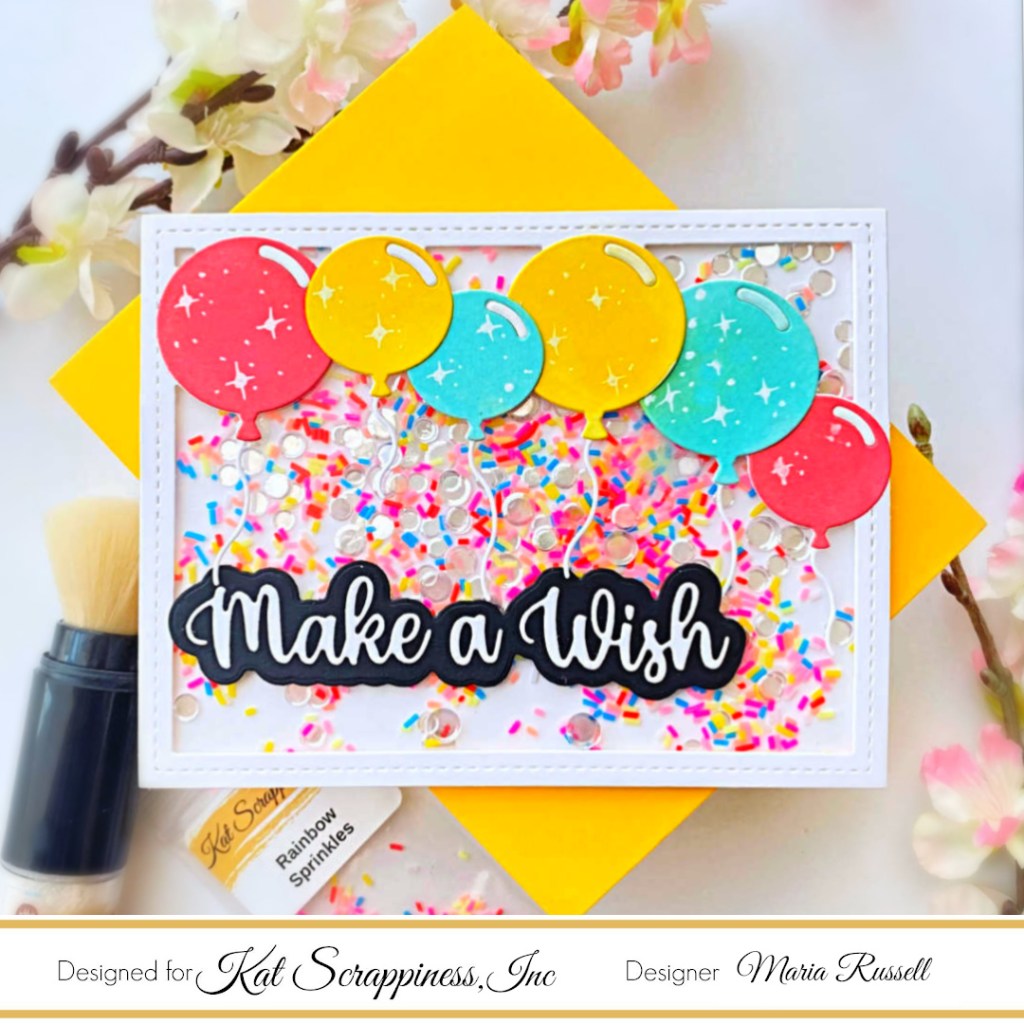
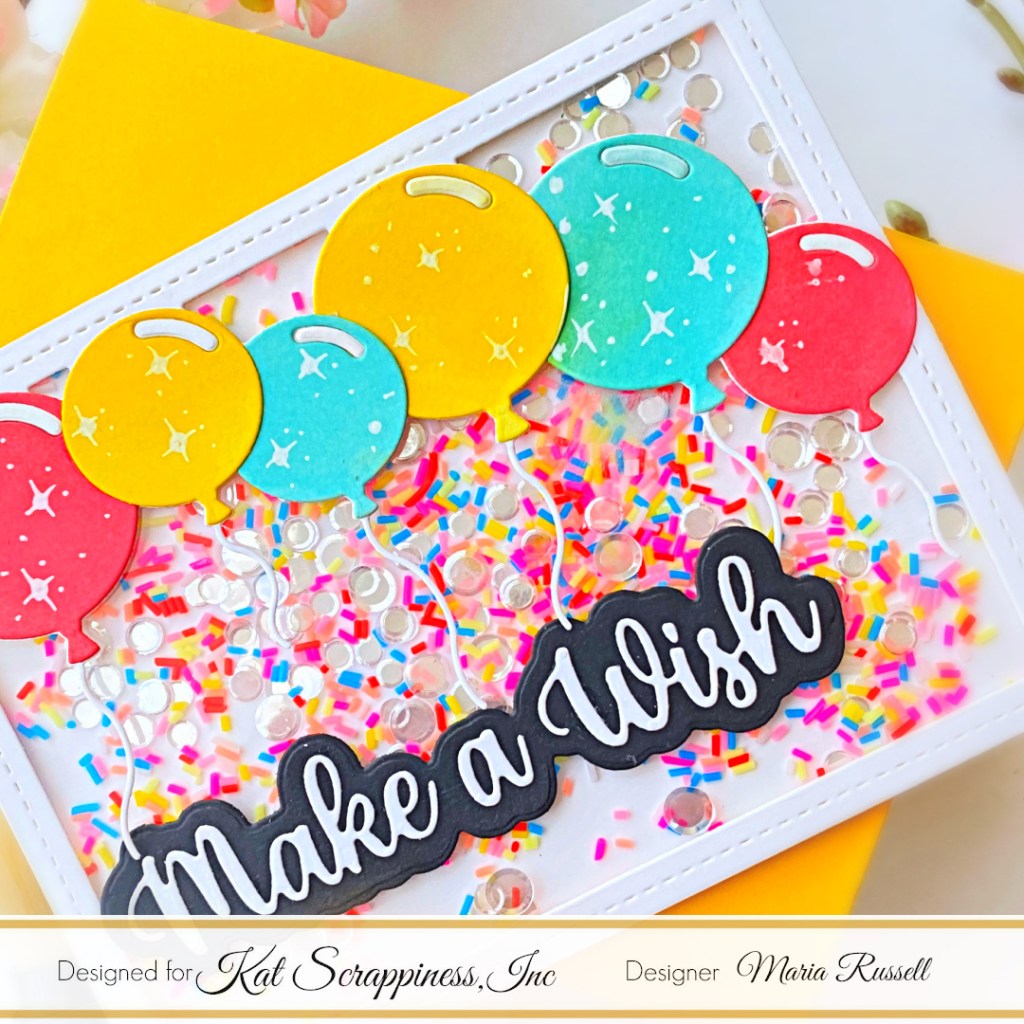
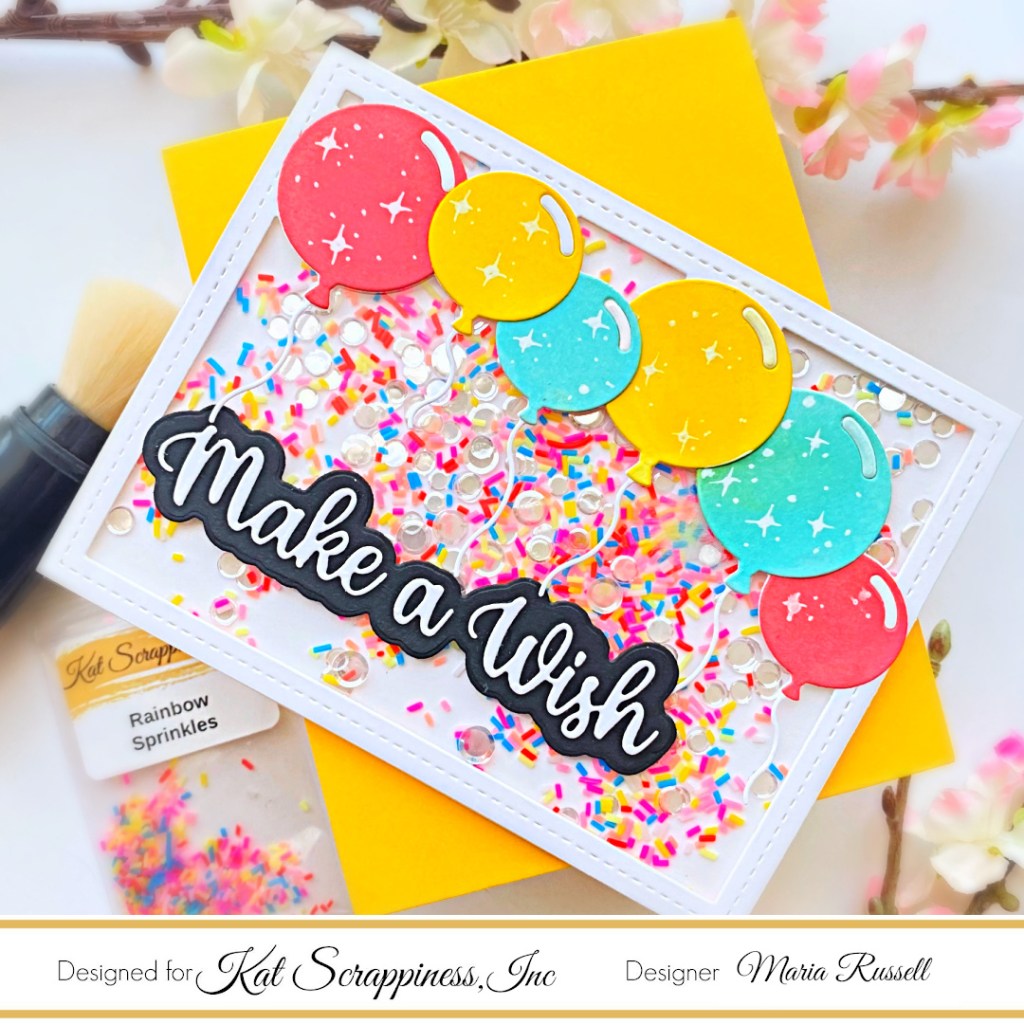
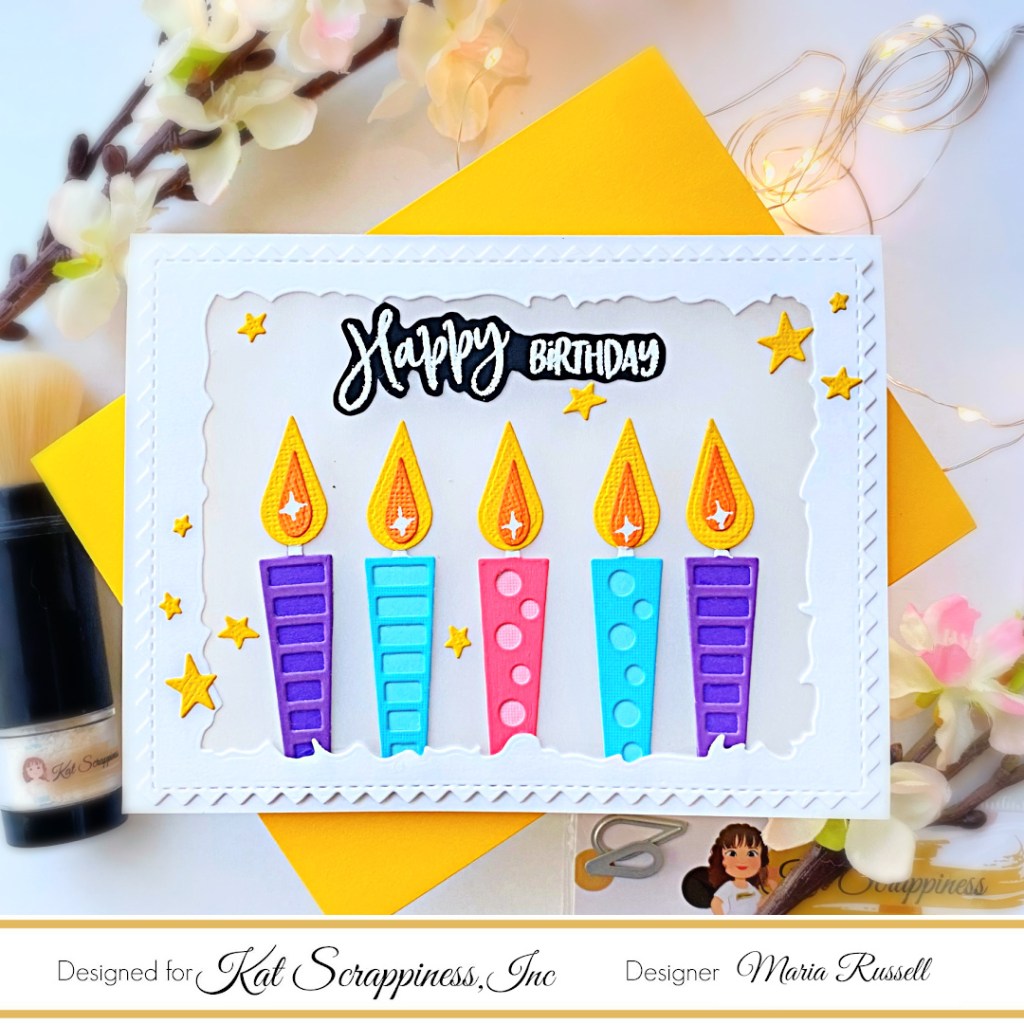
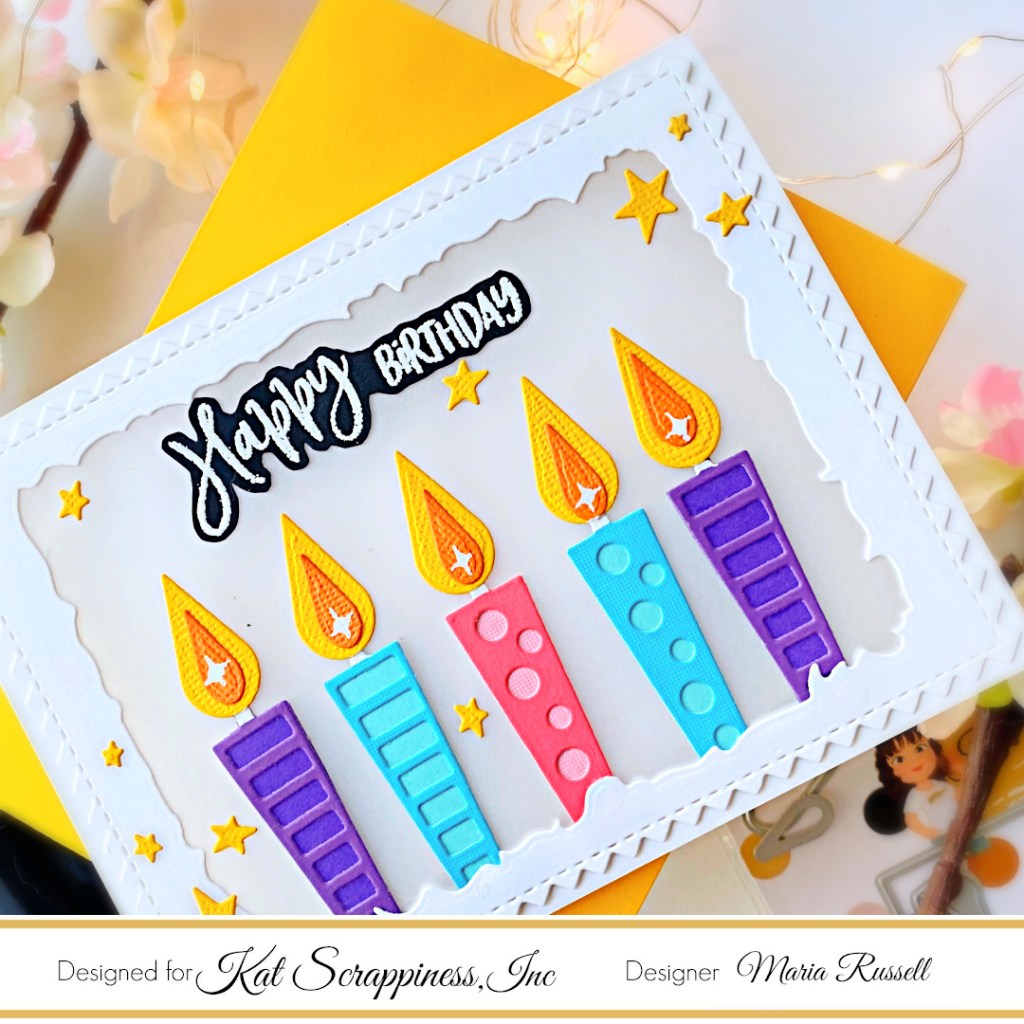
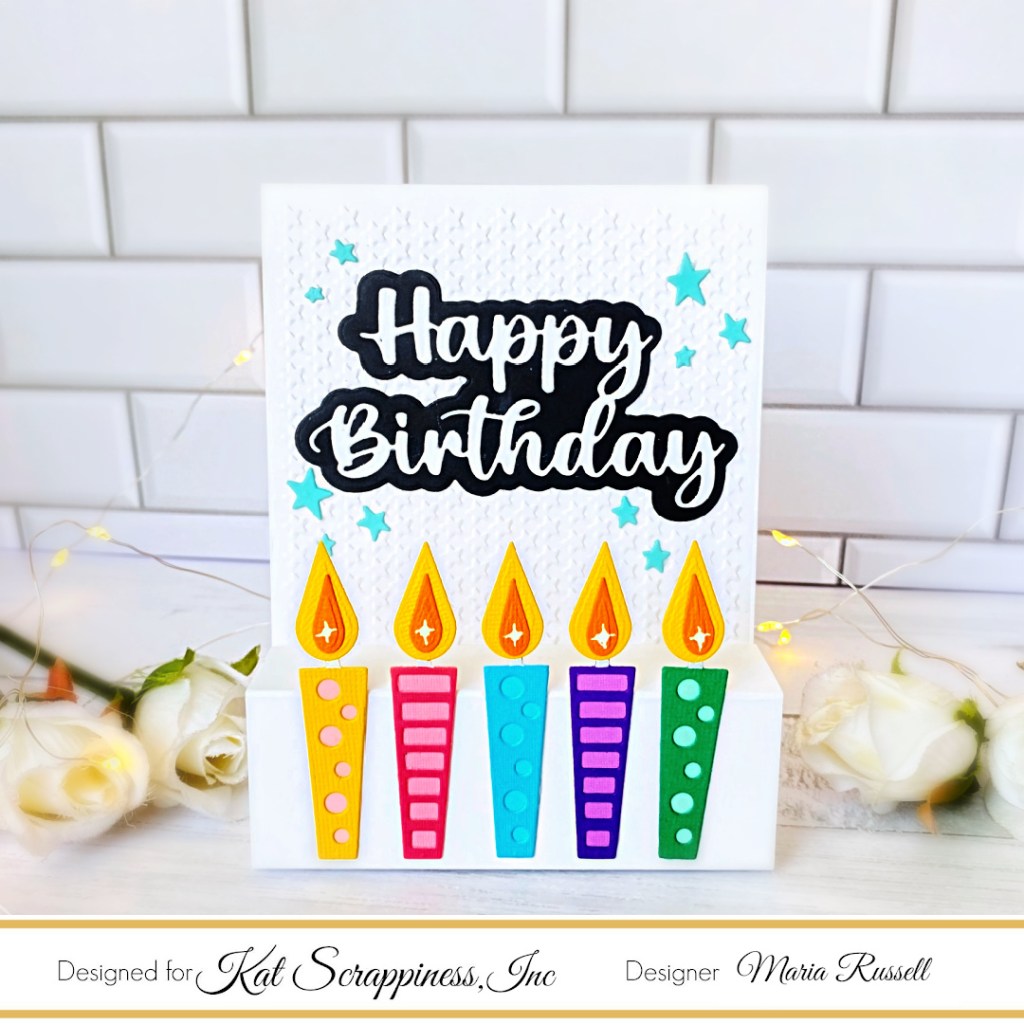
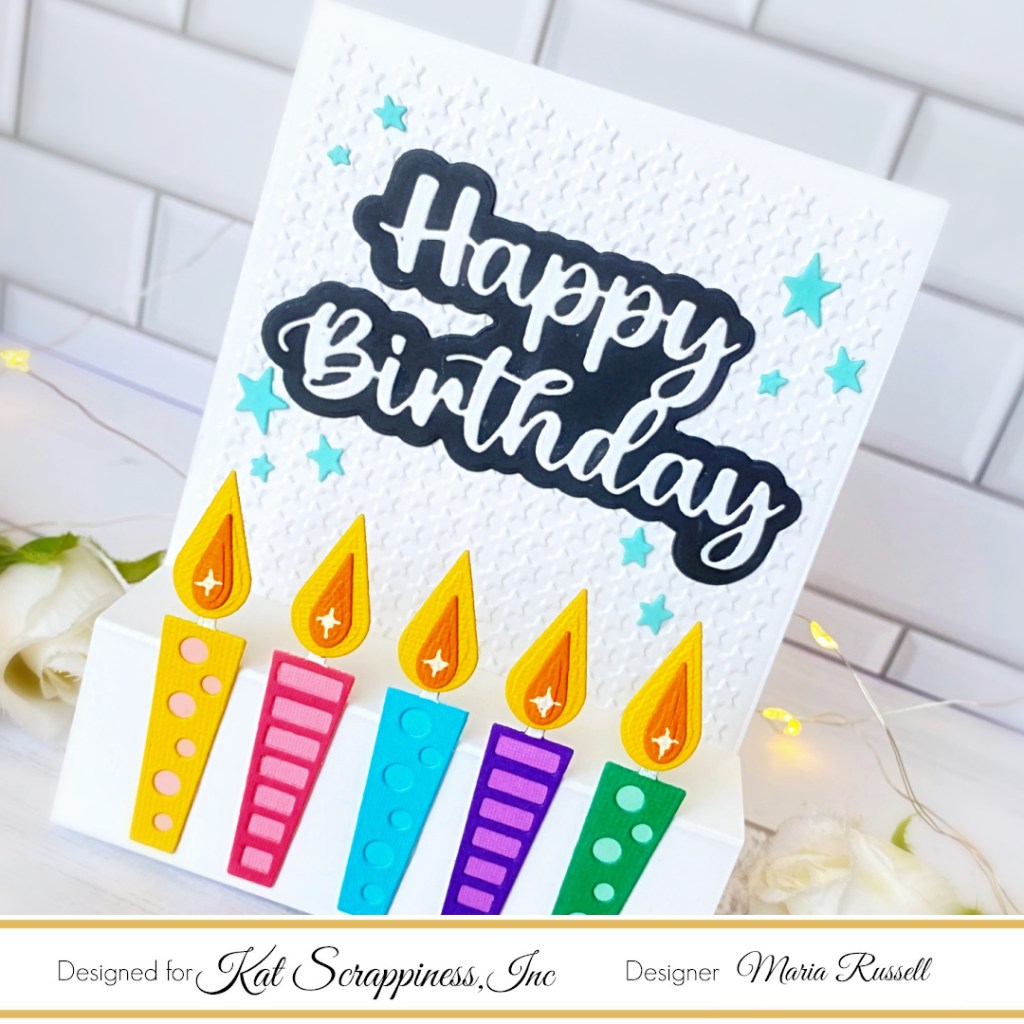
Hello everyone! I have been creating a lot of birthday cards lately and so I wanted to try this this technique inspired by Jennifer McGuire’s YT video tutorial, showcasing the Birthday Essentials die set with the Happy Birthday sentiment die with shadow by Kat Scrappiness
Here’s how I made the card:
- Die-cut the candles from the Birthday Essentials die set on different color of card stock.
- Assemble the candles using liquid glue.
- Dry-emboss an A2-size panel using an embossing folder from your stash. Adhere this panel on an A2-size notecard.
- Prepare the pop-up feature by following Jennifer McGuire’s tutorial, cutting some white card stock measuring 4 1/4 x 5. Score the card stock at 3/4, 1 3/4. 3 1/4 and 4 1/4. Adhere this panel on the front of the card.

- Adhere the candles on the pop-up panel with liquid glue.
- Use white gel pen to draw some starbursts to the candle’s flame for added texture.
- Die-cut the sentiment using the Happy Birthday Sentiment Die with Shadow on some white and black card stock. Adhere this on the card with liquid glue.
- Finish the card design by adding the stars to the background.
I hope you like my card today. The supplies I used are listed and linked below. Thanks for stopping by and have an amazing day!
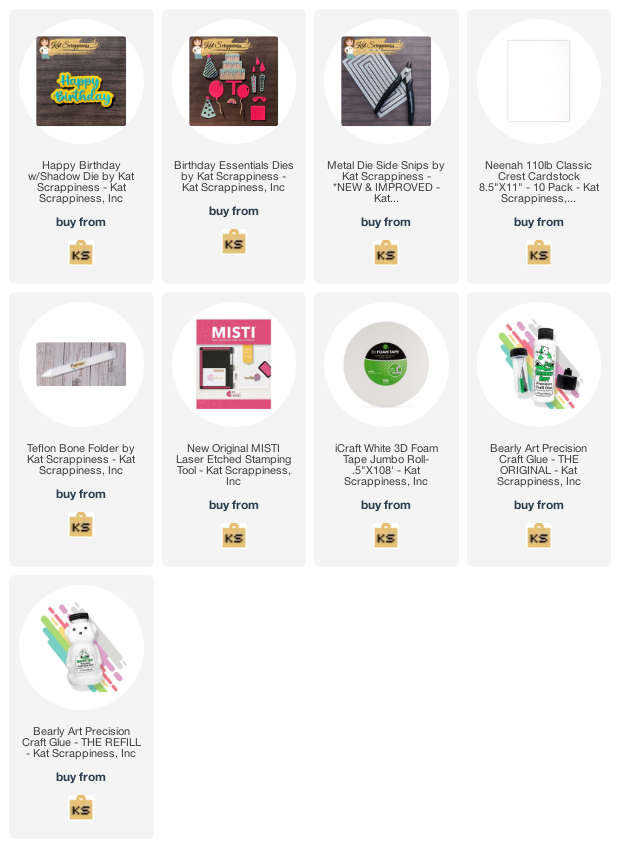
———-SUPPLIES———-