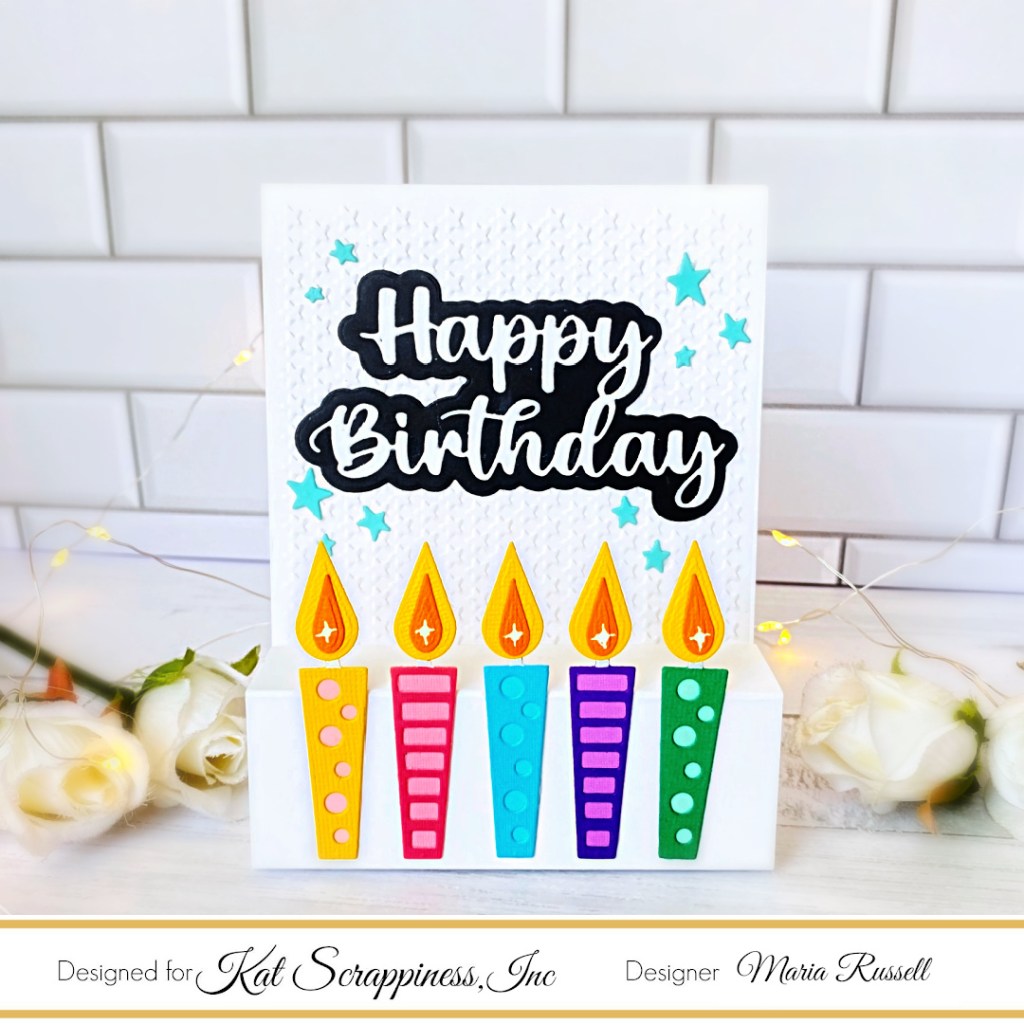
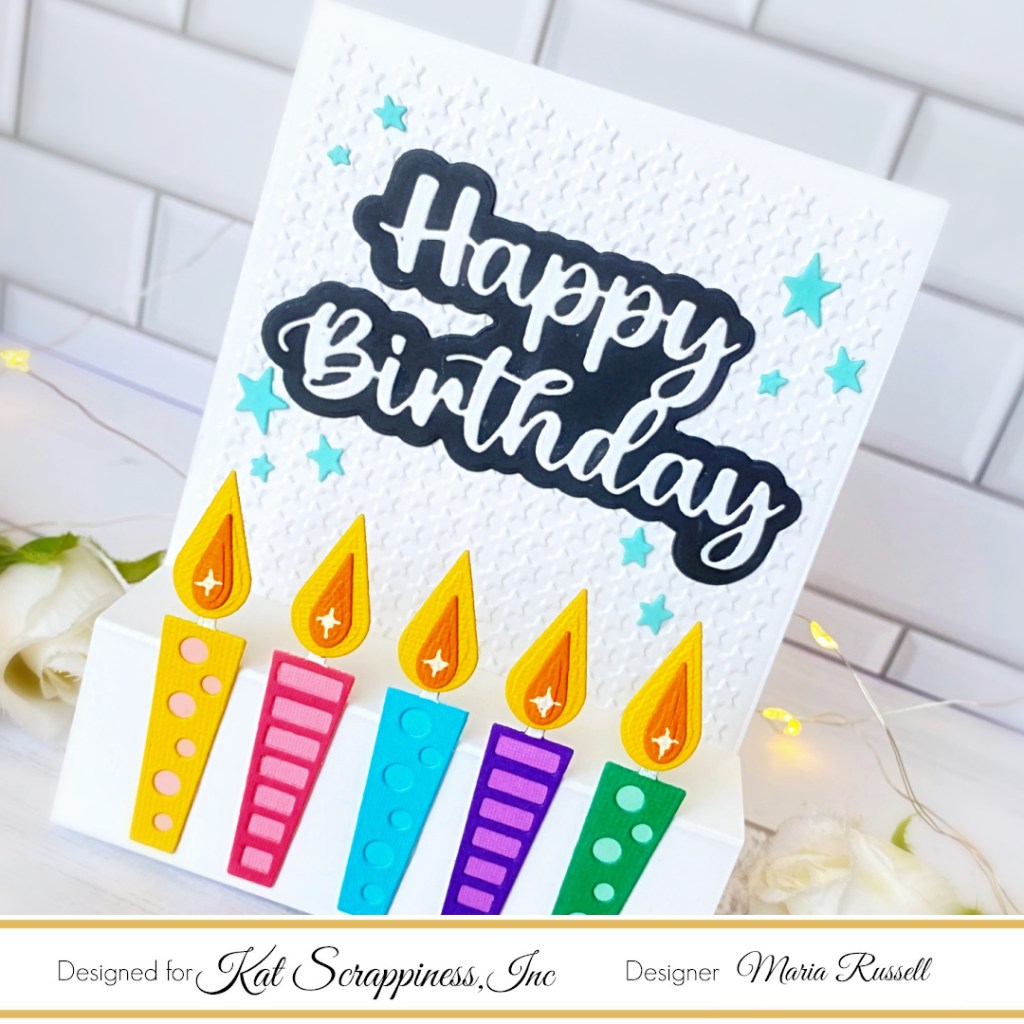
Dry-emboss an A2-size panel using an embossing folder from your stash. Adhere this panel on an A2-size notecard.
Prepare the pop-up feature by following Jennifer McGuire’s tutorial, cutting some white card stock measuring 4 1/4 x 5. Score the card stock at 3/4, 1 3/4. 3 1/4 and 4 1/4. Adhere this panel on the front of the card.
Adhere the candles on the pop-up panel with liquid glue.
Use white gel pen to draw some starbursts to the candle’s flame for added texture.
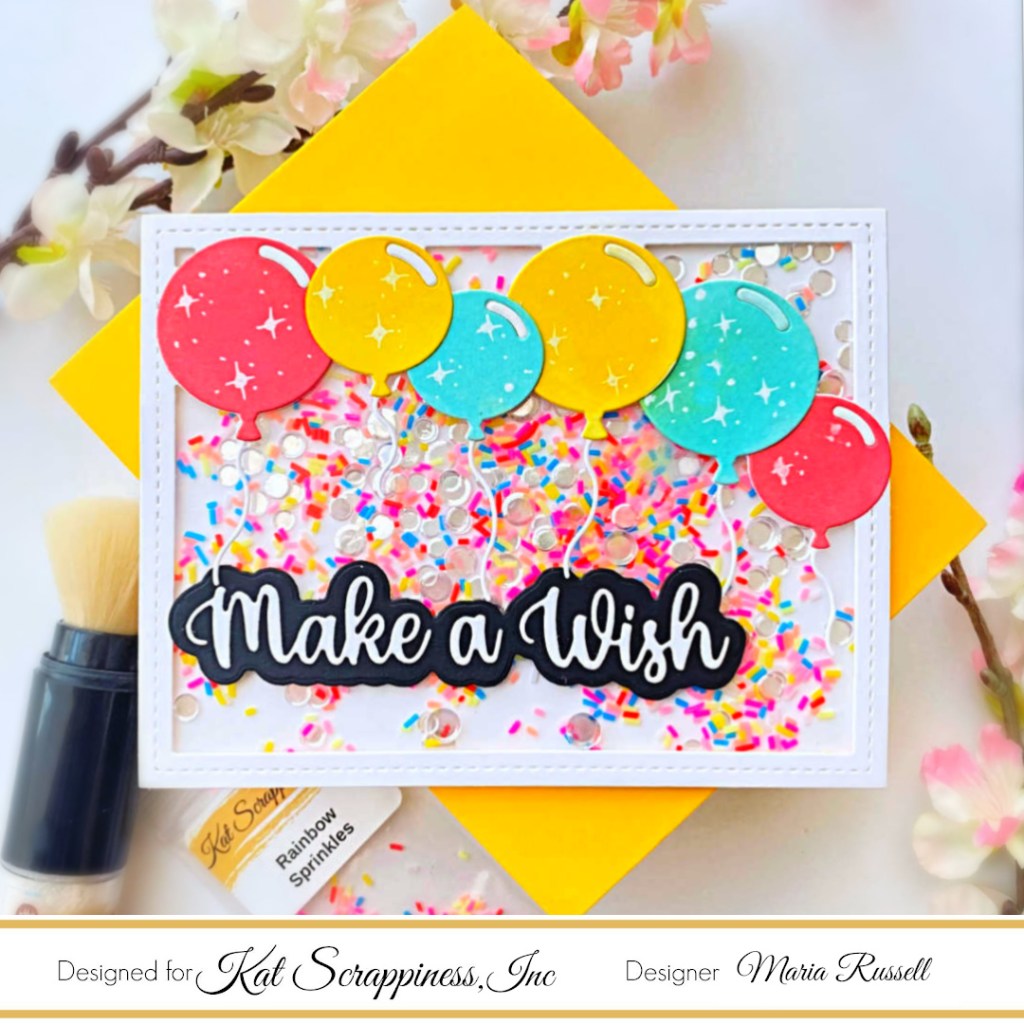
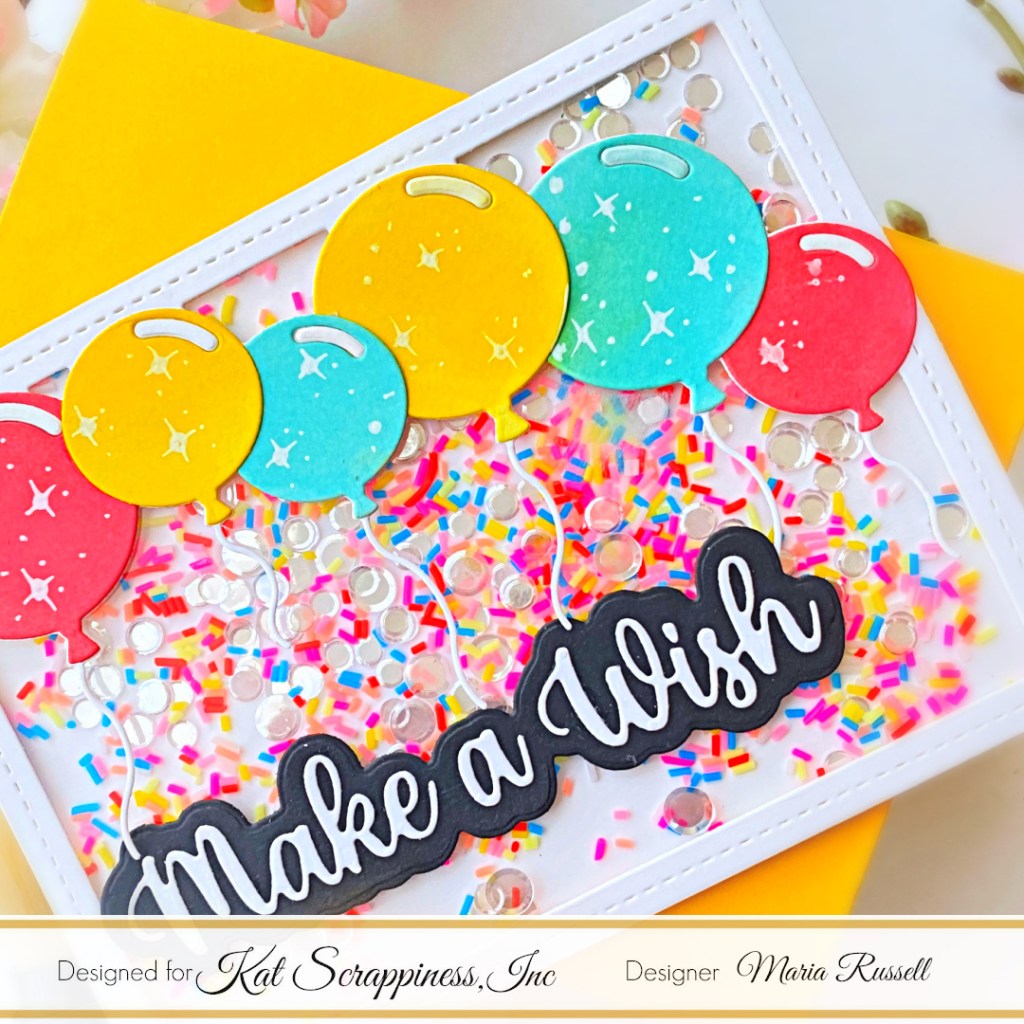
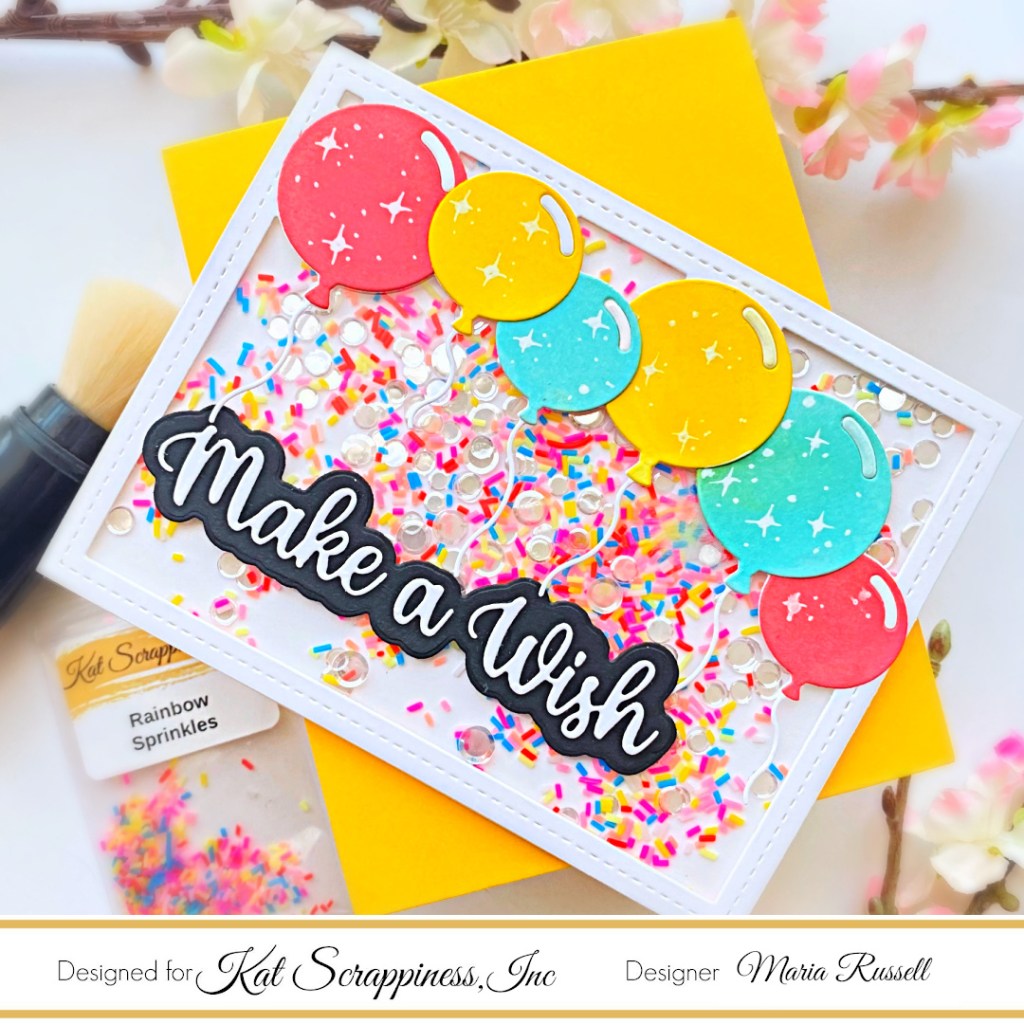
I started by die-cutting the cover panel using the Layered Balloon Coverplate Die on some Neenah solar white card stock. I also die cut the balloons included in the Layered Balloon Coverplate Die set on some Bristol smooth white card stock and used some distress oxide ink to ink-blend the die-cuts.
I adhere the balloons with liquid glue and created a shaker well, by adding acetate sheet to the back of the die-cut panel and foam adhesive. I used the rainbow sprinkles as my shaker element and adhered the panel on some A2 size notecard.
I die-cut the words Make A Wish on some white and black card stock and added to the focal panel with liquid glue. I finished my card design by adding some stars and dots to the balloons using white gel pen.
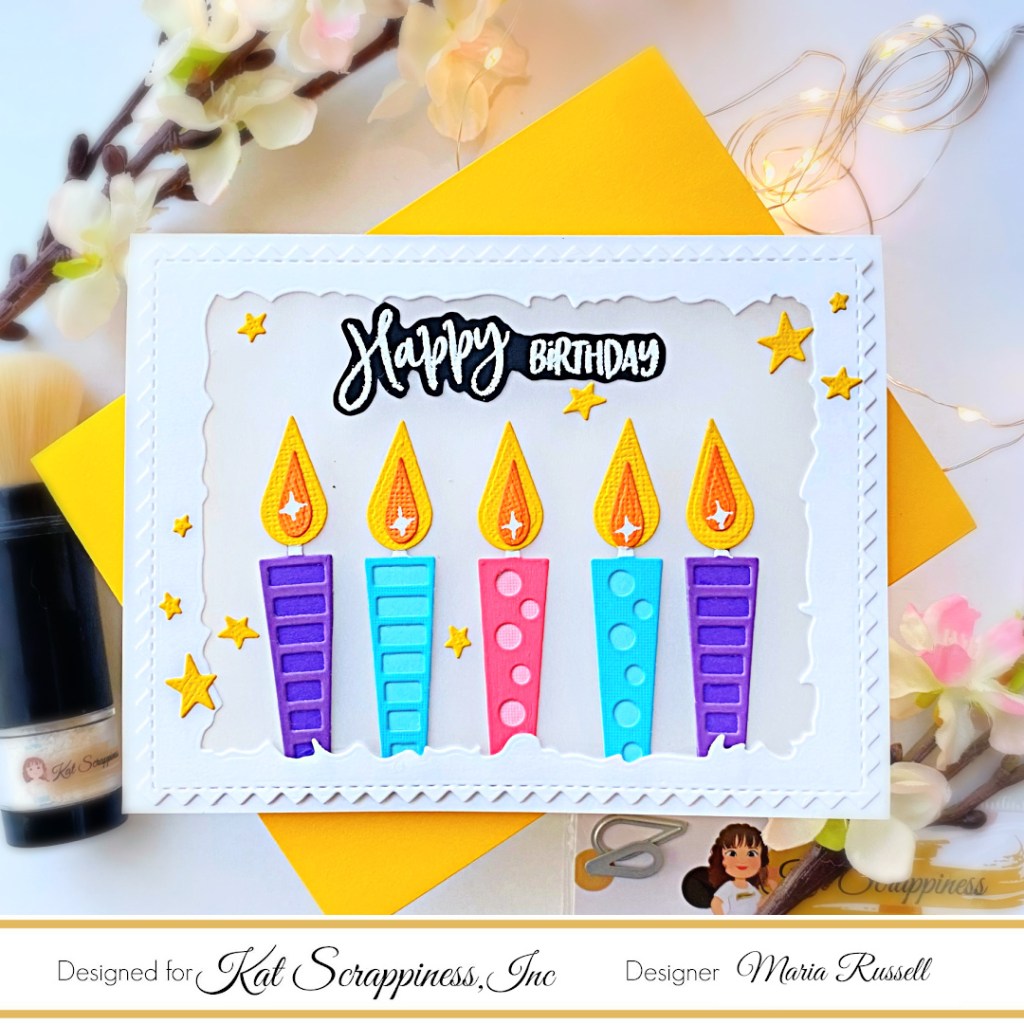
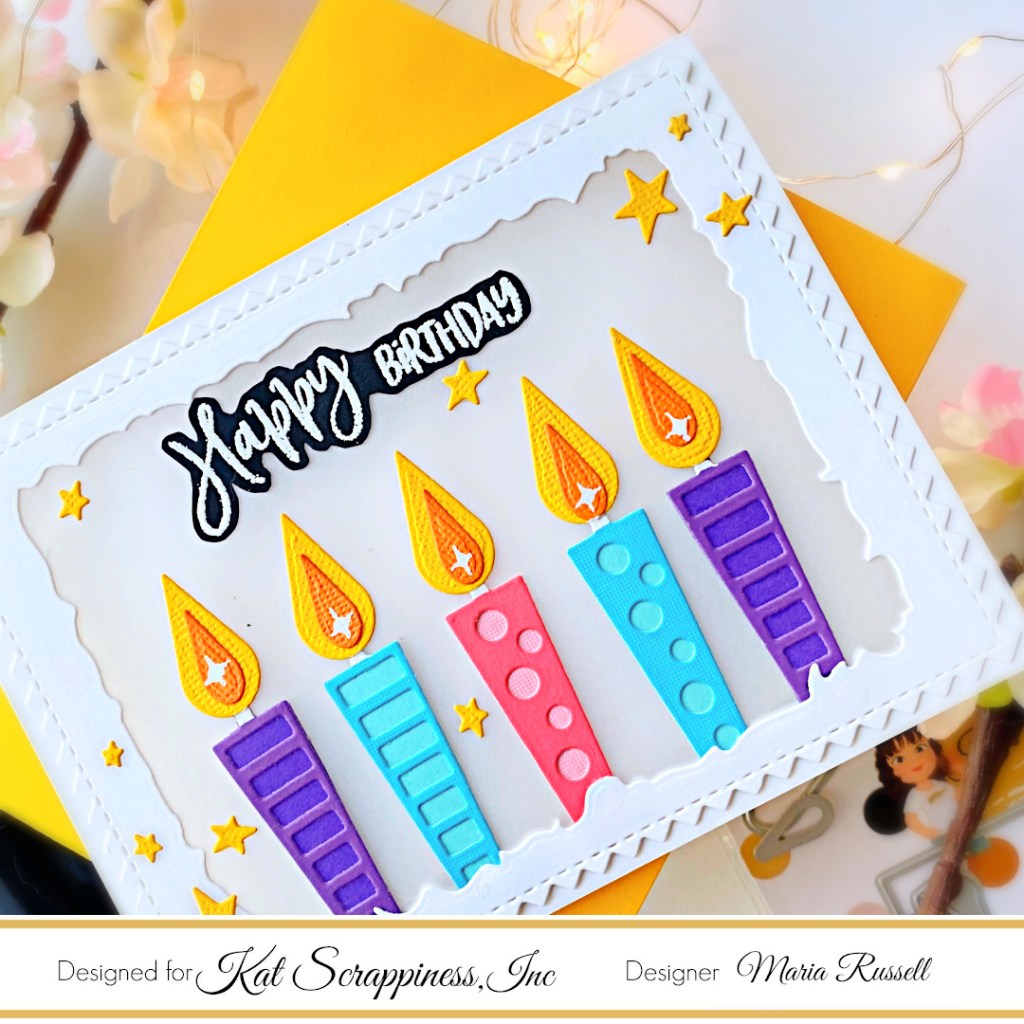
I die-cut the Zig Zag Rectangle Die on some Neenah solar white card stock and used the Distressed Edge Rectangle Dies to cut the window. I also used the same Distressed Edge Rectangle Die to cut the notecard so that when I adhered both panels together, it would create the window. I added some acetate sheet on the back.
The candles were die-cut in different colors or card stock and adhered together with liquid glue. I finished the design by adding the sentiment and yellow stars for interest and texture.
I hope you like my cards today. The supplies I used are listed and linked below. Thanks for stopping by!
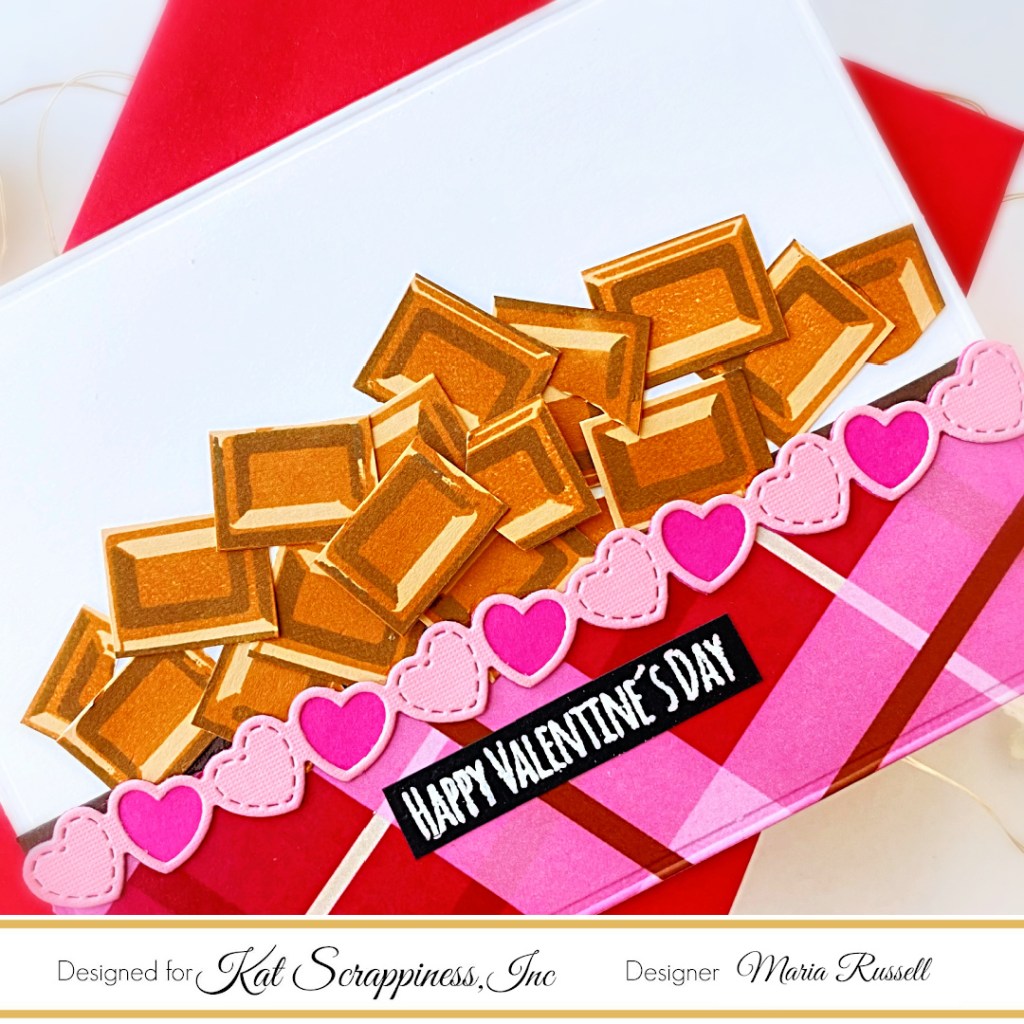
Stamp the sentiment from the Valentine Quokka Stamp Set on some black card stock with Versamark Ink and heat-set with the heating tool.
Finish the card design by adhering the sentiment.
The images look so realistic, don’t you think? This is honestly one of my favorite layering stamp set of all time! It is so easy to layer and the result is just fantastic! Check out my older project photos of the Layered Chocolate Stamp Set on the website for more samples.
I hope you like my card today. The supplies I used are listed and linked below. Thanks for stopping by today and have an amazing day!
Create texture to the heart shaped-glaze by using an embossing folder and dry-emboss all of them.
Assemble the donuts by adhering them with liquid glue.
Use one of the heart dies and die-cut the sprinkles on some dark pink card stock.
Adhere the sprinkles on the donuts with liquid glue.
Die-cut the pattern paper from the Heartfelt Wishes Slimline Paper Pad. Adhere the same on some slimline card base measuring 8 1/2 by 7 (folded on the 7 inches side).
Cut some Neenah solar white card stock measuring 8 1/2 by 3 1/2. Create the white frame by using the second biggest die from the Distressed Edge Nesting Slimline Dies.
Add foam adhesive to all sides and adhere on the slimline card base for added dimension.
Foam-mount the middle donut on the card and adhere the rest with liquid glue. [Designer tip: make sure you are not covering the frame]
Before stamping the sentiments, use the Telescopic Embossing Powder Tool with Retractable Brushto get rid of static. I do this even when I don’t need to emboss my sentiments.
Stamp the sentiments on the frame using the For the Love of Donuts Stamp Set with Black ink and stamp the little hearts with red and pink dye inks.
Finish the card design by using the white gel pen and add some dots and stars to the donuts for added interest.
Who’s getting excited for Valentine’s Day?! Have you decorated yet? I hope you like my card today and got inspired. The supplies I used are listed and linked below. Thanks for stopping by today and happy crafting!
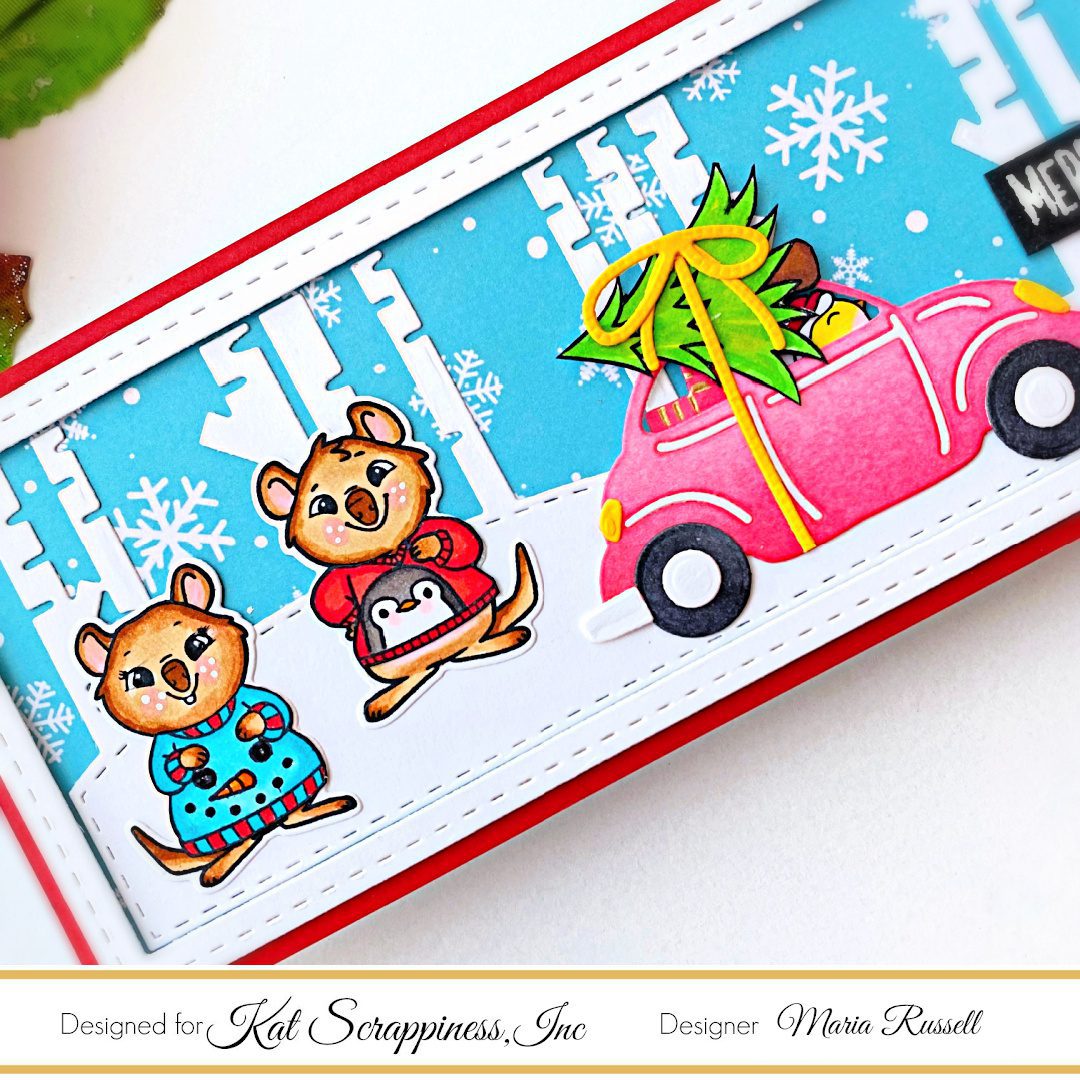
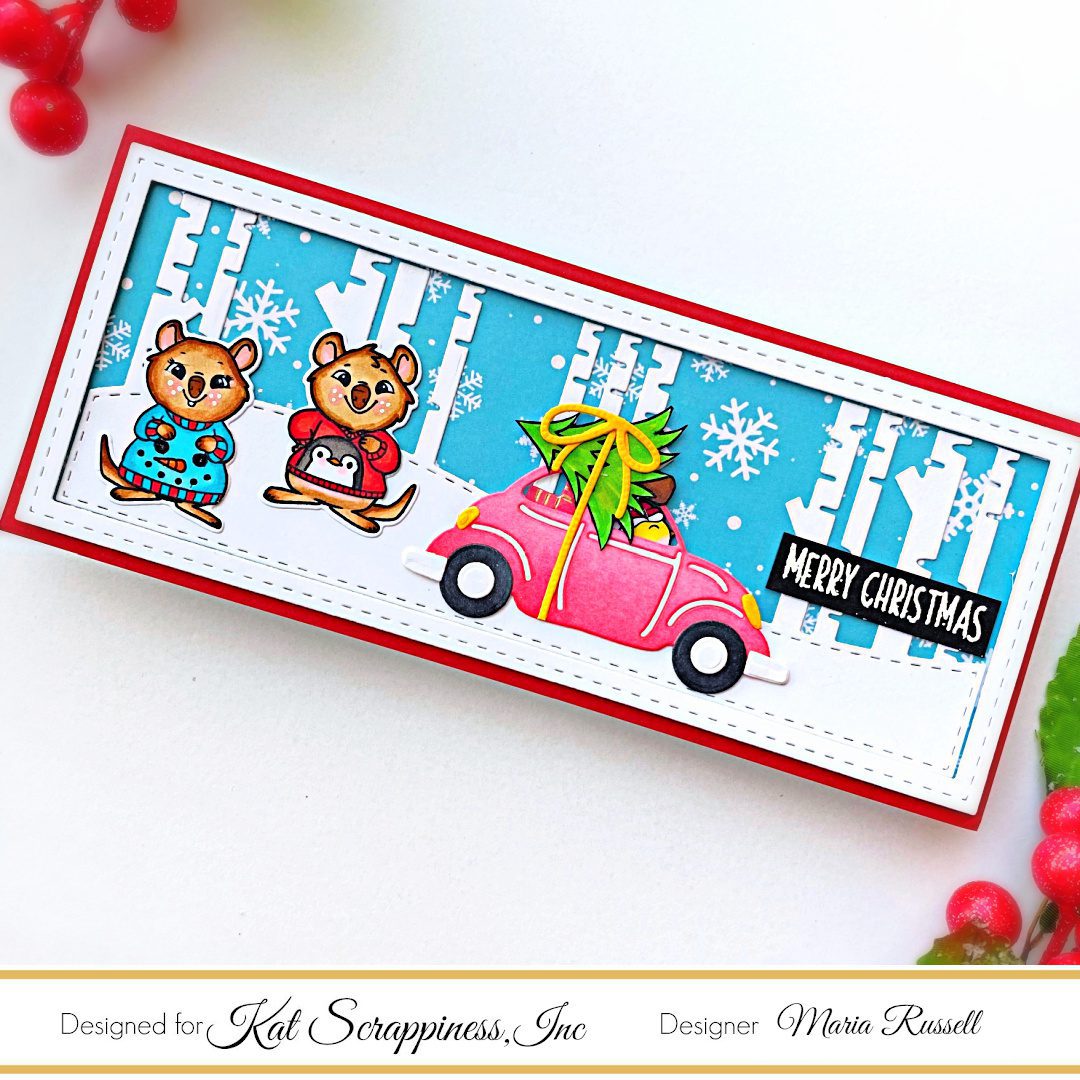
Christmas is fast-approaching and I am totally looking forward to coming home. There’s something so special about being home for the holidays! Campfire, Ugly Sweaters, Hot Cocoa, and spending quality-time with my family! Home for the holidays is my theme for today’s blog post.
Fussy-cut the Christmas Tree and the ugly sweater images and adhere the ugly sweaters on the Quokkas.
Use the Special Delivery Etched Diesand die-cut all the pieces on some Neenah Solar White Card Stock. Ink blend the die-cuts and use markers to color them in.
Adhere the red car with foam-adhesive for added dimension.
Add the quokkas on the focal panel with liquid glue.
Stamp the sentiment on some black card stock. Sprinkle some white embossing powder and heat-set with the heating tool.
Adhere the sentiment on the card.
I really LOVE how this card turned out and I hope you got inspired to use your older stamps and dies. The supplies I used are listed and linked below. Thanks for stopping by and have an amazing day!
Happy Thanksgiving, everyone! Before I show you the project, here’s a little Black Friday special “Site-wide” sale going on at Kat Scrappiness! Use the coupon code below to get 20% off your order and grab your favorites now before they sell out!
For today’s project, I’m showcasing the Woodland Reindeer Die set, along with the Happy Day Stamp Set and Stitched Slimline Hills. Thanksgiving is a great time to be with family and friends and after the feast is over, get some quality time and start creating Christmas cards (if you haven’t done so already). On my next few posts here, I will be giving you some inspiration to use your older Kat Scrappiness dies you’ve had from your stash for awhile and give them some love.
Here’s what I did to create the card:
Ink-blend the panel using distress oxide inks and mini-ink blending tools with Wilted Violet, Picked Raspberry and Dried Marigold.
Add texture to the background by using a Starfield Stencil and texture paste. Spread the paste evenly with the help of Therm-O-Web’s Stencil Pal. Let this panel dry for at least half an hour.
Adhere the background panel on some A2-size notecard.
I hope you like my card today and got inspired! The supplies I used are listed and linked below. Don’t forget to use the coupon code “CHRISTMAS2021” to get 20% off your order. Thanks for stopping by today and have an amazing Thanksgiving weekend!
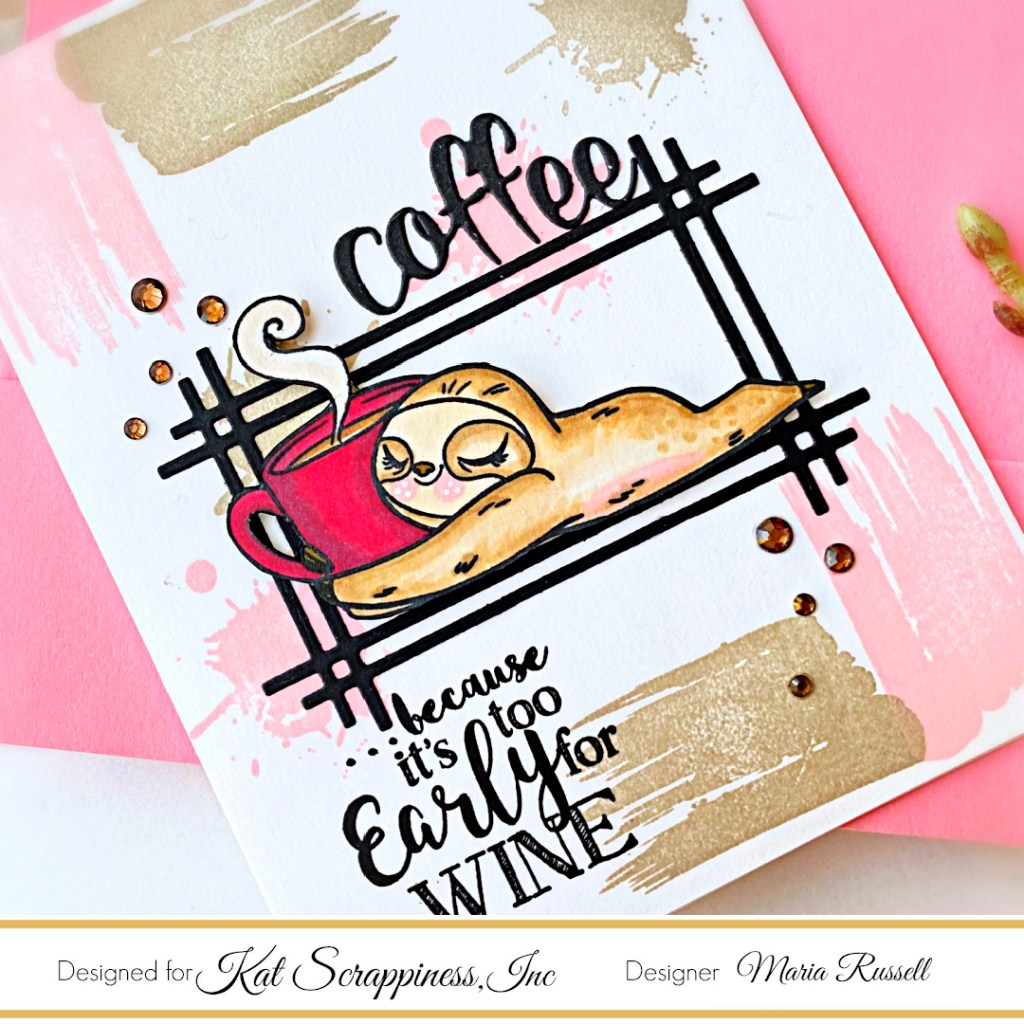
Hello everyone! It is that time of the year where card-makers get together and celebrate our love for coffee! It is the Fall/Winter Coffee Lover’s Blog Hop and Kat Scrappiness, Inc. is pleased to be a returning super sponsor for this event. I’d also like to take this opportunity to thank Amy Tsuruta and the rest of her team responsible for facilitating this great hop! I don’t know how you guys do it but you all rock!
Stamp the image on some Neenah solar white card stock.
Color the images in with alcohol markers and fussy-cut with precision snips.
Create your own background panel by using the Everyday Brush Strokes stamp set and randomly stamp the images using Lawn Fawn Ballet Slippers and Pizza Crust ink.
Use a die from my collection to die-cut the black frame and adhere in the center of the card panel with liquid glue.
Adhere the focal image on the card with foam adhesive for added dimension.
Before you go, please note that EVERYTHING in the “Coffee-Themed Products” Category is on sale for 15% off from November 12 to 19, 2021. Please use coupon code: “FWCOFFEEHOP” to avail this special discount. So grab your KS favorites now!
I hope you like my card and got inspired! I’d love for you to leave a comment and tell me what you think! The supplies I used are listed and linked below. Thanks for stopping by today and have an amazing day!
Hello and welcome to the Kat Scrappiness September Product Release – Halloween!
I’m so excited to share this post today as we kick off this week with the most adorable Halloween-themed products! There are are a lot of products to showcase so sit back, relax and enjoy browsing through all of them today!
Kat Scrappiness also has a GIVEAWAY so make sure you read all the way to the end of this post and click on the link to participate there directly and have a chance to WIN the entire release!!
Our Home Sweet Home Base Die will create the base house perfect for any season. It measures approximately 4.25 x 5.75 inches. You can use it to create a house shaped card ,create a larger card such as a 5×7, an-A2 card (cutting it off slightly to make the house smaller!). There are multiple ways to use this die to create a one-of-a-kind house of your own!
The Crafters Essentials Halloween Dies include 8 individually designed dies that you can mix and match to create uniquely designed cards time and time again. These dies will work for A2, Slimline & Mini Slimline Cards (and other projects too!)
This super adorable Boo-gy Ghosts die set consists of 9 dies including five ghosts and four cute little accessories that will allow you to create each ghost’s individual character!
Create your own Creepy Crawly fun with this die set which includes four dies, two spider webs and two CUTE spiders! Add some googly eyes to the spiders for that extra cutesy look! Wouldn’t it be fun to add these die-cuts to your Happy Planner as well?
This sentiment die has a 1/4″ shadow. You can use the sentiment with or without the shadow. This die set can be used for any occasion and they’re also perfectly matched to go with the Boo-gy Ghosts!
This BOO TO YOU! Patterned Paper Pack is a fun, colorful and spooky selection of papers in a Halloween theme. They will make your Halloween cards a blast to create!
Create your own Mini Slimline Envelopes using this set of 14 dies. Use your own creativity to select from either patterned paper or colored card stock, etc. to create your own one-of-a-kind envelope. We’ve added the “Happy Mail” word dies to decorate your envelope. The envelope can be mailed and/or hand delivered to the recipient.
I have four (4) samples to share with you today. I have mixed and matched the Halloween products to create some fun and spooky cards.
I have to admit that this first card below is probably one of my favorite Halloween cards that I’ve ever made! I ink-blended the background with some distress oxide inks and used a stencil set from my collection to create the creepy sky!
The Home Sweet Home House Die Set was die-cut using some purple card stock and dry-embossed with a brick stencil. I then added black soot on the bricks to add more texture and dimension.
This slimline card is another favorite of mine. I adhered the Boo To You Paper on some black slimline card base. On another panel of SL Bristol smooth white card stock, I used some clouds stencil and distress oxide inks to create the night-time sky.
I then stamped the costume from the Dress-Up Quokka Halloween Add-on Stamp Set on some masking paper and fussy-cut using precision snips. I stamped the costumes first on some Neenah solar white card stock and used the mask to mask-off the image, then stamped the two quokkas from the Dress-Up Quokka Stamp Set. By doing so, it created a seamless look. I used my Scan N cut machine to cut the images out.
My third sample is fairly simple! For my card base, I used the Tri-Fold Scored Cards and Envelopes available at the shop with the Never-Ending Square die set to create the windows. I once again ink-blended the background with some distress oxide inks and clouds stencil. I cut a piece of patterned paper from the Boo To You Paper Pack and adhered on the inside with liquid glue.
The cute ghosts from the Boo-gy Ghosts Die Set were die-cut on some glitter card stock. I finished the design by adding some Purple Pearls and the sentiment Lift Your Spirits that I die-cut with some black and white card stock.
DISCLOSURE. *I belong to a few design teams with affiliate programs and link these supplies at the end of each blog post. If you click on my affiliate link, I will receive a small commission at no additional cost to you. I use these funds to pay for the cost of running this blog. If you like what I do, please consider supporting me by clicking on these links. Thank you so much!
Hello my crafty friends! It has been awhile since I posted my projects for Kat Scrappiness here. Since I am the Design Team Manager, I do most of the product releases on the Kat Scrappiness Blog. However, they have a HUGE release today and it is AMAZING! I thought it deserved to be showcased here as well because some of you may not have heard of Kat Scrappiness (if you are a new follower!).
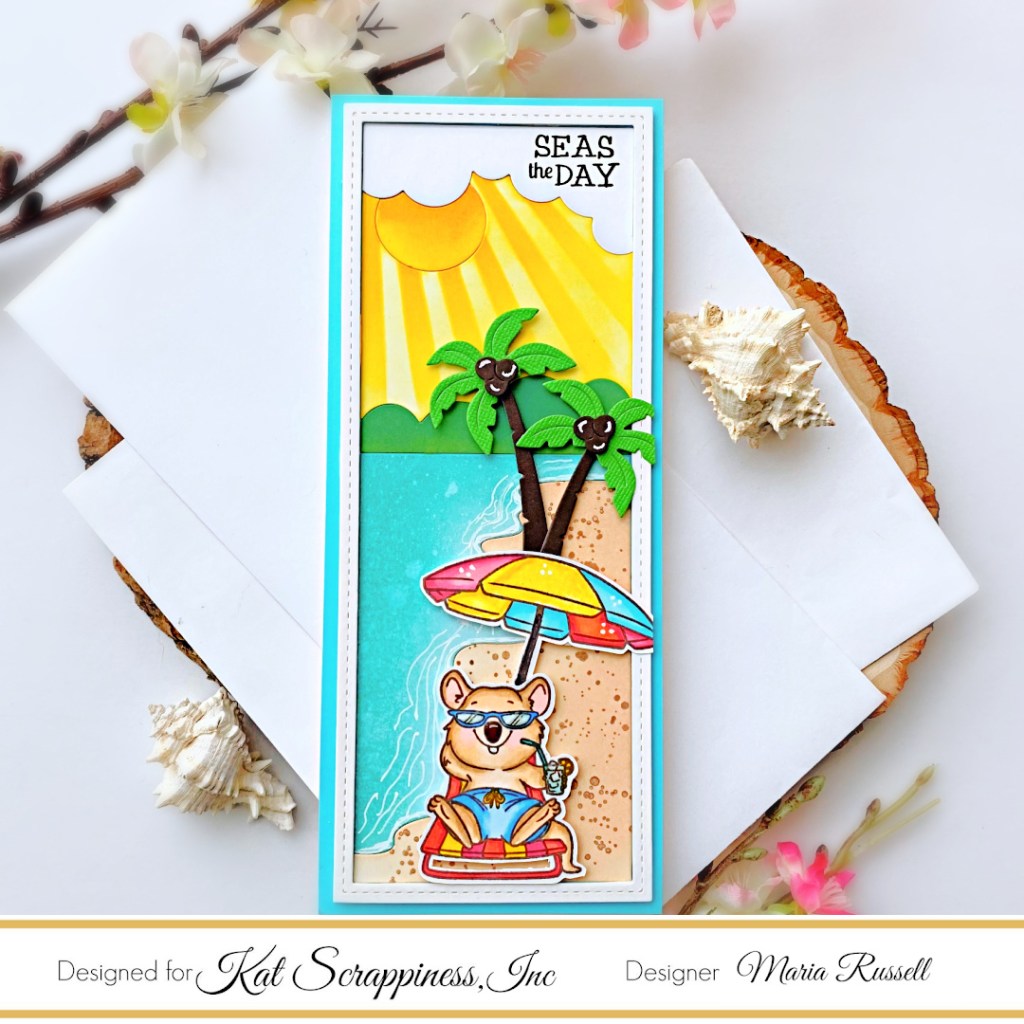
The first project below features the Slimline Waterside Die. The die cuts out all the pieces you need to paper piece your very own waterside scene! Make it day or night, a sunset scene perhaps?! Customize the colors of all the different pieces using colored card stock, ink blending, or any other coloring medium you can think of! This die has unlimited potential to create the most beautiful scenes. Take a look:
I used the Sunscape Stencil to create the sunny scene behind the cute Quokka hanging by the beach. I ink-blended the water and the sand on some Bristol smooth white card stock with distress oxide inks, to create a realistic look and added the ripples with my white gel pen. I used some dies that I had from my collection to add the palm trees.
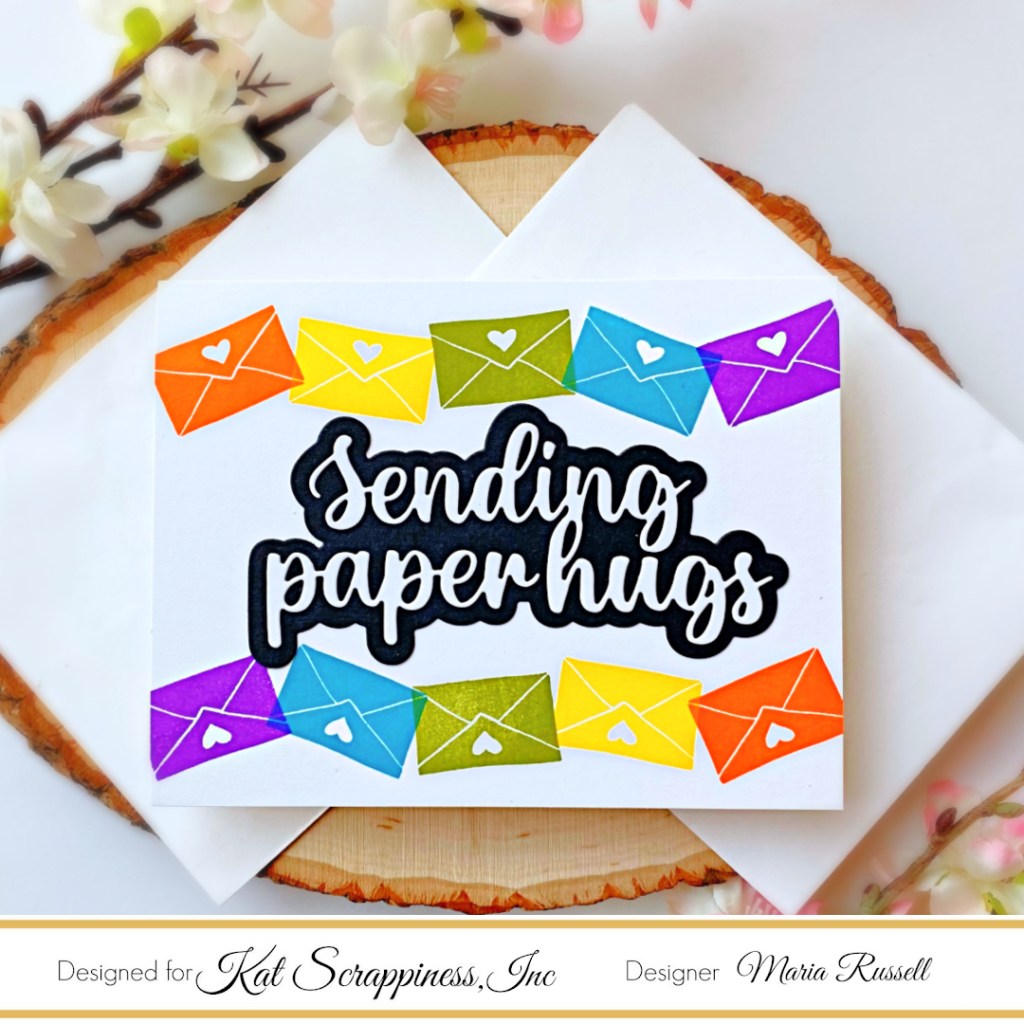
For my second project below, I am showcasing the Sending Paper Hugs Word Die with Shadow. Like most Kat Scrappiness dies, they cut like butter! One pass on the die-cutting machine is all it takes!
This next project features the Tag Essentials Die Set. This die set allows you to create an unlimited number of unique tags, including shaker tags, gift tags, or even bookmarks. Switch up the top and bottoms and mix and match all of the other included elements to make your tag unique!
I created the Tag using the components from the die set and used the Quokka stamp set with the new sprinkles available at the shop. Isn’t it cute?
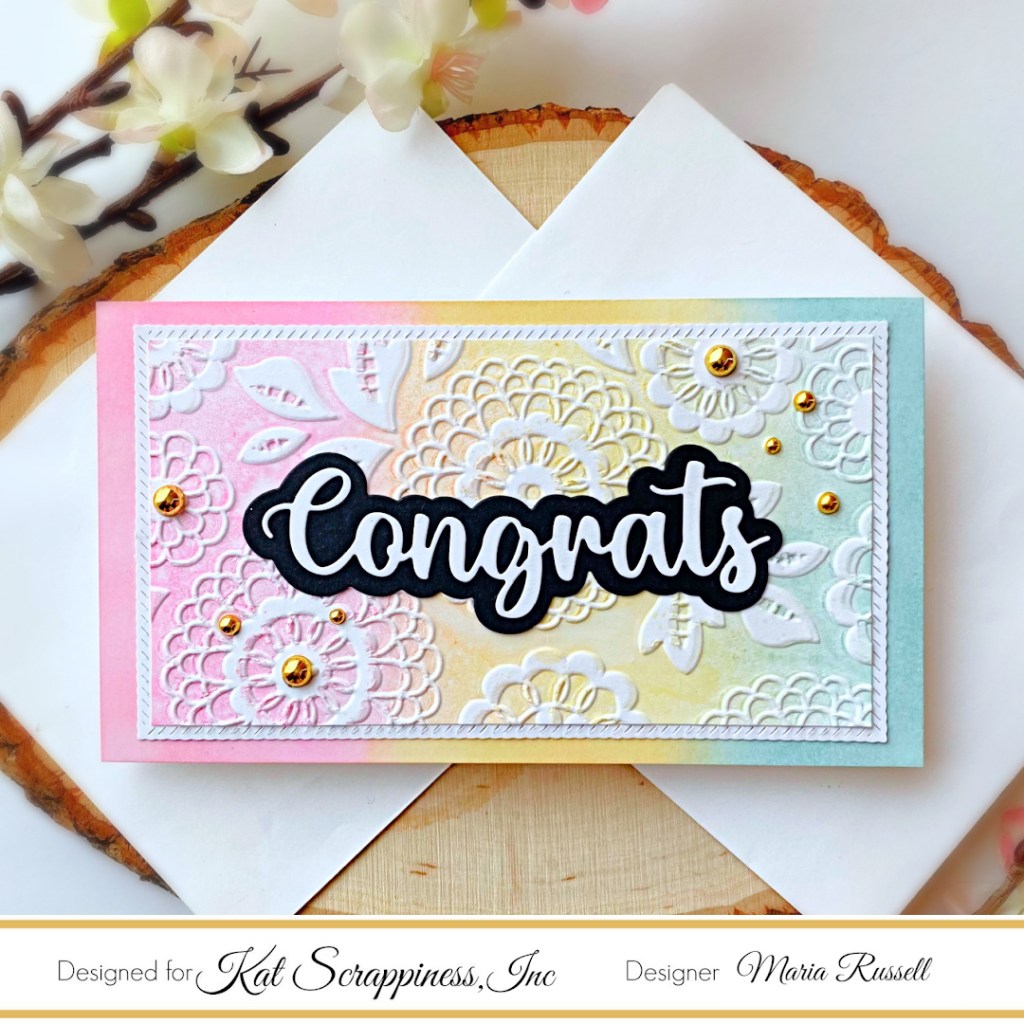
My next sample is a mini Slimline card. I am featuring the “Congrats” Word Die with shadow. You can use the sentiment with or without the shadow. This die measures approximately 4″ x 1.25″.
The background was made by ink-blending the colors with distress oxide ink. I used my embossing folder to run it through my die-cutting machine for added dimension and finishing the design by adding the new Gold Pearls! I really LOVE how this one turned out:
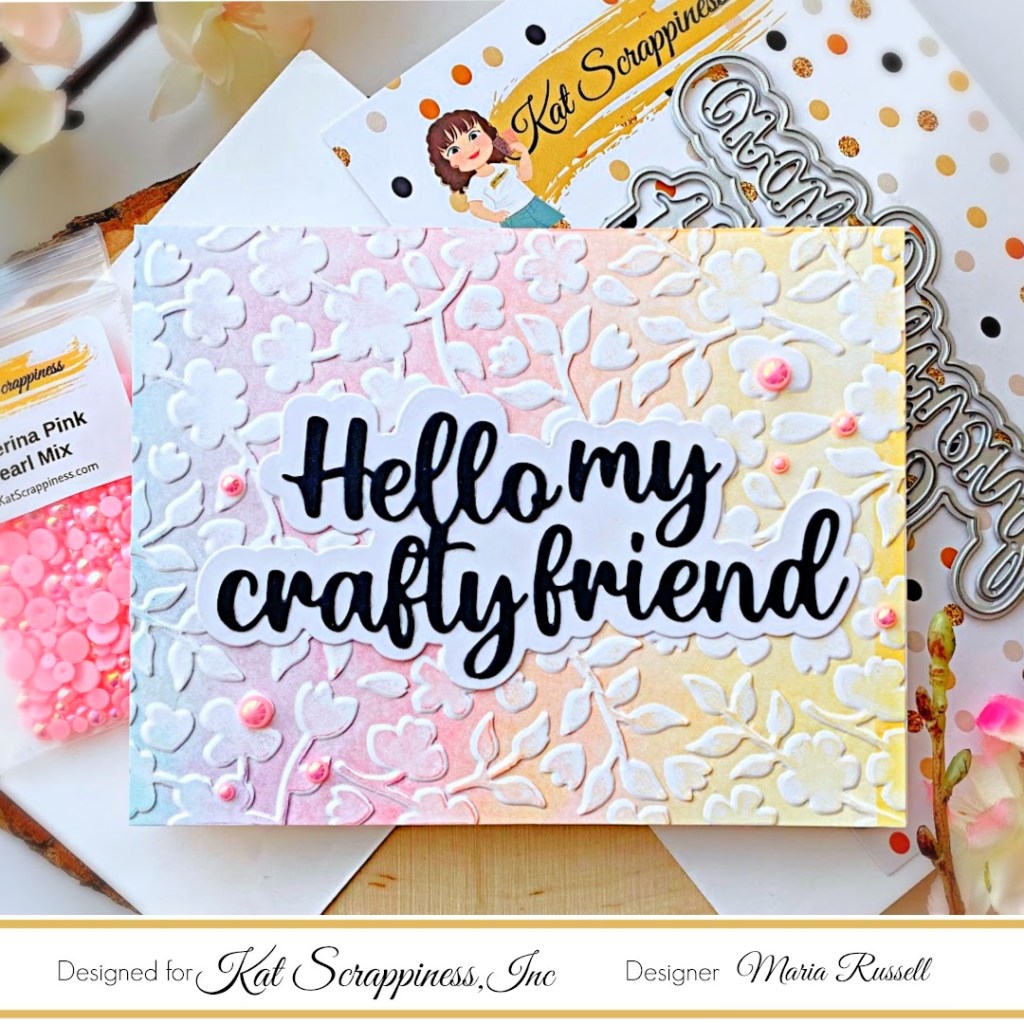
For my fifth and final sample, I am showcasing the “Hello My Crafty Friend” Word Die. This great sentiment die has a 1/4″ shadow. You can use the sentiment with or without the shadow. This die measures approximately 4.75″ x 2.25″.
I did the same technique as the card above but reversed the colors on the word die, and finished the design by adding some Ballerina Pink Pearl Mix.
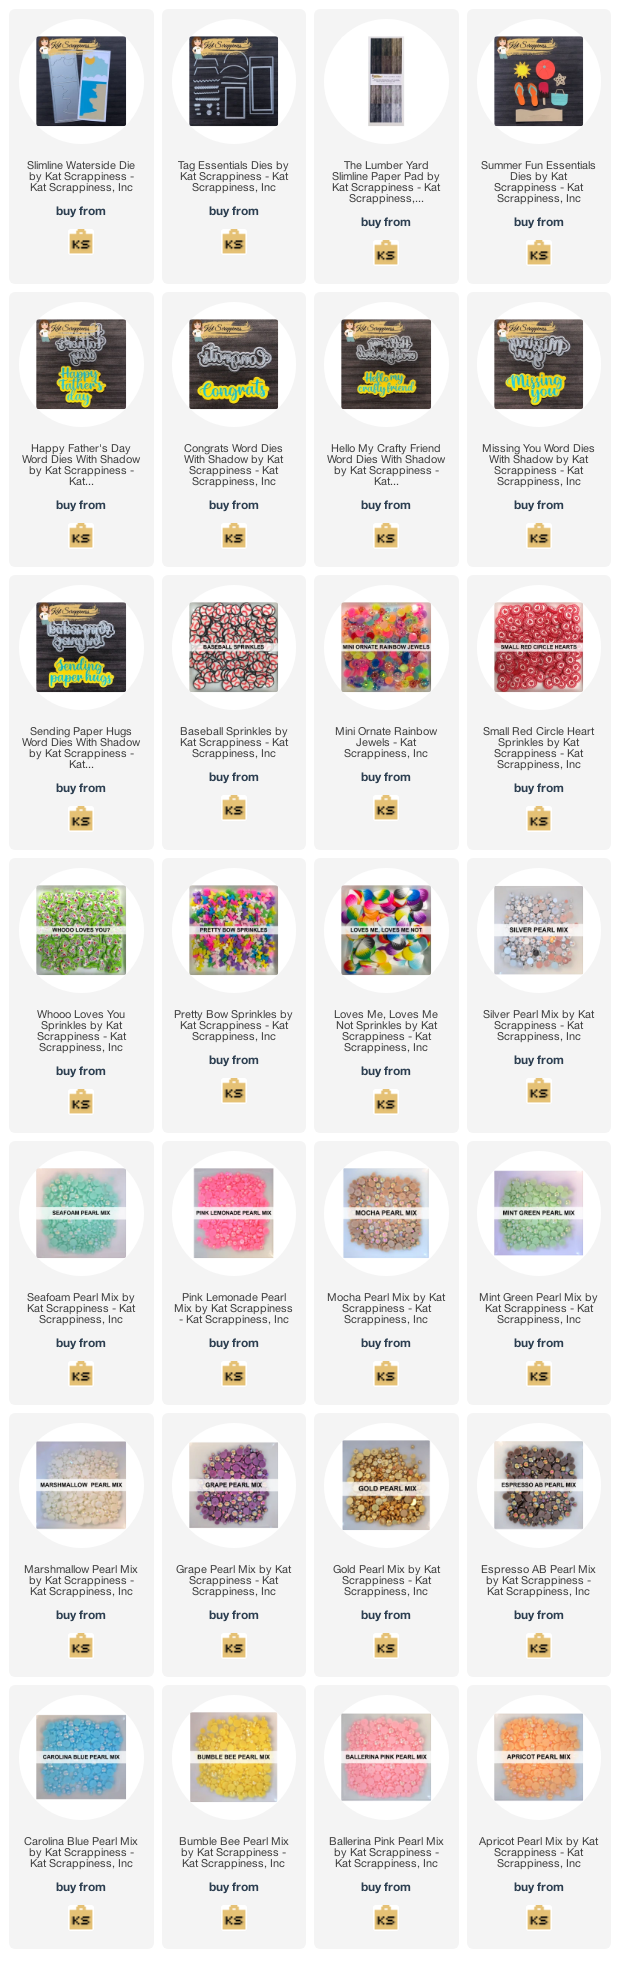
Which one is your favorite? I really can’t even pick one! The May 2021 products are AMAZING! The supplies I use are listed and linked below! Grab your favorites before they sell out!
Here’s the BEST part! You can WIN the entire May 2021 release by clicking on the Rafflecopter link. Have an amazing day!