It is that time of the month where the entire design team get so excited to show off the new stamps, dies and stencils by Newton’s Nook Designs. You also have a chance to win a stamp set for each reveal day so please read through til the end of the blog post to find out more info. [Just a little important note: I know some of you had difficulties finding the comments section. If you would like to leave a comment to participate in the giveaway, the “comments section” will only be ever visible when a single post on Word Press is being viewed. Please click on this particular blog post and you will be able to leave a commentbelow. Thank you!]
For the first day of the reveals, we are showcasing the following products:
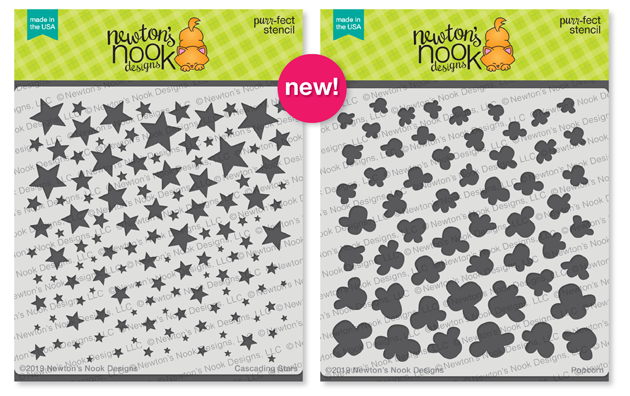
Newton’s Movie Night and Coordinating DiesCascading Stars and Popcorn Stencils
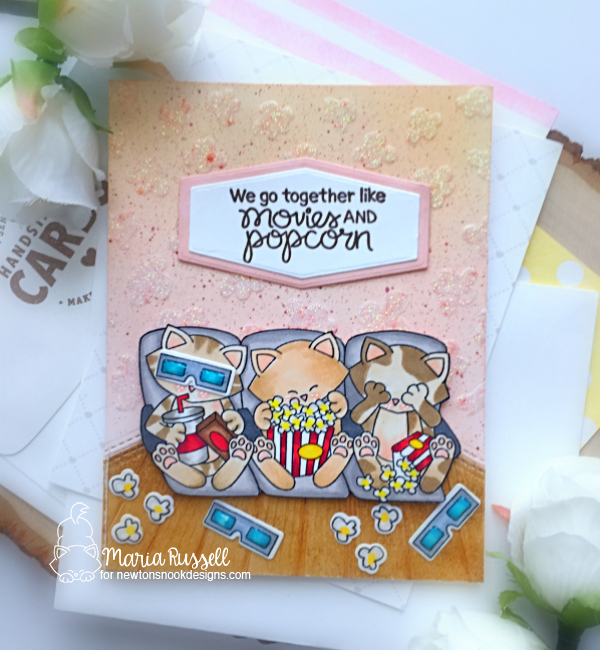
Here is my card:
Here’s how I made it:
stamp the images on smooth white card stock, color and and die-cut the images using the coordinating dies. I used the dies to die-cut the 3D glasses and the popcorn but I fussy-cut the main image.
Ink up an A2 size piece of Bristol smooth white card stock with distress oxide inks. I used Victorian Velvet distress oxide ink.
I smooshed my Aged Mahogany distress oxide ink onto an acrylic block and used my distress sprayer to add water. I then used my watercolor brush to splatter some color onto my inked up background.
I used the popcorn stencil and moonstone glimmer paste to add some glitter and shine on my background, using a palette knife.
I used another die from my stash to die-cut the “wooden floors”. I also used this die to die-cut the colored background. I adhered both panels to my A2-size card base.
I die-cut some diagonal frames in white and pink card stock and adhered them together, and stamped my sentiment.
I adhered all of the pieces onto the card.
I finished my design by adding some glossy accents to the 3D glasses.
Here’s a closer look:
Would you like to win the “Newton’s Movie Night” Stamp Set?This stamp set will be given away to ONE lucky winner!
Here’s how to win:
Comment on the NND blog and Design Team blogs (see list below)! Thewinner will be chosen at random from the collective reveal posts. Make sure to check out each of their blogs and comment for your chance to win. You will not know which blog has been chosen so the more you comment on the better your chances are of winning! You have until Thursday, May 16th at 9pm EST to comment — winners will be announced on the blog post on Friday, May 17th.
Check out all the awesome Design Team Blogs below to enter:
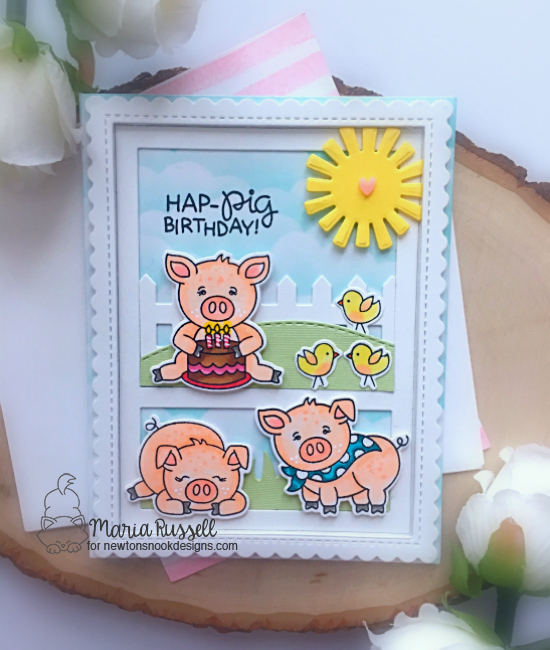
Hello Newton’s Nook fans! Have you seen last week’s April release? What was your favorite? I am back today to share with you two farm-themed cards, showcasing the Oink stamp set and coordinating dies with the Moo stamp set and coordinating dies.
Here’s my first card:
I started out by stamping my images on Neenah solar white card stock and colored them in with Copic markers. I used the coordinating dies to die-cut the images. I inked up a Bristol smooth white card stock with some Broken China distress oxide inks to create the sky. I die-cut the rest of the images that I needed and assembled the card. Here’s a closer look:
I absolutely ADORE these little piggies. I don’t know about you but I think pigs are extremely cute. A crafty friend of mine has a pet pig and that pig is so smart it makes me want to have one as a pet.
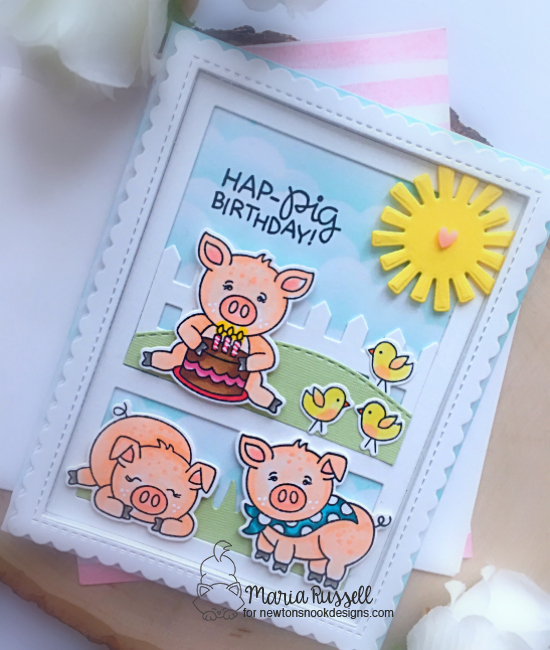
For my second project, I did all those steps that I mentioned above. However for my grass hill and trees, I inked up my Neenah solar white card stock with some freshly cut grass ink using some make-up brushes. I really love how it turned out.
For my background, I inked up the background with Tumbled Glass and Spun Sugar distress oxide inks. I also used the aged mahogany distress oxide inks to add the colorful speckles. To create my clouds, I used the Cloudy Sky stencil by Newton’s Nook with some Peacock Feathers distress oxide ink. Here’s a closer look:
The sentiment was stamped using Aged Mahogany distress oxide ink and “note to self”, next time wait for it to dry before adhering it to the card base. I smudged the sentiment a little. I didn’t want all of my efforts to be wasted so I am keeping the card as it is. To finish the design, I used my Sakura white gel pen to add some dots and lines to the trees to give it a little dimension. I do LOVE how both cards turned out (with the exception of my little boo-boo!).
I hope you like my cards. The supplies I used are listed and linked below in case you are interested. Thank you for stopping by my blog today and happy crafting!
It is the third day of the April reveals by Newton’s Nook Designs. Were you able to check out the last two days of the reveal? Which one is your favorite so far? You have a chance to win each stamp set during release week so check out the details I have indicated at the end of this blog post. [Just a little important note: I know some of you had difficulties finding the comments section. If you would like to leave a comment to participate in the giveaway, the “comments section” will only be ever visible when a single post on Word Press is being viewed. Please click on this particular blog post and you will be able to leave a commentbelow. Thank you!]
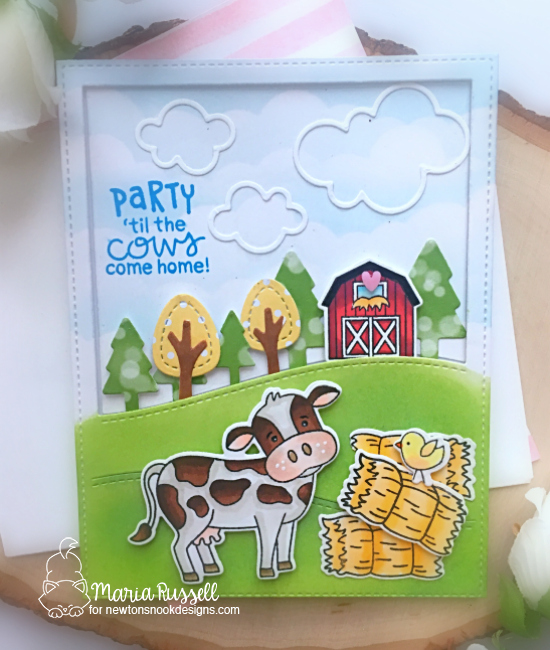
For the third day, the design team is showcasing the Moo stamp set and coordinating dies. Here’s what it looks like:
Here’s my card:
Here’s how I made my card:
stamp the images on some Neenah solar white card stock and color the images in with Copic markers. Die cut the images using the coordinating dies. I opted to color the cow with some dark brown Copic markers instead of the typical black to make it stand out.
cut an A2 size piece of Bristol smooth white and use distress oxide inks to ink up the background.
use a die from my stash to die-cut the colored background.
use some small dies to die-cut the trees with some patterned papers.
adhere this piece on an A2 size card base with liquid and foam adhesive.
die-cut the clouds silhouette using some clouds die from my stash.
adhere the clouds on the card.
adhere the rest of the elements to the card.
Here’s a closer look:
I finished my card design by adding some pink enamel heart to the barn.! Here’s another look:
Would you like to win the “Moo” Stamp Set?This stamp set will be given away to ONE lucky winner!
Here’s how to win:
Comment on the NND blog and Design Team blogs (see list below)! Thewinner will be chosen at random from the collective reveal posts. Make sure to check out each of their blogs and comment for your chance to win. You will not know which blog has been chosen so the more you comment on the better your chances are of winning! You have until Thursday April 11th at 9pm EST to comment — winners will be announced on the blog post on Friday, April 12th.
Check out all the awesome Design Team Blogs below to enter:
It is the second day of the April reveals by Newton’s Nook Designs. I hope you were able to check out yesterday’s reveal. You also have a chance to win each stamp set during release week so check out the details I have indicated at the end of this blog post. [Just a little important note: I know some of you had difficulties finding the comments section. If you would like to leave a comment to participate in the giveaway, the “comments section” will only be ever visible when a single post on Word Press is being viewed. Please click on this particular blog post and you will be able to leave a commentbelow. Thank you!]
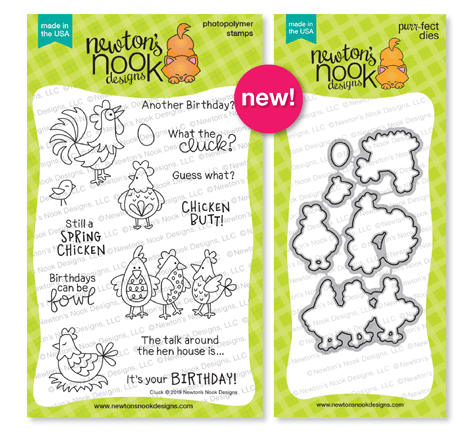
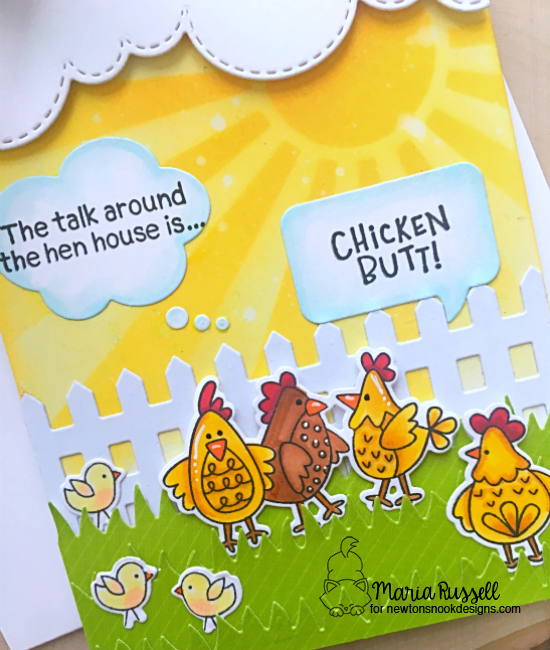
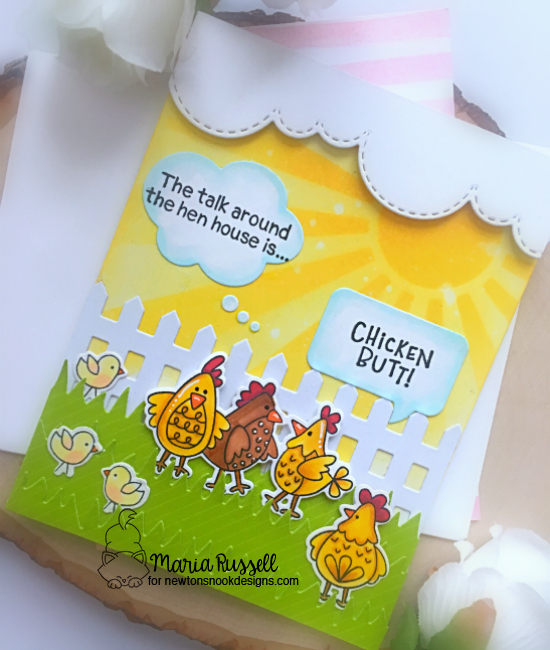
For our projects today, the design team is showcasing the Cluck stamp set and coordinating dies. Here’s what it looks like:
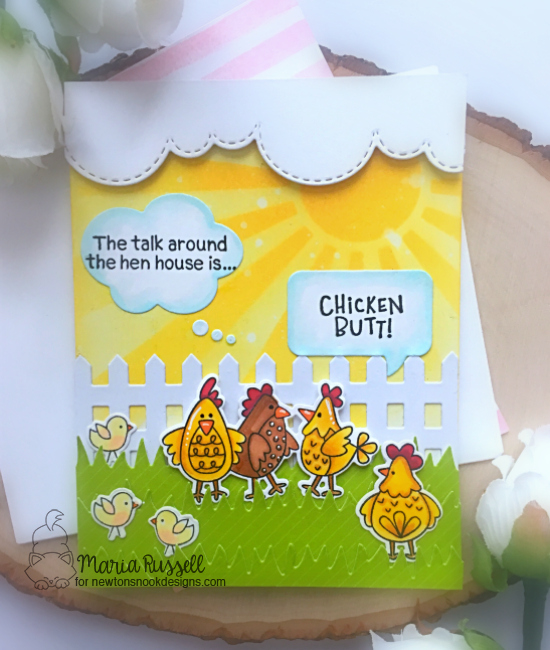
Here’s my card:
How I made it:
stamp the images on Neenah solar white card stock and color the images in with Copic markers.
die-cut the images using the coordinating dies.
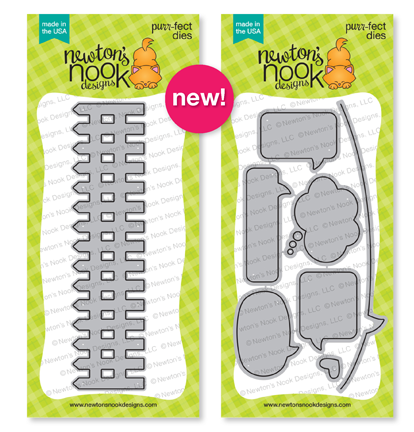
die-cut the speech bubbles using the Speech bubble die set and stamp the sentiment on each bubble.
die-cut the clouds using the Sky borders die set and the Picket Fence with some white card stock.
cut an A2 size piece of Bristol smooth white card stock and use the Sunscape stencil to ink up the background with some distress oxide inks. I used the Mustard Seed and Fossilized Amber distress oxide inks.
use the distress sprayer to spray some water on the inked up background and wipe it with some paper towel.
die-cut the grass three times using the grass border die with some patterned paper.
adhere the clouds using some foam adhesive.
assemble the rest of the elements to finish the card design.
To finish my design, I used my Sakura white gel pen to add some lines and dots on the images. Here’s a closer look:
This whole scene just cracks me up. If I have to choose a favorite for this week’s reveal, I think it would be this stamp set!
Would you like to win the “Cluck” Stamp Set?This stamp set will be given away to ONE lucky winner!
Here’s how to win:
Comment on the NND blog and Design Team blogs (see list below)! Thewinner will be chosen at random from the collective reveal posts. Make sure to check out each of their blogs and comment for your chance to win. You will not know which blog has been chosen so the more you comment on the better your chances are of winning! You have until Thursday April 11th at 9pm EST to comment — winners will be announced on the blog post on Friday, April 12th.
Check out all the awesome Design Team Blogs below to enter:
It is that time of the month where the entire design team get so excited to show off the new stamps, dies and stencils by Newton’s Nook Designs. You also have a chance to win a stamp set for each reveal day so please read through til the end of the blog post to find out more info. [Just a little important note: I know some of you had difficulties finding the comments section. If you would like to leave a comment to participate in the giveaway, the “comments section” will only be ever visible when a single post on Word Press is being viewed. Please click on this particular blog post and you will be able to leave a commentbelow. Thank you!]
For the first day of the reveals, we are showcasing the following products:
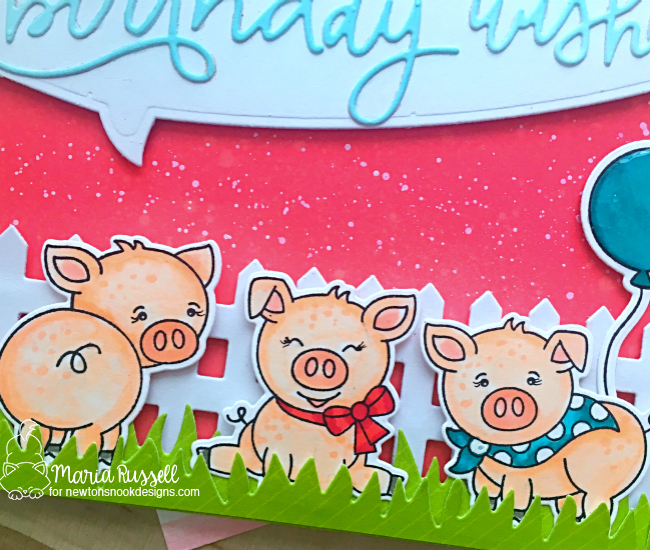
Oink Stamp Set and Coordinating DiesPicket Fence Die and Speech Bubble Die SetHardwood Stencil
Here is my card:
Here’s how I made it:
stamp the images on smooth white card stock and die-cut the images using the coordinating dies.
die-cut the Picket Fence and the Speech Bubble border using the Speech Bubble die set with some white card stock.
ink up some Bristol smooth white card stock with some Tumbled glass distress oxide ink. Use the “birthday wishes” die to die-cut the sentiment.
use some white paint and smoosh them onto an acrylic block and splatter white paint all over the inked up background.
assemble the card.
Here’s a closer look:
I love, love, love this new stamp set. I also used my Copic multi-liner pen to draw some eyelashes to the piggies. I think they look cuter with eyelashes. I finished my design by adding glossy accents to the balloon. Here’s another look:
Would you like to win the “Oink” Stamp Set?This stamp set will be given away to ONE lucky winner!
Here’s how to win:
Comment on the NND blog and Design Team blogs (see list below)! Thewinner will be chosen at random from the collective reveal posts. Make sure to check out each of their blogs and comment for your chance to win. You will not know which blog has been chosen so the more you comment on the better your chances are of winning! You have until Thursday April 11th at 9pm EST to comment — winners will be announced on the blog post on Friday, April 12th.
Check out all the awesome Design Team Blogs below to enter:
It is the third day of the March reveals by Newton’s Nook Designs. Were you able to check out the last two days of the reveal? Which one is your favorite so far? You have a chance to win each stamp set during release week so check out the details I have indicated at the end of this blog post. [Just a little important note: I know some of you had difficulties finding the comments section. If you would like to leave a comment to participate in the giveaway, the “comments section” will only be ever visible when a single post on Word Press is being viewed. Please click on this particular blog post and you will be able to leave a commentbelow. Thank you!]
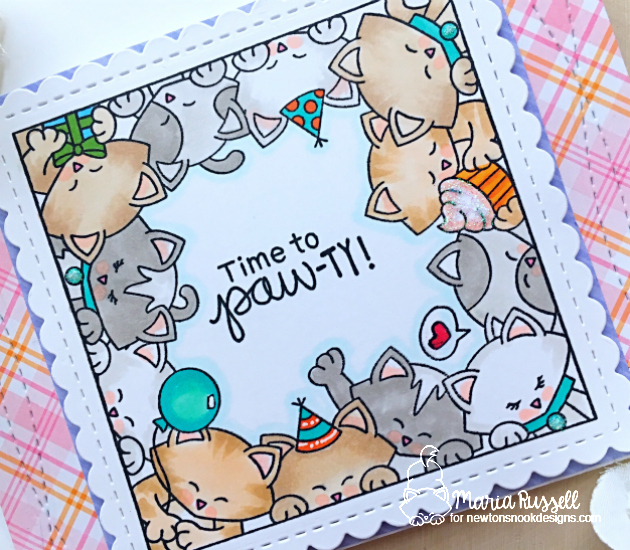
For the third day, the design team is showcasing the Newton’s Block Party stamp set and the Frames Squared Die set that we revealed yesterday.
NEWTON’S BLOCK PARTYFRAMES SQUARE DIE SET
Here’s how I made my card:
die-cut the scallop frame from the Frames Squared die set with some Neenah solar white card stock.
color the images using Copic markers (or any coloring medium of your choice).
adhere this colored image onto a purple patterned paper. Cut the excess.
cut an A2 size card base and cover with patterned paper.
i used a die from my stash to add the wonky stitch details on both sides.
adhere the colored image on the card base.
Here’s a closer look:
To finish my card design, I added some Stardust stickles to the cupcake and white dots using my Sakura gel pen! Here’s another look:
Would you like to win the “Newton’s Block Party” Stamp Set? This stamp set will be given away to ONE lucky winner!
Here’s how to win:
Comment on the NND blog and Design Team blogs (see list below)! Thewinner will be chosen at random from the collective reveal posts. Make sure to check out each of their blogs and comment for your chance to win. You will not know which blog has been chosen so the more you comment on the better your chances are of winning! You have until Thursday March 14th at 9pm EST to comment — winners will be announced on the blog post on Friday, March 15th.
Check out all the awesome Design Team Blogs below to enter:
It is the second day of the March reveals by Newton’s Nook Designs. I hope you were able to check out yesterday’s reveal. You also have a chance to win each stamp set during release week so check out the details I have indicated at the end of this blog post. [Just a little important note: I know some of you had difficulties finding the comments section. If you would like to leave a comment to participate in the giveaway, the “comments section” will only be ever visible when a single post on Word Press is being viewed. Please click on this particular blog post and you will be able to leave a commentbelow. Thank you!]
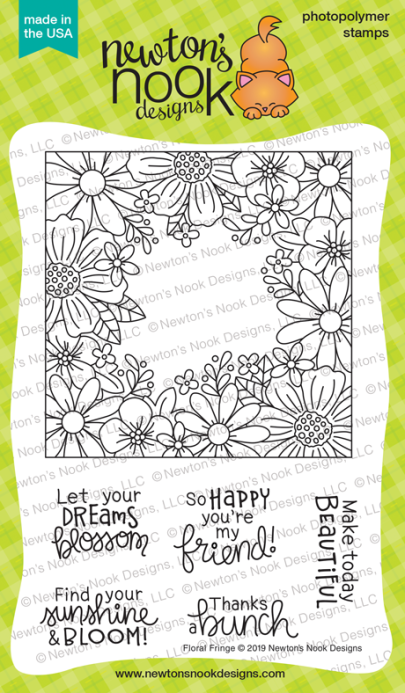
For our projects today, the design team is showcasing the Floral Fringe stamp set and the Frames Squared die set. Here’s what they look like:
FLORAL FRINGE STAMP SETFRAMES SQUARED DIE SET
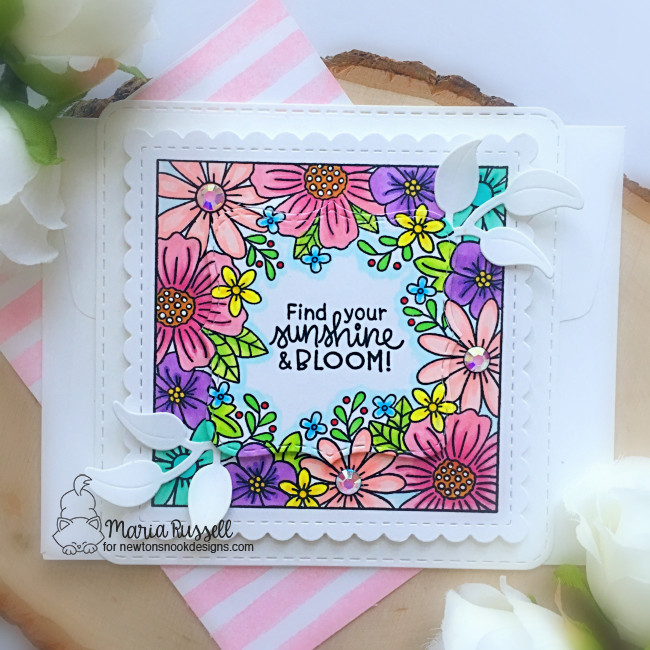
Here’s how I made my card:
die-cut the square scallop from some Neenah solar white card stock using the Frames Squared die set.
stamp the floral fringe image on this piece and color with Copic markers (or any coloring medium of your choice.
use the banners die (4th piece from the die set) to die-cut the middle piece of the colored background to create the “ghost” die-cut.
cut the leaves on white card stock using the Flower Trio die set and adhere this on the colored background.
adhere the “ghost” die-cut on top of the leaves, making sure you are aligning all the images together to create a seamless look.
Cut a square card base using the biggest die from the Frames Squared die set and assemble the card.
To finish my design, I added some sparkling clear jewels from Kat Scrappiness. Here’s a closer look:
I love that the Floral Fringe stamp set is so unique and the sentiments that Jen included in the set can be used for any occasion! I also LOVE that the Frames Squared die set have different shapes and can certainly be used in different paper crafting projects. Here’s another look at the card:
Would you like to win the “Floral Fringe Stamp Set?This stamp set will be given away to ONE lucky winner!
Here’s how to win:
Comment on the NND blog and Design Team blogs (see list below)! Thewinner will be chosen at random from the collective reveal posts. Make sure to check out each of their blogs and comment for your chance to win. You will not know which blog has been chosen so the more you comment on the better your chances are of winning! You have until Thursday March 14th at 9pm EST to comment — winners will be announced on the blog post on Friday, March 15th.
Check out all the awesome Design Team Blogs below to enter:
It is that time of the month where the entire design team get so excited to show off the new stamps, dies and stencils by Newton’s Nook Designs. You also have a chance to win a stamp set for each reveal day so please read through til the end of the blog post to find out more info. [Just a little important note: I know some of you had difficulties finding the comments section. If you would like to leave a comment to participate in the giveaway, the “comments section” will only be ever visible when a single post on Word Press is being viewed. Please click on this particular blog post and you will be able to leave a commentbelow. Thank you!]
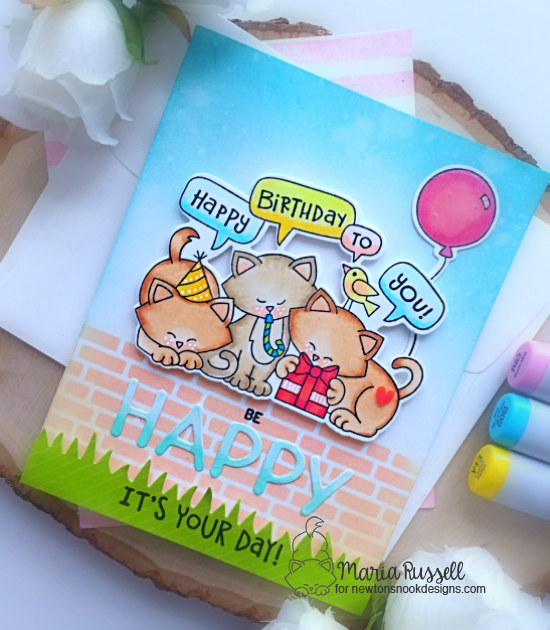
For the first day of the reveals, we are showcasing the following products:
I LOVE that Newton’s Nook Designs make their dies to cut the spaces between the images. This one cuts out the spaces between the dog and the presents. I also LOVE that the dies are pretty inexpensive. I think this is another must-have!
Would you like to win the “Newton’s Birthday Trio” or the “Paw-some Birthday” Stamp Set?We will choose ONE lucky winner for each stamp set!
Here’s how to win:
Comment on the NND blog and Design Team blogs (see list below)! Thewinner will be chosen at random from the collective reveal posts. Make sure to check out each of their blogs and comment for your chance to win. You will not know which blog has been chosen so the more you comment on the better your chances are of winning! You have until Thursday March 14th at 9pm EST to comment — winners will be announced on the blog post on Friday, March 15th.
Check out all the awesome Design Team Blogs below to enter:
Hello and welcome to the release hop. We are so excited for you to join us as we present to you our March release. The whole design team and one guest Designer will be sharing projects featuring the four new stamp sets that are available to purchase right now in the shop. We also have a GIVEAWAY so please be sure to scroll at the end of this blog post to find out how you can WIN. Don’t forget to visit the participating blogs (links are indicated below) and leave us some crafty love.
FREE SHIPPING
on orders of $25 or more before taxes and shipping
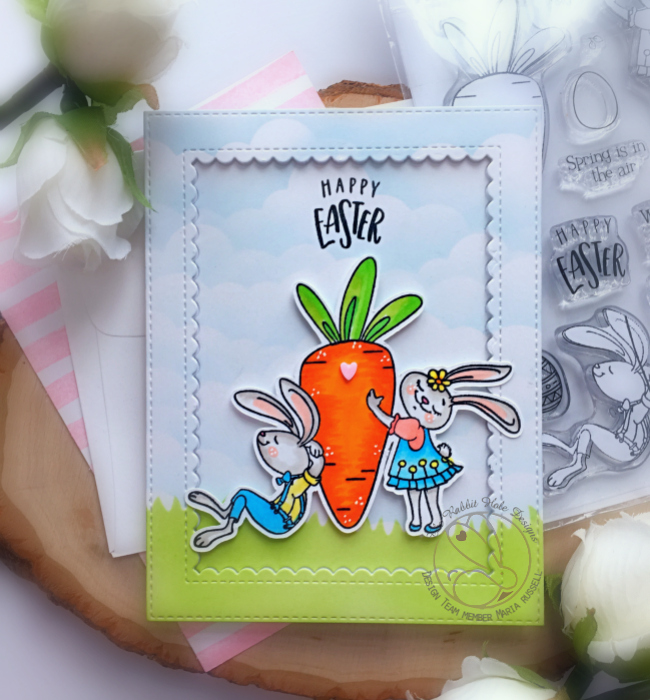
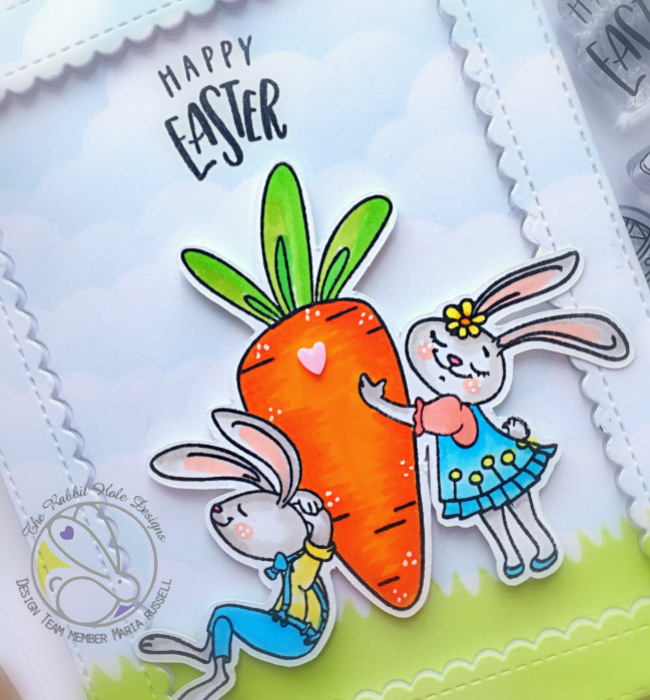
stamp the images on smooth white card stock and color the images using copic markers or any coloring medium of your choice.
fussy cut the image or use scan n cut machine.
ink up some Bristol smooth white card stock using a clouds stencil and grass stencil.
die-cut the frame using the scallop frame die.
adhere the images on the background and adhere this piece on an A2 size card base.
stamp the sentiment using versafine onyx black ink.
add some white dots on the carrot some white gel pen and adhere a pink heart.
Here’s a closer look:
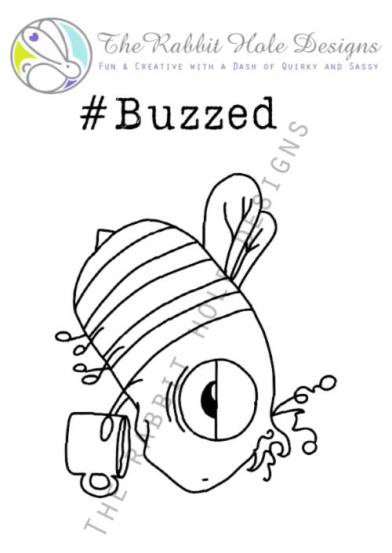
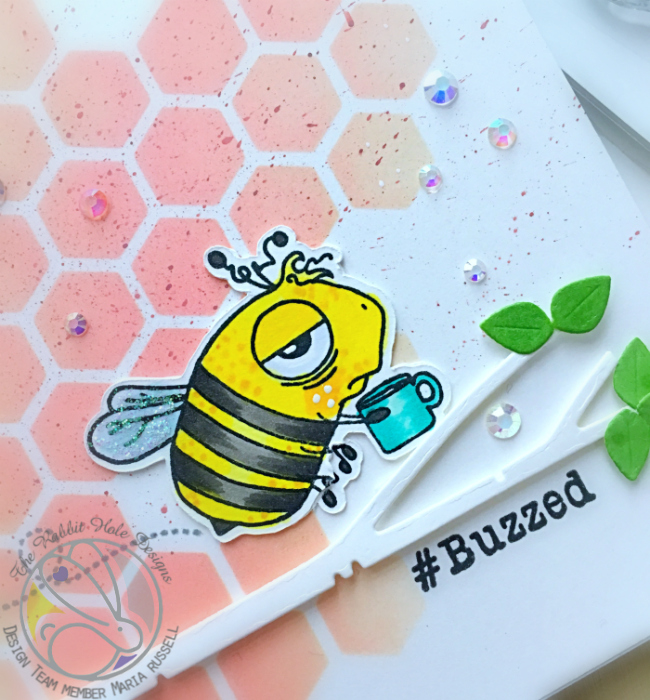
For my second project, I used the Caffeinated Bee:
How I made this card:
stamp the bee image on smooth white card stock and color him in with copic markers (or any coloring medium of your choice.
fussy-cut the image or use scan n cut 2.
Cut an A2 size Bristol smooth white card stock. Ink this up using some distress oxide inks, mini ink blending tool and a hexagon stencil.
smoosh aged mahogany distress oxide ink on an acrylic block and add some water.
use watercolor brush and flick it onto the background to add some some tiny speckles. dab it dry with some paper towel.
adhere this colored background on an A2 size card base.
stamp the sentiment using versafine onyx black ink.
die cut the birch tree branch and leaves using some dies. adhered these pieces on the colored background with some foam tape and liquid adhesive.
adhere the bee on the card.
finish the design by adding some Stardust stickles on the wings and sparkling clear jewels all over the card.
Here’s a closer look:
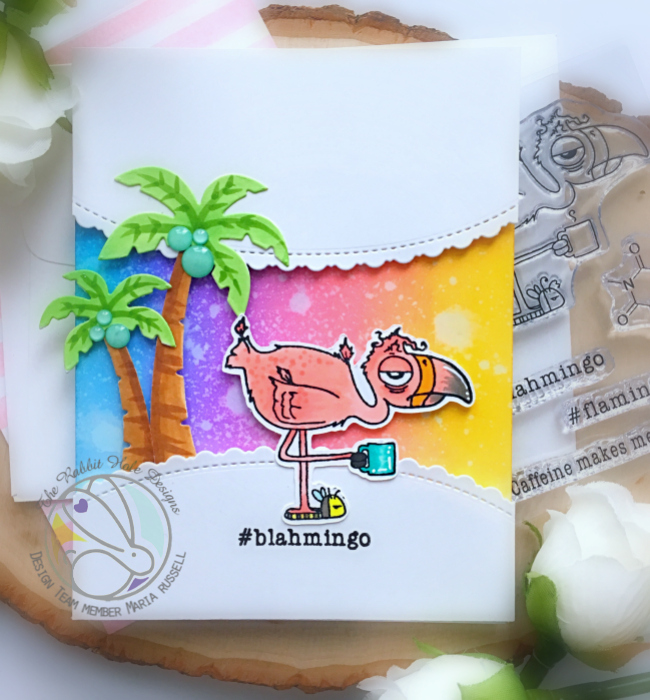
For my third project, I used the Caffeinated Flamingo:
How I made this card:
stamp the image on smooth white card stock and color it in with Copic markers (or any coloring medium of your choice.
fussy-cut the image or use scan n cut machine.
cut an A2 size Bristol smooth white card stock and ink up up the background with mini ink blending tools using distress oxide inks. I used fossilized amber, worn lipstick, seedless preserves and peacock feathers.
adhere this colored background on an A2 size card base.
die-cut two scallop frames using the fancy scalloped border die (see supply list below). adhere these pieces on the card with some foam tape.
die-cut the coconut trees using the dies and adhere these pieces on the card base with some foam and liquid adhesive.
adhere the flamingo on the middle of the card.
stamp the sentiment using versafine onyx black ink.
finish the design by adding some green enamel dots on the coconut trees and add white dot details using some gel pen.
Here’s a closer look:
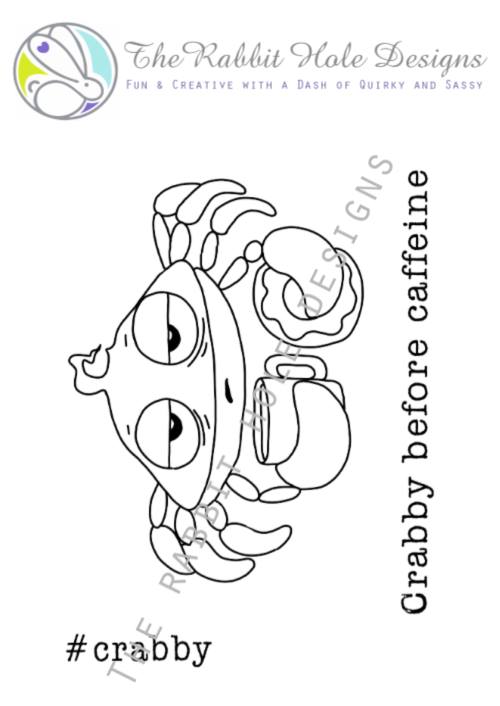
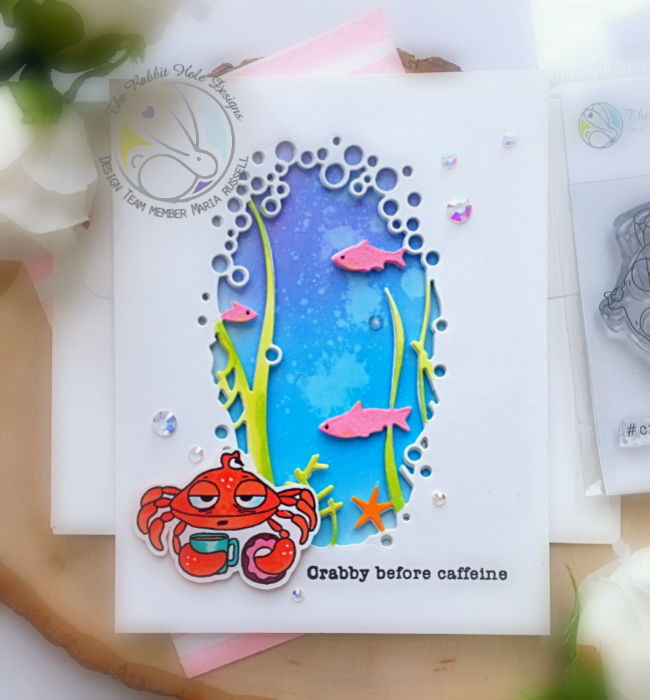
For my last project, I used the Caffeinated Crab:
How I made this card:
stamp the image on smooth white card stock and color it in with Copic markers (or any coloring medium of your choice.
fussy-cut the image or use scan n cut machine.
cut an A2 size Bristol smooth white card stock and ink up up the background with mini ink blending tools using distress oxide inks. I used salty ocean, peacock feathers and seedless preserve.
adhere this colored background on an A2 size card base.
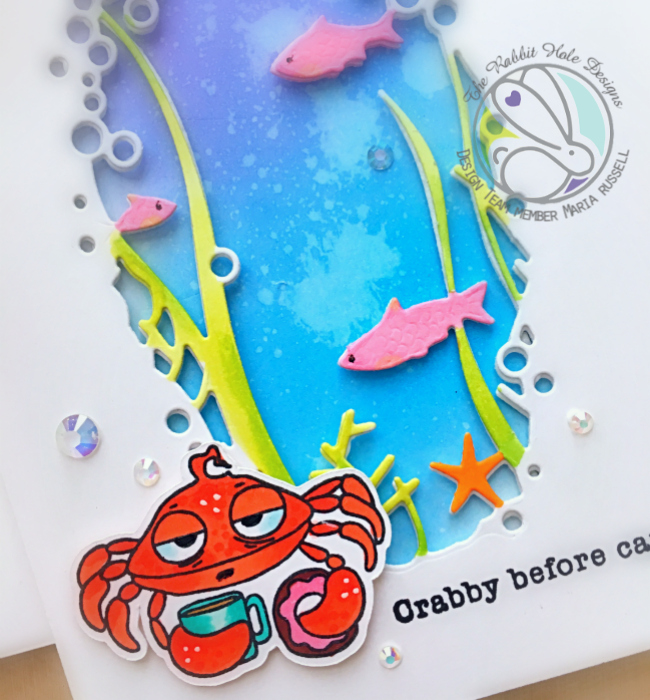
die-cut some white card stock using the “under the sea” collage die. color the seaweeds and fishes with copic markers. use the same collage die to die-cut some fun foam and adhere both with liquid glue.
adhere this piece on the colored background.
adhere the crab with some foam adhesive to give it a little dimension.
stamp the sentiment using versafine onyx black ink.
finish the design by adding some white dot details using white gel pen and adhere some sparkling clear jewels to make it look like bubbles.
Here’s a closer look:
Giveaway
Two (2) winners will be chosen at random for a chance to win a *$10.00 (US funds) Gift Certificate* to The Rabbit Hole Designs. Leave a comment by 11:59 pm PST on 03-03-2019 on all participating blogs, for the entirety of the hop, so make sure to visit each stop and leave a comment. Winner will be announced on The Rabbit Hole Designs blog 03-04-2019
*Gift certificate can be used at any time and will not expire. It is a one-time use certificate and any funds not used will not be carried over for future use.
For more inspiration, updates, and news make sure to check out these places.
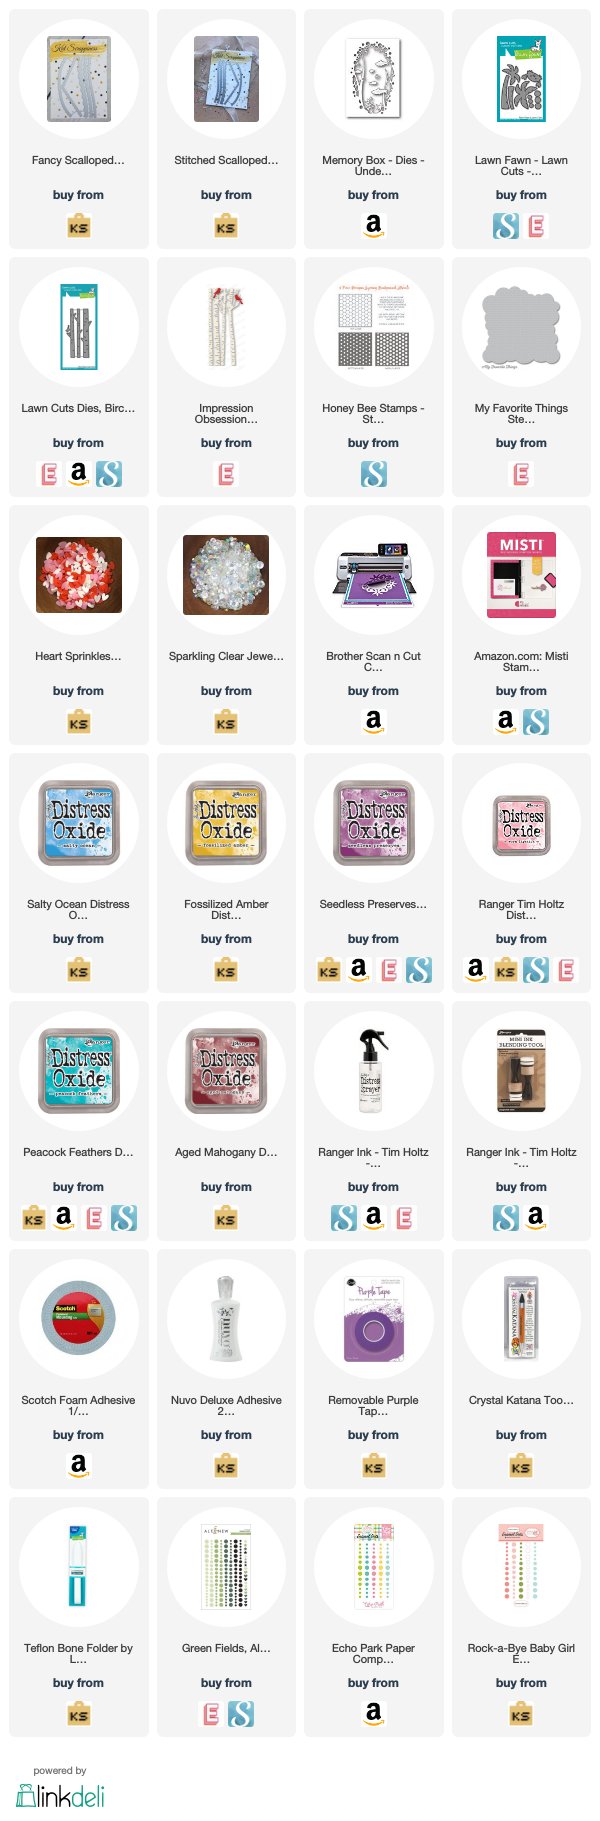
I hope I have given you some great inspiration today. The stamp sets are now available for purchase at The Rabbit Hole Designs website. The rest of the supplies I used are listed and linked below. Have a wonderful day and happy crafting!