
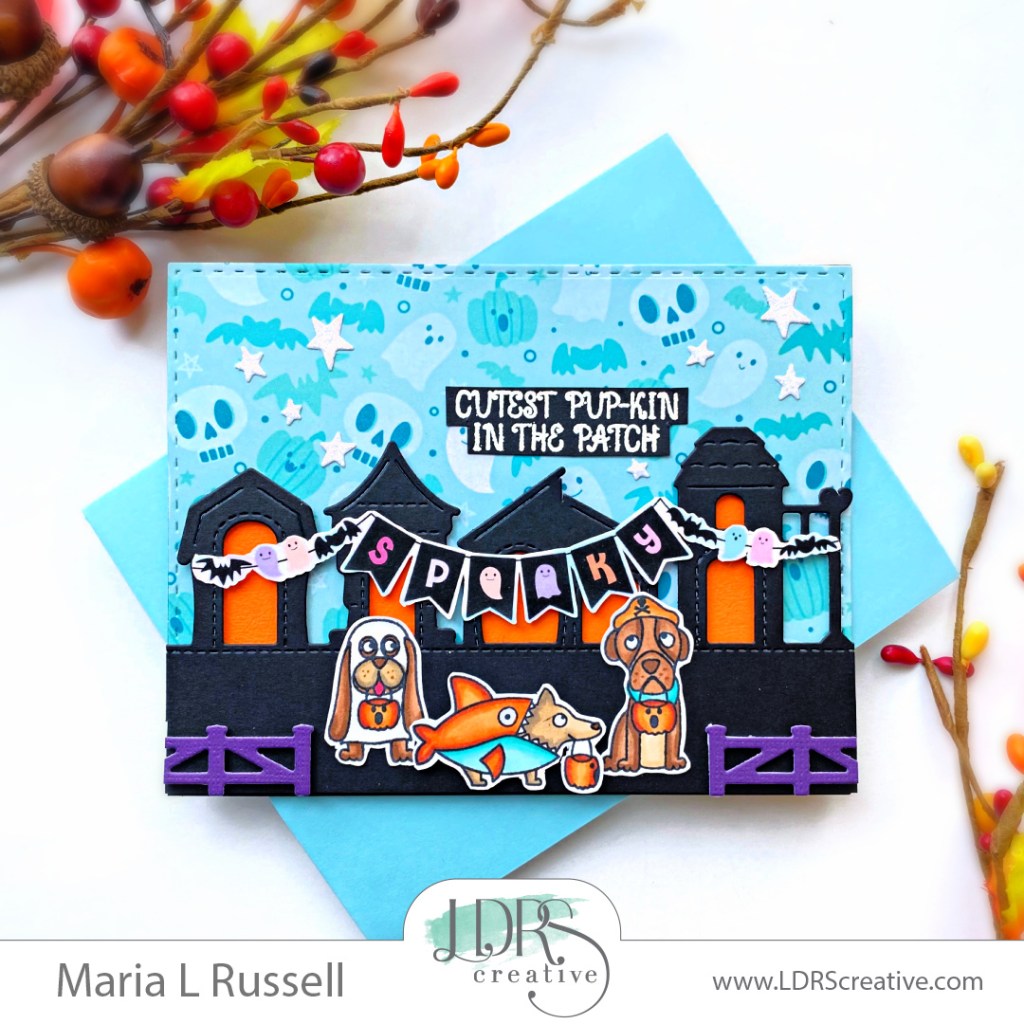
Hello my crafty friends! I am so happy to be on the LDRS Creative Inspiration Blog! I’m back today sharing yet another cute but “spooky” card, showcasing the Trick or Treat Stamp Set and coordinating dies, along with (this is one of my all-time favorite paper pack) the Trick or Treat 6×6 Paper Pack, A2 Stitched Layered Card Toppers, In the Doghouse Border Die, and the Country Fence – Pocket Die.
Here’s what you need to create this card:
- Stamp the images from the Trick or Treat stamp set on some Neenah solar white card stock with Raven Hybrid Ink. Make sure you use the Stampendable Stamping Tool to get some good impression.
- Die-cut the colored images using the coordinating dies.
- Die-cut the pattern paper from the Trick or Treat 6×6 paper pack using the biggest die from the A2 Stitched Layered die set.
- Use the In the Doghouse Border Die to die-cut the doghouses on some black card stock.
- Cut little pieces of orange card stock to cover the door on each doghouse. Adhere with foam tape for added dimension.
- Add more foam tape to the back of the doghouses for more stability and dimension.
- Die-cut the picket fence on some purple card stock, using the Country Fence – Pocket Die.
- Fussy-cut the banner from the Trick of Treat 6×6 paper pack.
- Stamp the sentiment on some black card stock using the Watermark Ink and white embossing powder. Heat set with heating tool.

Now that we have all of the components, we are ready to assemble the card.
- Adhere the pattern paper on an A2-size black note card.
- Foam-mount the In the Doghouse Border die-cut for added dimension.
- Adhere the colored images on the foreground with liquid glue.
- Add the Picket Fence on both sides of the card with foam adhesive. Make sure you are using enough foam adhesive for added stability.
- Adhere the banner on the doghouses with liquid glue.
- Use tape runner to adhere the sentiment.
- Finish the design by adding some glittered star stickers.
Here’s another look at this cute Halloween card! Don’t you just LOVE these puppies?!

I just love mixing and matching products from LDRS Creative to create some cute scenes! The supplies I used are listed and linked below. Thanks for stopping by and have an amazing day!
————SUPPLIES———-

