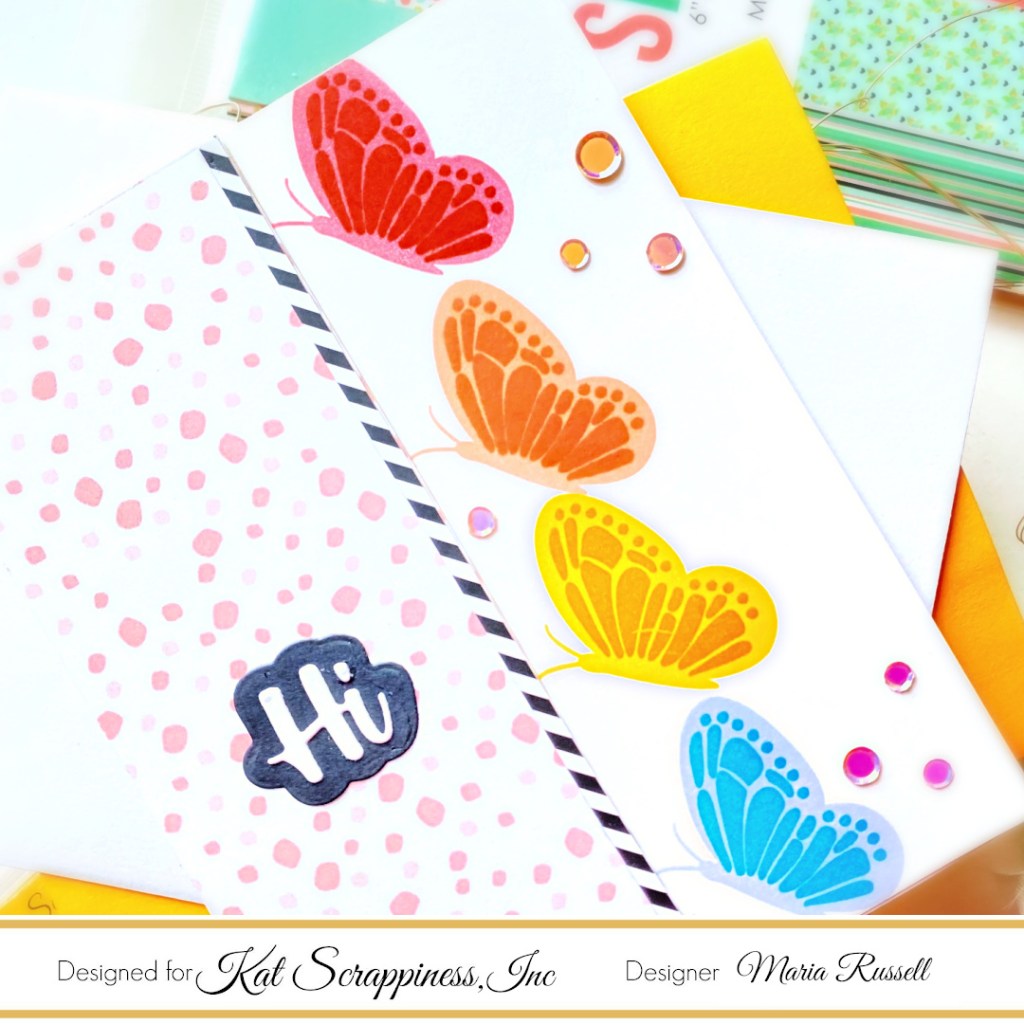
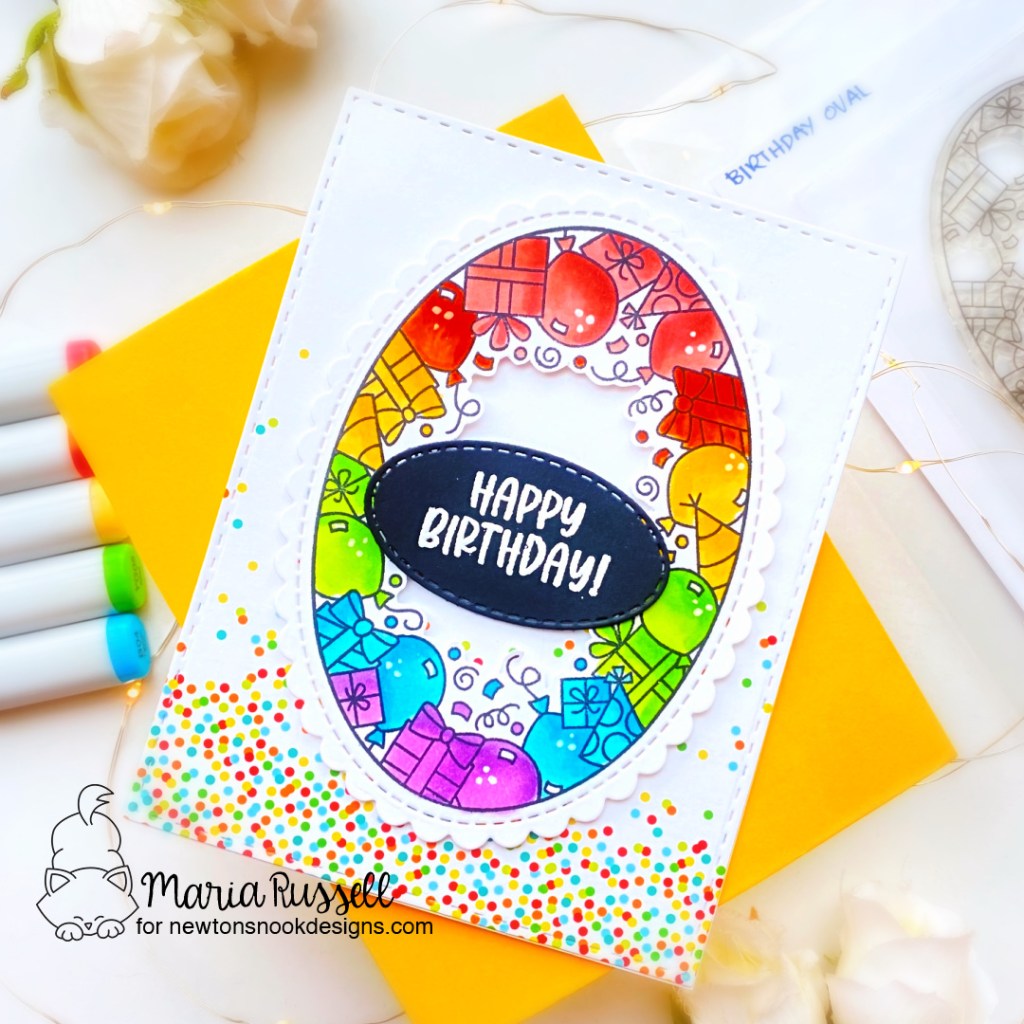
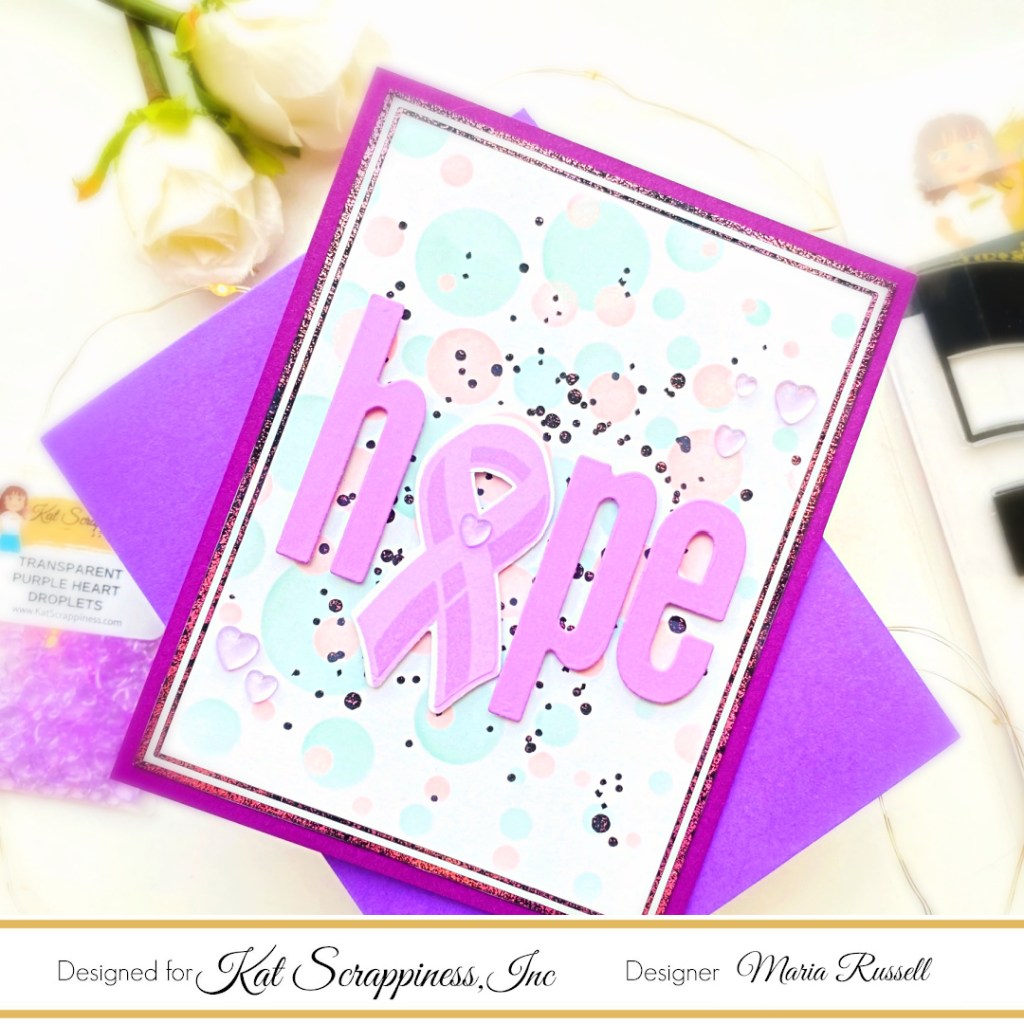
I am so happy to join Reverse Confetti’s Creative Hop where you’ll find a lot of AMAZING inspiration using products from the last release. Check out the hop listing below to see the wonderful projects prepared by the entire team.
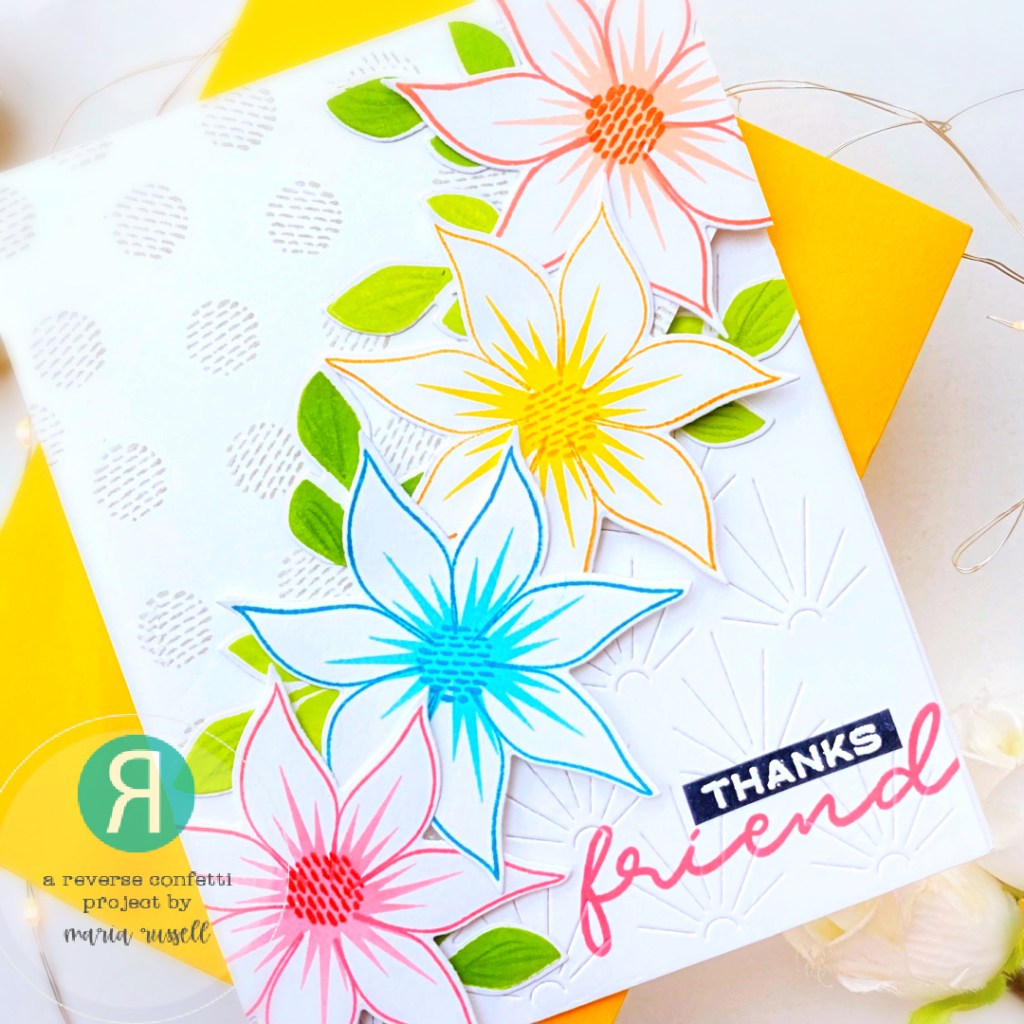
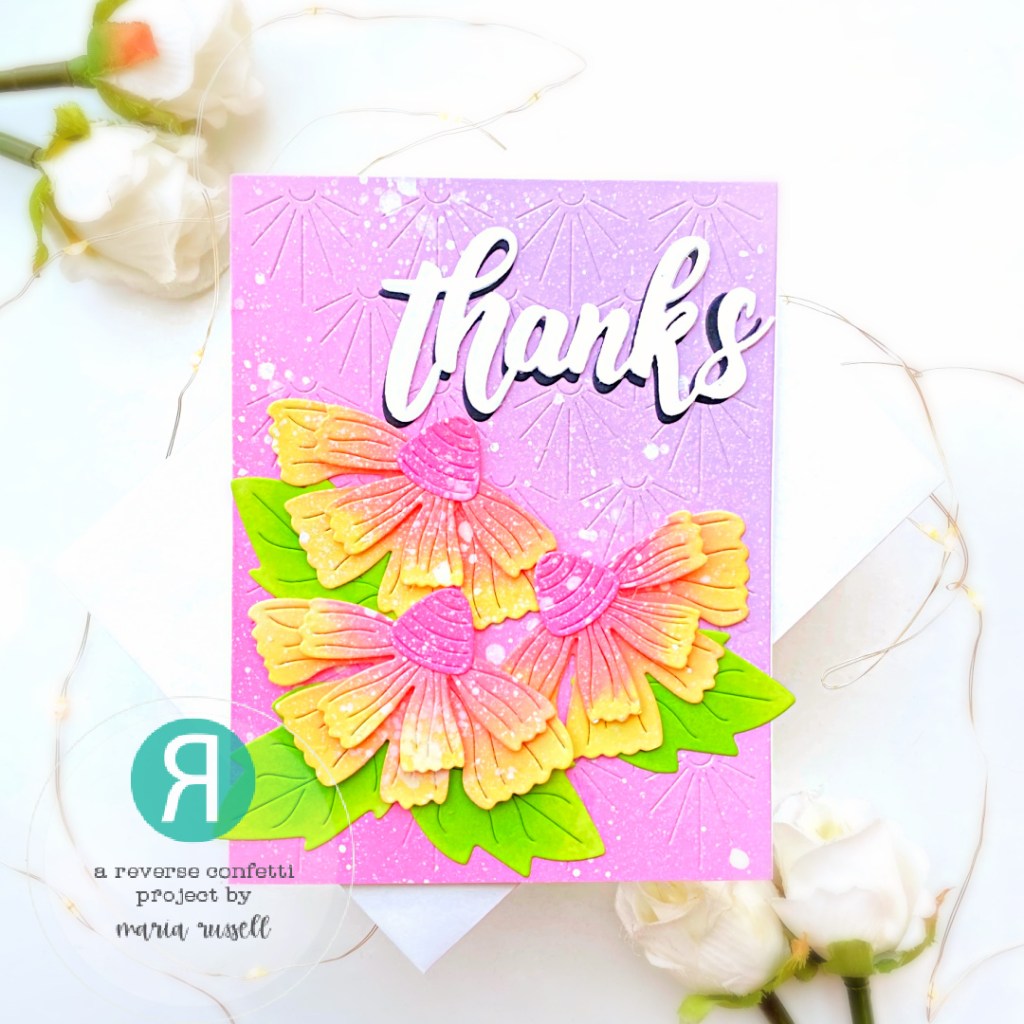
For my project today, I am showcasing the Flower Builder Confetti Cuts along with the Little Bits Envie Confetti Cuts, Sunny Flower Stamp Set and Little Bits Sentiment Stamp.

Here’s how I made this card:
- die-cut the Little Envelope using the Little Bits Envie Confetti Cuts with some Neenah solar white card stock.
- place the envelope inside your stamping tool and start stamping the dots from the Sunny Flower stamp set with some yellow dye ink.
- cut the insert using some yellow card stock measuring 2 5/8 by 2 5/8. Place this piece inside the cut-out. [Designer tip: I didn’t stamp the inside as this is where I’ll write my note].
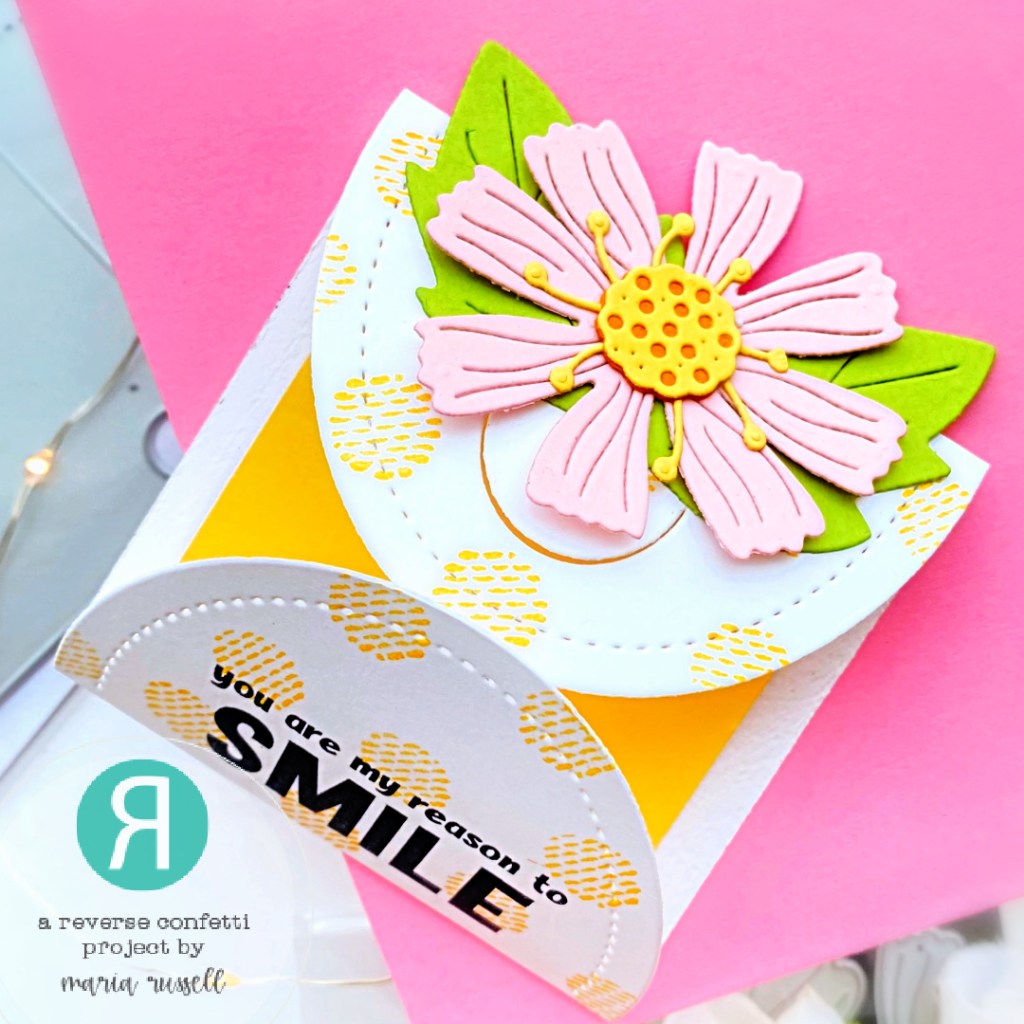
- stamp the sentiment on the little envelope using the Little Bits Sentiment Stamp Set with some black ink. This stamp set is a must-have for sure!
- die-cut the flower and leaves using the Flower Builder Confetti Cuts on some pink, yellow, orange and green card stock.
- assemble the flowers and adhere on the little envelope with liquid glue. [Designer tip: make sure you are not adhering the flower covering the opening so that your recipient can open and close the envelope.]

I really LOVE the latest release by Reverse Confetti. I hope you like my project and got inspired! Below, you will find links to the supplies used to create this project(s). Where available, I use compensated affiliate links at no extra cost to you. Your support helps me to keep bringing you new projects and inspiration.
Remember that you will get a FREE STAMP SET on orders over $60.00!!!! Don’t forget to hop along and check out more inspiration from the entire team. Thanks for stopping by and have an amazing day!
Here’s the hop listing:
Maria Russell (you are here)
———SUPPLIES——–