NND August Release Day 1 – Believe in Unicorns

NNDAugust1


It is the first day of the August release at Newton’s Nook Designs. You will absolutely love today’s stamp set.  If you’re like me and love unicorns, this set is a must-have. You also have a chance to win each stamp set during release week so check out the details I have I indicated at the end of this blog post.

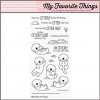
For today’s cards, I am showcasing the adorable Believe in Unicorns stamp set and it’s coordinating dies.


NNDAUG_BelieveInUnicorns


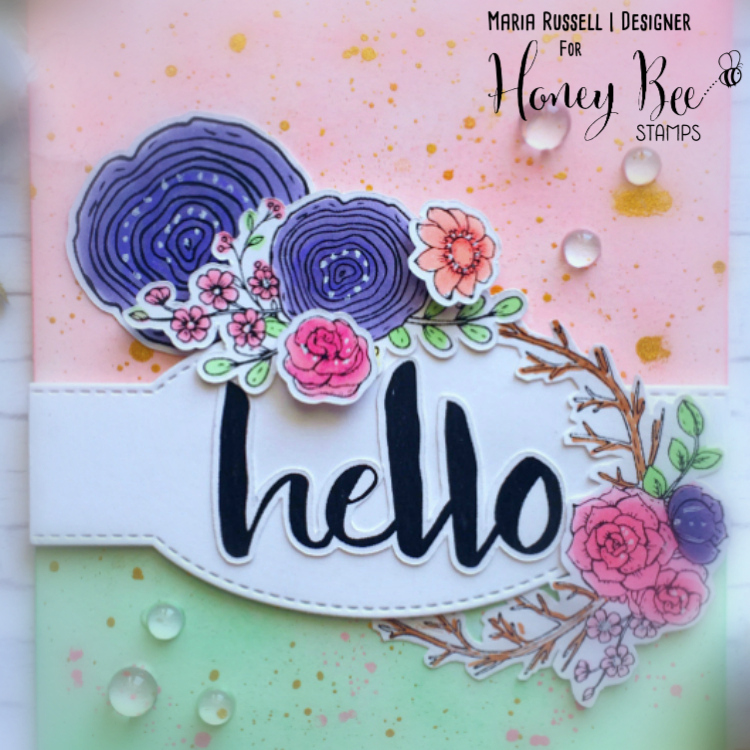
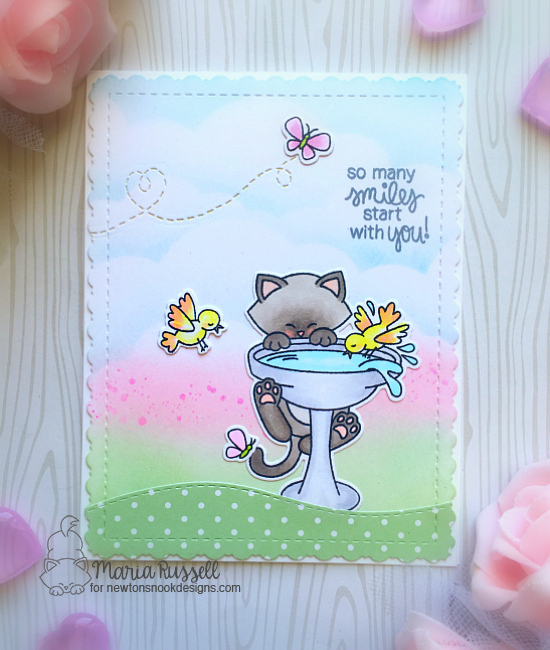
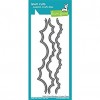
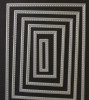
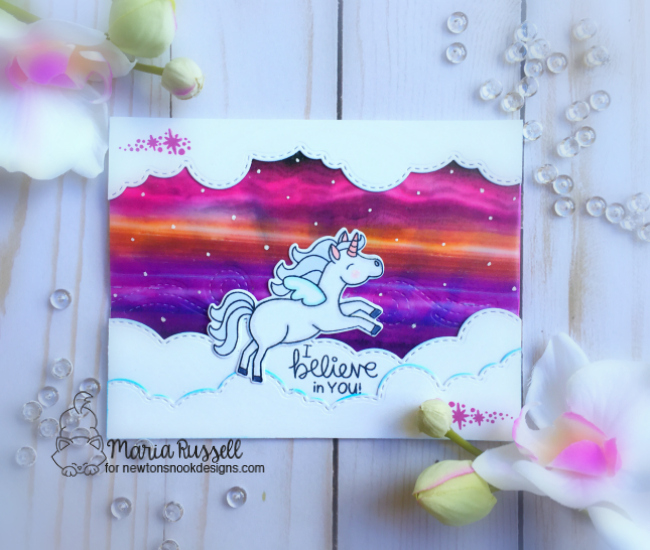
I wanted to create a heavenly scene for my lovely unicorns. For the first card, I started out by using my sunburst stencil, on Neenah solar white cardstock and I adhered my colorful vellum on top. this created some dimension and lovely details to my card. I also used the clouds border die to die-cut my clouds. Here is my first card:


NNDUnicorn

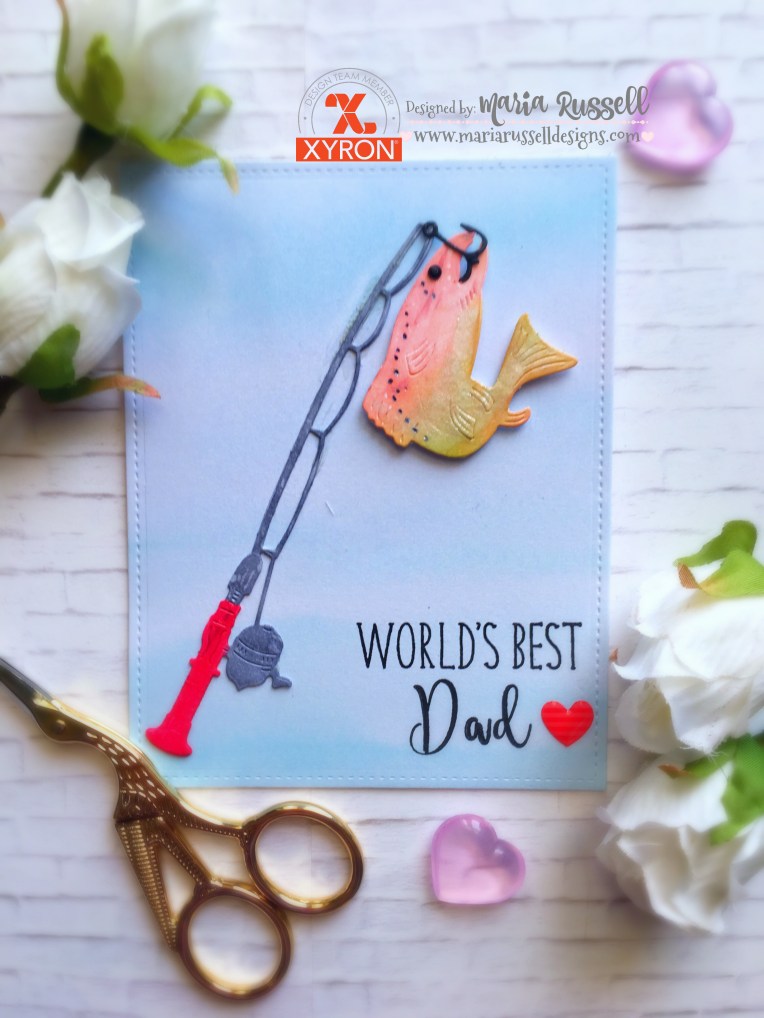
For my second card, I started out by using the Starfield stencil by NND with my fossilized Amber distress oxide ink. I die-cut the clouds with the clouds border die and the Rainbow using a die from my stash. I adhered the rainbow to my card front, as well as the clouds. I used my foam tape to adhere my unicorn, and stamped my sentiment using my new stamping platform tool by Tim Holtz. I finished my design by adding the 4mm sparkling clear solid confetti mix from Kat Scrappiness. here is my second card:


NNDUnicorn2

This Believe in Unicorns stamp set and its coordinating dies will be available for purchase on Friday, August 18th at 8:00 am CST.

Would you like to win the “Believe in Unicorns” stamp set? This set will be given away to ONE lucky winner!

Here’s how to win: Comment on the NND Blog and design team blogs (see list below). The winner will be chosen at random from the collective earl posts. Make sure to check out each of their blogs and comment for your chance to win. You will not know which blog has been chosen so the more you comment on the better your chances are of winning! You have until Thursday, August 17th at 9 pm CST to comment – winners will be announced on the NND blog post on Friday, August 18th.

Check out all of the awesome Design Team blogs below to enter the giveaway:

Newton’s Nook Designs
Amanda Bodine
Holly Endress
Ellen Haxelmans
Larissa Heskett
Samantha Mann
Juliana Michaels
Naki Rager
Maria Russell (you are here)
Jennifer Timko
Tatiana Trafimovich

———–SUPPLIES———–


https://linkdeli.com/widget.js?1502455275791

Hello Card with Honey Bee Stamps

I am super excited to share with you my first project as a design team member for Honey Bee Stamps.  I am showcasing the Hello Gorgeous 6×8 stamp set and Hello Gorgeous Honey Cuts coordinating dies.

I started out by stamping my images on Neenah Solar White card stock and colored the images in with my Copic markers. I die-cut the image with its coordinating die.

IMG_5054

I cut another Neenah solar white card stock, measuring 4 1/4 by 5 1/2 for my card front.  Using a sponge, I started applying color to the card stock with my worn lipstick distress ink, then adding and blending it with cracked pistachio.  Using my wet watercolor brush, I put some gold watercolor on my acrylic block and started splattering watercolor on the front of the card.

IMG_5053

I used a die from my stash and adhered the “hello” script sentiment on my card panel.

IMG_5051

I adhered the flowers I colored from the Hello Gorgeous stamp set and also added some Crystal Mix Dew Drops to finish my design.  Here is a close-up of the card:

HBCloseupHello

I hope you like my card today and got inspired.  This stamp set is a must-have.

HBHelloCard.jpg

The supplies I used are listed and linked below in case you would like to purchase them.  Have an amazing week!

Maria HoneyBee Watermark


https://linkdeli.com/widget.js

Newton’s Nook June Release – Furr-Ever Friends

NND_ReleaseIconJUNE17

Hello everyone! It is the second day of the June release at Newton’s Nook Designs.  You will absolutely love today’s stamp set. If you are a pet-lover (or know someone who is one), this stamp set is a must-have. You also have a chance to win each stamp set during release week so check out the details I have indicated at the end of this blog post.


For today’s project, I am showcasing this amazing Furr-Ever Friends stamp set.


NND20170601_FurrEverFriends_PKG


I wanted to create a scene that is somewhat ethereal to make it look like the pets are just hanging out in heaven. I know this is where they go when they pass.


I stamped my images on Neenah solar white card stock and used my Brother Scan N Cut2 machine to die-cut my images. I die-cut another rectangular card stock and used my sun stencil to create the look of sun. I die-cut the rest of the card stock, as well as my acetate sheet to create the window for my shaker card. I added some iridescent confetti and sequins available from Kat Scrappiness to finish the design. Here is my card:


NNDPets


This Furr-ever Friends stamp set and coordinating dies will be available for purchase on Friday, June 16th, at 8:00 a.m. CST.


Would you like to win the “Furr-Ever Friends” Stamp Set? This set will be given away to ONE lucky winner!


Here’s how to win:


Comment on the NND blog and Design Team blogs (see list below)! The winner will be chosen at random from the collective reveal posts. Make sure to check out each of their blogs and comment for your chance to win. You will not know which blog has been chosen so the more you comment on the better your chances are of winning! You have until Thursday June 15th at 9pm CST to comment — winners will be announced on the blog post on Friday, June 16th.


Check out all the awesome Design Team Blogs below to enter the giveaway:


Newton’s Nook Designs

Amanda Bodine

Holly Endress

Ellen Haxelmans

Larissa Heskett

Samantha Mann

Juliana Michaels

Naki Rager

Maria Russell (you are here)

Jennifer Timko

Tatiana Trafimovich


Newton’s Nook June Release – Terrific Terriers

NND_ReleaseIconJUNE17

Hello my crafty peeps! It is the first day of the June release at Newton’s Nook Designs.   I always get excited during release week. You will absolutely LOVE this month’s stamp release! You also have a chance to win each stamp set during release week so check out the details I have indicated at the end of this blog post.


For today’s project, I am showcasing the Terrific Terriers stamp set and its coordinating dies.

NND_17June_TerrificTerriers

I stamped my images on Neenah solar white card stock and colored my image in with my Copic markers. I also die-cut my card front with dies that I have from my stash. After coloring the images, I ran it through my die-cutting machine using its coordinated dies. Here is my card:


NNDTerrier1


This Terrific Terrier stamp set and coordinating dies will be available for purchase on Friday, June 16th, at 8:00 a.m. CST.


Would you like to win the “Terrific Terrier” Stamp Set? This set will be given away to ONE lucky winner!


Here’s how to win:

Comment on the NND blog and Design Team blogs (see list below)! The winner will be chosen at random from the collective reveal posts. Make sure to check out each of their blogs and comment for your chance to win. You will not know which blog has been chosen so the more you comment on the better your chances are of winning! You have until Thursday, June 15th at 9pm CST to comment — winners will be announced on the blog post on Friday, June 16th.


Check out all the awesome Design Team Blogs below to enter the giveaway:

Newton’s Nook Designs

Amanda Bodine

Holly Endress

Ellen Haxelmans

Larissa Heskett

Samantha Mann

Juliana Michaels

Naki Rager

Maria Russell (you are here)

Jennifer Timko

Tatiana Trafimovich


World’s Best Dad Card with Xyron

Hello my crafty friends!  I am back today to share with you a very simple Father’s Day card, using dies from Gina Marie Designs and the best of the best, Xyron 1.5 Inch. Sticker Maker and Xyron Mega Runner adhesive.

XyronFD1

I find it hard to create cards for guys because I am always guilty of over-embellishing my cards or using feminine colors.  I thought my card below is super simple, yet it is perfect for your Dad, or husband for Father’s Day.

I started out by die-cutting my card stock using my dies.  Since the fishing pole is quite intricate, I had to die-cut it twice to have more stability.  I adhered both pieces using my sticker maker.

XyronFD2

I colored my fish die-cut using my sponge and distress oxide inks (worn lipstick and peeled paint).  I wanted the colors to blend well together to make it look more realistic.  I colored the rest of the die-cut pieces with my Copic markers.

XyronFD3

To finish my design, I highlighted my fish with my Spectrum Noir glitter brush pen, and added the black rhinestone to the fish’s eye.  Here’s my card:

XyronFathersday.jpg

I hope you like my project today and got inspired to create a simple father’s day card.  The supplies I have used are listed and linked below.  Have a great weekend!

———–SUPPLIES———

Welcome Baby Shadow Box – We Are Family Blog Co-hop ~ Xyron & Paper House

XyronPaperhouse1

Hello my crafty peeps! I am so happy because today the Xyron Design Team is teaming up with Paper House.  For my project, I am showcasing a collection of beautiful patterned papers and sticker collection by Paper House. A huge “thank you” to Paper House and Xyron for all of the amazing products we got to play with. They are extremely beautiful!

To further celebrate this collaboration, there is going to be GIVEAWAY!!!!! Xyron is giving away a prize pack (photo below).  In order to win, please visit the Xyron Facebook page (link: https://www.facebook.com/xyroninc/) from Monday, May 22nd through Friday, May 26th and leave a comment on each post.  Winners will be announced on Xyron’s Facebook page.

XyronPaperhouse2

For my project today, I decided to create a beautiful Shadow Box to showcase the beautiful patterned paper and card stock/puffy stickers that I received from the Paper House. I recently went to Daiso and found this inexpensive shadow box and I thought it would be perfect to use for my project. I also wanted to show you guys that you don’t always have to use liquid glue or modpodge to adhere patterned paper to your 3D projects. The Xyron Creative Station Lite is the perfect machine because it applies edge-to-edge adhesive to your paper and you don’t need to wait for it to dry. You can create 3D projects in no time. Here are the products that I have used:

IMG_4898

I started out by painting my shadow box using craft paint and my foam brush. To cover the outside, I took my ruler and measured my shadow box (height, length and width) and cut the paper so I can cover the outside of the box. I used the patterned paper with pink elephants. I thought this paper pad is so beautiful! I used my Xyron Creative Station Lite and ran the papers through the machine to create stickers. I adhered the paper to the box.

This is what the outside of the box look like.  The beautiful patterned paper is adhered to the box perfectly!

IMG_4934

Using my ruler again, I measured the inside of the box (height, length and width) and cut my Neenah solar white card stock to fit inside the box. I wanted to create a hillside scene for my hot air balloon, elephant and giraffe. I used my Lawn Fawn pop-up hillside border dies and Grass border dies. I also die-cut the rest of the elements that I needed to create the scene, using different dies from my stash.

IMG_4914

Using my homemade cloud stencil and Broken China distress ink, I started sponging the color to my white card stock to create the look of the sky. I used my Xyron Creative Station Lite to adhere the card stock inside my shadow box.

IMG_4926

Using my Xyron mega-tape runner, I adhered my hillside pop-up border inside the box to create the hills for my scene, as well as the sun and tress. I used the cute stickers from the pack that I received from the Paper House (baby elephant, giraffe, hot air balloon, flowers, onesie, rattle, etc.) to finish my design.

Here’s a close-up photo of my shadow box:

XyronPH3

Here’s another look, with the box open:

XyronPH2

And another close-up photo below!  You can also add some battery-operated twinkle lights to make this shadow box more dramatic, or a battery-operated tea light.  This will be perfect to give as a gift:

XyronPH1

I hope you like my project and got inspired today.  Please don’t forget to visit the Xyron Facebook page, like it, and leave a comment on each blog post from May 22nd to 26th, 2017 to enter the giveaway.  You can purchase this adorable paper pack and other beautiful patterned papers by Paper House or by clicking on the supplies list below.  Also please check out their amazing design team on their Blog: (https://paperhouseproductions.wordpress.com).  The products I have used are listed and linked below.  Have an amazing day!

—————–SUPPLIES————-


Newton’s Nook Designs April Release – Newton’s Birdbath

NND_ReleaseIconApril17

Good morning stampers and crafters!  It is the last day of the April release at Newton’s Nook Designs.    All of the new stamps and dies will be available tomorrow for purchase.  I hope you have been checking out the projects since Monday.  You also have a chance to win each stamp set during release week so check out the details I have indicated at the end of this blog post. [Just a little important note:  I know some of you had difficulties finding the comments section.  If you would like to leave a comment to participate in the giveaway, the “comments section” will only be ever visible when a single post on WordPress is being viewed. Please click on this particular blog post and you will be able to leave a comment below.  Thank you for understanding and I apologize for the confusion.]

For today’s card, I am showcasing the adorable Newton’s Birdbath stamp set and its coordinating dies.   I absolutely adore the images that Jennifer included in this set!  This Newton’s Birdbath stamp set and coordinating dies be available for purchase on Friday, April 14, at 8:00 a.m. CST.

NND_17April_NewtonsBirdbath

I have created a very simple card today but I really love how it turned out.  I stamped my images on Neenah solar white card stock and colored the images in with my Copic markers.

I die-cut my card front using the  Stitched Fancy Scalloped Die by Kat Scrappiness.  Once again, I used my D.I.Y. clouds border stencil to sponge the color on my card panel to create the clouds.   I also sponge the colors at the bottom using my new Lawn Fawn ink pads (Minty Fresh and Bubblegum).  It almost looks like grass and flowers.  I love this color combination!

To finish my design, I used the Land Borders die from Newton’s Nook, and also used a small die from my stash to do the stitching details for my butterfly.  Here’s my finished design:

NNDNewtonBirdbath

Would you like to win the “Newton’s Birdbath” Stamp Set?  This set will be given away to ONE lucky winner!  Here’s how to win:

Comment on the NND blog and Design Team blogs (see list below)! The winner will be chosen at random from the collective reveal posts. Make sure to check out each of their blogs and comment for your chance to win. You will not know which blog has been chosen so the more you comment on the better your chances are of winning!  You have until Thursday, April 13th at 9pm CST to comment — winners will be announced on the blog post on Friday, April 14th.


Check out all the awesome Design Team Blogs below to enter the giveaway:

Newton’s Nook Designs

Amanda Bodine

Holly Endress

Ellen Haxelmans

Larissa Heskett

Samantha Mann

Juliana Michaels

Naki Rager

Maria Russell (you are here)

Jennifer Timko

Tatiana Trafimovich

—————-SUPPLIES—————

(I have listed and linked the supplies I have used from different suppliers for availability.  Some affiliate links may have been used AT NO ADDITIONAL COST TO YOU)

Coffee Cards with Xyron and Maya Road

xyronmayaroadgraphic

Hello crafters and stampers! Today the Xyron design team is teaming up with the amazing Maya Road design team. If you haven’t checked the past posts by my fellow DT members, they have made some wonderful projects that I was “ooh-ing” and “ahh-ing” the last few days.

I am also happy to share that everyday during the blog hop Xyron will be giving away a “sparkly” X sticker maker. Who doesn’t love a sticker maker, right? And best of all it’s sparkly!!!! All you have to do is leave a comment on the Maya Road projects that Xyron had shared on the Facebook page https://www.facebook.com/xyroninc during the hop and Xyron will announce the winner the following morning.

xstickermaker

Maya Road is also giving away a $15 gift certificate to their shop. Here’s a link to the Maya Road’s blog for full details: http://www.mayaroad.typepad.com

For my projects, I am showcasing the Enjoy Coffee Die bundle and I made I gift tag and two cards. The tag and the first card did not have any stamping since the die bundle is full of cute dies. I die-cut them all with my Neenah 100 lb. card stock and my patterned paper.

For the gift tag, I wanted to create a shaker tag and decided to use my exacto-knife to cut out the middle portion of the die-cut, adhered the acetate with my Xyron mega runner adhesive, added the foam and used my espresso mix sequins for my shaker elements from Kat Scrappiness.  It turned out really cute!

XyronMayaRoad3

For my first card, I wanted it to look like the coffee is sitting on top of the table with the little spoon. I used a die from my stash to die-cut the white piece twice. I then used my embossing folder to emboss the first piece, making it look like a lacy, tablecloth. I also used my Xyron creative station to make my own foam adhesive with fun foam. I wanted to give the “tablecloth” a little dimension. I then used my Xyron mega tape runner to adhere everything to my front panel. Here are the step-by-step photos:

IMG_4609

xyronmayaroad1

For my second card, I used some cute patterned paper and a stamp from my stash. To finish off the design, I used some vellum to die-cut my leafy swirls. I also used my X sticker maker to adhere a vellum bow to the spoon. The sticker maker is the best tool to have when adhering vellum on your projects.  This card will have a Starbuck’s gift card inside.

Here is the second card:

xyronmayaroad2

I hope you like my projects! I have also listed and linked the supplies I have used. Have an amazing day!

————SUPPLIES———–

(Some affiliate links may have been used AT NO ADDITIONAL COST TO YOU)

There’s No Otter Like You

I finally had some down-time this week and was able to play with my Otterly Love You stamp set and dies by MFT Stamps.

I started out by stamping my images on Neenah solar white card stock using my Lawn Fawn Jet Black Ink pad.   I colored the images in with my Copic markers. I wanted to achieve soft coloring on my Otters and I used my E40 and E41 markers, highlighting their cheeks with R00.

I die-cut my front window frame panel using a die from my stash, and die-cut the blue vellum paper to achieve the look of water.

I used my clouds border die to die-cut the clouds using Inkadinkado masking paper, with my broken china distress ink to achieve the look of clouds on the front panel.

I finished off the design by adding the light blue coral from another stamp set. I hope you like my card today and got inspired.  I have also listed and linked the supplies I have used.  Have a great weekend!

MFTOtter

——-SUPPLIES——-