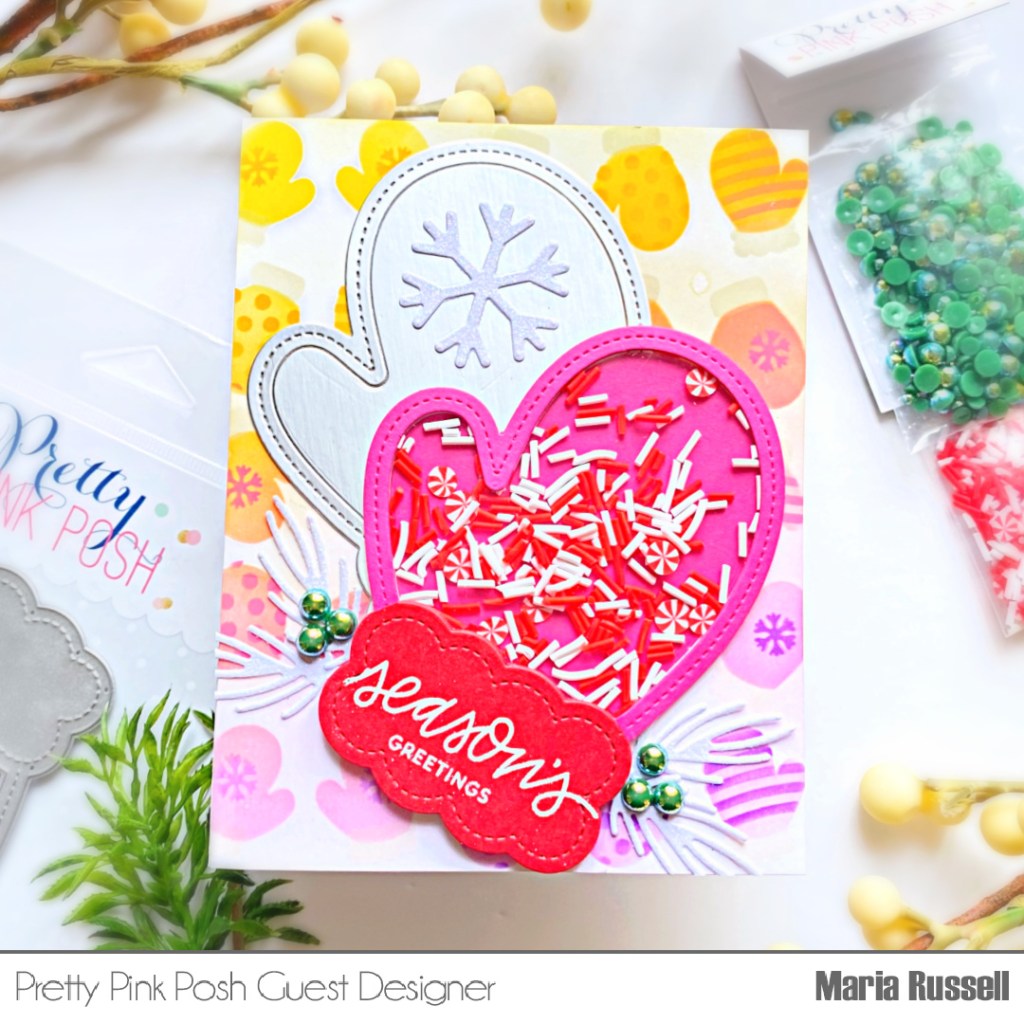
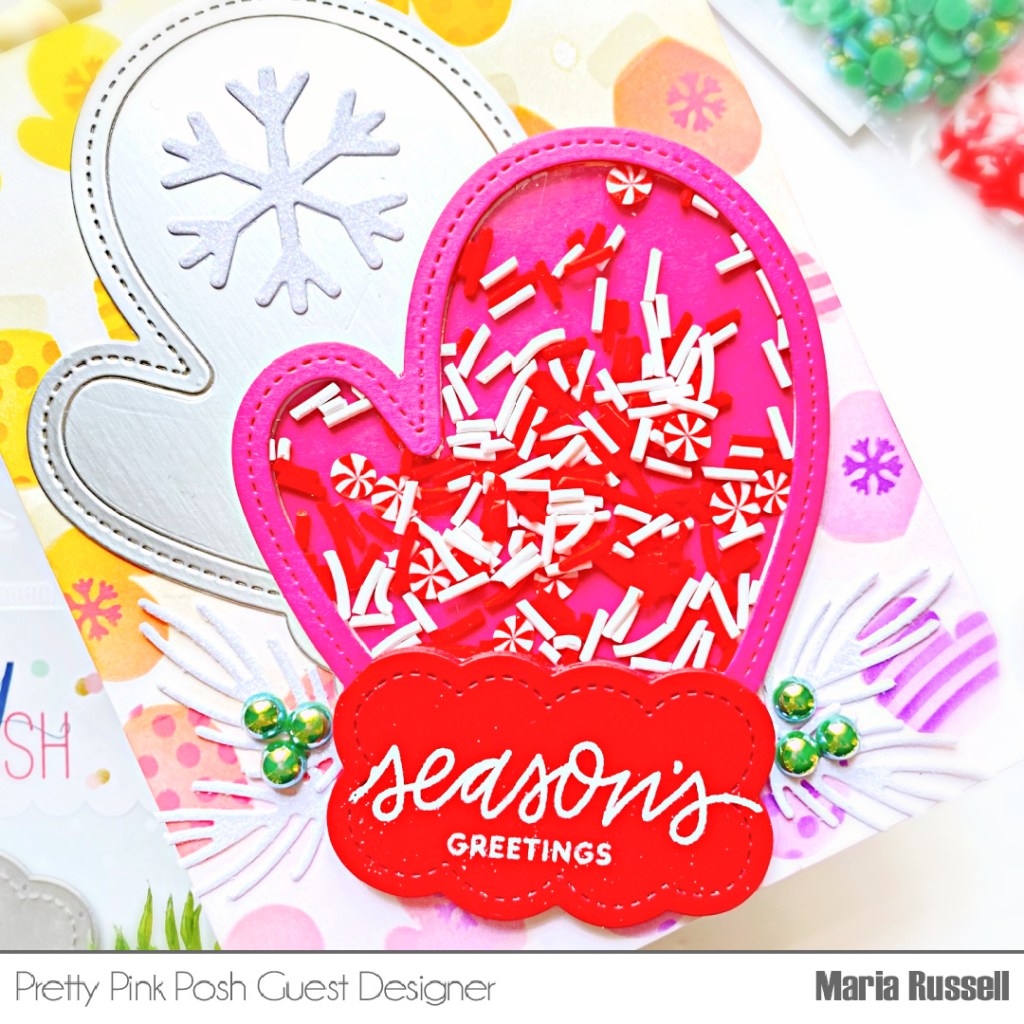
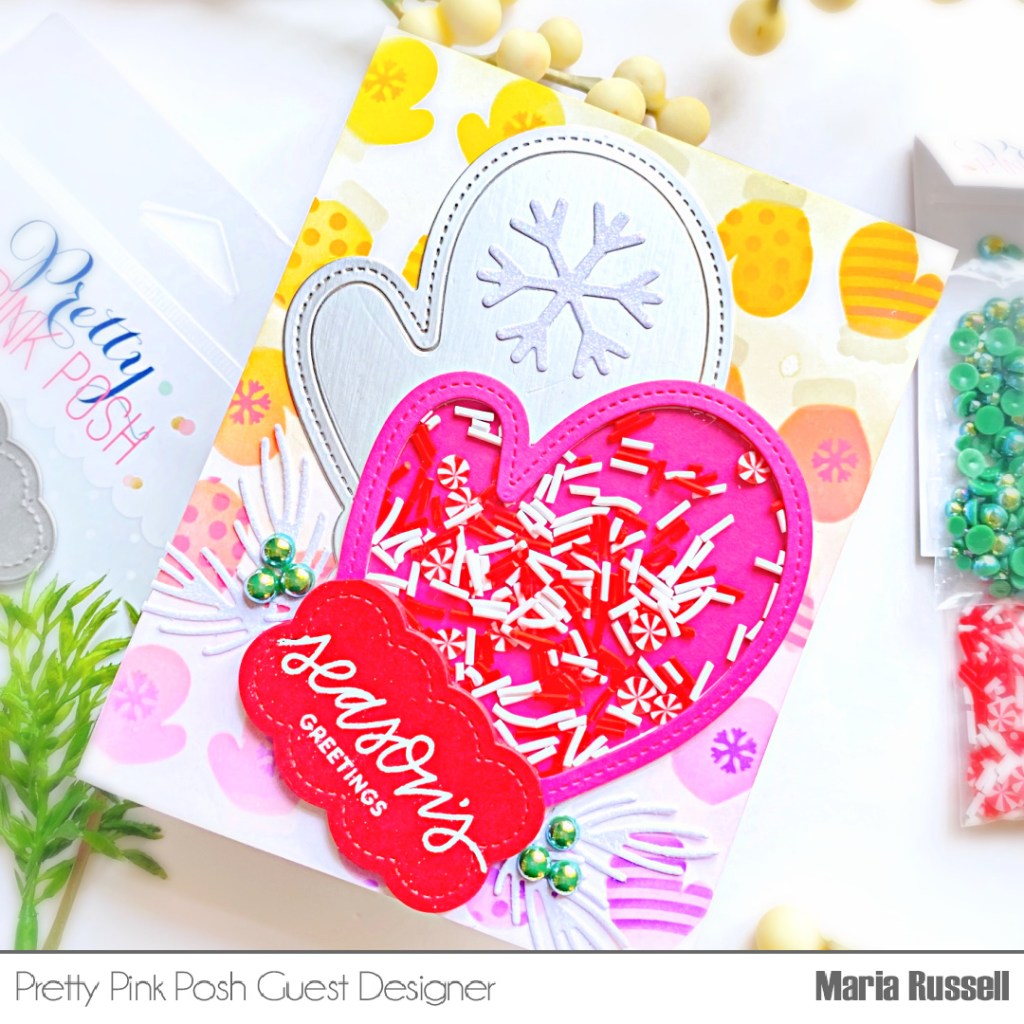
It’s been a very hectic week for me but I managed to make these two Christmas Cards today from the latest holiday release by Pretty Pink Posh.
For today’s projects, I am showcasing the Winter Foliage Dies along with the Happy Santa Stamp Set (sentiment) and Ruby Red Pearls.
Here’s how I made this first card:
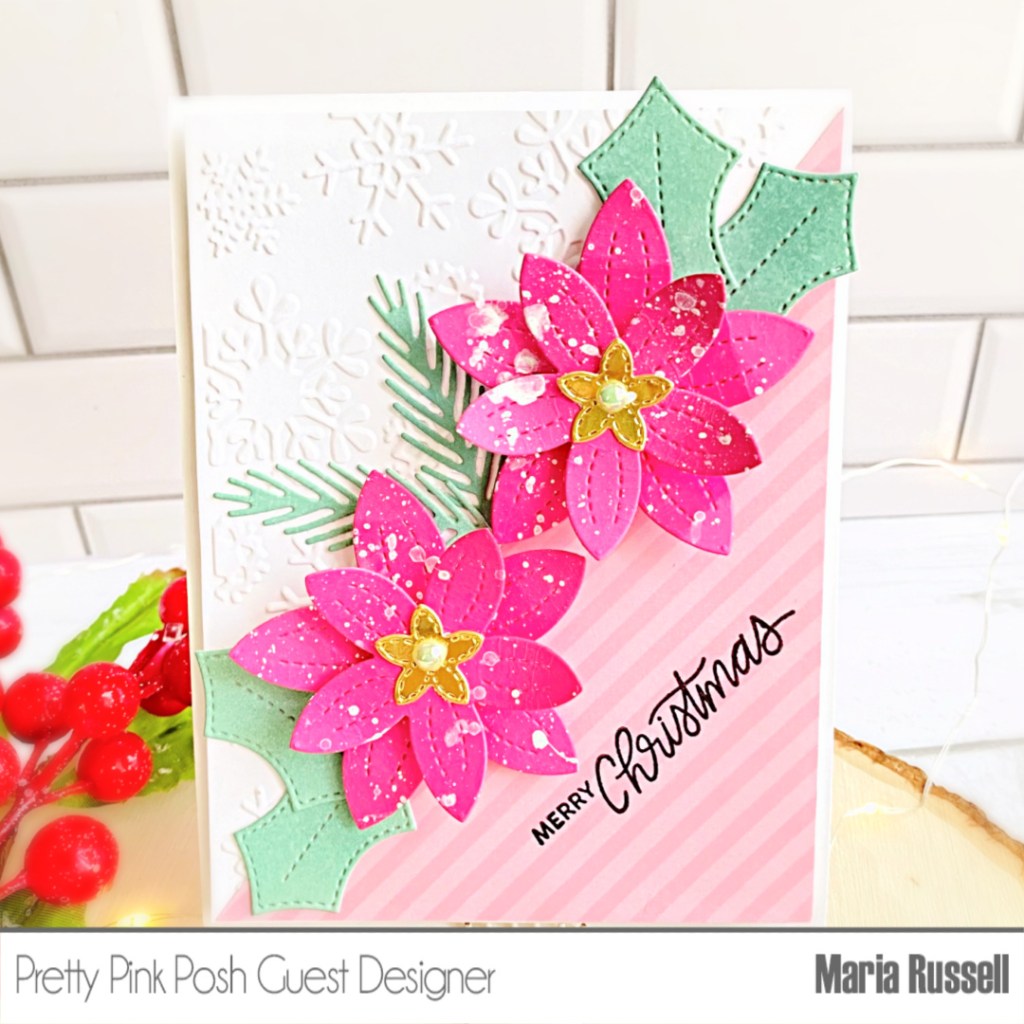
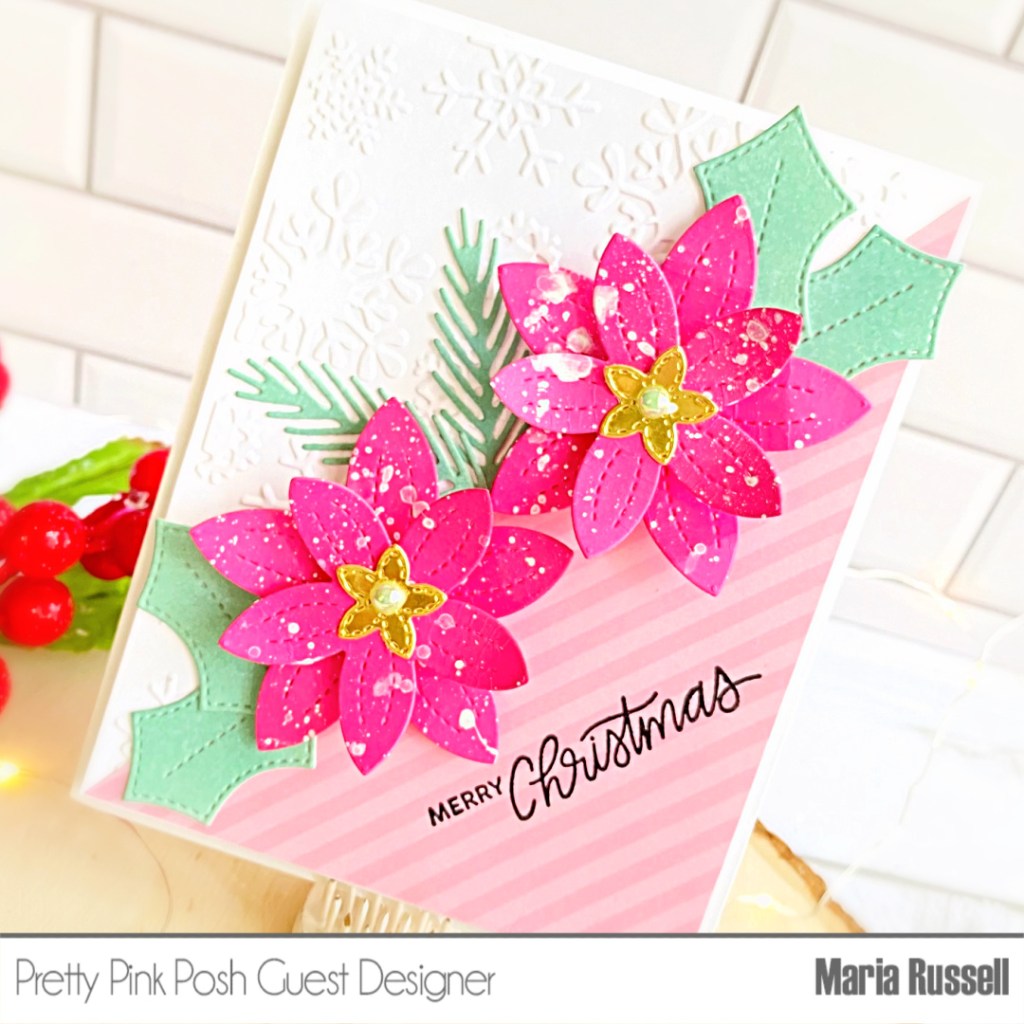
- to prepare the background, cut some Neenah Classic Crest Solar white card stock measuring 4″ x 5 1/4″. Since I am making two cards, I did this twice.
- use some snowflake embossing folder and dry-emboss both panels using your die-cutting machine. In case you’re wondering, I use the Sizzix Big Shot Machine with Cutting Plates plus Magic Mat by Scrapbook.Com. [The Magic Mat is a self-healing mat and you can use it for a long time without having to buy new plates].
- adhere both card panels on some A2-size, top-folding notecard.
- cut some pink pattern paper diagonally and adhere on both card panels with liquid glue.
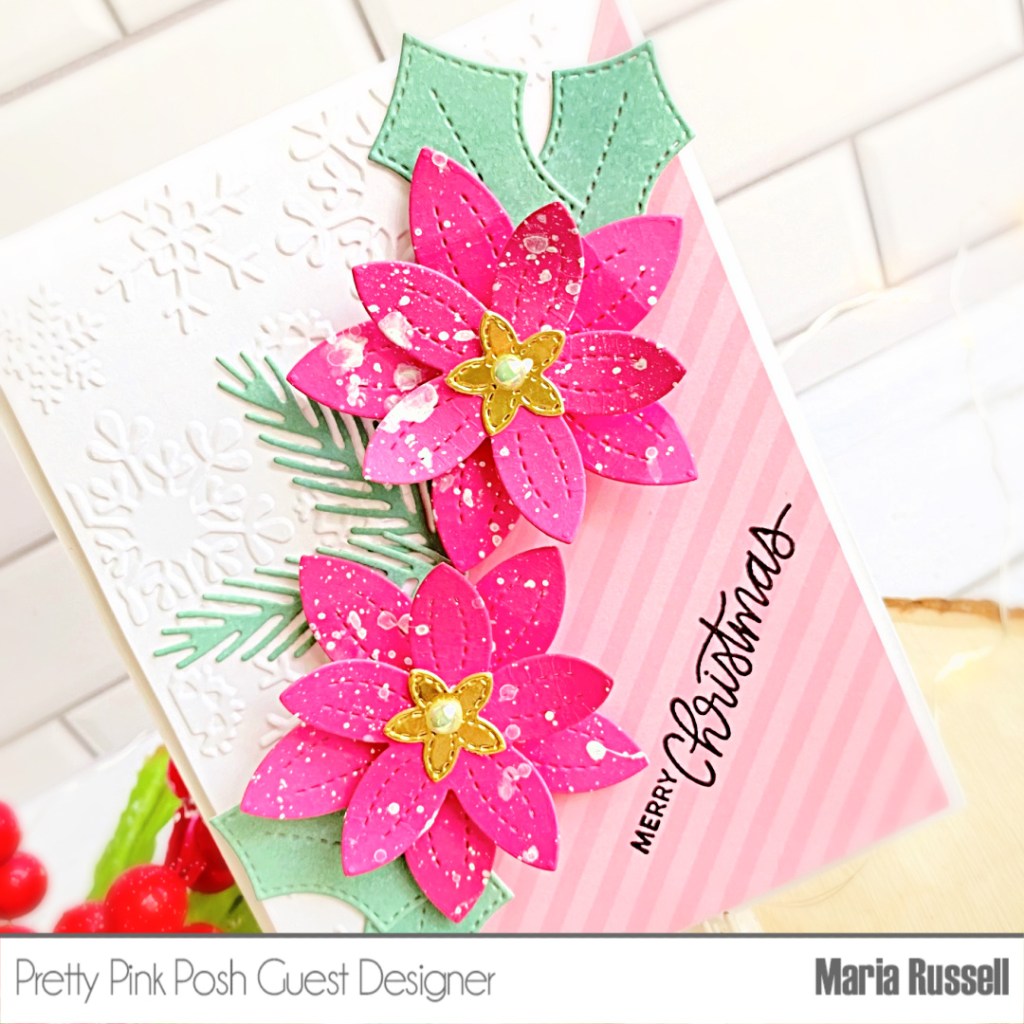
- ink-blend some Bristol Smooth white card stock with Evergreen Boughs Distress Oxide ink.
- die-cut the holly leaves and pine boughs using the Winter Foliage Dies.
- die-cut the Poinsettia a few times with some dark pink card stock.
- layer the die-cuts inside a used box. Water-down some white paint on an acrylic block and use a brush to sprinkle the paint on the die-cuts. This added texture and interest to the die-cuts.
- foam-mount the poinsettia on the card panel for more dimension and adhere the greenery with liquid glue.
- finish the card design by stamping the sentiment from the Happy Santa Stamp Set.
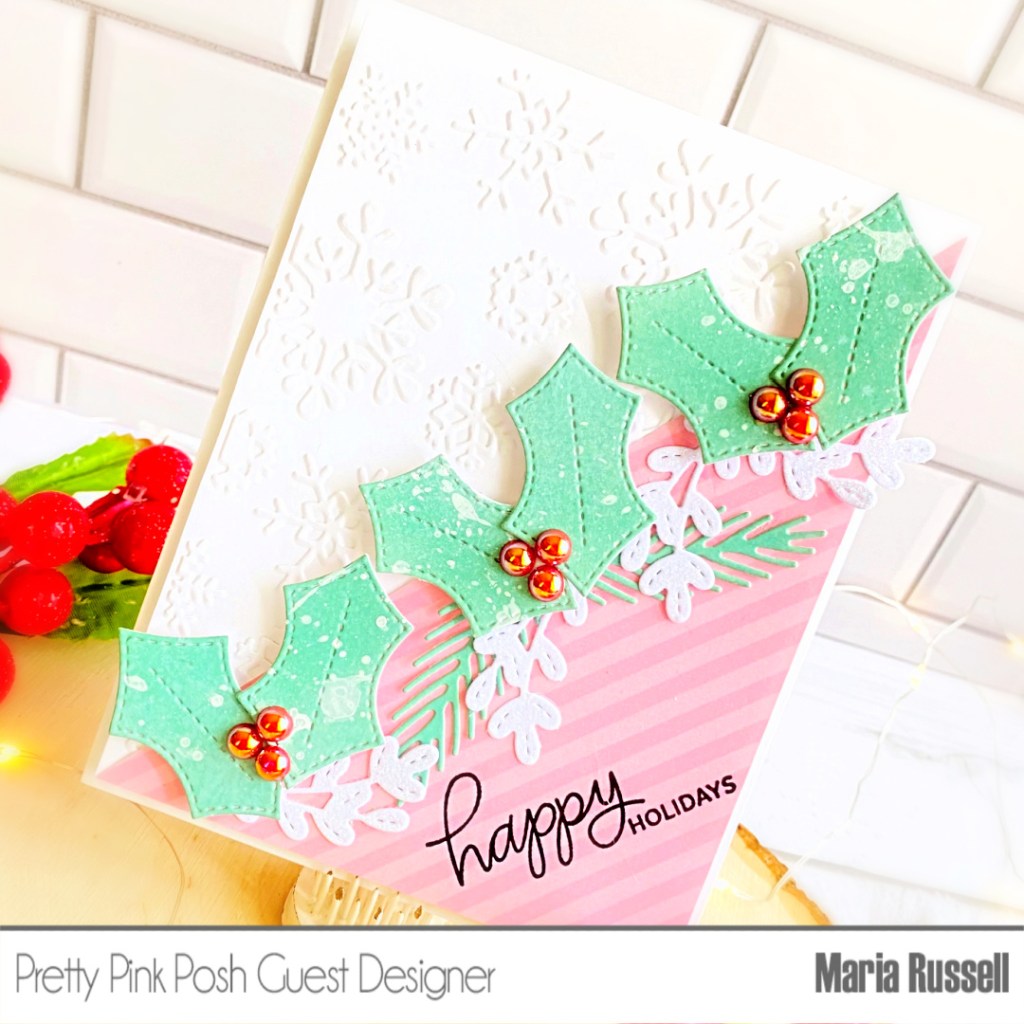
Since I already die-cut a few of the winter foliage and have another card panel prepared, I created another card. This time, I only used the Holly Leaves, another type of greenery and the Pine Boughs.
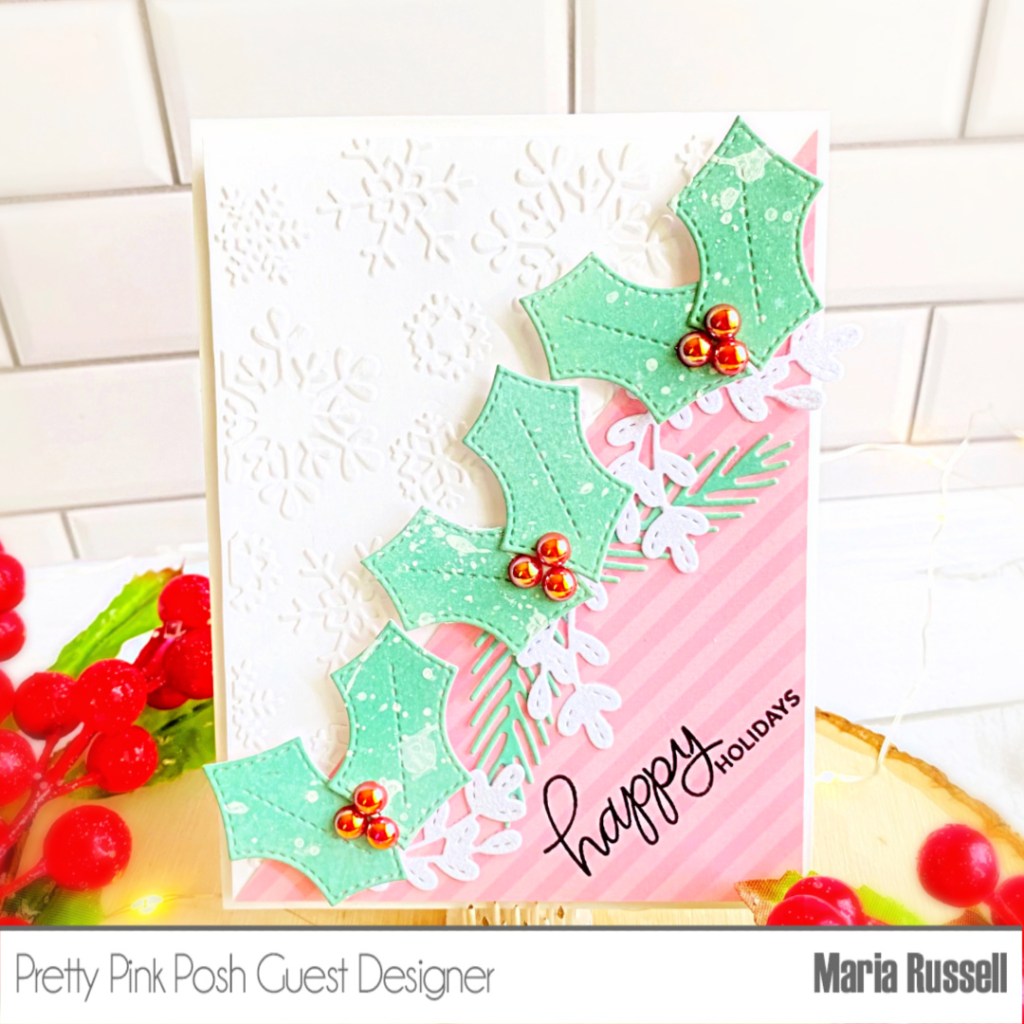
I foam-mounted the Holly Leaves onto the card for more dimension and used the Ruby Red Pearls for my berries, adhering the pearls and the greenery on the card with liquid glue.
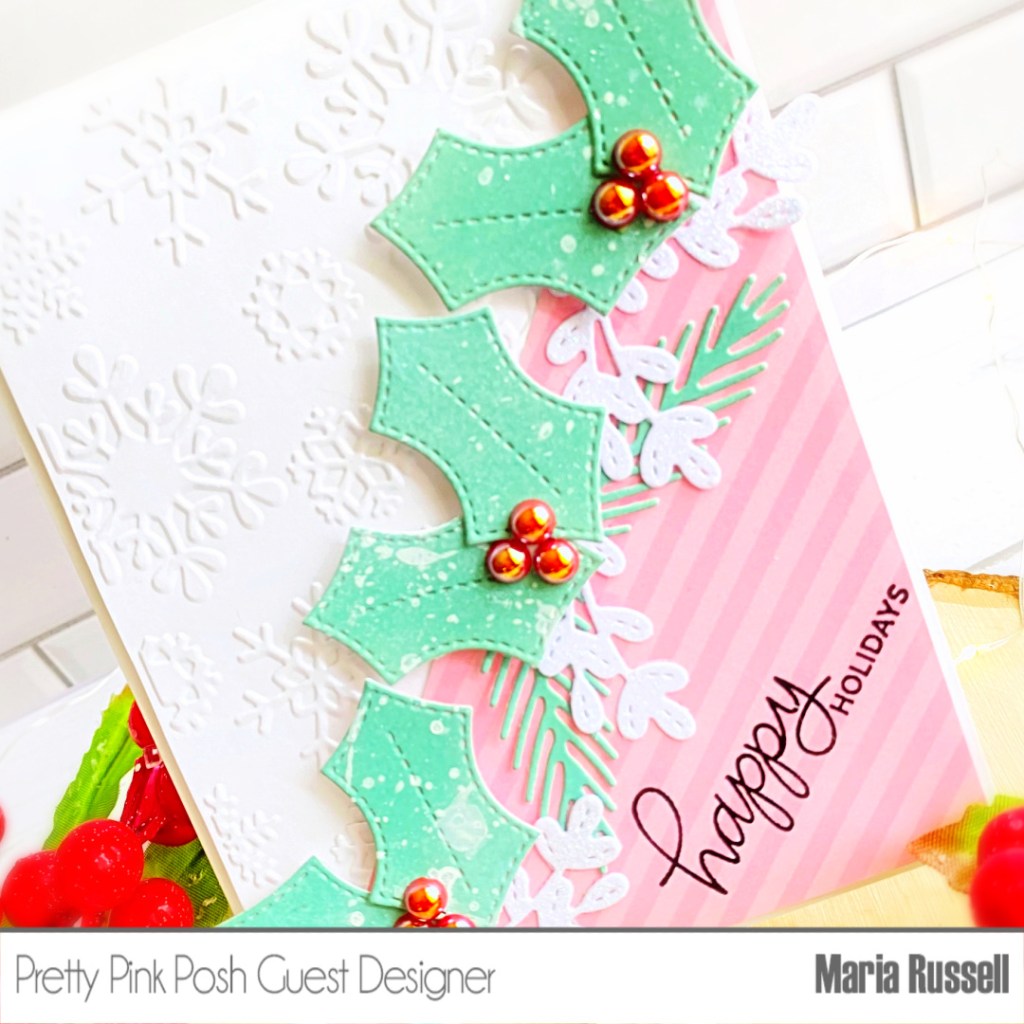
I finished my card design by stamping the sentiment with some Versafine Onyx Black ink. Here’s another look at the second card:
I hope you like these cards today and got inspired. Below, you will find links to the supplies used to create these projects. Where available, I use compensated affiliate links at no extra cost to you. Your support helps me to keep bringing you new projects and inspiration. Thank you for stopping by, and have an amazing day!
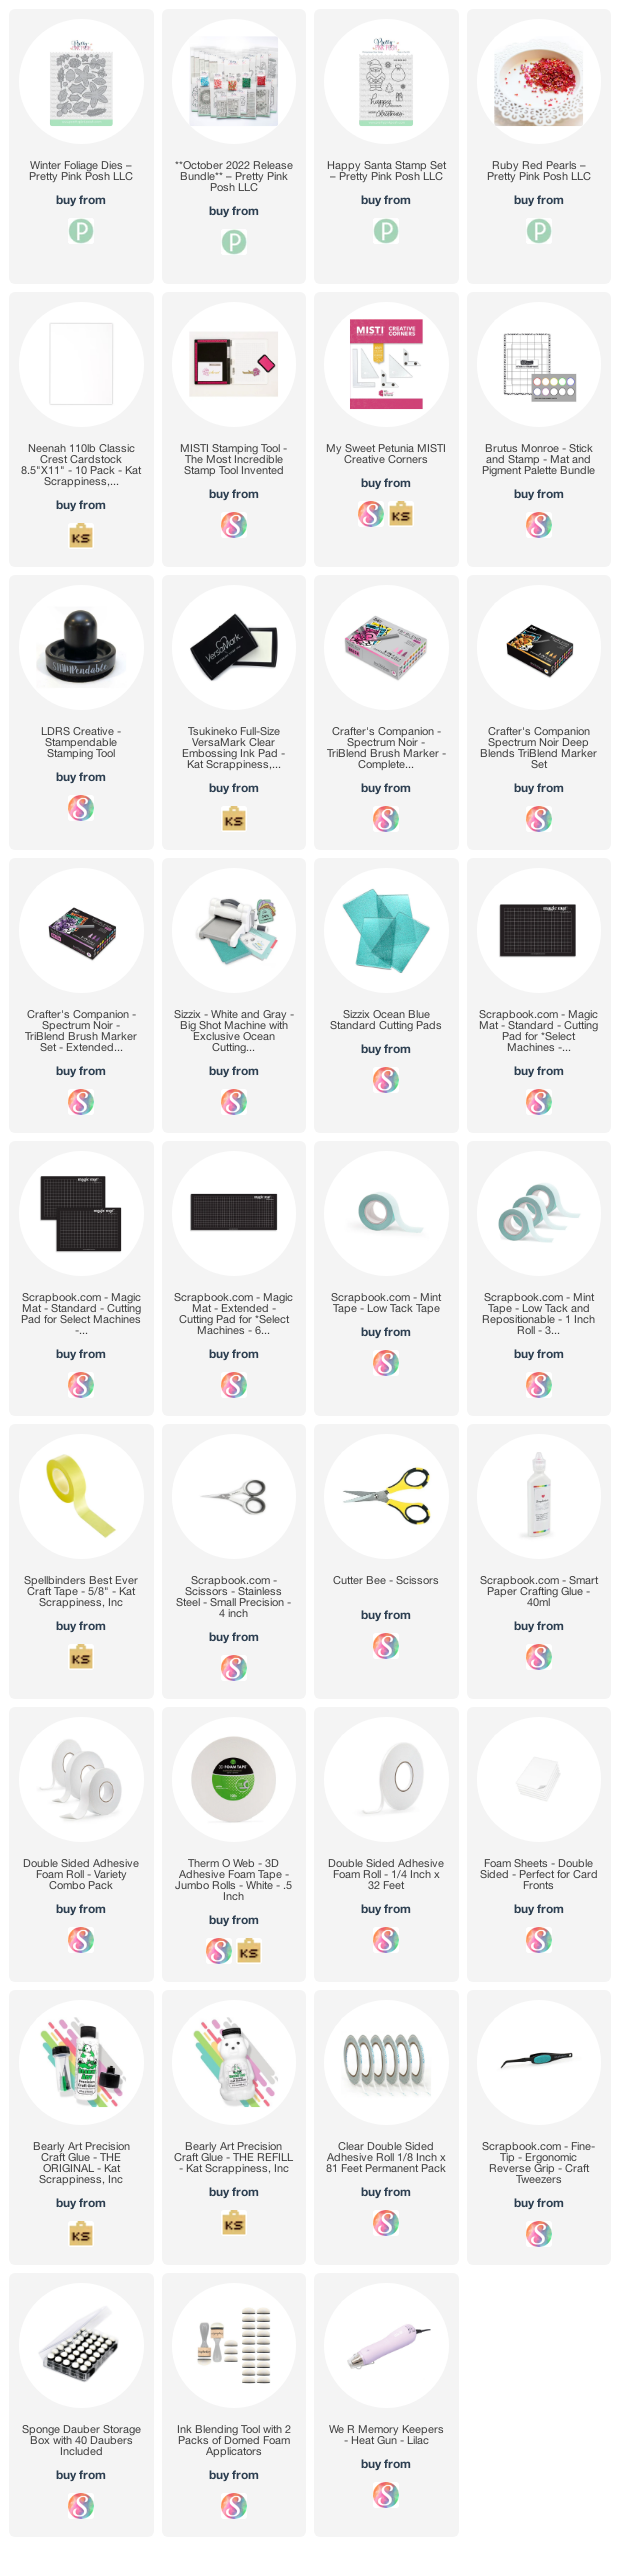
———-SUPPLIES———-