Newton’s Nook Designs February Release – Day 1 – Loads of Blooms and Flower Trio Die

NNDReleaseIcon_Feb19

It is that time of the month where the entire design team get so excited to show off  the new stamps, dies and stencils by Newton’s Nook Designs.   You also have a chance to win a stamp set for each reveal day so please read through til the end of the blog post to find out more info.  [Just a little important note:  I know some of you had difficulties finding the comments section.  If you would like to leave a comment to participate in the giveaway, the “comments section” will only be ever visible when a single post on Word Press is being viewed. Please click on this particular blog post and you will be able to leave a comment below.  Thank you!]  

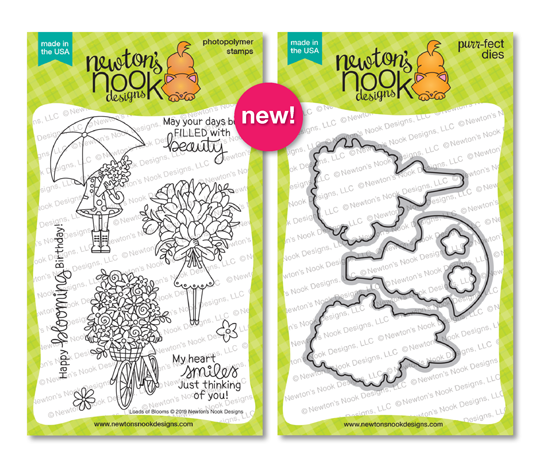
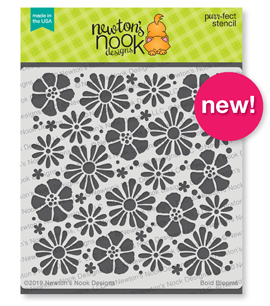
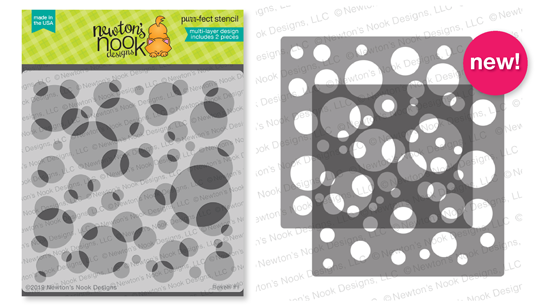
For the first day of the reveals, we are showcasing the following products:

NNDFEB19_LoadsofBlooms
LOADS OF BLOOMS STAMP SET & COORDINATING DIES
NNDFEB19_FlowerTrio
FLOWER TRIO DIE SET
NNDFEB19_BoldBlooms
BOLD BLOOMS STENCIL
NNDFEB19_BokehStencilSet
BOKEH STENCIL SET

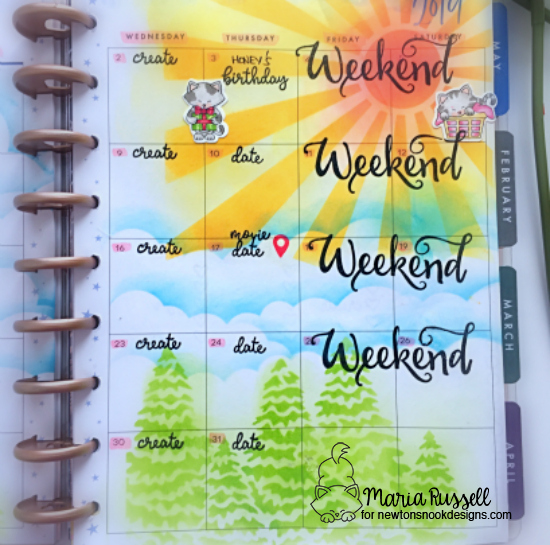
For my first project, here’s how I made the card:

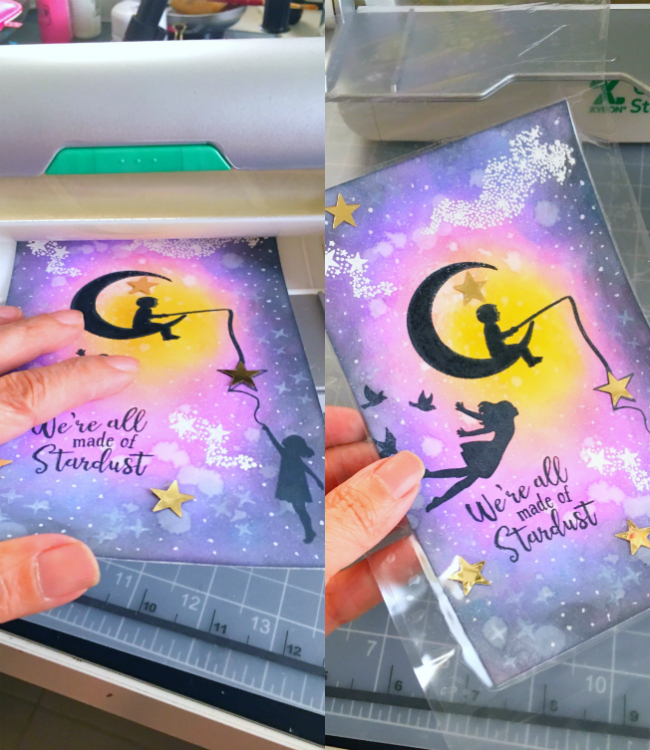
  • stamp the images on smooth white card stock.  The butterflies I added for my scene are from the Newton’s Birdbath stamp set.
  • color the image using Copic markers or any coloring medium of your choice.
  • die-cut the image with the coordinating dies.
  • die-cut the birch trees using the Forest Scene Builder dies and the grassy hill with the land border die.
  • die-cut the rest of the elements needed to create the scene.
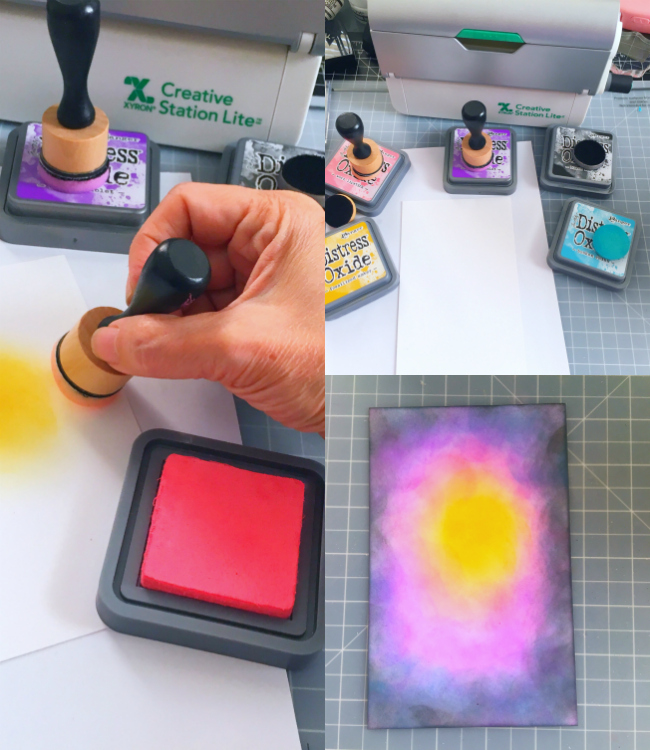
  • ink up the background on Bristol smooth white card stock with distress oxide inks using the Sunscape stencil.  Spray the background with water and dab it dry with a paper towel.
  • assemble the card on an A2 size white card base.
  • Finish the design by stamping the sentiment and add a pink heart.

NNDLoadsofBloom1A

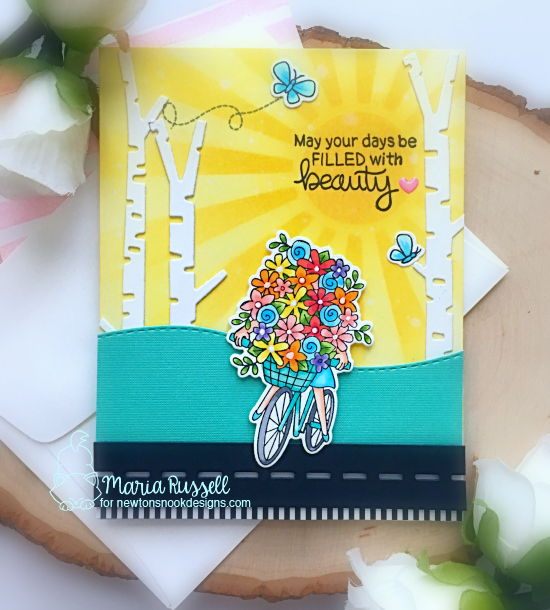
I just love this image so much!  It reminds me of those times back when I was a child and my sisters and I were riding our bicycles, gathering flowers around the area.  Those were simple times that I will always cherish forever.  Here’s a closer look:

NNDLoadsofBloom1B

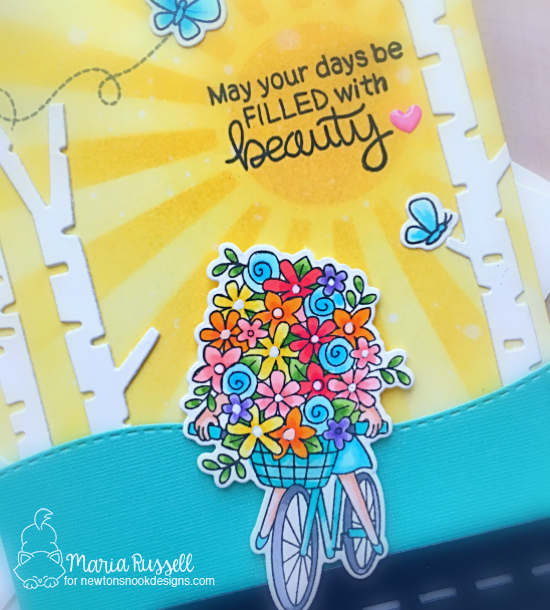
I would never trade in those times where my friends and I just enjoyed being kids, riding our bikes, playing games and not wanting to come home when it’s starting to get dark because of dinner.  I am certainly thankful we didn’t have smart phones and computer games back then.

NNDLoadsofBloom1C

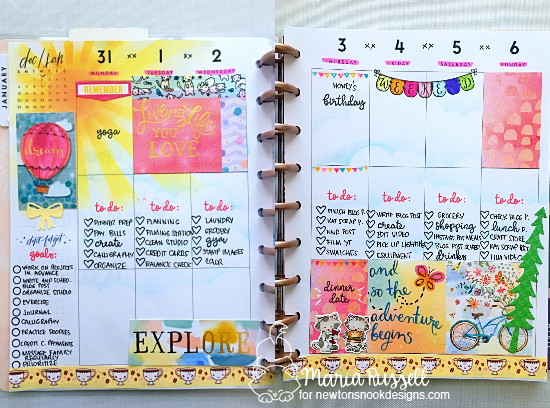
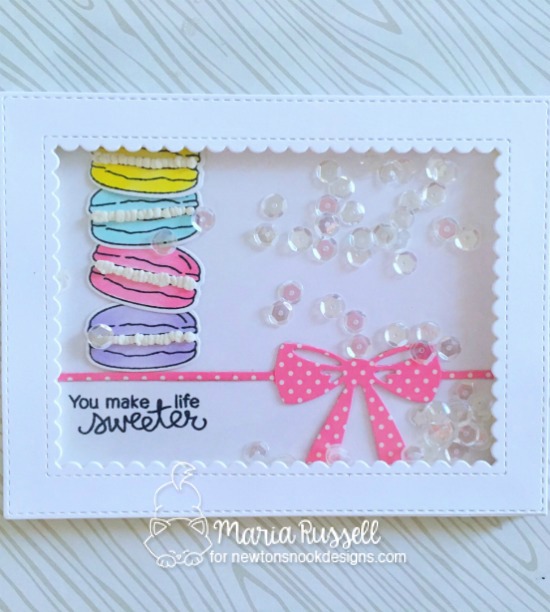
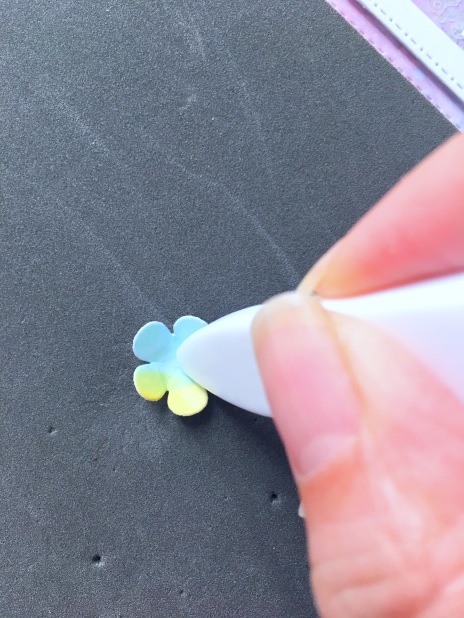
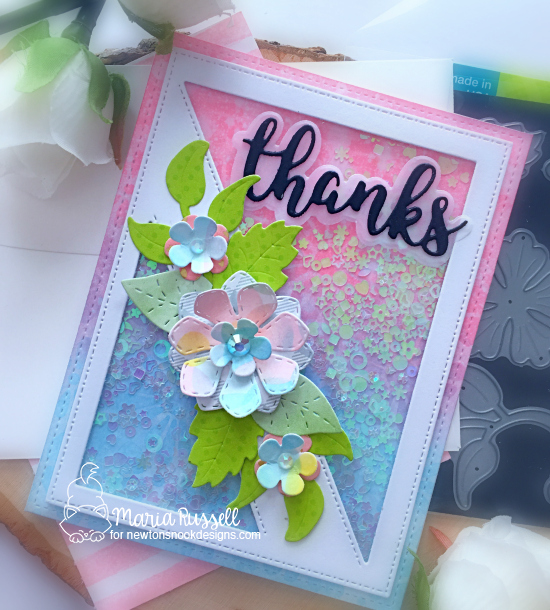
For my second project, I used the Flower Trio die, Bokeh Stencil set and the Bold Blooms stencil.  Here’s how I made the card:

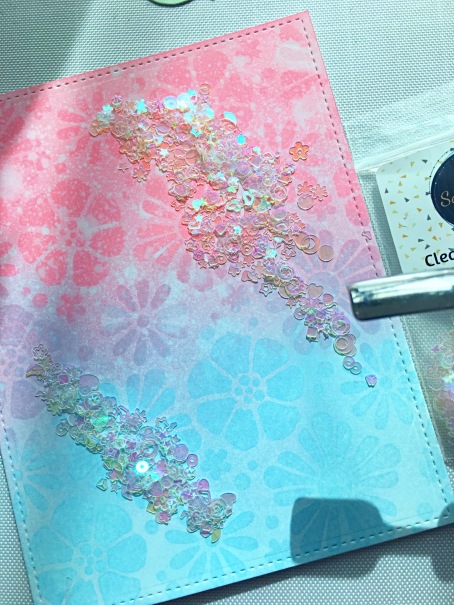
  • Ink up some Bristol smooth white card stock using different pastel distress oxide inks with the Bokeh stencil set.
  • Die-cut the flowers using the Flower Trio Die.

IMG_1038

  • Use a stamping mat and bone folder to shape the flowers and give it a little dimension.  If you have a round stylus, it’s better.

IMG_1039

  • Ink up some Bristol smooth white card stock using distress oxide inks and the bold blooms stencil.  Spray water and dab it dry with some paper towel. Use clear sequins as shaker element.

IMG_1037

  • die-cut the diagonal die coverplate and adhere acetate sheet.  Add foam adhesive to create the shaker well and adhere on top of the background.

IMG_1040

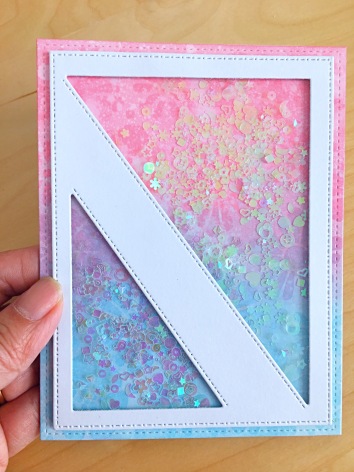
  • adhere the flowers and leaves on the card and finish the design by adding the script sentiment die.

NNDFlowerTrioDie1A

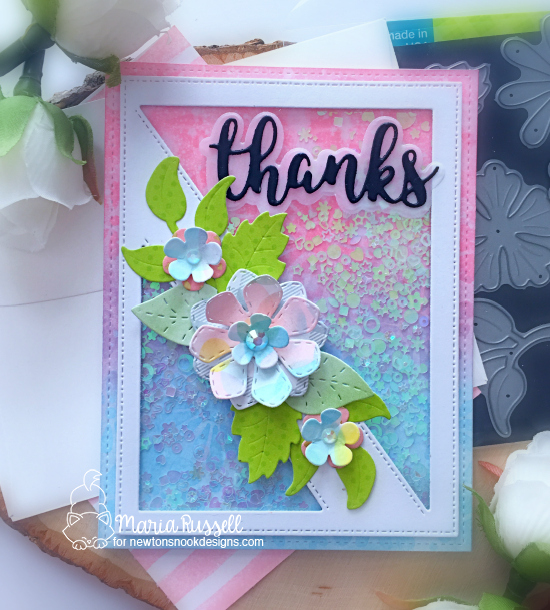
Since I used clear sequins as my shaker element, the die-cut flowers really stood out on this card design.  I also added the Crystal clear jewels in the middle of the flowers.  Here’s a closer look:

NNDFlowerTrioDie1B

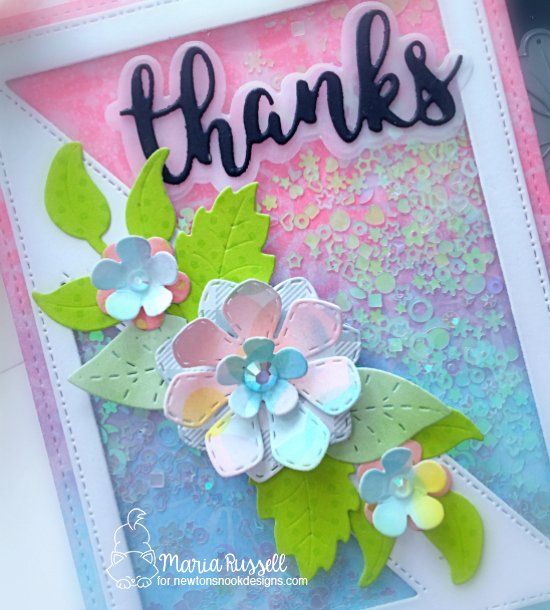
I really LOVE how this card turned out.  The Flower Trio die set is a must-have for sure. You can even decorate your Spring wreath using this die.  The possibilities are endless!  Here’s another look:

NNDFlowerTrioDie1C

Would you like to win the “Loads of Blooms” Stamp Set?  This stamp set will be given away to ONE lucky winner!

Comment on the NND blog and Design Team blogs (see list below)! The winner will be chosen at random from the collective reveal posts. Make sure to check out each of their blogs and comment for your chance to win. You will not know which blog has been chosen so the more you comment on the better your chances are of winning! You have until Thursday February 14th at 9pm EST to comment  — winners will be announced on the blog post on Friday, February 15th.

Check out all the awesome Design Team Blogs below to enter:

Newton’s Nook Designs

Amanda Bodine

Holly Endress

Ellen Haxelmans

Larissa Heskett

Samantha Mann

Zsofia Molnar

Naki Rager

Maria Russell

Andrea Shell

Tatiana Trafimovich

————SUPPLIES—————


Newton’s Nook Designs January Release – Day 1 – It’s a Plan and Newton Makes A Plan

nndreleaseicon_jan19

It is that time of the month where the entire design team get so excited to show off  the new stamps, dies and stencils by Newton’s Nook Designs.   You also have a chance to win a stamp set for each reveal day so please read through til the end of the blog post to find out more info.  [Just a little important note:  I know some of you had difficulties finding the comments section.  If you would like to leave a comment to participate in the giveaway, the “comments section” will only be ever visible when a single post on Word Press is being viewed. Please click on this particular blog post and you will be able to leave a comment below.  Thank you!]  

For the first day of the reveals, we are showcasing the It’s a Plan stamp set with Newton Makes a Plan stamp set, and coordinating dies.   Heres what they look like:

nndjan19_plannerall

Before I start, I just want to point out that some of the dies are a bit tricky to match up because they are similar in shape and size so Jennifer was kind enough to share this little sheet to help you to number them before you cut the dies apart.


nndcattemplate

I love decorating my planner.  I don’t always have time to do it each month but when I do, I go all out!  I use stencils and distress oxide inks to add color to my pages.  I also adhered some die-cuts, stickers and other cute elements just to make it cuter.

For my first project, I stamped and colored the little kitties from the Newton Makes a Plan stamp set and colored them in with my Copic markers.  Since these images are tiny, I tried to use a maximum of two markers to do my color-blending.  I die-cut the little kitties with its coordinating dies.

I used the Sunscape Stencil and the Evergreens Stencil with my distress oxide inks to add color to my planner pages.  NOTE:  Since I am so over the winter-themed cards you will be seeing a lot of sunshine and happiness on my post this week, haha!  I also used my home-made clouds stencil using the Sky Borders die.  Here’s my monthly calendar spread:

nndplanner1a

I stamped the words on the corresponding days from the It’s a Plan stamp set like “yoga” – which I do every Mondays, “shopping”, I do every Sundays and I leave mostly Tuesdays and Wednesdays to do my card-making and/or design team projects.  I used the tiny heart checklist also from the It’s a Plan stamp set for my “goals”, “to do” and “my mantra”.  I did not fill it all out just yet because I have yet to determine what goals I would like to set for myself this month.  To decorate my planner a little further, I used the little kitties for my yoga days, the one inside the laundry basket for my laundry days on Saturdays, the Kitty holding a present for my husband’s birthday this month and the kitty holding a shopping cart for my grocery shopping day.

Here’s a little close-up of my monthly spread:

nndplanner1c

nndplanner1b

I used the hearts and circle checklist from the It’s a Plan stamp set to add my “to-do’s”, as well as my weekly goals.  Here’s what my weekly spread look like:

nndplanner3a

Since I colored a lot of the images, I decided to create a card using the Newton Makes a Plan stamp set.  Here’s my second project:

nndplanner2a

I used a circle die from my stash to cut out 6 circles on some A2 size 110 lb Neenah solar white card stock.  I used a cat embossing folder also from my stash to add some details onto the foreground.  On a piece of Bristol smooth white card stock, I traced the circle and added different colors of distress oxide inks.  Here’s a close-up:

nndplanner2b

To finish my design, I stamped the sentiment from the Newton Loves Cake stamp set on a banner strip with versamark ink.  I sprinkled white embossing powder on it and heat-set it using my heating tool.  Here’s another look:

nndplanner2c

Would you like to win the “Newton Makes Plans” or the “It’s a Plan” Stamp Set?
We will choose ONE lucky winner for each stamp set!

Here’s how to win:

Comment on the NND blog and Design Team blogs (see list below)! The winner will be chosen at random from the collective reveal posts. Make sure to check out each of their blogs and comment for your chance to win. You will not know which blog has been chosen so the more you comment on the better your chances are of winning! You have until Thursday January 17th at 9pm EST to comment  — winners will be announced on the blog post on Friday, January 18th.

Check out all the awesome Design Team Blogs below to enter:

Newton’s Nook Designs

Amanda Bodine

Holly Endress

Ellen Haxelmans

Larissa Heskett

Samantha Mann

Zsofia Molnar

Naki Rager

Maria Russell

Andrea Shell

Tatiana Trafimovich

————SUPPLIES—————


Laminated Planner Insert with Xyron Creative Station Lite

Hello my crafty friends! I hope you are having a fabulous week so far. I’m back today for Xyron and I have a cute project to show you, using the Creative Station Lite, with a double-sided laminate cartridge.

I have always loved to decorate my planner. If my planner looks organized and beautiful, I get inspired to use it more. Write my thoughts down and update my schedule.

As soon as I open my planner, I would like to see something inspiring, something beautiful. Most of the times the cover that you get when you purchase your planner is plain and boring ~ so I decided to create my own planner insert.

I started out by cutting a Bristol Smooth white card stock measuring 4 ¼ by 6 ¾. I am using my favorite combination of distress oxide inks for galaxy backgrounds (i.e., fossilized amber, picked raspberry, wilted violet, broken china and black soot). Using my mini-ink blending tools, I started to sponge the fossilized amber in the middle, then blended the rest of the distress oxide colors onto my card stock.

XyronLaminate1

I used my distress sprayer to spray some water on my colored background to achieve the distress look, dabbing the excess water droplets with a paper towel. They look like stars in the sky!

XyronLaminate2

I stamped by images using a stamp set by Hero Arts onto my colored card stock with memento tuxedo black ink. To add the stars, I stamped them with versa mark ink and heat set it with white embossing powder. I also added the sentiment “We’re All Made of Stardust”. To finish the design, I added some gold star confetti.

Using my Creative Station Lite with a double-sided laminate cartridge, I inserted my decorated planner insert through the machine, cranked the handle, and cut it through using the trimmer on the other side. Here’s what it looks like once it’s fully laminated. I really love that you can use laminate projects using this machine without having to use heat or electricity.  I trimmed the excess with my scissors.

XyronLaminate3

I used my We R Memory Keepers Crop-A-Dile to punch the holes on my planner insert. Here’s what it looks like inside my travel planner.

XyronLaminate5

XyronLaminate4

Isn’t it beautiful? I absolutely love creating my own planner inserts to decorate my planner. What do you guys think? I hope you like my project today.  For more project inspiration using Xyron products, please visit the Xyron Facebook Group here (https://www.facebook.com/xyroninc/) or the website at www.xyron.com.   I have also listed and linked the supplies I used below.  Have an amazing day!

————-SUPPLIES————

Click on the link to go directly to the product. Where available, I used compensated affiliate links which means if you make a purchase I receive a small commission at no extra cost to you. Thanks for your support.


Newton’s Nook Designs – January Release Day 2 – Love & Chocolate

nnd_releasejan17


Hello stampers and crafters! Thank you for stopping by.  Today is release day (Day 2) at Newton’s Nook Designs.  If you haven’t checked out yesterday’s post, please do so to see the amazing projects created by our design team members.  Please also check out our Instagram photos to get more inspiration.

For my card below, I stamped my images on Neenah solar white card stock with my memento tuxedo black ink. I colored the images using my Copic markers (I opted for pastel colors), and die-cut my stamped images with its coordinating dies.   To give my macaroons a little bit more detail, I used my liquid appliqué and heating tool to puff up the white liquid and make it look like icing.

At this point, I decided to make this a shaker card. I used my 3M Scotch foam adhesive to adhere it on my card stock to create my window panel for the card. I wanted the macaroons to be the main focal point on this card so I created a white on white background, and used some clear sparkling sequins for my shaker element.

nnd_macaroon

I also used this stamp set for my planner layout this week.  I really love stretching my stamps and using them to decorate my planner.

nndplanner3

nndplanner4

I hope you like my card and my planner layout and somehow got inspired today. This Love & Chocolate stamp set and Love & Chocolate Dies will be available for purchase on January 20 at 8:00 a.m. CST.

Would you like to win this “Love & Chocolate” stamp set?  This stamp set will be given away to ONE (1) lucky winner!

Here’s how to win: 

Comment on the NND blog and Design Team blogs (see list below)!  The winner will be chosen at random from the collective reveal posts. Make sure to check out each of their blogs and comment for your chance to win. You will not know which blog has been chosen so the more you comment on the better your chances are of winning!  You have until Thursday January 19th at 9pm CST to comment  — winners will be announced on the Newton’s Nook Designs blog post on Friday, January 20th.


Check out all the awesome Design Team Blogs below to enter:

Newton’s Nook Designs

Amanda Bodine

Holly Endress

Ellen Haxelmans

Larissa Heskett

Samantha Mann

Juliana Michaels

Naki Rager

Maria Russell (you’re here)

Jennifer Timko

Tatiana Trafimovich


Food & Fitness Planner Stamp Launch with JessicaLynnOriginal + Giveaway

Today marks the launch of the new Food and Fitness Planner Stamp Set by www.jessicalynnoriginal.com. This is the fourth planner stamp set by JLOriginal. I love these planner stamps and I use them all the time on my Erin Condren Planner.


Since this is our release day, Jessica is giving away this planner stamp set to one (1) lucky winner. All you have to do is check out all of the design team member’s posts and leave a comment on each blog. Jessica will be picking a winner tomorrow at 8:00 p.m. Central Standard time. She will announce the winner on her blog. Our design team will also show you ways on how we all use the stamp set. Please check it out:


Jessica Lynn Mould – Blog: http://www.jessicalynnoriginal.net

Lisa Reynolds Bzibziak – Blog: http://bzscrapper66.blogspot.com/

Sharon Rogers – Blog: http://sharonshowcase.blogspot.com/

Jeanette Cloyd – http://creativeplayischeaperthantherapy.blogspot.com/

Maria Russell – https://www.mariarusselldesigns.com/ 
(YOU ARE HERE)

Andrea Dover-Whisman – http://savvyhandmadecards.blogspot.com/

Angeline Choo – http://scrappyscrappy.blogspot.com/


Here is how I decorated my planner this week. I also used an older JLO Planner Stamp Set (which is one of my all-time favorite).

IMG_1573

Here is a card that I made using the bicycle and a digital stamp by JLO. This is a motivational card.

IMG_1577

Last but not the least, here are two fun shaker tags that I made using the cute veggies. I had so much fun creating this week.

IMG_1598

The stamps are now available for purchase at http://www.jessicalynnoriginal.com or through http://www.amazon.com.


Please don’t forget to visit the other team member’s blog and leave a comment to be able to enter Jessica’s giveaway. Good luck and have an amazing weekend!