Love You to the Moon & Back Scrapbook Layout

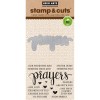
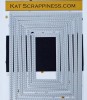
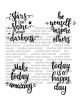
Hello my crafty friends!  I am super excited to share my project today.  Mother’s Day is fast-approaching and I wanted to create a scrapbook page layout, showcasing the Large Alpha dies, the “Love You to the Moon & Back” script sentiment dies by Kat Scrappiness, plus other supplies available at the shop.

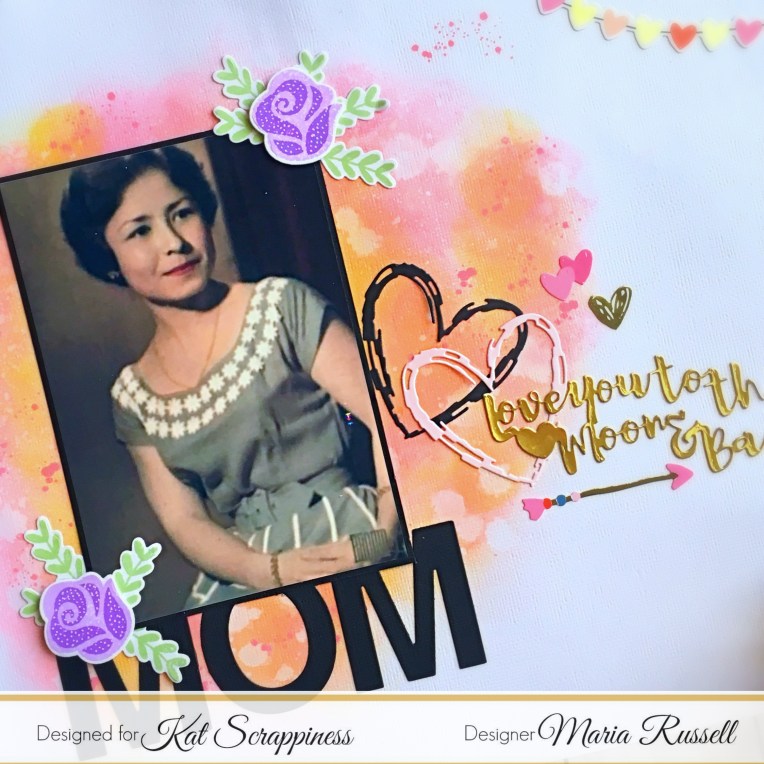
I started by inking my 12 x 12  white card stock with my ink blending tool and my Worn Lipstick and Fossilized Amber distress oxides.    I spritzed my background with water and dabbed it with my paper towel.  I love the look of distress backgrounds especially on white card stock.

IMG_7253

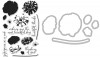
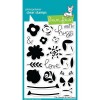
I matted my mom’s photograph on Gina K Designs Black Card Stock.  I also stamped my flowers and leaves using the Lawn Fawn Fab Flowers 4 x 6 stamp set.  I die-cut my images using the Lawn Fawn Fab Flowers dies.

IMG_7254

Using the Large Alphabet Dies, I die-cut the letters M-O-M on Gina K Designs Black Card Stock.   I adhered the die-cut pieces onto my layout using my Nuvo Deluxe Adhesive, lining it up with my T-square ruler to make sure that they are evenly spaced and perfectly aligned.

IMG_7255

I adhered my mom’s photograph onto my layout.  To finish my design, I added the rest of my embellishments.  Here is my layout:

KatScrapMomLayout

Here’s a little close-up!  Isn’t she beautiful?!  My mom is an amazing, strong, beautiful person, inside and out.  She has taught me how to become independent, and be able to do things that I couldn’t even believe it’s possible.  I am such a lucky person to have a mom like mine.  I love her to the moon and back!

KatScrapMomLayout2

I hope you like my project today and got inspired.  I have listed and linked the supplies I used below.  Don’t forget to use my coupon code “MARIA10” for 10% off of your order at Kat Scrappiness.  Have a wonderful day and happy crafting!
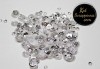
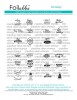
—————-SUPPLIES————–


Thinking of You-Calyptus Valentine’s Card

Hello my crafty friends.  I am back today with a simple Valentine’s Day card, showcasing the Gerda Steiner You’re Koalafied 4 x 6 stamp set and coordinating dies, with the Wonky Wavy Stitched Rectangle Dies, Distressed Edge Rectangle Dies and a bunch of other supplies available at Kat Scrappiness.

Here is my card:

KatScrapKoala1

Here’s a little close-up:

KatScrapKoala2

I have a process video for you today so I will keep this blog post short.

I hope you like it.  I also listed and linked the supplies I used below.  Have a great day!


Maria Russell Signature Logo

———–SUPPLIES———–

Chocolate Lover’s Card Kit – 5 Projects

Hello, hello my crafty peeps!  I hope you are all having a wonderful day!  I am back to share with you my projects, showcasing the limited-edition Chocolate Lover’s card kit by Kat Scrappiness.  I ABSOLUTELY LOVE THIS KIT!  There are so many possibilities using the supplies included in this kit.  Here’s what’s inside, plus the two add-ons, which is the Chocolate Lover’s sentiment stamp set and the Wonky Wavy Stitched Heart Dies.


KatScrapCardKit


For my first project, I wanted to create a fun shaker card using the 6 X 6 paper pad by Pebbles and the Mint Sprinkles Sequin mix as my shaker material.  I love this color combo.  I also included a short video showing you how to stamp the layered chocolate stamp set.  It looks so realistic.  Here’s the first card:


KatScrapChocolate1


Here’s the close-up:


KatScrapChocolate1A


Here’s the YouTube video showing you how I stamped the chocolate:


For my second project, I wanted to create a simple, one-layer card, with the chocolate layering stamp set and the Chocolate Lover’s sentiment stamp set.  I added the pink and blue dots and finished my design with glossy accents.  The card is very simple but I love how it turned out.  Here’s the second card:


KatScrapChocolate2


For my third project, I used the chocolate image again with the “Sweet” script sentiment  die included in the kit, as well as the Fancy Scalloped Stitched Border dies.  I finished my design by adding the gold twine.  Here’s the third card:


KatScrapChocolate3


For my fourth project, I used the chocolate candy bar stamp set again but this time, I added a wreath die-cut using the Avery Elle Star Frames Elle-Ments Dies and also created a wavy card-front using the Fancy Scalloped Stitched Border Dies.  I finished my design by adding the wooden heart embellishments from the kit, coloring it with my Copic marker.  Here’s the fourth card:


KatScrapChocolate4


For my last project today, I wanted to use the stamp set to decorate a giant Hershey’s chocolate candy bar to give as a gift either for Christmas or Valentine’s Day.

I wrapped the candy bar with a plain white typing paper.  I used a stamp from my stash to stamp the snowman’s face on the paper, and colored it with my Copic markers.  I cut a square and a rectangle black card stock to create the snowman’s hat.  I then stamped my sentiment on the hat with versa mark ink, and heat-embossed it with my white embossing powder.  I adhered the hat to the snowman.  I used my 1/2 inch circle punch to create the buttons for the snowman, and adhered it onto the wrapped candy with my Xyron Mega Tape Runner.  To finish my design, I added the red seam binding for the snowman’s scarf, and added the heart embellishment by pebbles, included in the kit.  It turned out so cute.  You can easily mass-produce this project to give as gifts to teachers, your friendly neighborhood mailman/mailwoman, or anyone else.  Here’s my fifth project.  Isn’t he cute?


KatScrapChocolate5

I hope you like all of the projects that I created today and got inspired.  The supplies I used are listed and linked below if you are interested.  Have a wonderful day!

————SUPPLIES———-


Prayers & Hugs Coming Your Way

Hello everyone! It’s Maria Russell here with you today. It’s been awhile since I made a project for Kat Scrappiness. I was traveling for two weeks and if you have been following me here on my blog, you’ll probably know that I got sick. I am on the mend now but it is taking a lot longer than expected which is making me a little miserable!

I apologize that I don’t have a process video for you today because it takes awhile for me to create a project right now. I can’t sit still for so long and look down so I constantly take a break and walk so I don’t get any pains. Please bear with me as I get better and I promise to make more process videos once I am over this hump.

For my shaker card today, I am showcasing the Hero Arts Color Layering Poppy Stamps and Dies, the Prayers Stamps and Die set, with the Wood Floorboard Prints Cling stamp, as well as the White Diamond sequin mix by Kat Scrappiness, and a lot more supplies available at Kat Scrappiness online store.

I started out by stamping and layering my images on Neenah solar white card stock using three Lawn Fawn Ballet Slippers, Guava and Lobster ink. I die-cut the flowers using the coordinating dies.

I stamped my background using the wood floorboard cling stamp with light- gray ink. I wanted a subtle background for my card because I wanted the main focal point to stand out, which are the poppies!

I die-cut the prayers die using a dark gray card stock, and stamped my sentiment using the Hippo Ink on my card front.

I ran my flowers, branches and die cut sentiment using my favorite Xyron sticker maker and Mega Tape Runner. I also adhered my acetate sheet using glue dots, and created my shaker window panel with scotch foam tape. I added my favorite White Diamond sequin mix by Kat Scrappiness and adhered my window panel to my card base.

I finished off my design by sponging my Neenah white card stock with the Tim Holtz worn lipstick distressed oxide ink to match the color of the dot details on my shaker card.

Here is the card. I hope you like it and got inspired today. The supplies I have used are listed and linked below. Have a great weekend!

IMG_4893

————SUPPLIES———–


You Make Me a Happy Camper – Avery Elle ~ Glamper Camper

Hello my lovelies!  I hope you are having a good day so far.  I am back today to share with you a cute card that I made, showcasing the Glamper Camper stamp set by Avery Elle, Kat Scrappiness Stitched Circle die, Distress Oxide Inks, Inkadinkado masking paper and a bunch of other supplies available at Kat Scrappiness.

Here’s the card:

KatScrapGlamperCamper1

I have a process video for you today if you’d like to see how I made the card.  I also listed and linked the supplies I have used below.  Don’t forget to use my coupon code: MARIA10 for 10% off  your order at Kat Scrappiness shop.  I hope you got inspired.  Have a wonderful day!

Here’s the process video:

————–SUPPLIES———–


Creative Vision Foilables ~ Perfect Day to be Happy

Good morning my crafty friends! I am back to share with you my design team project this week for Kat Scrappiness and I am showcasing the Creative Vision Foilables, Double-stitched rectangle Dies, Lawn Fawn Fab Flowers Stamp set and dies, sparkling clear droplets and a lot more supplies available at the shop.

Here is the card:

KatScrapFoil1


I have a process video for you today. I hope you got inspired. The supplies I used are listed and linked below. Have an amazing day!


———-SUPPLIES———-