Stamp the sentiment from the Hippity Hoppity Sentiment Stamp Set with Versamark ink on some black card stock. Sprinkle some white embossing powder and heat-set with your heating tool.
Adhere the sentiment on the card.
Finish the design by using some white gel pen to add more interest to the card.
I simply ADORE these bunnies from the Hippity Hoppity Stamp Set. This Easter-scene was so much fun to create! I do hope you like this card and got inspired by my project today. The supplies I used are listed and linked below for your convenience. Thanks for stopping by!
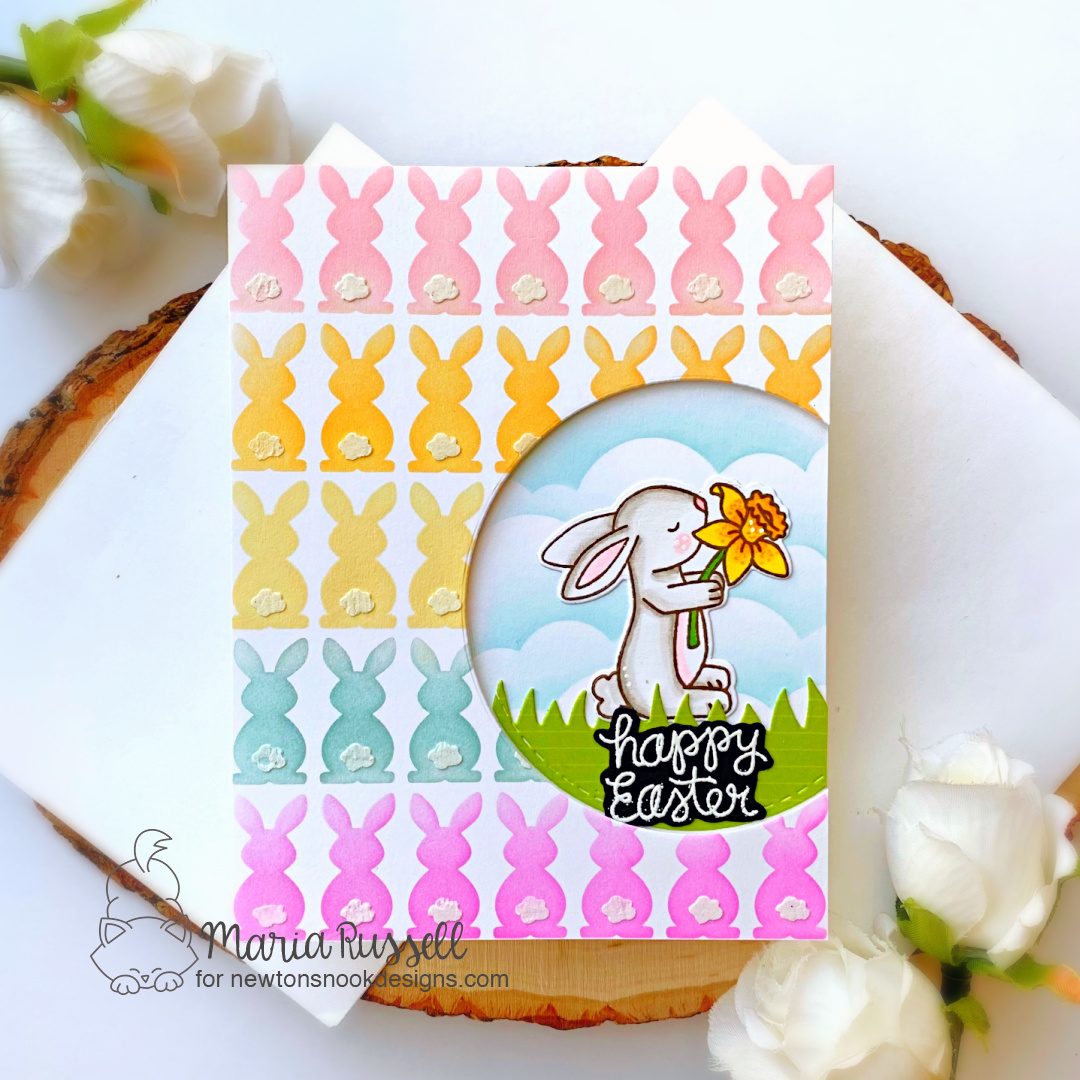
I stamped the image on Neenah solar white card stock using Memento Rich Cocoa ink and colored the images in with alcohol markers. I used the coordinating die to die-cut the image.
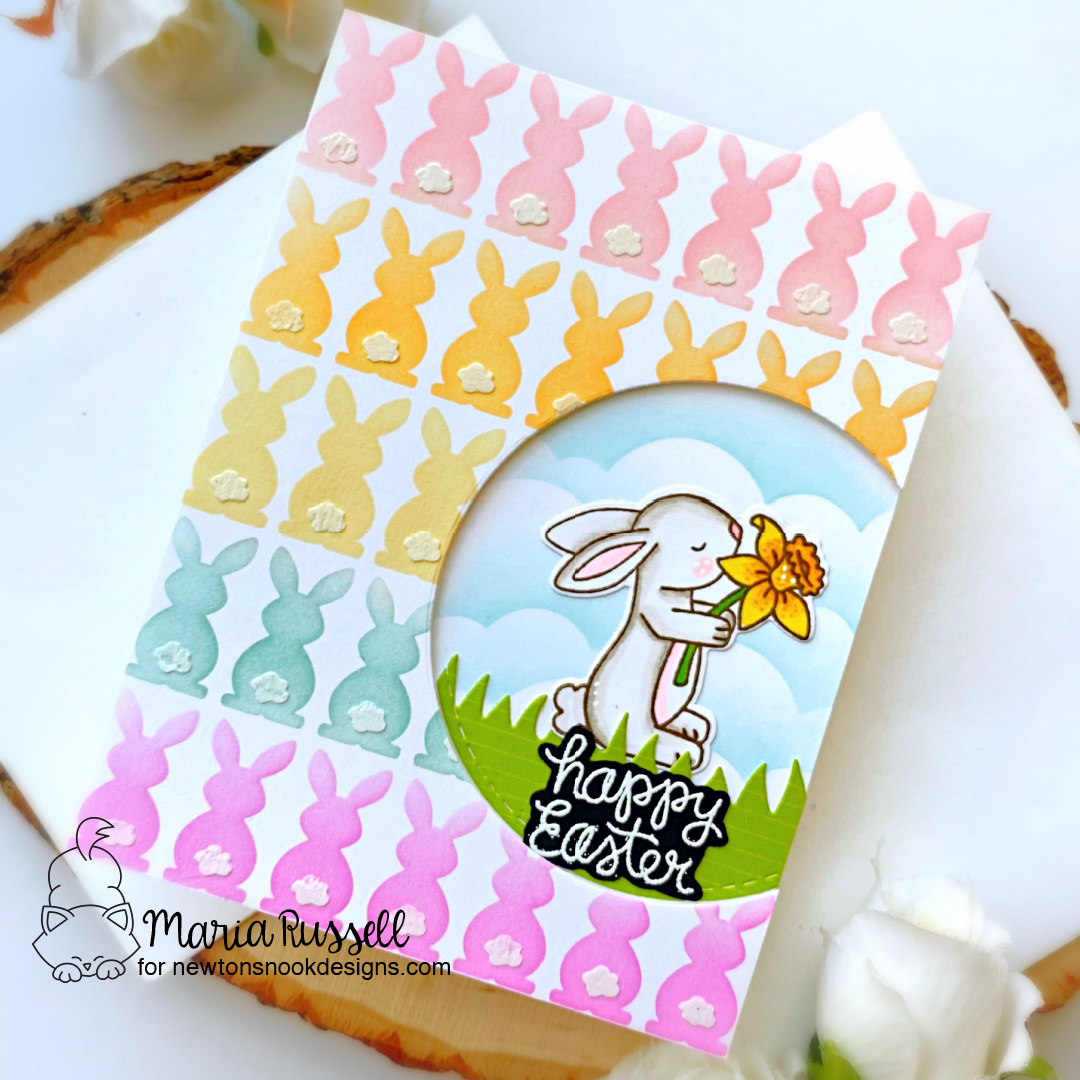
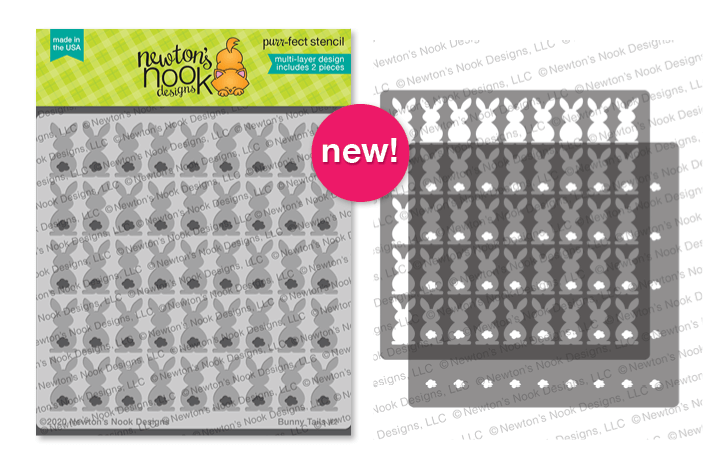
I cut another panel of Neenah solar white card stock measuring 4 1/4 x 5 1/2. I sprayed my Bunny Stencil (#1) with Pixie Spray. I waited for the stencil to dry a little and placed it on top of my card stock. The pixie spray gave it some light tack so that it didn’t shift while blending the colors. I used some low tack tape to mask-off the the lower portion of the stencil so that the colors don’t contaminate each other. I used my blending brushes to add pink, then peach, yellow, blue and purple. The bunny tails were added using stencil #2 with some textured paste and my palette knife for added texture and dimension. I set this aside for about half an hour to let it dry and added foam tape at the back of the panel.
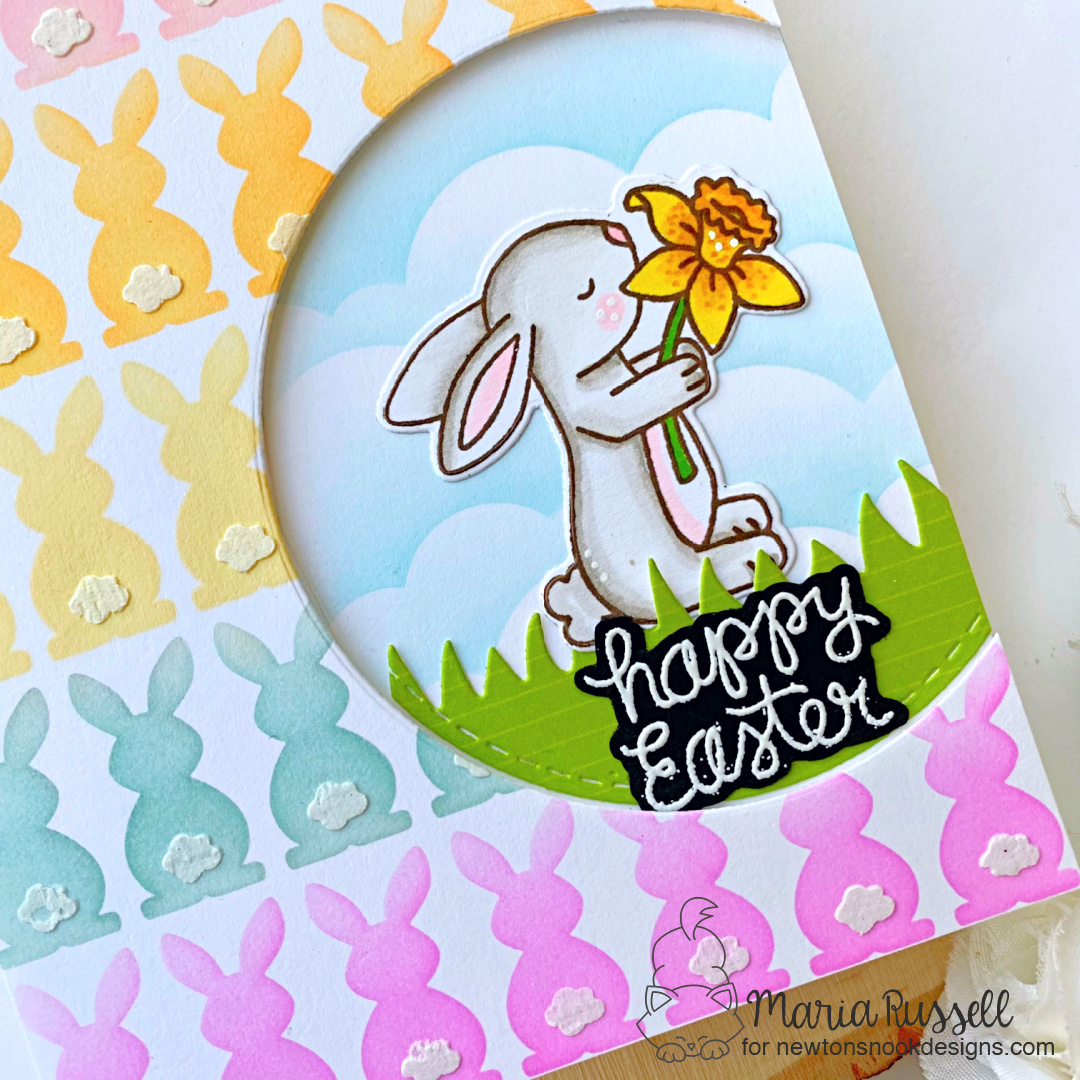
I used the “positive” die-cut to pencil the lines on my notecard. I then used my clouds stencil and some dye ink to create the clouds. The grass panel was die-cut using the same circle die that I used to create the window and the land border die. I foam-mounted the focal panel onto the notecard. I also added the grass and the bunny with some glue. I finished my design by stamping the sentiment on some black card stock. I sprinkled some white embossing powder and heat-set with my heating tool. I fussy-cut the sentiment with my precision snips and adhered to the card with glue. Here’s another look:
I hope you like my card today. The supplies I use are listed and linked below. Thanks for stopping by!
It is that time of the month where the entire design team get so excited to show off the new stamps, dies and/or stencils by Newton’s Nook Designs. You also have a chance to win the stamp set being revealed each day so please read through til the end of the blog post to find out more info. [Just a little important note: I know some of you had difficulties finding the comments section. If you would like to leave a comment to participate in the giveaway, the “comments section” will only be ever visible when a single post on Word Press is being viewed. Please click on this particular blog post and you will be able to leave a comment below. Thank you!]
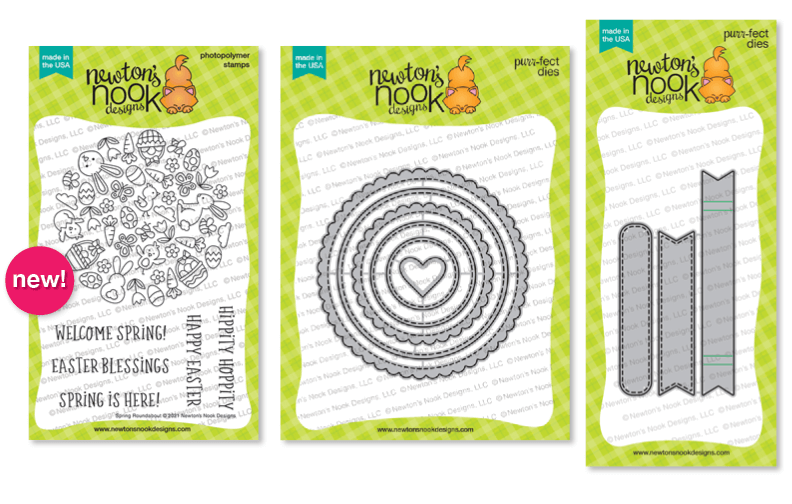
For the first day of the reveals we are featuring the Spring Roundabout Stamp Set that coordinates with the Circle Frame Dies and Banner Trio die, along with the Basketweave and Bunny Tail Stencils.
It’s all about Spring colors today guys!
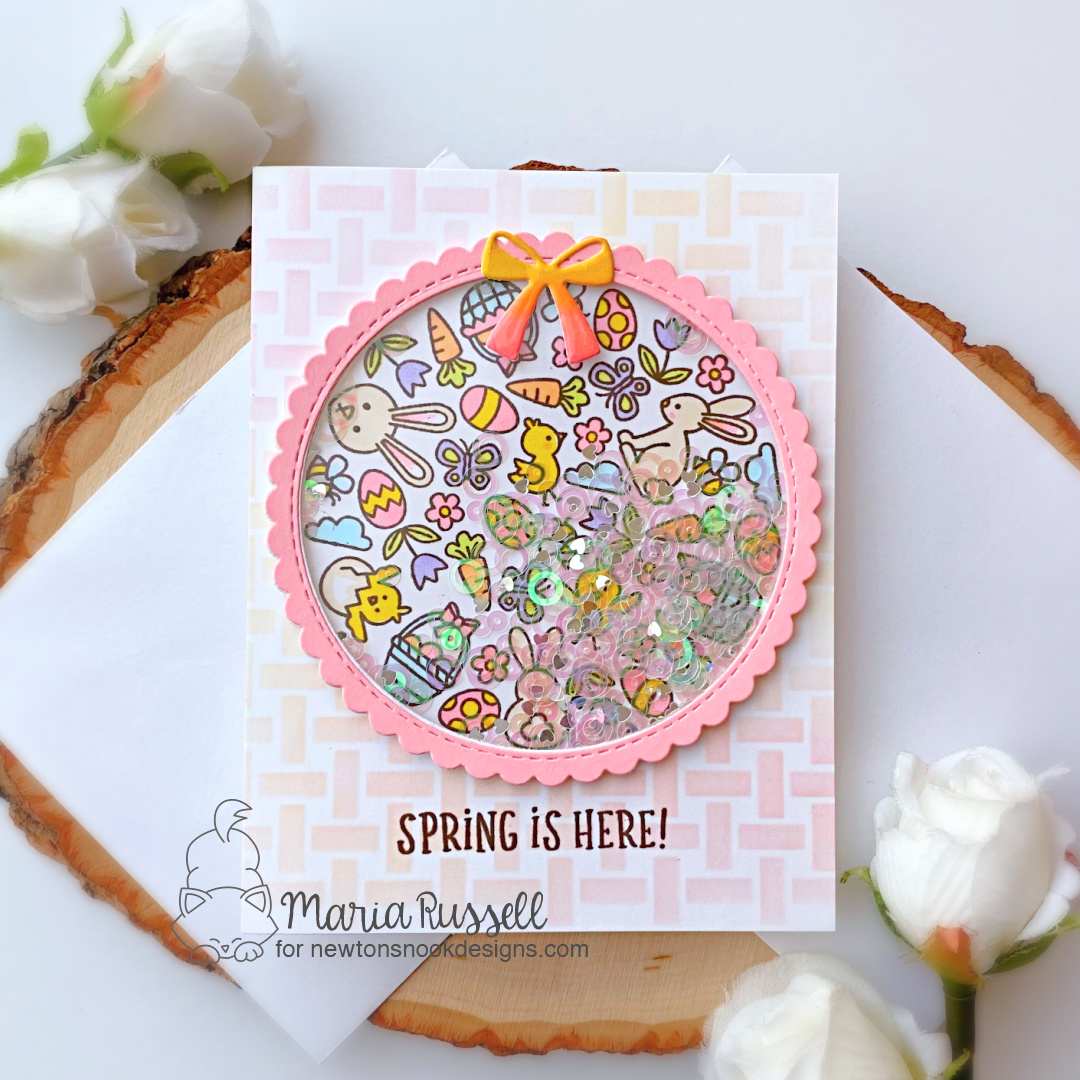
I started by cutting an A2-size panel of some Bristol smooth white card stock. I sprayed my Basketweave stencil with some Pixie Spray and temporarily adhered it on the panel. I used my blending brushes and some pink and peach dye inks to add the basketweave details on the background.
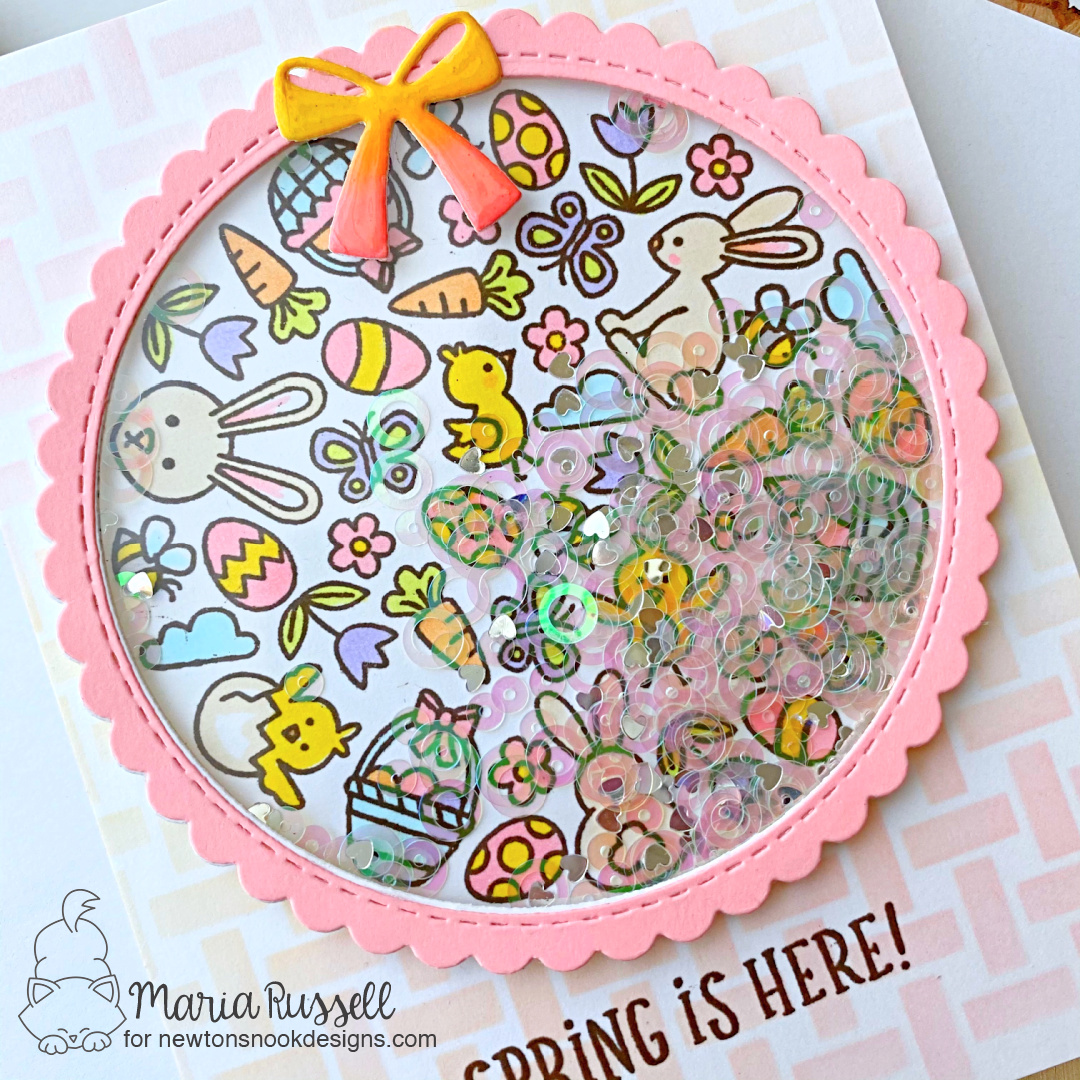
Next, I stamped the images on some Neenah solar white card stock with Memento Rich Cocoa ink and colored the images in with Spectrum Noir “Hint of Collection” alcohol markers. I used the Circle Frame die to die-cut the image. I also used the same circle frame die to die-cut a few pieces of white and pink card stock to create my shaker card. I adhered the pieces together with some liquid glue to create my shaker well. I added some iridescent sequins as my shaker element.
To close the shaker portion, I adhered some acetate sheet to the pink die-cut and added some liquid glue. I put some big acrylic blocks on this and waited for about half an hour until it was completely dry.
I die-cut from the Bitty Bibs die set and added some color to this piece. I also added some glossy accents to give it more texture and dimension. I waited for this piece to dry for about 30 minutes.
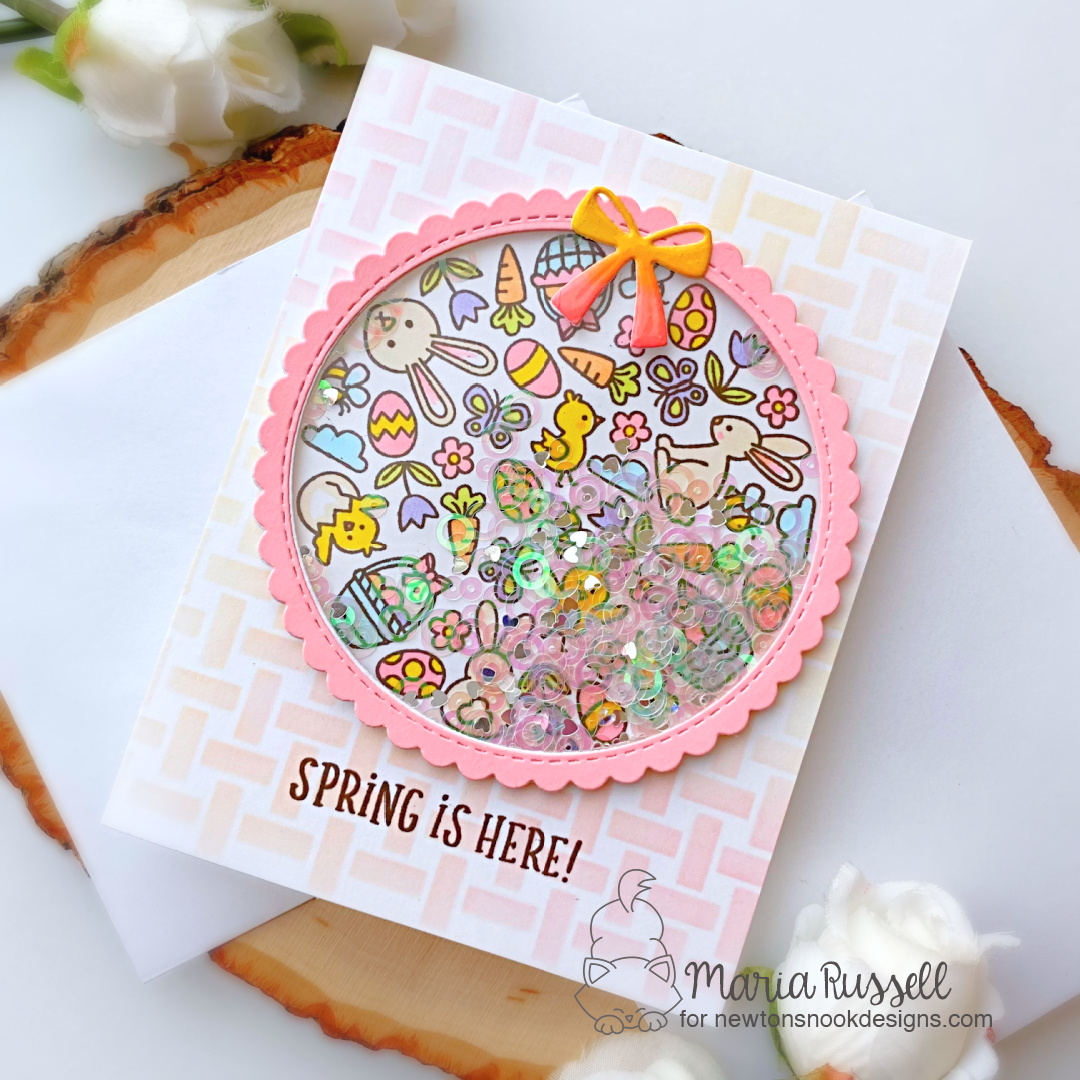
Next, I added my shaker to the ink-blended panel with some liquid glue and also added the little bow. I finished my design by adhering this panel to an A2-size notecard and stamped the sentiment with Memento Rich Cocoa ink. Here’s another look at the finished card:
Would you like to win the “Spring Roundabout” Stamp Set?This stamp set will be given away to ONE lucky winner!
Here’s how to win: Comment on the NND blog and Design Team blogs (see list below)! Thewinner will be chosen at random from the collective reveal posts. Make sure to check out each of their blogs and comment for your chance to win. You will not know which blog has been chosen so the more you comment on the better your chances are of winning! You have until Thursday February 18th at 9pm EST to comment — winners will be announced on the blog post on Friday, February 19th.
Check out all the awesome Design Team Blogs below to enter:
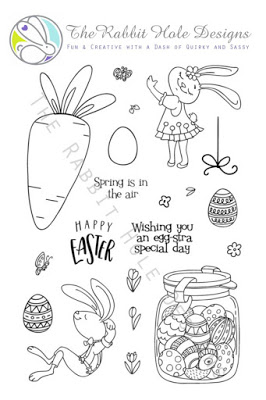
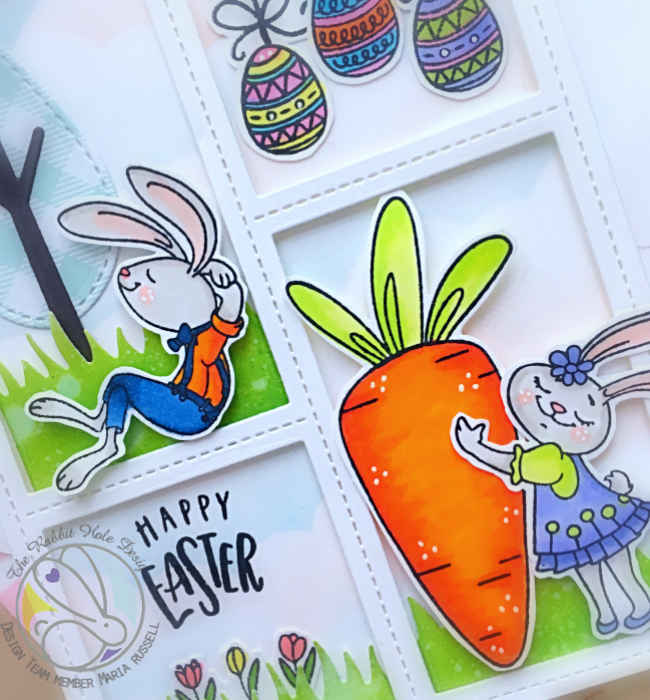
Hello my crafty peeps! I hope you are having a wonderful day so far. I am back today sharing this Easter card, showcasing the new Easter Bounty stamp set by The Rabbit Hole Designs. Here’s what it looks like:
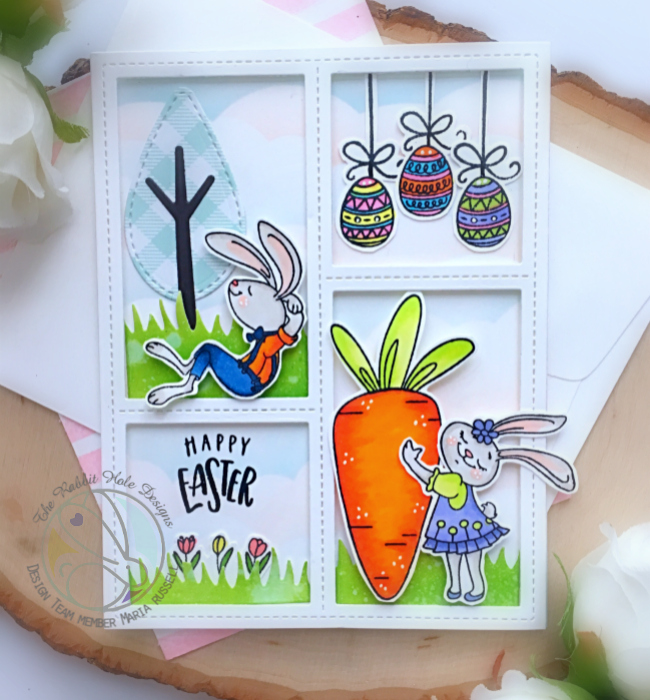
Here’s my card:
CARD RECIPE:
Stamp the images on smooth white card stock and color the images in with Copic markers (or any coloring medium of your choice).
Die-cut the image with an electronic die-cutting machine or fussy cut with scissors. I used my Brother Scan N Cut 2.
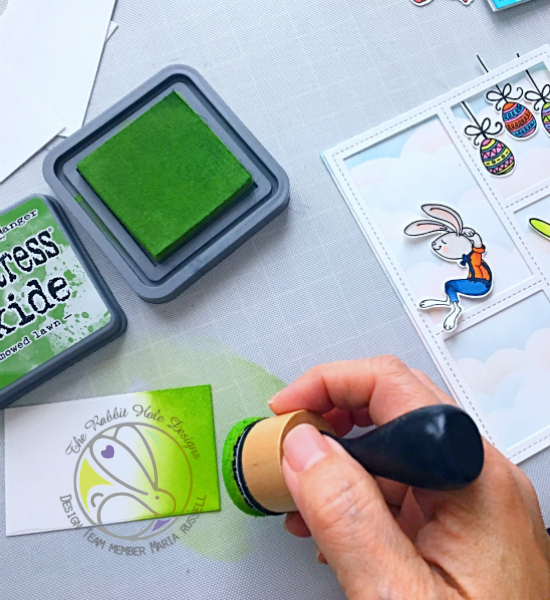
Use the storybook die and die-cut a piece using 110 lb. card stock. Keep the negative pieces to ink up with distress oxide (see photo below).
Use a grassy border die to die-cut the inked pieces.
Adhere the storybook die on the colored background with foam adhesive to give it some dimension.
Die-cut the tree using the tree die.
Start building your scene by adhering the colored images and die-cuts onto the card
Use stamping tool to stamp the sentiment.
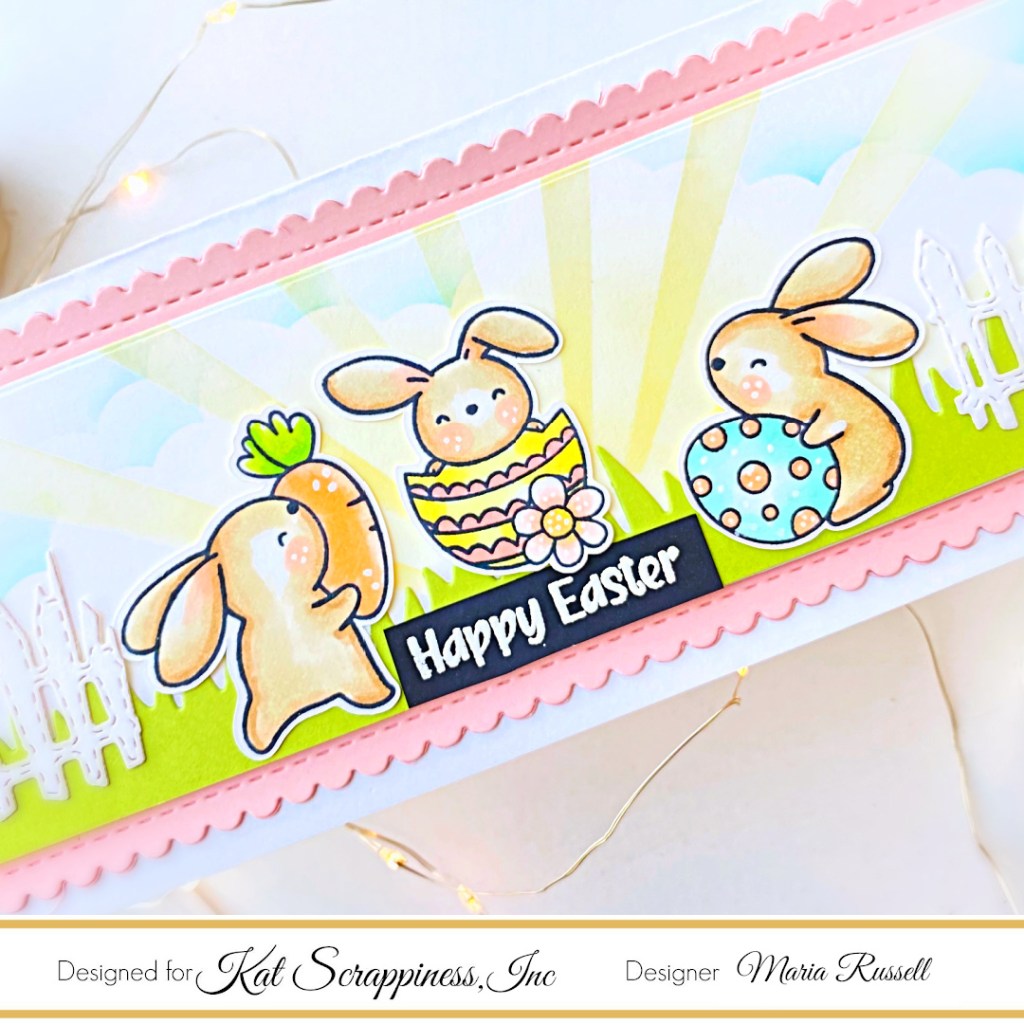
Here’s a little close-up of the card:
I used my white gel pen to add some details to the carrots, the bunny’s cheeks and on the Easter eggs. I absolutely adore this stamp set! Here’s another look:
For more inspiration, updates, and news make sure to check out these places.
Hello and welcome to the release hop. We are so excited for you to join us as we present to you our March release. The whole design team and one guest Designer will be sharing projects featuring the four new stamp sets that are available to purchase right now in the shop. We also have a GIVEAWAY so please be sure to scroll at the end of this blog post to find out how you can WIN. Don’t forget to visit the participating blogs (links are indicated below) and leave us some crafty love.
FREE SHIPPING
on orders of $25 or more before taxes and shipping
stamp the images on smooth white card stock and color the images using copic markers or any coloring medium of your choice.
fussy cut the image or use scan n cut machine.
ink up some Bristol smooth white card stock using a clouds stencil and grass stencil.
die-cut the frame using the scallop frame die.
adhere the images on the background and adhere this piece on an A2 size card base.
stamp the sentiment using versafine onyx black ink.
add some white dots on the carrot some white gel pen and adhere a pink heart.
Here’s a closer look:
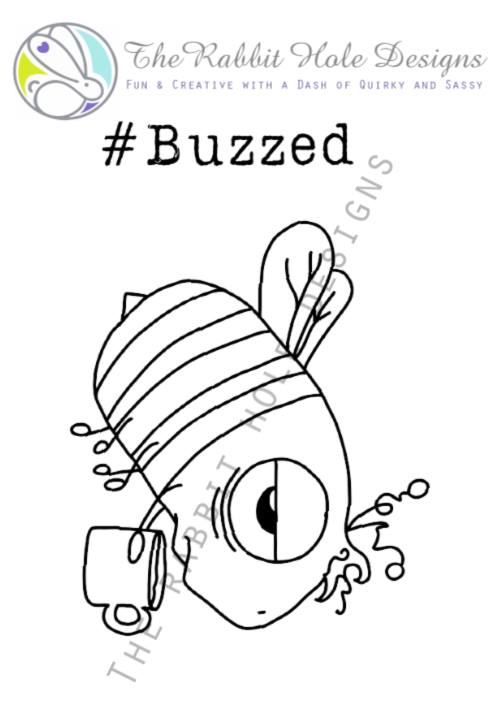
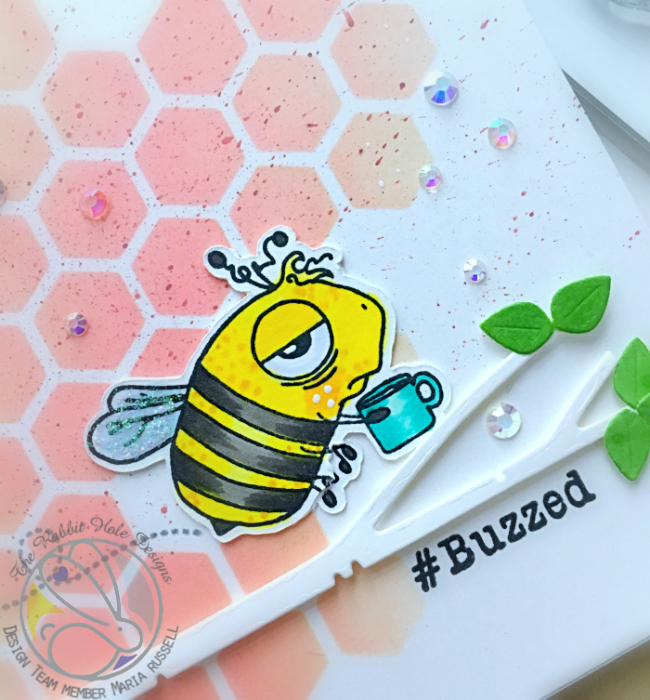
For my second project, I used the Caffeinated Bee:
How I made this card:
stamp the bee image on smooth white card stock and color him in with copic markers (or any coloring medium of your choice.
fussy-cut the image or use scan n cut 2.
Cut an A2 size Bristol smooth white card stock. Ink this up using some distress oxide inks, mini ink blending tool and a hexagon stencil.
smoosh aged mahogany distress oxide ink on an acrylic block and add some water.
use watercolor brush and flick it onto the background to add some some tiny speckles. dab it dry with some paper towel.
adhere this colored background on an A2 size card base.
stamp the sentiment using versafine onyx black ink.
die cut the birch tree branch and leaves using some dies. adhered these pieces on the colored background with some foam tape and liquid adhesive.
adhere the bee on the card.
finish the design by adding some Stardust stickles on the wings and sparkling clear jewels all over the card.
Here’s a closer look:
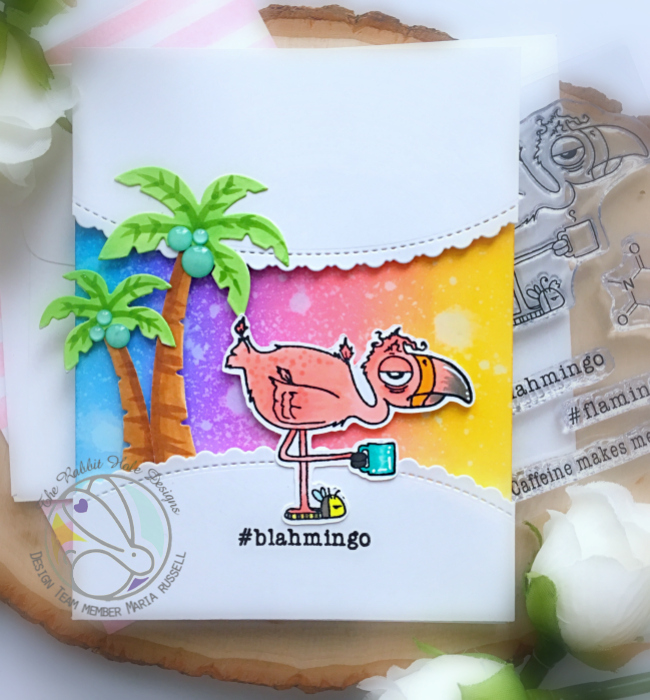
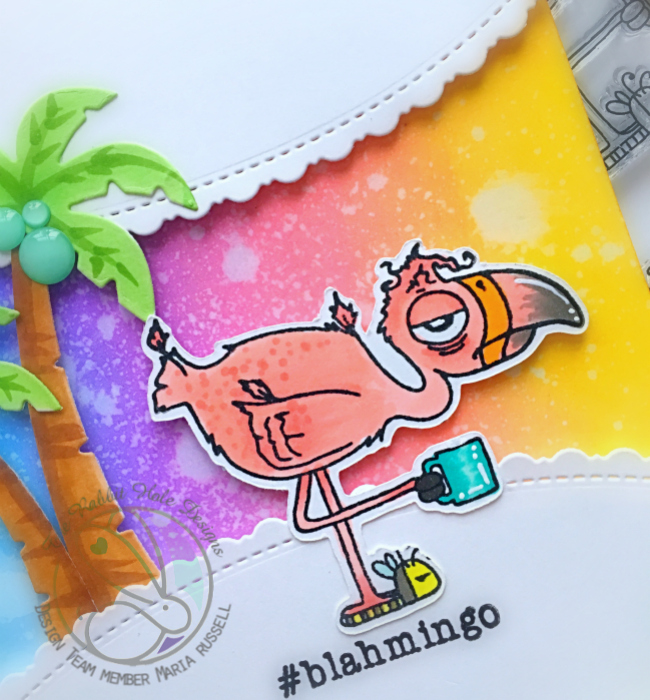
For my third project, I used the Caffeinated Flamingo:
How I made this card:
stamp the image on smooth white card stock and color it in with Copic markers (or any coloring medium of your choice.
fussy-cut the image or use scan n cut machine.
cut an A2 size Bristol smooth white card stock and ink up up the background with mini ink blending tools using distress oxide inks. I used fossilized amber, worn lipstick, seedless preserves and peacock feathers.
adhere this colored background on an A2 size card base.
die-cut two scallop frames using the fancy scalloped border die (see supply list below). adhere these pieces on the card with some foam tape.
die-cut the coconut trees using the dies and adhere these pieces on the card base with some foam and liquid adhesive.
adhere the flamingo on the middle of the card.
stamp the sentiment using versafine onyx black ink.
finish the design by adding some green enamel dots on the coconut trees and add white dot details using some gel pen.
Here’s a closer look:
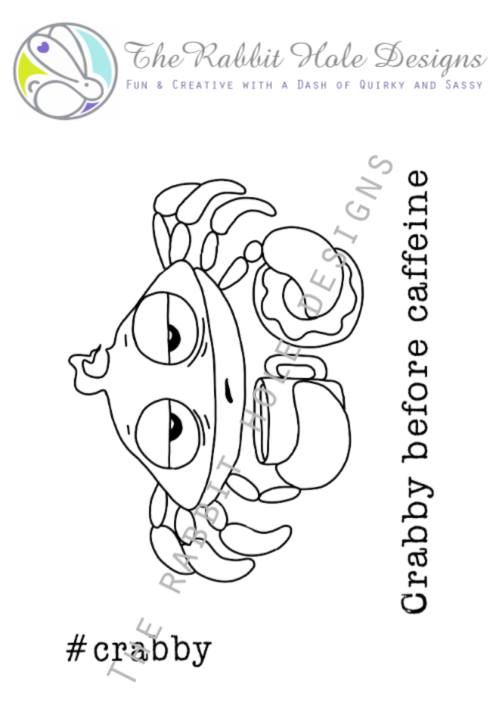
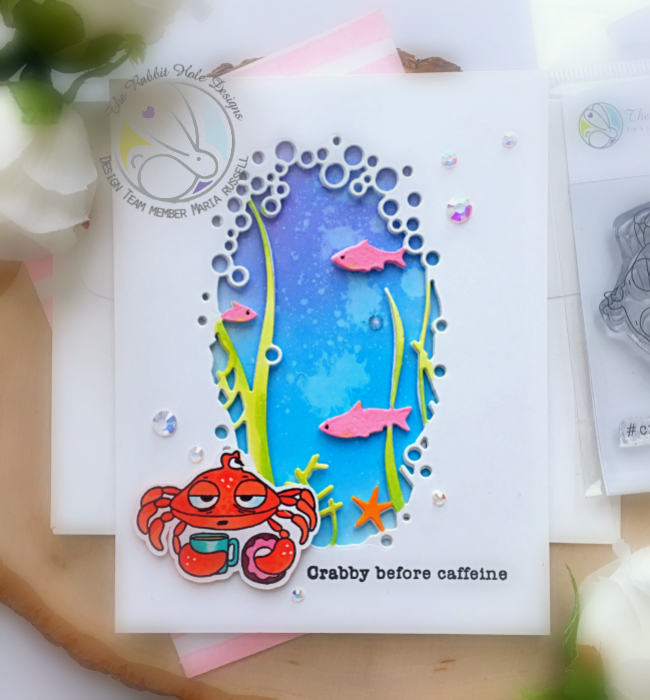
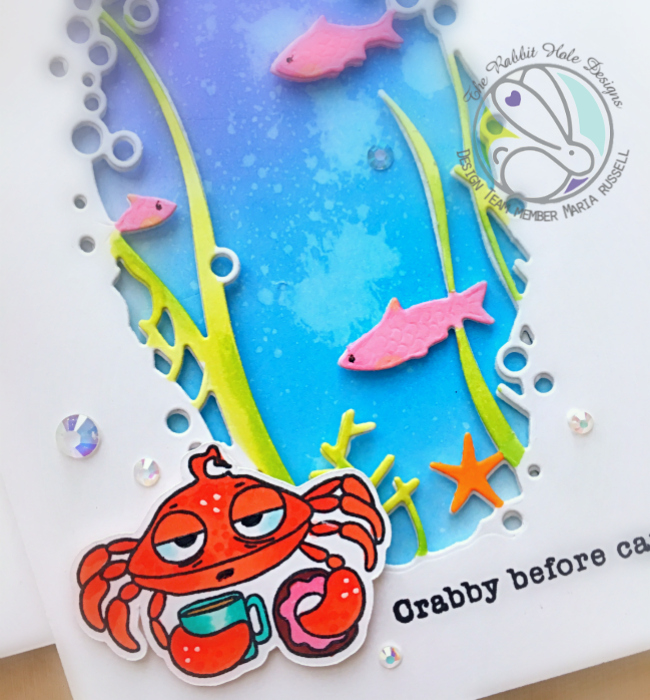
For my last project, I used the Caffeinated Crab:
How I made this card:
stamp the image on smooth white card stock and color it in with Copic markers (or any coloring medium of your choice.
fussy-cut the image or use scan n cut machine.
cut an A2 size Bristol smooth white card stock and ink up up the background with mini ink blending tools using distress oxide inks. I used salty ocean, peacock feathers and seedless preserve.
adhere this colored background on an A2 size card base.
die-cut some white card stock using the “under the sea” collage die. color the seaweeds and fishes with copic markers. use the same collage die to die-cut some fun foam and adhere both with liquid glue.
adhere this piece on the colored background.
adhere the crab with some foam adhesive to give it a little dimension.
stamp the sentiment using versafine onyx black ink.
finish the design by adding some white dot details using white gel pen and adhere some sparkling clear jewels to make it look like bubbles.
Here’s a closer look:
Giveaway
Two (2) winners will be chosen at random for a chance to win a *$10.00 (US funds) Gift Certificate* to The Rabbit Hole Designs. Leave a comment by 11:59 pm PST on 03-03-2019 on all participating blogs, for the entirety of the hop, so make sure to visit each stop and leave a comment. Winner will be announced on The Rabbit Hole Designs blog 03-04-2019
*Gift certificate can be used at any time and will not expire. It is a one-time use certificate and any funds not used will not be carried over for future use.
For more inspiration, updates, and news make sure to check out these places.
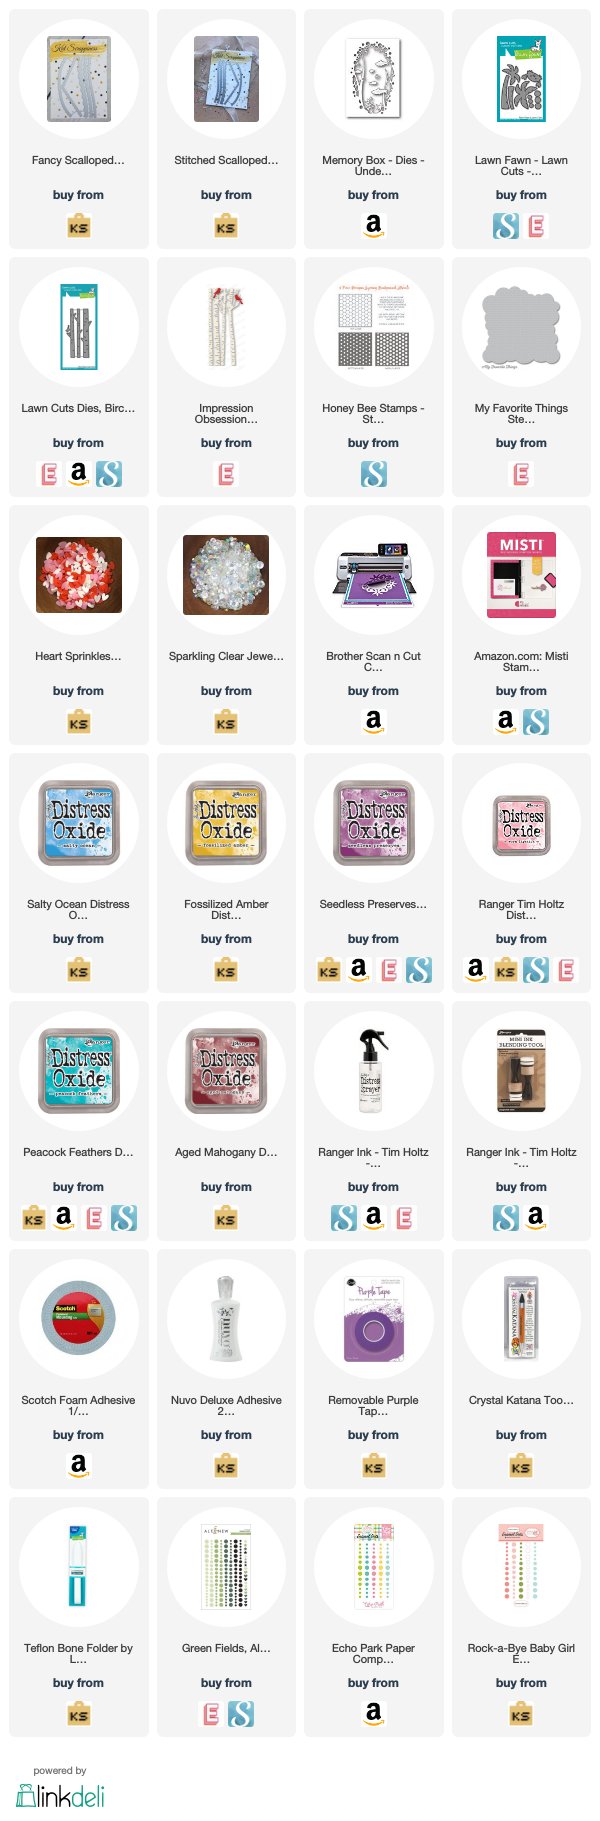
I hope I have given you some great inspiration today. The stamp sets are now available for purchase at The Rabbit Hole Designs website. The rest of the supplies I used are listed and linked below. Have a wonderful day and happy crafting!
It is the third day of the February reveals by Newton’s Nook Designs. Were you able to check out the last two days of the reveal? Which one is your favorite so far? You have a chance to win each stamp set during release week so check out the details I have indicated at the end of this blog post. [Just a little important note: I know some of you had difficulties finding the comments section. If you would like to leave a comment to participate in the giveaway, the “comments section” will only be ever visible when a single post on Word Press is being viewed. Please click on this particular blog post and you will be able to leave a commentbelow. Thank you!]
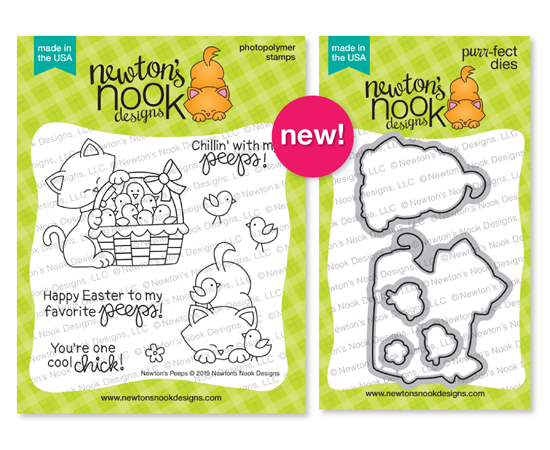
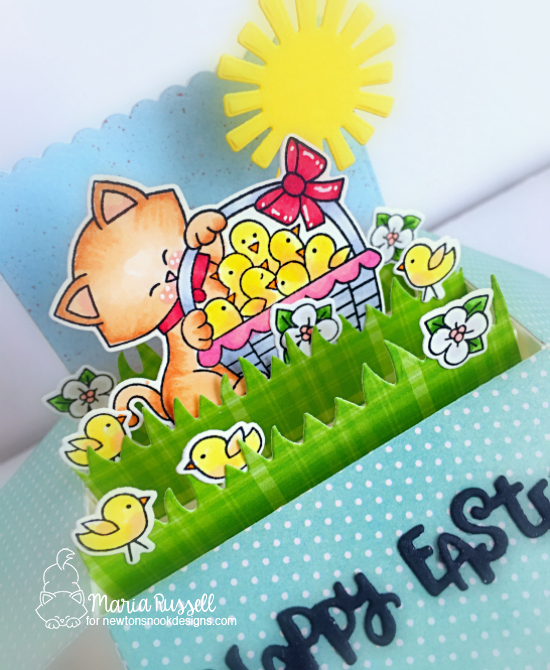
For the third day, the design team is showcasing the Newton’s Peeps stamp set and coordinating dies. Here’s what it looks like:
NEWTON’S PEEPS STAMP SET & DIES
Here’s how I made my box card:
stamp and color the images using the Newton’s Peeps stamp set.
use the coordinating dies to die-cut the images.
use the grassy hills die from the land border die set and die-cut the grass using green patterned papers.
die-cut the box die with card stock and patterned paper.
die-cut the rest of the elements to create the scene.
die-cut the “Happy Easter” from some black card stock. The happy easter die is from the Spring Pile Up die set and we are showcasing them tomorrow.
assemble the card.
I love this scene with Newton and his peeps and I think the colors are so cheerful. This card will be displayed in my studio, for sure. Here’s a closer look:
I adhered the sun with some acetate sheet. The white flowers are from the Woodland Spring stamp set that we showcased yesterday.
Would you like to win the “Newton’s Peeps” Stamp Set? This stamp set will be given away to ONE lucky winner!
Comment on the NND blog and Design Team blogs (see list below)! Thewinner will be chosen at random from the collective reveal posts. Make sure to check out each of their blogs and comment for your chance to win. You will not know which blog has been chosen so the more you comment on the better your chances are of winning! You have until Thursday February 14th at 9pm EST to comment — winners will be announced on the blog post on Friday, February 15th.
Check out all the awesome Design Team Blogs below to enter:
Hello my crafty friends! I hope you all had an amazing weekend! I’m back today with a very special card. It is the start of the Holy Week and this is the perfect time to reflect. Don’t get me wrong; this isn’t the only time to show our faith. I think everyday we open our eyes, we should start thanking the Lord for all the blessings that we have in our lives. I’ve always been religious in my own way. However, I am not going to go into all the details of what I do to show my faith.
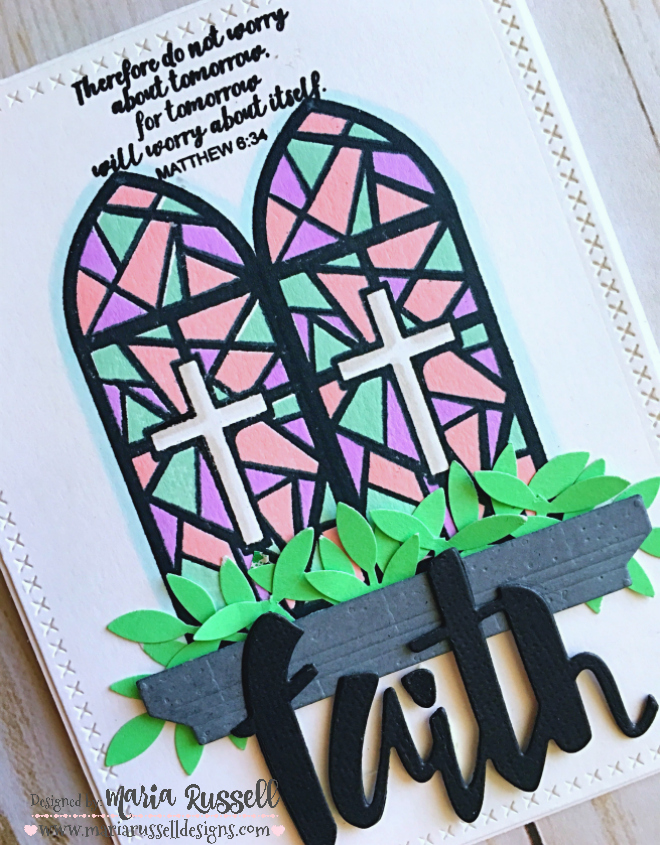
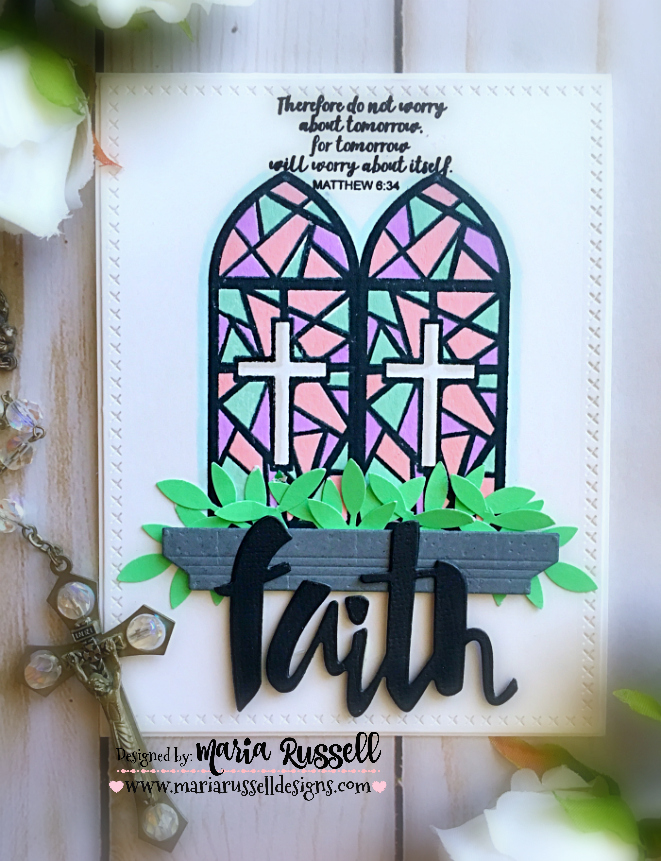
Today’s card features a stamp set that is very new to me. I was searching for a stained glass stamp set because I have this design that I’ve had in my head for a card. I found the perfect stamp set through YouTube. This stamp set is called Layered Stained Glass by Maymay Made It.
I started out by stamping the image on Neenah solar white card stock with Memento Tuxedo Black Ink. Then I stamped the layers using Ballet Slippers, Minty Fresh and Fresh Lavender inks by Lawn Fawn with my Tim Holtz stamp platform.
I used a die from my stash to create the mantelpiece and also used a leaf punch to cut the greenery. To finish my design, I used my “Faith” die from Simon Says Stamp and also stamped the sentiment “Therefore, do not worry about tomorrow, for tomorrow will worry about itself”. Here’s the card:
I absolutely love this scripture! Here’s a little close-up below! Can you see the details on the mantelpiece? I embossed it with my embossing folder to make it look like concrete. I have visited a LOT of churches in Europe and it is spot on!
I wanted to add glossy accents to make it look like real glass so I’ll probably add it later on. For now, here’s the card:
I hope you got inspired today. I have listed and linked the supplies I used below. Have a great holy week!
I started out by die-cutting my bunnies with different colored card stocks. For one of the bunnies, I adhered some googly-eyes and drew the mouth with my black Copic multi-liner pen. I colored the cheeks and the ears with my R00 Copic marker.
I die-cut a piece of Bristol smooth white card stock and inked the background with Tattered Rose and Worn Lipstick distress oxide, using my mini-ink blending tool. I sprayed the background with water to give it a distress look. I used the Fancy Scalloped Stitched Border dies to give my card stock a decorative edge. I die-cut another piece in light blue to layer it together. I adhered this piece onto my card base.
Using a mini action wobbler, I adhered the bunny in the center of the frame.
Here’s my first card:
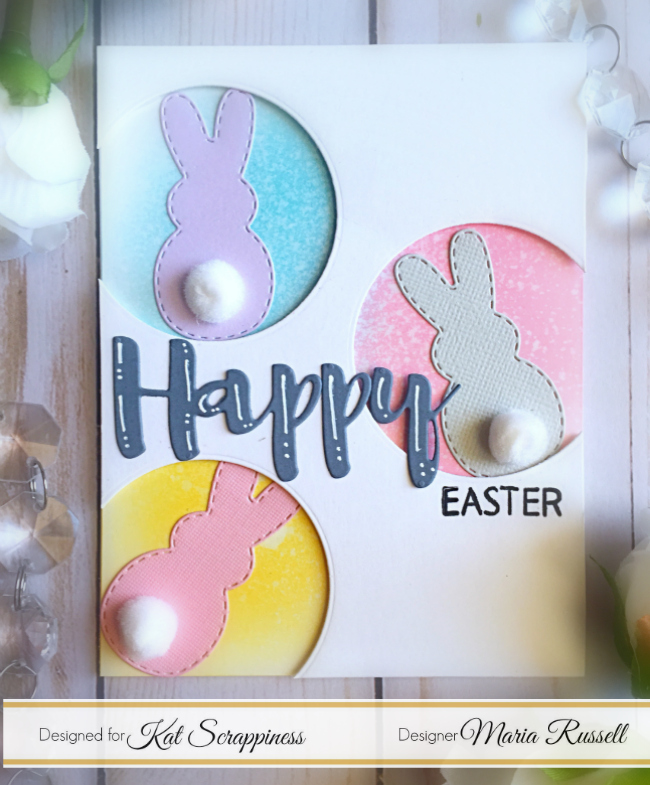
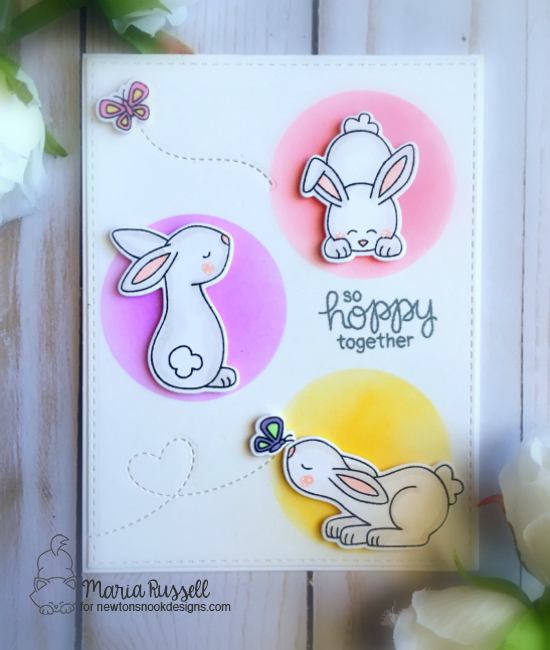
For my second card, I colored another piece of Bristol smooth card stock with my Broken China, Worn Lipstick and Wild Honey distress oxides. I used the Never-Ending circle dies to cut some circles on my foreground. I adhered this piece to my colored background with my foam tape to give it some dimension. I adhered the cute peeps on each circle.
I finished my design by adhering some white pompoms on the bunnies, and added the script sentiment “Happy” from the Brush Script Happy Easter die and stamped the sentiment “EASTER”. I also used my white gel pen to add some details to the script sentiment. Here’s my second card:
Aren’t these cards so much fun? I love how they turned out. I hope you got inspired today. I have also listed and linked the supplies I used below. Have an amazing day and happy crafting!
It is day 2 of the February release by Newton’s Nook Designs and the design team is showcasing the Bitty Bunnies stamp set and coordinating dies. You also have a chance to win each stamp set during release week so check out the details I have indicated at the end of this blog post. [Just a little important note: I know some of you had difficulties finding the comments section. If you would like to leave a comment to participate in the giveaway, the “comments section” will only be ever visible when a single post on Word Press is being viewed. Please click on this particular blog post and you will be able to leave a commentbelow. Thank you for understanding and I apologize for the confusion.]
Here’s what the stamp set and dies look like:
I stamped my images on Neenah solar white card stock and colored them in with my Warm Gray Copic markers (W2 and W00). Since the bunnies looked almost white, I wanted to showcase them by adding some colors on the foreground to make them pop. I use my home-made stencil to color the background with my distress oxide inks (Worn Lipstick, Wilted Violet and Wild Honey).
To finish my design I used some dies from my stash to create the stitching details for the butterflies. Here’s my card:
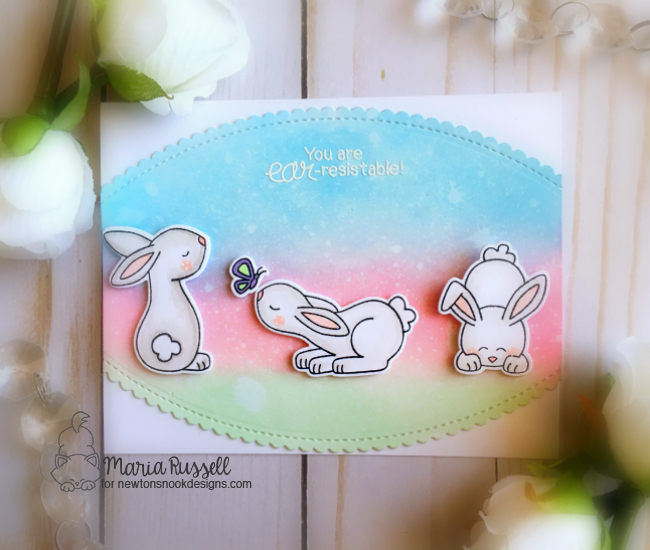
For my second card, I colored my Bristol Smooth white card stock with Broken China, Worn Lipstick and Cracked Pistachio distress oxide inks with my mini-ink blending tool. I adhered the bunnies with some foam tape and heat-embossed my sentiment with my white embossing powder. Here’s the second card:
Would you like to win the “Bitty Bunnies” Stamp Set? This stamp set will be given away to ONE lucky winner!
Here’s how to win:
Comment on the NND blog and Design Team blogs (see list below)! Thewinner will be chosen at random from the collective reveal posts. Make sure to check out each of their blogs and comment for your chance to win. You will not know which blog has been chosen so the more you comment on the better your chances are of winning! You have until Thursday February 15th at 9pm EST to comment — winners will be announced on the blog post on Friday, February 16th.
Check out all the awesome Design Team Blogs below to enter: