You Guac My World with Kat Scrappiness

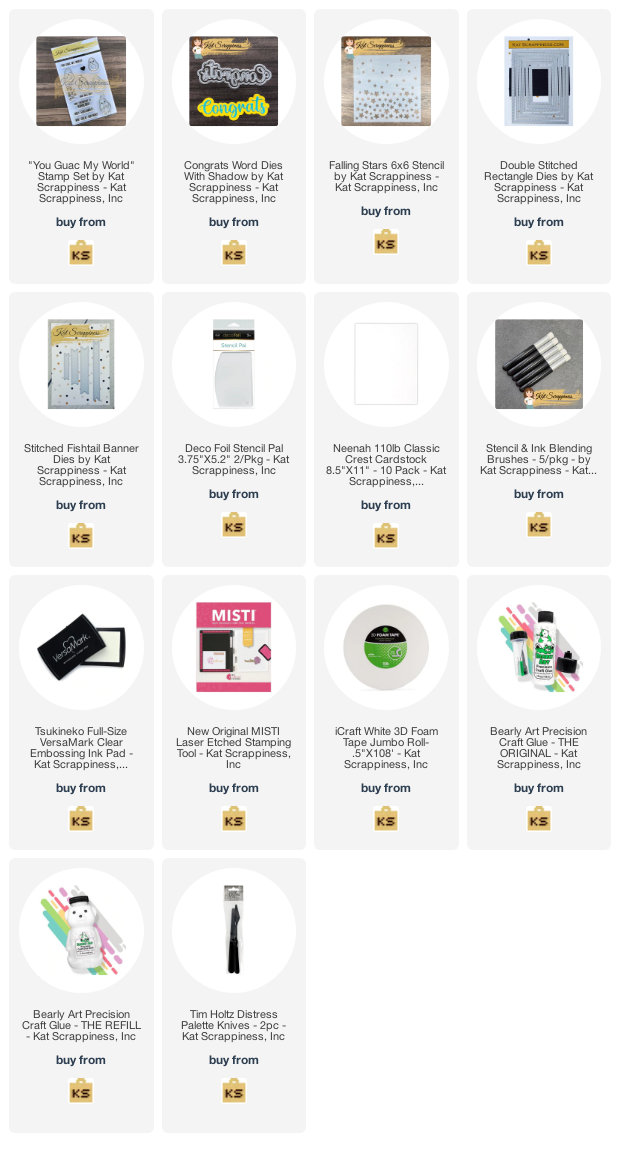
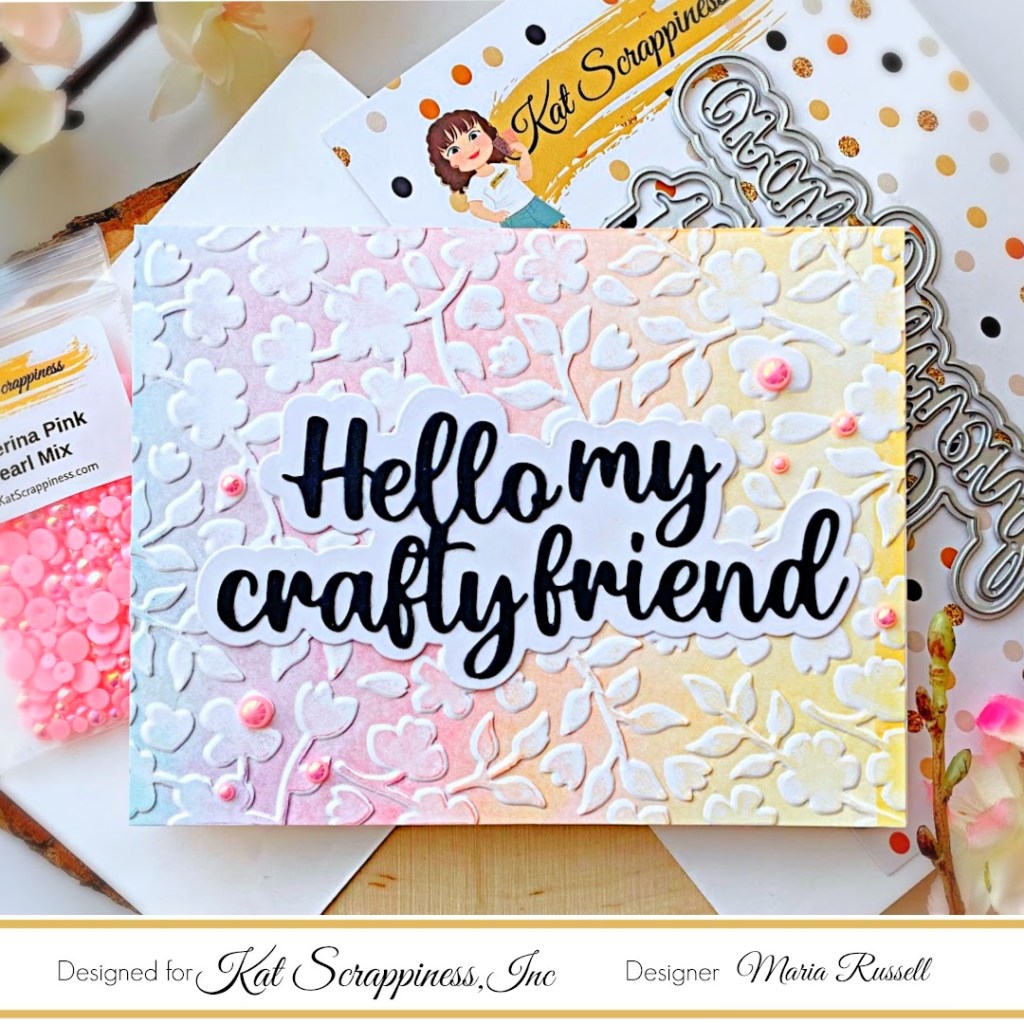
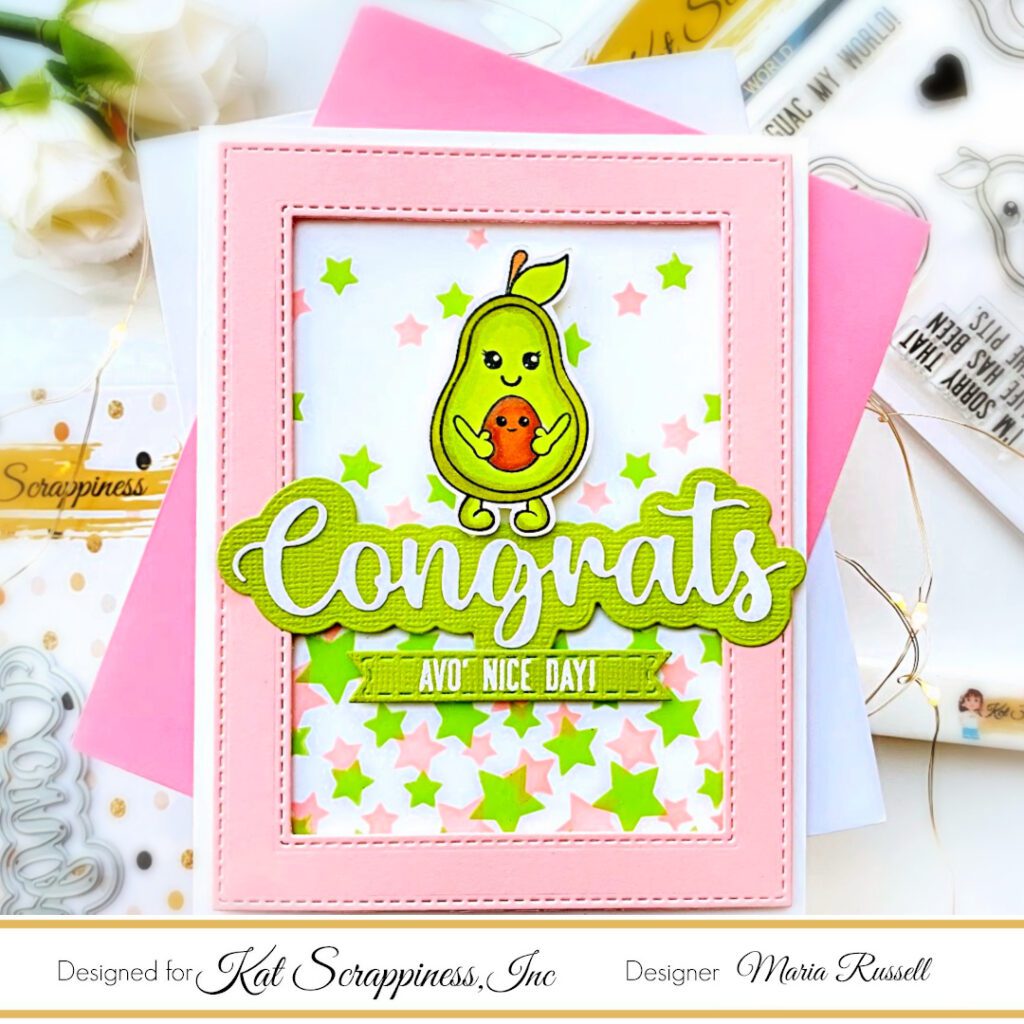
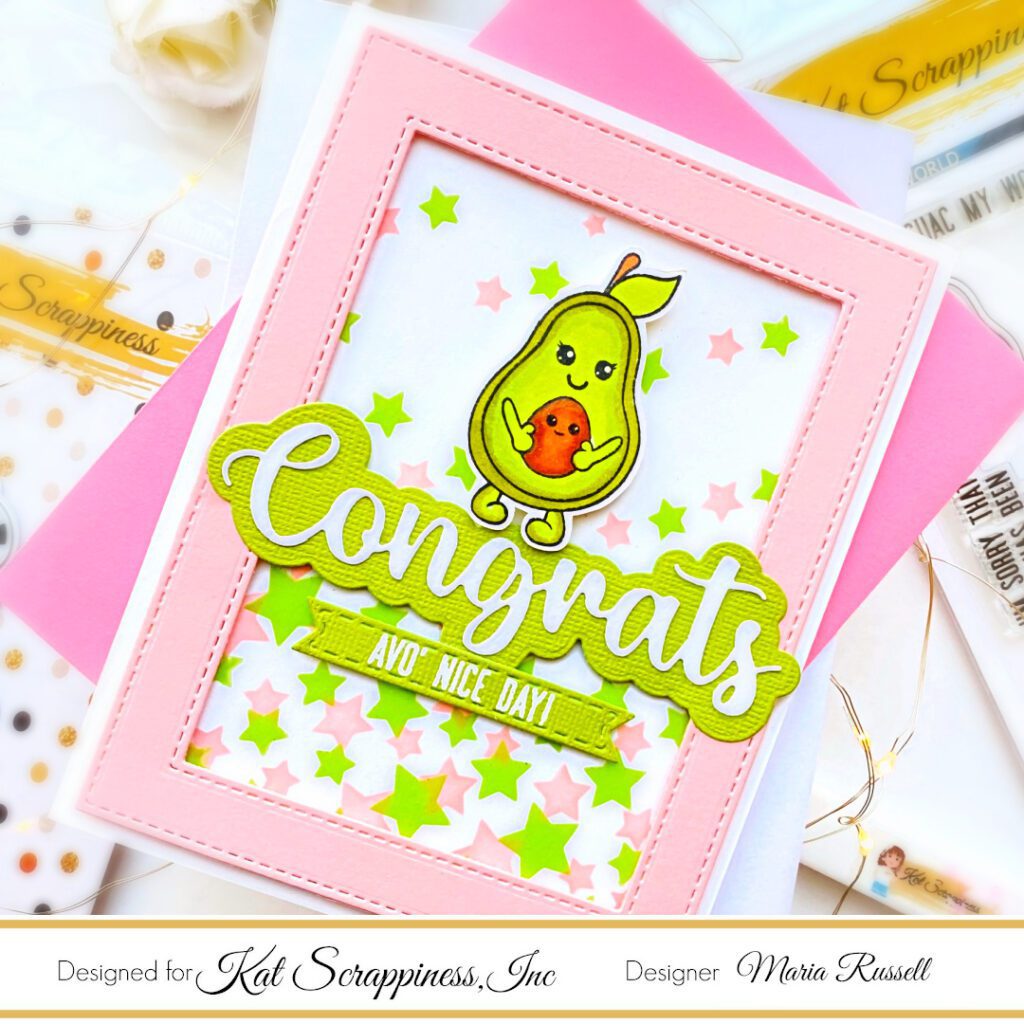
Hello KS fans! I have a fun card to share with you today, showcasing one of my favorite older KS stamp set called You Guac My World, along with the Double Stitched Rectangle Die Set, Congrats Word Die with Shadow, Stencil & Ink Blending Brushes, Fishtail Banner Dies and the Falling Stars 6×6 Stencil.

Here’s how I made this card:

  • Prepare the background by ink-blending a panel of Neenah solar white card stock measuring 4 x 5 1/4 inches, using the Stencil & Ink Blending Brush with the Falling Stars 6×6 Stencil and pink dye ink.
  • Using the same stencil, apply some Lime Chroma Glaze and Stencil Pal to spread the paste all over the background. Set this aside to let it dry for about 2 hours.
  • Stamp the image on some Neenah solar white card stock and color the images in with alcohol markers. Use Brother Scan N Cut machine or precision snips to cut the image out.
  • Once the background panel is dry, adhere the same on some A2-size notecard.
  • Die-cut the pink frame using the Double Stitched Rectangle Die Set on some pink card stock.
  • Foam-mount the frame on the card for added dimension.
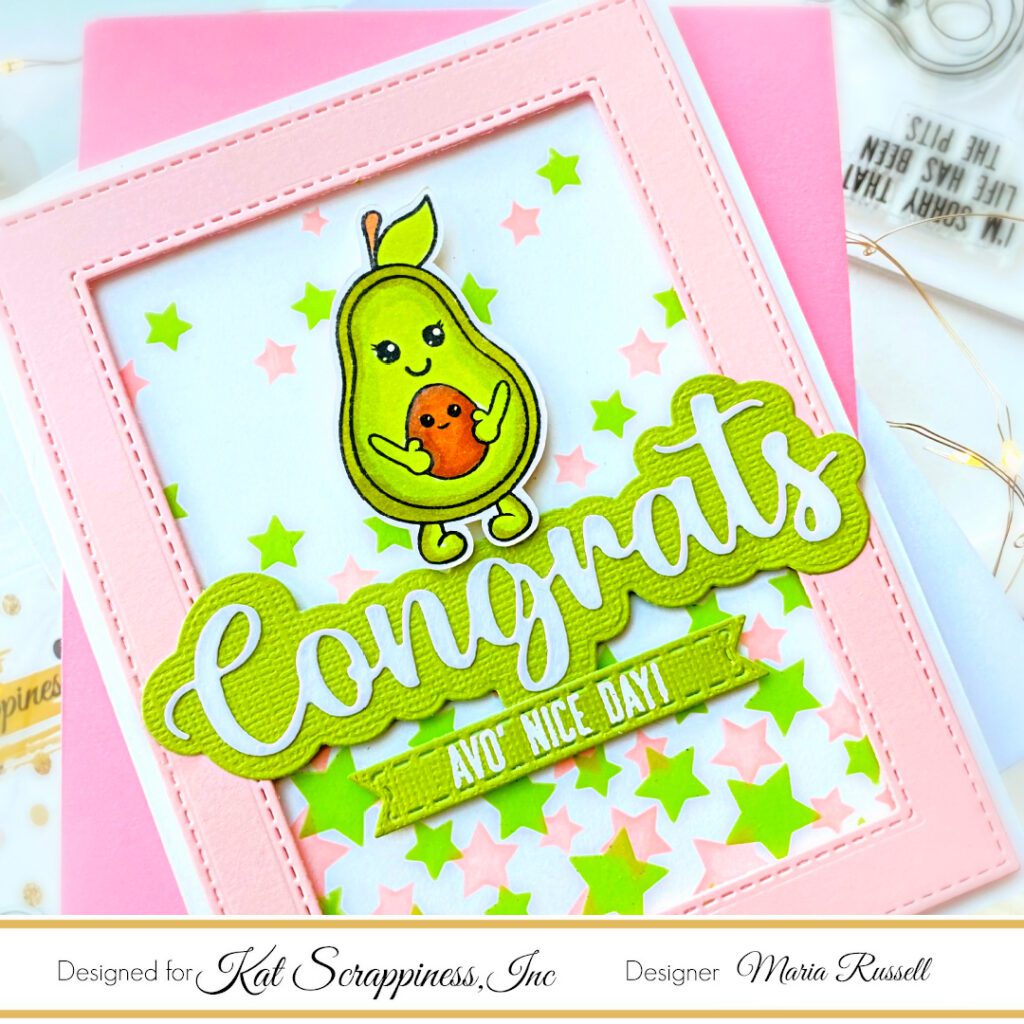
  • Die cut the word “Congrats” on some Apple Green and White card stock using the Congrats Word Die with Shadow. Adhere them together with liquid glue.
  • Foam-mount the Congrats die-cut onto the card so that it is the same height with the frame.
  • Adhere the focal image using foam adhesive.
  • Add glossy accents to the Avocado image.
  • Die-cut some Apple Green Card Stock using the smallest die from the Fishtail Banner Die Set. Stamp the sentiment on this piece with Versamark ink and heat-set with heating tool.
  • Foam-mount the sentiment strip on the card to finish the design.

I hope you like this simple card today and got inspired. Below, you will find links to the supplies used to create this project(s). Where available, I use compensated affiliate links at no extra cost to you. Your support helps me to keep bringing you new projects and inspiration. Thank you for stopping by, and have an amazing day!

———–SUPPLIES———-

Kat Scrappiness May Release & Giveaway

Hello my crafty friends! It has been awhile since I posted my projects for Kat Scrappiness here. Since I am the Design Team Manager, I do most of the product releases on the Kat Scrappiness Blog. However, they have a HUGE release today and it is AMAZING! I thought it deserved to be showcased here as well because some of you may not have heard of Kat Scrappiness (if you are a new follower!).

The first project below features the Slimline Waterside Die. The die cuts out all the pieces you need to paper piece your very own waterside scene!  Make it day or night, a sunset scene perhaps?!  Customize the colors of all the different pieces using colored card stock, ink blending, or any other  coloring medium you can think of!  This die has unlimited potential to create the most beautiful scenes. Take a look:

I used the Sunscape Stencil to create the sunny scene behind the cute Quokka hanging by the beach. I ink-blended the water and the sand on some Bristol smooth white card stock with distress oxide inks, to create a realistic look and added the ripples with my white gel pen. I used some dies that I had from my collection to add the palm trees.

For my second project below, I am showcasing the Sending Paper Hugs Word Die with Shadow. Like most Kat Scrappiness dies, they cut like butter! One pass on the die-cutting machine is all it takes!

This next project features the Tag Essentials Die Set. This die set allows you to create an unlimited number of unique tags, including shaker tags, gift tags, or even bookmarks.  Switch up the top and bottoms and mix and match all of the other included elements to make your tag unique!

I created the Tag using the components from the die set and used the Quokka stamp set with the new sprinkles available at the shop. Isn’t it cute?

My next sample is a mini Slimline card. I am featuring the “Congrats” Word Die with shadow. You can use the sentiment with or without the shadow.  This die measures approximately 4″ x 1.25″.

The background was made by ink-blending the colors with distress oxide ink. I used my embossing folder to run it through my die-cutting machine for added dimension and finishing the design by adding the new Gold Pearls! I really LOVE how this one turned out:

For my fifth and final sample, I am showcasing the “Hello My Crafty Friend” Word Die. This great sentiment die has a 1/4″ shadow.  You can use the sentiment with or without the shadow.  This die measures approximately 4.75″ x 2.25″.

I did the same technique as the card above but reversed the colors on the word die, and finished the design by adding some Ballerina Pink Pearl Mix.

Which one is your favorite? I really can’t even pick one! The May 2021 products are AMAZING! The supplies I use are listed and linked below! Grab your favorites before they sell out!

Here’s the BEST part! You can WIN the entire May 2021 release by clicking on the Rafflecopter link. Have an amazing day!

https://www.rafflecopter.com/rafl/display/c7e745433/?fbclid=IwAR0po46UBVVstwRBzCLlqyO0__ucEsx-M4uxjmsM8gYzNpLkDKxD0mKT1vc

————–SUPPLIES———-