Newtons Nook Designs 5 Year Anniversary Blog Hop

NNDJuly18_5yr


It’s Newton’s Nook Designs 5-year anniversary and we are celebrating with a HUGE bog hop.  Five (5) winners will be selected to win a $25 Store Credit so please read through til the end to find out more info.  [Just a little important note:  I know some of you had difficulties finding the comments section.  If you would like to leave a comment to participate in the giveaway, the “comments section” will only be ever visible when a single post on Word Press is being viewed. Please click on this particular blog post and you will be able to leave a comment below.  Thank you!]  

NND2018_SALE_JulyMiniStamps_550


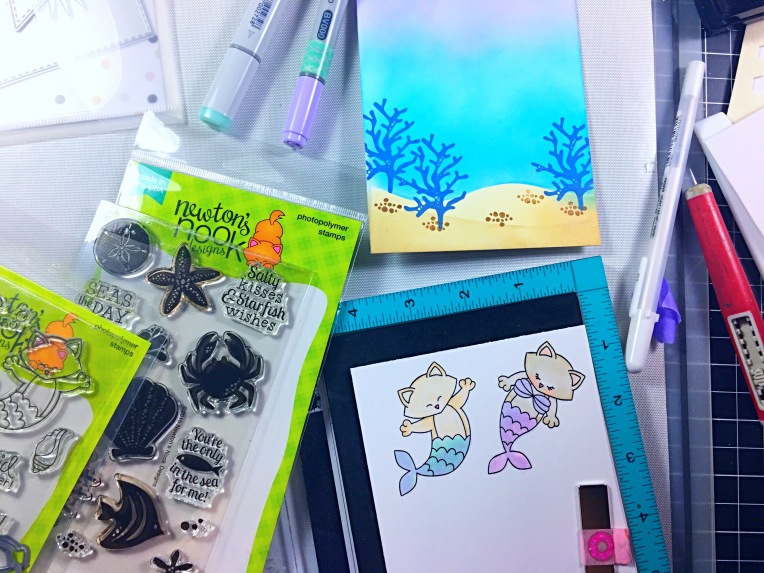
For my one-layer card, I am showcasing the Purr-maid Newton stamp set.  There’s nothing cuter than these cat merman and mermaid so I wanted to use them again.  I also combined my project with the Tranquil Tides stamp set.


I started out by inking up some Bristol smooth white card stock with distress oxide inks and my mini ink blending tools.  For the sand, I used a combination of Antique Linen and Vintage Photo.  For the sea, I used Mermaid Lagoon, Peacock Feathers and Shaded Lilac.  I sprayed water on my colored background and dabbed it with a paper towel.


I stamped the coral images with Faded Jeans distress oxide.  I love this effect because it made it look more realistic!


I stamped the images on some Neenah solar white card stock and colored them in with my Copic markers.  I have coordinating dies for these images but I chose to fuzzy-cut them this time.


IMG_9088


I adhered my images onto the foreground and stamped little bubbles here and there.  I also stamped other images to complete my scene and finished my design by adding glossy accents to the bubbles, and stamped my sentiment.   Here’s my card:


NND5YrCelebHop


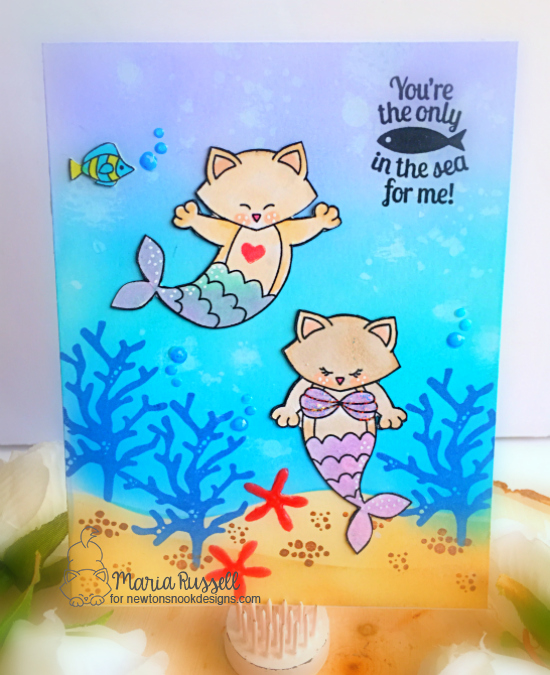
I love this sentiment so much and those mermaid/merman images are so cute!  Here’s a little close-up:


NND5YrCelebHop1A


Oh, I also added some stardust stickles to the mermaid seashell bra to give it a whimsical look.


NND5YrCelebHop1B


I hope you like my card today and got inspired.  Celebrate with us and enter to win!


To celebrate 5 years, Newton’s Nook Designs is giving away a $25 store credit to spend in their online shop to 5 lucky winners!

Here’s how to win:

Comment on the NND Design Team and Special Guest blogs (see list below)! The winner will be chosen at random from the collective blog hop posts. Make sure to check out each of their blogs and comment for your chance to win. You will not know which blog has been chosen so the more you comment on the better your chances are of winning! You have until Sunday, July 22 at 9pm EST to comment. Winners will be announced on NND blog post on Monday, July 23 and will need to contact us to claim their prize so make sure you check back to see if you’ve won!

Special Guests:

Jess Gerstner

Stephanie Muzzulin

Kimberly Rendino

Jenn Shurkus

Newton’s Nook Design Team:

Newton’s Nook Designs

Amanda Bodine

Holly Endress

Ellen Haxelmans

Larissa Heskett

Samantha Mann

Juliana Michaels

Zsofia Molnar

Naki Rager

Maria Russell

Tatiana Trafimovich

Kat Scrappiness Blog Hop – Lola the Giraffe

Thank you so much for visiting my blog on today’s 1st Celebration Blog hop for www.katscrappiness.com,  Today is so exciting! Not only will you be inspired by the designers projects along this hop, there is a lot of fantastic prizes to be won! You should have arrived here from Taniesa’s Blog, but if I am your first stop you will find the full link up list at the end of this post on www.katscrappinessblog.com.
katscrapbloghop
We are so excited to announce the addition of our first ever exclusive clear stamp sets! One that is perfect for interactive papercraft designs and one that is an adorable Giraffe! You will also catch a glimpse of some brand new dies and sequin embellishment mixes that are also exclusives. Check out all of the exclusive products at www.katscrappiness.com.  Here are the two stamp sets:
I apologize that I will not have a step by step instruction on how I made the card (for now). I am planning to recreate this card with a video tutorial once I get back from my trip in Toronto.  I am currently still going through my medical issue and I am in Toronto  getting physiotherapy.
Here’s the front of the card.

KatScrapLola1


Here’s what it looks like when you open the shaker card:


KatScrapLola2

I hope you have been inspired by my project.  In order for your chance to win one of the brand new stamp sets or one of the three grand prizes you must comment on all the designer’s blogs and the Kat Scrappiness blog. That is over 10 chances to win! Winners will announced at 12 noon pst on 6/25/17, you have until 12:00 midnight pst Saturday 6/24/17 to enter!
Next person in the hop is Cheryl. Hop on over and see what’s next! If you have missed any designer’s posts you can find the links below. Thank you for participating in the very first blog hop for www.katscrappiness.com
The full blog hop line up is:
Maria  ← you are here!
Cheryl  ← Click here to the next person on the hop!

Coffee Cards with Xyron and Maya Road

xyronmayaroadgraphic

Hello crafters and stampers! Today the Xyron design team is teaming up with the amazing Maya Road design team. If you haven’t checked the past posts by my fellow DT members, they have made some wonderful projects that I was “ooh-ing” and “ahh-ing” the last few days.

I am also happy to share that everyday during the blog hop Xyron will be giving away a “sparkly” X sticker maker. Who doesn’t love a sticker maker, right? And best of all it’s sparkly!!!! All you have to do is leave a comment on the Maya Road projects that Xyron had shared on the Facebook page https://www.facebook.com/xyroninc during the hop and Xyron will announce the winner the following morning.

xstickermaker

Maya Road is also giving away a $15 gift certificate to their shop. Here’s a link to the Maya Road’s blog for full details: http://www.mayaroad.typepad.com

For my projects, I am showcasing the Enjoy Coffee Die bundle and I made I gift tag and two cards. The tag and the first card did not have any stamping since the die bundle is full of cute dies. I die-cut them all with my Neenah 100 lb. card stock and my patterned paper.

For the gift tag, I wanted to create a shaker tag and decided to use my exacto-knife to cut out the middle portion of the die-cut, adhered the acetate with my Xyron mega runner adhesive, added the foam and used my espresso mix sequins for my shaker elements from Kat Scrappiness.  It turned out really cute!

XyronMayaRoad3

For my first card, I wanted it to look like the coffee is sitting on top of the table with the little spoon. I used a die from my stash to die-cut the white piece twice. I then used my embossing folder to emboss the first piece, making it look like a lacy, tablecloth. I also used my Xyron creative station to make my own foam adhesive with fun foam. I wanted to give the “tablecloth” a little dimension. I then used my Xyron mega tape runner to adhere everything to my front panel. Here are the step-by-step photos:

IMG_4609

xyronmayaroad1

For my second card, I used some cute patterned paper and a stamp from my stash. To finish off the design, I used some vellum to die-cut my leafy swirls. I also used my X sticker maker to adhere a vellum bow to the spoon. The sticker maker is the best tool to have when adhering vellum on your projects.  This card will have a Starbuck’s gift card inside.

Here is the second card:

xyronmayaroad2

I hope you like my projects! I have also listed and linked the supplies I have used. Have an amazing day!

————SUPPLIES———–

(Some affiliate links may have been used AT NO ADDITIONAL COST TO YOU)