Thinking of You with LDRS Creative

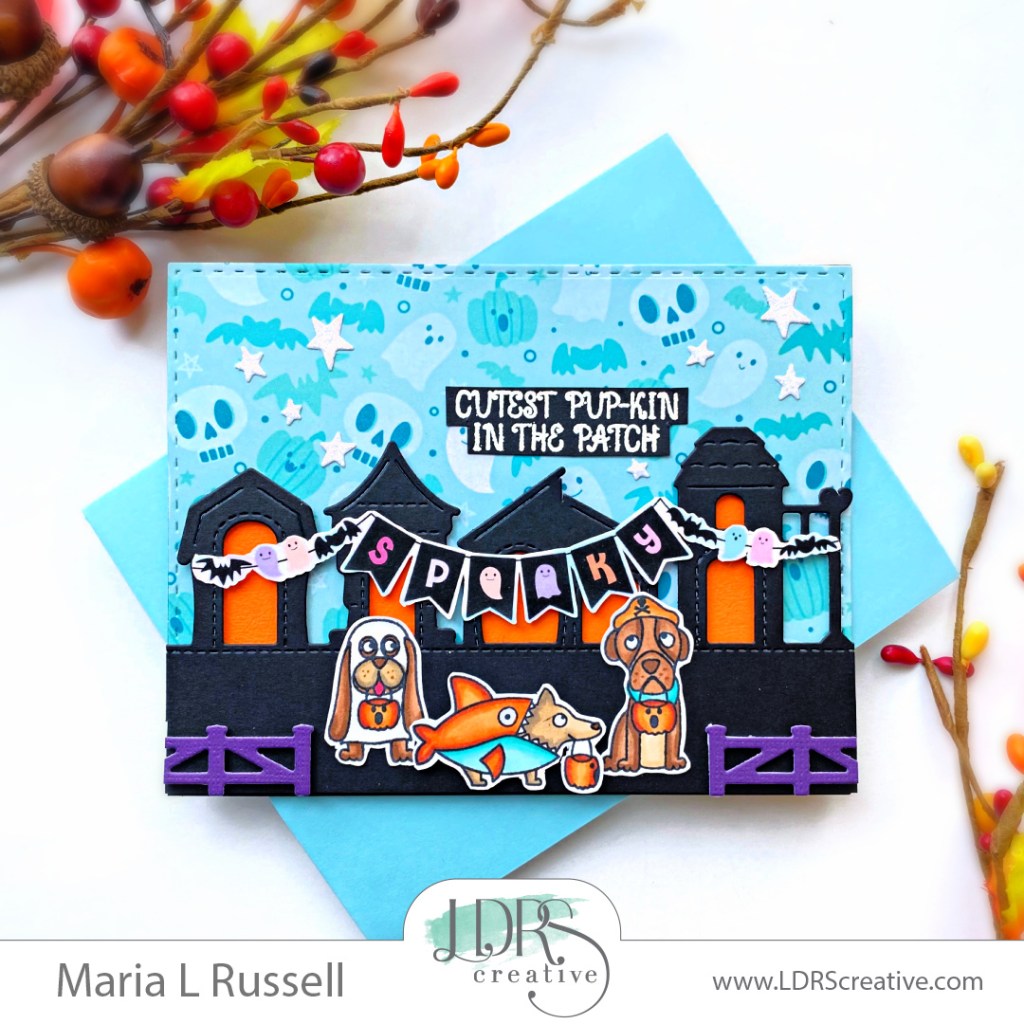
I have been enjoying creating clean and simple cards and today’s project is super easy, you can create this in less than 30 minutes!

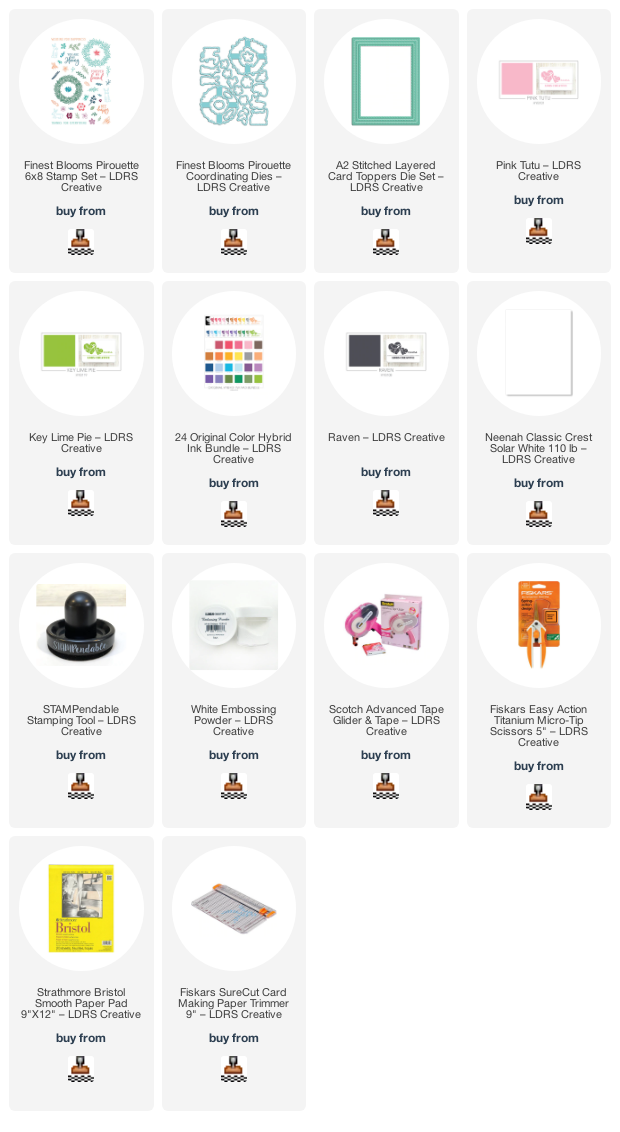
For today’s card, I am showcasing the Finest Blooms Pirouette Stamp Set and Finest Blooms Pirouette Coordinating Dies, along with the A2 Stitched Layered Card Toppers Die Set with the following Hybrid Inks –> Pink TutuKey Lime Pie and Raven.

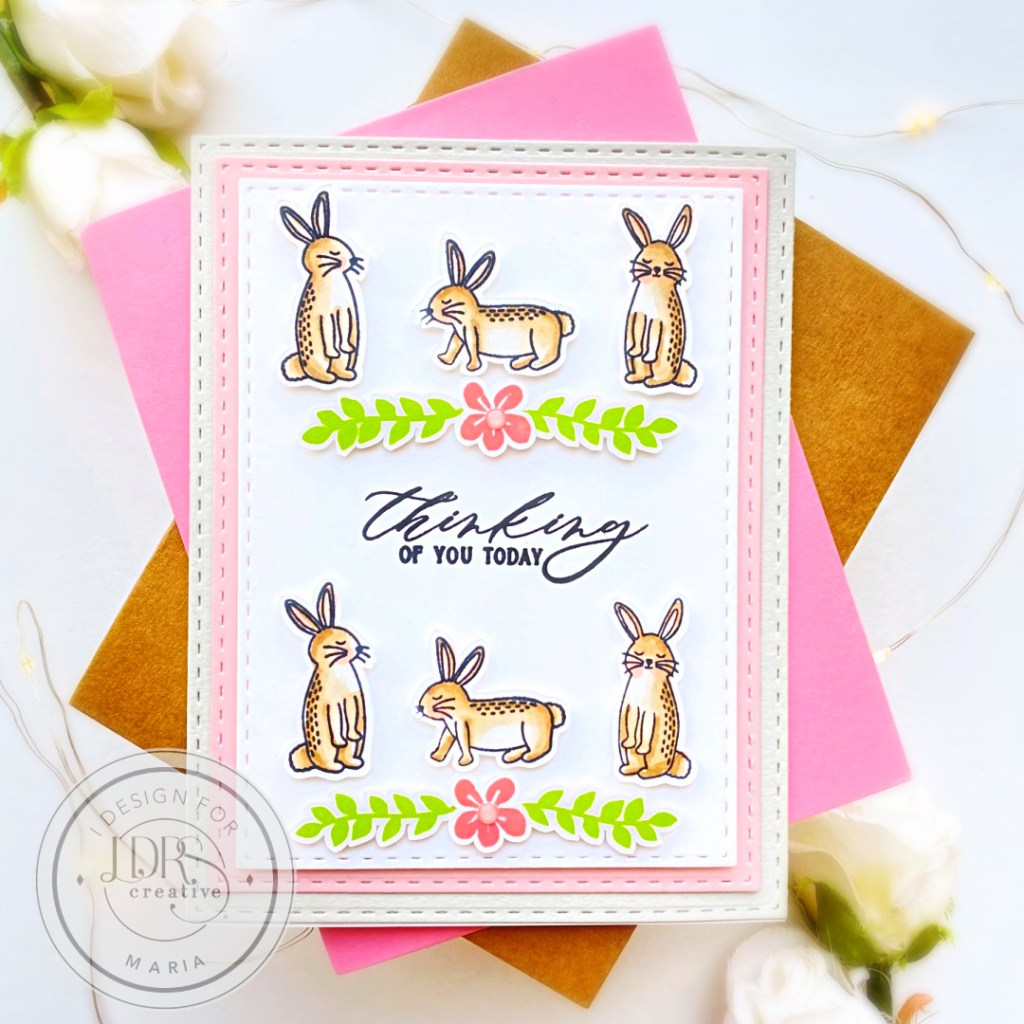
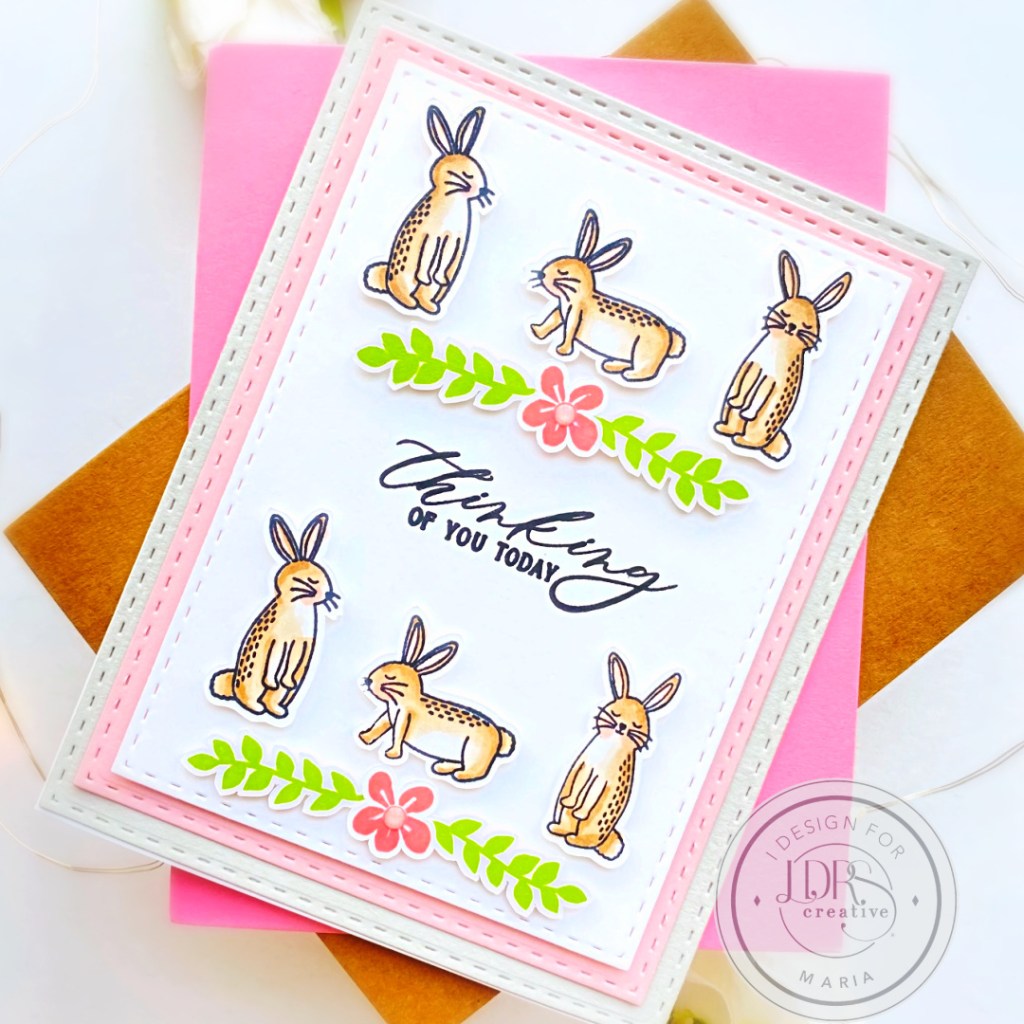
I started by die-cutting some Beige, Pink and White card stock using the A2 Stitched Layered Card Toppers Die Set.  I adhered the layers on an A2-size notecard, and foam-mounted the white card stock for added dimension.

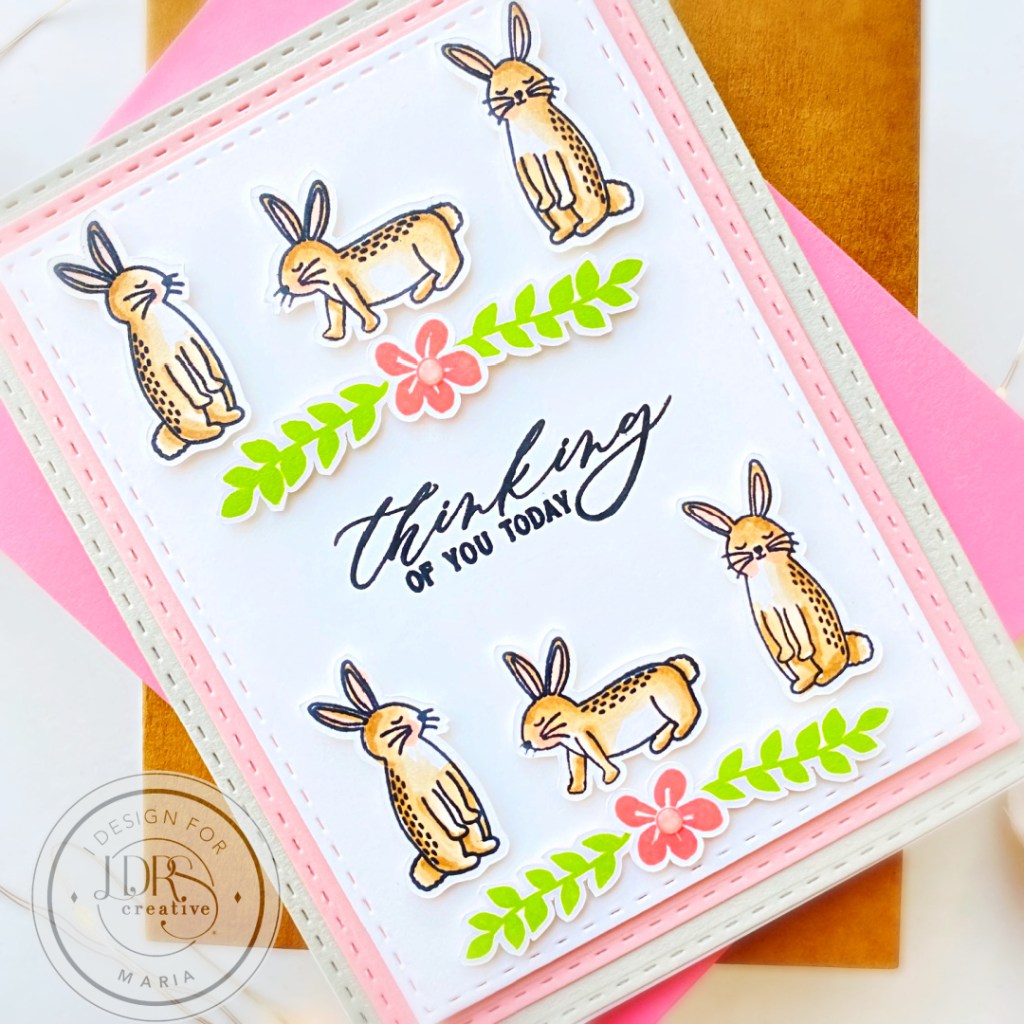
Next, I stamped the images with Raven Hybrid Ink on some Neenah Solar White Card Stock and colored the images in with alcohol markers.  I used the Finest Blooms Pirouette Coordinating Dies to cut them all out.  The leaves and flowers were stamped using Pink Tutu and Key Lime Pie Hybrid Inks.

I finished my design by foam-mounting the images on the card for added dimension and stamping the sentiment with Raven Hybrid ink.  Here’s another look:

I hope you like my project today and got inspired!  Below, you will find links to the supplies used to create this project(s). Where available, I use compensated affiliate links at no extra cost to you. Your support helps me to keep bringing you new projects and inspiration. Thank you for stopping by, and have an amazing day!

———SUPPLIES———

Cutest Pup-Kin in the Patch with LDRS Creative

Hello my crafty friends!  I am so happy to be on the LDRS Creative Inspiration Blog!  I’m back today sharing yet another cute but “spooky” card, showcasing the Trick or Treat Stamp Set and coordinating dies, along with (this is one of my all-time favorite paper pack) the Trick or Treat 6×6 Paper PackA2 Stitched Layered Card ToppersIn the Doghouse Border Die, and the Country Fence – Pocket Die

Here’s what you need to create this card:

Now that we have all of the components, we are ready to assemble the card.  

  • Adhere the pattern paper on an A2-size black note card.
  • Foam-mount the In the Doghouse Border die-cut for added dimension.
  • Adhere the colored images on the foreground with liquid glue.
  • Add the Picket Fence on both sides of the card with foam adhesive.  Make sure you are using enough foam adhesive for added stability.
  • Adhere the banner on the doghouses with liquid glue.
  • Use tape runner to adhere the sentiment.
  • Finish the design by adding some glittered star stickers.

Here’s another look at this cute Halloween card!  Don’t you just LOVE these puppies?! 

 I just love mixing and matching products from LDRS Creative to create some cute scenes! The supplies I used are listed and linked below.  Thanks for stopping by and have an amazing day!

————SUPPLIES———- 

2 Welcome Baby Cards with LDRS Creative

Hello LDRS fans! I am back on the blog with you today to share two Welcome Baby cards, showcasing the Hoppy Egg Hunt stamp set and coordinating dies, along with the Sophie Uppercase Die SetSophie Lowercase Die SetA2 Stitched Layered Card Toppers DieSlim Line Pocket Basket Weave Pocket Die SetPastel Dreams 6×6 Paper Pack, and Farmer’s Market 6×6 paper pack.  Here’s what they look like:
I started by stamping my images on some Neenah Solar White card stock with Raven Hybrid Ink.   I colored them in with alcohol markers.  I used the coordinating dies to die-cut the images.  Next, I die-cut two patterned papers from the 6×6 Pastel Dreams and 6×6 Farmer’s Market Paper Packs using the biggest die from the A2 Stitched Layered Card Toppers Die.  Both patterned papers kind of matched the alcohol markers that I used to color my focal images. I adhered both patterned papers to an A2 size notecard.
I used the scallop die from the Slim Line Pocket Basket Weave Pocket Die Set to die-cut two pieces and used the inner die with my embossing mat to emboss the middle.  I wanted to have more texture to this background without overwhelming the whole card design.  I adhered both pieces to my card using my ATG Tape Runner.  I also adhered the images on both cards.
I die-cut the word “Baby” twice using the Sophie Uppercase Die Set and Sophie Lowercase Die Set.  I used the same markers to color the die-cuts to match the little basket.  I also used a darker marker to highlight the bottom of the letters for added texture.  I adhered the letters on the card with liquid glue.
I finished my design by stamping the sentiment with Watermark Ink on some black card stock.  I sprinkled some White Embossing Powder on this and used my heating tool to heat-set the sentiment.  I fussy-cut the sentiment using my precision snips and adhered to the card using my ATG Tape Runner.  Here’s another look at both baby cards:
I hope you like my cards today.  The supplies I use are listed and linked below.  Thanks for stopping by today and happy crafting!
———-SUPPLIES———-


You’re One of a Kind with LDRS Creative

Hello my crafty friends!  Maria Russell with you today on the LDRS blog with a simple “Valentine-themed” card showcasing one of my favorite stamp sets from the shop.  I am featuring the A2 Stitched Layered Card Toppers die setUp & Away stamp set and dies, along with the Rainy Day StencilAnytime Stack stamp setSentiment Stack Coordinating Die and In the Breeze die

Since Valentine’s Day is fast-approaching, I thought I’d get a head start and create some simple cards that you can easily mass-produce to send to friends.  I started by stamping my images on some Neenah Classic Crest Solar White Card Stock with Raven Hybrid Ink and colored the images in with alcohol markers.  I used the Up & Away die set to die-cut the images.

Next, I cut a panel of Neenah Classic Crest Solar White Card Stock using the A2 Stitched Layered Card Toppers die set.  I started to create my outdoor scene with the Rainy Day Stencil, a blending brush and Pistachios-A-Plenty Hybrid Ink for the grass.  The pink clouds were created with the same Rainy Day Stencil, blending brush and Soft Kisses Hybrid Ink.  I don’t know about you but this color-combo just screams “valentine’s” to me!

I used the In the Breeze die for added texture and adhered this panel on an A2-size card base.

Next, I adhered the images on the card with some liquid glue.  I finished my design by adding the sentiment “You’re One of a Kind“, that was earlier stamped on some black card stock using the Anytime Stack stamp set and Sentiment Stack Coordinating Die.  These stamp-and-die combo is one of my favorites because you can stamp the sentiments and die-cut a bunch with just one pass on your die-cutting machine.  LDRS has a few of these awesome stamps so check them all out at the shop and grab your favorites.  

I really love how this card turned out, don’t you?!  The supplies I use are listed and linked below.  Thanks so much for stopping by!

———SUPPLIES———