Be a Macaron In A Cookie-Cutter World!

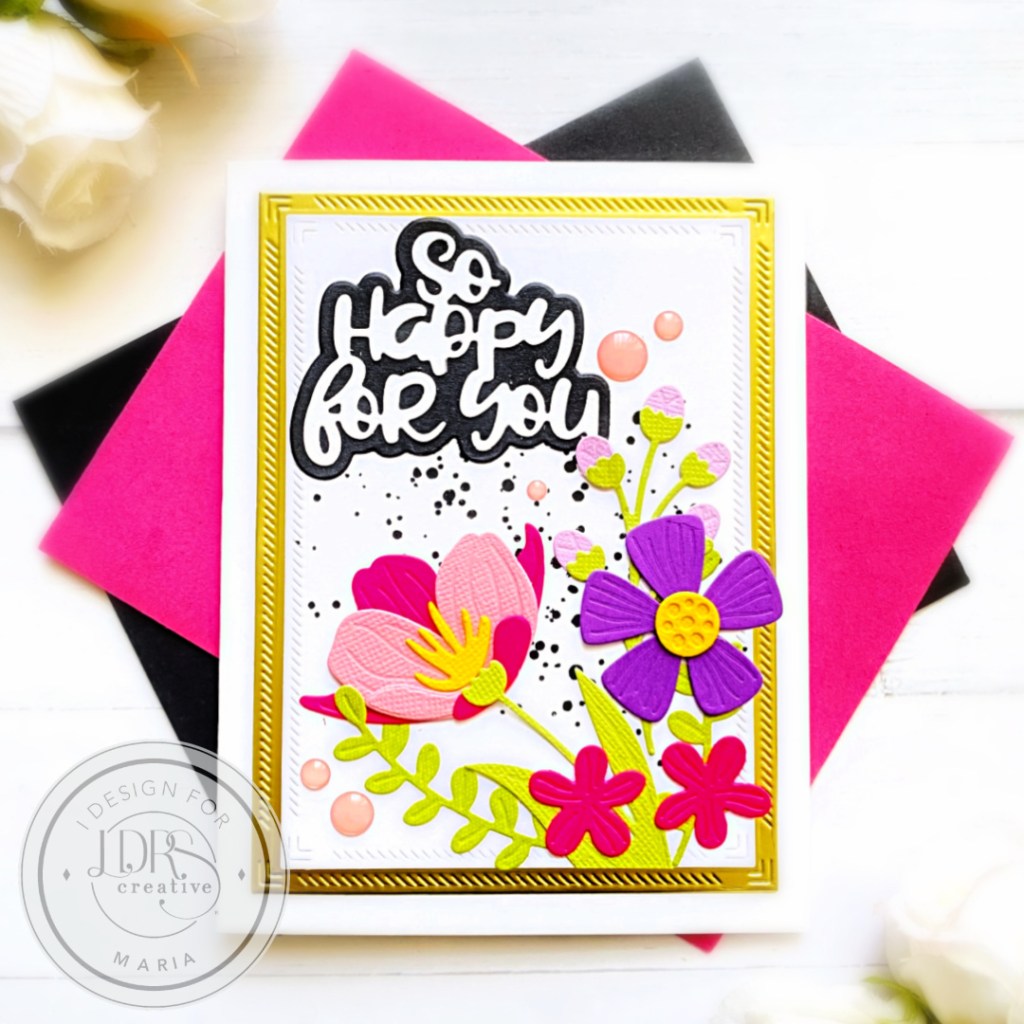
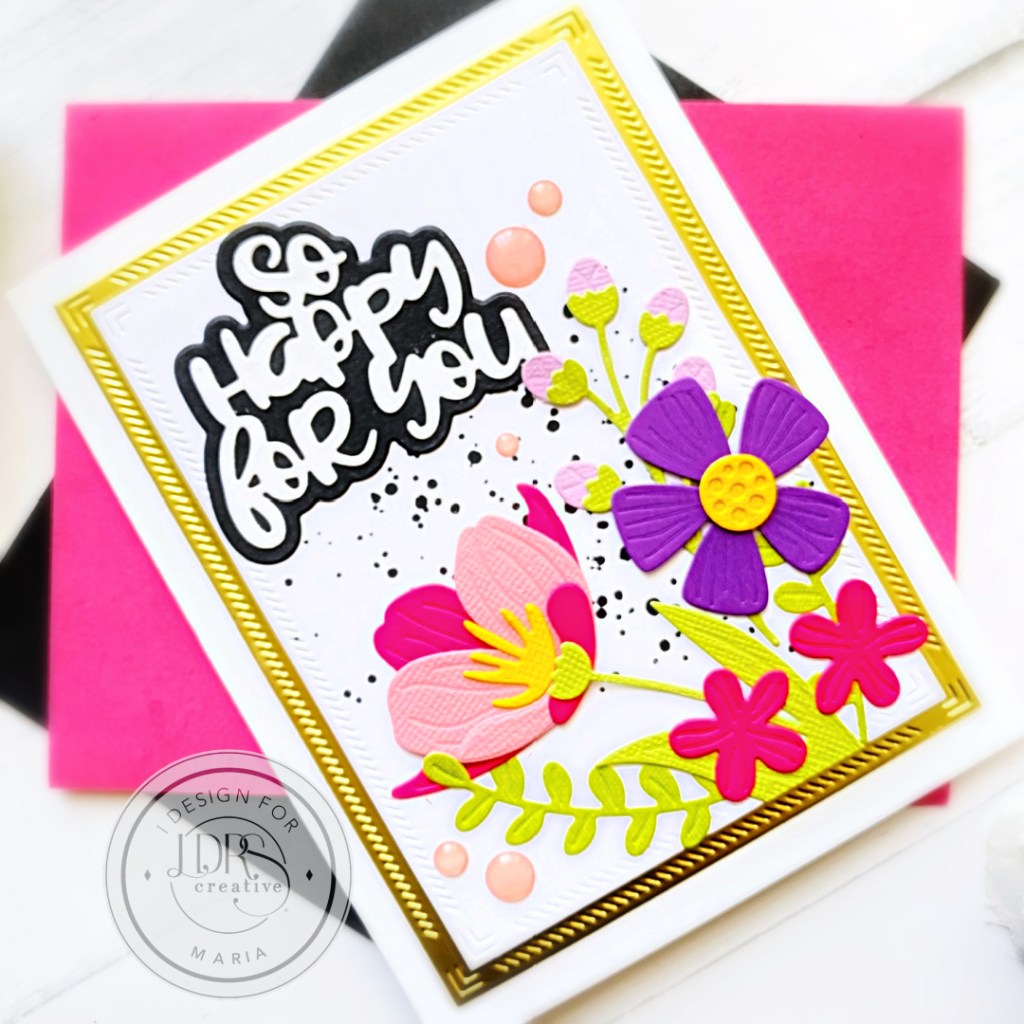
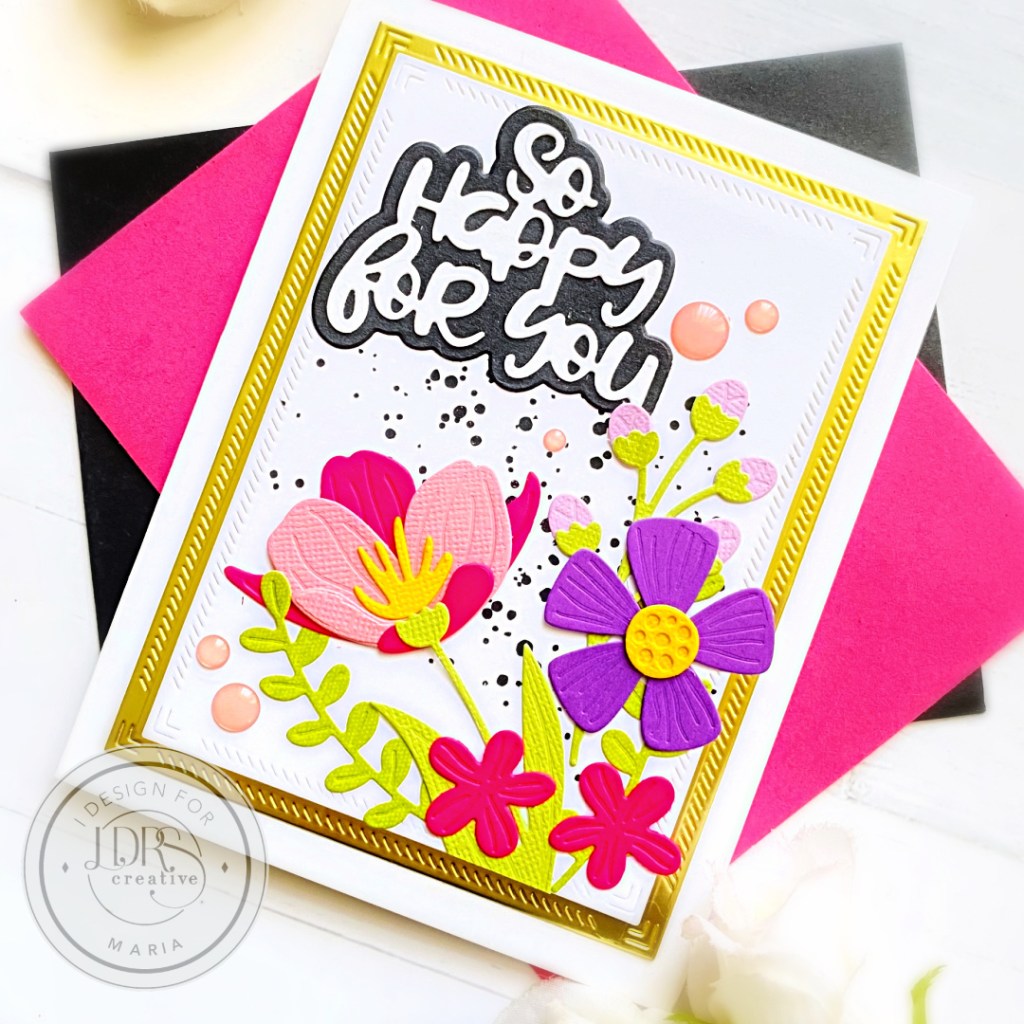
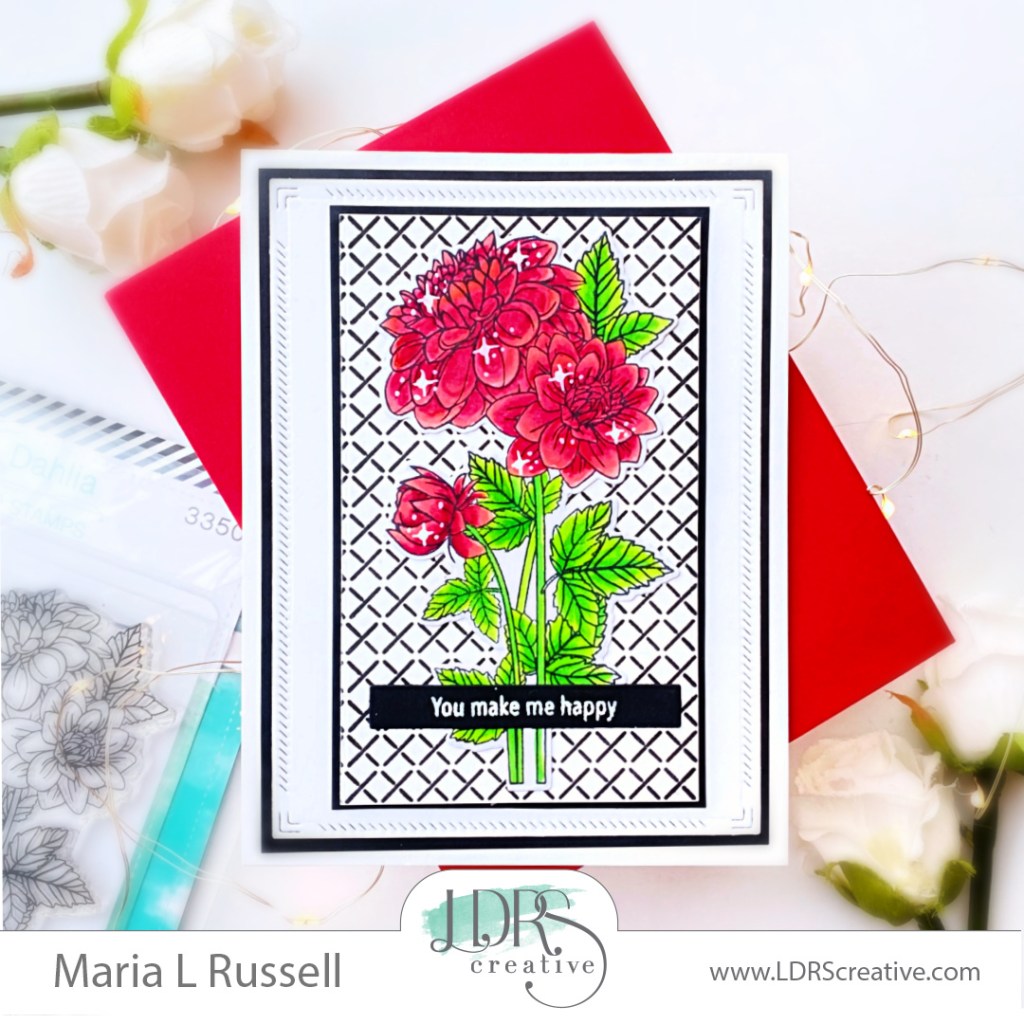
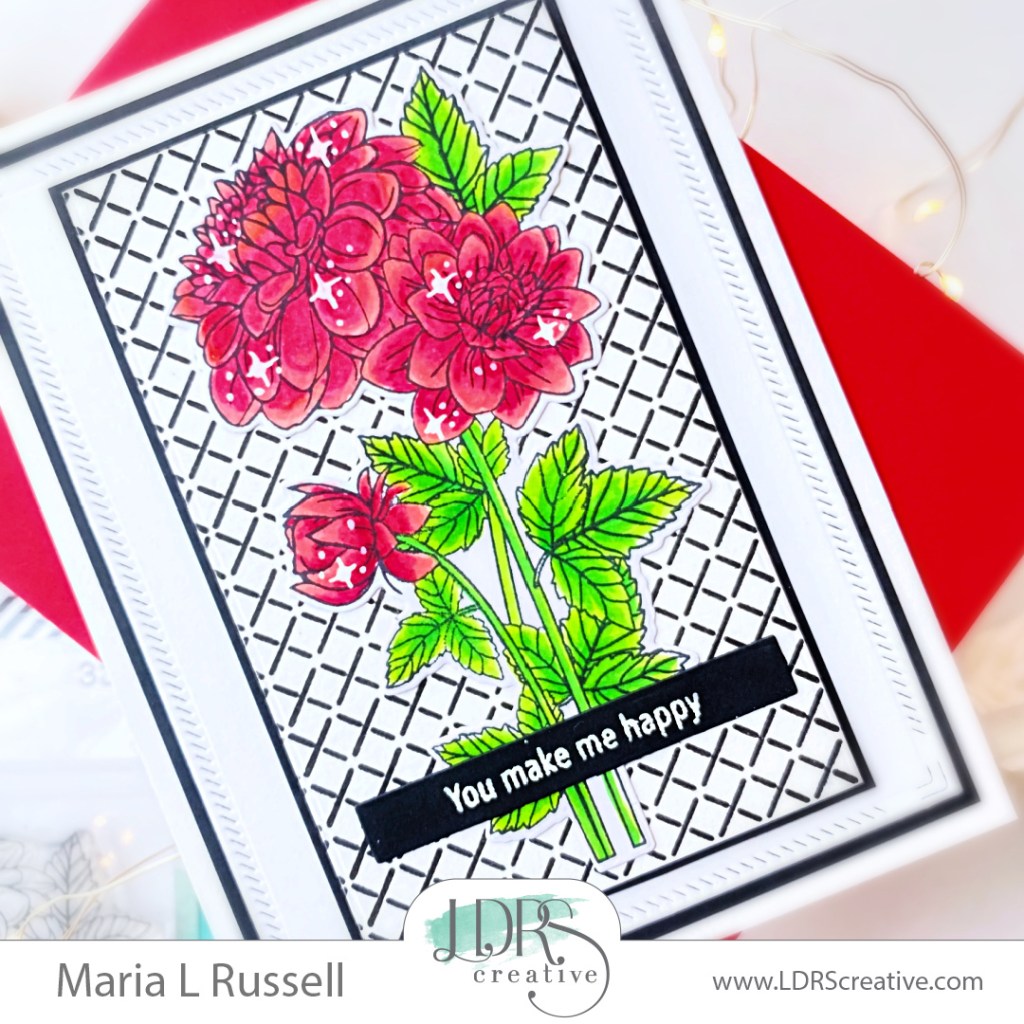
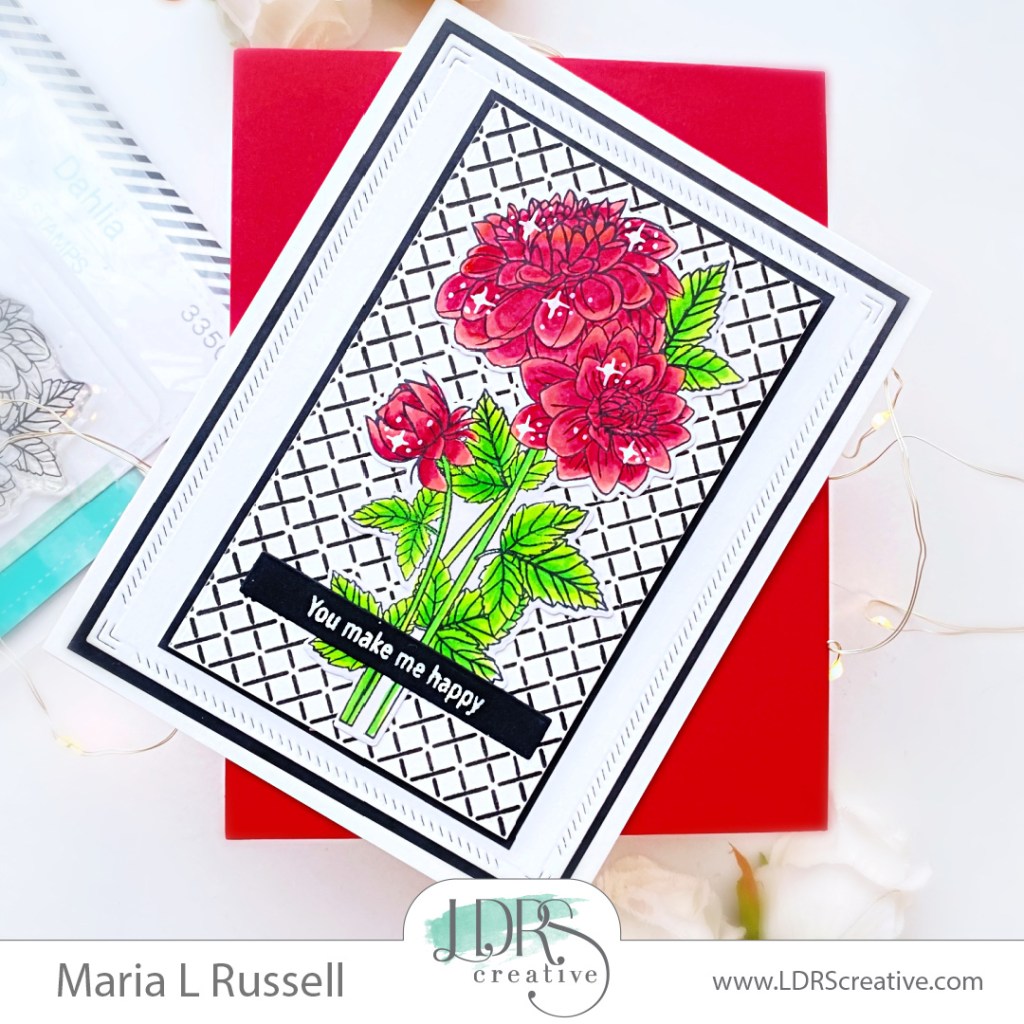
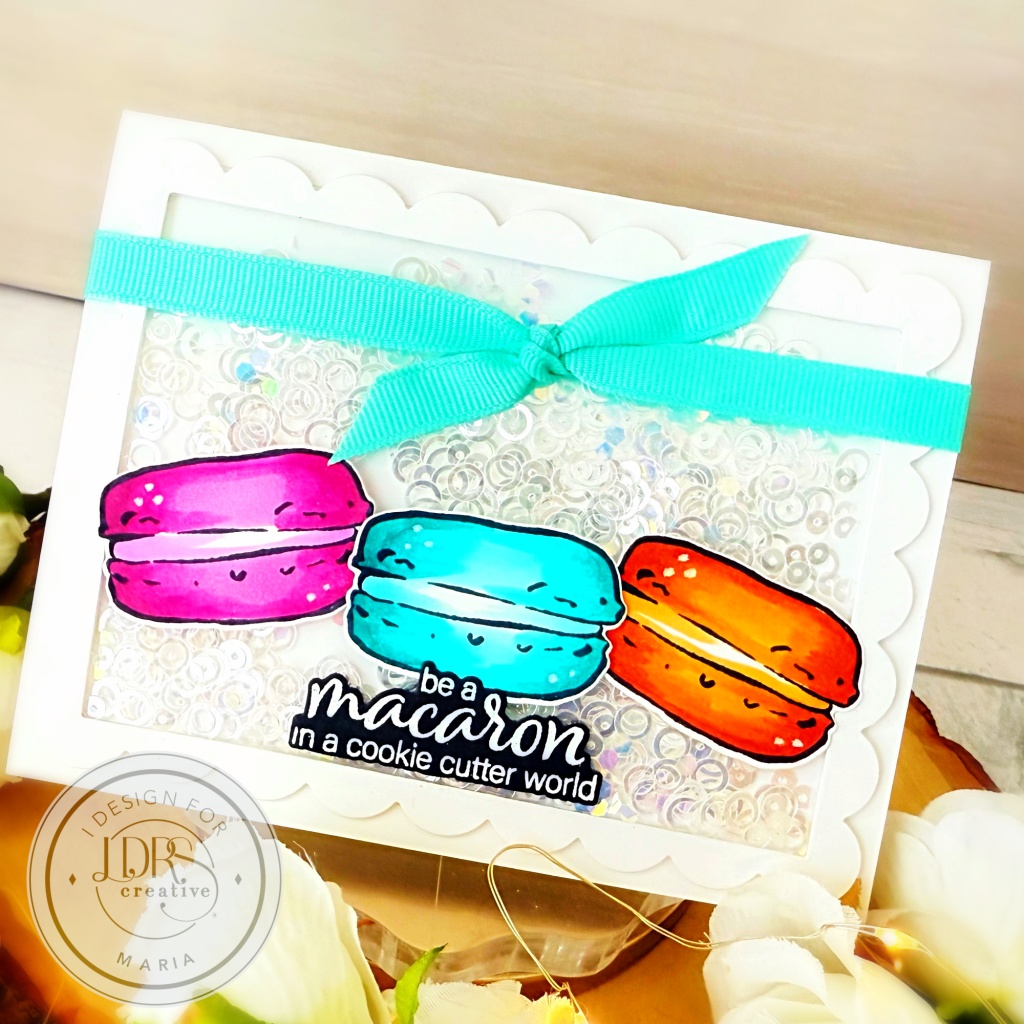
Hello everyone!   Is anyone else feeling “blah” about the weather?  It has been raining here in Florida, and the humidity kicked in full, uncomfortable mode!  I wanted to create a cheerful, shaker-card, showcasing the Macarons Stamps Set and Coordinating Dies bundle.

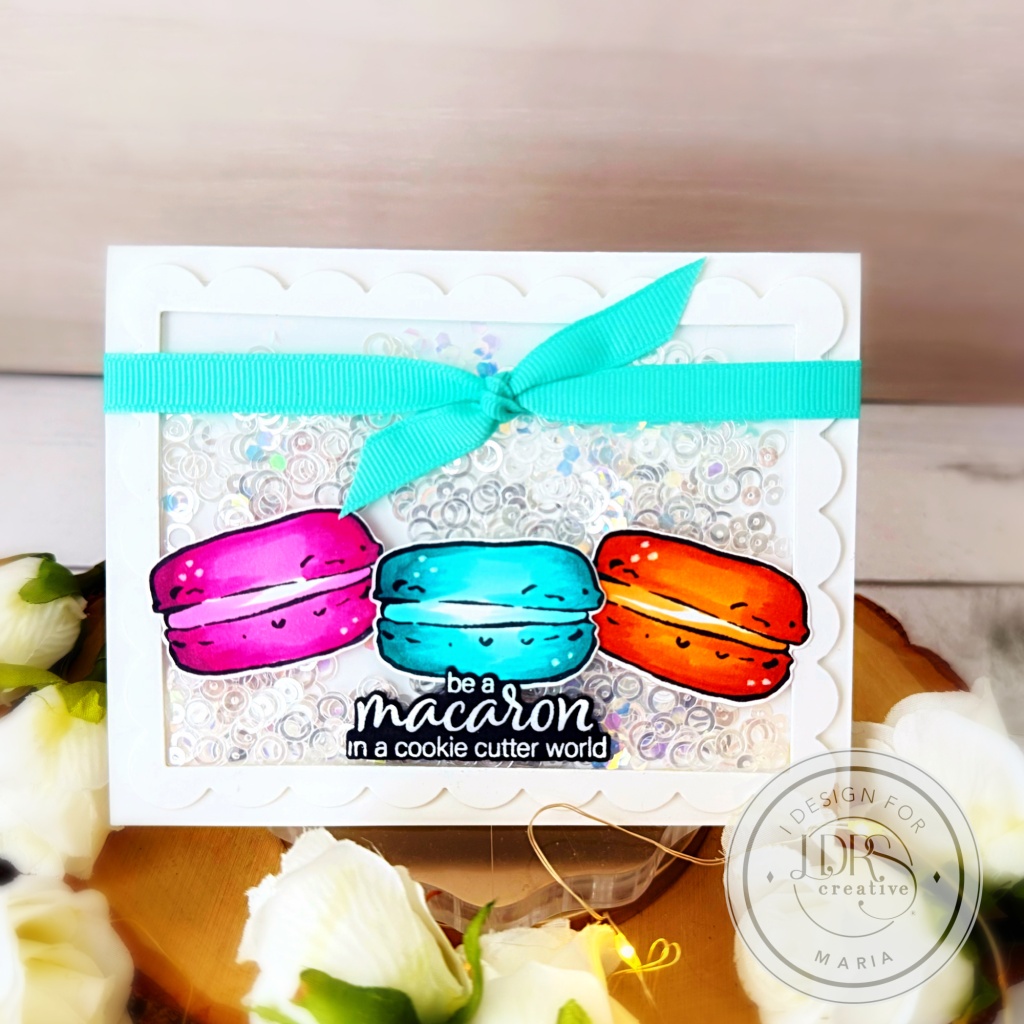
The images were stamped on Neenah Solar White card stock with Raven Hybrid ink and colored with alcohol markers.  I die-cut the images using the Macarons Coordinating Die and set them aside while I prepared the shaker card.

The scallop frame was created using the Mixed Scallop Rectangle Die, with the A2 Diagonal Stitched Layered Card Topper.  I adhered the acetate sheet and added foam adhesive to create the well.  I used iridescent sequins for my shaker element and adhered the frame to an A2-size top-folding notecard.  I added the colored images using liquid glue.

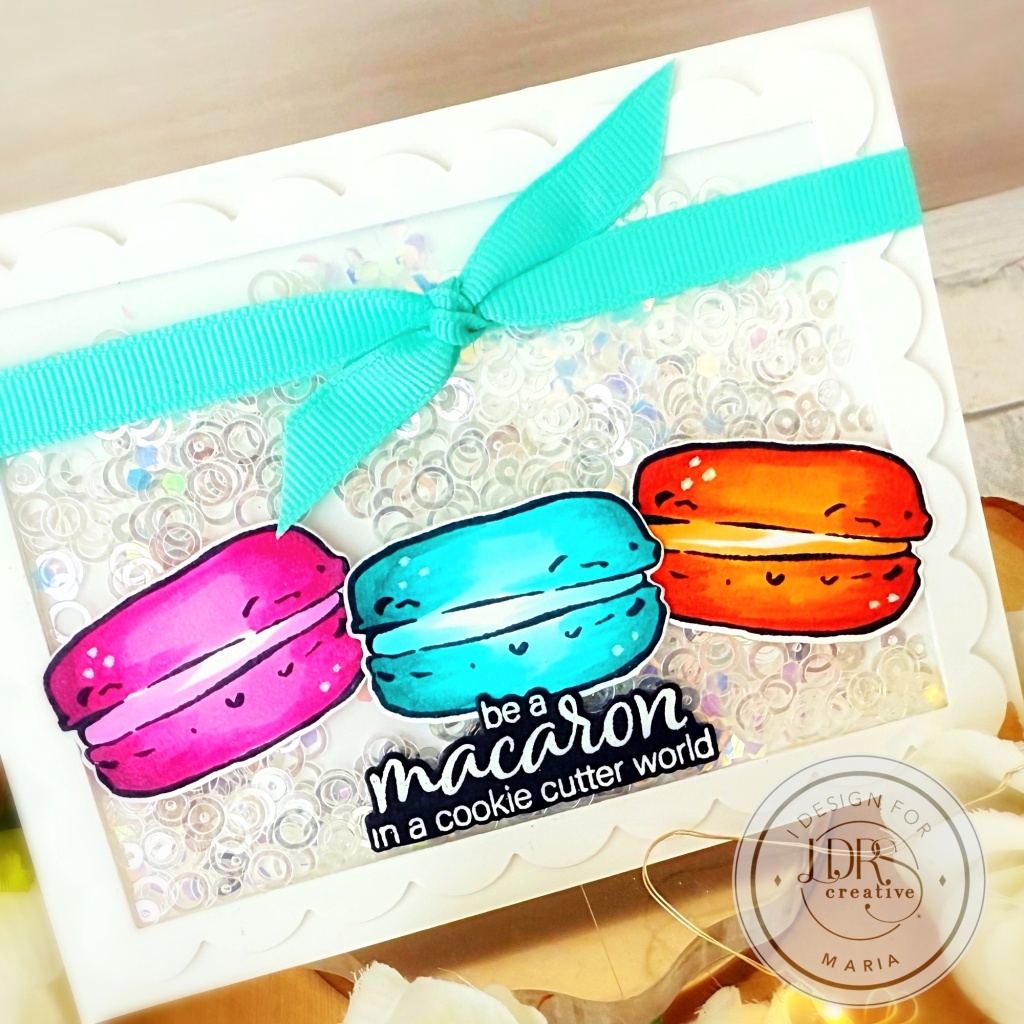
The sentiment was stamped and heat-embossed with White embossing powder and adhered in the center of the card.  Lastly, I added the blue satin bow to finish the design.  Here’s another look:

I hope you like this shaker card today.  Thanks for stopping by and have a great week ahead!

Doodle Flowers with LDRS Creative

Is anyone else excited for Spring?! I am back today to share yet another just-because card, featuring products by LDRS Creative.

I am so happy that I got to play with the beautiful Doodle Flower Dies, along with the All Occasions Word Dies from the November release.

I don’t know what it is but even though LDRS Creative has a ton of flower dies released in the past, each set has an amazing array of floral and greenery that are so unique and beautiful, I just can’t get enough of them!  This Doodle Flower Die Set is another example!  I love that you can look at the back of the packaging too and see how you can just put them together!  Even a beginner paper-crafter will have no issues assembling the flowers!

I started by die-cutting the flowers and greenery using the Doodle Flower Die Set with a bunch of scraps that I already have in my stash.  I adhered and assembled the flowers together with liquid glue and set them all aside to dry while I work on the card background.

The card background was made by die-cutting the gold card stock first, using the medium die from the A2 Diagonal Stitched Layered Card Toppers and adhered on some A2 size notecard with liquid glue.  I also used the smaller die from the same A2 Diagonal Stitched Layered Card Toppers to die-cut the Lily Toner Collection paper pad.  I foam-mounted this on top of the gold background for added dimension.

Adhering the floral pieces were easy as I only used liquid glue to layer them up.  Lastly, the sentiment was die-cut using the All Occasions Word Dies on some black and white card stock, and adhered on the card with glue.  I finished the card design by adhering some Lovely Watercolor Enamel Dots for added interest.  Here’s another look:

I hope you like this card today and got inspired. Below, you will find links to the supplies used to create this project. Where available, I use compensated affiliate links at no extra cost to you. Your support helps me to keep bringing you new projects and inspiration. Thank you for stopping by, and have an amazing day!

———-SUPPLIES———- 

You Are a Shining Star with LDRS Creative’s January 2022 Release

Hello everyone!  I’m sharing this cute and simple card today showcasing the ADORABLE Never Stop Dreaming Stamp Set and Never Stop Dreaming Dies, with the A2 Stitched Layered Card Toppers Die Set and In the Grass Border Dies

To make the card, I placed the stamps from the Never Stop Dreaming Stamp Set inside my stamping tool and stamped the images on some Neenah Solar White Card stock using Raven Hybrid Ink.   I stamped the images with the help of the Stampendable Stamping Tool  to get some really good impression.  I colored the images in with alcohol markers and used the Never Stop Dreaming Dies to cut them all out. 

The background is a pattern paper from a previously released Exclusive Craft Kit  that I die-cut using the  A2 Stitched Layered Card Toppers Die Set.  [Side note: y’all need to check the Exclusive Craft Kit  as they are packed-full of crafting goodies that you can use over and over again]. I used my white gel pen to draw dots and starbursts to the background for added texture and interest. I adhered this panel on some A2-size notecard.  Since the paper is 6×6, I cut the extra using the In the Grass Border Dies.  I adhered the grass panel to the background panel with some 1/8 inch double-sided tape.  Other than that, I didn’t really need to do anything else since the background already has everything to create my scene.

Next, I adhered all of the images on the card with glue.  Since I needed the sentiment to stand out on the card, I stamped it on some black card stock using Watermark Ink.  I sprinkled some White Embossing Powder and heat-set with my heating tool.  I cut the sentiment using the Fiskars Paper Trimmer and adhered on the card with double-sided adhesive.  I finished my design by using some white gel pen to draw dots and stars on the background for added texture and interest.  I also used some Stickles to add some shine to the moon.  Here’s another look at the finished card: 

 I hope you like my card today and got inspired.  The supplies I used are listed and linked below.  Thanks for stopping by and happy stamping! 

———SUPPLIES———-

You Make Me Happy – CREATIVE TEAM INSPIRATION DAY 2 with LDRS Creative

It’s inspiration day 2 at LDRS Creative and the entire design team is showing off a few of our favorites from the winter release. For today’s card, I am featuring the Log Cabin Pocket Pals stamp set and Log Cabin Pocket Pals Coordinating Dies with the A2 Diagonal Stitched Layered Card Toppers and In the Grass Die Set.

Here’s how I made this card:

  • Stamp the sentiment on some black card stock with watermark ink. Sprinkle some white embossing powder and heat-set with heating tool.
  • Adhere the sentiment on the focal panel and use some white gel pen to add dots to the background.

Don’t you just love that it looks “glowing” from the inside? I am so happy how this card turned out. I hope you love this card too and got inspired. The supplies I used are listed and linked below. Thanks for stopping by!

———SUPPLIES———-

You Make Me Happy – CREATIVE TEAM INSPIRATION DAY 1 with LDRS Creative

It’s inspiration day 1 at LDRS Creative and the entire design team is showing off a few of our favorites from the winter release. For today’s card, I am featuring the Dahlia stamp set and coordinating dies, with the A2 Diagonal Layered Stitched Card Toppers Die Set, Happy Me Happy You stamp set and the Sentiment Stack II Die.

Here’s how I made this card:

  • Adhere the focal image on the card.
  • Stamp the sentiments from the Happy Me Happy You stamp set and use the Sentiment Stack II Die to cut them all out. I really LOVE these type of stamp & die combo as you get to stamp a few sentiments and die cut all at once.
  • Adhere the sentiment “You Make Me Happy” on the card.
  • Finish the design by using white gel pen to add some dots and stars to the flowers for added texture.

Stay tuned for Day 2 as we bring you more inspiration tomorrow. I hope you like my card today. The supplies I used are listed and linked below. Thanks for stopping by!

———SUPPLIES———-