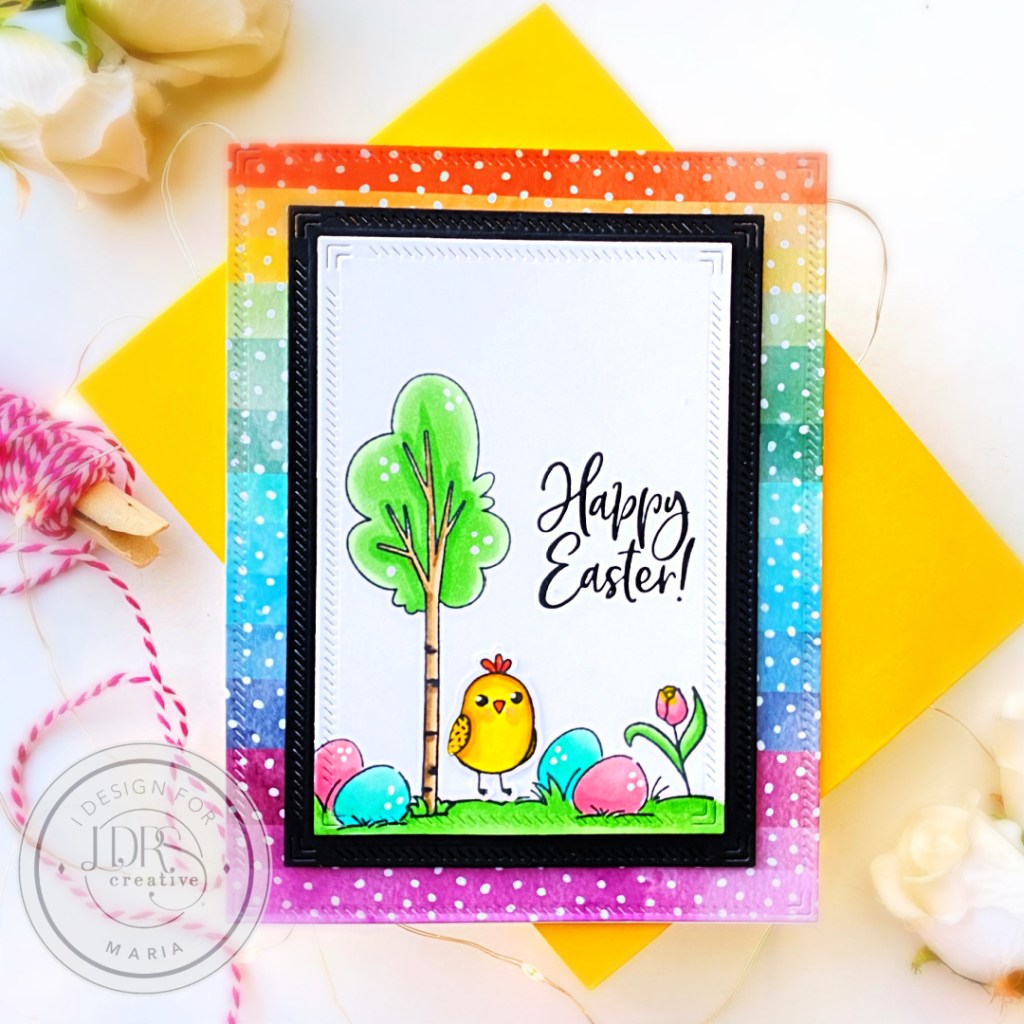
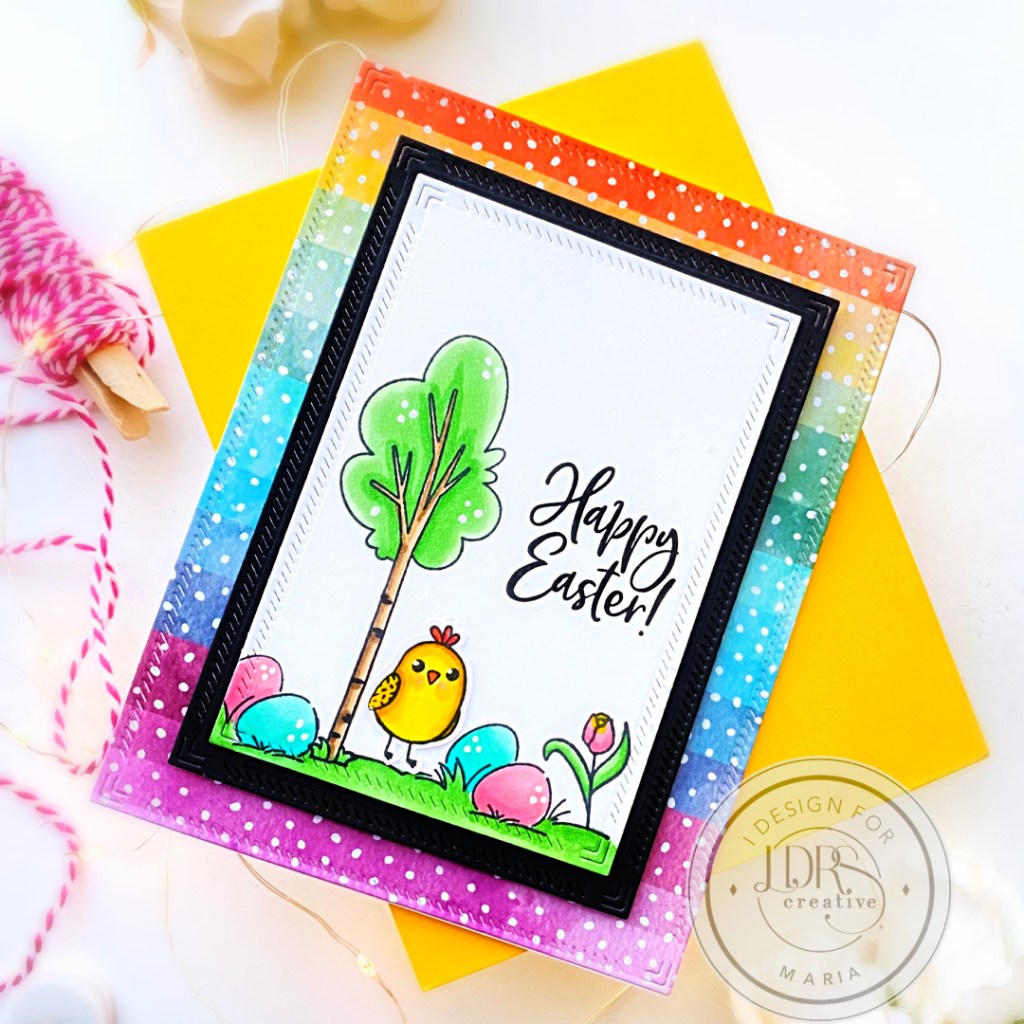
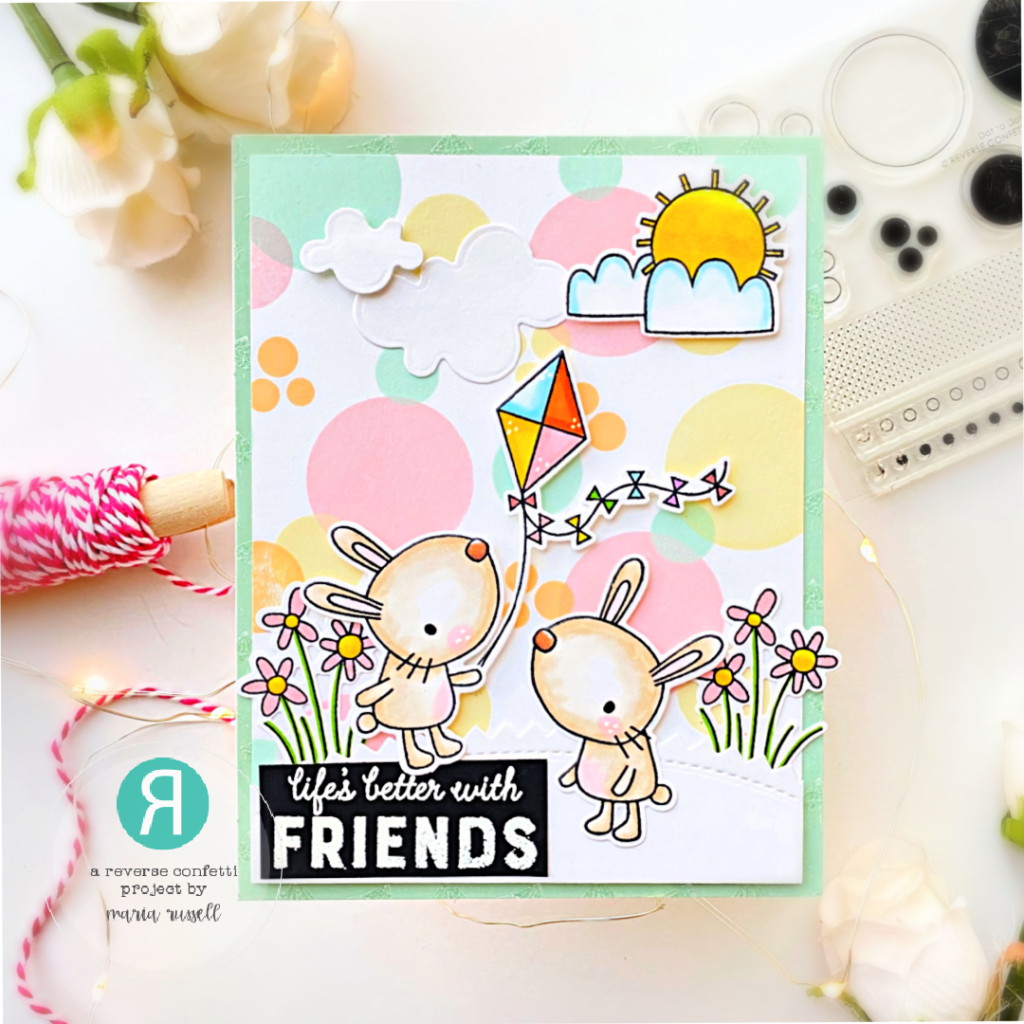
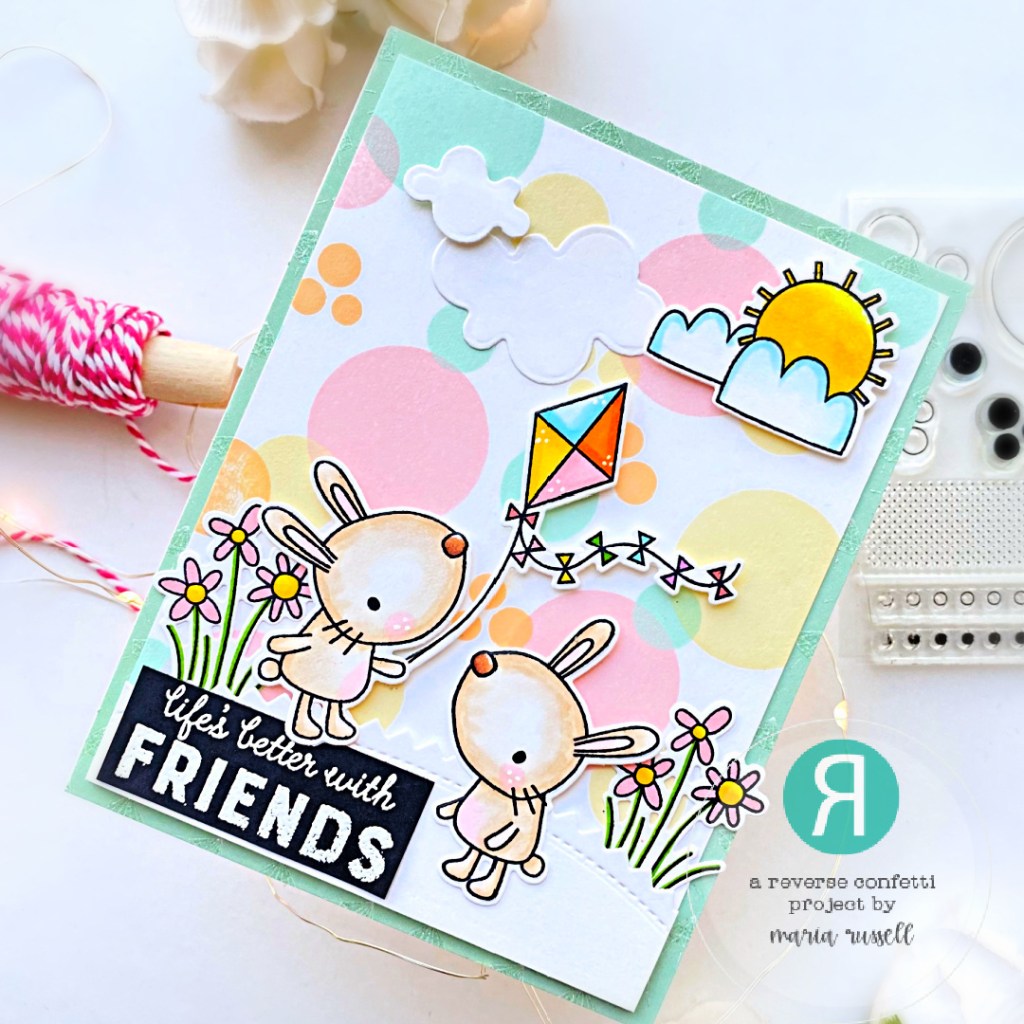
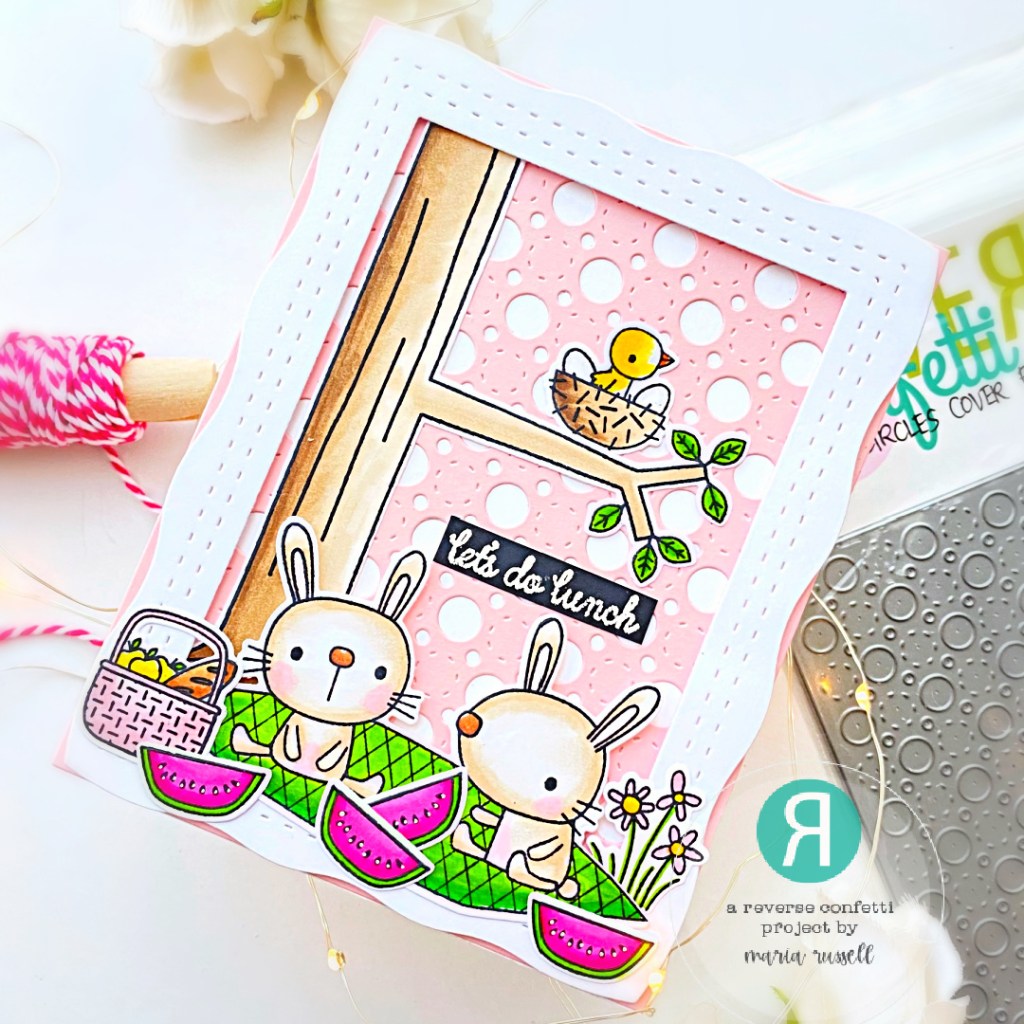
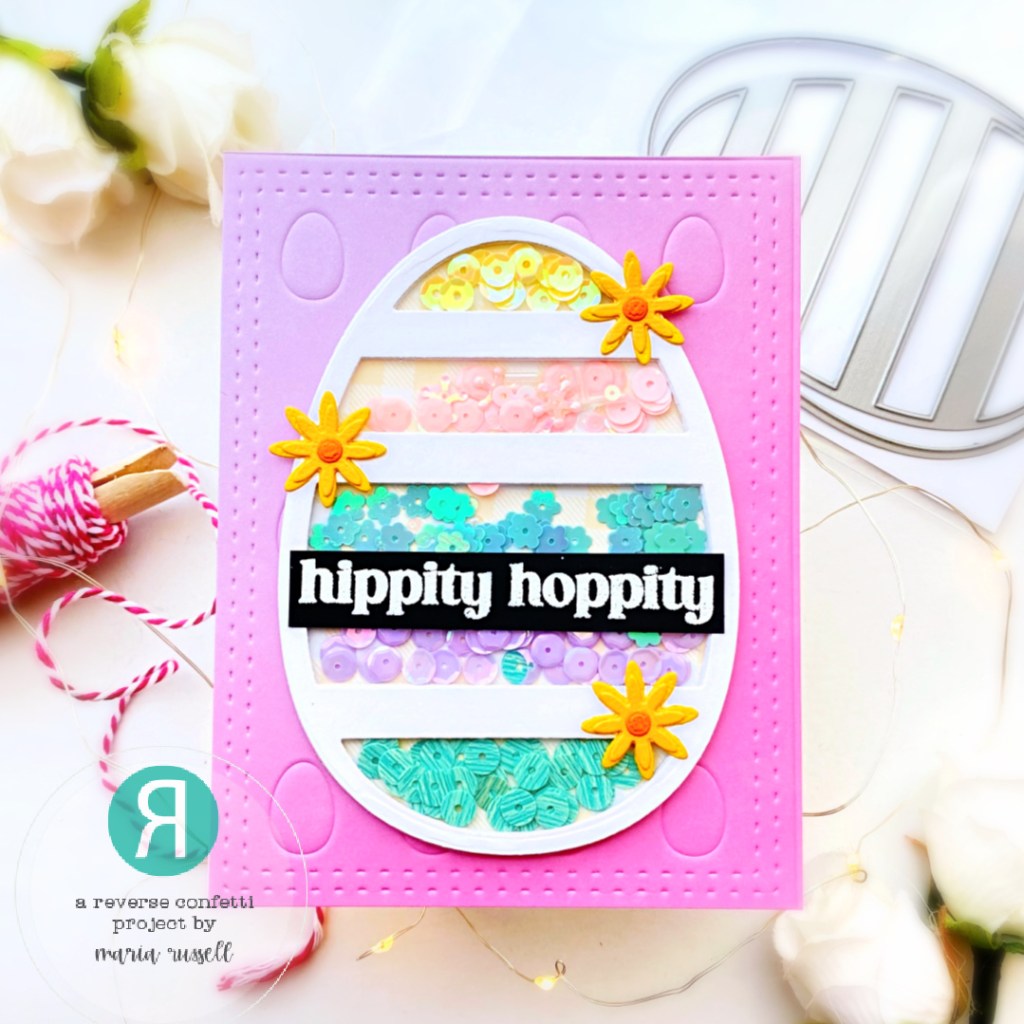
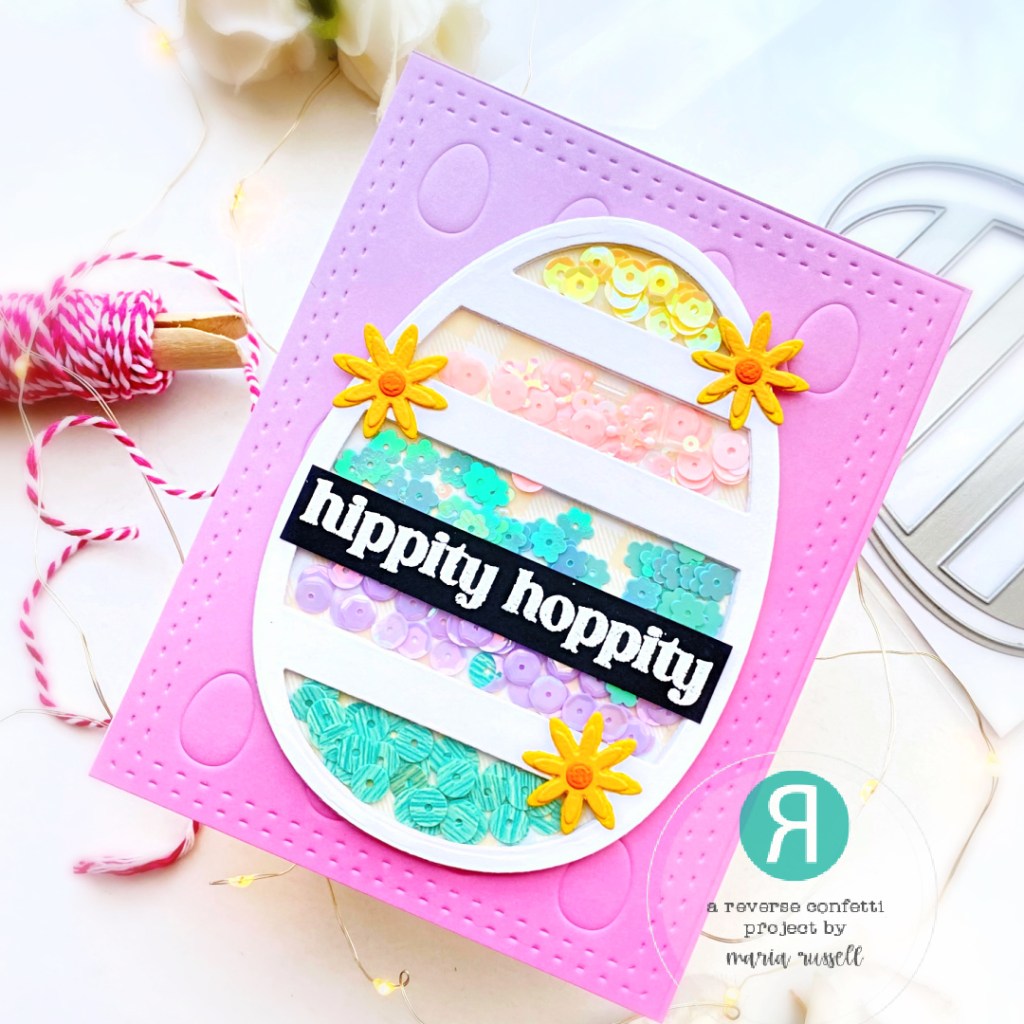
Easter is just around the corner and this ADORABLE Hippity Hoppity Bunnies Stamp Set along with the Hippity Hoppity Sentiment stamp set from the latest Kat Scrappiness release are the perfect combo to create this cute Easter card! I’ve also used a TON of other Kat Scrappiness die to create this scene.

Here’s how I made it:
- Die-cut the scallop panel using the biggest die from the Stitched Scalloped Slimline Die Set on some pink card stock.
- Die-cut the inner slimline panel using the second biggest die from the Slimline Never-ending die set with Neenah solar white card stock.
- Ink-up the panel using dye inks with the Slimline Clouds Stencil and the Sunrise Radiating Stencil with some Altenew Blending Brushes.
- Die-cut the grass panel on some green card stock using the Slimline Grass Border Die. Adhere this on the background panel with liquid glue.
- Die-cut the little picket fence twice using the fence die from the Crafter’s Essential’s Fall Die Set. Adhere both die-cuts on the card with Bearly Art liquid glue.
- Foam-mount the focal panel on the scalloped die-cut for added dimension. Adhere this on a slimline card base.
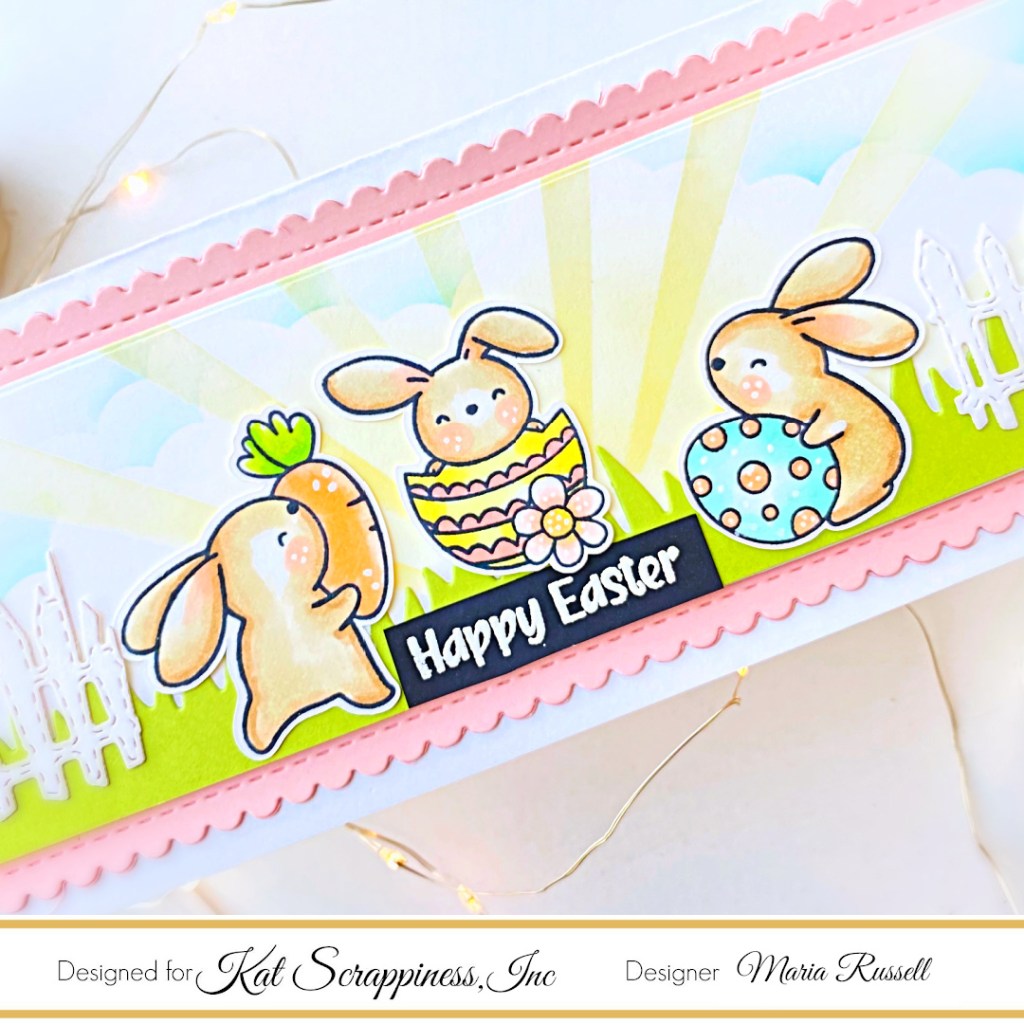
- Place some Neenah solar white card stock inside your Misti Stamping Tool and stamp the bunnies from the Hippity Hoppity Bunnies stamp set with Memento Tuxedo Black Ink. I stamped mine about 4 times to get some good impression.
- Color the images in with alcohol markers and cut them all out using a Scan N Cut Machine or precision snips.
- Adhere the images on the card panel with Bearly Art Liquid Glue.
- Stamp the sentiment from the Hippity Hoppity Sentiment Stamp Set with Versamark ink on some black card stock. Sprinkle some white embossing powder and heat-set with your heating tool.
- Adhere the sentiment on the card.
- Finish the design by using some white gel pen to add more interest to the card.

I simply ADORE these bunnies from the Hippity Hoppity Stamp Set. This Easter-scene was so much fun to create! I do hope you like this card and got inspired by my project today. The supplies I used are listed and linked below for your convenience. Thanks for stopping by!
———-SUPPLIES———