
This is a cheap DIY to make some Halloween decor without breaking the bank. Recycle your old bottles and make them into potion bottles.
Stampin Up Projects
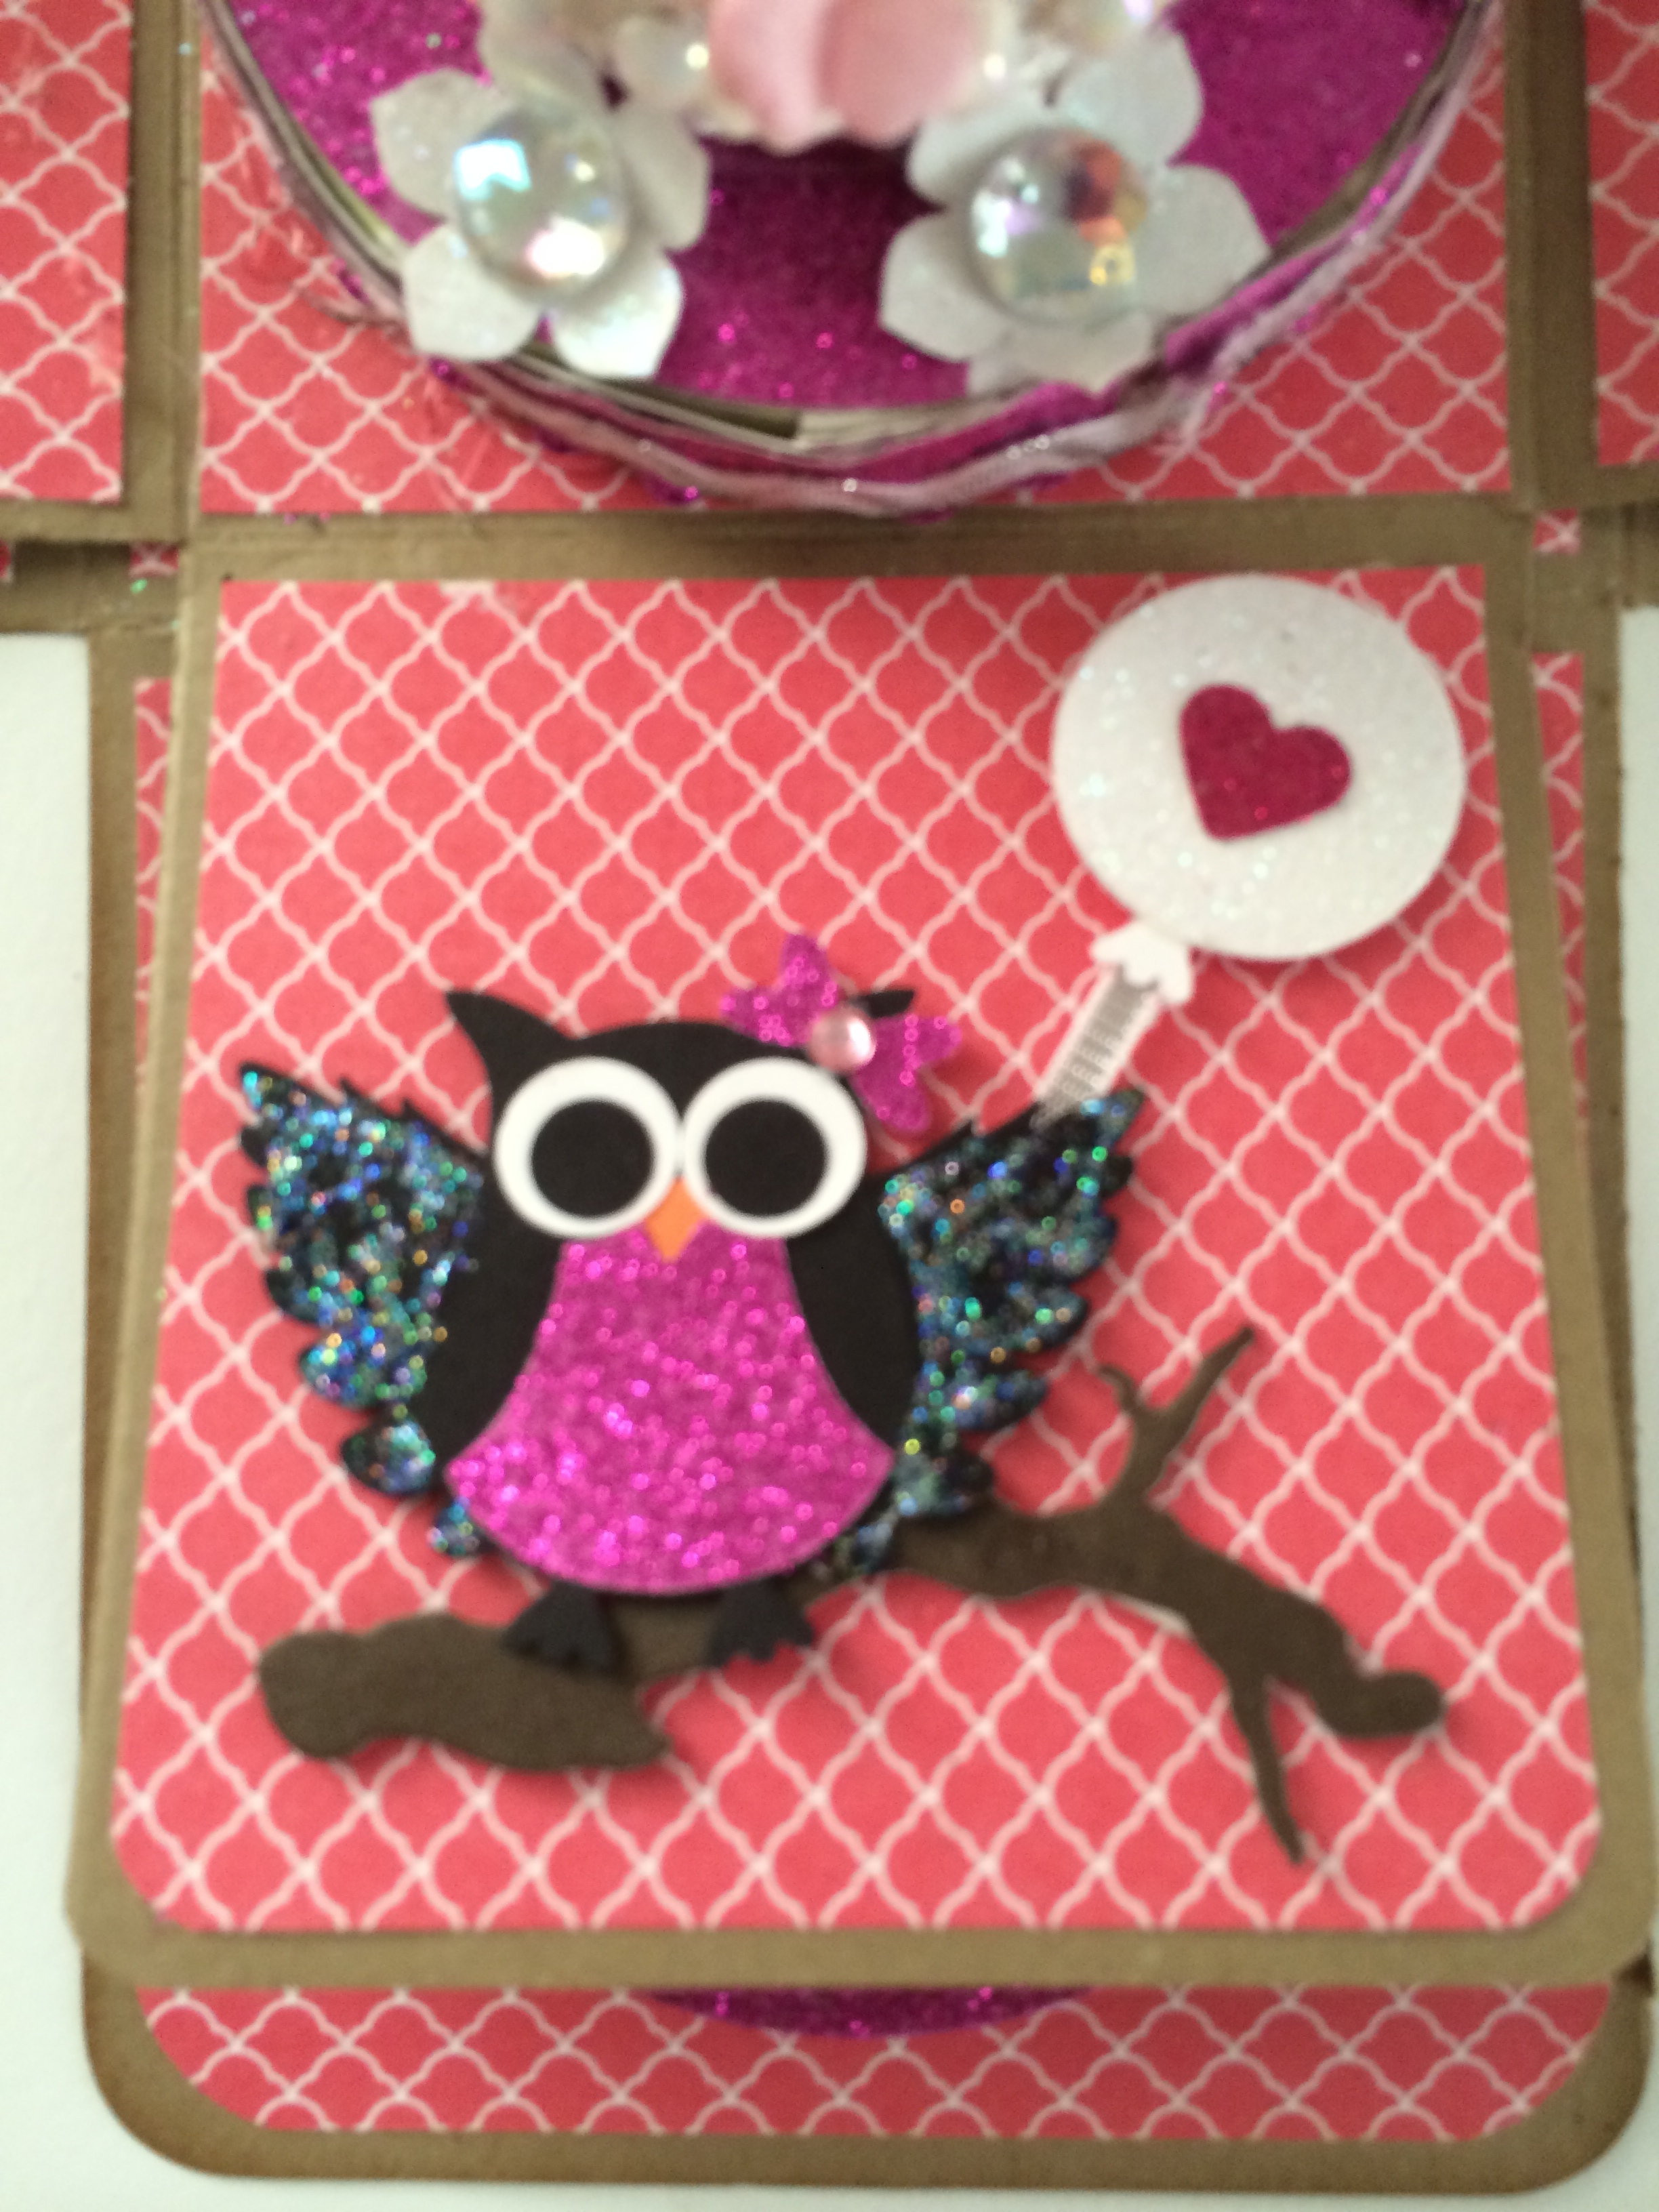
Birthday Explosion Box
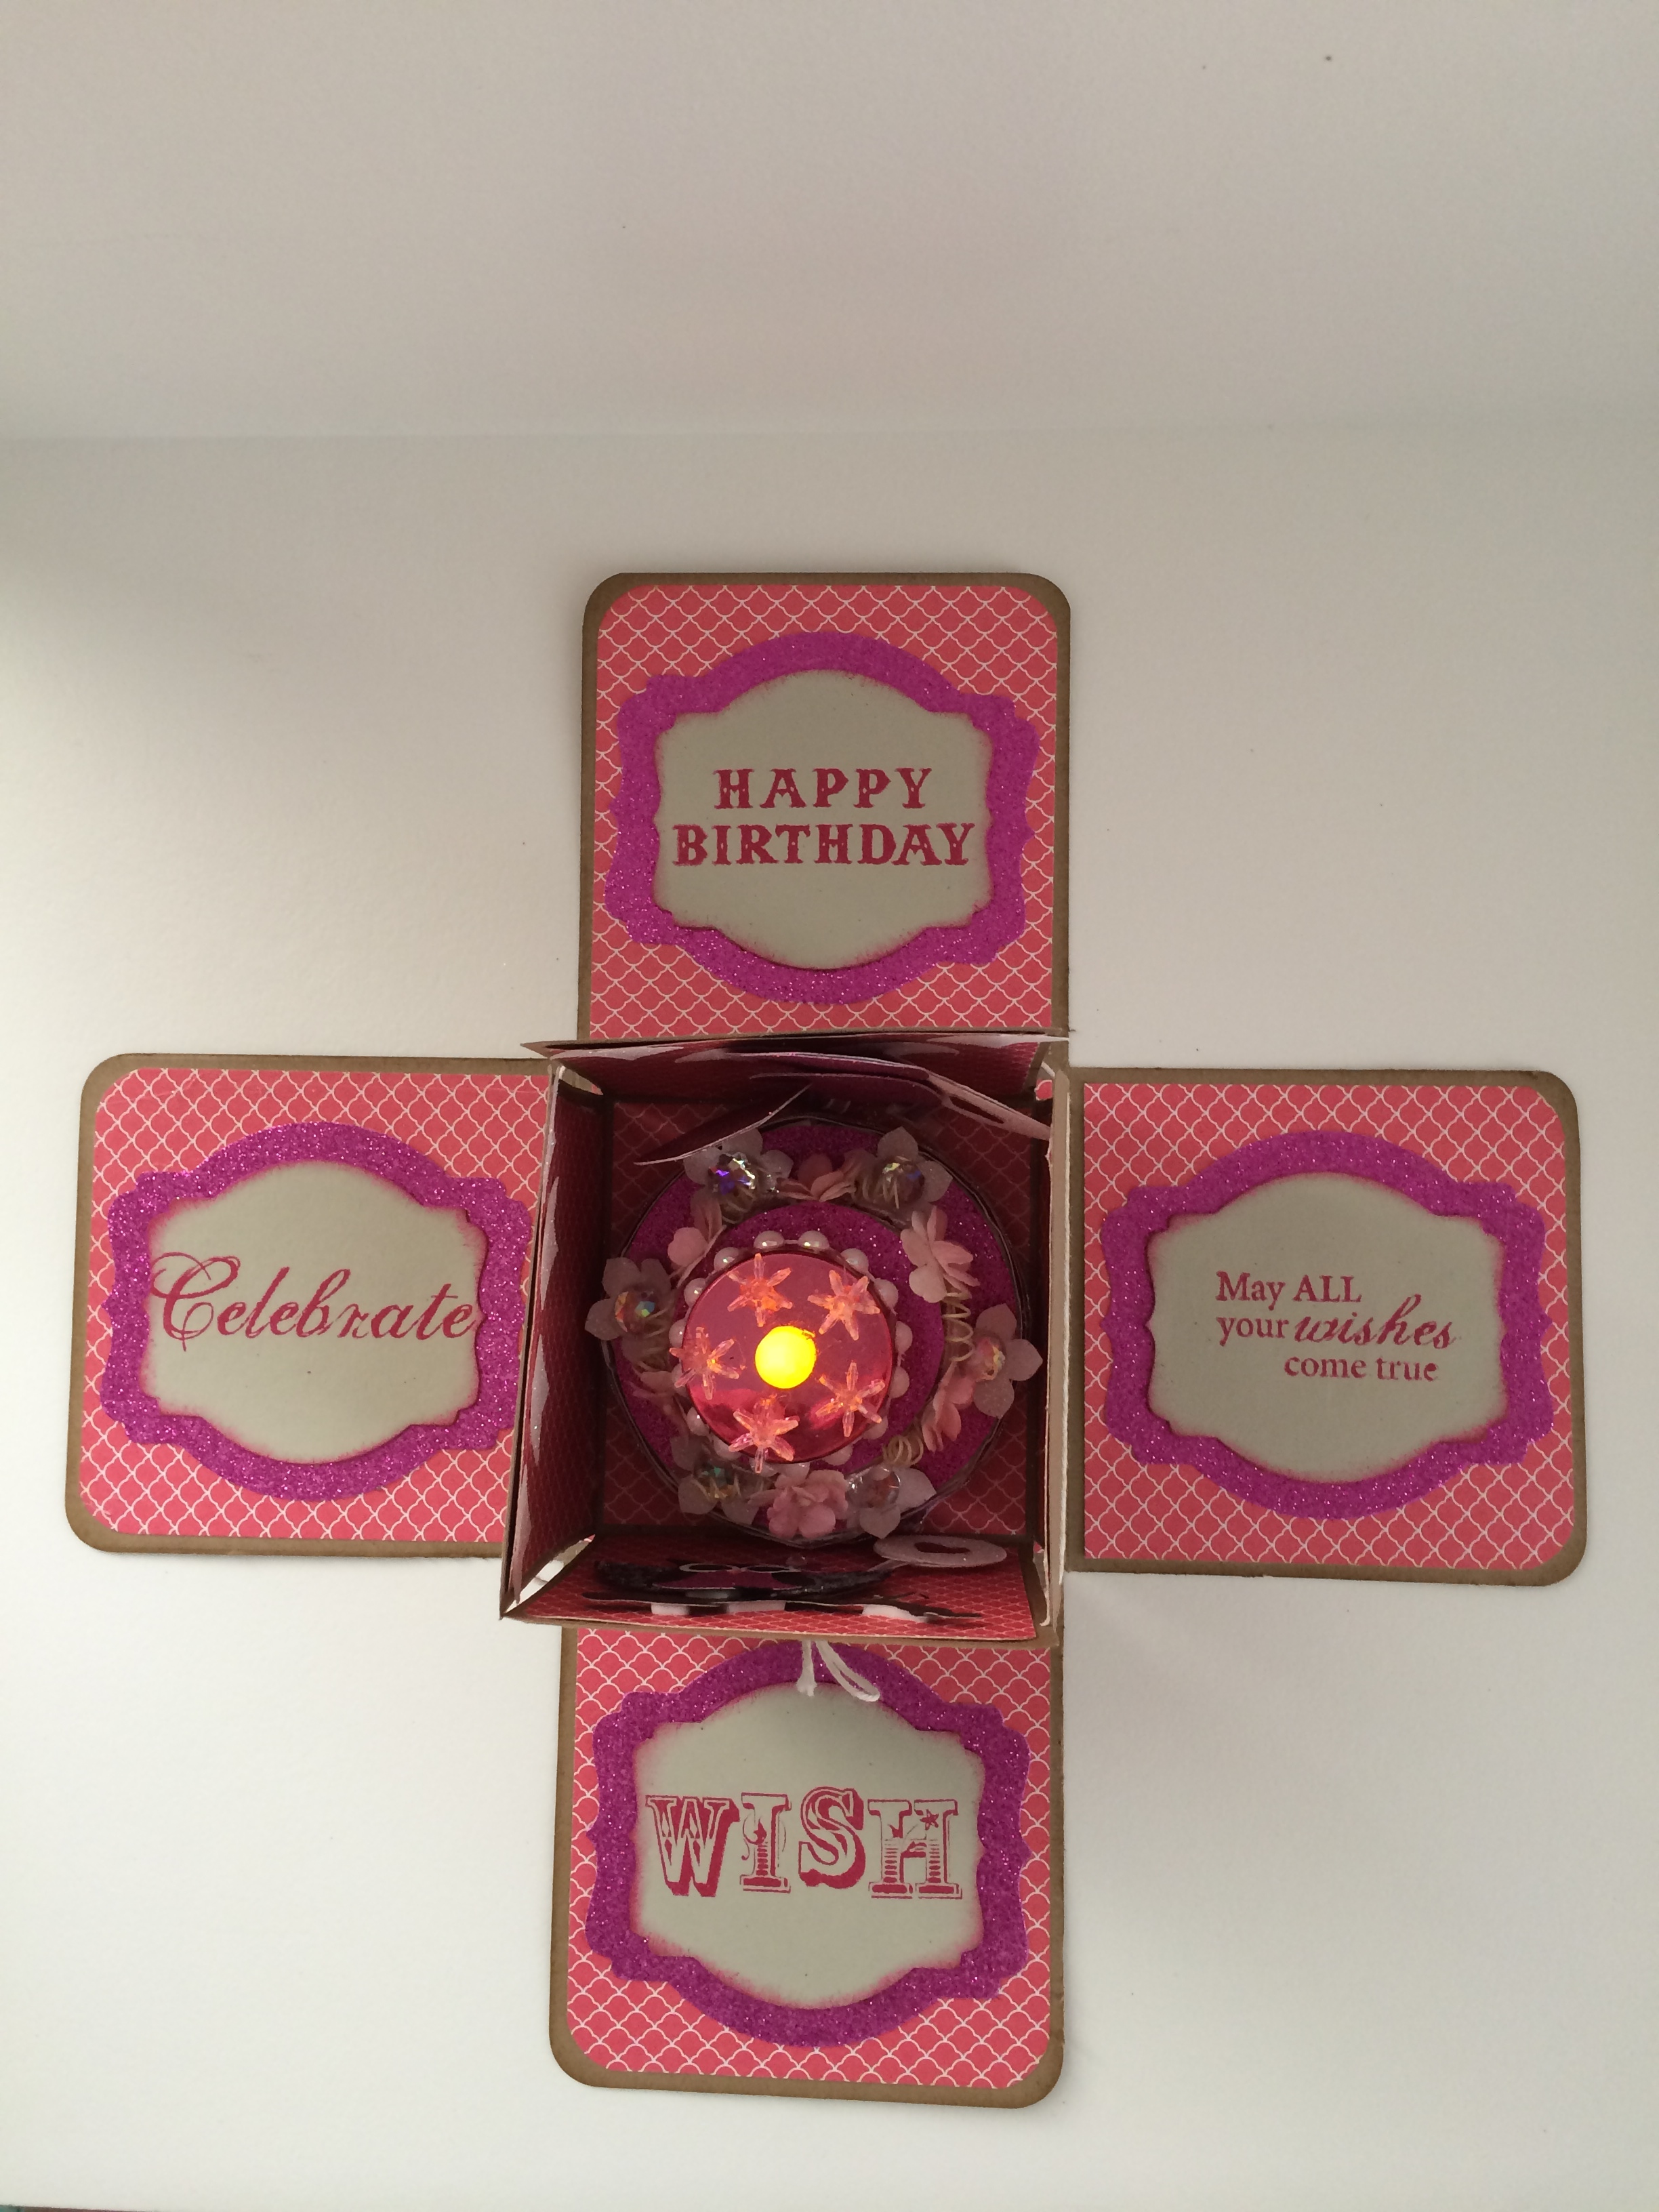
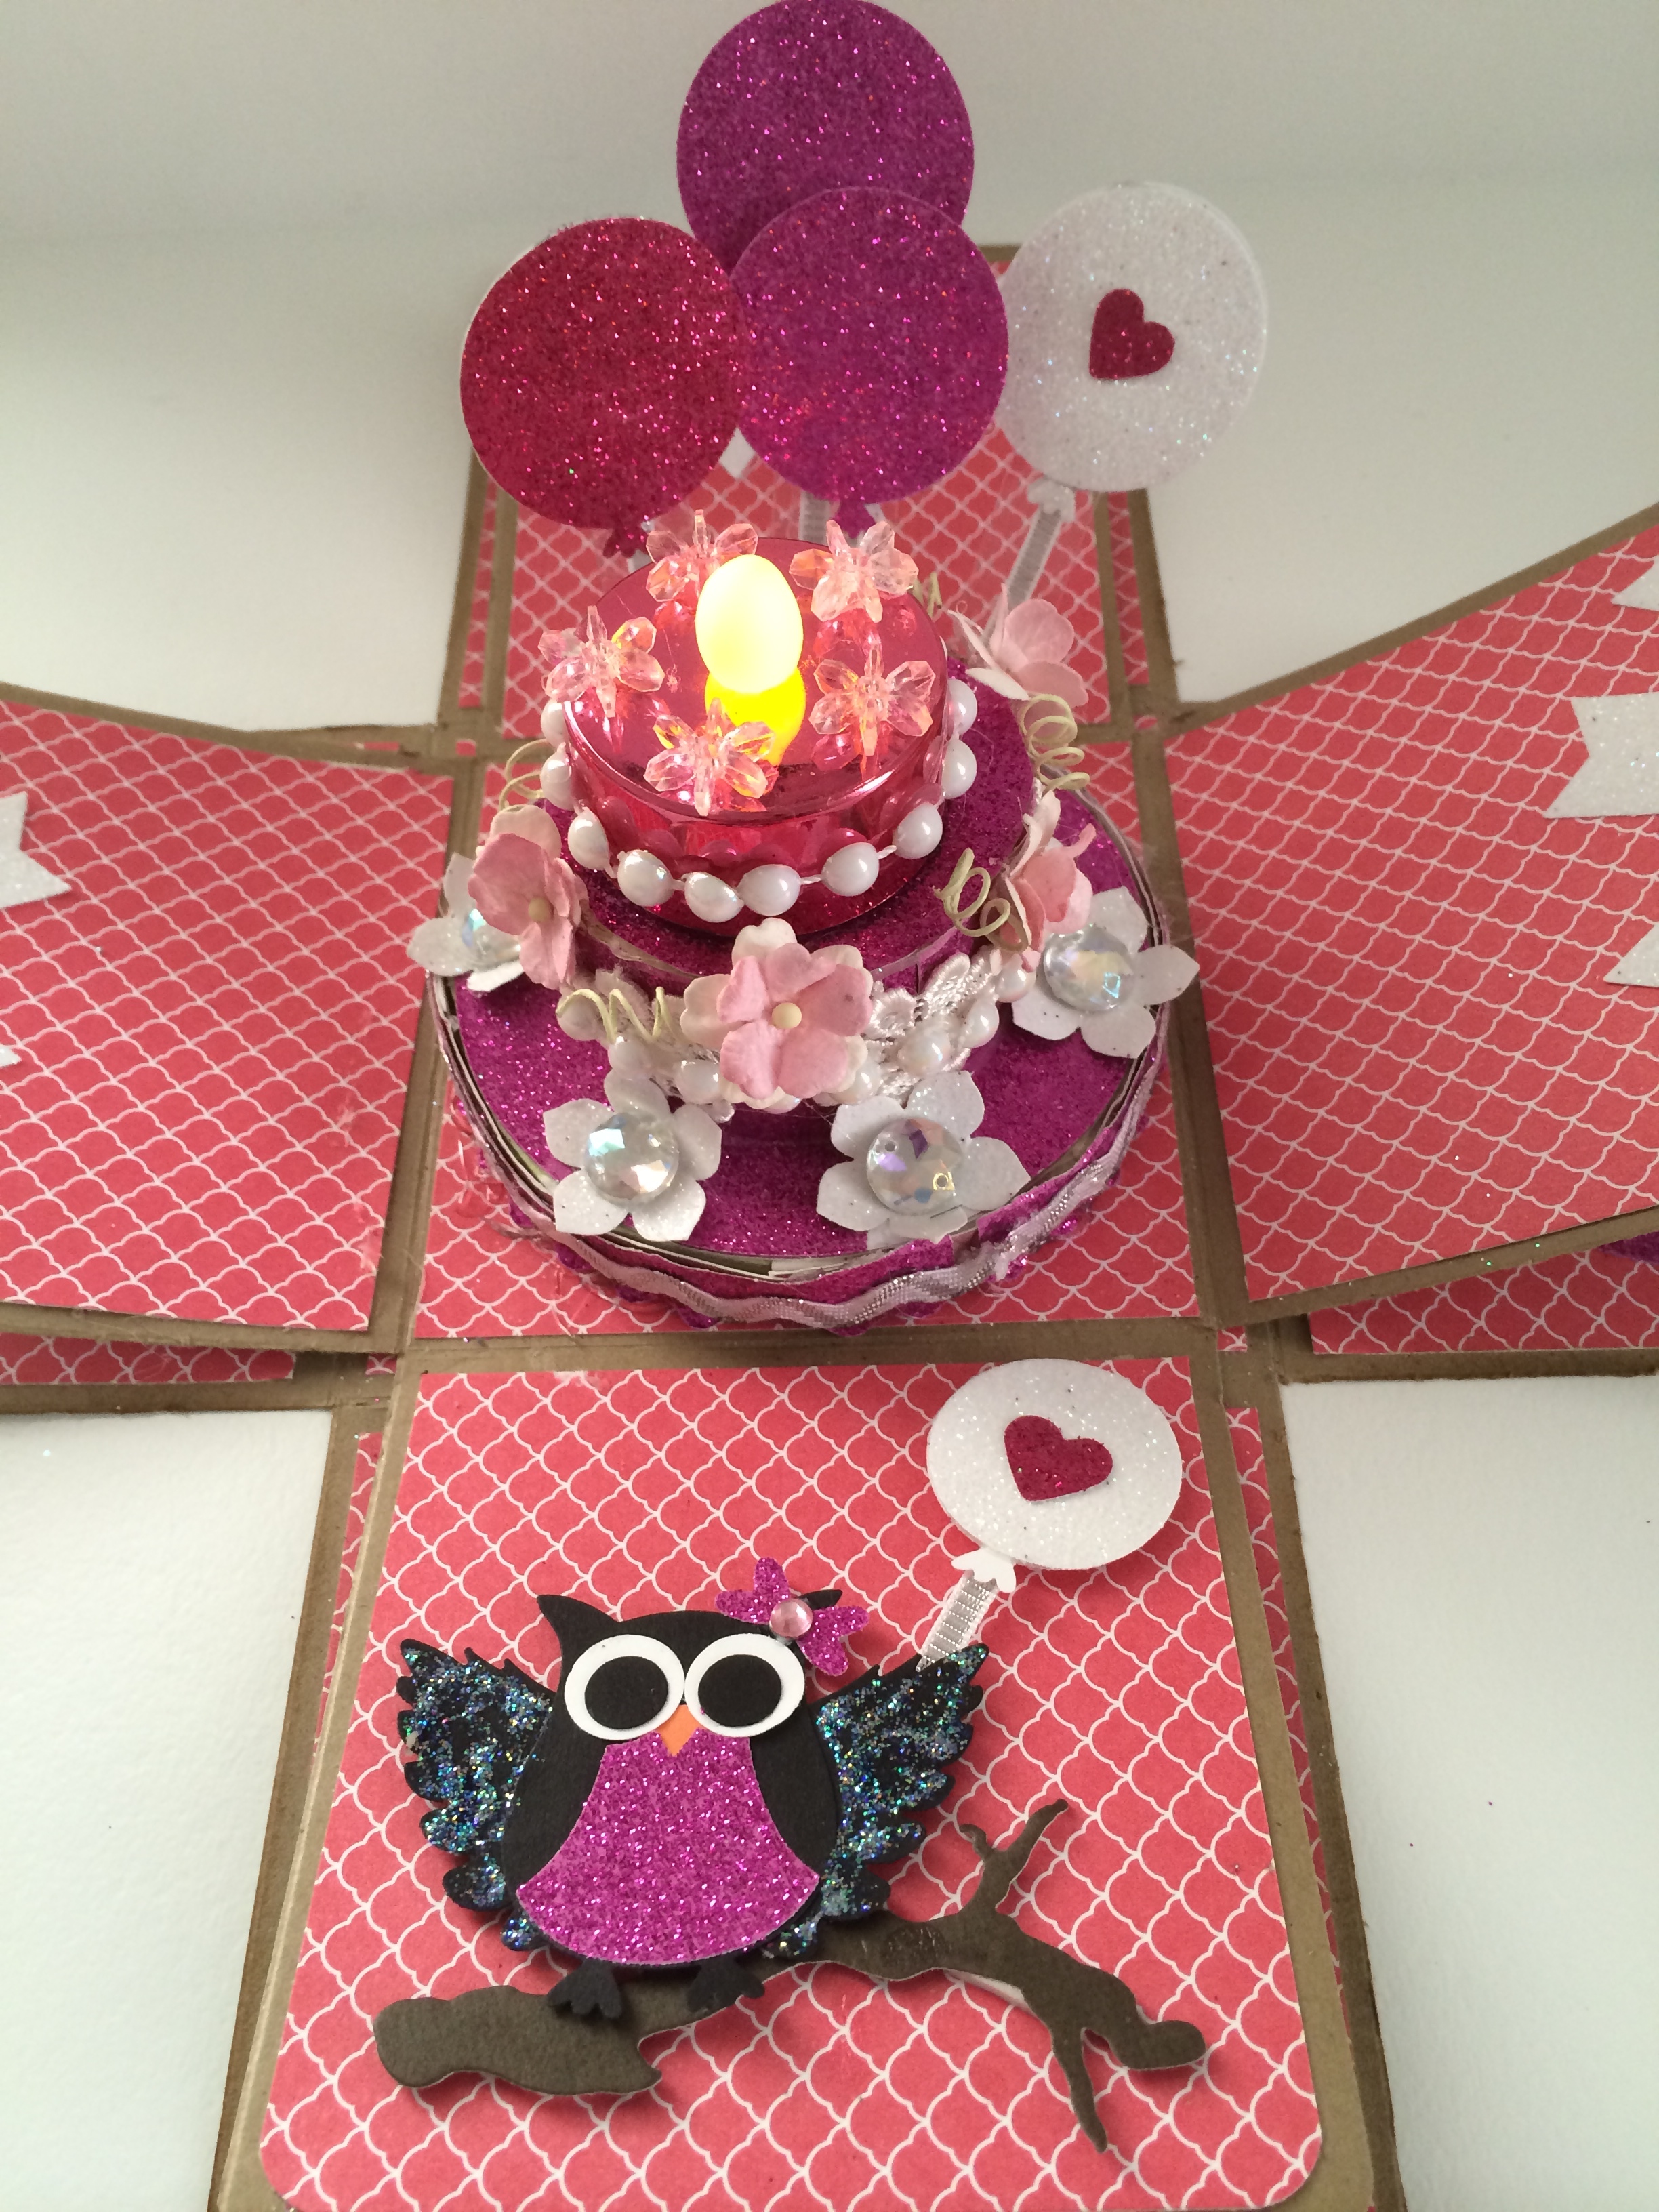
This month’s contribution is very special for me. I’ve always love birthdays and since my daughter just turned 18, I wanted to make something very unique for this month’s issue.
It took me a few days to finish this project. It wasn’t because it was difficult to put together; it was just very time-consuming. I had to use a lot of my dies, framelits and punches to make the faux “cake”, as well as decorate the box with “floating” balloons, and use the right sentiment for the occasion. For some of you, this box might be over-the-top. For me, this is just my way of saying “I Love You” and “You’re Very Special”.
Supplies and Tools I used and how I put it together:
THE BASE OF THE BOX:
1 piece of 12 x 12 card stock
1 piece of 11 ½ x 11 ½ card stock
Score both pieces above at 4 inches on all four sides. I made it this way so it is easier for anyone to follow this project. Once you score all four sides, you will notice that you have 9 squares in total.
Cut the “outer” 4 squares of both card stocks using your trimmer or scissors. Once cut, your card stock should look like a cross. You can use your corner rounder if you’d like to round the corners.
You can then use designer series paper to decorate your box.
Designer Series paper for the 12 x 12 piece:
4 pieces cut at 3 ¾ x 3 ¾
Designer Series paper for the 11 ½ x 11 ½ piece:
4 pieces cut at 3 ½ x 3 ½
Adhere the designer series paper to the card stock using Xyron mega-runner adhesive or any adhesive of your choice.
I used my glitter card stock, sahara sand card stock and Decorative Framelits from Stampin Up to cut the pieces for the sentiment.
Sentiment Used: Birthday Greetings from Fiskars
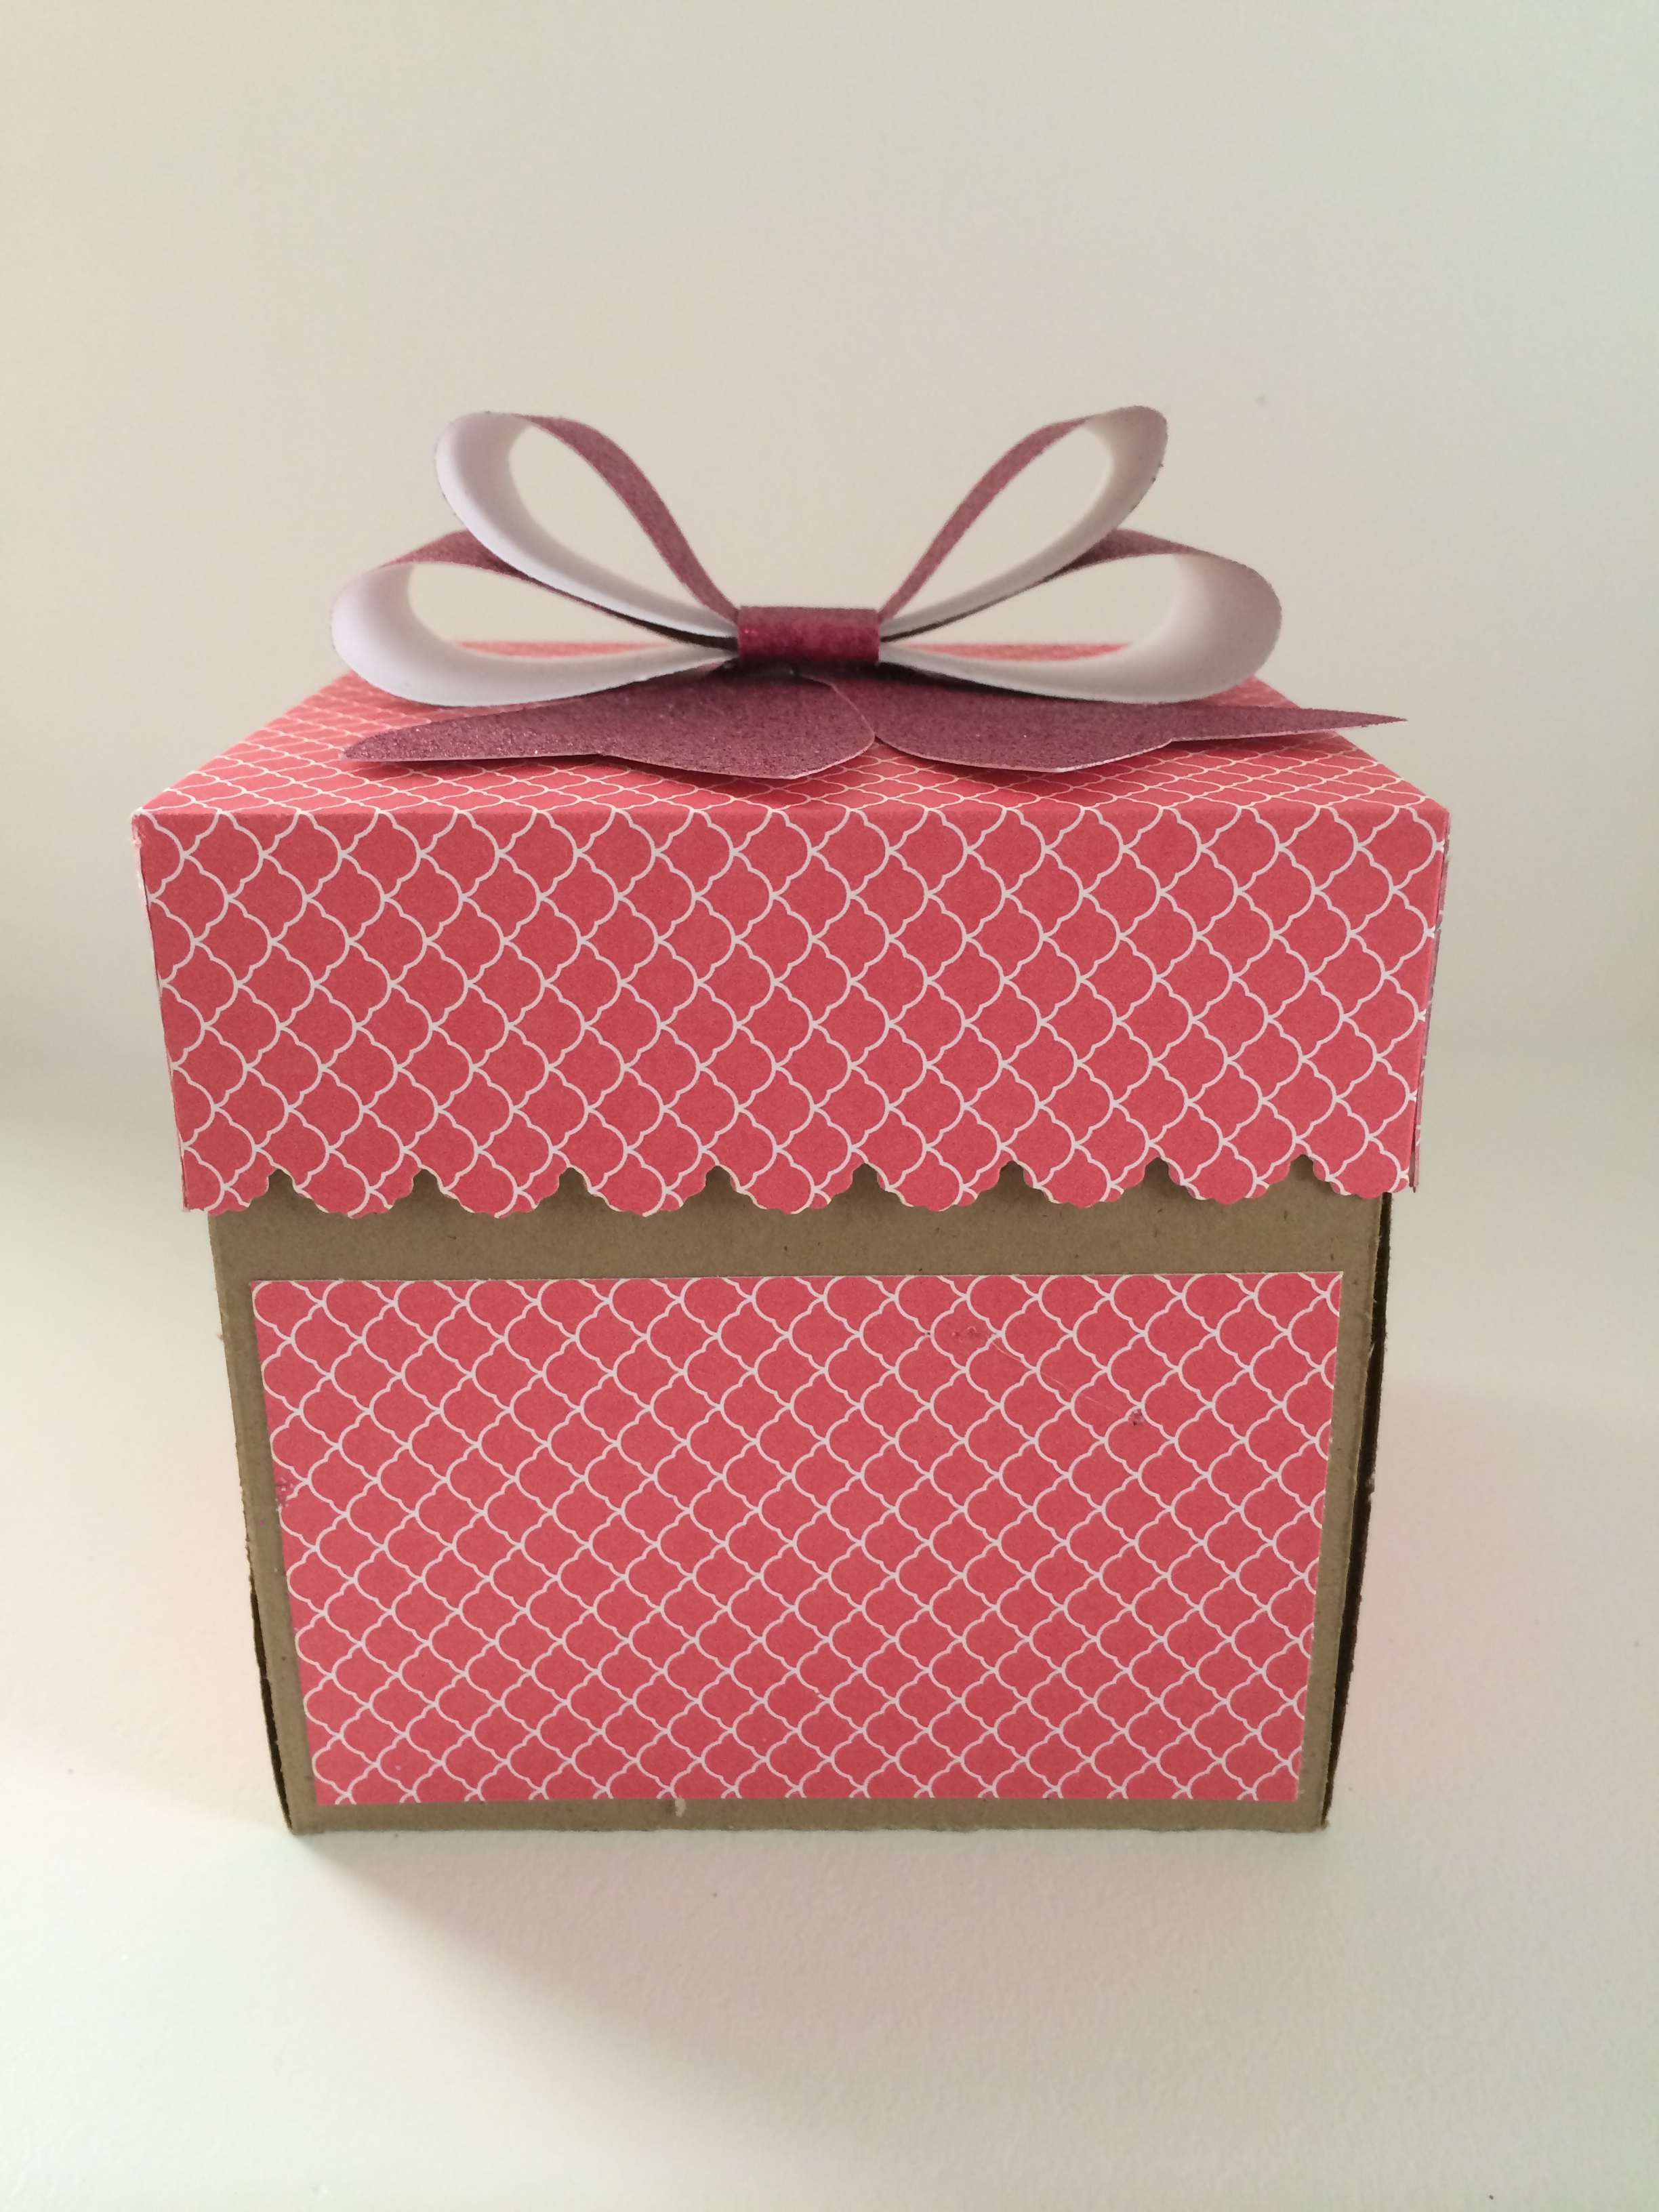
THE LID OF THE BOX:
Designer Series Paper cut at 7 1/8 x 7 1/8. Score at 1 ½ inches on all four sides.
Cut a slit up to the first score-mark on all four sides.
Adhere the slits (or you can say, build your wall) to create the lid for the box, using Tombow glue.
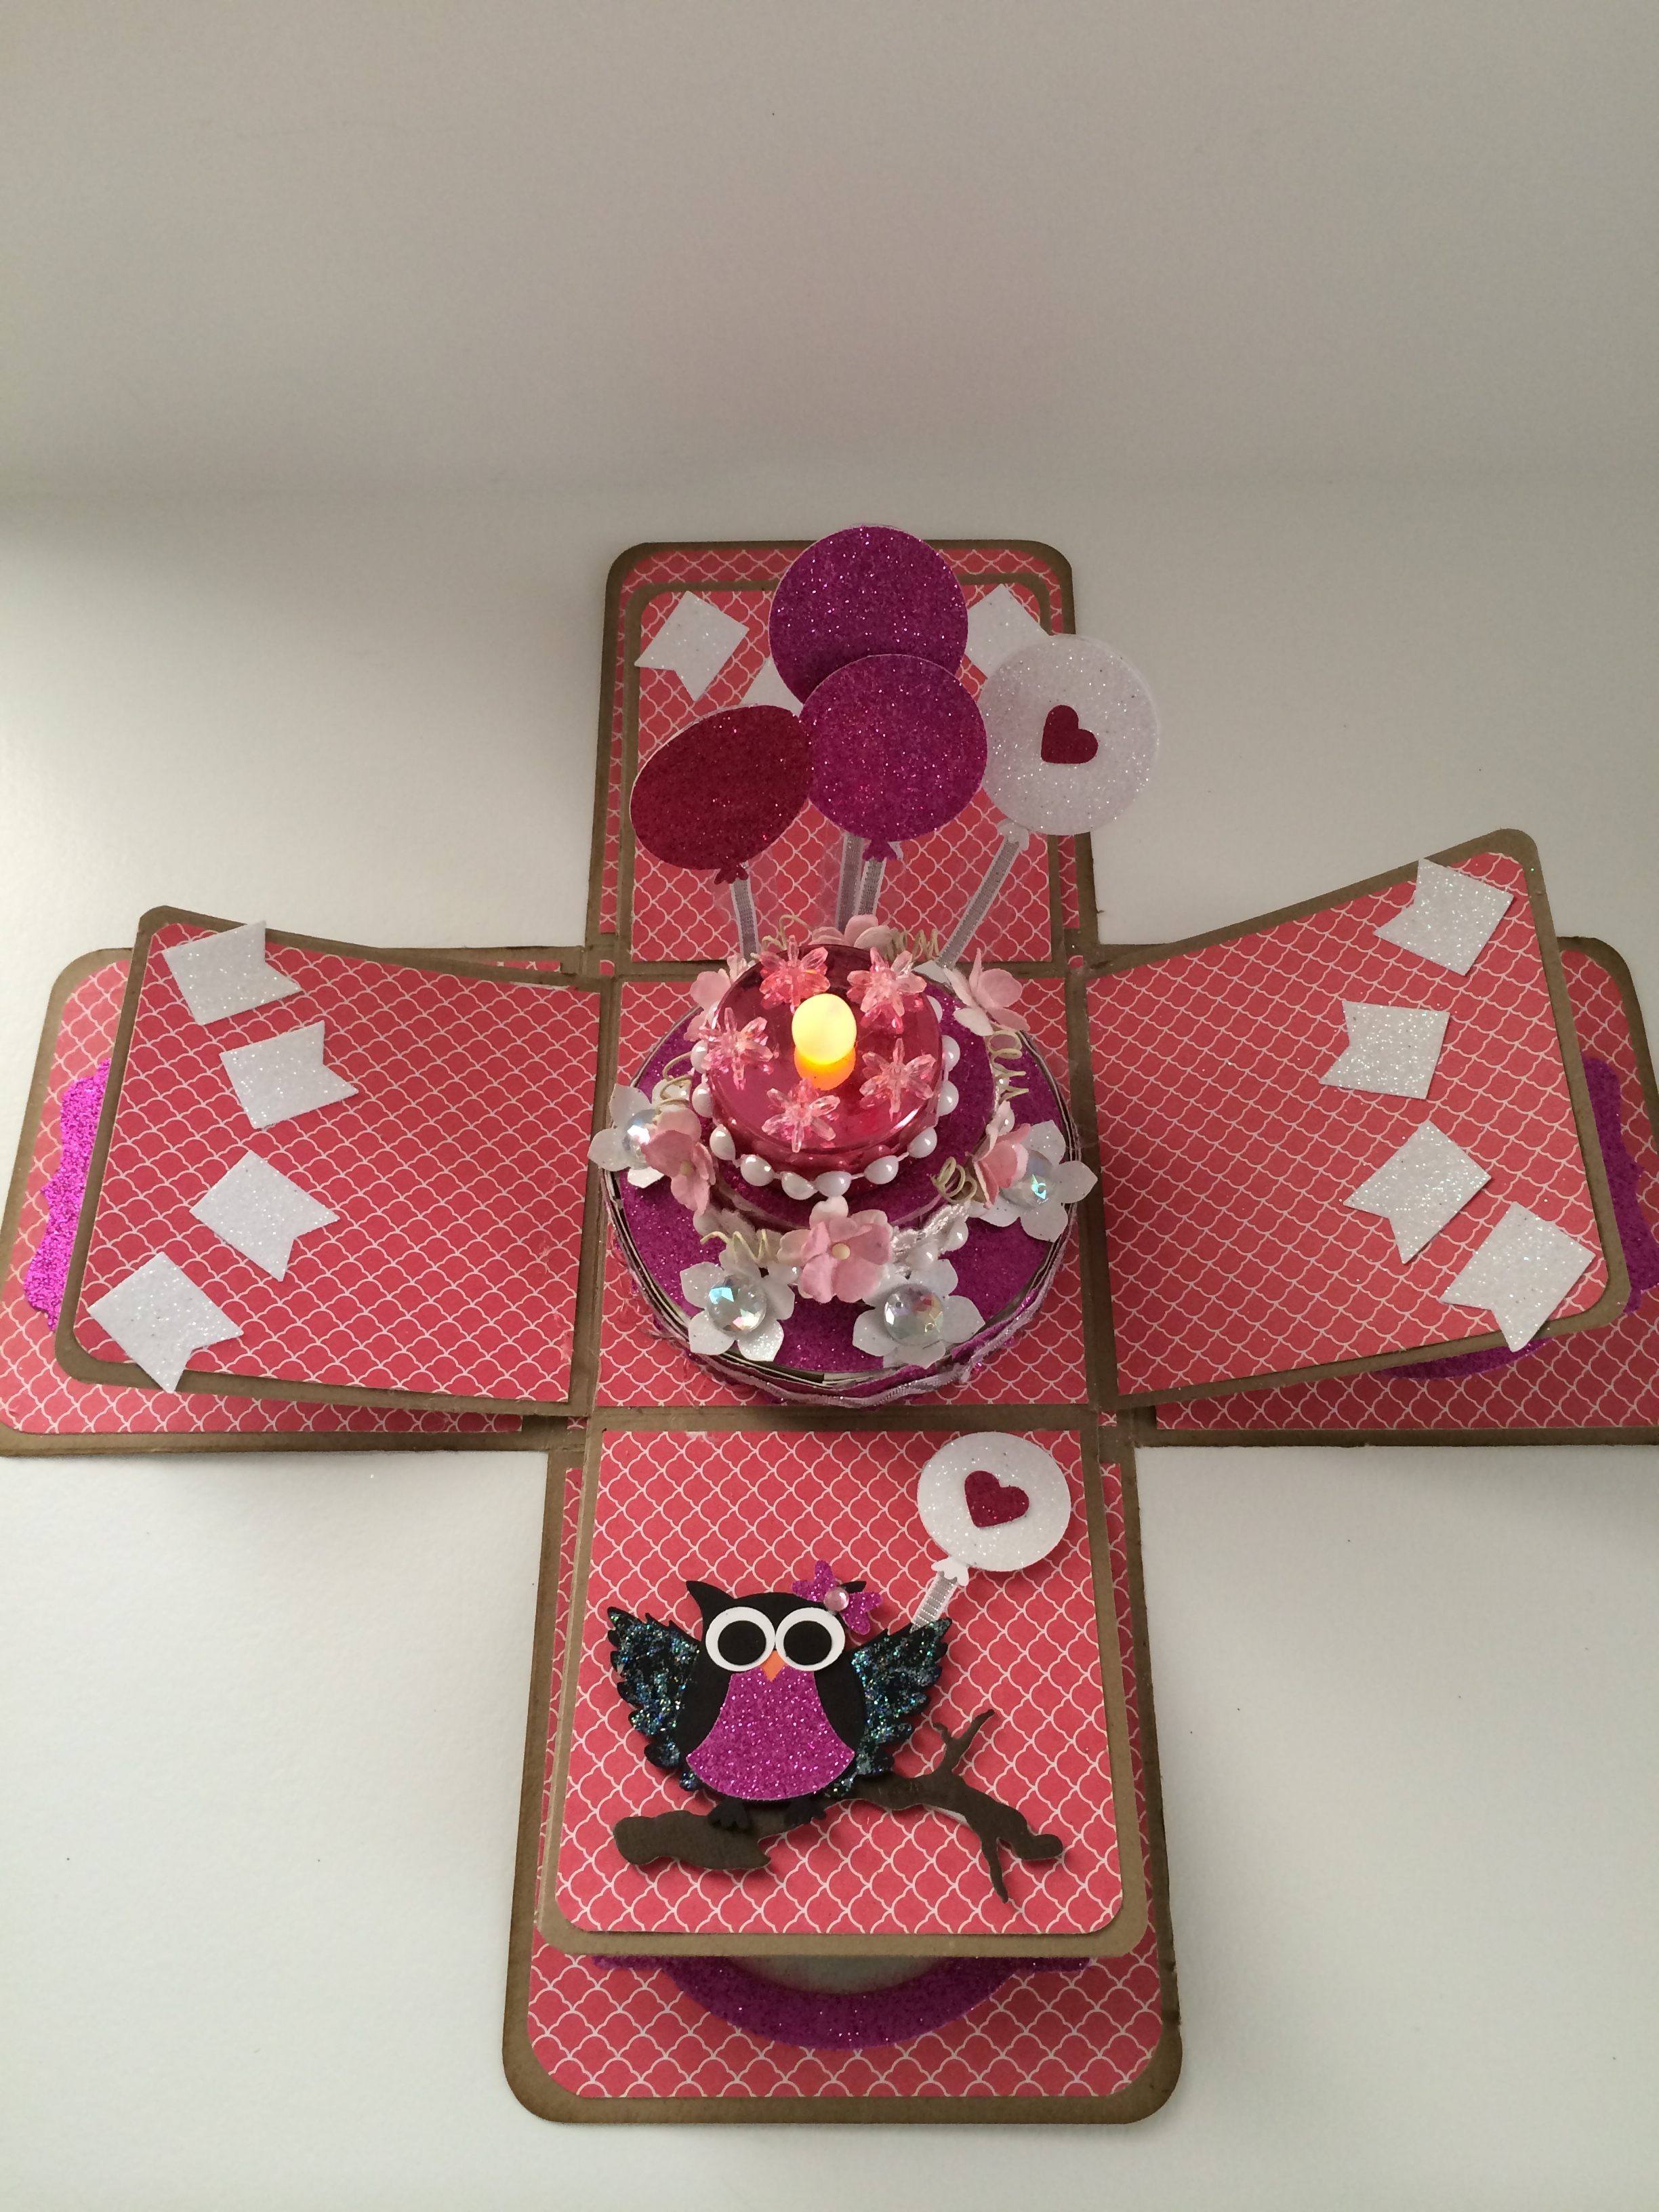
THE FAUX CAKE:
Base of the Cake: I used my Brenda Walton Cupcake Stand Die to create the base with my glitter card stock. I added the silver ric-rac and adhered it using my hot-glue to make it look like the “icing”.
I cut 6 flowers using my Petite Petals Punch from Stampin Up, and used clear rhinestones for the middle of the flower.
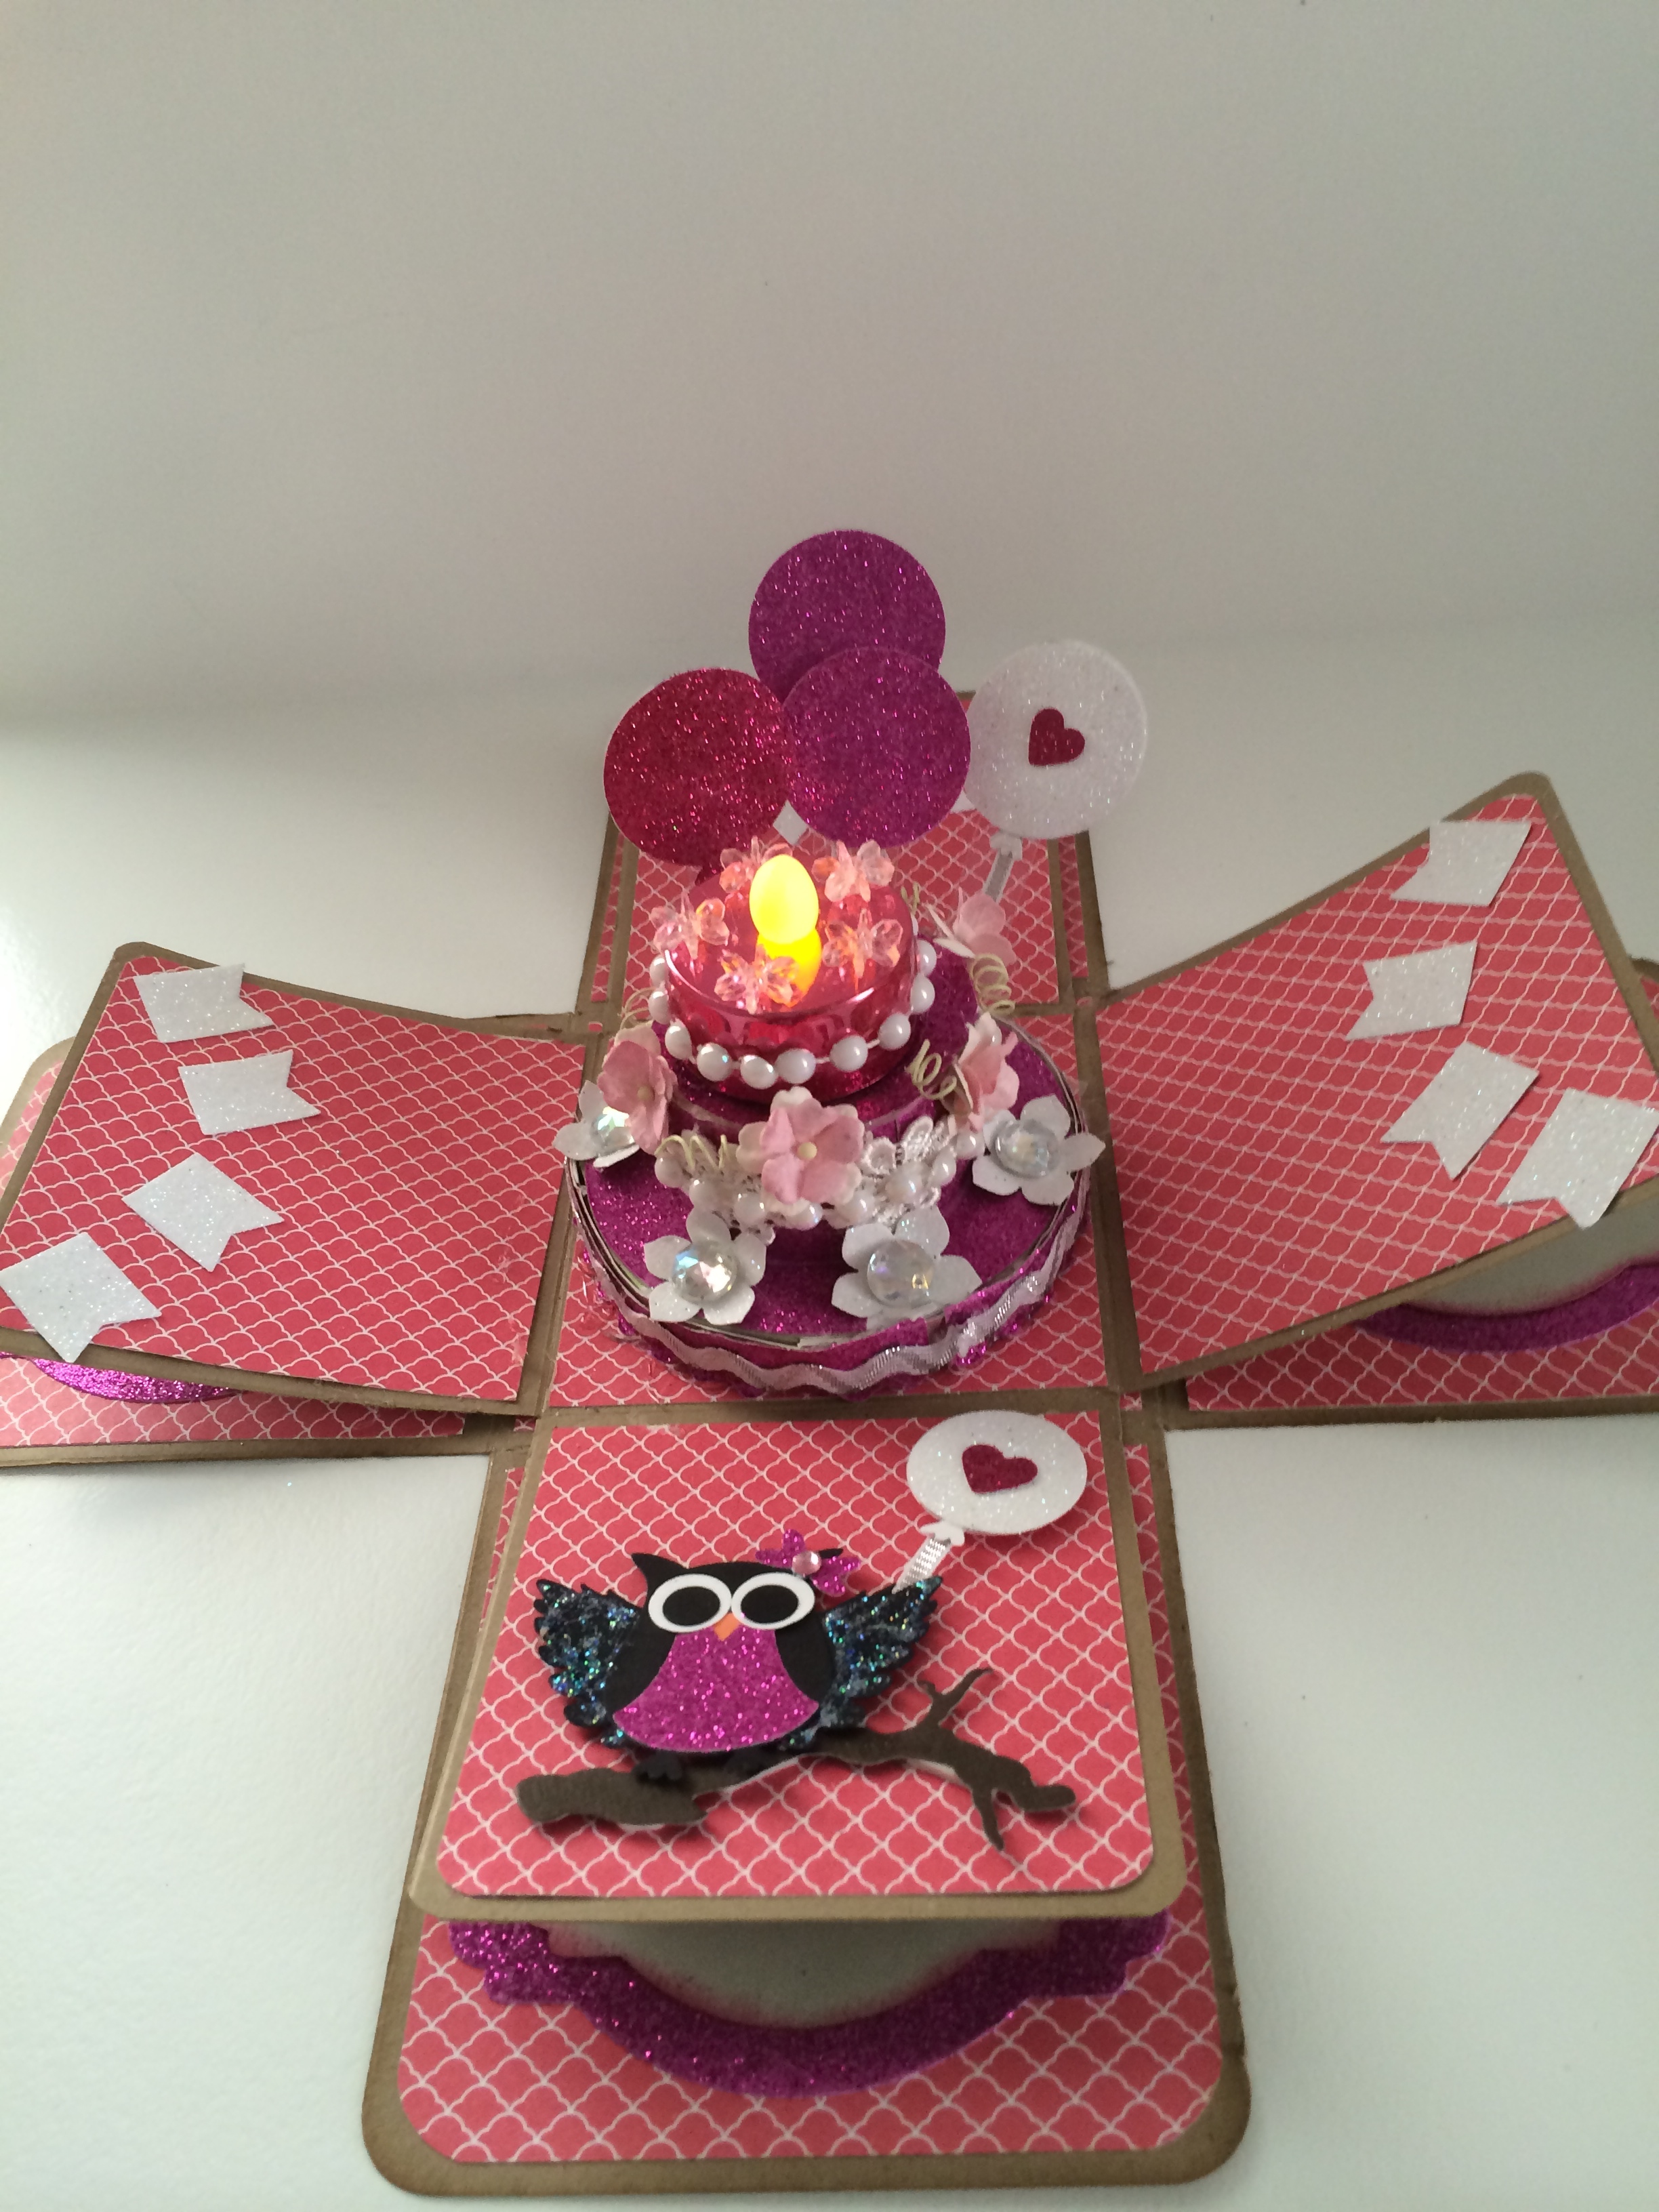
Middle Piece of the Cake: I used an empty toilet paper roll and eyeballed the height using my scissors. I used the same glitter card stock on this piece and adhered it to cover the toilet paper roll. I then used my 2 1/8 circle framelit to cut the top, then adhered this piece using hot-glue.
I cut some lace and flat-back pearls to adhere it on the side of the second layer. I also used some paper flowers from Wild Orchid crafts to decorate it. Note: make sure you adhere the paper flowers on the side of the second layer so you still have enough space to put the tea light on the top of your cake.
I used my hot-glue to adhere this piece on top of the base.
Top Piece of the Cake: I used an LED tea light from the Dollar Store for the top piece of my cake. I decorated it with flat-back pearls and some beads.
Obviously, I did not adhere the tea light on the cake so I can still turn it on and off.
Note: I didn’t adhere the cake just yet at this point because I wanted to create the balloons and attach it to the base of the box, before I hot-glue the cake on top of it.
THE FLOATING BALLOONS:
I created the balloons using my 1 3/8 circle punch and my Owl builder punch from Stampin Up. I also used the 1/8 silver ribbon from Stampin Up to create the string for the balloons.
I used strips of window sheets and attached it to the balloons to make it look like they are just floating in the box.
I then folded the bottom piece of the window sheet, enough to make a lip (or an L-shape) so I can tape it at the bottom of the box.
Adhere the cake using hot glue.
Banner: I used my Banner punch from Stampin Up to create the banner.
BOW ON TOP OF THE BOX:
I made the bow using my Bigz L Bow Die from Stampin Up, adhering it on the lid of the box using hot glue.
I hope you like this project. Happy crafting!
Facebook: http://www.facebook.com/mariarusselldesigns
YouTube Channel: http://www.youtube.com/rprmlr772
Pinterest: http://www.pinterest.com/rprmlr77
Altered Halloween Tea Light Holder
I decided to do another Halloween-themed project by altering this wooden piece that I bought from SaCrafters. Enjoy the video.
Halloween in June Challenge by Papercrafter45
This is a late post.
This is a video response to papercrafter45’s Halloween in June Challenge. When I watched their video, I immediately got super excited and decided to participate on this challenge. As most of you know, I do love Halloween and it is my favorite holiday. I also liked the fact that we were given the freedom to decide on whatever project we felt like making, as long as the digital image was included. If you would like t o participate on this challenge, your project is due on June 30, 1014 (Pacific time). You will need to comment on the papercrafter45’s challenge video and provide a link to your site; whether that is through youtube, pinterest, twitter or your Blog. The main idea is to have fun. I really did!
Screen/Panel Card
I am so happy to be chosen as one of the many talented monthly contributors for Diecut Crazy Magazine and this screen panel card below, is my first project submission. Our theme for the month of July is “Summer”. I have to admit that I was just a bit perplexed. I didn’t have any stamp sets with a summer theme. The majority of my dies are for Halloween, fall, Christmas and spring. I had to look back at some of my past projects and for some reason I couldn’t find any inspiration that would perfectly describe summer.


In my opinion, summer is all about spending quality time with my husband and kids, traveling around, barbecues, loving the longer daylight, playing with pinwheels, kites, picking flowers, bird-watching and just generally enjoying the great outdoors! So I decided to capture these moments and showcase it through this Screen/Panel Card. The sentiment that I used for this card is exactly what summer is all about ~ it doesn’t have to be perfect to be WONDERFUL!
Supplies and Tools I used:
Screen/Panel Card – 6 x 12 Card Stock (on the 12-inch side, score at 3 inches, 6 and 9). This will create the screen.
All Four Panels (Card Stock)
Bottom Layer: 2 3/4″ x 4 1/2″
Middle Layer: 2 1/2″ x 4 1/4″
Top Layer: 2 1/4″ x 4″
Stamp Sets – Perfect Pennants Stamp set, For the Birds Stamp set, Sweetie Pie Stamp set
Pinwheel sizzlit die
Decorative Punch (I used this punch to create the “legs” of the screen)
Petite petals punch
Banner Punch
Spellbinders Cherry Blossom Die
Fanciful Wings embosslits
Banners Framelits Dies
Grass Die (taken from the Garden Bench Pop it Ups Die)
Rhinestones
Brown Embossing Powder
Copic Markers
Bahama Breeze Memento Ink
Victorian Velvet Distress Ink
Xyron Sticker Maker (I used this to adhere the branch and grass die cuts to my project ~ it makes my life a lot easier!)
Glue dots and stampin dimensionals
Blog: http://www.mariarusselldesigns.wordpress.com
Facebook: http://www.facebook.com/mariarusselldesigns
YouTube Channel: http://www.youtube.com/rprmlr772
Gatefold Shutter Card
When I saw this video posted by France Martin, I immediately wanted to recreate this card and share with my subscribers. I thought this card is not only unique, but also stylish. I wanted to make my version a lot easier and I hope I achieved that on this video. I chose a simple black and white color scheme and I thought it turned out so pretty.
Materials Used:
Card Base — Very Vanilla Card Stock — cut at 8 ½ by 5 ½, then score at 2 1/8 and 6 3/8
Shutter — Basic Black card stock (2 pieces) — cut at 3 ½ by 4. On the 4 inch side, score both pieces at ½ inch. Then on 3 ½ side pencil mark at 1 ¾ then mark at 2 inches to find the center so you can cut the fish tail for the shutter.
Center Piece — Basic Black card stock — cut at 3 by 5 ½. DSP cut at 2 ¾ x 5 1/4 . Adhere together using your TG or tombow glue. Use your large circle punch or circle framelits to cut a hole on the middle piece. This will create the window to your shutter card.
Shutter DSP — DSP cut at 5 ¼ by 1 7/8.
Bellyband — 1 by 11 inches. Fold on your card to create the bellyband. Don’t make it too tight so it can still slide in and out. Decorate according to your style.
TOOLS:
Score board and scoring tool or stylus
Bone Folder
Stampin Dimensionals or foam dots
Mini Glue Dots
Rhinestones
Adhesive (tape runner of Tombow glue)
Ruler
Pencil
Scissors
Circle Framelits (about 1 ¾ inch. In diameter)
Pansy Punch
Boho Blossoms Punch
Petite Petals Punch
Birdhouse Tea Light Holder-DIY Mini Milk Carton
Spring is already in full bloom where I am and in fact, it is already getting hot over here. I know some of you are still experiencing snow and hoping that it’ll be over soon. Maybe crafting is the best way to deal with snow days. So here is a little cute project that I hope will cheer you all up.
I don’t have the mini milk carton die from Stampin Up. I saw this tutorial by Sam of PootlesPapercraft and I was just so thrilled since I didn’t have to purchase the die to make these boxes. She made hers as a treat holder but I wanted mine to look like a bird house and make it as a home decor. So I added the roof, and the tea light. Thank you Sam for this inspiration and for giving us the measurements. I tried to make this video as short as possible so some of the boring scenes have been fast-forwarded for your benefit.
Mini Milk Carton:
Baked Brown Sugar Cardstock – 8 1/4 x 5 1/2″
Score on the 8 ¼ side at 1 7/8, 3 3/4, 5 5/8, 7 1/2″
Score on the 5 1/2 side at 1 7/8, 3 3/4, 5″
Roof:
Chocolate Chip Cardstock – 1 7/8 by 5 (embossed using the textured arrow embossing folder)
Tools:
Trimmer and Scoring Board
Bird Builder Punch
Paper Snips
TIEF Arrow embossing folder
Sticky Strip
Circle Punch
Scallop Trim Punch
Polka Dot Parade Stamp Set
HAPPY CRAFTING! HAPPY SPRING!
Easter Bunny Treat Box
I just came back from the Far East and I am still suffering from jet lag. I wanted to post a video or do a Blog the other day but chores should be done first. However, I had a free time last night creating these boxes, just in time for Easter. I hope you like it.
Box:
Card Stock – cut at 6 ½ by 8 ¼
– On the 6 ½ side, score at 2”, 3”, 5” and 6”
– On the 8 ¼ side, score at ½”, 1 ½”, 5 ½” and 6 ½”
– Cut the two bottom score lines up to the box level – leave the middle part out to create the bottom lid.
– Cut the top score lines but leave the two skinny score lines that will create the top of the box. This will actually measure 2 inches.
Get your scallop tag topper punch and punch the middle piece. This is the one that will create the fold top, for your bunny face.
Bunny Punch Art:
Large Oval Punch – punch out 4 pieces using the same color card stock as your box base. These will create the bunny ears and paws.
Blossoms Punch – punch out 2 pieces of the long leaf in Pink card stock to create the inside of the bunny ears.
¾ inch Circle Punch – punch out 2 pieces (the same color as your box base) to create the Bunny’s cheeks.
Itty Bitty Punch set – Circle Punch – punch out 2 pieces in Black to create the Bunny’s eyes
Itty Bitty Punch set – Circle Punch – Punch 1 piece in Pink for Bunny’s ears.
Decorate and use any stamp set as you wish.
Pocket Tags and Flower Tutorial Using the Envelope Punch Board
These tags are so easy to make. You can use them as gift tags, or for your mini-albums and scrapbooks. You can also create these paper flowers as a home décor.
Materials used:
Designer Series Paper (free) from Sale-A-Bration
Lightweight Chipboard or Cereal Box
Other scraps
Envelope Punch Board — Item No. 133774
Perfect Pennants Stmap Set
Pansy Flower Punch —
Adhesive
Crop-A-Dile
Ribbon
