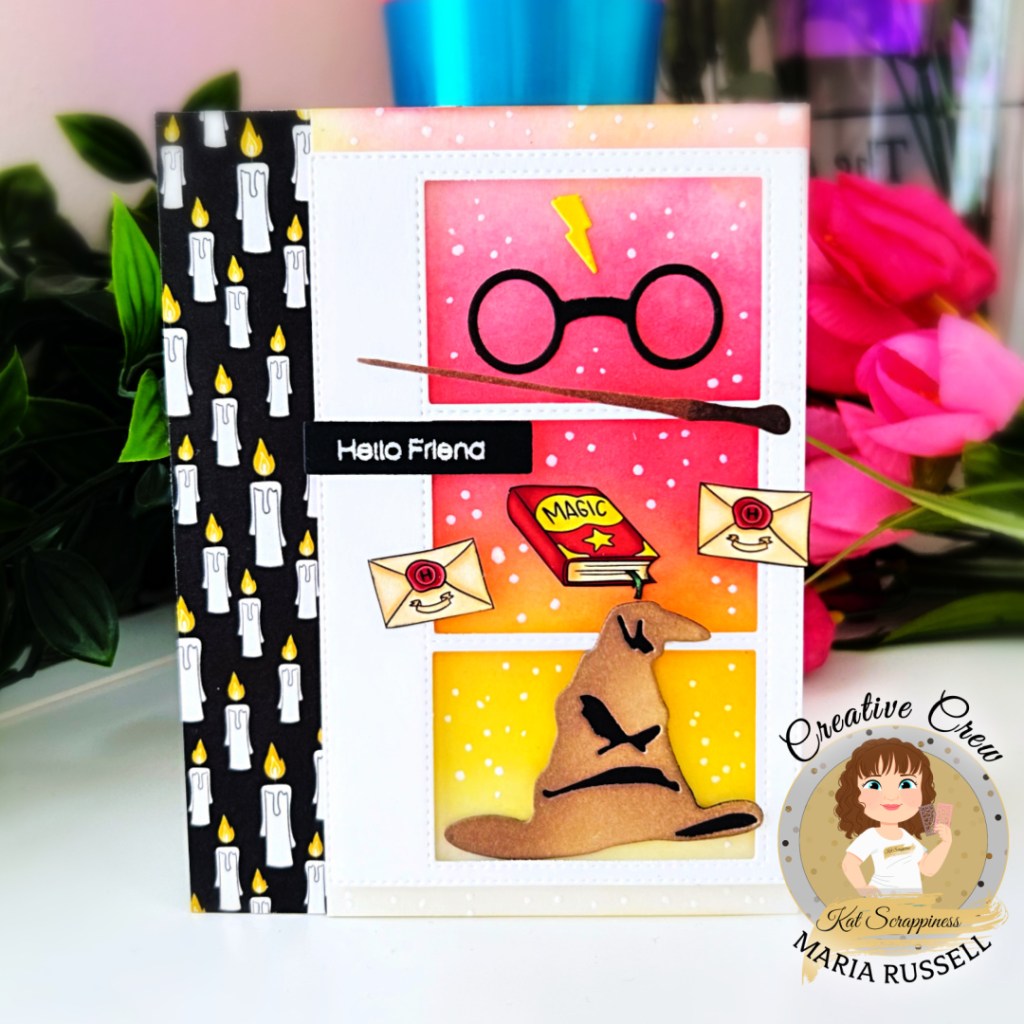
Starting by inking up a panel of some Bristol smooth white card stock with Distress oxide inks and adhering the same to some A2-size top-folding card base. I cut a strip of patterned paper from the Magical Quokka 6×6 paper pad to add a little contrast to the colorful background.
To showcase the new products, I die-cut the white frame with the Crafter’s Essentials 1 die set with the Wizarding Provisions Craft Dies. I ink-blended the sorting hat with distress oxide ink and adhered the frame with foam-adhesive for added dimension.
Next, I adhered the Magical Quokka Ephemera to the frame and finished the design with the sentiment from the Simple Sentiment Stamp and die set.
I cannot get over how super cute this new release is! I hope you like this project as much as I do. The supplies I used are listed and linked within the context of this blog post. Thanks for stopping by!
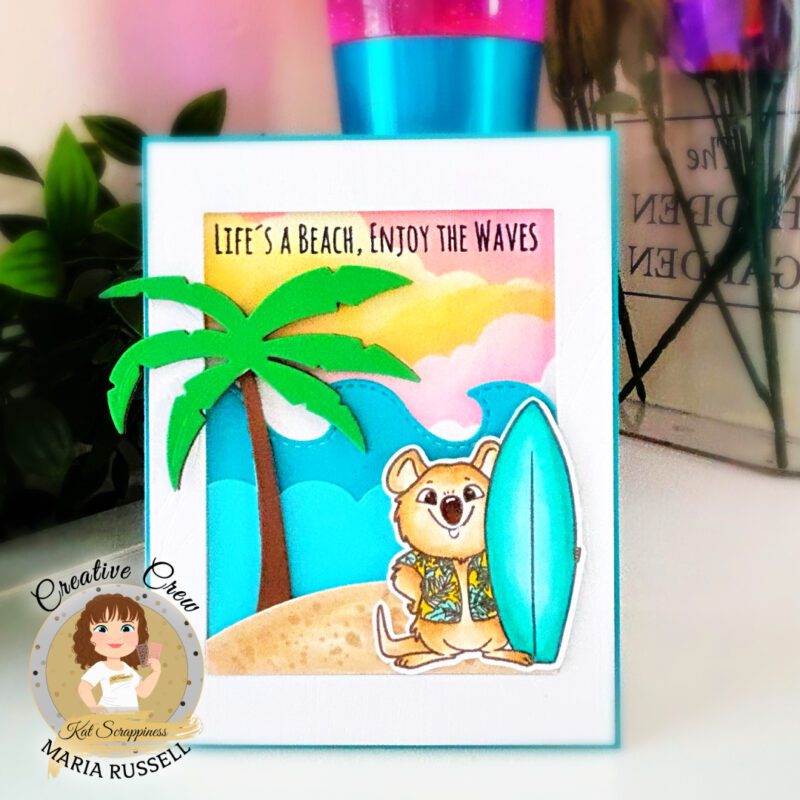
I inked up a panel of some Bristol Smooth White card stock using the Scene Builder Stencil and some Distress Oxide inks. I used the Wood Grain Frame Cut Die to die-cut the white frame, along with a few colored card stock that I later on used to die-cut the waves with the A2 Stitched Wave Dies.
Creating the beach scene came together really fast since I’ve already die-cut the frame and the waves. Adhering the frame onto a blue card base using some foam adhesive to give it some dimension, then adding the waves with liquid glue.
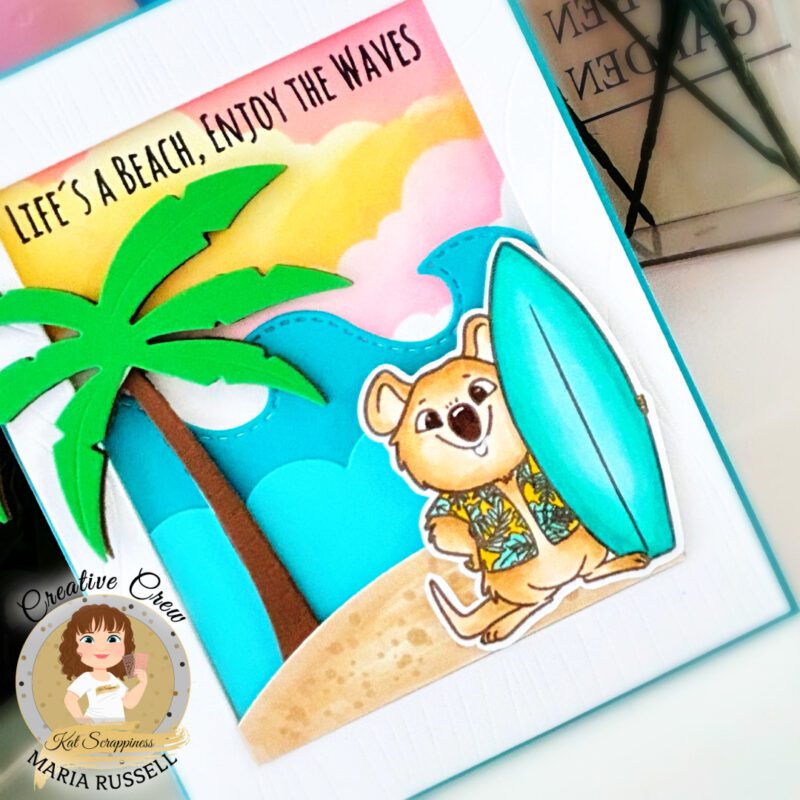
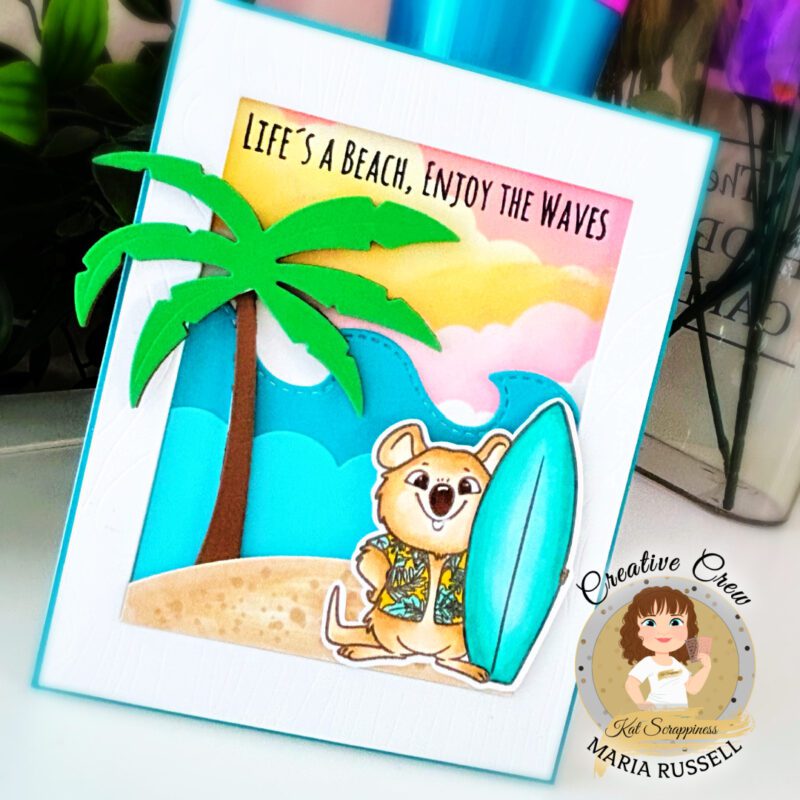
I added the sand dune and the palm tree on the card front using the Tropical Island Getaway Dies with foam adhesive to make everything look cohesive. I added the cute Quokka from the Summer Quokka Stamp Set that I previously colored using Copic markers. Lastly, I stamped the sentiment with some black ink. Easy Peasy! Here’s another look:
Is anyone in the mood to go to the beach this weekend?! I hope you celebrate Memorial Day not just being with family, but remembering all the heroes who served our country! After all, this country is the “home of the free, because of the brave!“.
The supplies I used are linked within the context of this post. Thanks for stopping by!
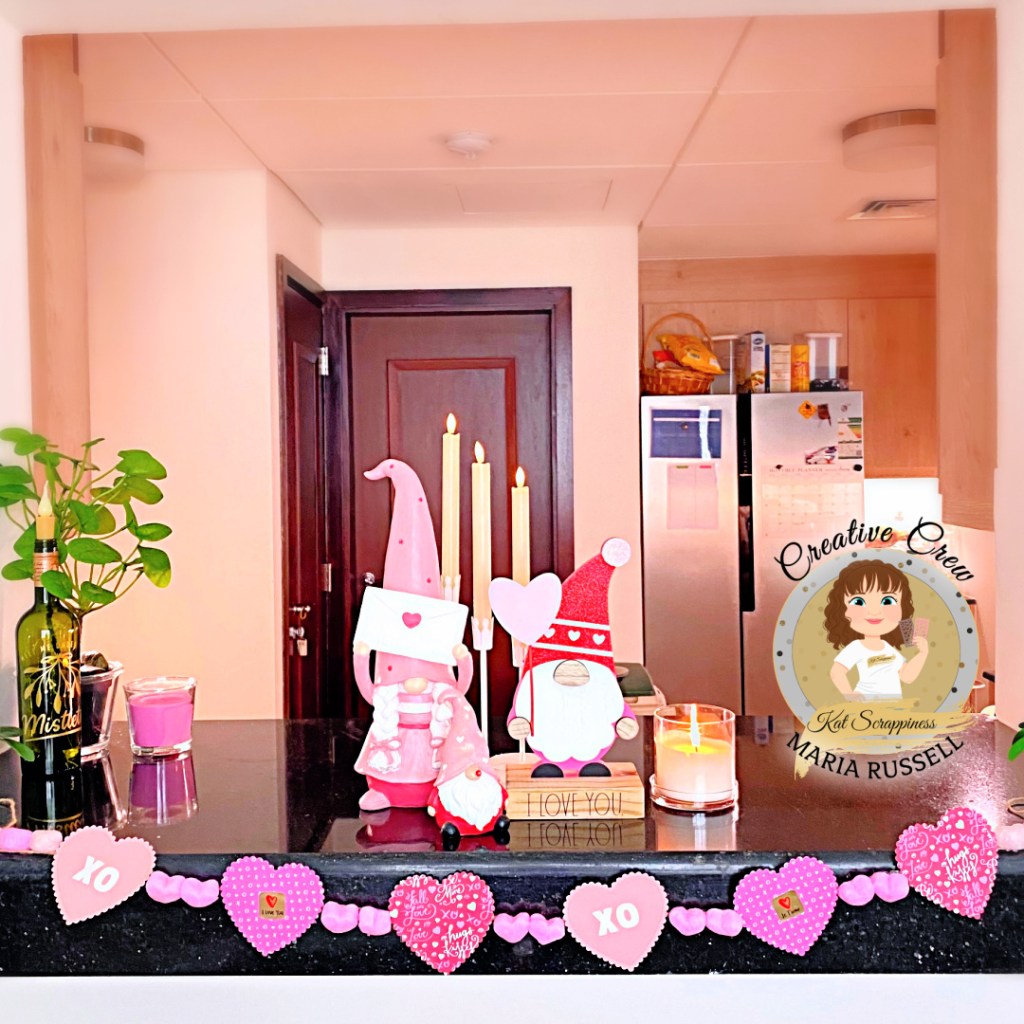
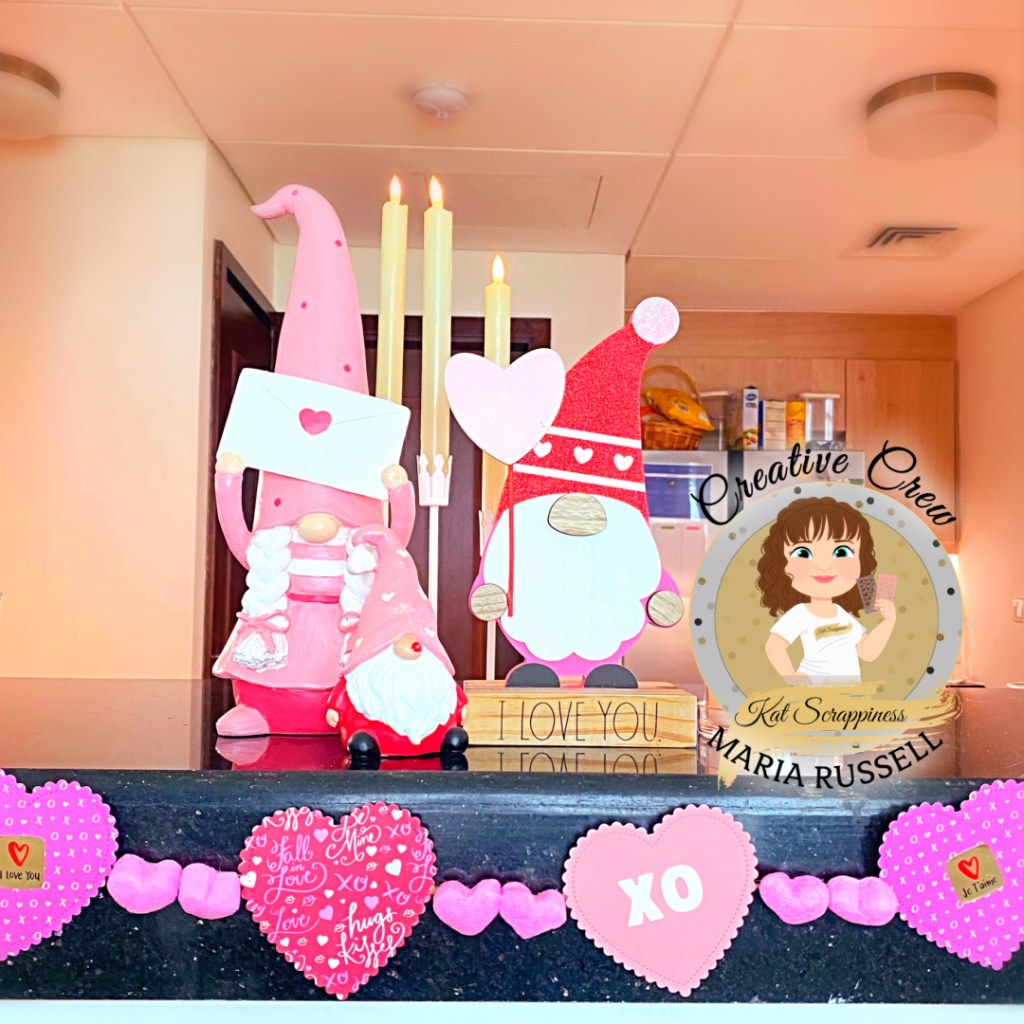
Do you have a HUGE stash of 12×12 patterned paper that you got from a Michael’s sale and running out of ideas to use them all up? How about making a DIY Valentine’s Banner? With a few dies from Kat Scrappiness, Inc. you can make a collection of cute banners to display for any occasion and season.
I always LOVE decorating for Valentine’s Day but sometimes I just don’t have the time to go out and get a few decor. Since I have a lot of craft supplies, I figured I’d make my own banner today.
Here’s how I made this project:
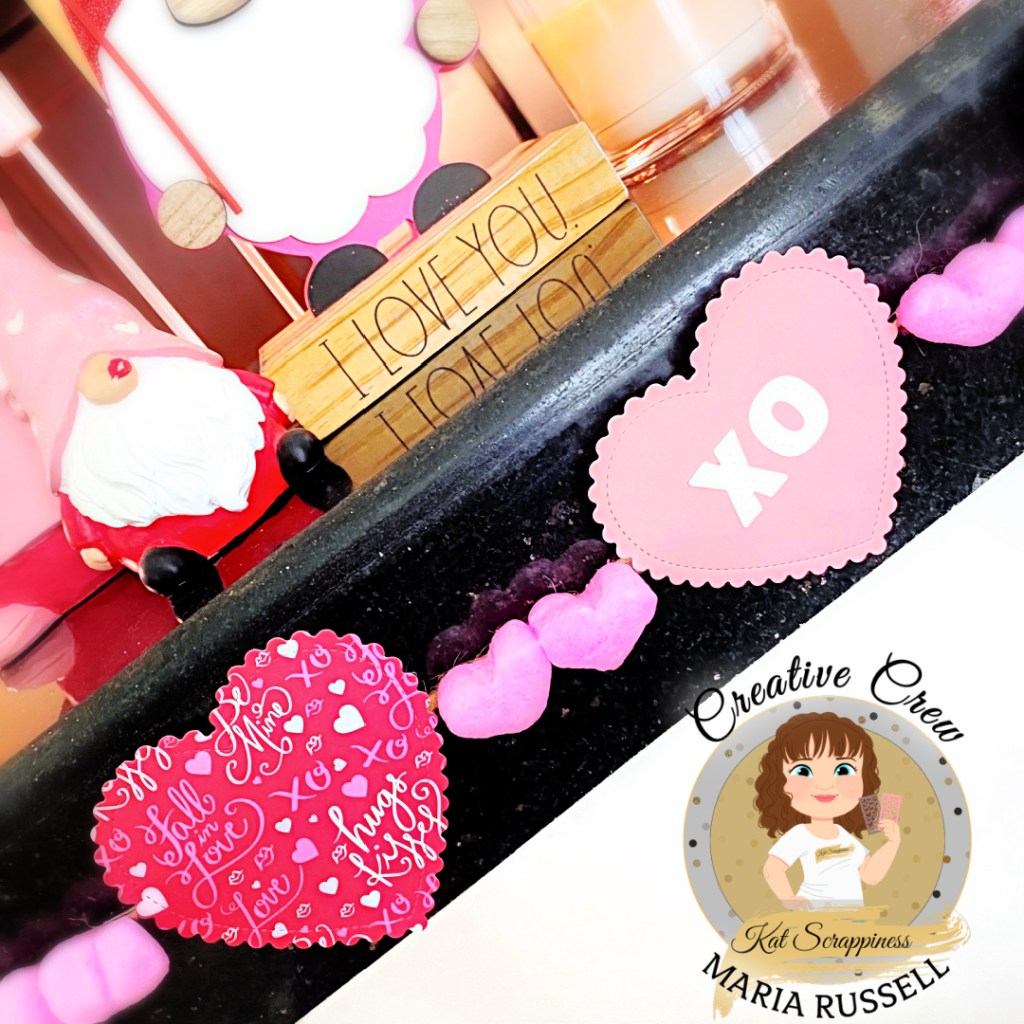
die-cut some patterned paper and plain pink card stock from your stash using the Stitched Scalloped Heart Dies. I did this 6 times. Kat Scrappiness has a lot of Valentine-themed dies so you can choose what you like.
prepare your hot-glue gun and sticks and line them all up together with your twine.
I have a few vase fillers that I purchased from Daiso a few years ago so I figured I’d add them to my project. I adhered the foam hearts first and added the die-cut hearts.
make sure to use a silicone mat underneath so your project doesn’t stick on your table.
adhere the letters “XO” on the pink heart.
use some stickers to adhere on the other die-cuts. As I mentioned we are using our stash so go ahead and add them to your project.
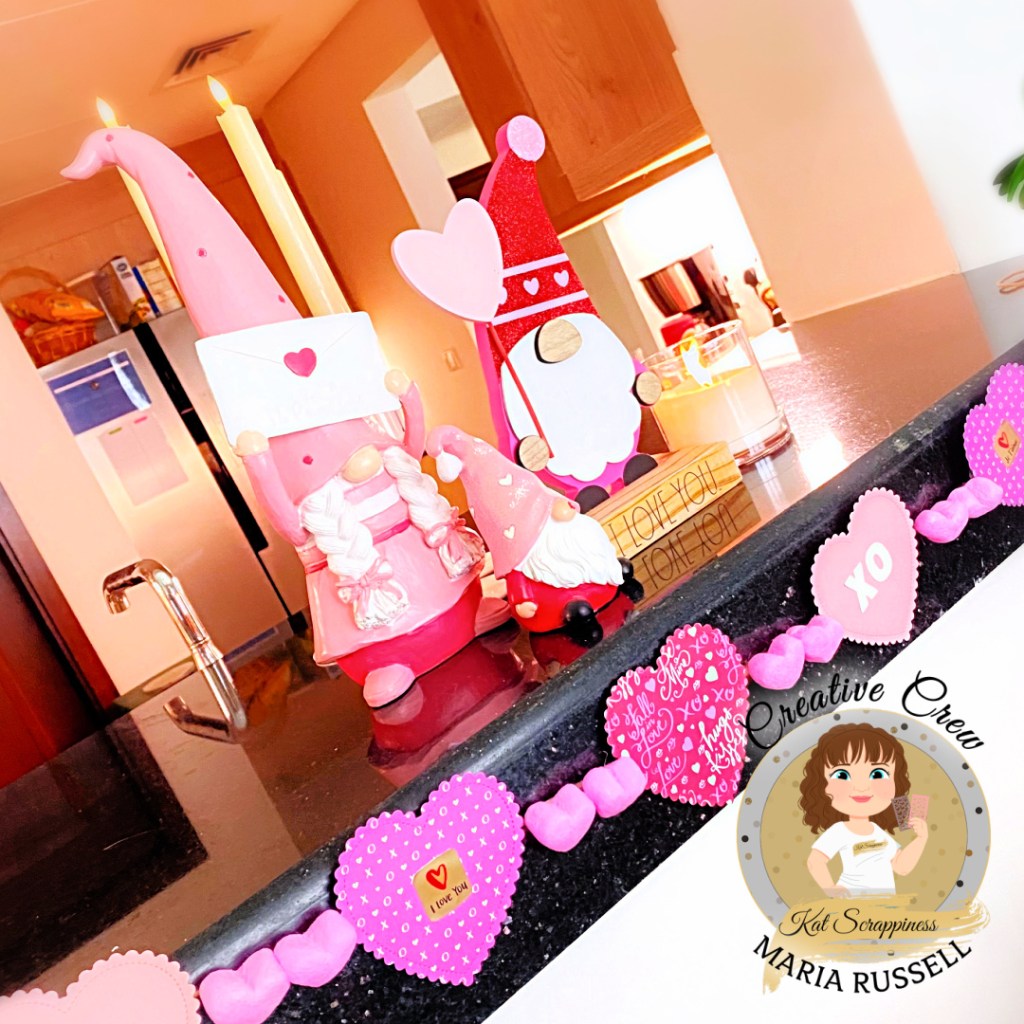
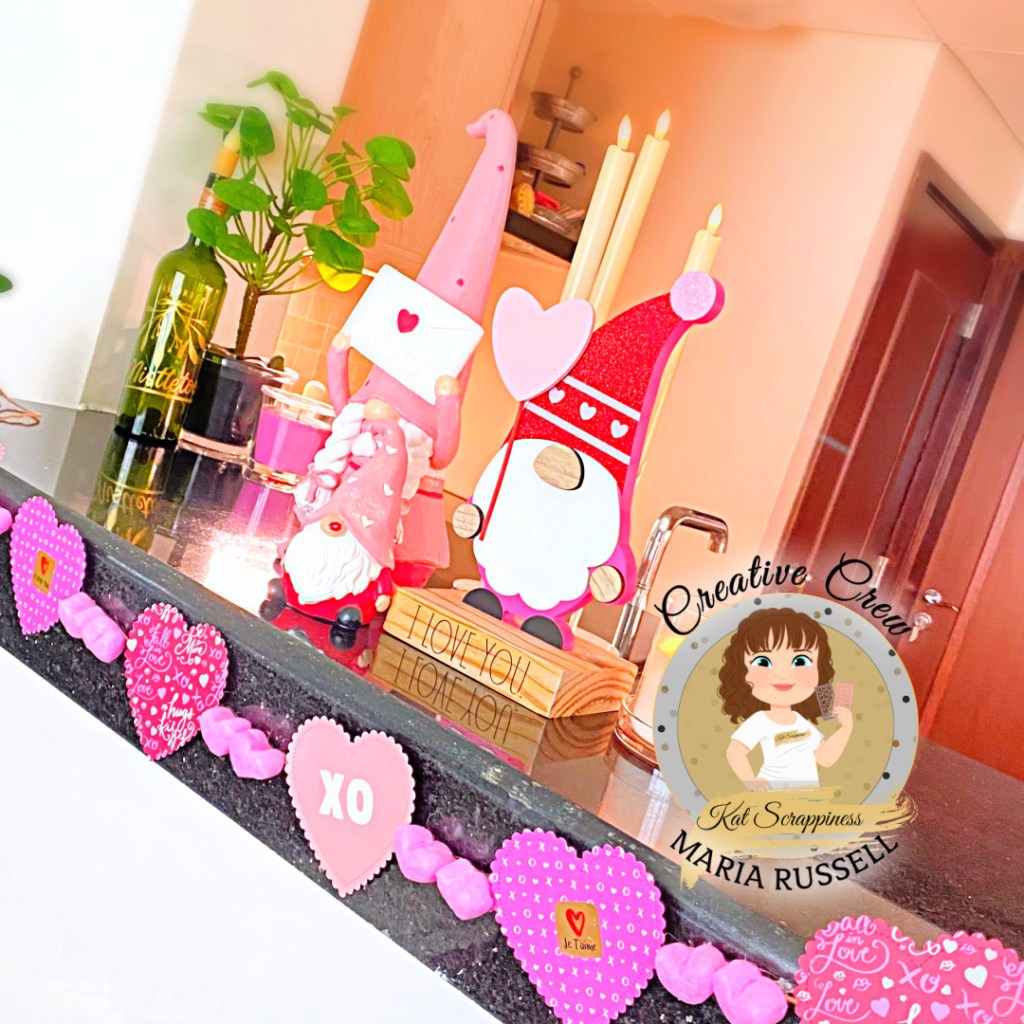
I placed my banner on the kitchen counter and added a few of my favorite decor and candles from Home Goods.
light up the candles and enjoy your work!
Before I go, take advantage of this Valentine’s deal by Kat Scrappiness, Inc. Sale starts today and ends on the 7th. See graphic below for your coupon code:
I hope you like this project today and got inspired. Below, you will find links to the supplies used to create this project. Where available, I use compensated affiliate links at no extra cost to you. Your support helps me to keep bringing you new projects and inspiration. Thank you for stopping by, and have an amazing day!
I have a cute shaker card to share with you today, featuring some old and new products by Kat Scrappiness. For this shaker card, I am showcasing the Mason Jar Shaker Dies, along with the Deco Frame Nesting Dies and lot more. These products will also be linked below.
Here’s how I made this card:
die-cut all of the components needed for the shaker card on some pearl glitter card stock and patter papers using the Mason Jar Shaker Dies.
die-cut the deco frames using the Nesting Deco Frame Die Set and adhere the white frame on some top folding notecard.
adhere some light blue card stock on the second deco frame and foam-mount this panel for added dimension.
create the shaker well using some acetate sheets, glue and foam adhesive and close the shaker.
die-cut the foliage using the Christmas Foliage Die with some light blue card stock. [I really love combining blue and red, with pink and white.]
adhere the shaker on the focal panel card with liquid glue.
stamp the sentiment from the Simple Sentiments Stamp Set on some black card stock with Versamark ink. heat-set with heating tool.
die-cut the sentiment using the Simple Sentiment Die and adhere on the card with glue.
I hope you like this card today and got inspired. Below, you will find links to the supplies used to create this project. Where available, I use compensated affiliate links at no extra cost to you. Your support helps me to keep bringing you new projects and inspiration. Thank you for stopping by, and have an amazing day!
stamp the images on some Neenah Classic Crest Solar white card stock. It is really helpful if you have the Misti stamping tool to get a really nice impression of your stamped images.
die-cut the image(s) using the coordinating die(s) with your die-cutting machine. Secure the dies by using Pixie Tape so they don’t shift while die-cutting.
ink-blend a panel of some Bristol smooth white card stock with Distress Oxide Inks and blending brushes. Keep blending until they have a smooth transition between the colors.
I hope you like this card today and got inspired. Below, you will find links to the supplies used to create this project. Where available, I use compensated affiliate links at no extra cost to you. Your support helps me to keep bringing you new projects and inspiration. Thank you for stopping by, and have an amazing day!
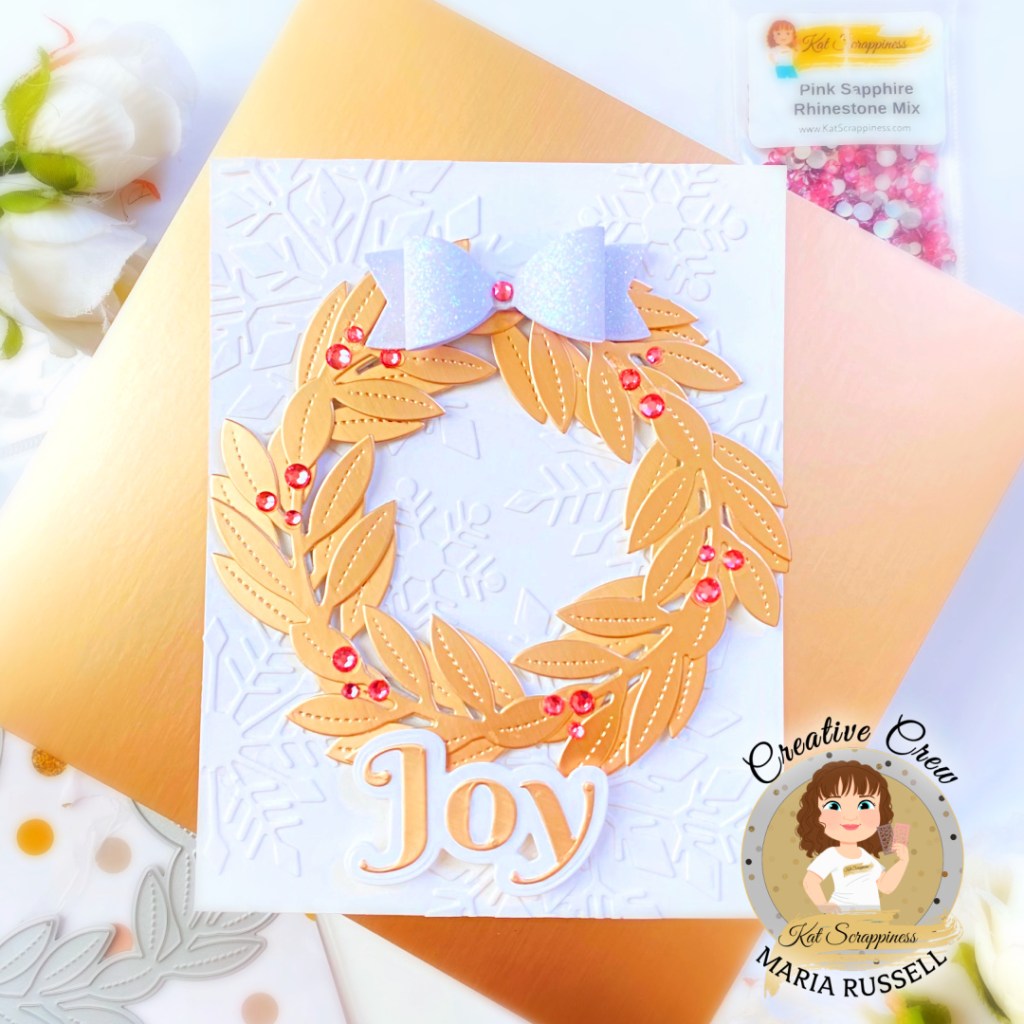
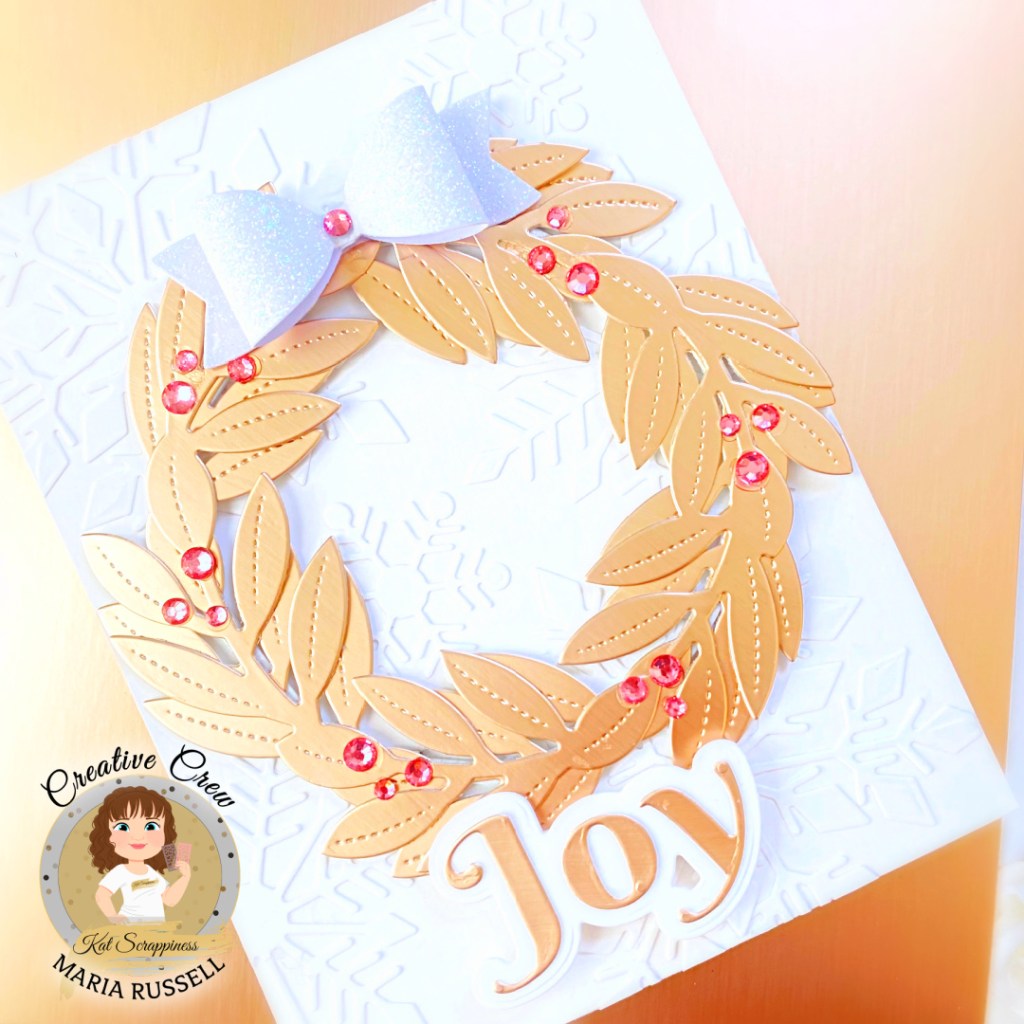
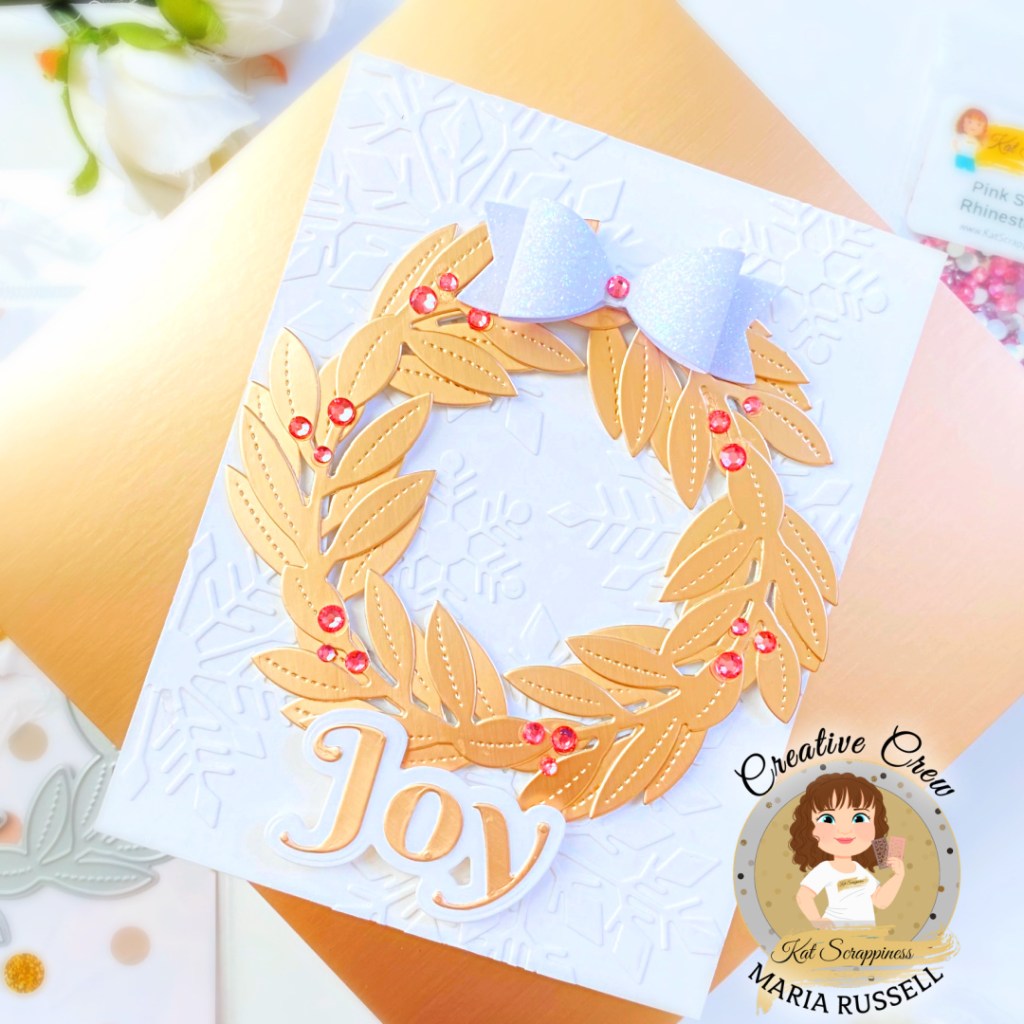
create the background panel by die-cutting some Snowflakes using the Snowflake Trio Dies, and adhering on some A2-size panel. Adhere the snowflakes randomly and add this panel on some A2-size notecard. [Designer’s tip: adhering the snowflakes on the background added some subtle texture and interest to the card without overwhelming the whole design].
die-cut the Wreath Die twice using some rose gold card stock. Adhere on the card panel with foam-adhesive for added dimension.
die-cut the Joy Word Die with Shadow also with the rose gold card stock and some Neenah solar white card stock. Adhere on the card with foam adhesive.
finish the card design by die-cutting the Build A Bow Dies on some white glitter card stock and adhere on the card with foam adhesive to make everything look cohesive.
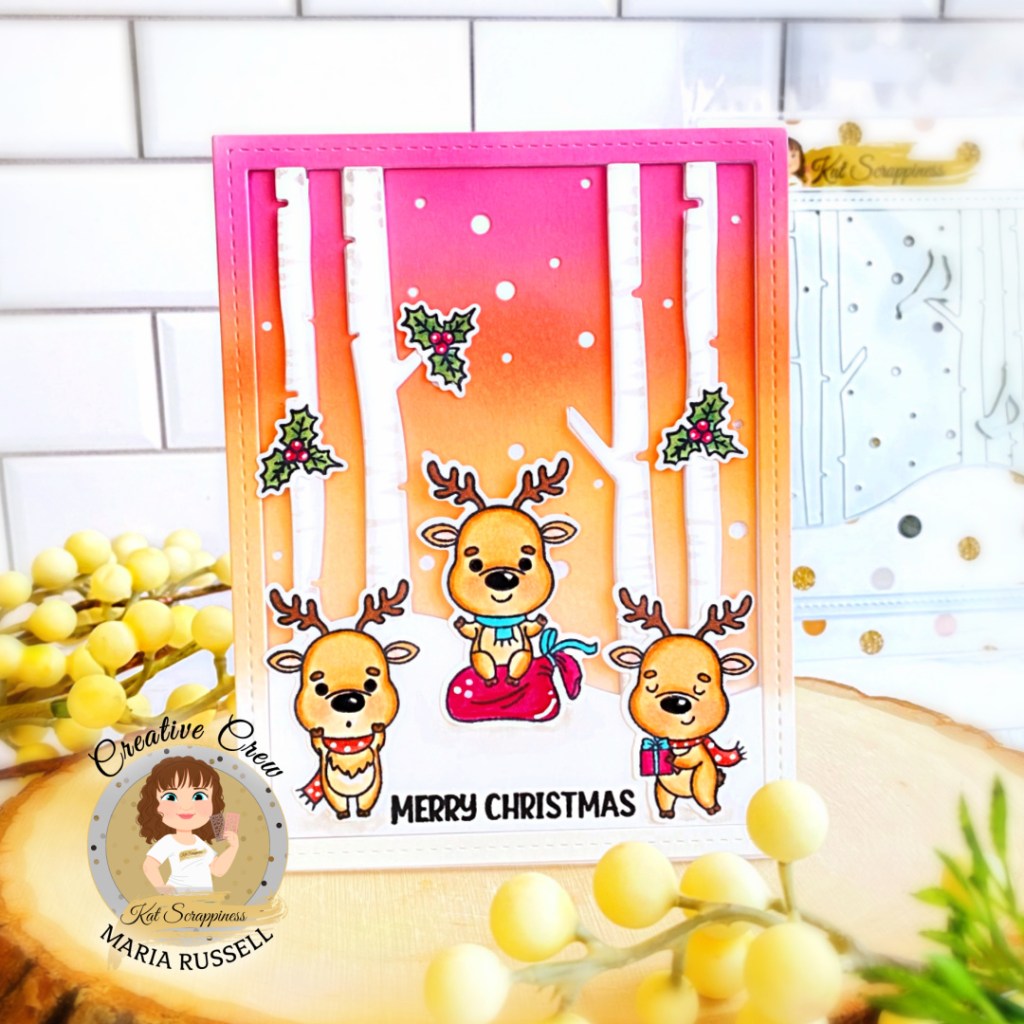
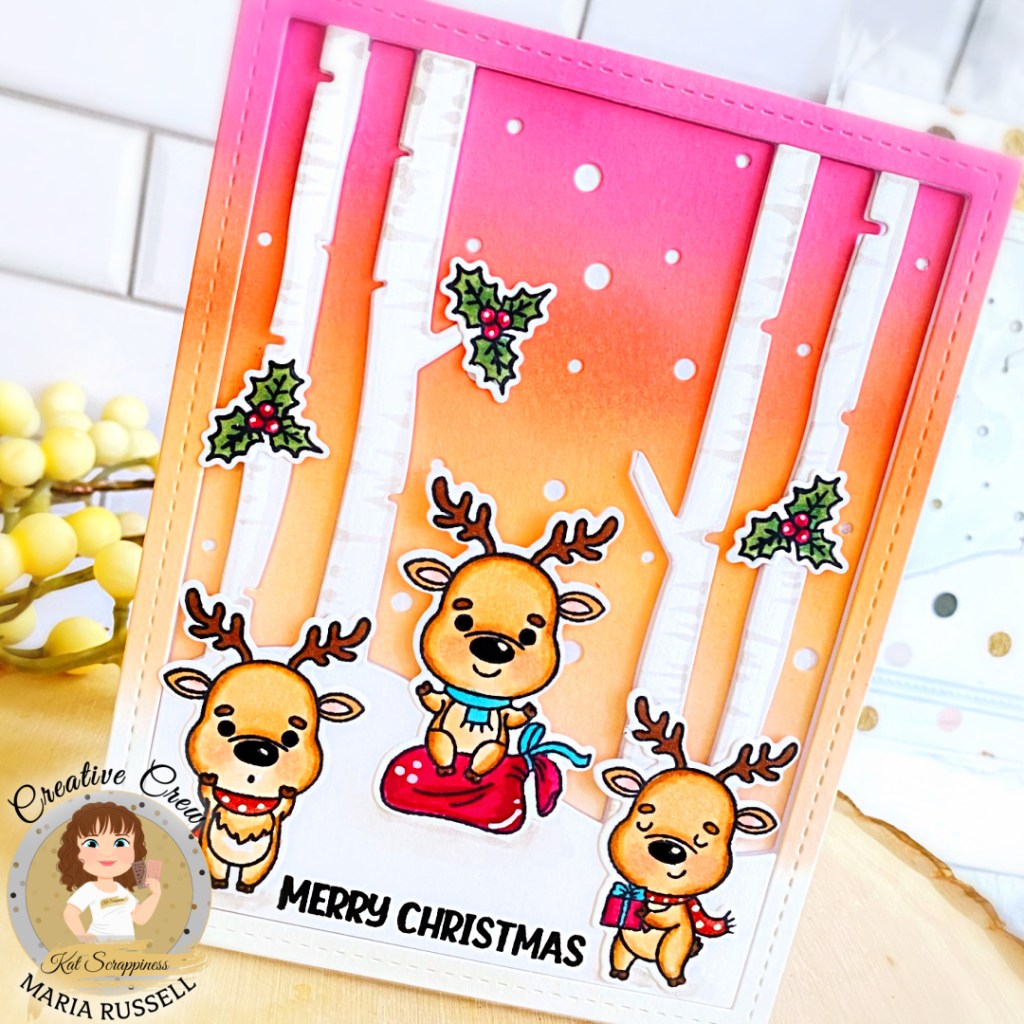
The next card is quite simple as well but I really LOVE the way this one turned out!
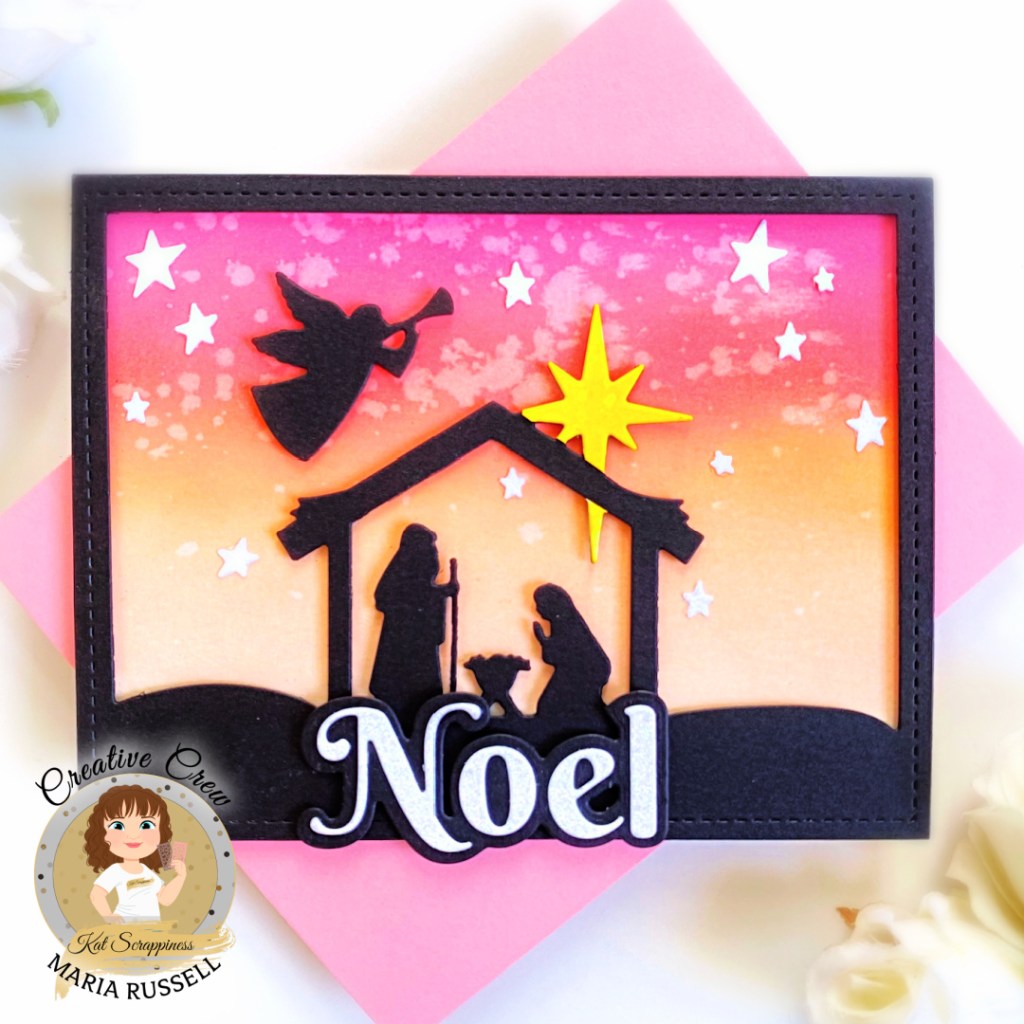
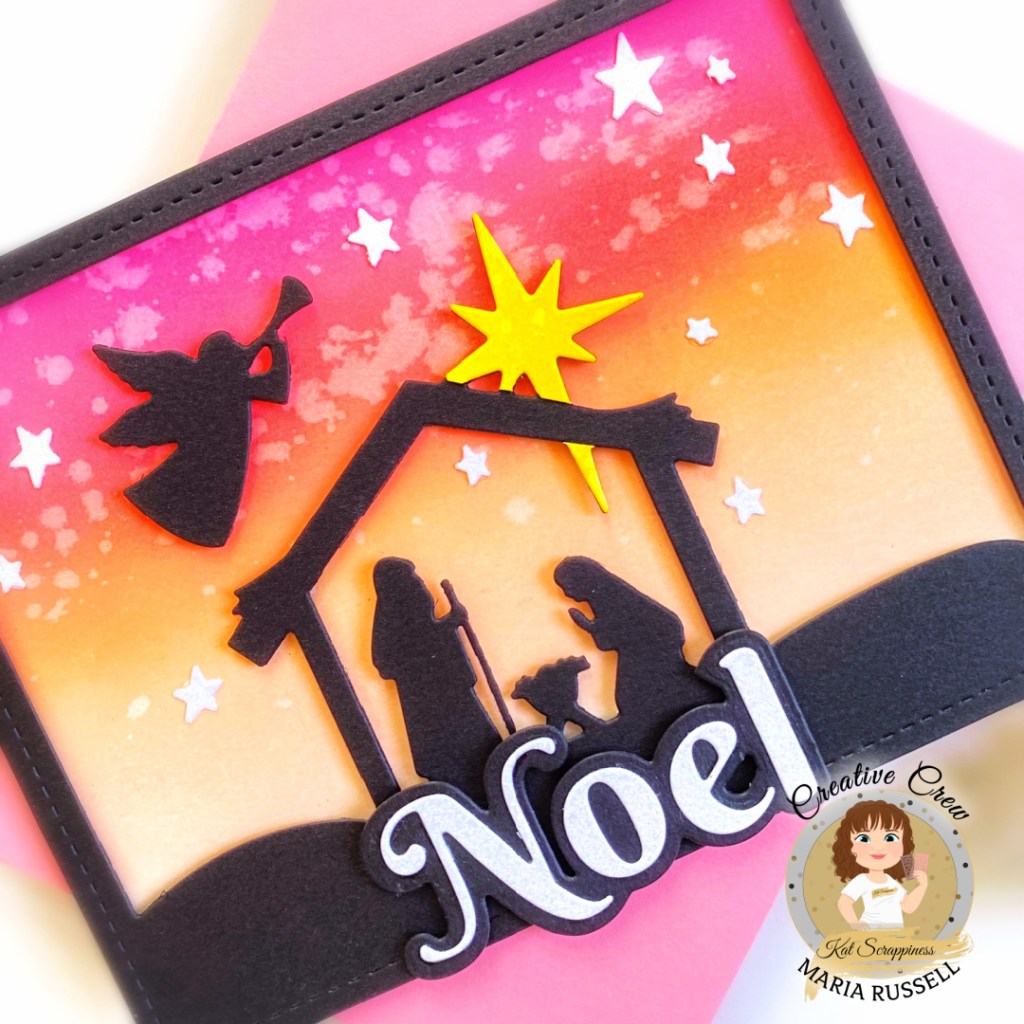
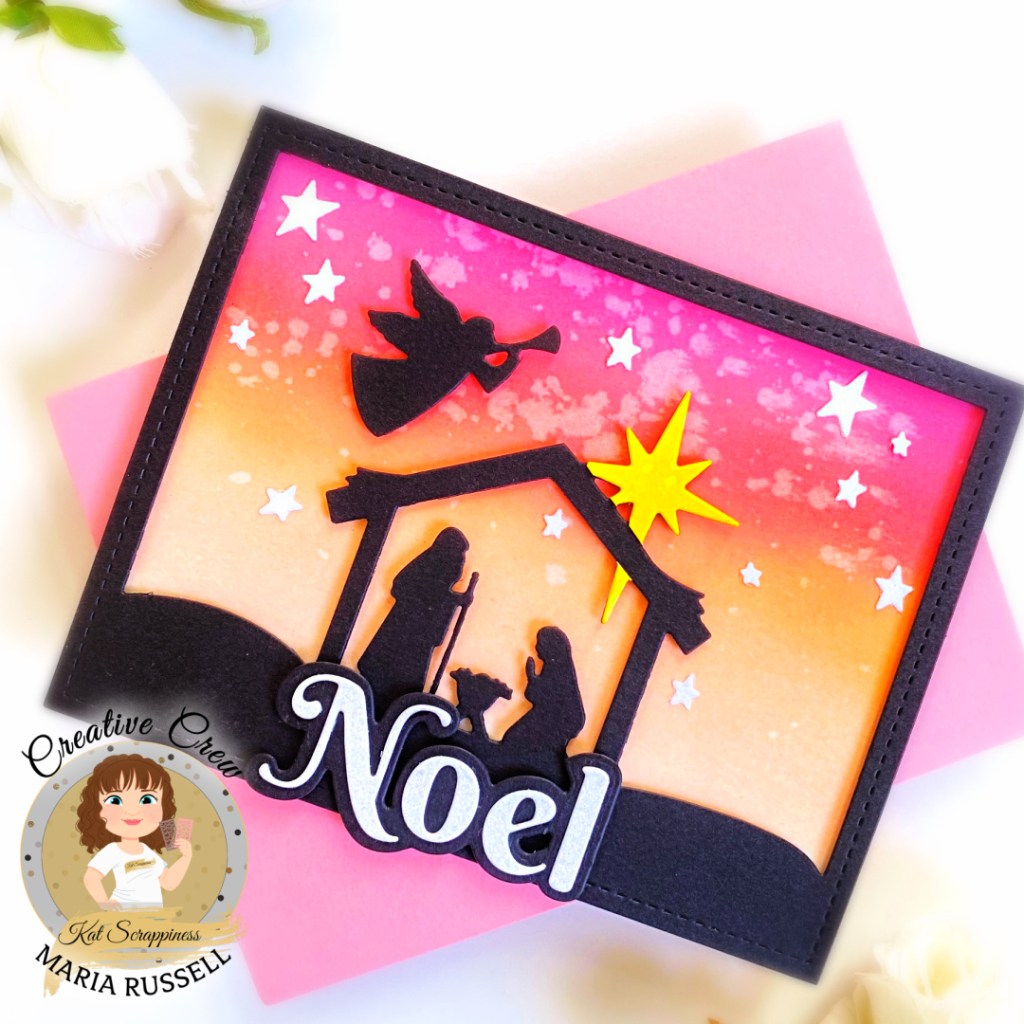
prepare the background panel by ink-blending some Bristol Smooth White Card Stock. For a sunset effect, I used Picked Raspberry, Ripe Persimmon, Dried Marigold and Tattered Rose Distress Oxide inks.
adhere the background panel with foam adhesive for added dimension.
die-cut the sentiment using the Noel Word Die with Shadow on some black and white glitter card stock and adhere on the card front with foam adhesive.
finish the card design by adhering some stars to the panel.
I hope you like these cards today and got inspired. Below, you will find links to the supplies used to create these projects. Where available, I use compensated affiliate links at no extra cost to you. Your support helps me to keep bringing you new projects and inspiration. Thank you for stopping by, and have an amazing day!
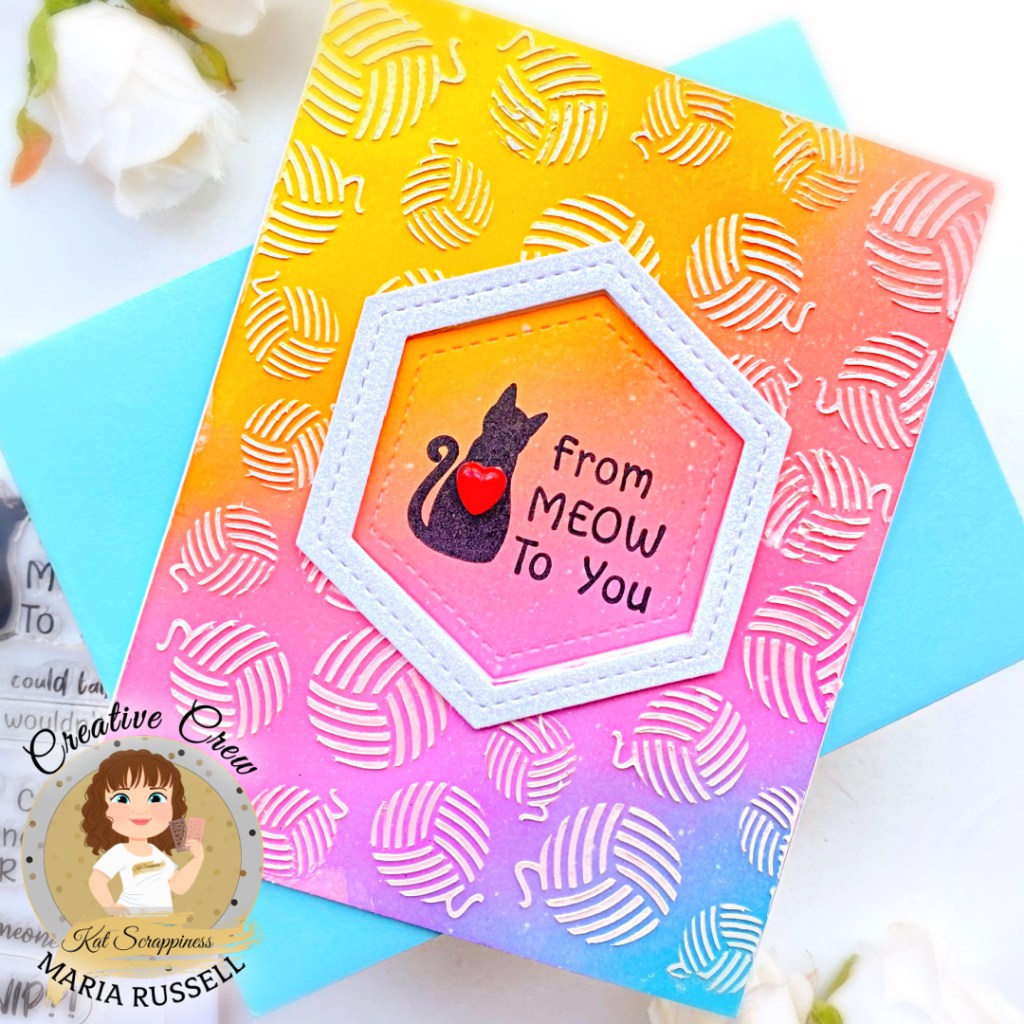
I am currently in the process of moving to another destination overseas with hubby, so this project was made awhile back. I wanted to share this today since this card is super adorable, and features new products from the latest release by Kat Scrappiness, Inc.
Here’s how I made this card:
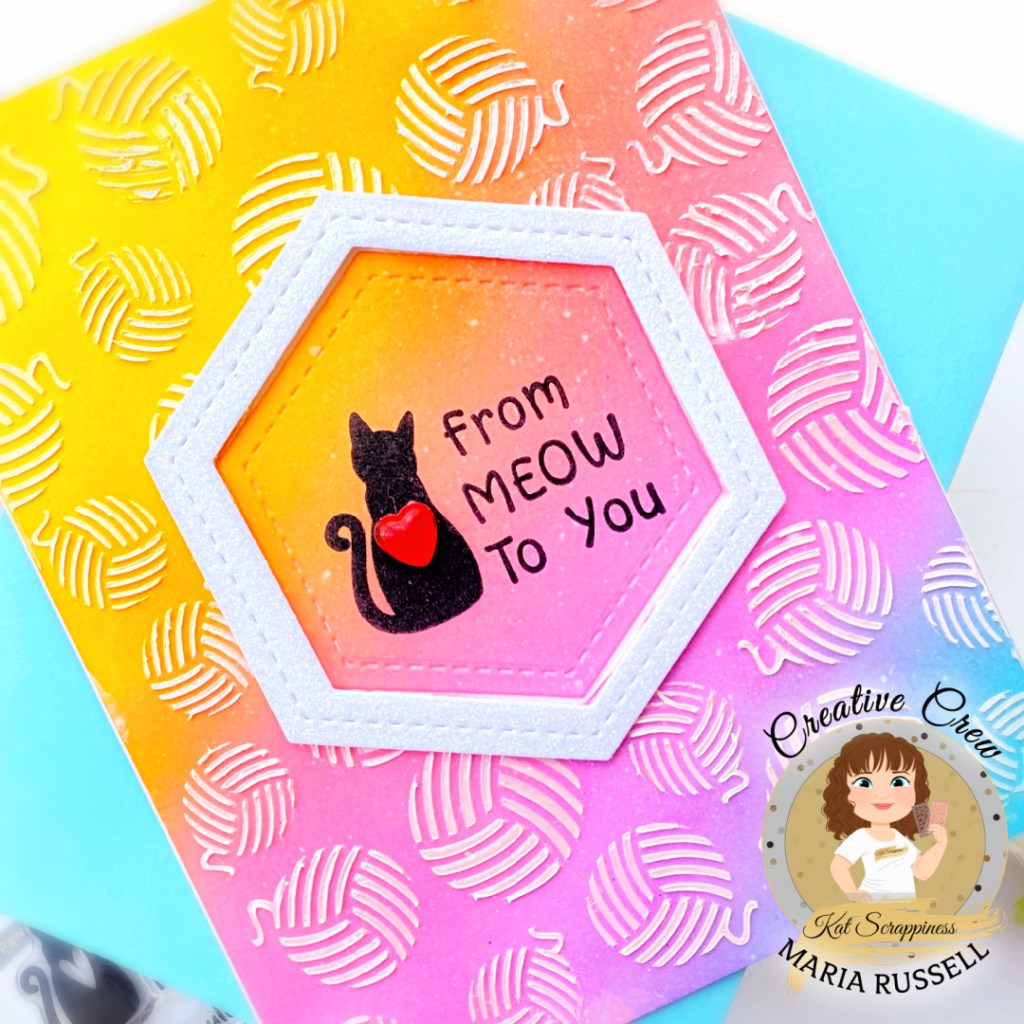
prepare the background panel by ink-blending some Bristol Smooth white card stock with Distress Oxide inks.
use some Distress Sprayer to spray some water on the background. Pick up the excess water using some paper towel.
finish the design by stamping the sentiment onto the card using the Pawsome Cats Sentiments Stamp Set with some Versafine Onyx Black Ink and adhere some red heart for some fun texture.
I hope you like this card today and got inspired. Below, you will find links to the supplies used to create this project(s). Where available, I use compensated affiliate links at no extra cost to you. Your support helps me to keep bringing you new projects and inspiration. Thank you for stopping by, and have an amazing day!
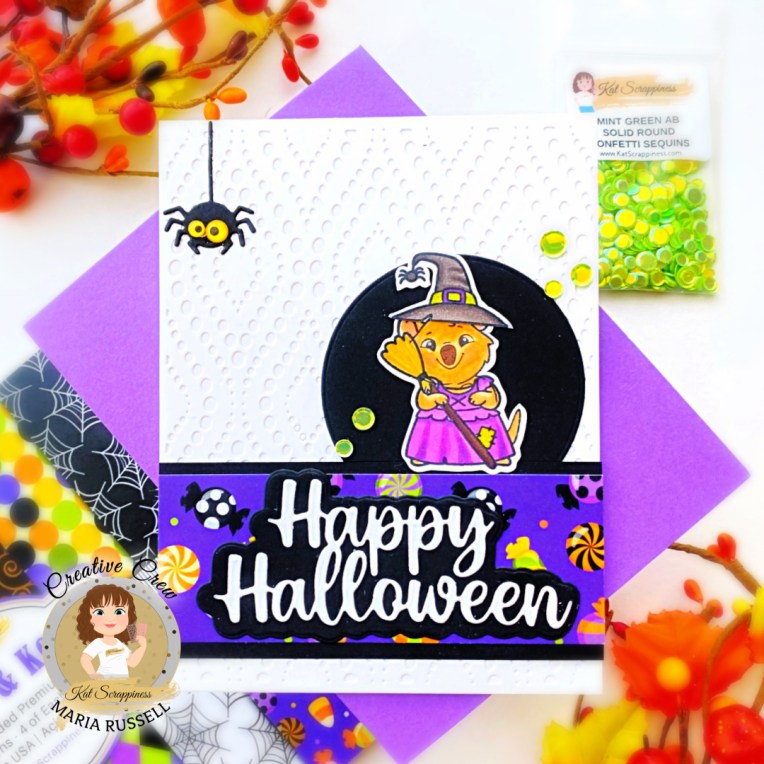
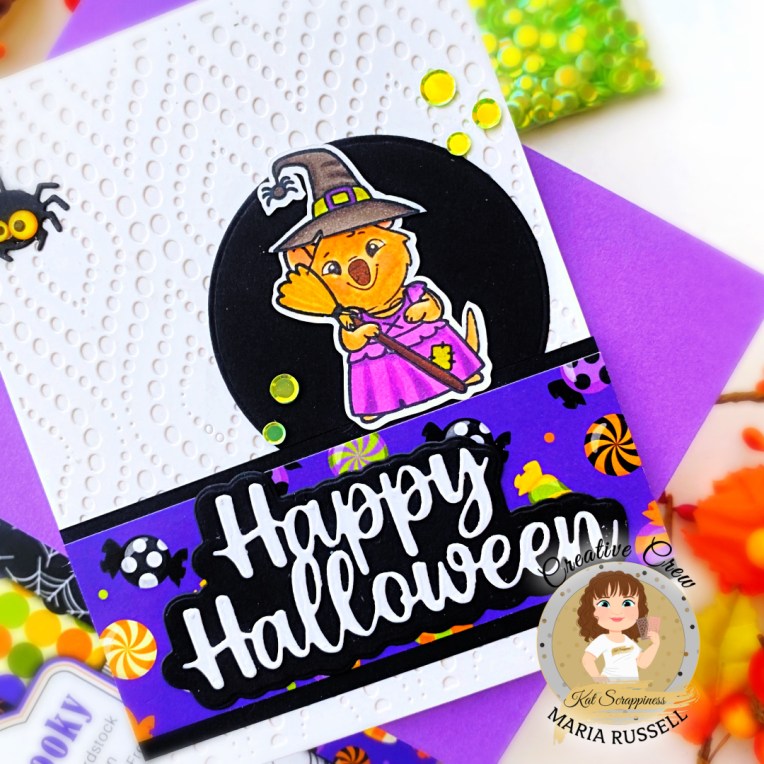
Sometimes, you just don’t have the time or energy to die-cut a lot of pieces to create a scene for your card. I am showing you a simple way to create a cute Halloween card without spending too much time, and use up those cute pattern paper without overwhelming the design.
Here’s how I made this project:
Stamp the image from the Quokka Halloween Costume Add On Stamp on Neenah solar white card stock. Stamp the image again on some masking paper and use precision snips to fussy-cut the masking image.
Stamp the Dress-Up Quokka Stamp Set onto the masked image. Remove the mask and color the images with alcohol markers.
Use Brother Scan N Cut machine to die-cut the image or precision snips if you don’t have the machine.
Die-cut the background panel using the Peacock Backdrop Die and adhere on some A2-size top-folding notecard.
Die-cut some black circle using the Never-Ending Circle Dies and cut some black strip as well measuring 2 1/4 by 4 1/4. Adhere both pieces on the card.
I hope you like this super simple Halloween card today and got inspired. Below, you will find links to the supplies used to create this project(s). Where available, I use compensated affiliate links at no extra cost to you. Your support helps me to keep bringing you new projects and inspiration. Thank you for stopping by, and have an amazing day!
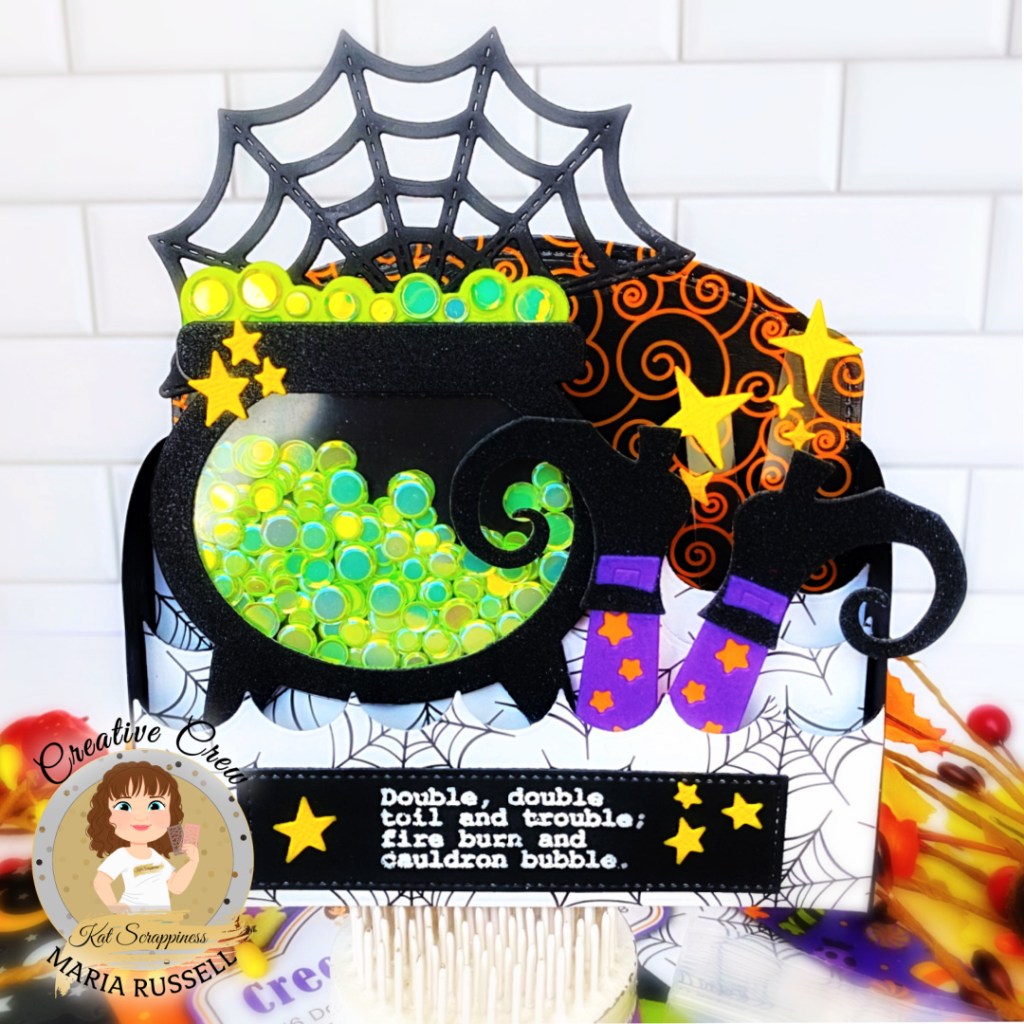
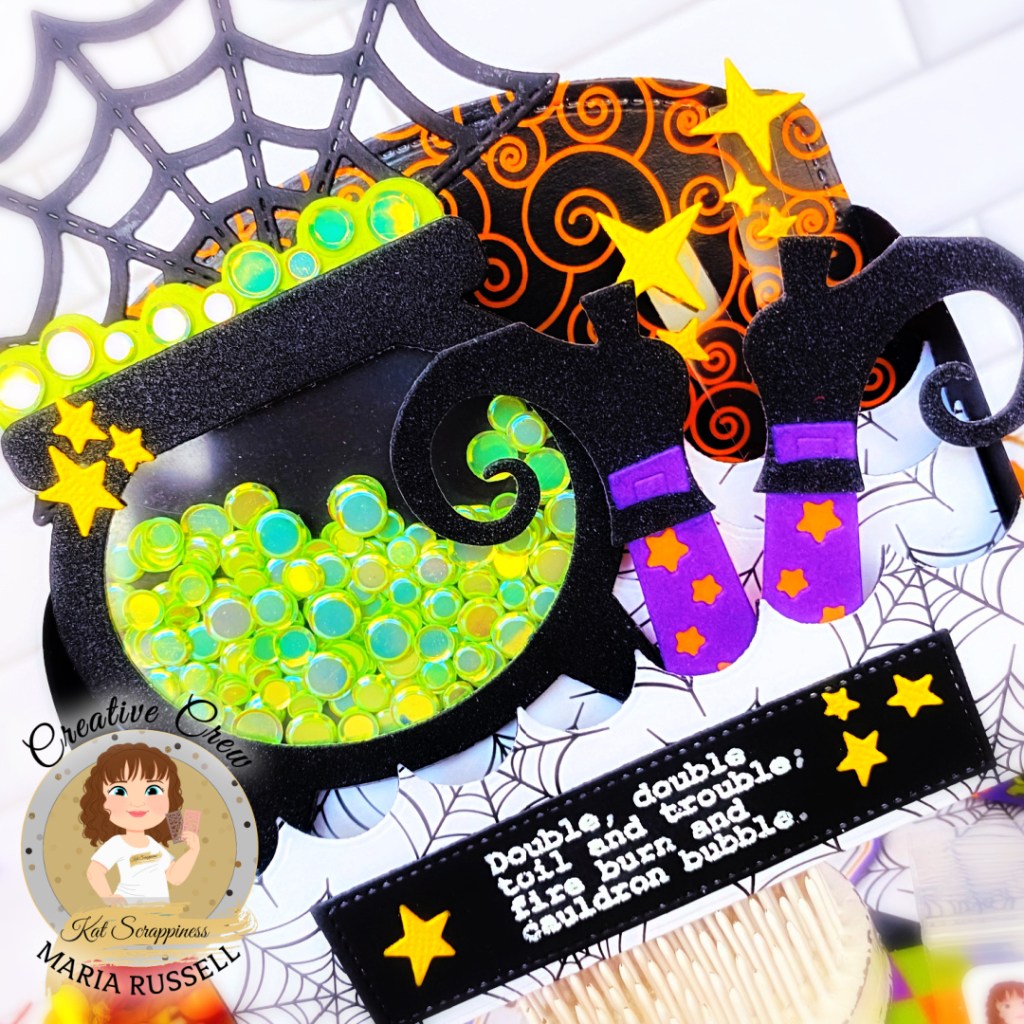
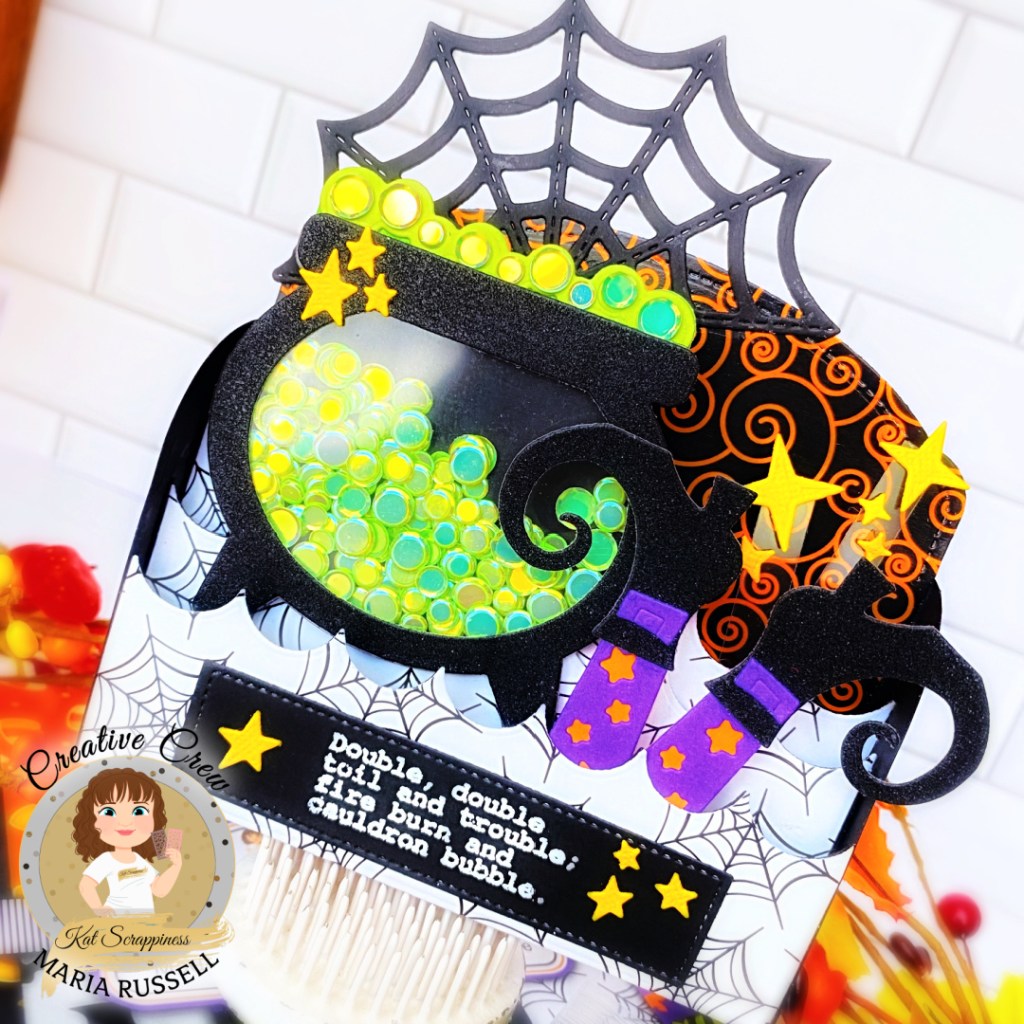
die-cut the cauldron using the Witches Brew Die Set on some black glitter card stock and acetate sheet. adhere the acetate sheet with strong double-side tape.
create the shaker well by adding foam-tape and use the Mint Green Solid Confetti Sequin Mix as the shaker element and close the well with double-sided tape.
adhere stars to the cauldron with liquid glue.
adhere the cauldron on the 3D Box card with liquid glue.
die-cut the witch’s legs from the Witches Brew Die Set from different colors of card stock and adhere them together. Add the witch’s legs to the
adhere the cauldron on the 3D Box card with liquid glue.
die-cut the witch’s legs from the Witches Brew Die Set from different colors of card stock and adhere them together. Add the witch’s legs to the 3D Box card also with strong double-sided tape.
cut a few strips of acetate sheets and adhere some stars that were die-cut using the A2 Reverse Scallop Frame (Stars) for added texture and interest. I love that they look like they are floating!
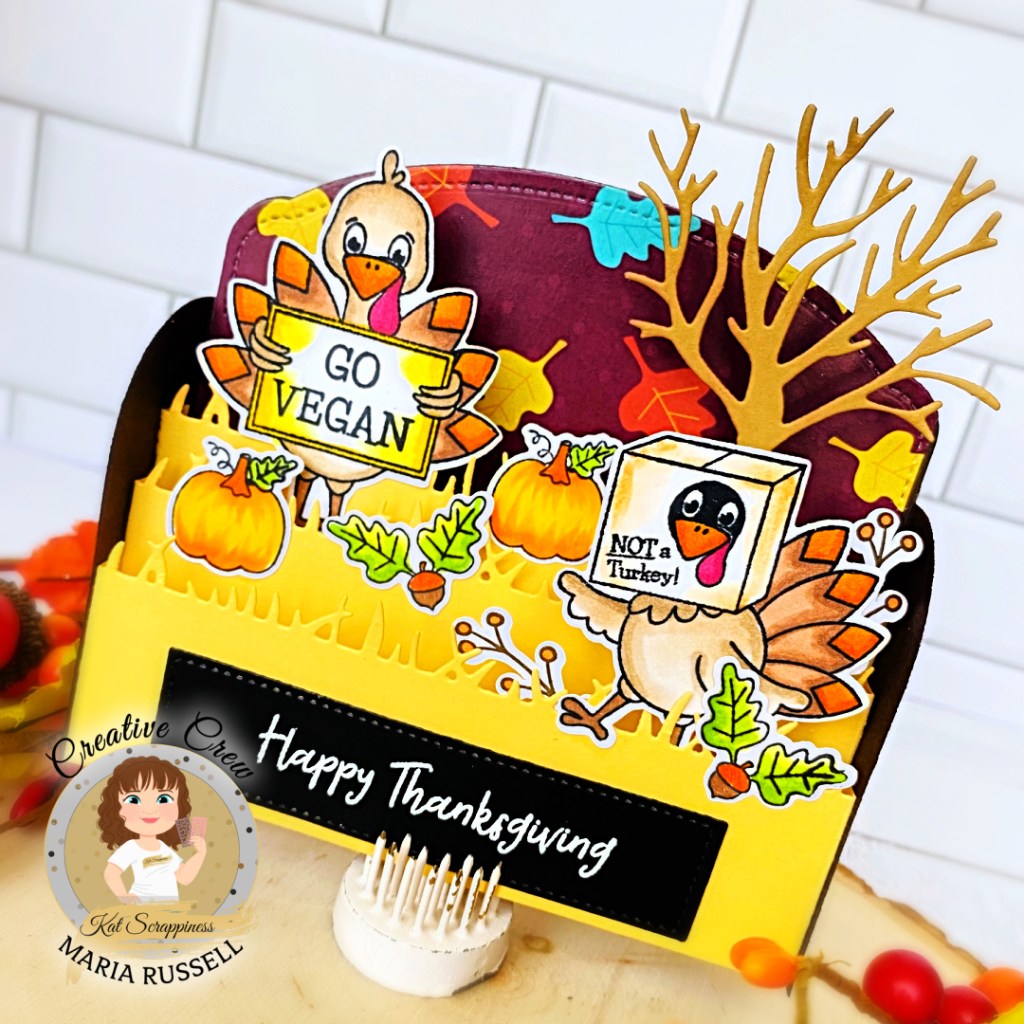
I pretty much did the same steps above. The only difference is I stamped and die-cut the images from the Gobble, Gobble Stamp Set and cut using the Gobble, Gobble coordinating dies. I also used the Gobble, Gobble Paper 6×6 Paper Pad.
The “spooky” tree was die-cut using the Crafter’s Essentials Halloween Dies and adhered with double-sided tape and finishing the card design by adding the sentiment.
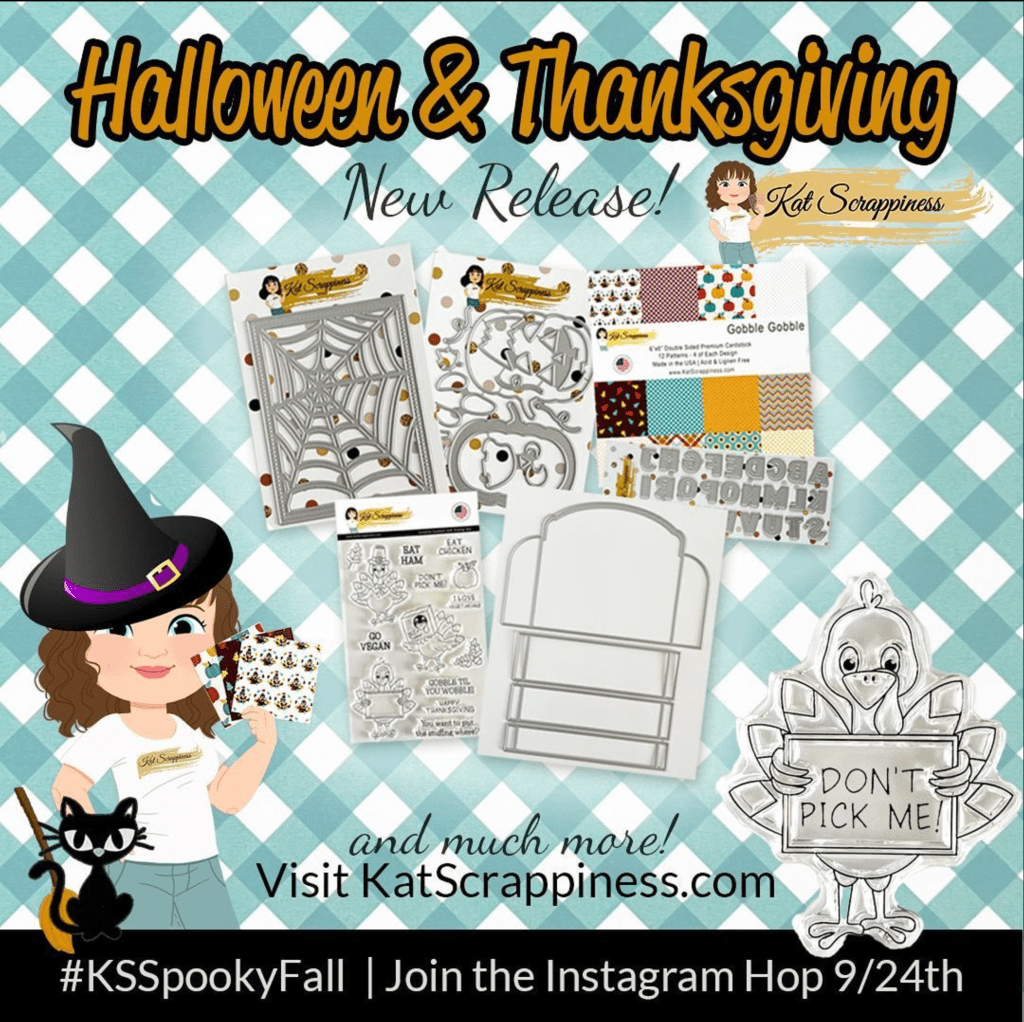
In a couple of hours, we are also having an Instagram hop where you can find more projects by the entire Design Team. We also have a GIVEAWAY! Hop on over to my Instagram handle @RPRMLR77 to join and WIN.
I hope you like this card today and got inspired. Below, you will find links to the supplies used to create this project(s). Where available, I use compensated affiliate links at no extra cost to you. Your support helps me to keep bringing you new projects and inspiration. Thank you for stopping by, and have an amazing day!