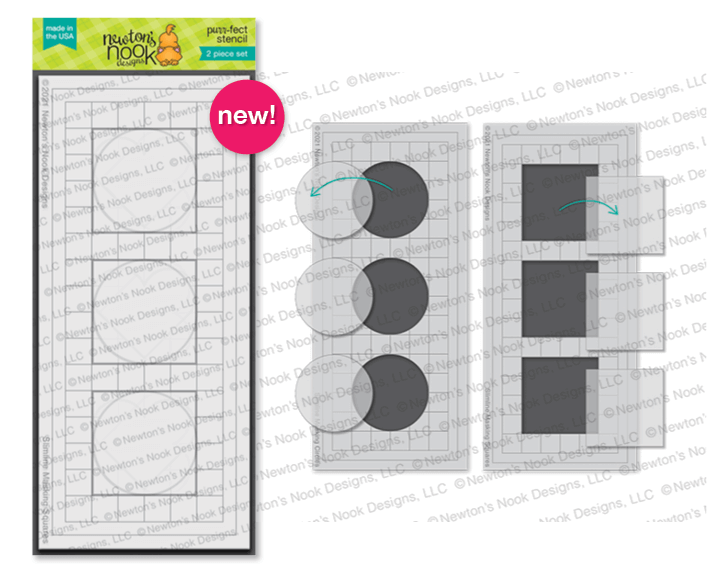
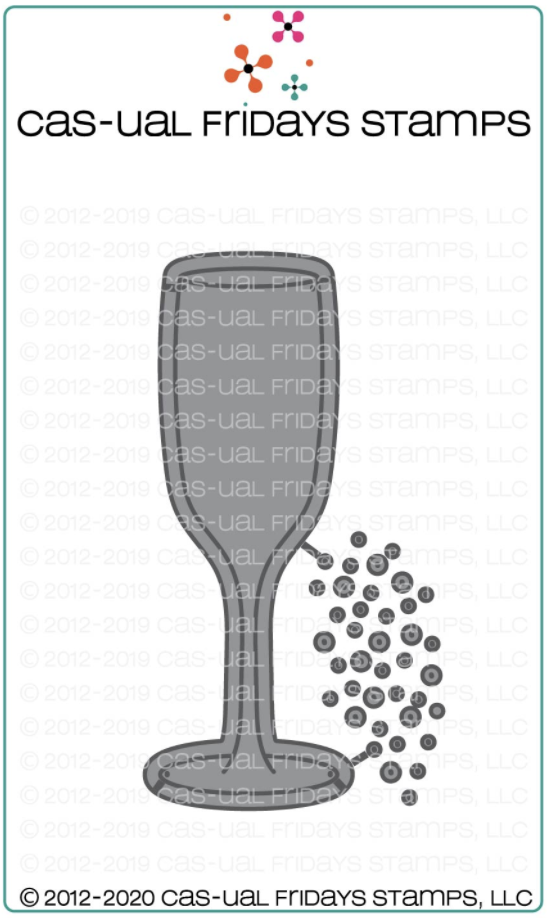
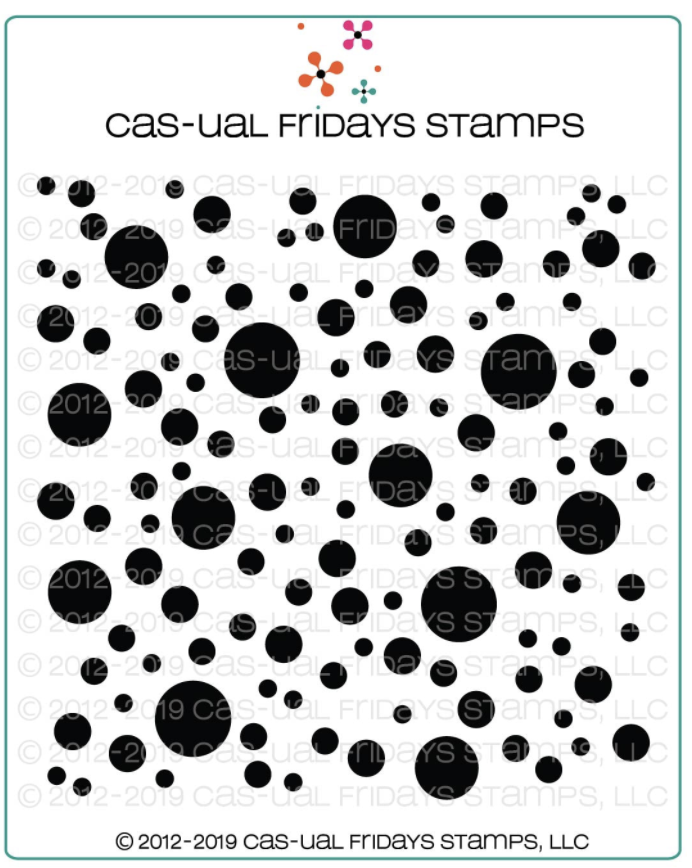
It is the third day of the reveals by Newton’s Nook Designs. I hope you were able to check out the last two days of the release. You also have a chance to win the stamp set being revealed each day so please read through til the end of the blog post to find out more info. [Just a little important note: I know some of you had difficulties finding the comments section. If you would like to leave a comment to participate in the giveaway, the “comments section” will only be ever visible when a single post on Word Press is being viewed. Please click on this particular blog post and you will be able to leave a comment below. Thank you!]
For Day 3, we are showcasing the Love Emergency stamp set and coordinating dies along with two new Slimline Masking Stencils.
To begin, I stamped my images on some Neenah solar white card stock and colored them in with my Spectrum Noir alcohol markers. I used the coordinating dies to die-cut them out. I added some glossy accents on the images for added texture and set it aside to dry.
I die-cut the red scallop and the black frame using the Slimline Frames & Portholes die set and Slimline Frames & Windows die set. I adhered the pieces on a matted slimline card base, and foam-mounting the black frame for added dimension.
The clouds were made using the Cloudy Sky stencil and some quick-dry dye ink and little trees that were die-cut using a die set from my collection. The positive pieces from the black frame were also used to create the road for my scene, using my gel pen to draw the lines.
I adhered the focal images using my tape runner, then finished my design by stamping the sentiment using Versafine Onyx black ink. Here’s another look:
Would you like to win the “Love Emergency” Stamp Set? We will choose ONE lucky winner for each stamp set!
Here’s how to win: Comment on the NND blog and Design Team blogs (see list below)! The winner will be chosen at random from the collective reveal posts. Make sure to check out each of their blogs and comment for your chance to win. You will not know which blog has been chosen so the more you comment on the better your chances are of winning! You have until Thursday, January 21st at 9pm EST to comment — winners will be announced on the blog post on Friday, January 2nd.
Check out all the awesome Design Team Blogs below to enter:
———-SUPPLIES———
It is the second day of the reveals by Newton’s Nook Designs. I hope you were able to check out yesterday’s reveal. You also have a chance to win the stamp set being revealed each day so please read through til the end of the blog post to find out more info. [Just a little important note: I know some of you had difficulties finding the comments section. If you would like to leave a comment to participate in the giveaway, the “comments section” will only be ever visible when a single post on Word Press is being viewed. Please click on this particular blog post and you will be able to leave a comment below. Thank you!]
For Day 2, we are showcasing the Smitten Kittens stamp set and coordinating dies along with two new Slimline Masking Stencils.
To make my first card, I started by die-cutting the scallop from the Slimline Frames & Portholes die set with some Bristol smooth white card stock. I also die-cut the white frame from the Slimline Frames & Windows die set and foam-mounted this piece to the scallop die-cut. Next, I used the Slimline Square Masking Stencil to add some colors on the boxes with some distress oxide inks in Worn Lipstick, Mermaid Lagoon and Mustard Seed.
Next, I stamped the images from the Smitten Kittens stamp set and colored them in with my Spectrum Noir alcohol markers. I die-cut the images using the coordinating dies and foam-mounted the mages onto my card panel for added dimension.
I cut a Slimline card panel and adhered some pink card stock, then added the focal panel onto the card. I stamped the sentiment with some Versafine Onyx Black ink.
I finished my design by adhering some hearts for more texture. Here’s another look:
Would you like to win the “Smitten Kittens” Stamp Set? We will choose ONE lucky winner for each stamp set!
Here’s how to win: Comment on the NND blog and Design Team blogs (see list below)! The winner will be chosen at random from the collective reveal posts. Make sure to check out each of their blogs and comment for your chance to win. You will not know which blog has been chosen so the more you comment on the better your chances are of winning! You have until Thursday, January 21st at 9pm EST to comment — winners will be announced on the blog post on Friday, January 2nd.
Check out all the awesome Design Team Blogs below to enter:
———-SUPPLIES———
It is that time of the month where the entire design team get so excited to show off the new stamps, dies and/or stencils by Newton’s Nook Designs. You also have a chance to win the stamp set being revealed each day so please read through til the end of the blog post to find out more info. [Just a little important note: I know some of you had difficulties finding the comments section. If you would like to leave a comment to participate in the giveaway, the “comments section” will only be ever visible when a single post on Word Press is being viewed. Please click on this particular blog post and you will be able to leave a comment below. Thank you!]
For the first day of the reveals we are featuring the Heartfelt Love & Heartfelt Love Stamp sets, along with the Heart Frames die that also coordinates with the previously released Banner Trio die set.
To make my first card, I started by using the Heart Frames die set to die-cut the scallop heart with some Neenah solar white card stock. I stamped the image on this piece with some Memento Rich Cocoa ink and colored the images in with alcohol markers. I also used the biggest die to die-cut some red card stock.
Next, I used the third stitched die from the set, and die-cut the scallop panel that I previously colored. I adhered the outer layer on the red card stock with liquid glue, then foam-mounted the middle piece for added dimension. This gave it some nice layers without overwhelming the whole design.
I finished my design by stamping the sentiment with Versamark ink on the sentiment strip that I die-cut using one of the dies from the Banner Trio die set, and adhered with my tape runner in the middle of the card.
The second card is relatively simple but I really LOVE how this one turned out.
I die-cut the scallop frame on some Bristol Smooth white card stock using the scallop doe from the Frames & Flags die set. I positioned this panel inside my Misti stamping tool and stamped the images twice with some Versafine Onyx black ink. I colored the images in with my Zig Clean Color Real Brush Markers. I forgot how much I love these markers!
I die-cut the arrows using a retired die-set called Points & Plumes and adhered onto the panel with liquid glue for added texture. I stamped the sentiment on a die-cut strip from the Banner Trio die set, with some Versamark ink and sprinkled some white embossing powder, before heat-setting with my heating tool. I foam-mounted this piece onto the card.
Lastly, I finished my design by adding some clear mirror confetti dots for added texture. Here’s another look:
Would you like to win the “Heartfelt Love” or the “Heartfelt Roses” Stamp Set? We will choose ONE lucky winner for each stamp set!
Here’s how to win: Comment on the NND blog and Design Team blogs (see list below)! The winner will be chosen at random from the collective reveal posts. Make sure to check out each of their blogs and comment for your chance to win. You will not know which blog has been chosen so the more you comment on the better your chances are of winning! You have until Thursday, January 21st at 9pm EST to comment — winners will be announced on the blog post on Friday, January 2nd.
Check out all the awesome Design Team Blogs below to enter:
———-SUPPLIES———


Hello and welcome to the Catherine Pooler and CAS-ual Fridays Collaboration weekend! I am so pleased to participate in this amazing blog hop! Both companies are giving away a $30 Gift Certificate to the shop and the winners will be announced on each company’s blog post on Tuesday, September 29th.
For this hop, I am showcasing the Happy Birthday stamp set and SweetFriend Fri-dies by Cas-ual Fridays, along with the AMAZING CP Minis – Carnivale Collection, CP Off The Loom Stencil, Oval Balloon Stencil, CP Minis – Life of the Party and CP mini ink in Midnight.
For my first card, I started by using the CP Oval Balloon stencil and inked up the balloons using CP Mini inks in Samba, Tiara, Lime Rickey, Grape Crush and All that Jazz. I also used a stencil from my collection to add the clouds with All That Jazz ink.
The balloon strings and the sentiment from the CFS Happy Birthday stamp set were stamped using the CP mini ink in Midnight. I used my white gel pen to add more texture to the balloons.
To finish my design, I die-cut some yellow stars using a die from my collection. Here’s another look:
For my second card, I inked up an A-2 size panel of Bristol smooth white card stock using the CP Off the Loom Stencil and CP Mini inks in Samba, Tiara, Lime Rickey, Grape Crush and All that Jazz. These inks are so juicy and wonderful to blend to create a seamless, colorful background.
I adhered this panel on an A2-size top-fold card base. Next, I die-cut some Neenah solar white and black card stock using a die from my collection. I adhered both pieces on the card with my tape runner.
I finished my card design by die-cutting the “hello friend” using the Sweet Friend fri-dies and adhering it onto the card with liquid glue. Here’s another look:
I am so in-love with these Catherine Pooler inks that I purchased more of them to complete my CP mini ink collection!
I hope you like my cards today! The supplies I use are listed and linked below. Don’t forget to leave a comment on each stop for a chance to win one of the (2) $30 Gift Certificates by both companies today. Thanks for stopping by and happy stamping!
Here’s the order of the hop:
Maria Russell (you are here)
————SUPPLIES————-
Hello crafty friends! Before I show you my card, I just want to let you know that CAS-ual Fridays is making room for upcoming release and they have a sale until September 7th. The stamps, dies and stencils are already reduced but you can still use my coupon code below (code at the end of the post), for an additional 15% discount. Hurry up and get some of those goodies before they sell out!
For my project today, I am featuring one of the stamp set that is currently on sale, called “Floating“. The bunny came from the Somebunny stamp set.
I started by inking up my slimline panel using a clouds stencil and some distressed oxide ink. I also die-cut the trees, grass hill and the clouds using a die from my collection.
I stamped and colored my images in with alcohol markers. Since the floating stamp set did not come with a coordinating die, I used my precision snips to fussy-cut the image.
I adhered my colored panel on a slimline white card base. I adhered the trees, grass hill and clouds with some glue. I also adhered my focal images using my tape runner. I thought about using foam adhesive but I didn’t think it needed more dimension.
To finish my design, I stamped the sentiment with Versafine Onyx black ink. Here’s another look:
Here are the supplies:
I hope you like my project today. Please don’t forget to use my coupon code below for an additional 15% off your order. Have an amazing day! Happy shopping!
Hello my crafty peeps! Maria here on the blog with you today sharing two summer-themed cards, showcasing one of my favorite stamp sets from the summer release called “Mermaid Treasures“, along with the Under the Sea, Ocean Waves and Mermaid Shimmer stencils.

For my under the sea card on the left, I started by inking up the background with my blending brushes and Ocean Waves and Under the Sea stencils using a combination of the Marina Madness, Tropical Sea and Four Leaf hybrid inks. I used the same stencil and some glitter glitz gel to add more texture to the school of fishies. I also die-cut two borders using the By The Sea border die and foam-mounted these pieces onto the colored panel. I adhered this to an A2 size card base.

Next, I stamped the images on some Neenah solar white card stock and colored them in with my alcohol markers. I used the coordinating dies to die-cut them out and adhered them using either some foam or liquid adhesive for added dimension.

Lastly, I adhered some Sparkling Clear Droplets to my card for added texture. Don’t they just look like bubbles? Here’s another look:

Since I colored a lot of images, I decided to make another card. I used some low-tack tape to mask both sides of my A2-size card panel. I used my blending brushes with the Mermaid Shimmer stencil, and colored the background mixing the Fandango and Tangerine Dream hybrid inks.

I used my glitter glitz gel to add more texture to the background. I love the glittery effect it gave on the card. I die-cut two strips of black card stock and adhered it both sides. I also cut some strips of the patterned paper from the Seaside paper pack.

I foam-mounted my focal image and used my shimmer pen to add some highlights to her hair.
To finish my design, I stamped the sentiment with watermark ink and sprinkled some white embossing powder. I used my heating tool to heat-set the sentiment and die-cut using the Sentiment Stack die. I adhered this piece with some foam adhesive. Here’s another look:

This card is really simple but I love the textured background!
Don’t you just love the mermaid images on the Mermaid Treasures stamp set? They are beyond adorable! I also LOVE, love, love the new stencils! I can’t really pick a favorite! LDRS Creative has an amazing line of stencils that you can use to create a wonderful scene on your projects.
I hope I have given you some great inspiration today. The supplies I use are listed and linked below. Thank you for stopping by the happy stamping!
———–SUPPLIES———–
CAS-ual Fridays Stamps is this weekend’s sponsor for Crafting of Hue and we are celebrating with a SALE and a GIVEAWAY!. Starting today through July 12, 2020, all Stencils are only $5.00. You can also use my coupon code below to get an additional 15% off your order. Cas-ual Fridays is also giving away a $50 shopping code to ONE lucky commenter! All you have to do is leave a comment on all the hop stop (line up listed below) to be eligible to win. The winner will be announced on the CAS-ual Friday Blog on Tuesday, July 14th.
Don’t forget to check out the clearance section because everything there is only $0.99!
Now back to my project! Don’t you just love stencils? They are so versatile and can be used in many different ways to create your projects. For my card today, I am showcasing the Blossom Bubble stencil with the Just Breathe Fri-dies.
I used the Blossom Bubble stencil, mini sponge daubers and some hybrid inks to create my focal image. I used my paint brush and some distress oxide inks and splatter some color on my card for added texture.
I cut down my card panel to 5 inches and adhered this piece on some A2 size card base. I added the black strip at the bottom with the black & white patterned paper. I also used my white gel pen to add more texture on the center of each the flower.
To finish my design, I adhered some Crystal Clear Jewels with some liquid glue. Easy, peasy! Here’s another look:
I hope you got inspired today. The supplies I use are listed and linked below. Thanks for stopping by!
Hop here:
CAS-ual Fridays
Michelle Wallace
Vicki Dutcher
Larissa Heskett
Nora Noll
Maria Russell (you are here)
Lisa Bzibziak
Carolina Flores
———SUPPLIES———-