Welcome to Therm-O-Web and Newton’s Nook Designs collaboration. This week, NND and TOW are partnering for a fabulous inspiration week! All week long, both design teams will be sharing ways to add use Therm O Web products with Newton’s Nook Designs stamps! There are prizes too! Read all the way to the end of this post to find out how you can win!
Today is the last day of the collaboration so I figured I’ll share two projects to give you more inspiration! I used A LOT of products from both companies!
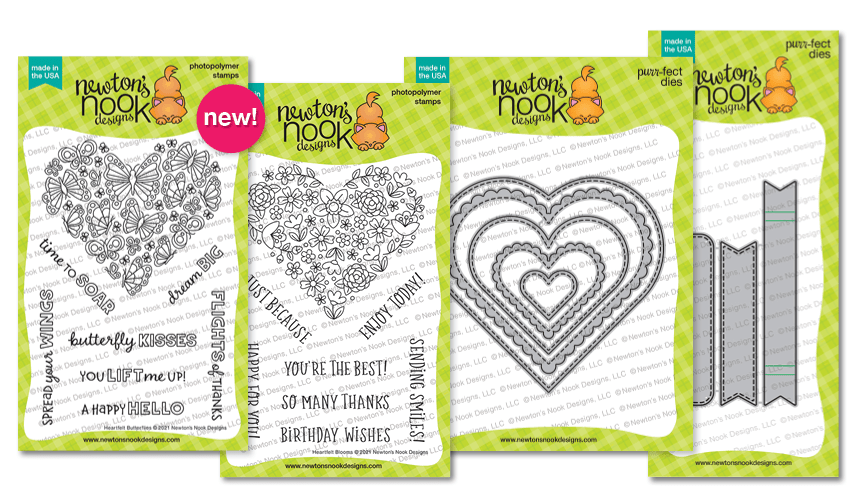
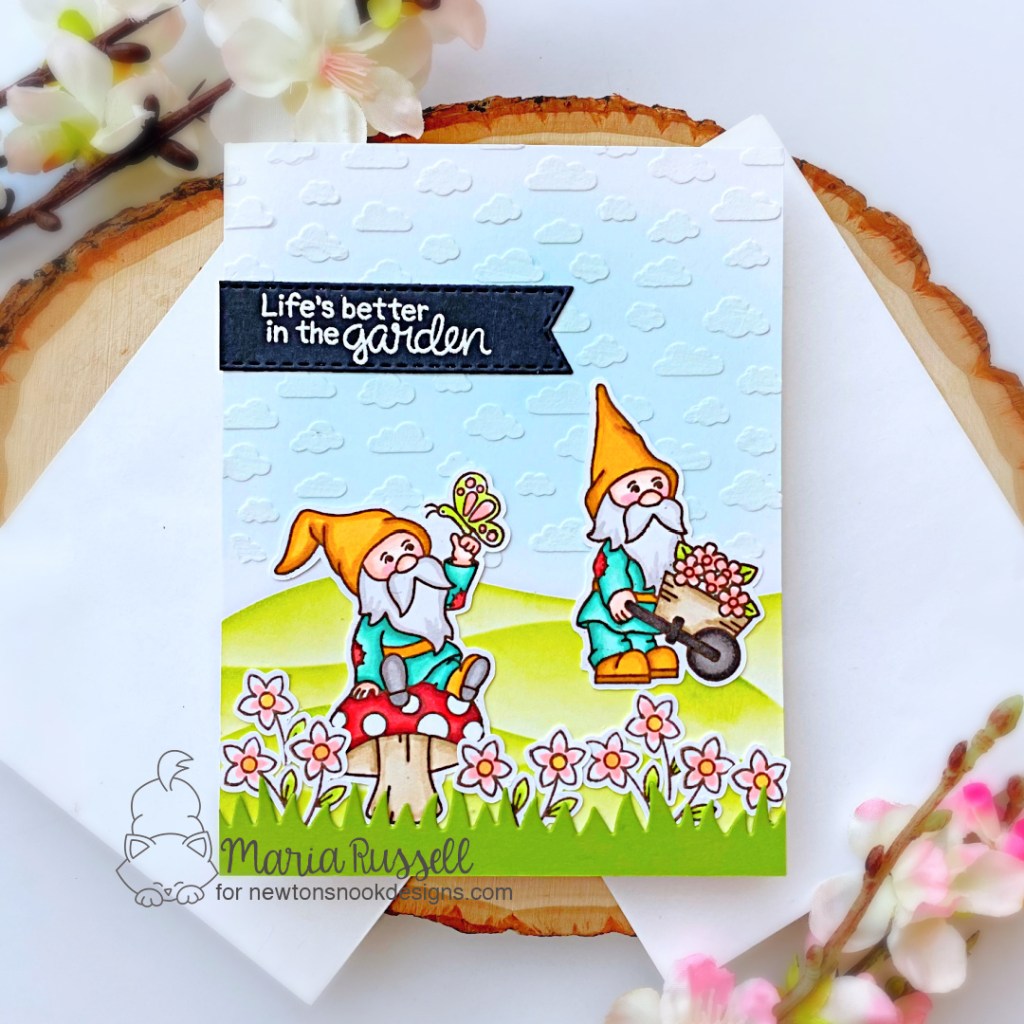
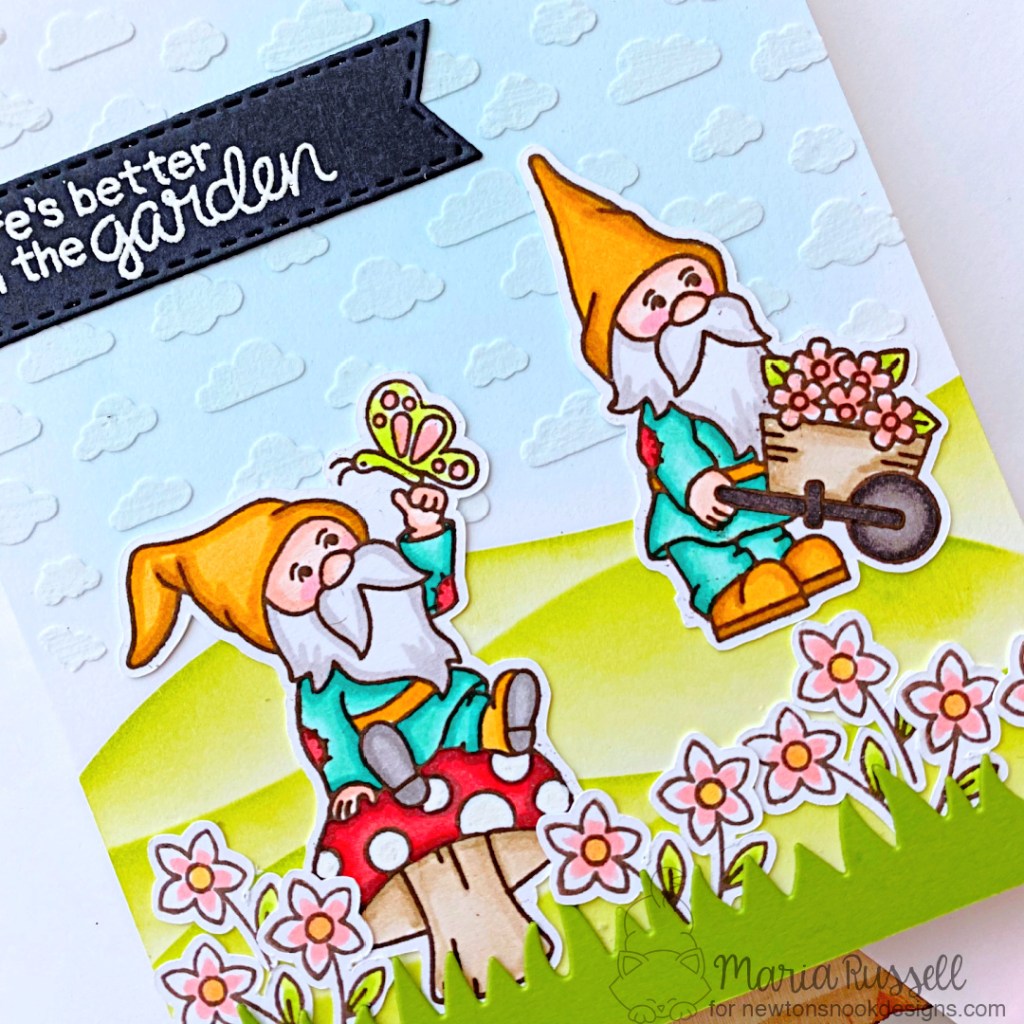
For my first card below, I’m showcasing Newton’s Birdbath stamp set and coordinating dies, Gnome Garden stamps & dies, Sky Scene Builder Die Set, Land Border Die Set, Circle Frames Dies, Heart Frames Dies, Petite Stencil, along with the AMAZING Deco-Foil Flock Transfer Sheets in White Latte, Sunshine Yellow, Green Envy, Black Velvet, and Emerald Green with DecoFoil Transfer Sheet in Enchanted Rose, Deco-Foil Transfer Gel Duo and iCraft Memory Tape Runner XL.

The background was created by applying Deco-Foil Transfer Gel Duo with the Petite Clouds Stencil on some blue card stock. I spread the gel evenly with the help of (one of my favorite tool) the Stencil Pal. I set this panel aside to let it dry for about half an hour.
Once the gel turns translucent, you are ready to do the flock transfer. Since I used the Deco-Foil Transfer Gel Duo, you can either run this panel through your laminator, or use your die-cutting machine. In this instance, I used my laminator. I put the panel inside my transfer sheet and cut a piece of the Deco-Foil Transfer Flock in White Latte (fussy side down). I run it through my laminator to transfer the flock. I love how the small clouds look so fluffy and realistic because of the flock sheet.
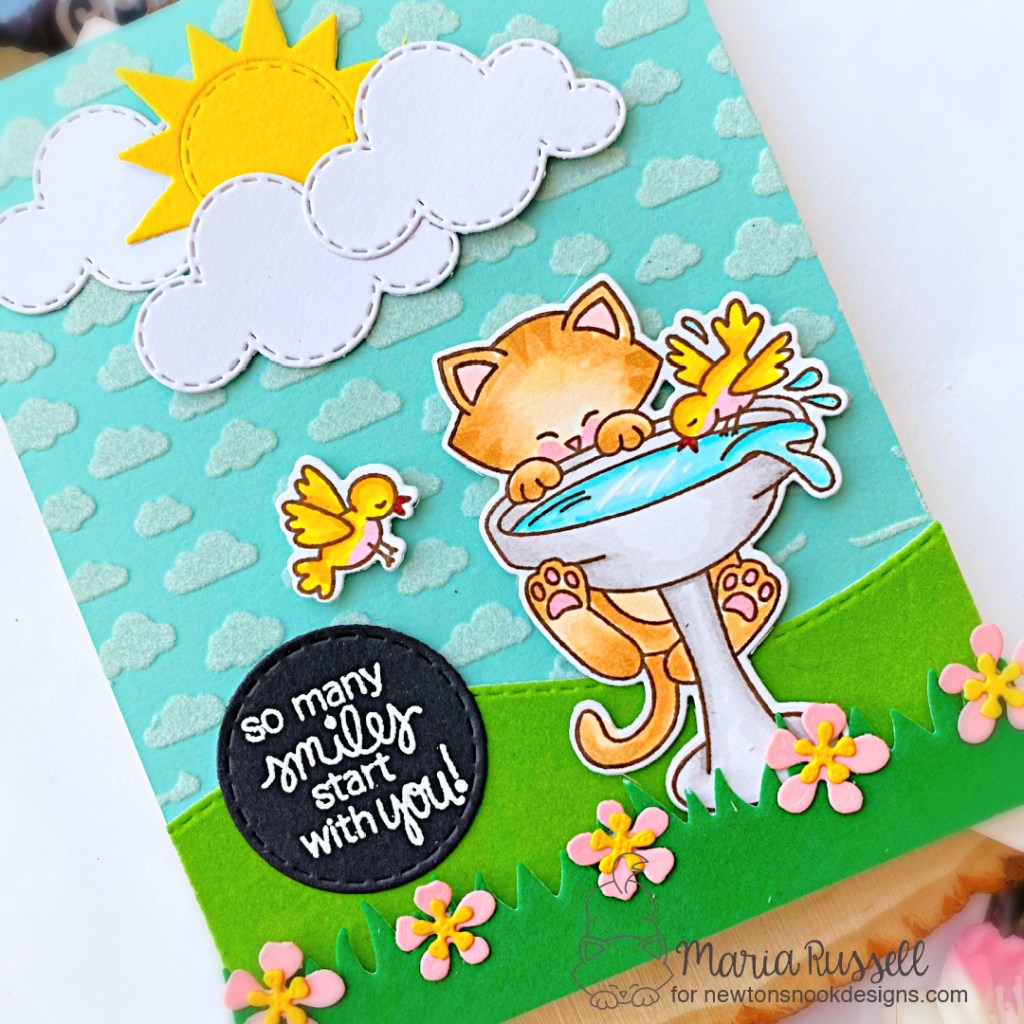
Next, I stamped the images from Newton’s Birdbath stamp set on some Neenah solar white card stock and colored them in with alcohol markers. I used the coordinating die to cut them out.
I die-cut the rest of the components together using the dies and flock transfer sheets (mentioned above) to and started building my scene. I like having a bit of a dimension on my cards so I used the iCraft 3d Foam Adhesives on the grass panel, clouds and sun. I also had some cute flowers that I’ve already die-cut from a previous project so I adhered them onto the card for added interest.
The last piece to add is the sentiment. I stamped it on some black card stock with Versamark ink and sprinkled some white embossing powder. I used my heating tool to heat-set, then die-cut using the smallest die from the Circle Frames Die set. I adhered the sentiment using the tape runner.

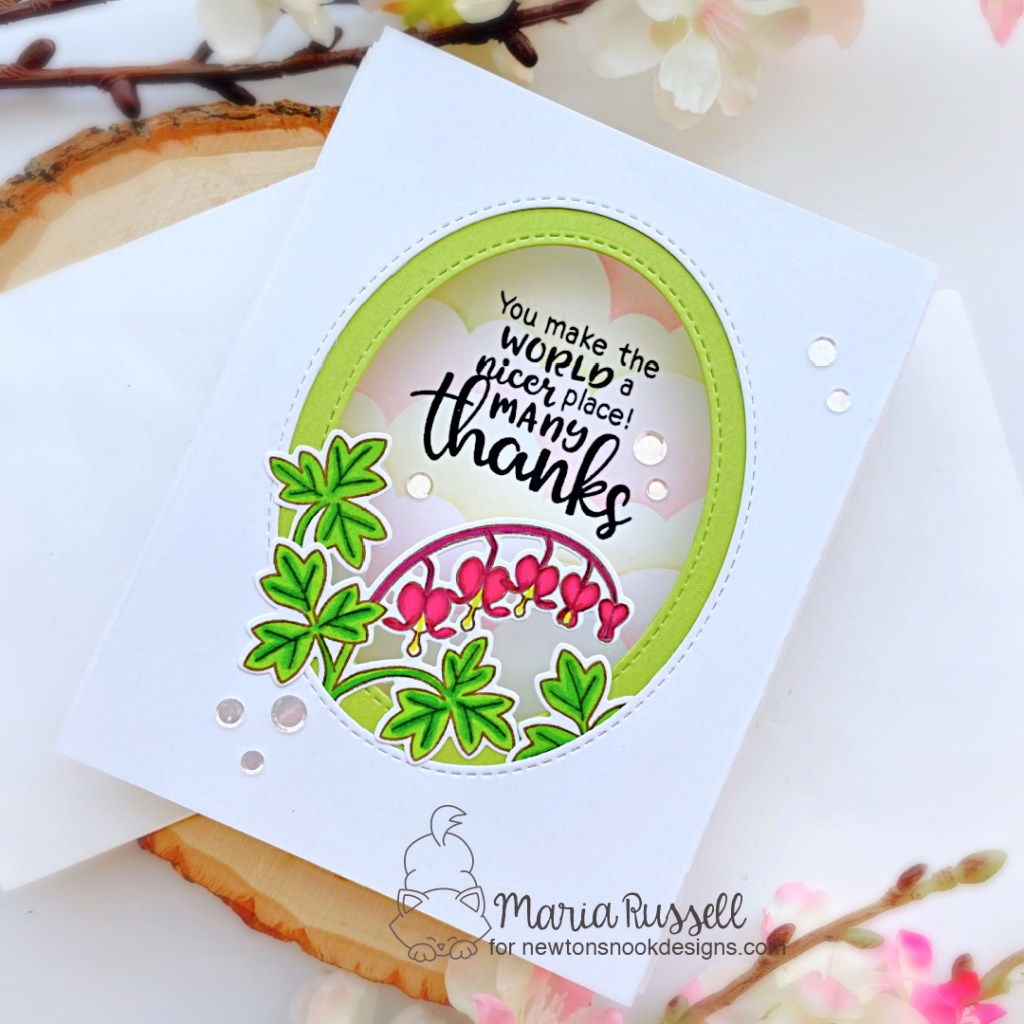
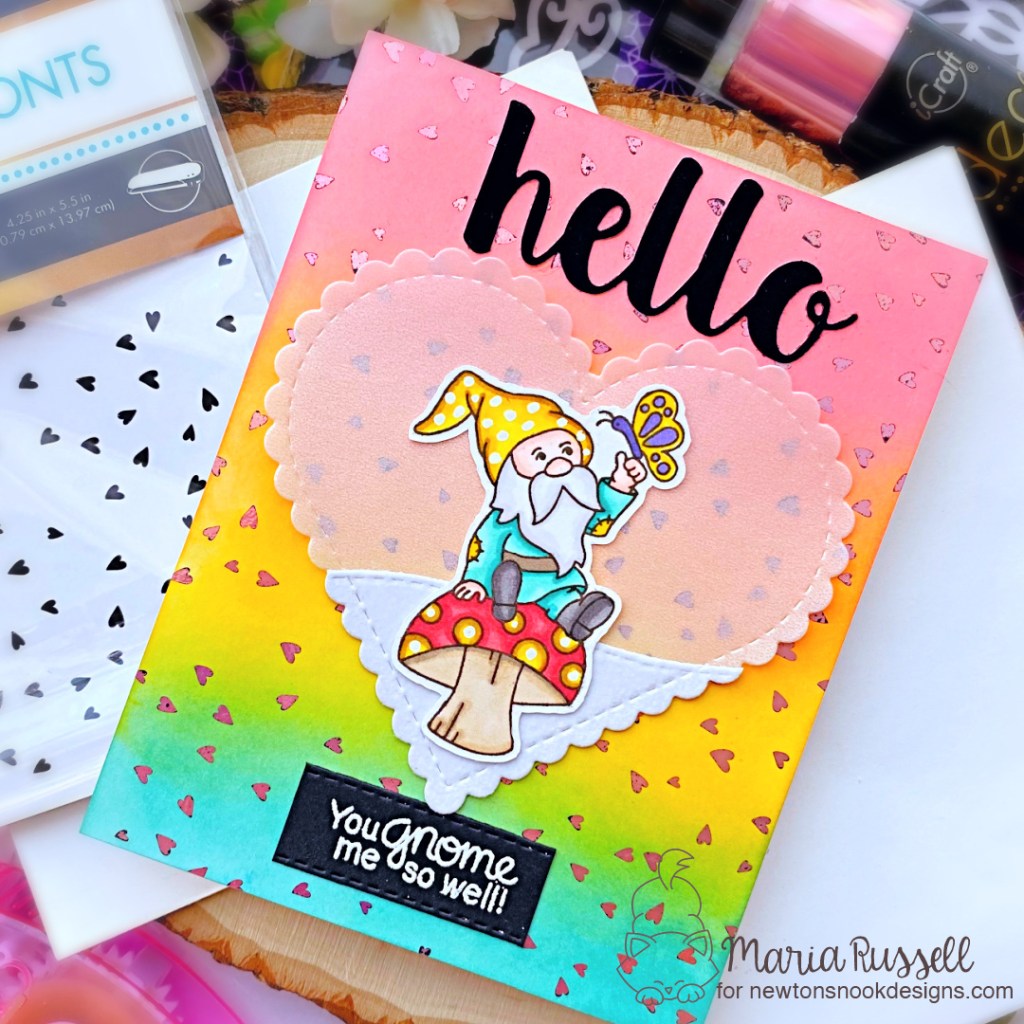
Simplicity is my main goal for the second card! I ink-blended the Deco-Foil Toner Card Front in Dainty Hearts with some of my favorite distress oxide inks. I cut some Deco Foil Transfer Sheet in Enchanted Rose (just enough to cover the panel), and run this through my laminator.

For my focal point, I die-cut the scallop heart on some Vellum and Deco Foil Flock Transfer in White Latte to ground my Gnome. Adhering the focal image on the foiled card panel was easy using the iCraft Tape Runner.

The word “hello” was die-cut using a die from my collection and the Deco Foil Flock Transfer Sheet in Black Velvet. With a colorful background such as this card, I wanted the sentiments to stand out!
I finished my card design by using my white gel pen and drew some dots to the Gnome’s hat for added interest. Here’s another look:
Which one is your favorite -> Newton’s Birdbath or the cute Garden Gnome? I hope you like both cards because I love how they turned out. The supplies I use are also listed and linked below in case you are interested.
NOW HERE IS THE BEST PART! Would you like to win a $40 store credit from Therm O Web or Newton’s Nook Designs? Visit the Newton’s Nook Designs blog and the Therm O Web Blog for a chance to win! Both companies will be giving away a prize this week! Make sure to check out their blog posts for the announcement of the lucky winners!
Thanks for stopping by my blog today and happy foiling and stamping!
———-SUPPLIES———