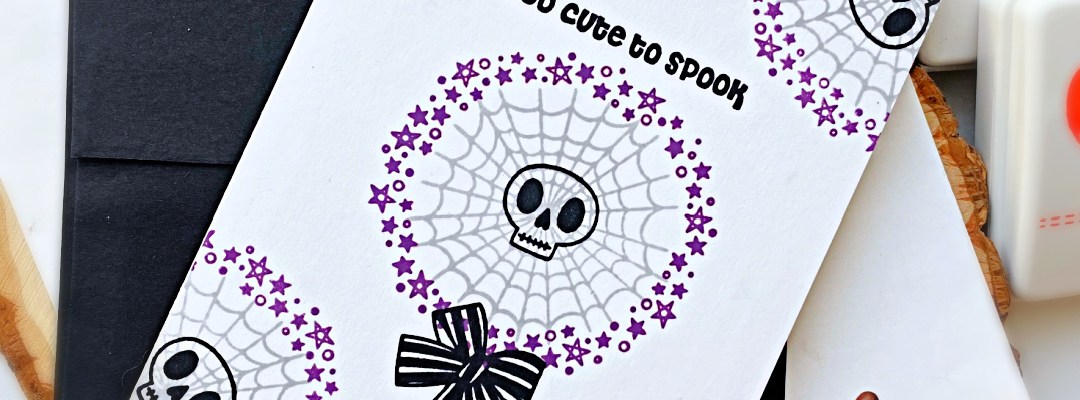
This first card reminds me of one of my all-time favorite animated movie for Halloween. Can you guess what movie that is? Of course that was my inspiration creating this card.
I started by positioning the Pirouette Pattern Master Template inside my stamping tool and taped it down with washi tape. I position the spider web from the Trick or Treat 6×8 Pirouette Stamp Set in the center and closed the lid. I opened the lid again to place my card stock inside the stamping tool and stamped the spider web in the middle using Alloy Hybrid Ink. I went on and positioned the stars and dots wreath and used Grape Ape Hybrid Ink.
I repeated the process by stamping the images randomly on my card stock. Next, I used some Raven Hybrid Ink to stamp the skull in the middle of the spider web. I adhered this card panel on an A2 size notecard. and finished the card design by stamping the black ribbon and the sentiment with Raven Hybrid ink. I just LOVE the intensity of this black ink, don’t you?!
For my next project below, I used the Pirouette Patterns Template again to stamp the images on a 4×4 card stock. This template makes it super easy to perfectly center your images on the card. The lines really helped me position the images to create a seamless pattern. I am warning you, it gets really addicting! Haha!
I started with a 4×4 card stock and stamped the spiderweb first with Alloy Hybrid Ink. Next, I stamped the stars and dots wreath image using Grape Ape Hybrid Ink. I positioned the ghost and stamped it with Raven Hybrid ink. I colored the ghost with some alcohol markers for added dimension. Then, I moved on by stamping the rest of the images with Raven and In Your Face Orange Hybrid inks.
Next thing to do is to mat the card on some orange and black card stock, then adhering it on some purple card stock measuring 4 3/4 by 9 1/2 folded in half, which makes it a 4 3/4 x 4 3/4 notecard. I finished my card design by stamping the words “Happy Hunting” with some Raven Hybrid Ink. Here’s another look:
Hello Newton’s Nook fans! I am so glad you joined me today and I am also up on the Newton’s Nook blog, sharing this cute Halloween card from the new August product release. I didn’t get to join in the fun because I was traveling but rest assured that you will be seeing a lot more throughout the month.
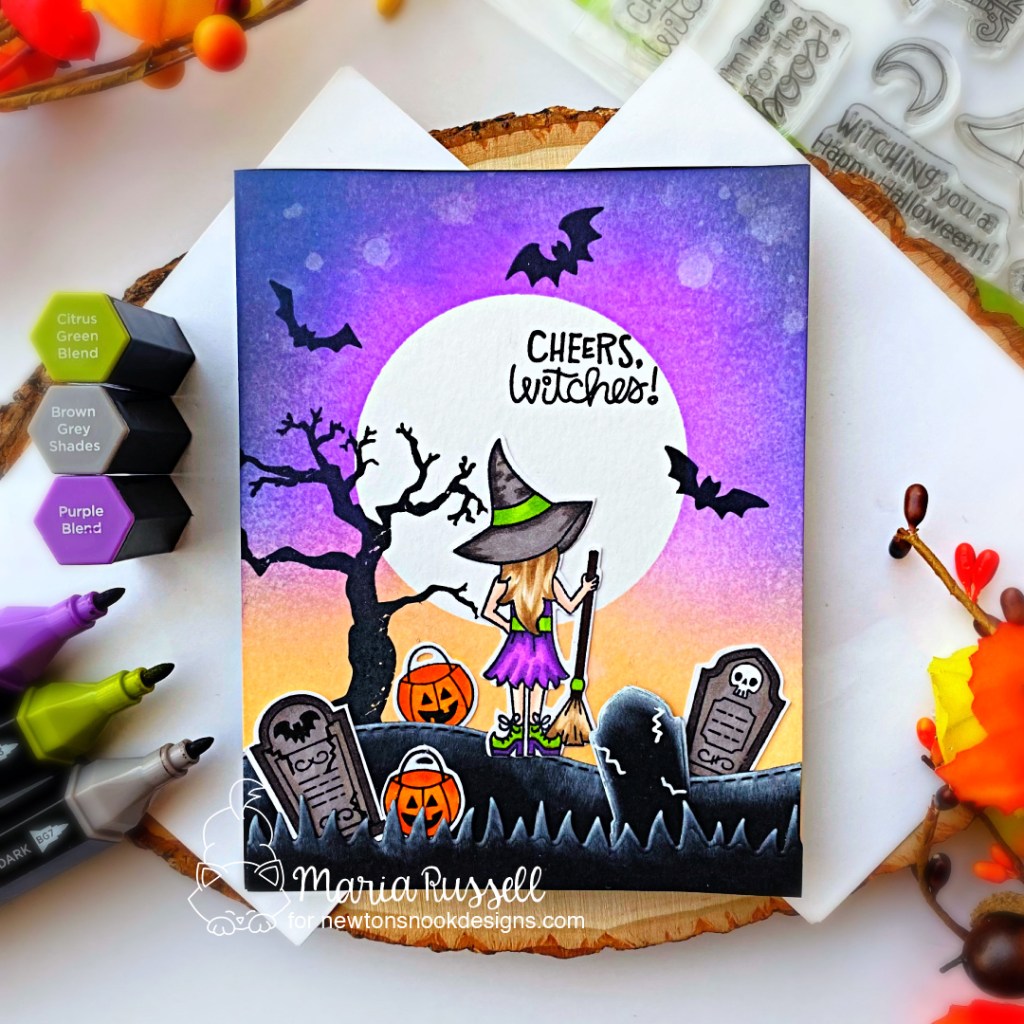
Apply some Unicorn ink on the edges of the tombstone, land and grass borders for added texture.
Use a circle die to die-cut some masking paper and adhere to an A2-size panel of Bristol smooth white card stock.
Ink-blend this panel with distress oxide ink.
Use distress sprayer to add water droplets to the ink-blended panel for added texture and interest.
Pick up excess water with some paper towel and remove the mask.
Stamp the spooky tree, bats and sentiment using black ink.
Adhere the hill and grass border on the card using tape runner.
Use white gel pen to add some detail to the black tombstone.
Adhere the rest of the elements to finish the scene.
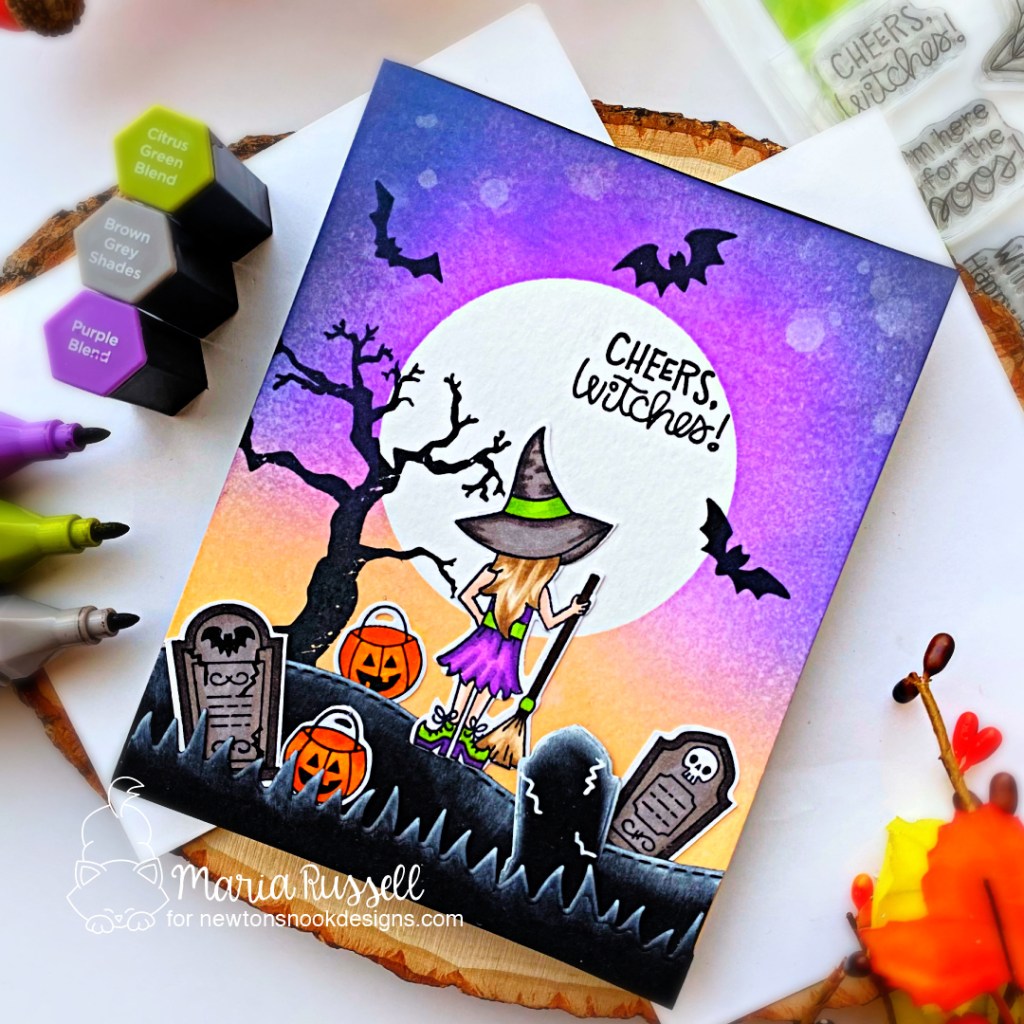
I really LOVE creating halloween cards and this will be the first of many halloween cards I’ll be posting on this blog. Here’s a closer look:
The white pigment ink on the tombstone, hill and grass border added more texture and interest to this spooky scene, don’t you think?
That is all for today! I hope this spooky card will entice you to start thinking about Halloween! The supplies are listed and linked below for your reference*. Thanks so much for stopping by today, and happy crafting!
Love,
——–supplies——
DISCLOSURE. *I belong to a few design teams with affiliate programs and link these supplies at the end of each blog post. If you click on my affiliate link, I will receive a small commission at no additional cost to you. I use these funds to pay for the cost of running this blog. If you like what I do, please consider supporting me by clicking on these links. Thank you so much!
Hello and welcome to the Kat Scrappiness September Product Release – Halloween!
I’m so excited to share this post today as we kick off this week with the most adorable Halloween-themed products! There are are a lot of products to showcase so sit back, relax and enjoy browsing through all of them today!
Kat Scrappiness also has a GIVEAWAY so make sure you read all the way to the end of this post and click on the link to participate there directly and have a chance to WIN the entire release!!
Our Home Sweet Home Base Die will create the base house perfect for any season. It measures approximately 4.25 x 5.75 inches. You can use it to create a house shaped card ,create a larger card such as a 5×7, an-A2 card (cutting it off slightly to make the house smaller!). There are multiple ways to use this die to create a one-of-a-kind house of your own!
The Crafters Essentials Halloween Dies include 8 individually designed dies that you can mix and match to create uniquely designed cards time and time again. These dies will work for A2, Slimline & Mini Slimline Cards (and other projects too!)
This super adorable Boo-gy Ghosts die set consists of 9 dies including five ghosts and four cute little accessories that will allow you to create each ghost’s individual character!
Create your own Creepy Crawly fun with this die set which includes four dies, two spider webs and two CUTE spiders! Add some googly eyes to the spiders for that extra cutesy look! Wouldn’t it be fun to add these die-cuts to your Happy Planner as well?
This sentiment die has a 1/4″ shadow. You can use the sentiment with or without the shadow. This die set can be used for any occasion and they’re also perfectly matched to go with the Boo-gy Ghosts!
This BOO TO YOU! Patterned Paper Pack is a fun, colorful and spooky selection of papers in a Halloween theme. They will make your Halloween cards a blast to create!
Create your own Mini Slimline Envelopes using this set of 14 dies. Use your own creativity to select from either patterned paper or colored card stock, etc. to create your own one-of-a-kind envelope. We’ve added the “Happy Mail” word dies to decorate your envelope. The envelope can be mailed and/or hand delivered to the recipient.
I have four (4) samples to share with you today. I have mixed and matched the Halloween products to create some fun and spooky cards.
I have to admit that this first card below is probably one of my favorite Halloween cards that I’ve ever made! I ink-blended the background with some distress oxide inks and used a stencil set from my collection to create the creepy sky!
The Home Sweet Home House Die Set was die-cut using some purple card stock and dry-embossed with a brick stencil. I then added black soot on the bricks to add more texture and dimension.
This slimline card is another favorite of mine. I adhered the Boo To You Paper on some black slimline card base. On another panel of SL Bristol smooth white card stock, I used some clouds stencil and distress oxide inks to create the night-time sky.
I then stamped the costume from the Dress-Up Quokka Halloween Add-on Stamp Set on some masking paper and fussy-cut using precision snips. I stamped the costumes first on some Neenah solar white card stock and used the mask to mask-off the image, then stamped the two quokkas from the Dress-Up Quokka Stamp Set. By doing so, it created a seamless look. I used my Scan N cut machine to cut the images out.
My third sample is fairly simple! For my card base, I used the Tri-Fold Scored Cards and Envelopes available at the shop with the Never-Ending Square die set to create the windows. I once again ink-blended the background with some distress oxide inks and clouds stencil. I cut a piece of patterned paper from the Boo To You Paper Pack and adhered on the inside with liquid glue.
The cute ghosts from the Boo-gy Ghosts Die Set were die-cut on some glitter card stock. I finished the design by adding some Purple Pearls and the sentiment Lift Your Spirits that I die-cut with some black and white card stock.
DISCLOSURE. *I belong to a few design teams with affiliate programs and link these supplies at the end of each blog post. If you click on my affiliate link, I will receive a small commission at no additional cost to you. I use these funds to pay for the cost of running this blog. If you like what I do, please consider supporting me by clicking on these links. Thank you so much!
Hello my crafty friends! Maria here on the blog with you today sharing this cute Halloween card, featuring a few of my favorite stamp sets by LDRS Creative. Halloween is fast-approaching and I want to start creating my cards so that I’ll have plenty of time to mail them to the recipient.
I started by stamping the images on some Neenah solar white card stock using the Raven Hybrid ink. I colored the images in with my alcohol markers and die cut, using the coordinating dies.
I ink-blended my A2 size panel of Neenah with some Banana Cream Pie Hybrid Ink and mini sponge dauber. I increased the intensity of the color towards the middle. I foam-mounted the window, flower box and the black cat on the card panel then started adhering the rest of the ivy leaves with liquid glue.
Before adhering my trick-or-treaters, I die-cut the two grass panels out of the Sweater Weather paper using the In the Grass die set. I added the pumpkins and the treat bag, then foam-mounted the rest of the images for added dimension.
I finished my design by stamping the cobweb and spider, then stamped the sentiment using Raven Hybrid Ink. Here’s another look:
I absolutely LOVE that you can mix and match these cute stamp sets to create a beautiful Halloween scene. I hope you like my card today. The supplies I use are listed and linked below. Thanks for stopping by and happy stamping!
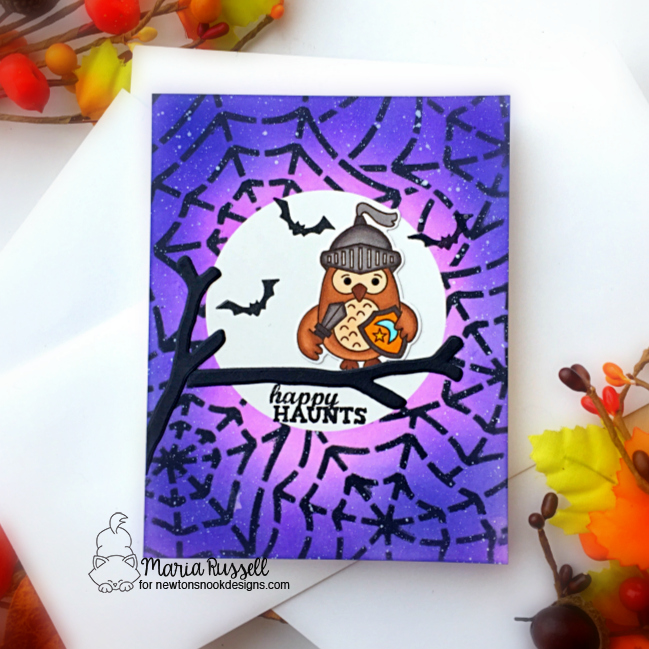
I started by masking a panel of some Bristol smooth white card stock. I ink-blended this panel with some distress oxide ink
I used the Spiderweb stencil to ink add more details to the background with some black ink. I also sprinkled some white paint all over the background for added texture.
Next, I removed the mask to reveal the full moon. I die-cut the bats from the Halloween Trio die set and adhered it onto my background with some liquid glue.
The focal image was stamped and colored with alcohol markers. To ground my image, I die-cut the branch from What A Hoot die set and adhered on the card with some glue.
I finished my design by stamping the sentiment from the Spooky Street stamp set. Here’s another look at the card:
I hope you like my Halloween card today. The supplies I use are listed and linked below. Thanks for stopping by and happy stamping!
I always get a bit bummed when it’s the last day of the reveals by Newton’s Nook Designs. Have you seen the last three days? The design team totally knocked it out of the park it! You also have a chance to win the stamp set being revealed each day so please read through til the end of the blog post to find out more info. [Just a little important note: I know some of you had difficulties finding the comments section. If you would like to leave a comment to participate in the giveaway, the “comments section” will only be ever visible when a single post on Word Press is being viewed. Please click on this particular blog post and you will be able to leave a commentbelow. Thank you!]
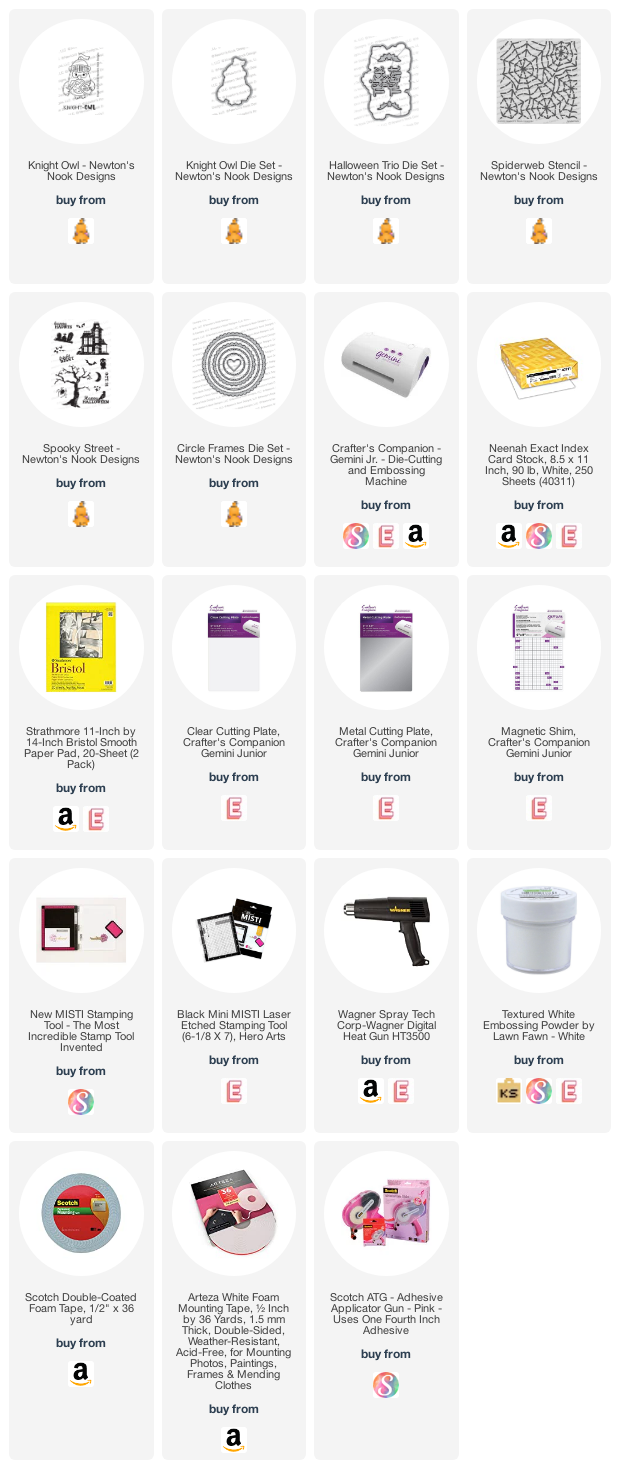
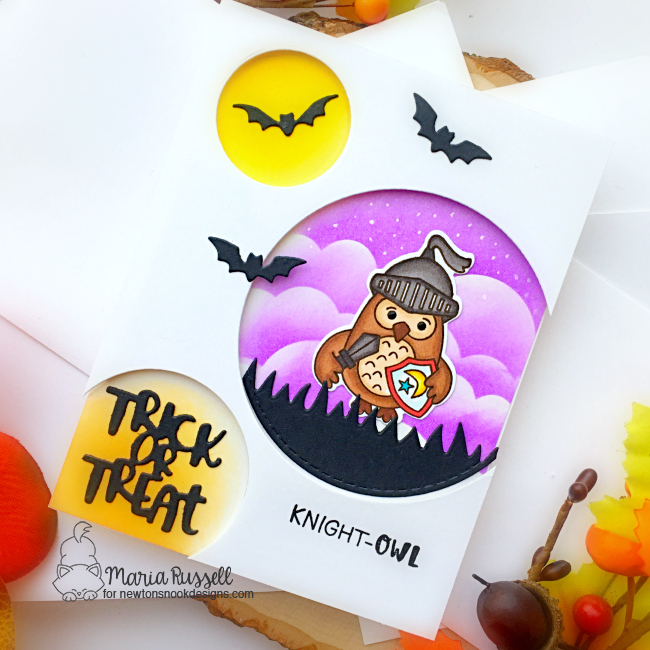
For day 4, we are showcasing the Knight Owl and Pug-kin Stamp Sets with the coordinating dies.
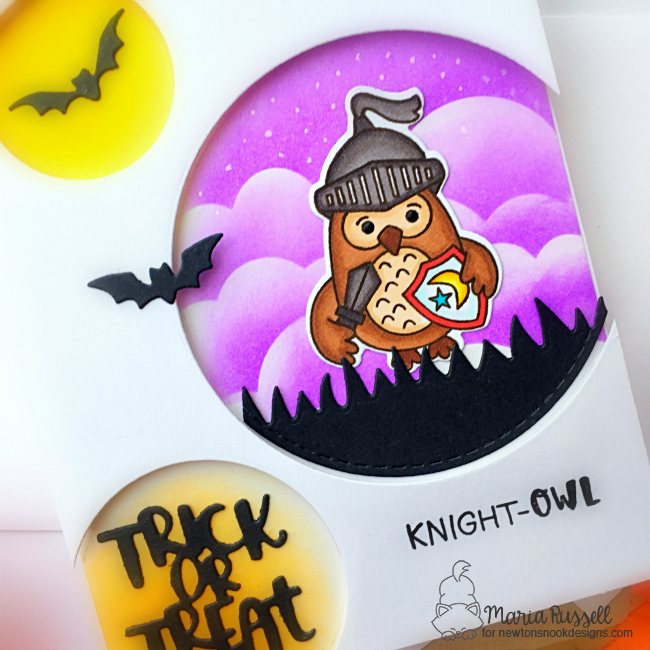
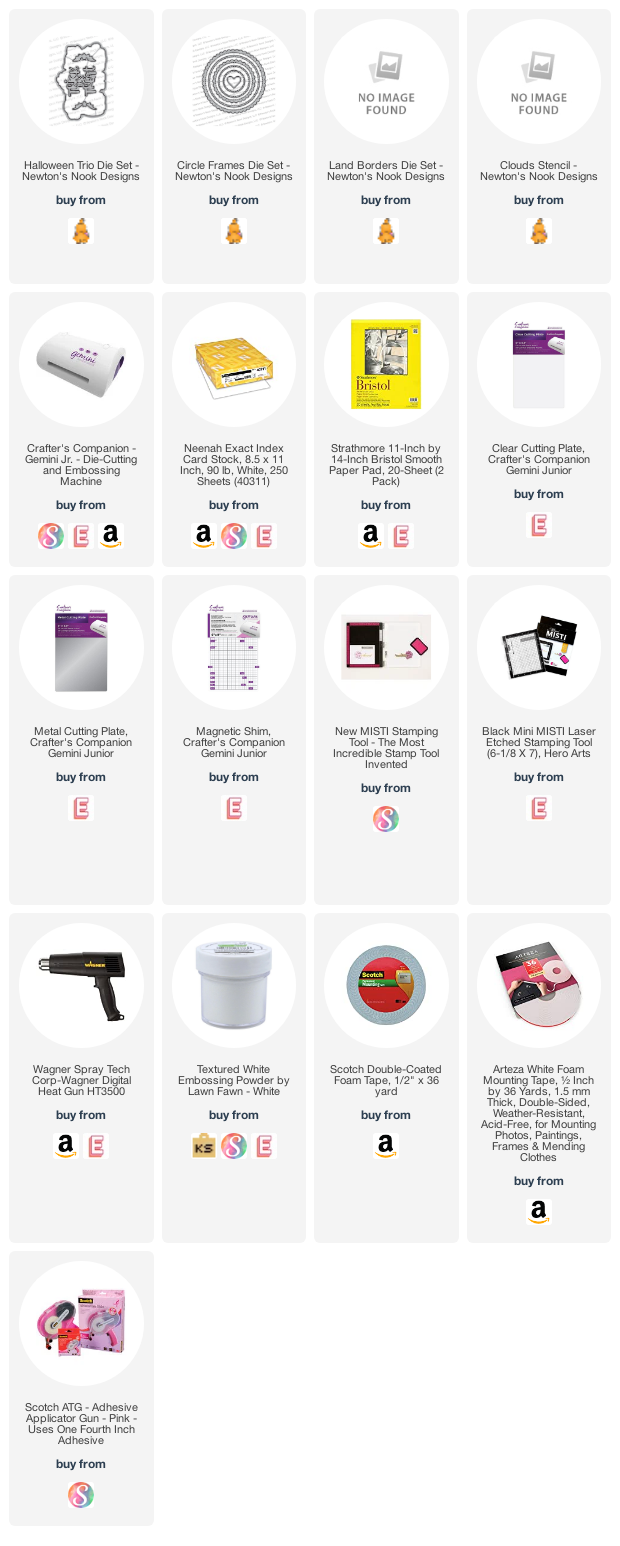
To make my first card, I cut an A2 size panel of some Neenah solar white card stock and used the circle dies from the Circle Frames die set to cut the three windows. I used my pencil to draw the circles on another A2 size panel of Bristol smooth white card stock. I inked up the circles with some distress oxide inks and erased my pencil lines using a pencil eraser.
The Neenah white panel was foam-mounted on the colored background for added dimension. I stamped my focal image and color it in with my alcohol markers. I adhered this onto the card with liquid glue.
My scene was created by adding the grass panel die-cut from the same circle dies I used earlier and the Land borders die. I adhered this onto the card with glue.
The bats and “TRICK OR TREAT” were die-cut using the dies from the Halloween Trio die set. I adhered them onto the card with some liquid glue.
To finish my design, I used my white gel pen to draw some dots to the sky to make them look like stars. Here’s another look:
For my second card, I die-cut the circle from the Circle Frames die seton some Bristol smooth white card stock. I ink-blended this piece with some distress oxide inks. I used the same circle die and the Land Border die to die-cut the grass.
The background was created by using the Spiderweb stencil and some light gray dye ink. I cut this panel to 4 1/4 by 5 1/4 and adhered on an A2 size panel, that was colored with the Houndstooth stencil. I die-cut some black strip and adhered onto the card with liquid glue. I also die-cut some black party streamers using a die from my collection and the bats using the Halloween Trio die set.
I stamped the image and used alcohol markers to color it in. I used the coordinating die to die-cut the image and adhered on the circle. I foam-mounted this piece on my card for added dimension. Here’s another lookK
Would you like to win the “Knight Owl” and the “Pug-kin” Stamp Set?We will choose TWO lucky winners to each win this duo of stamp sets!
Here’s how to win: Comment on the NND blog and Design Team blogs (see list below)! Thewinner will be chosen at random from the collective reveal posts. Make sure to check out each of their blogs and comment for your chance to win. You will not know which blog has been chosen so the more you comment on the better your chances are of winning! You have until Thursday August 20th at 9pm EST to comment — winners will be announced on the blog post on Friday, August 21st.
Check out all the awesome Design Team Blogs below to enter:
Have you ever gone to the Dollar Store and and got disappointed with the quality of the decor? As crafters, we have a ton of supplies and with just a little patience and imagination, you can create your own cute decorations for Halloween. It has been awhile since I created some DIY projects so here are a couple that you can make on your own. If you don’t have the dies that I used for my projects, you can always get stickers and other supplies from the craft store.
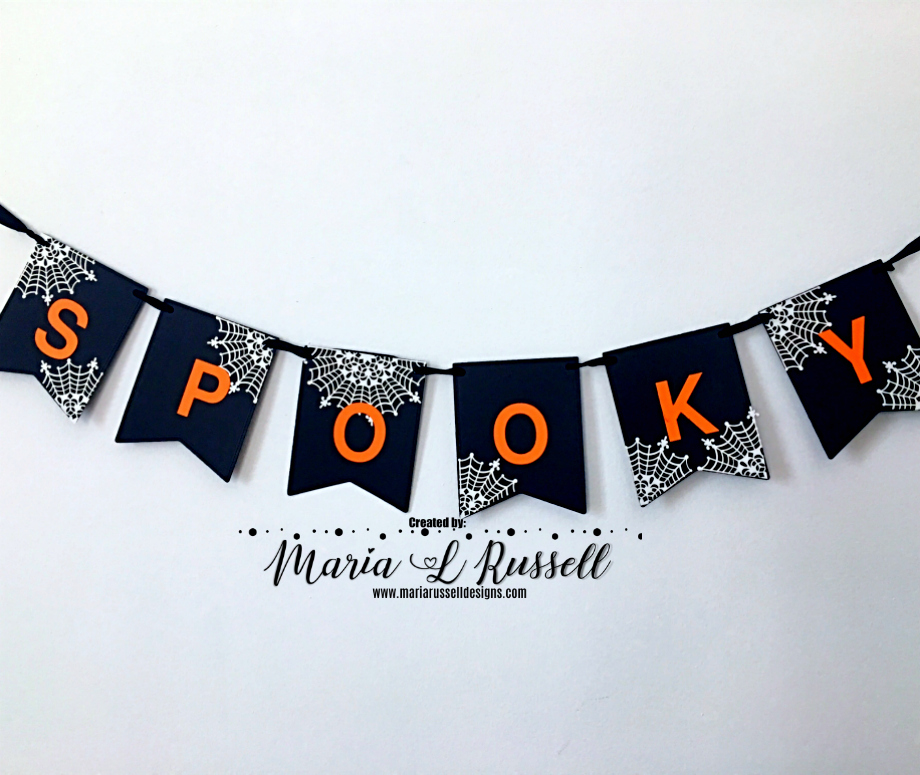
First up, the Halloween banner. I started by die-cutting the letters “SPOOKY” using the Large Alphabet Dies by Kat Scrappiness. I positioned the letters and run it through my Xyron Creative Station Lite to create the sticker. I die-cut the banner six times with some black card stock using my Lawn Fawn banner die. I used some spider web” die-cuts that I’ve had for years and adhered them onto the banner.
Since the letters are now very sticky, they were so easy to adhere to the banner.
I used some black seam binding ribbon to create the banner and hung it on my wall. Here’s what it looks like:
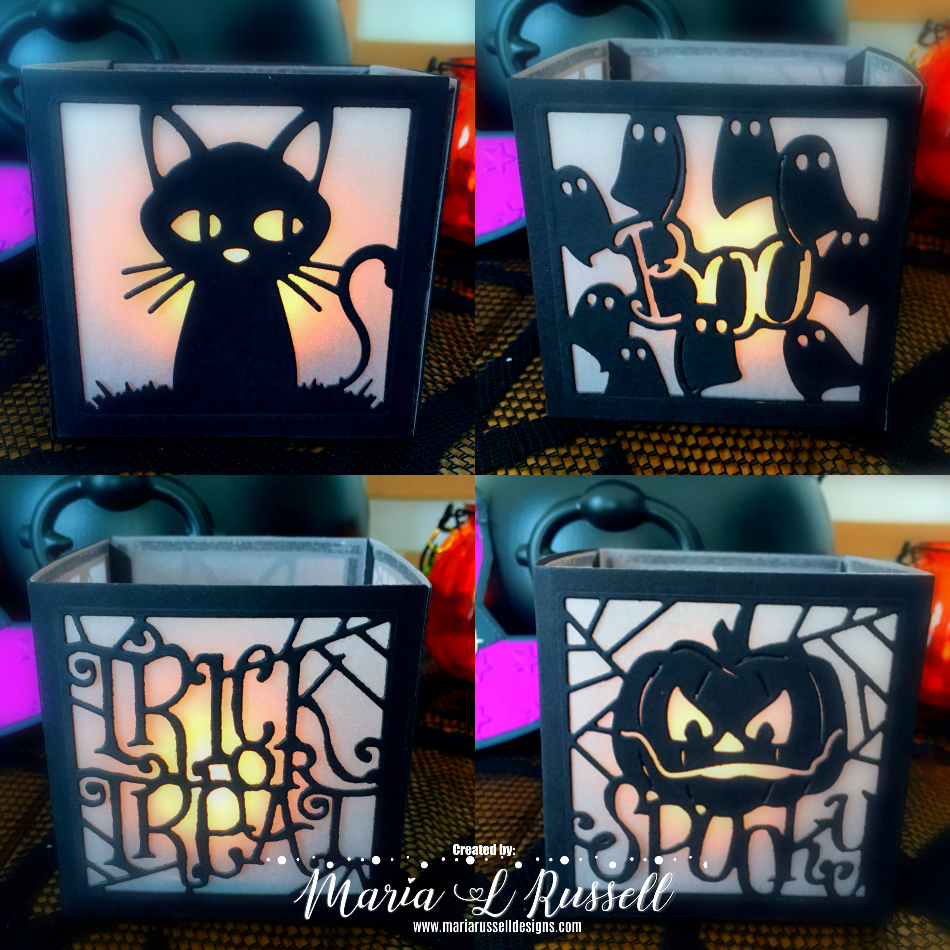
For my second project, I wanted to create some luminaries using a Spellbinder die that I have in my stash for a few months now. I couldn’t wait to create this project. To begin, I die-cut some black card stock and some vellum using the dies. I added some adhesive using my Xyron Mega Tape Runner.
I adhered the vellum using the tape runner and assembled the luminary. Since this is made entirely out of card stock, I used an LED tea light candle to illuminate this piece. This luminary has four designs and I really LOVE how it turned out. Here’s what it looks like:
Lastly, I created a handmade Halloween card to send to my best friend. I die-cut the main card base using the LDRS Creative Build A Card – Spooky Hat with some black card stock. I die-cut the second piece with some purple card stock and used an embossing folder to add some dimension.
I really LOVE how this one turned out. Using my Xyron Creative Station Lite made it easier for me to adhere the little pieces together. Here’s a little close-up:
I hope I have given you some great inspiration to create your own DIY decor and handmade cards. The supplies I used are listed and linked below. Have an amazing day and happy crafting!
I hope you are all having a fabulous day. This is my second post for today for the MFT Stamps 2019 Card Design Superstar contest! This post is to enter the Clean & Simple category.
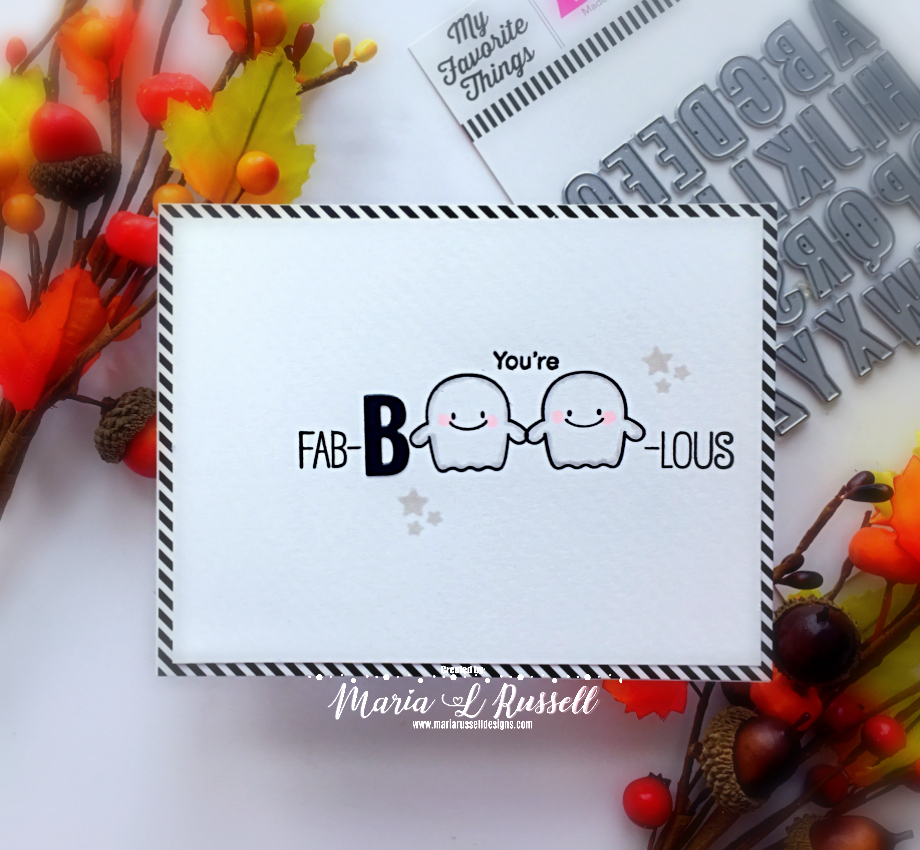
I started by masking the sentiment and stamping it on some A2-size Neenah 80 lb. solar white card stock. I also stamped the two ghosts from the BB Fab-BOO-lous stamp set and colored them in with some T1 and T0 copic markers. I used my R00 to add some pink color to their cheeks.
I die-cut the letter “B” on some black card stock using the LLD Little Letters Die-namics. and adhered it right next to the ghost. I stamped the remaining sentiment with Versafine Onyx black ink and also stamped the stars using some light gray ink.
If you guys have been following me for awhile, you know that clean & simple is not my strongest point. This category was quite the challenge for me! I think having this contest is amazing because it challenges us (card-makers), to go beyond our comfort zone and try something new. Here’s a closer look:
I hope you like my card today and got inspired. If you would like to enter the contest, please click on this link: 2019 Card Design Superstar. The supplies I used are listed and linked below. Have a great day and happy stamping!
It is that time of the year when most card-makers get nervous trying to come up with unique designs to join the MFT Stamps 2019 Card Design Superstar contest! I have entered the last two years but never won. There are so many amazing card-makers out there and the competition gets tougher every year. However, I think this is a great way to interact with a lot of people and I adore MFT Stamps for giving us a chance to show off our skills. For this post, I am entering the “Coloring Virtuoso” category.
To begin, I die-cut a piece of masking paper using a circle die and masked some A2-size Bristol smooth white card stock. I inked up this piece using some water-reactive inks. I used my distress sprayer to spray some water on my colored background and dabbed it dry with my paper towel.
I stamped the images from the Spooktacular Friends stamp set and colored them in with my alcohol markers. Since I didn’t have the coordinating dies for this, I used my cutter-bee scissors to fussy-cut the images. I also colored the border on the images with some T7 Copic marker. Since I have a night scene, I didn’t want the edges of the images to have some white border.
I die-cut some black card stock using the Tucked-In Turf and Grassy Hills Die-namics. I used my blending brush and some Sweet Tooth Pigment Ink by MFT Stamps to add some texture on the grass. Since I have a ginormous moon, I needed to make the grass look more realistic by having some light shadows.
I adhered my colored background on an A2 size card base. I foam mounted some of the grassy hills and started assembling my card. I stamped the tree image directly onto the foreground with some Versafine Onyx black ink. I then used my white gel pen to add some color to the ghost. Lastly, I stamped the sentiment on the card with some Versamark ink. I sprinkled some white embossing powder and heat-set this with my Wagner Heating tool. Here’s my card:
I don’t know about you but I think one of the most difficult part about creating a night scene is to make sure that the images pop against the dark background. This is the reason why I colored the edges with some dark marker. I wanted them to pop against the dark background but I didn’t want the white edges to stand out either. Here’s a closer look:
I hope you like my card today. If you would like to participate and have some fun, please visit their blog post here: 2019 Card Design Superstar Contest. The supplies I used are listed and linked below. Have an amazing day and Happy stamping!