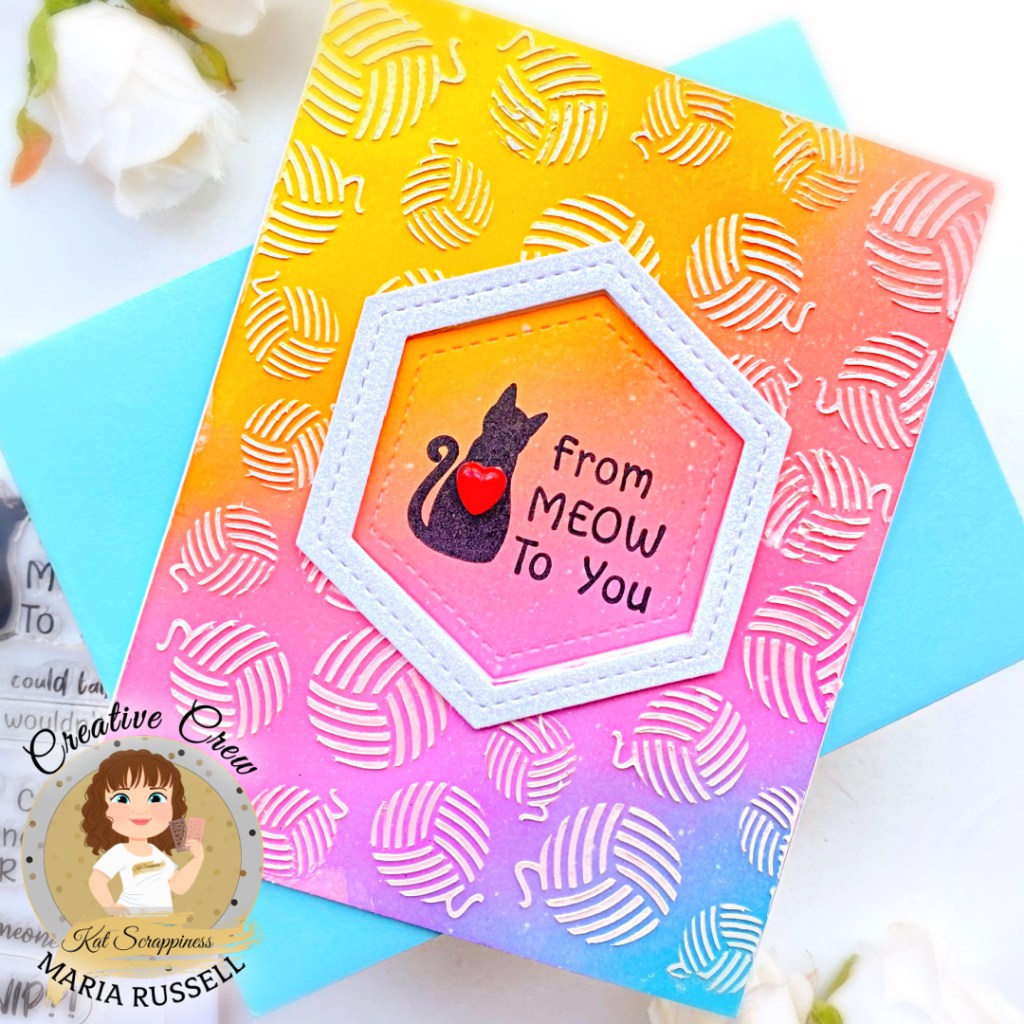
Hello everyone and Happy 2025! I hope you are all doing well! I want to start the new year by creating more projects and giving you a lot of content this year!
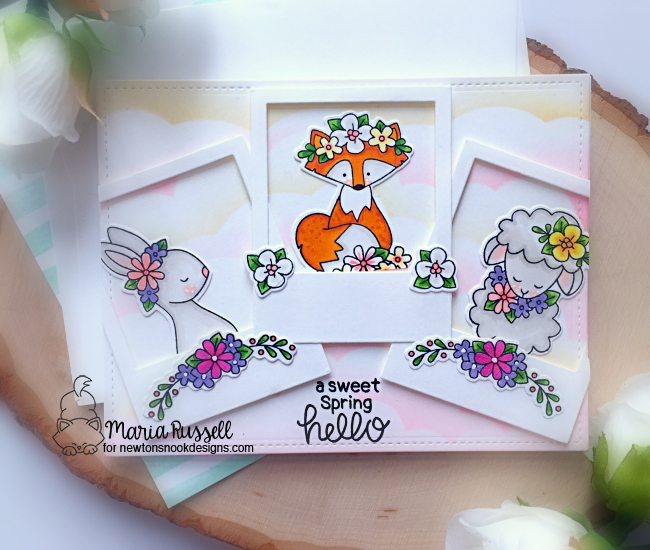
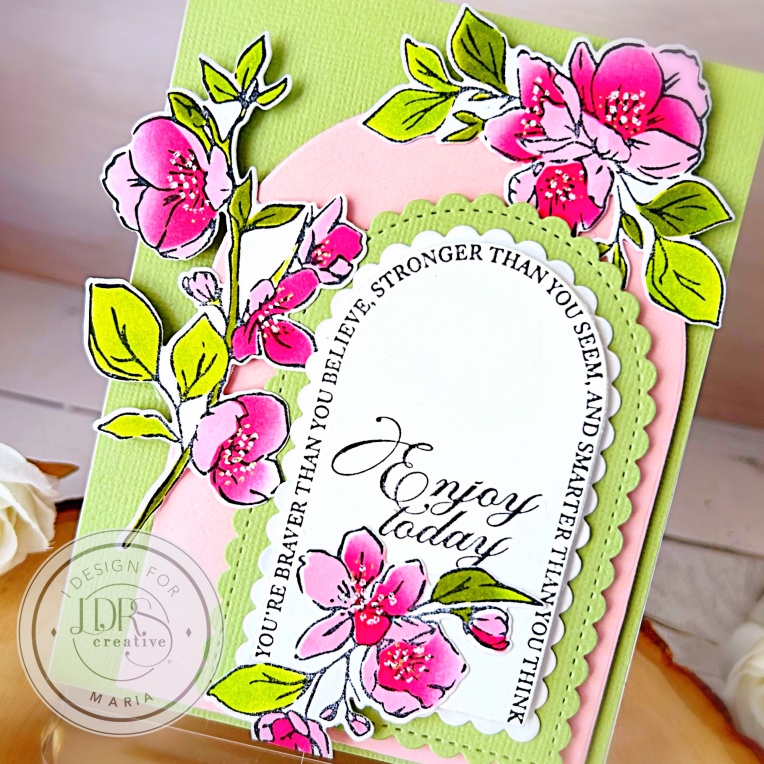
I always run out of all-occasion handmade cards and that’s because I send them to friends all the time! I was looking at the new LDRS collection and the Apple Blossom Swag Bundle is just the right combo to create this beautiful card below.

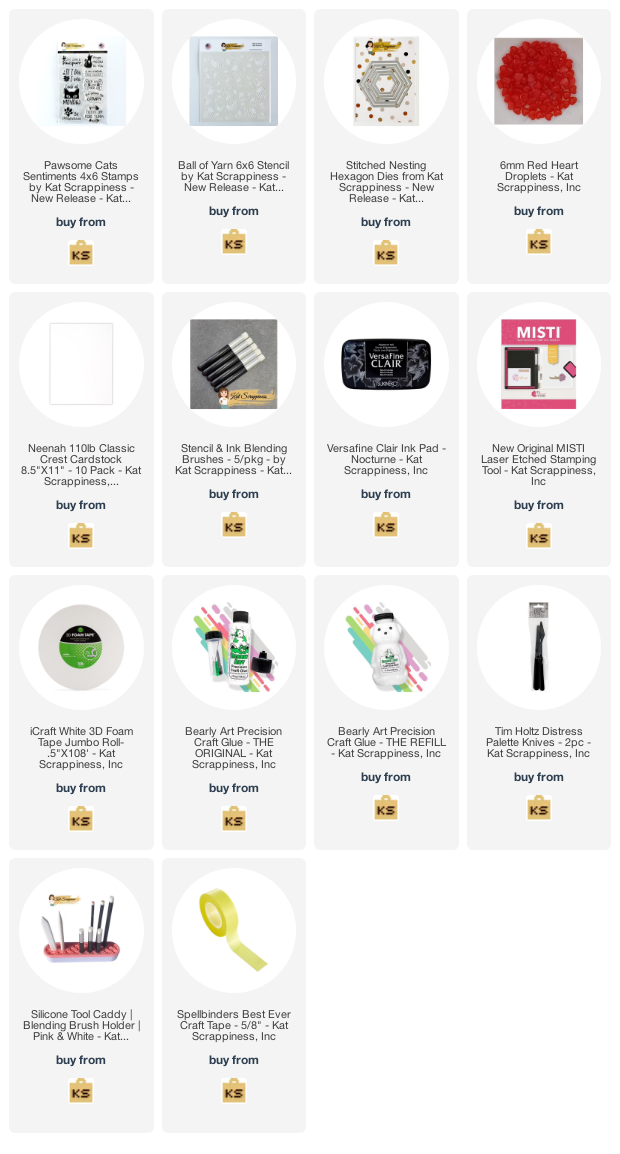
I started by placing the Apple Blossom Swag Impress-ion Press + Foil Plates on the BetterPress platform and inking them with Raven Hybrid ink. I run the BetterPress platform through the die-cutting machine to get a nice impression.
Next, I used the Apple Blossom Swag Stencil to color the images. I love that I don’t have to be an expert when it comes to coloring because the stencils made it very easy for me to layer the colors and add dimension. For reference, I used Pink Tutu, Lipstick Jungle, Prickly Pear Perfection, and Olive Branch hybrid inks.
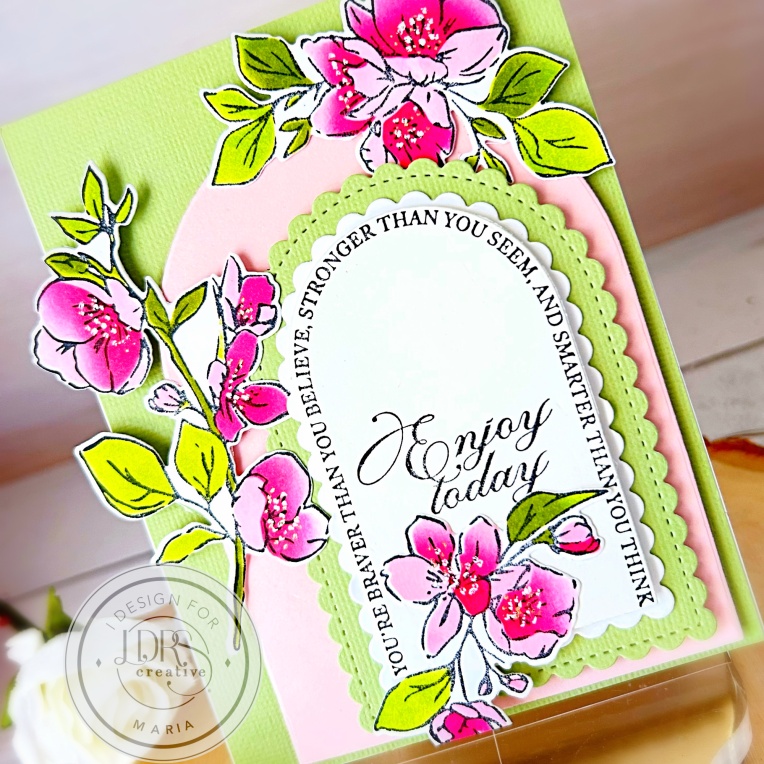
Once I finished coloring the images, I used the Apple Blossom Swag Coordinating Dies to cut them out. The final step was to get the sentiment stamped and die-cut. I used the Arch Builder Impress-ion Press + Foill Dies with Raven Hybrid ink, followed by die-cutting the same using the Arches Die.
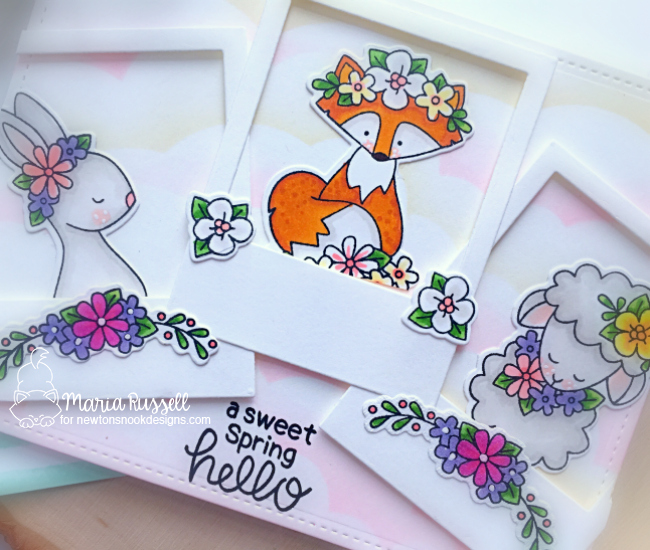
Finally, assembling the card was very easy by layering the Stitched Scallop and Arches dies with foam adhesive for dimension and stability. Here’s another look at the card.
I hope you like this card as much as I do! Thanks for stopping by, and happy crafting!