
Hello Newton’s Nook fans! I hope you are all having a great day. Who is ready for summer? I know a lot of you are still experiencing the cold climate and probably even have snow on the ground so here’s a little colorful, under-the-sea themed card that will brighten anyone’s day.
For my project today, I am showcasing the Tranquil Tides stamp set and coordinating dies, with the land border dies.
I started out by cutting a mask using Inkadinkado masking paper, and the Land Border dies by Newton’s Nook. I placed the mask onto my Bristol smooth white card stock, measuring 4 1/4 by 5 1/2 so that I can mask the bottom edge, while I ink-up the top portion of the card. I used my distress oxide inks to ink up the background.

I flipped the mask and inked up the bottom portion of my card base with my Antique linen distress oxide ink. I sprayed my background with water using my distress sprayer and dabbed it with my paper towel.
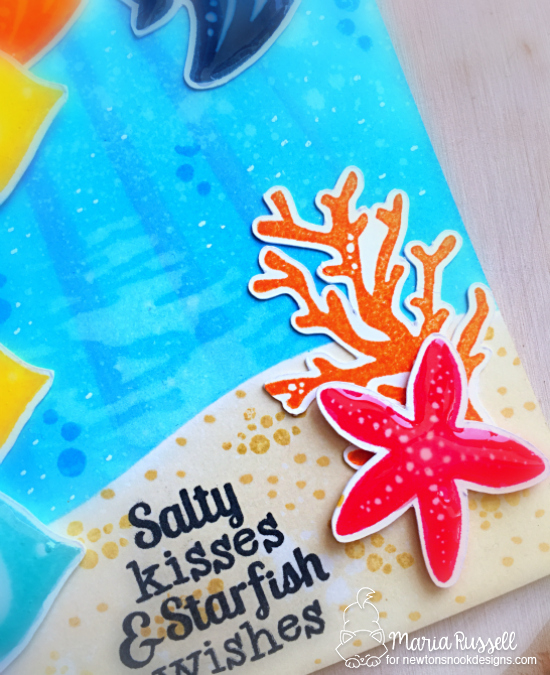
On another piece of Neenah solar white card stock, I stamped my images using different colorful inks. I cut the images using the coordinating dies.

I adhered all of my images onto my colored background. To finish my design, I stamped the bubbles using the stamp set with a darker blue ink, and added glossy accents to the fishies and the starfish. Here’s my card:
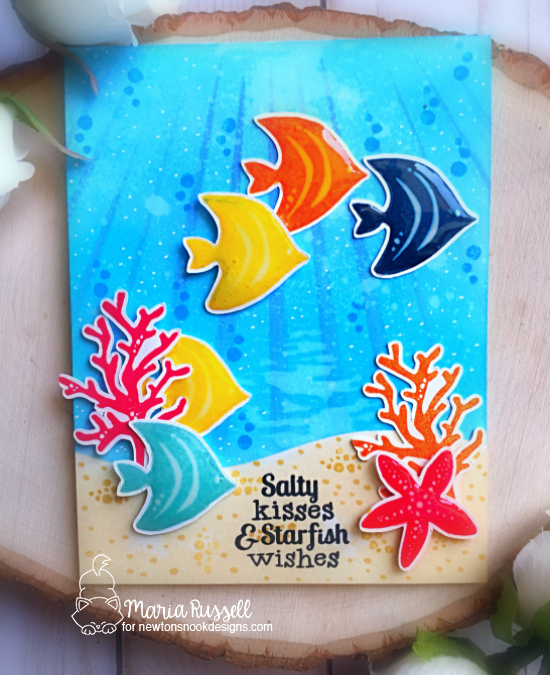
I really like how this card turned out! The glossy accents just made the fishies look a little bit more realistic.

I just love the sentiment on this card. I am sure you are all dreaming about the summer now, after seeing this card.
I hope you like my project today. The supplies I used are listed and linked below. Have an amazing day!
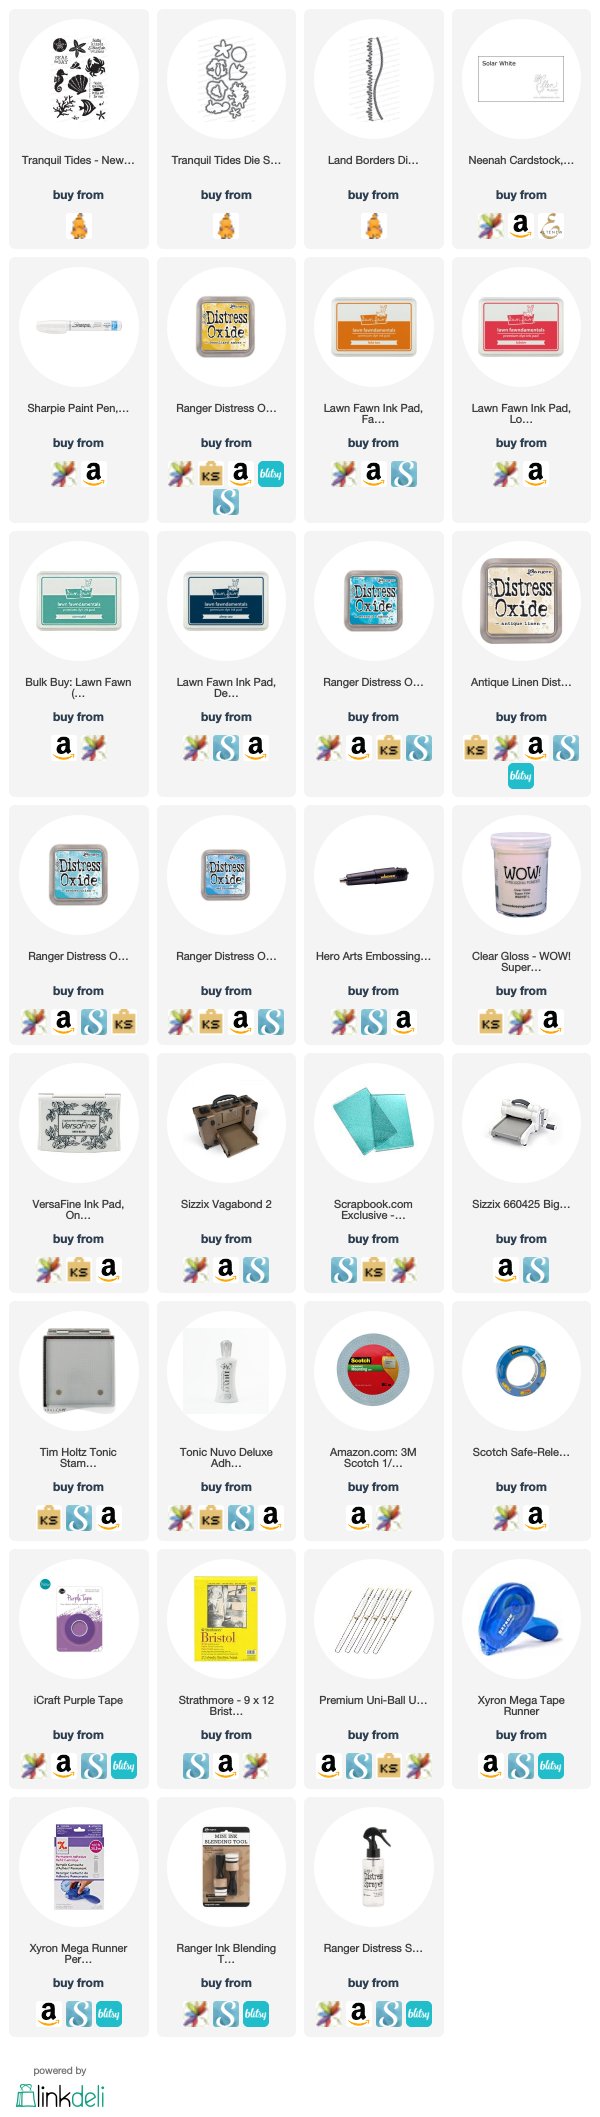
———–SUPPLIES———-

Hi Maria, I love this card. I love anything critters and ocean. Such s cute card. I live in FL so I’m surrounded by sunshine and beaches. How lucky am I!!! I would like to know if you would share how you created the ocean scene. The underwater effect is beautiful. Thanks in advance.
Gayle
LikeLike
Hello Gayle! Lucky you! I’m not really allowed to share some of the products I used but if you really want to see how I made the underwater scene, I have a video on my YouTube channel that I posted several days ago for Paper house and I showed how I created the underwater scene for the shaker card. It’s the same hint I did for this card. Here’s the link if you want to see it: https://youtu.be/WCVu2P3MTjw
LikeLike
I meant the same “process”I did for this card. I also linked the supplies I used for that video and you will find those in the description box. Thank you so much for commenting and liking the card. You’re the best! 😀
LikeLike
Hi Maria, thanks so much for sharing❤️ I’m going to watch it right now. I’m happy I found you and now subscribed to your blog.
Gayle
LikeLike