Here Today, Gone to Maui with LDRS Creative

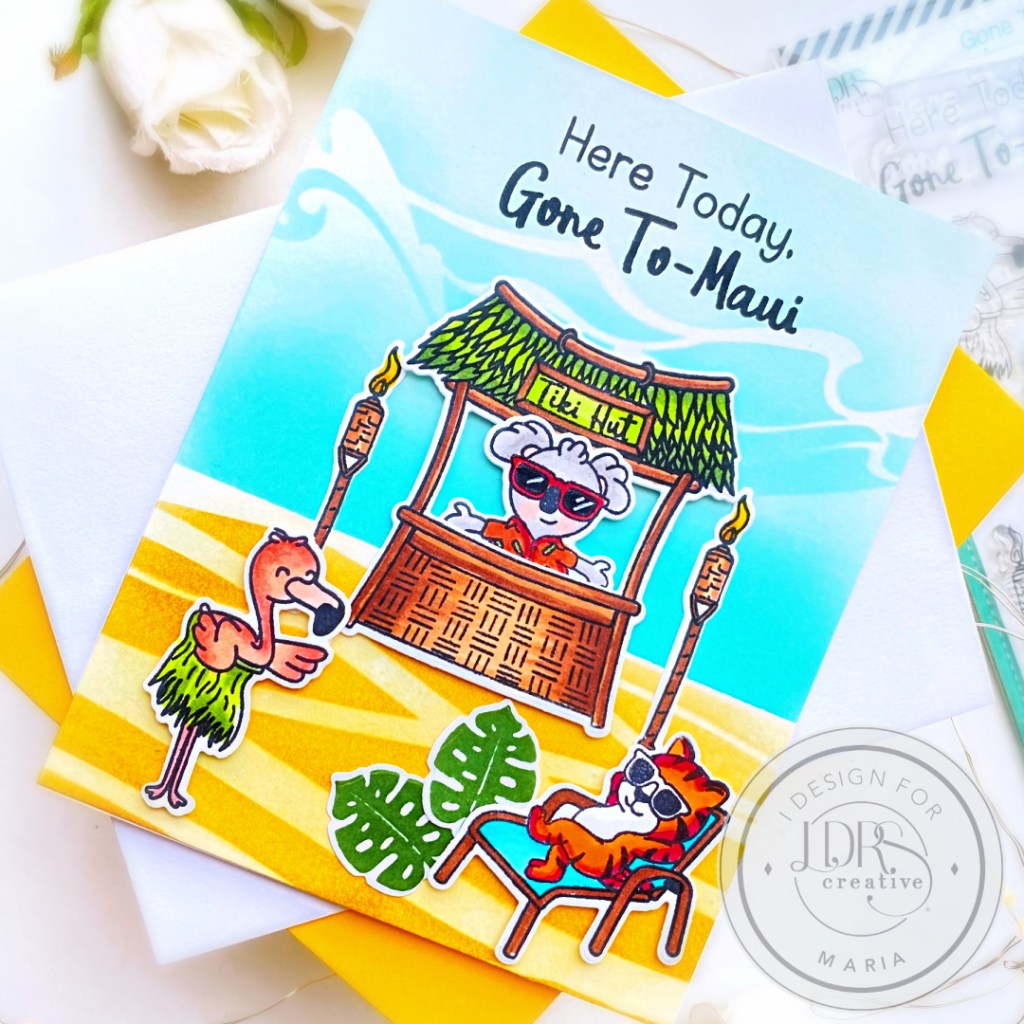
Hello LDRS fans!  Summer is here and tanning season officially started, yay!  To celebrate, I am sharing this fun “just-because” card showcasing the Gone to Maui Exclusive Craft Kit, along with the Ocean Waves 6×6 StencilUnder the Sea 6×6 Stencil and a few of my favorite LDRS Hybrid inks.

The Gone to Maui Exclusive Craft Kit is limited edition and only available while supplies lasts so grab them now before they are gone.  The kit is packed-full of awesome crafting goodies!

The images were stamped using Raven Hybrid Ink on some Neenah Solar White Card Stock.  I colored the images in with alcohol markers and used the coordinating dies to cut them all out.

The background panel was ink-blended using the Ocean Waves StencilUnder the Sea stencil with LDRS Blender Brushes and Iced TeaBali Blue and Little Boy Blue Hybrid inks.  I waited for this panel to dry for a few minutes and adhered on some A2-size notecard.

I foam-mounted the images on the focal panel and finished the card design by stamping the sentiment with Raven Hybrid Ink.  Here’s another look at the card:

I hope you like my card today and got inspired.  Below, you will find links to the supplies used to create this project(s). Where available, I use compensated affiliate links at no extra cost to you. Your support helps me to keep bringing you new projects and inspiration. Thank you for stopping by, and have an amazing day!

——–SUPPLIES———-

I’m Done Adulting. Let’s Be Mermaids!

Hello my crafty peeps! Maria here on the blog with you today sharing two summer-themed cards, showcasing one of my favorite stamp sets from the summer release called “Mermaid Treasures“, along with the Under the SeaOcean Waves and Mermaid Shimmer stencils.

For my under the sea card on the left, I started by inking up the background with my blending brushes and Ocean Waves and Under the Sea stencils using a combination of the Marina MadnessTropical Sea and Four Leaf hybrid inks.  I used the same stencil and some glitter glitz gel to add more texture to the school of fishies.  I also die-cut two borders using the By The Sea border die and foam-mounted these pieces onto the colored panel.  I adhered this to an A2 size card base.

Next, I stamped the images on some Neenah solar white card stock and colored them in with my alcohol markers.  I used the coordinating dies to die-cut them out and adhered them using either some foam or liquid adhesive for added dimension.

Lastly, I adhered some Sparkling Clear Droplets to my card for added texture.  Don’t they just look like bubbles?  Here’s another look:

Since I colored a lot of images, I decided to make another card.  I used some low-tack tape to mask both sides of my A2-size card panel.  I used my blending brushes with the Mermaid Shimmer stencil, and colored the background mixing the Fandango and Tangerine Dream hybrid inks.  

I used my glitter glitz gel to add more texture to the background.  I love the glittery effect it gave on the card.  I die-cut two strips of black card stock and adhered it both sides.  I also cut some strips of the patterned paper from the Seaside paper pack.

I foam-mounted my focal image and used my shimmer pen to add some highlights to her hair.

To finish my design, I stamped the sentiment with watermark ink and sprinkled some white embossing powder.  I used my heating tool to heat-set the sentiment and die-cut using the Sentiment Stack die.  I adhered this piece with some foam adhesive.  Here’s another look:

This card is really simple but I love the textured background!  

Don’t you just love the mermaid images on the Mermaid Treasures stamp set?  They are beyond adorable!  I also LOVE, love, love the new stencils!  I can’t really pick a favorite!  LDRS Creative has an amazing line of stencils that you can use to create a wonderful scene on your projects. 

I hope I have given you some great inspiration today.  The supplies I use are listed and linked below.  Thank you for stopping by the happy stamping!

———–SUPPLIES———–