NND June Release Day 2 – Summer Moments & Newton’s Seashell

It is the second day of the reveals by Newton’s Nook Designs.  I hope you were able to check out yesterday’s reveal.  You also have a chance to win the stamp set being revealed each day so please read through ’til the end of the blog post to find out more info.  [Just a little important note:  I know some of you had difficulties finding the comments section.  If you would like to leave a comment to participate in the giveaway, the “comments section” will only be ever visible when a single post on Word Press is being viewed. Please click on this particular blog post and you will be able to leave a comment below.  Thank you!]  

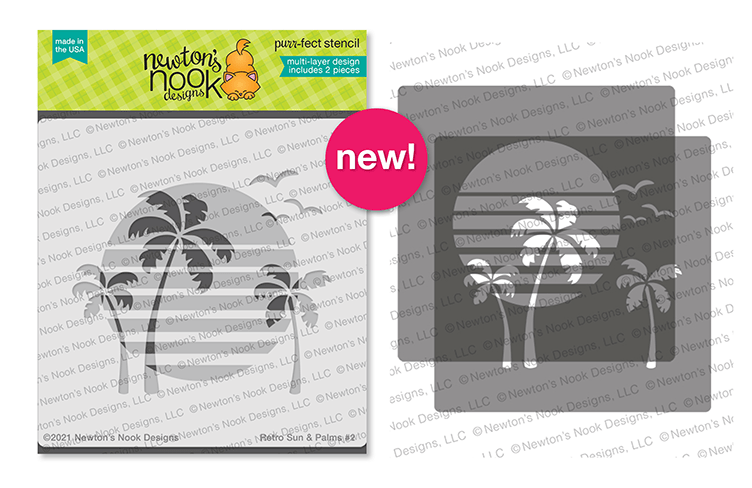
For Day 2, we are showcasing the Summer Moments and Newton’s Seashell stamp sets and their coordinating dies with the Retro Sun Stencil.

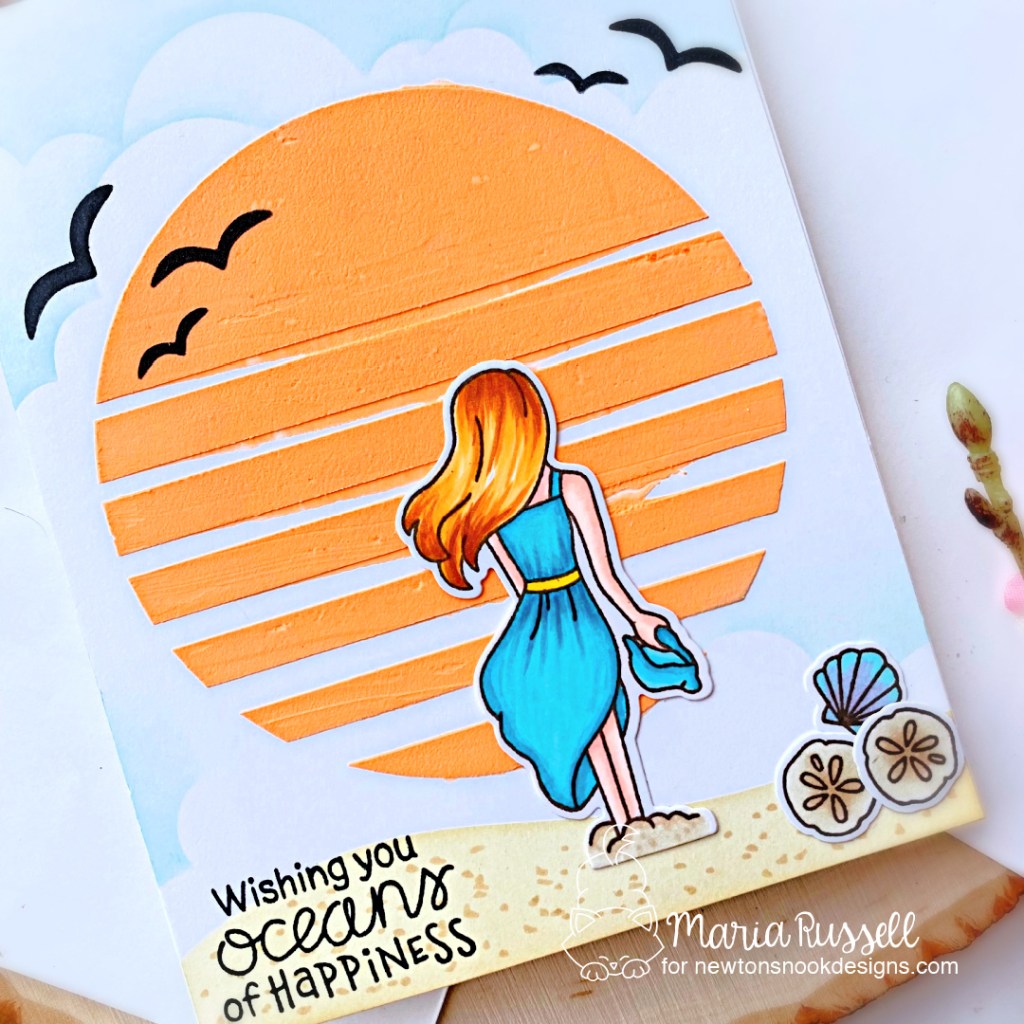
I started by creating the background panel by spraying some Pixie spray on the Retro Sun stencil number 1 and placed it on top of my Neenah solar white card stock. It just gave enough tack to adhere on my card stock.

Next, I used my palette knife to gather enough textured paste and spread it onto my craft mat. I dropped a few colors of my Carved Pumpkin distress oxide re-inker and mixed it together. Using the Stencil Pal from Therm-O-Web, I applied the textured paste onto the card panel. I removed the stencil and set this card panel aside to let it dry for about half an hour. Some of the paste kind of bled outside the lines but I didn’t really mind it. After all, this is “handmade” not hallmark (as per Jennifer Maguire).

Once the card panel was dry, I used the Clouds stencil to add the sky.

I stamped the images on some Neenah solar white card stock and colored the images in with Spectrum Noir TriBlend markers.  I used the coordinating die to cut them all out.

To create the sandbank, I used the Hills & Grass stencil with some light brown ink and blending brush to add color to my focal panel. I also used my alcohol marker to draw some dots randomly for added texture.

The last thing to do was to adhere my focal image and stamped the sentiment with some black ink. I used the Retro stencil again to add the birds. Here’s a closer look:
The next card is really simple. I pretty much did the same steps as mentioned above but this time, using the Waves & Splashes stencil, Petite Clouds stencil and one of my favorites, the Fancy Edges Tag Die Set.

I cut about half an inch off my A2-size card stock and adhered on some patterned paper that I added on white notecard. Adhering the tag on the card with liquid glue for added stability. Here’s a closer look:

Would you like to win the “Summer Moments stamp set”?  We will choose ONE lucky winner to win this set!

Here’s how to win: Comment on the NND blog and Design Team blogs (see list below)!  The winner will be chosen at random from the collective reveal posts. Make sure to check out each of their blogs and comment for your chance to win. You will not know which blog has been chosen so the more you comment on the better your chances are of winning!  You have until Thursday, June 17th at 9pm ET to comment  — winners will be announced on the blog post on Friday, June 18th. 

Check out all the awesome Design Team Blogs below to enter:

Newton’s Nook Designs

Ellen Haxelmans

Tina Herbeck

Larissa Heskett

Samantha Mann

Zsofia Molnar

Maria Russell (you are here)

Farhana Sarker

Tatiana Trafimovich

Samantha VanArnhem

Amanda Wilcox

———-SUPPLIES———

NND January Release – Deer Friend Stamp Set and Dies

NNDJan18ReleaseIcon_Jan18

It is the third day of the January reveals by Newton’s Nook Designs and today we are showcasing the Deer Friend stamp set and coordinating dies.   [Just a little important note:  I know some of you had difficulties finding the comments section.  If you would like to leave a comment to participate in the giveaway, the “comments section” will only be ever visible when a single post on Word Press is being viewed. Please click on this particular blog post and you will be able to leave a comment below.  Thank you for understanding and I apologize for the confusion.]  

NNDJan18_DeerFriend

I stamped all of the images on Neenah Solar White card stock and colored them in with my Copic markers.  I die-cut the images using the coordinating dies.  I wanted to showcase the deer by creating a shadow box card.  This card can be folded flat and inserted in an envelope for mailing.  I followed a shadowbox tutorial on pinterest.  here’s what you need:

  1.  Cut two pieces of card stock measuring 4 1/4 X 6 3/4, and score 1 1/4 from each long edge.
  2. Die-cut a square window from the center of one of the panels (this is your front piece).  You will later on connect both panels to create your shadow box.
  3. Cut a 4 1/4 square panel of patterned paper and adhere to the center of the second card panel (this is your back piece).  (You can do your stamping here before you assemble the box).
  4. Cut two pieces of green card stock. One is measuring 1 1/4 x 5 and the other is measuring 1 x 5 and score from each long edge at 3/8″
  5. I used the Newton’s Nook Grass Border die to die-cut the green panels.
  6. Adhere some score tape on each scored panels.
  7. Fold the ground panels flat, flush to the card’s bottom edge. Fold right side flat over them to adhere.
  8. Attach the images you need to decorate your shadow box.
  9. Fold box flat and adhere right side flaps to close the card.

Here are some step-by-step photos:

Here is the card:

NNDDeerFriend

You can also use acetate sheets to suspend some images inside your shadow box (i.e., birds, clouds, etc.)  I hope you got inspired today to create your own shadow box.

Would you like to win the “Deer Friend” Stamp Set?  This stamp set will be given away to ONE lucky winner!

Here’s how to win:

Comment on the NND blog and Design Team blogs (see list below)! The winner will be chosen at random from the collective reveal posts. Make sure to check out each of their blogs and comment for your chance to win. You will not know which blog has been chosen so the more you comment on the better your chances are of winning! You have until Thursday January 18th at 9pm EST to comment  — winners will be announced on the blog post on Friday, January 19th.

Check out all the awesome Design Team Blogs below to enter:

Newton’s Nook Designs

Holly Endress

Ellen Haxelmans

Larissa Heskett

Samantha Mann

Juliana Michaels

Naki Rager

Maria Russell (you are here)

Jennifer Timko

Tatiana Trafimovich

Maria Russell Signature Logo

 ————-SUPPLIES———–


Tiki Brentwood Owl Hawaiian Vacation – Project 2

Hello JLO fans!  It’s another day to share my guest design project showcasing this adorable Tiki Brentwood Owl Hawaiian Vacation. This stamp set is now available for pre-order and will ship for free until release day on Saturday, March 17th.

JLO.New2014....4x4d_9802dd5.1406684724.1280.12ee80__84218.1420396885.1000.1000__21184.1488730597.450.450

I will be sharing a total of 3 projects and today is my second post.   I distressed my background on Neenah solar white card stock using Spun Sugar, Broken China and Scattered Straw distress inks.  I used my Copic white opaque paint to splatter those white dot details to the front panel.  I also used my gel pens to embellish the card further.  This is a simple card but I love how it turned out.


JLOTiki2

Don’t you just love the images on this stamp set?  It really makes me want to go to Hawaii.

Here are the links to all of JessicaLynnOriginal’s Design Team members as well as guest-designers.  Everyone will be sharing her projects in the next few days until March 17th, 2017. Please check them out and get inspired!  Have a wonderful day!