Simple Cards with Patterned Paper & Bold Sentiments Featuring “Be” stamp set

Hello CAS-ual Fridays fans!  I hope you are having a great week so far.  Maria here with you today sharing some very simple cards with pretty patterned papers and bold sentiments, showcasing my favorite stamp set called “Be”.  Here’s what I used for my projects today:

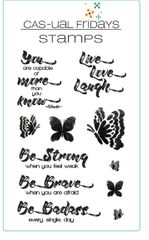
As paper crafters, I’m sure you can relate that we all have a bajillion collection of patterned papers!    Sometimes when I am not feeling all crafty especially when experiencing jet lag, I want to create some very simple but beautiful cards.  I always look at my collection of patterned papers and bold sentiments stamp set.  The “Be” stamp set is just what I needed today to create some encouraging cards.  This stamp set is a must-have!

Some of my non-crafty friends used to tell me that they just didn’t have any patience to make hand-made cards.  If you are a beginner and you don’t have a lot of supplies (or have no patience to color and die-cut), you can still make pretty cards by collecting some amazing stamp sets like the one that I used here and some beautiful patterned papers.

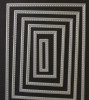
For my first card, I cut a patterned paper that I purchase from the craft store and adhered this piece to my card base.  I think the sentiment I used for my card below went perfectly well with the images on the paper.

To finish my card I simply added some white dot details to the images with my Sakura Gelli-Roll pen.

This card only took less than 2 minutes to make but I think it will definitely make someone’s day.  The bold sentiment complimented the busy background.  Here’s a close-up:

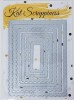
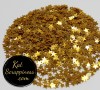
For my second card, I used a rainbow patterned paper and a die from my stash to die-cut the middle piece.  I adhered this piece onto my A2 size card base with some foam adhesive.  I stamped the sentiment in the middle.

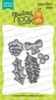
To finish the design, I added the white die-cuts using the Jumping Jacks Fri-dies.  I also added some sparkling clear jewels.

Don’t you just love the simplicity of these two cards?  I hope you got inspired today.  Please visit CAS-ual Fridays stamps to purchase the supplies I used.  Don’t forget to use my coupon code below, for 15% off your order.  Have a wonderful day and happy crafting!

A Halloween Hello

MFT_Superstars2017_BlogBanner


The MFT Card Design Superstar is finally here! The card that you see below is my entry for the “Clean and Simple Genius” category.


Sometimes, less is really more! I wanted to create a clean and simple Halloween card with non-traditional Halloween colors.  I also like the white pumpkins as fall decor, which is why I colored the pumpkins with light gray Copic markers. I wanted my focal point to be on the little witch and her cat. These images are so adorable!


I started out by stamping my images on Bristol Smooth 110 lb. white card stock using my MFT stamps Black Licorice hybrid ink. I used Copic markers to color my images in and used the coordinating dies to die-cut the images.


For my “subtle” sky scene, I used the clouds stencils with my light blue inkpad, lightly sponging the color on the card stock.


For the frame, I used my MFT Stamps Blueprints No. 32. I also die-cut the birch trees with the Birch Trees dies, also by MFT then lightly colored it with my Copic markers to give it some dimension.


To finish my design, I stamped the sentiment “A Halloween Hello” with my memento fog ink.


Here’s my card:


MFTSuperstar1

What do you guys think?  I hope you like my clean and simple card.  The supplies I used to create the card are listed and linked to the MFT online store.  Wish me luck and thank you for stopping by!

—–SUPPLIES——

BB Witch Way is the Candy Stamp Set

BB Witch Way is the Candy Die-Namics

Birch Trees Die-Namics

Die-Namics Blueprints No. 32 

Clouds Stencil – Large

Clouds Mini Edges Stencil

Black Licorice Hybrid Ink


Small Paws, Big Hearts

Hello everyone.  I am back today for Newton’s Nook Designs and I am sharing a simple dog-themed card, showcasing the Terrific Terriers stamp set and its coordinating dies.  I am currently in Toronto, Canada undergoing physiotherapy so I will keep this blog post short.


I started out by stamping my images on Neenah solar white card stock and I colored my images in with my Copic markers.  I die-cut the rest of the pieces that I needed for my card using dies from my stash.  I finished my design by creating my own “patterned paper” using the paw prints and the heart that came with the stamp set.


Here is my card today.  As you can see, it is very simple but I really love how it turned out.  This stamp set is now available for purchase at http://www.newtonsnook.com.  Have an amazing day!


NNDTerrier2

Newton’s Nook Designs February Release – Day 3 – Newton Loves Cake

nnd_feb17_releaseicon

Hello everyone!  It is the last day of the February release at Newton’s Nook Designs.  If you haven’t checked out yesterday’s post, please do so to see the amazing projects created by our design team members. [ Just a little important note:  I know some of you had difficulties finding the comments section.  If you would like to leave a comment to participate in the giveaway, the “comments section” will only be ever visible when a single post on WordPress is being viewed. Please click on this particular blog post and you will be able to leave a comment below.   I have contacted WordPress and that is what they told me. Thank you for understanding and I apologize for the confusion.]


All the new stamps and coordinating dies will be available for purchase tomorrow, February 17th.  You also have a chance to win each stamp set during release week so check out the details I have indicated at the end of this blog post.

For today’s post, I have created a birthday card, showcasing the new stamp set called Newton Loves Cake and Newton Loves Cake coordinating dies.

I started out by stamping my images on Neenah solar white card stock, with my memento tuxedo black ink.  I colored the images with my Copic markers and die-cut them using the coordinating dies.

I die-cut my card panel and distressed the background using my favorite distress inks – Spun Sugar and Shaded Lilac.  For the second card, I used Spun Sugar and Evergreen Bough.  I wanted to use some soft pastel colors for these two birthday cards.

To finish the design, I die-cut a rectangle frame to create a window, adding the banner to the frame.  I stamped my sentiment and adhered the 3 silver stars.  I also used my white gel pen to add some white dots to the card, making it look more whimsical.

Here’s the first card:

nndnewtonlovescake2

And here’s the second card I designed with the same concept but different shape and colors.  I wanted to really show off this stamp set by creating more than one sample for you.  The possibilities are endless using this stamp set!

nndnewtonlovescake1

What do you guys think? I hope you like the birthday cards. This Newton Loves Cake stamp set and coordinating dies will be available for purchase on Friday, February 17, at 8:00 a.m. CST.

Would you like to win the “Newton Loves Cake” Stamp Set?  This stamp set will be given away to ONE lucky winner!

Here’s how to win:

Comment on the NND blog and Design Team blogs (see list below)! The winner will be chosen at random from the collective reveal posts. Make sure to check out each of their blogs and comment for your chance to win. You will not know which blog has been chosen so the more you comment on the better your chances are of winning! You have until Thursday, February 16th, at 9pm CST to comment — winners will be announced on the blog post on Friday, February 17th.


Check out all the awesome Design Team Blogs below to enter:

Newton’s Nook Designs

Amanda Bodine

Holly Endress

Ellen Haxelmans

Larissa Heskett

Samantha Mann

Juliana Michaels

Naki Rager

Maria Russell (you are here)

Jennifer Timko

Tatiana Trafimovich


————SUPPLIES———–

Fall/Thanksgiving Card

This is a very easy card to make but it looks like you’ve made a lot of effort to put it together. I love making cards that is both elegant and unique. I also like the fact that you can mass produce these cards and each one will look different.

Materials used:

(All measurements in “Inches”)

Card Base:

Crumb Cake Card Stock – Item No. 120953
(Size used here on this video is: 5 ½ x 4 1/4)

1st Frame – leftover from Thanksful tablescape Kit
(Size used here is 5 3/8 X 4 1/8) – note: you can use any cardstock that
has an earthy color to go with our Fall theme

2nd Frame – Sweater Weather Designer Series Paper – Item No. 132184

2 Pieces of Silk Leaves (bought from Michael’s or the Dollar Store)

Whisper White Card Stock – Item No. 100730 – for the Happy Thanksgiving Sentiment (using Tags For You Stamp Set – Item No. 131823) punched with our Label Bracket Punch (Item No. 132153) or get it in a bundle that saves you 15%

Early Espresso Embossing Powder – Item No. 128980

Vellum Card Stock – Item No. 101856 – embossed the FallLeaf from the Wonderfall Stamp Set (Item No. 128087) – using Gold Embossing Powder (Item No. 109129

Stampin Dimensionals – 104430

Adhesives to adhere your card

I hope you enjoyed this video. If you have any questions, please feel free to send me a message.. Do some crafting and create some memories. Happy crafting!