Newtons Nook Designs – January Release Day 3 ~ Pug Hugs

nnd_releasejan17

Oh my goodness! Are you ready for today’s total cuteness?  Today is release day (Day 3) at Newton’s Nook Designs.  I hope you have been checking out the daily posts since Monday.  The whole design team at NND has been busy creating wonderful projects to give you some daily inspiration. You also have a chance to win each stamp set during release week so check out the details I have indicated at the end of this blog post.


nnd_jan17_pughugs

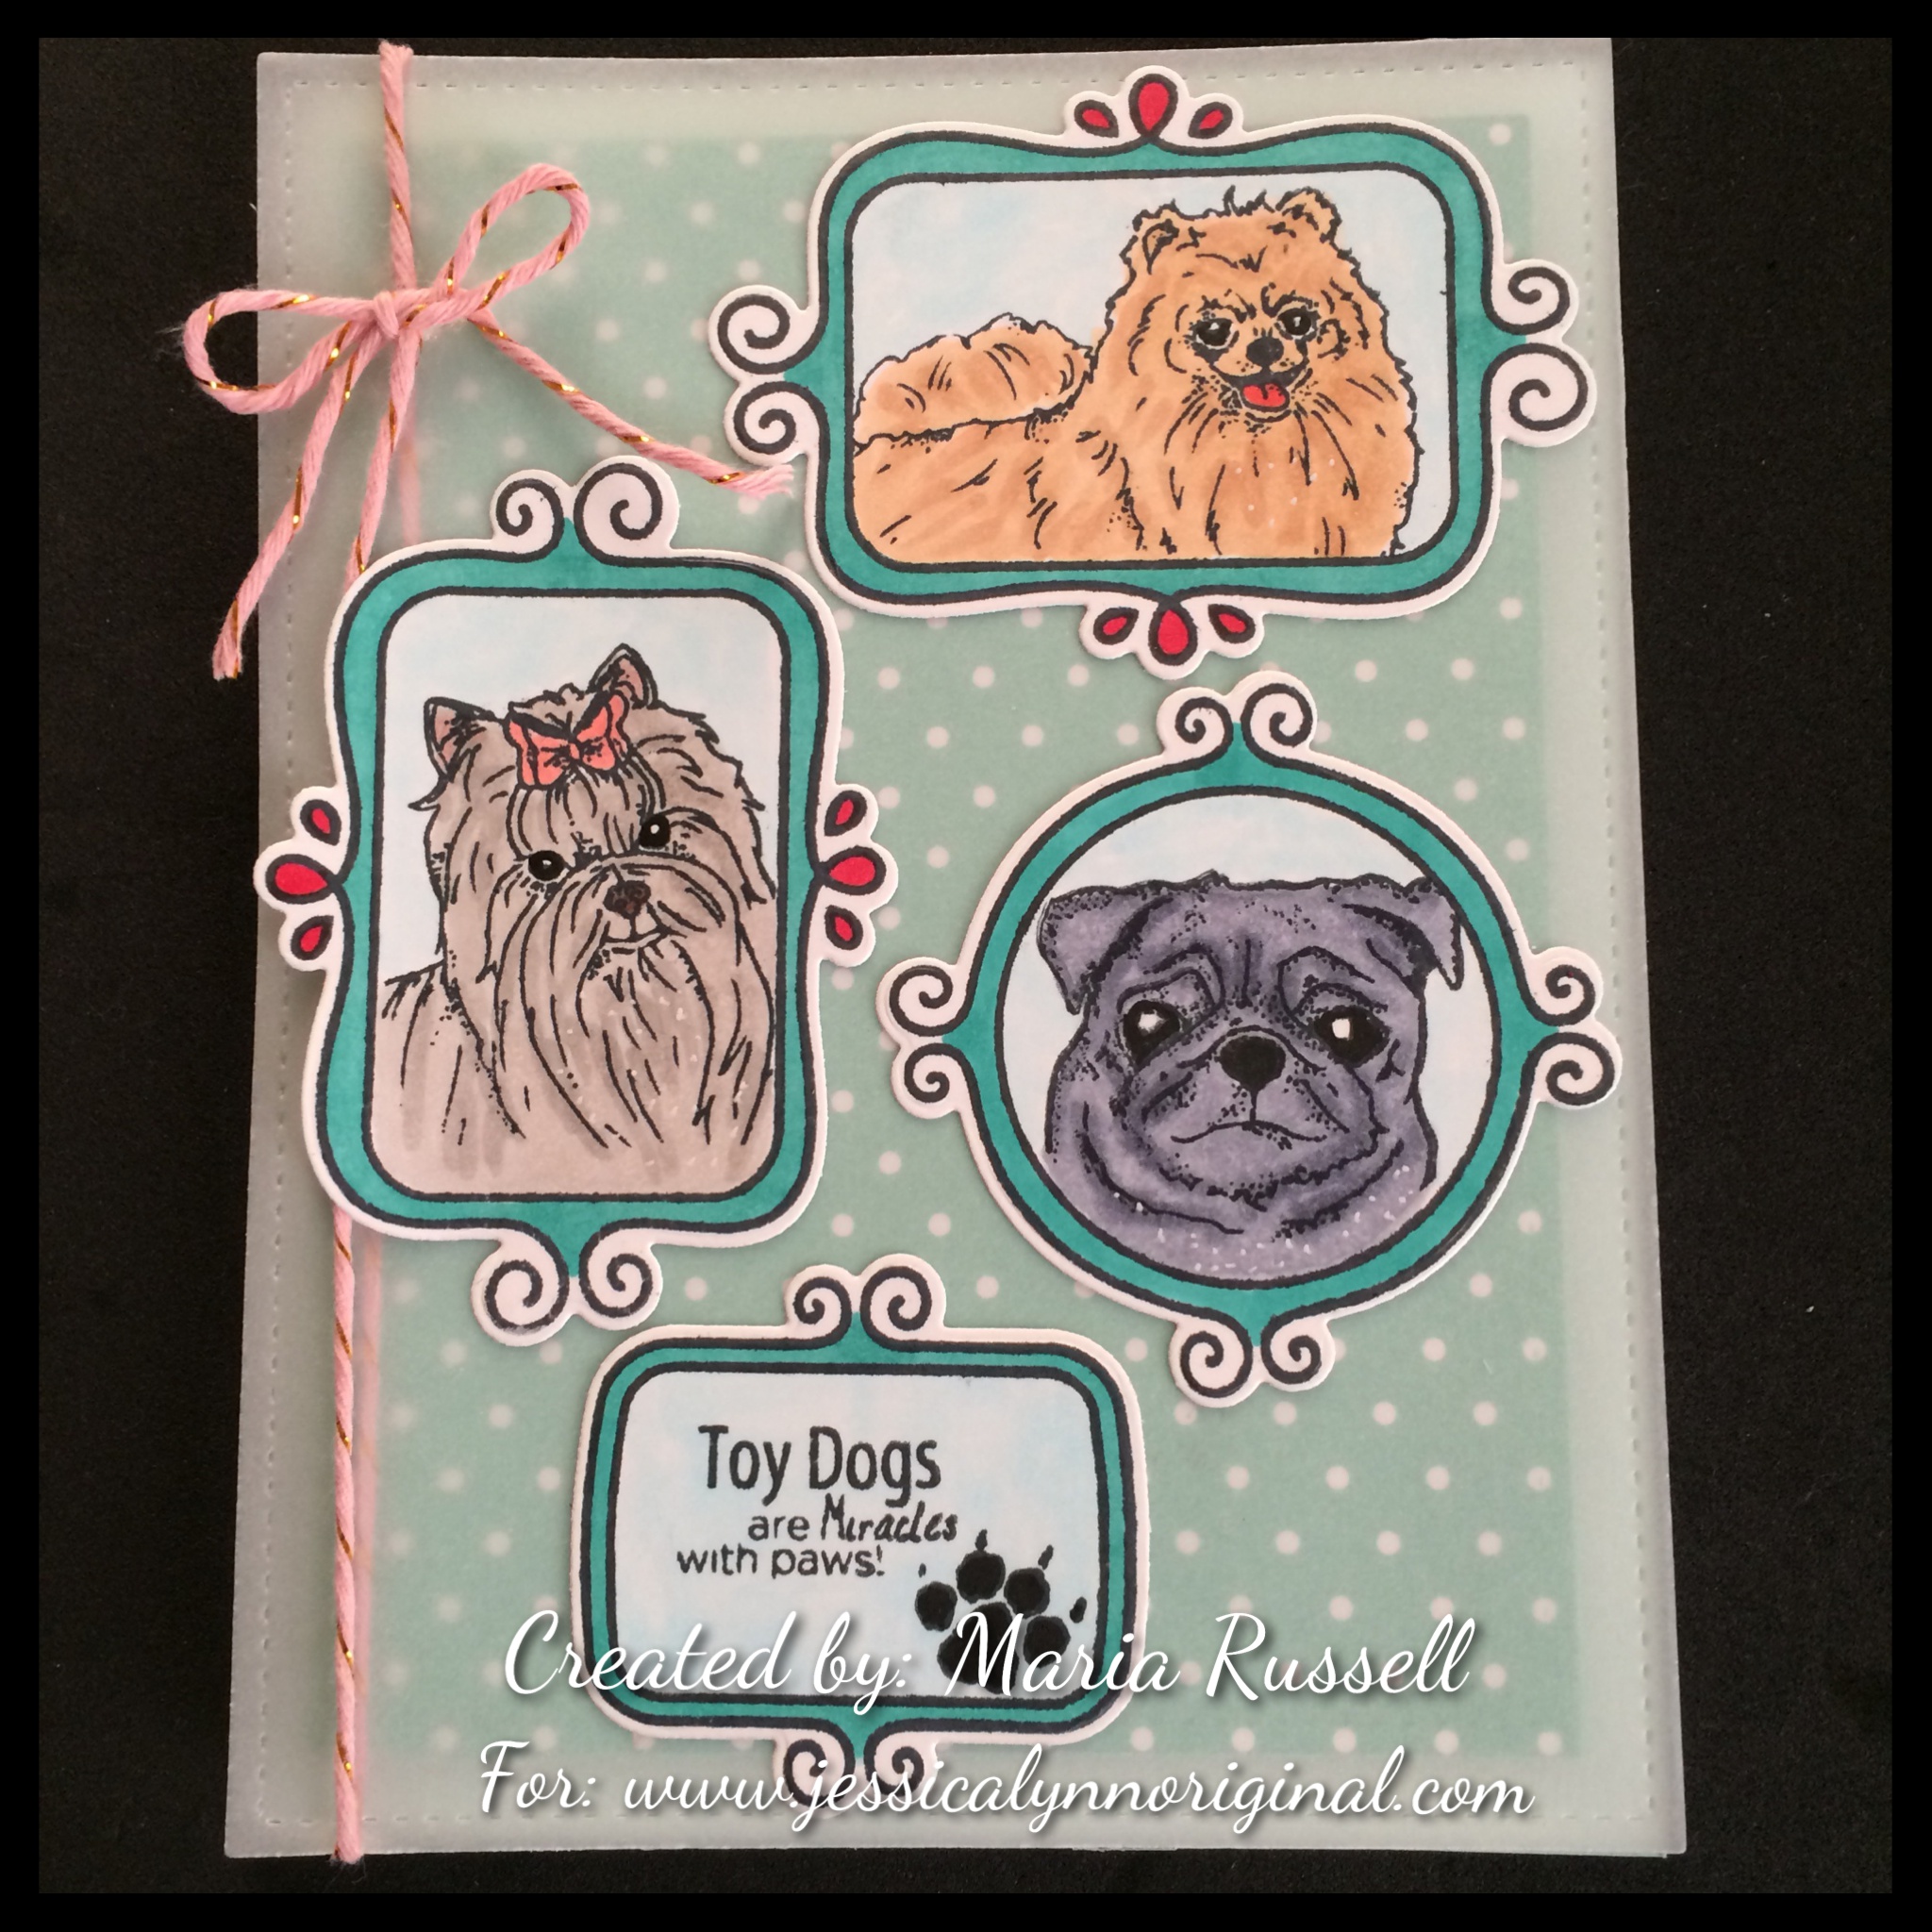
For my cards, I used this cute Pug Hugs stamp set and Pug Hugs coordinating dies, stamping my images on Neenah solar white card stock with my memento tuxedo black ink. I colored the Pugs using my Copic markers and die-cut the images with its coordinating dies with my die-cutting machine.


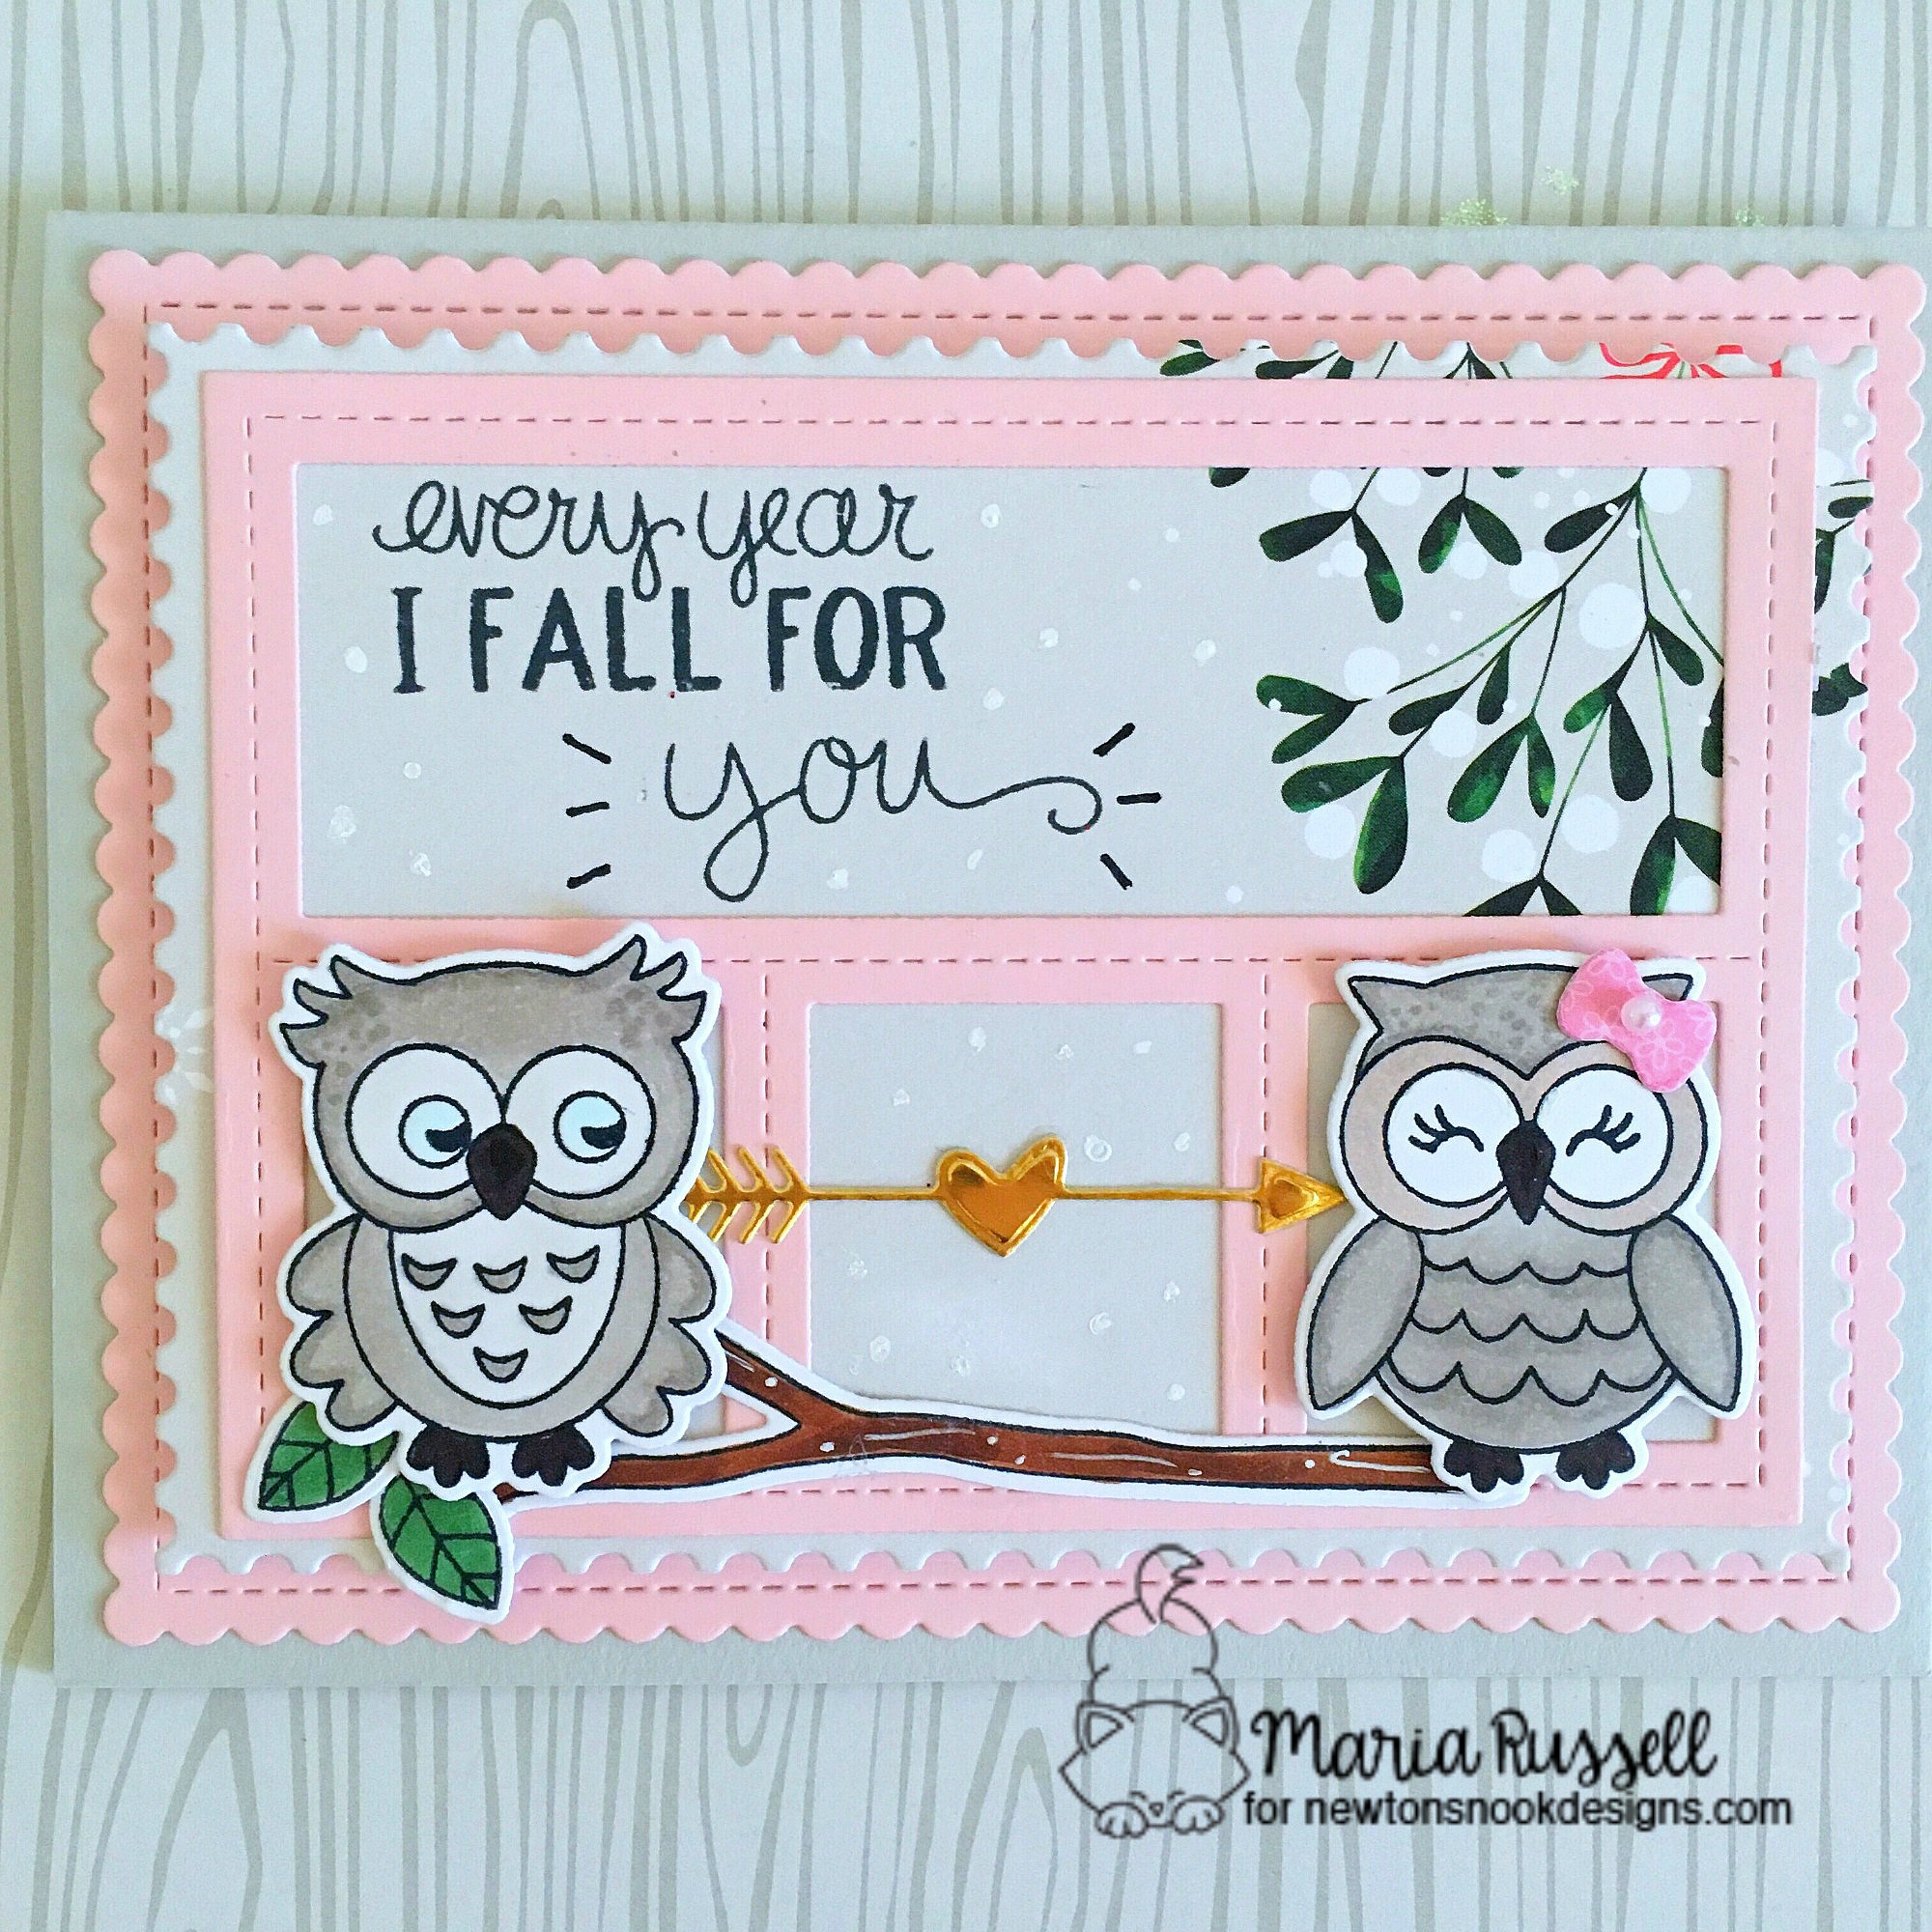
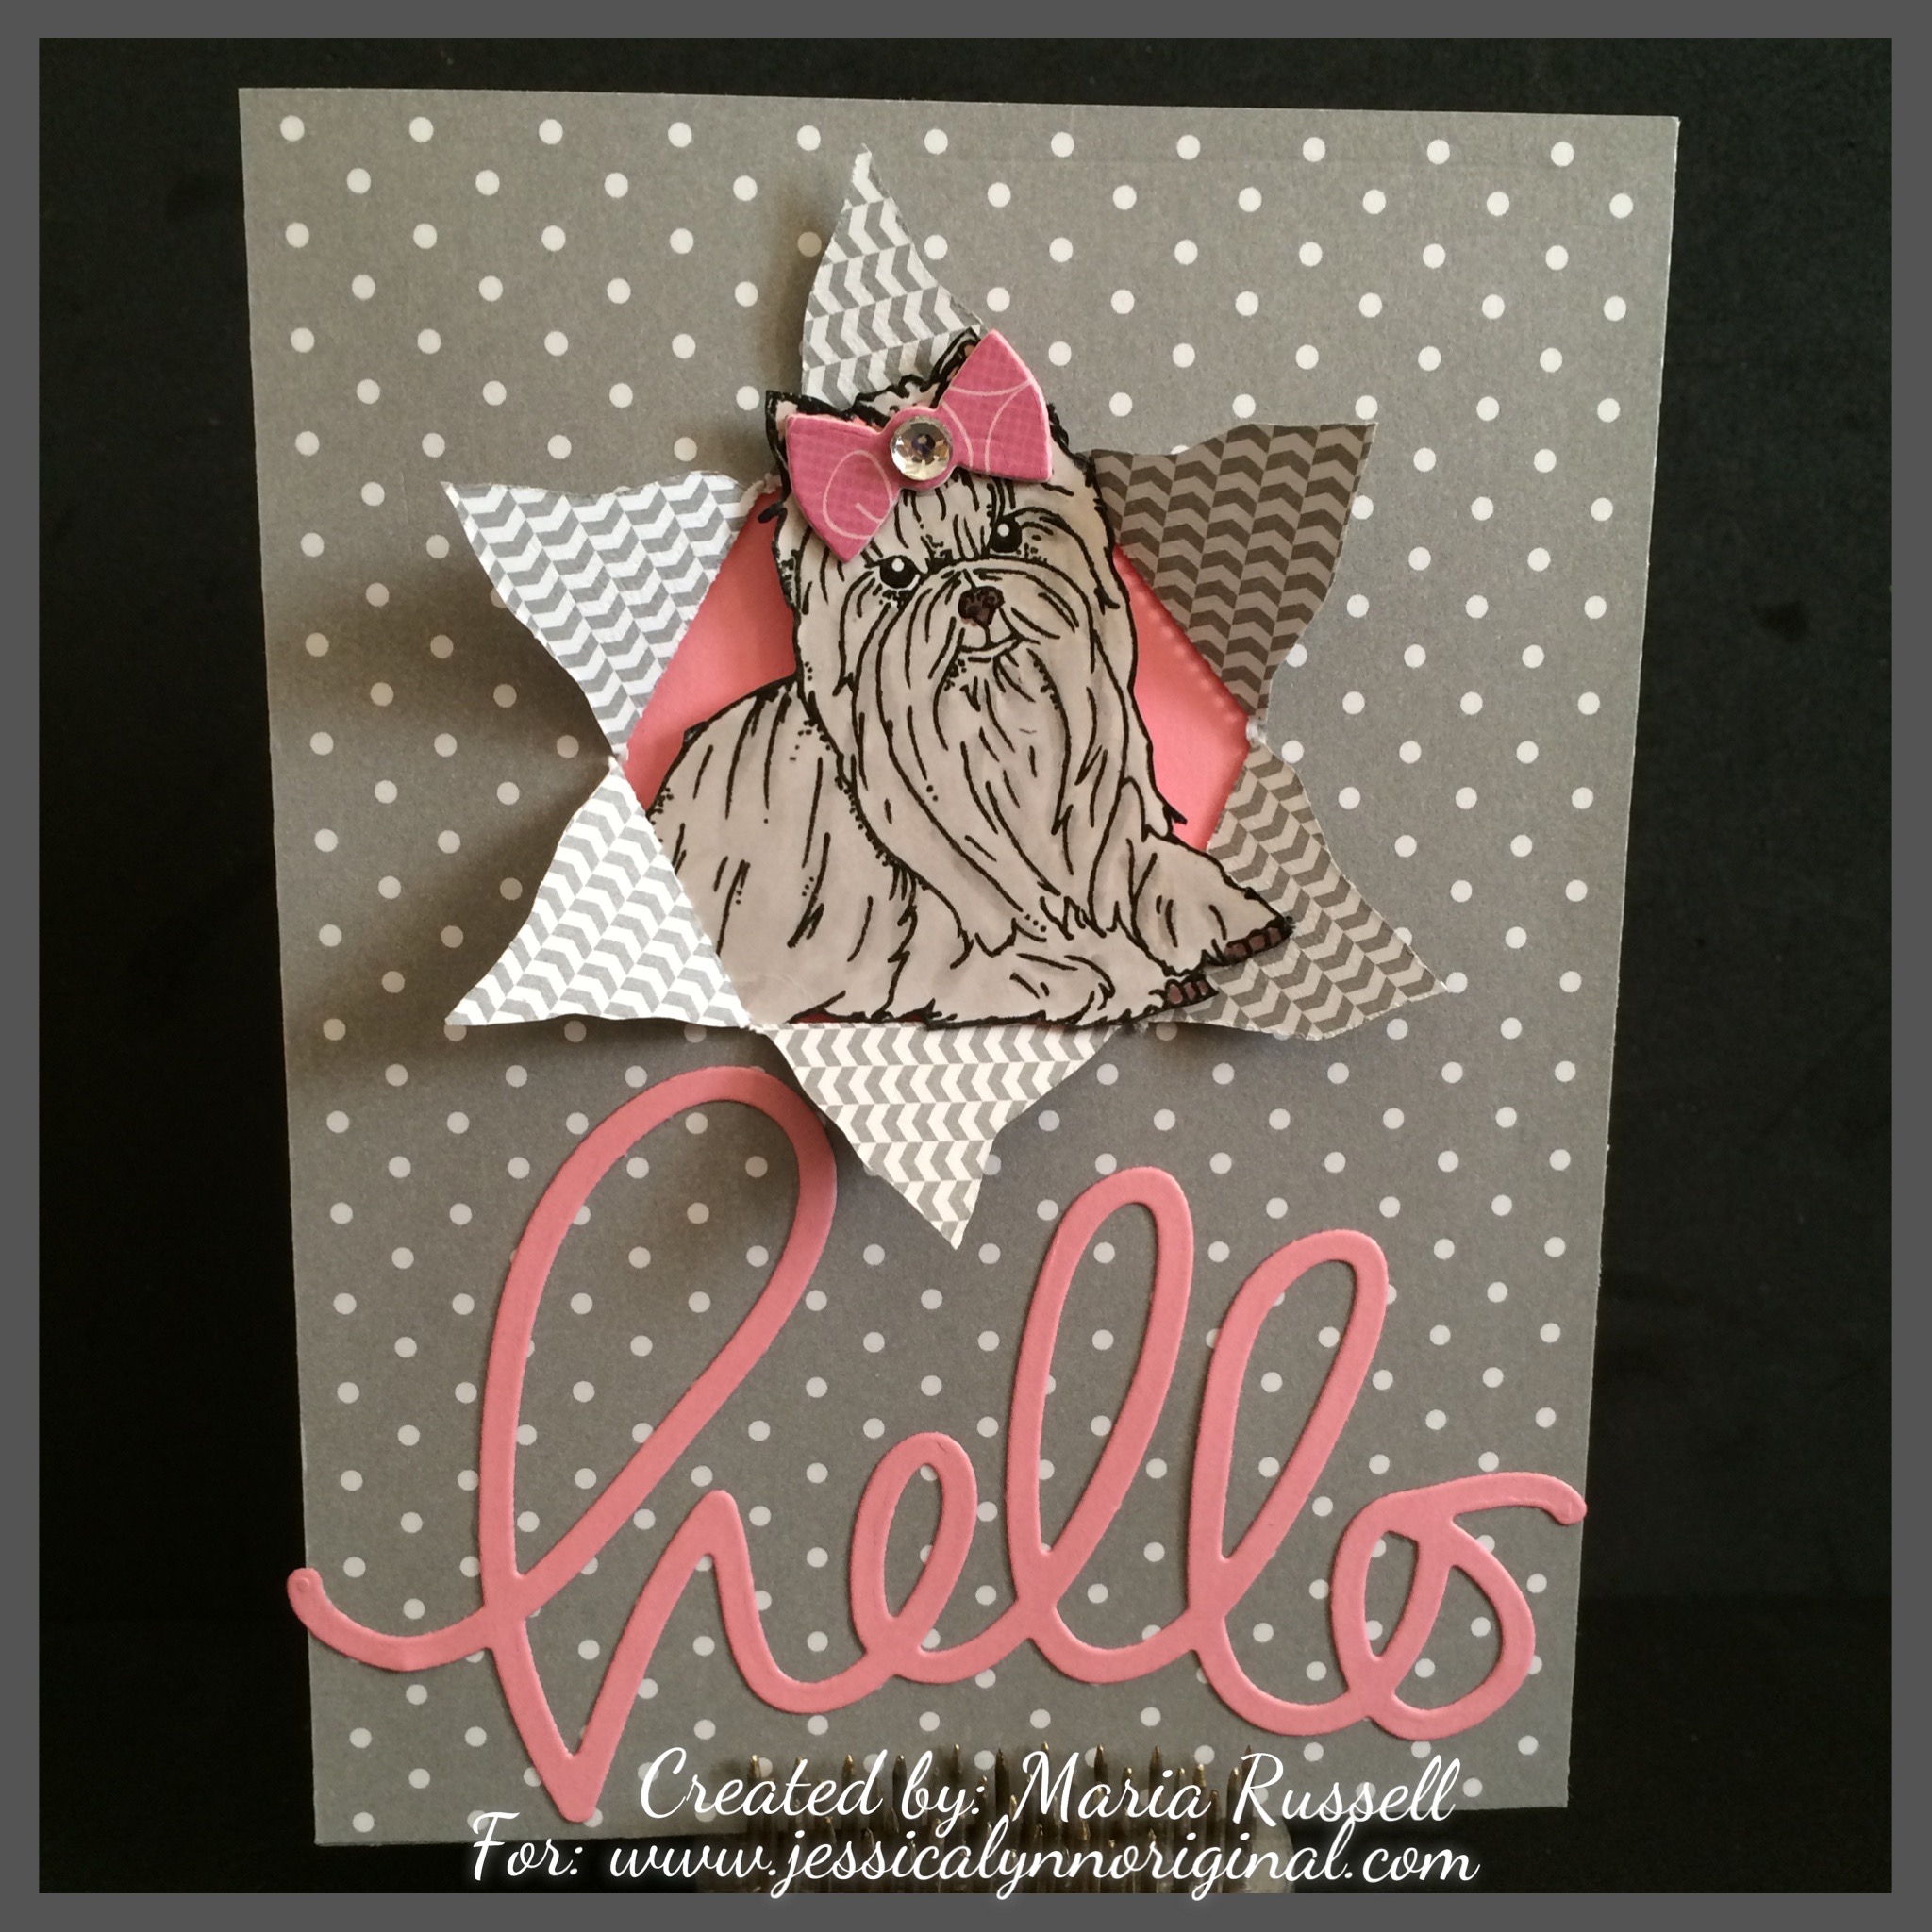
Here is my first card:

nnd_bdaypug

Since Valentine’s Day is fast approaching, I just had to make a Valentine-themed Pug card!  I created my own patterned paper by combining the hearts from the Pug Hugs stamp set and the Flirty Flamingos stamp set.

nndvalentinepug


Don’t you just love those cute Pugs?  This stamp set will be available for purchase on January 20 at 8:00 a.m. CST.


Would you like to win this “Pug Hugs” stamp set?  This set will be given away to ONE (1) lucky winner.


Here’s how to win: 


Comment on the NND blog and Design Team blogs (see list below)!  The winner will be chosen at random from the collective reveal posts. Make sure to check out each of their blogs and comment for your chance to win. You will not know which blog has been chosen so the more you comment on the better your chances are of winning!  You have until Thursday January 19th at 9pm CST to comment  — winners will be announced on the Newton’s Nook Designs blog post on Friday, January 20th.


Check out all the awesome Design Team Blogs below to enter:

Newton’s Nook Designs

Amanda Bodine

Holly Endress

Ellen Haxelmans

Larissa Heskett

Samantha Mann

Juliana Michaels

Naki Rager

Maria Russell (you’re here)

Jennifer Timko

Tatiana Trafimovich

Every Year I Fall For You

I am super excited to share this post today because it is my first post as a design team member for Newton’s Nook Designs (“NND”).

Since Valentine’s Day is just around the corner, I decided to start my projects early.  I wasn’t really sure in the beginning what images I wanted to use for the card so I had stamped out a couple of NND images on Neenah solar white card stock, using my stamping tool and colored the images using my Copic markers. I ended up not using the other images I colored and I have set it aside for a future project in mind. I die-cut the images with my die-cutting machine using the coordinating dies.


img_3315


For my card, I am showcasing the “What A Hoot stamp set and What A Hoot Die Set” and for my sentiment, I used “Fall-ing For You stamp set“. I did a little bit of masking so that I only use the words “every year, I fall for you”. I think it turned out perfectly!


img_3326


Here is the card. The supplies I have used are listed and linked below. I hope you like my card and somehow got inspired to create something beautiful today.  For cute stamp set and dies, please visit http://www.newtonsnookdesigns.com, and share your creations with us on Instagram (using hashtags, #newtonsnookdesigns, #NND) or share it on NND’s Facebook Group (https://www.facebook.com/groups/NewtonsNookDesigns/).

Have an amazing day!


nnd_whatahoot_blog


———SUPPLIES————-

https://static.inlinkz.com/ppr.js

Winter Scene Christmas Card

Is everyone ready for Christmas? To tell you the truth, I’m not. This year, I am way behind the shopping and all the other things that I need to do before Christmas. The only thing I was able to do last weekend was to at least take the fall décor down and put the Christmas décor up. I am waiting for my kids to arrive so we can all decorate the tree. But enough about my procrastination!

I was listening to some Christmas music today and got inspired to create this Winter Scene Christmas card, showcasing the Winter House Scene Die and Merry Christmas script die by Gina Marie Designs, available at Kat Scrappiness. This die is a must-have! You can easily mass-produce the card below. I promise you, it’s really easy. Please watch the process video below to see how I made the card.

final-23

Here’s the process video:


I hope you got inspired today. Supplies are listed and linked below in case you are interested to purchase them.

Have a wonderful day!


Beary Special Birthday Cards

Here are my design team projects this week for http://www.not2shabbyshop.com showcasing Beary Special Birthday stamp set from MFT Stamps.  I have also used the matching dies with the stamp set, plus the Tag Builder Blueprints No. 5 and the Flop Card-Oval Dienamics.


Here are photos of the other two cards that I have designed.  The white on white card on the video was also my entry for the MFT Stamps sketch challenge no. 291. I hope you got inspired!

IMG_1734IMG_1735

Fairy Friends with Tombow Dot Runner Adhesive

I recently ordered some very cute stamp sets from Lawn Fawn and I have been dying to play around with them before I travel in the next few days. I also received the new Tombow Dot Runner Adhesive. I have never used this adhesive before so I thought this Blog post will also serve as a review on how the adhesive worked.

I first stamped my images and colored them using my markers. I then lined up my images with the coordinating dies and run it through my die-cutting machine. Since I have made hundreds of these box cards, that you see on the photo below, I was able to put the box together in less than a minute, because I even have the dimensions memorized. (Note to self, I need to get a life)  I know that sounds really weird but it’s true! I wanted to create a cute scene for my fairies and so I also had to die-cut some grass to create my garden.

I used the Tombow Dot Stamp Runner for the first time to adhere all of my die-cut pieces and let me just tell you, I just fell in love with this adhesive.  It was sliding through so smoothly on the card stock and I didn’t have any issues at all!  Since it is also a dot-adhesive, I was able to reposition my die-cut pieces without tearing the paper but once you press it on, it adheres really well.

IMG_9550

IMG_9552

IMG_9551

Now comes the part where I have to use an acetate sheet to make one of my fairies look like she’s floating in the air. I normally use a mini-glue dot for this task but I decided to use the “stamp runner”. Holding it down and stamping it to the acetate, I was able to put enough adhesive to adhere my fairy.

I think the photos are self-explanatory so I will leave you all to enjoy looking at the photos. Overall, I’M IN LOVE WITH THE TOMBOW DOT RUNNER ADHESIVE!  I can say that this is now my all-time favorite tape runner and will purchase more in the future.

IMG_9553

I hope you like this project and have an amazing day!

IMG_9559IMG_9561IMG_9562


Launch of Toy and Working Dog Breed Stamp Sets by JessicaLynnOriginal

I am really excited to share today’s blog post. We are launching two wonderful new stamp sets at Jessica Lynn Original called “Toy and Working Breed”. I have always loved dogs! I grew up with them and I can’t imagine not having a dog in my life. They are amazing, loving, funny, faithful – truly a man’s best friend!

The toy breed stamp set is very special to me. The Chihuahua image that Jessica has for this set had a striking resemblance to my beloved pet, Chi-Chi. Chi-Chi was my constant companion and I took her everywhere with me. She was very stylish and had outfits for every occasion. She was super spoiled! I lost Chi-Chi in 2013 and I was really sad for a long time that I still couldn’t bring myself to getting another Chihuahua.

IMG_1085

When I first received the stamp set, I really had a hard time trying to think about card designs. I’ve always loved stamping, but I’ve never had stamp images that are so life-like, it was honestly hard to get creative. I am a novice with Copic markers so it was really hard for me to color the images and make it look realistic.

I decided to stamp and color a couple of the images on white card stock. I then fuzzy-cut the images and gathered my card supplies but when it came to putting the card together I was just stumped! I made one mistake after another.  I just couldn’t get creative! I left it alone for a few days and decided to look at Chi-Chi’s old photographs! For some reason, I had a light-bulb moment and got my crafty mojo back. I started with a simple card below, but then since I had all the other images already cut and colored, the ideas just kept coming. I guess it’s obvious since this is the very first time I actually have 4 card samples and one Doggie Treat bag for the launch.   You can tell I had so much fun playing around with the stamp images, I used a lot of my dies to “dress-up” the dogs.

I am not going to list all of the dies that I used for the cards because I would like to eventually post a YouTube video showing you how I made some of the cards, as well as the doggie treat bag.

Please let me know what you think about the cards or if you would like to see a tutorial for any of the cards I’ve shown today. Which one is your favorite? To order your sets, here is the link to the toy dogs stamp set: http://www.jessicalynnoriginal.com/jessicalynnoriginal-akc…/ and the link to the working breed stamp set: http://www.jessicalynnoriginal.com/jessicalynnoriginal-akc…/

Have a great weekend and happy crafting!

Created by Maria Russell for http://www.jessicalynnoriginal.com
Processed with Moldiv
Birthday Pop-Up Card by Maria Russell for http://www.jessicalynnoriginal.com
Created by Maria Russell for http://www.jessicalynnoriginal.com
Processed with Moldiv
Created by Maria Russell for http://www.jessicalynnoriginal.com
Doggie Treat Bag Created by Maria Russell for http://www.jessicalynnoriginal.com

UFO Brentwood Owl Stamp Set Release

Today I am featuring two cards that I created using the new Stamp Set by http://www.jessicalynnoriginal.com called the “UFO Brentwood Owl”. I am super excited to share these cards with you today because I absolutely love the images that Jessica created for this set. If you would like to win this stamp set, please head on over and leave a comment on Jessica’s Blog post (http://jessicalynnoriginalstamps.blogspot.com). Jessica will choose a random winner and she will announce it on her Blog, so please stay tuned for that.

To start, this stamp set reminds me of my love for the 90’s TV show, “Roswell”. My children and I were addicted to Roswell, and Buffy The Vampire Slayer – two famous TV shows at the time when my children were still young. Since we live overseas, I always pre-recorded the shows so that after homework and dinner, the kids and I will have some quality time together watching the show. We even listened to the Roswell soundtrack in my car while I drove them to school.

The first card below is a side-step card. I always love creating interactive cards, and I thought that Brentwood needed to have more space so that I can highlight each of the stamp images in their own way, without it getting “lost”. I think I was able to capture this sense by making a farm-scene at night with the moon shining in the background.

I first colored Brentwood and the UFO images with my Copics. Then I put glossy accents on Brentwood’s helmet to achieve the look of glass, and make it look more realistic. While waiting for the glossy accents to dry, I then stamped the other images using some of the stamps I already have in my stash and preceded to die-cut the pieces. Once I had everything laid out, it was really easy to put the card together. I added stickles to the moon and the UFO beam to make it stand out a little.

Processed with Moldiv
Created by Maria Russell for http://www.jessicalynnoriginal.com

The second card below is very patriotic. With the 4th of July coming up, I think this is a perfect project to make in time for our Independence Day. My original idea was to create a scene where Brentwood was holding the USA flag landing on the moon, but one of our design team members already made a card using a similar design. I was in Germany and Lithuania for a week and only came back yesterday, so I was a bit late creating these cards. However, I still wanted to create a scene in space, so I decided to create a shaker card. Brentwood is holding the USA flag, but with the UFO, stars confetti, blue and red seed beads as the shaker material. I also added glossy accents to Brentwood’s helmet but unfortunately it didn’t show through the photo.  I had so much fun creating this card. What do you guys think? I will post a tutorial on my YouTube channel for these two cards.

Processed with Moldiv
Created by Maria Russell for http://www.jessicalynnoriginal.com

Thank you so much for stopping by and have an amazing weekend!

My Once Upon A Time Chipboard Album

I am so happy that I finally finished my Once Upon A Time chipboard album. This has been an 8-month process and I almost gave up and didn’t finish the album. After putting it away for a few months, I decided to start on it again and somehow found the inspiration to finish it.

The album is 9.5 x 11 inches and it is very heavy. It will be kept in a keepsake box to protect the decoration on the album. I used a lot of Tim Holtz and Stampin’ Up! dies to decorate the pages. It was too difficult for me to cover the DCWV paper that I used in the whole album, because the designs were just too pretty.

I know that compared to some of the albums that you see on the internet, mine is not even as beautiful as what the others have posted on YouTube; but I am quite happy and proud of what I have achieved in the whole process of putting it together.

I hope you all check it out and see if you like my album. Hopefully it will give you some ideas on how to decorate yours.

Do some crafting with your kids, grandkids, etc. and create some great memories! XO!

Pocket Tags and Flower Tutorial Using the Envelope Punch Board

These tags are so easy to make. You can use them as gift tags, or for your mini-albums and scrapbooks. You can also create these paper flowers as a home décor.

Materials used:

Designer Series Paper (free) from Sale-A-Bration
Lightweight Chipboard or Cereal Box
Other scraps
Envelope Punch Board — Item No. 133774

Perfect Pennants Stmap Set

Pansy Flower Punch —

Adhesive

Crop-A-Dile

Ribbon