Happy Haunting with MFT Stamps

MFT_Superstars2017_BlogBanner

The MFT 2017 Card Design Superstar is here and I am super excited to participate.  The card that you see below is my entry for the “Innovation Master” category.  I have always loved MFT Stamps and for today’s card, I am showcasing a lot of these stamps and dies.  The products I used will be listed below, and they are all available at www.mftstamps.com.


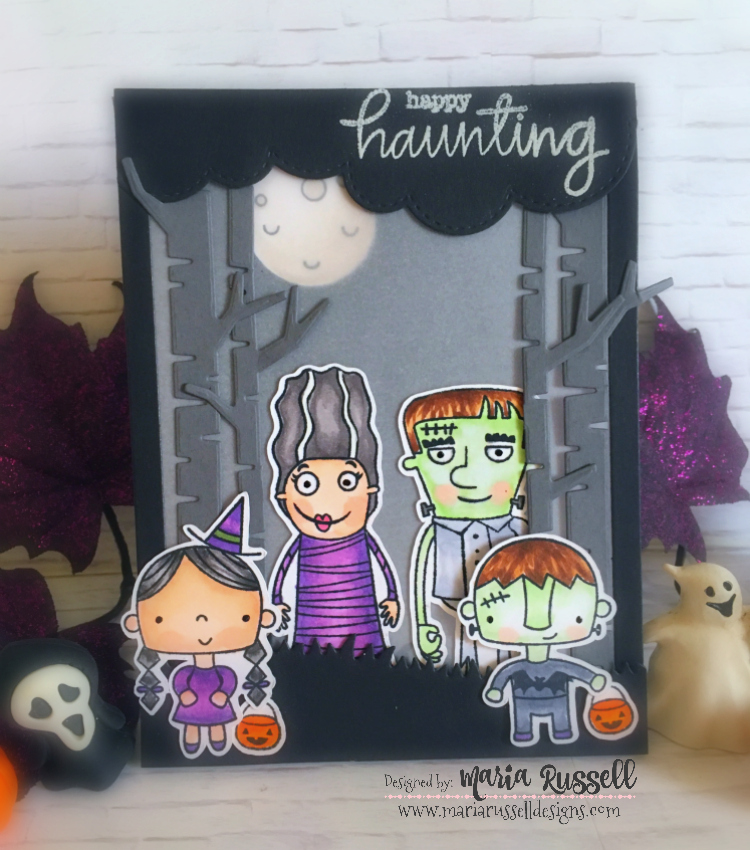
I started out by stamping my images on white card stock with the MFT Stamps Black Licorice Hybrid Ink and colored the images in with my Copic markers.  I thought the new Happy Haunting stamp set would be the perfect pair with the Frightful Friends stamp set (released by MFT Stamps last year).  I die-cut the images with the coordinating dies.


I die-cut all of the elements I needed for my scene. For the frame, I used the Die-namics Blueprints No. 32, the Die-namics Stitched Clouds Edges, and the Die-namics Birch Trees.


I die-cut an A2 size Vellum card stock because I wanted to create a see-through scene so that I can also use this card to display on my Halloween mantle. I wanted to use an LED tea-light to give a spooky glow behind Mr. and Mrs. Frankenstein. I love how this card turned out.


Here’s the card without the LED tea-light behind it.


MFTHappyHaunting2


Here’s the card with the LED Tea-Light on!  Don’t you just love the moon peaking from behind the clouds and birch trees?


MFTHappyHaunting1


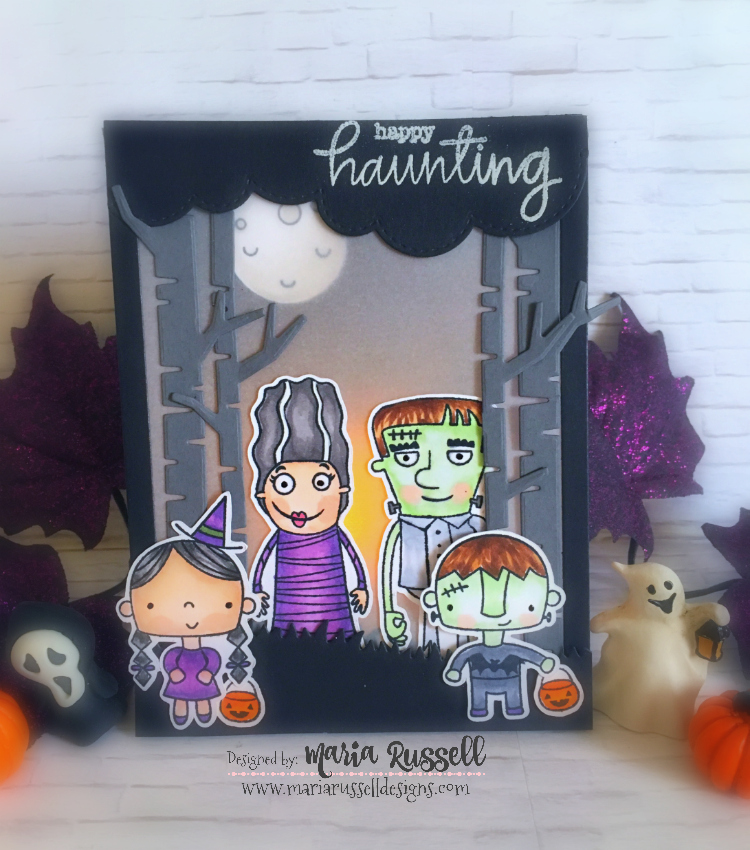
Here’s a close-up of the card with the LED Tea-light.  It looks so good on my Halloween mantle display.


MFTHappyHaunting3


I hope you like my card.  Please visit http://www.mftstamps.com to purchase the products I have listed below.  Have an amazing day!


Happy Haunting Stamp Set

Happy haunting Die-namics

Frightful Friends Stamp Set

Frightful Friends Die-namics

Die-namics Blueprints No. 32

Die-namics Stitched Clouds Edges

Die-namics Birch Trees

Die-namics Hillside Grassy Hills

MFT Stamps Black Licorice Hybrid Ink

Angel Inspirational Card

I finally had the chance to sit down, turn on my music, light some candles and start creating a card that is just simply for a friend, and not design-team related.

I recently ordered these cute Angel stamp set by Sunny Studio and I couldn’t wait to play with them. I had this design idea in my head for quite sometime now and decided to create a see-through card.  Here’s a step-by-step instruction below. It seems like a lot of work but I promise you, it’s really easy!

  1. Cut the white card-base at 4 ¼ by 11 and score at 5 ½.
  2. Trim the front panel at 4 ½, leaving the front of the card with an inch.
  3. Cut an acetate sheet measuring to 4 ¼ by 5 ½
  4. Adhere the acetate sheet behind the 1-inch flap. This will create the window part of the card.
  5. Using the leftover card stock that I just trimmed from the front card-panel, I used my Clouds border die to cut 3 different clouds pieces to create my “clouds”.
  6. Using my sponge, I distressed the clouds with Tim Holtz Spun Sugar and Shaded Lilac distressed inks. I wanted the card to have a unique pink and purple color.
  7. I then adhered the clouds on the front panel of the card. One cloud on top, and two at the bottom.
  8. I cut another white card stock measuring 4 1/8 by 5 3/8. Using my sponge again, I distressed the card stock with the same colors that I used for my clouds.
  9. I adhered this card stock on the inside of my card (I wanted to use the same colors that I used for my clouds for the inside of the card).
  10. Using my Memento Tuxedo Black Ink, I stamped the angels, cloud and lantern images on Neenah solar white card stock.
  11. I used my Copic markers to color the images.
  12. img_2551
  13. Using the coordinating dies for the angels, I die-cut the images with my big shot machine.
  14. I used my ATG tape runner to adhere the Angels on the front panel.
  15. I used my mini-glue dots to adhere the lantern on the Angels’ hands.
  16. Using my Ranger Multi-Medium Matte adhesive, I adhered the little purple star sequins by Kat Scrappiness to decorate my card further.
  17. I stamped the sentiment inside the card, using my Lawn Fawn Hippo Ink.


Here are the photos of the finished card. I inserted an LED tea light so that my friend can also use this to display in her craft room.


img_2556

img_2557

img_2558


I really love how this card turned out. Would you give it a try? I would love to see your version of my design.

The supplies I have used are listed and linked below. Thanks so much for stopping by and have an amazing day!

SUPPLIES: