Easter Peeps with Kat Scrappiness

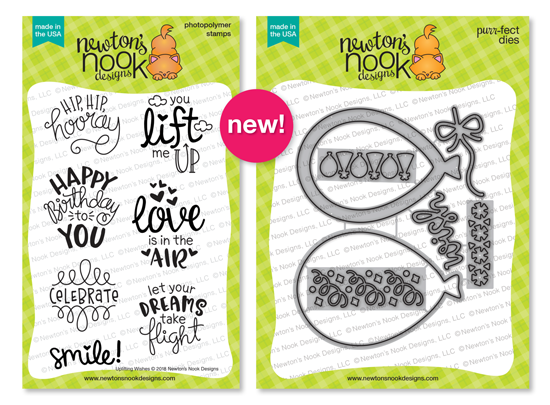
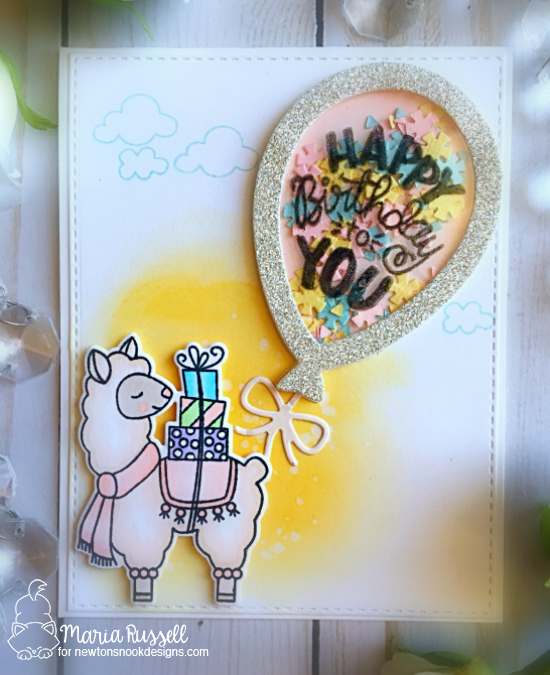
Hello my crafty peeps! (pun intended! haha!)  I am back today to share with you some fun Easter cards, showcasing the Stitched Easter Bunny outline dies, the Never-ending Circle dies, Brush Script Happy Easter die, Fancy Scalloped Stitched Border dies, and a bunch of other supplies available at the shop.

I started out by die-cutting my bunnies with different colored card stocks.  For one of the bunnies, I adhered some googly-eyes and drew the mouth with my black Copic multi-liner pen.  I colored the cheeks and the ears with my R00 Copic marker.

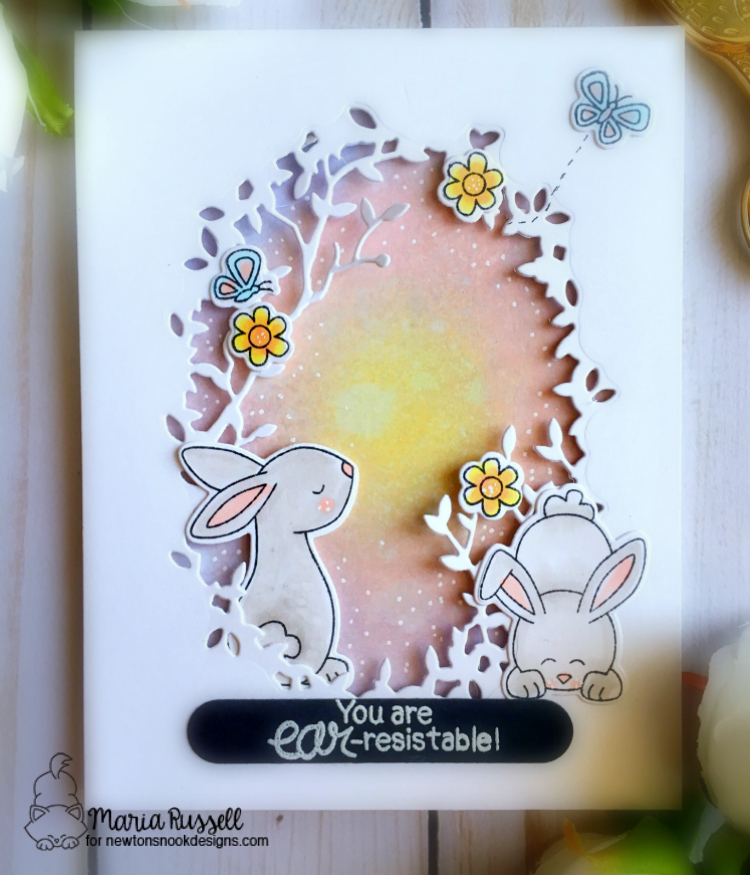
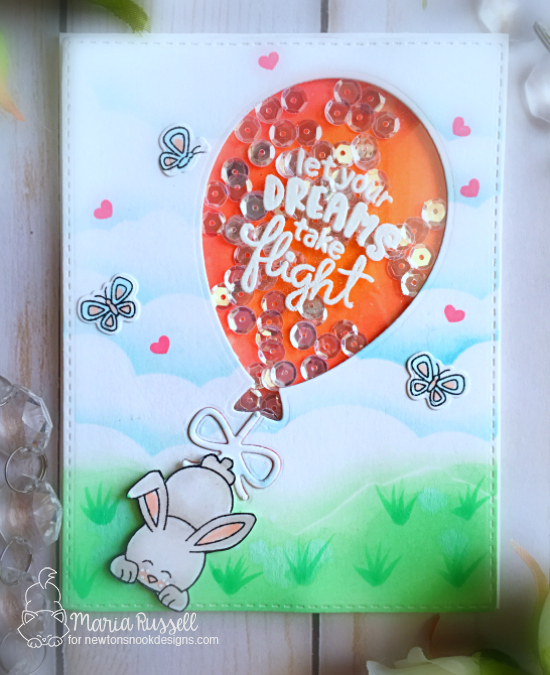
I die-cut a piece of Bristol smooth white card stock and inked the background with Tattered Rose and Worn Lipstick distress oxide, using my mini-ink blending tool.  I sprayed the background with water to give it a distress look.  I used the Fancy Scalloped Stitched Border dies to give my card stock a decorative edge.  I die-cut another piece in light blue to layer it together.  I adhered this piece onto my card base.

IMG_7487

I die-cut another piece of white card stock using my Rectangle Stick Frame by Your Next stamp, also available at the shop, and adhered this piece on my foreground.    My stamped my sentiment using my Tim Holtz Stamping Platform.

IMG_7486

Using a mini action wobbler,  I adhered the bunny in the center of the frame.

IMG_7485

Here’s my first card:

KatScrapEasterBunny1

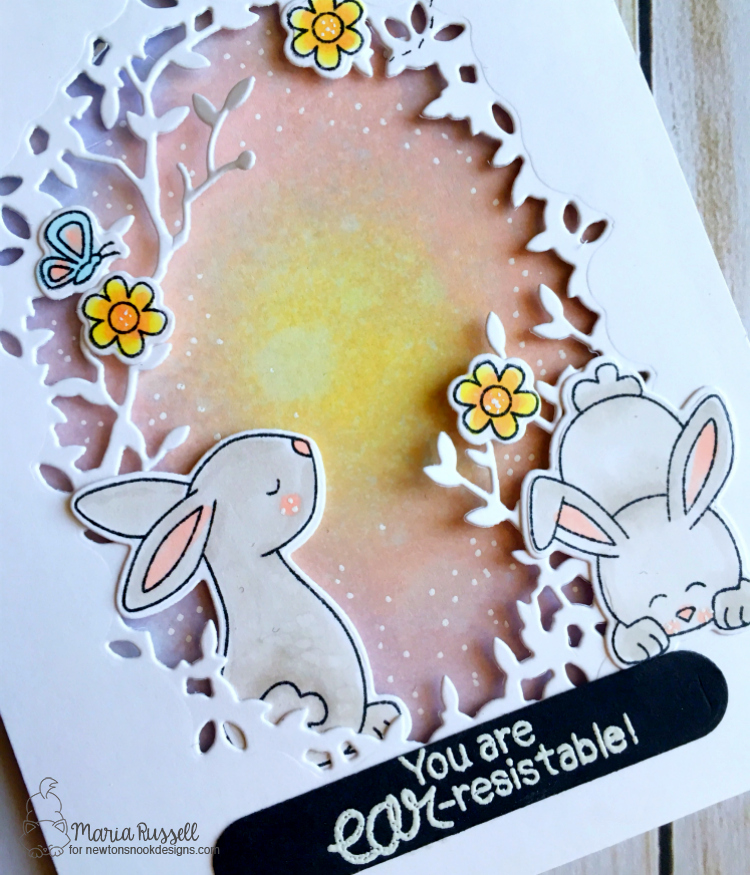
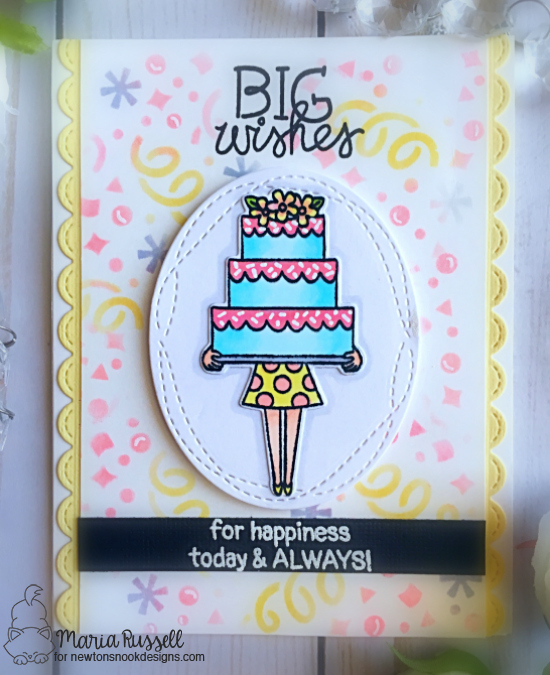
For my second card, I colored another piece of Bristol smooth card stock with my Broken China, Worn Lipstick and Wild Honey distress oxides.  I used the Never-Ending circle dies to cut some circles on my foreground.  I adhered this piece to my colored background with my foam tape to give it some dimension.  I adhered the cute peeps on each circle.

I finished my design by adhering some white pompoms on the bunnies, and added the script sentiment “Happy” from the Brush Script Happy Easter die and stamped the sentiment “EASTER”.  I also used my white gel pen to add some details to the script sentiment.  Here’s my second card:

KatScrapEasterBunny2

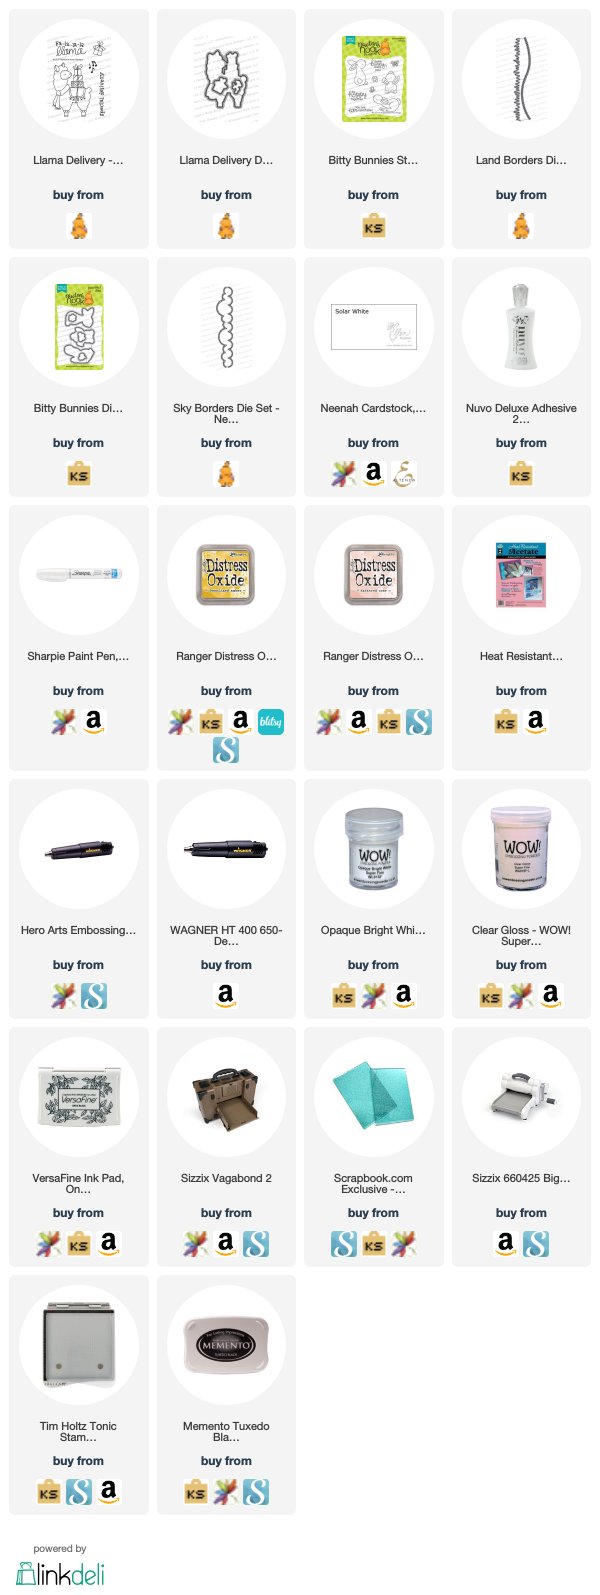
Aren’t these cards so much fun?  I love how they turned out.  I hope you got inspired today.  I have also listed and linked the supplies I used below.  Have an amazing day and happy crafting!
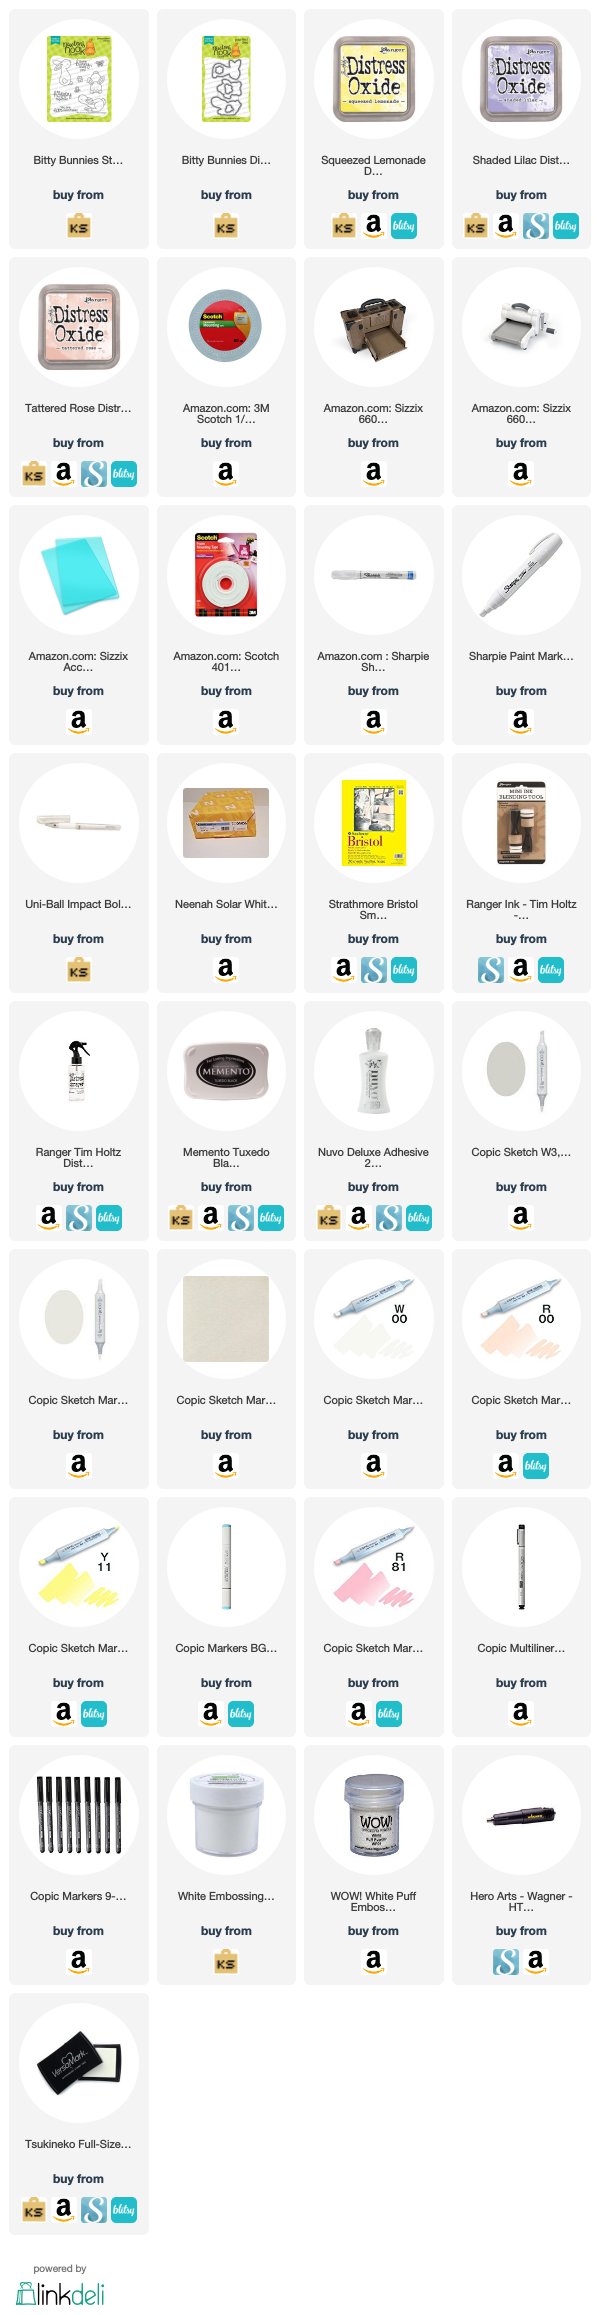
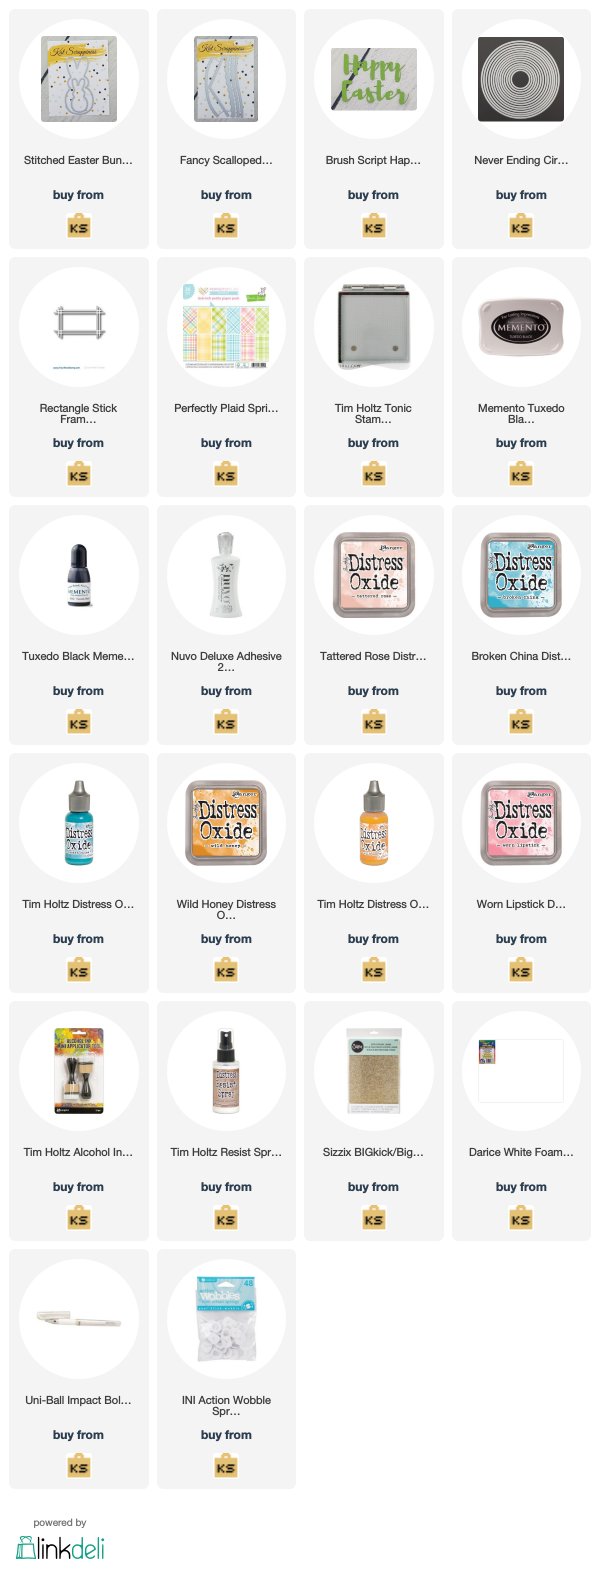
————SUPPLIES————-


NND March Release – Birthday Essentials Stamp Set

NNDReleaseIconMarch18

Are you loving the release so far?  It is now the 3rd day of the March reveals by Newton’s Nook Designs.  You also have a chance to win each stamp set during release week so check out the details I have indicated at the end of this blog post.  [Just a little important note:  I know some of you had difficulties finding the comments section.  If you would like to leave a comment to participate in the giveaway, the “comments section” will only be ever visible when a single post on WordPress is being viewed. Please click on this particular blog post and you will be able to leave a comment below.  Thank you!]  


For my project today, the design team is showcasing the Newton’s Birthday Balloons and the Newton’s Birthday Balloons coordinating dies.

NNDMarch18NewtonsBirthdayBalloon

As soon as I saw this stamp set, I immediately thought of creating a scene where Newton is floating up in the air with his balloons BUT I wanted the sky to look unique, than your regular blue and white!  I also pictured glitter dust, everywhere!


I started with die-cutting my 4 1/4 x 5 1/2 piece of Bristol smooth white card stock, using the Sky Borders die set.  I inked it up with Tattered Rose and Antique Linen distress oxide inks, with my mini ink blending tools.


To add the glitter dust on my background, I used my Perfect Pearls Pigment Powder in Perfect Gold and added it on a clear acrylic block with some water.  I used my watercolor brush to sprinkle the color onto the card stock.  This created some cute glittery-gold sparkle dust on my colored background.


To finish my design, I used my Clouds stencil that I created using the Sky Borders Die, and colored my card base using the Antique Linen distress oxide with my ink blending tool.  I also heat-embossed the sentiment on black card stock and added some details to the balloons with my Sharpie White paint pen.  Here’s my card:


NNDNewtonsBdayBalloons

Here’s another photo to show you the gold glitter dust:

IMG_7344


Would you like to win the “Newton’s Birthday Balloons” Stamp Set?  This stamp set will be given away to ONE lucky winner!

Here’s how to win:

Comment on the NND blog and Design Team blogs (see list below)!  The winner will be chosen at random from the collective reveal posts.  Make sure to check out each of their blogs and comment for your chance to win.  You will not know which blog has been chosen so the more you comment on the better your chances are of winning! You have until Thursday, March 15th, at 9pm EST to comment  — winners will be announced on the blog post on Friday, March 16th.

Check out all the awesome Design Team Blogs below to enter:

Newton’s Nook Designs

Amanda Bodine

Holly Endress

Ellen Haxelmans

Larissa Heskett

Samantha Mann

Juliana Michaels

Naki Rager

Maria Russell

Jennifer Timko

Tatiana Trafimovich

———-SUPPLIES———-


NND March Release – Uplifting Wishes and Balloon Shaker Die

NNDReleaseIconMarch18


Who’s been looking forward to day 2 of the March reveals by Newton’s Nook Designs?  Today’s reveal is AMAZING!  You also have a chance to win each stamp set during release week so check out the details I have indicated at the end of this blog post.  [Just a little important note:  I know some of you had difficulties finding the comments section.  If you would like to leave a comment to participate in the giveaway, the “comments section” will only be ever visible when a single post on WordPress is being viewed. Please click on this particular blog post and you will be able to leave a comment below.  Thank you!]  


For today’s cards, the design team is showcasing the Uplifting Wishes stamp set with the Balloon Shaker die. Yay!   I LOVE, LOVE, LOVE this shaker die.  It is so much fun and what’s good about this is the Uplifting stamp set will fit inside the balloon shaker!


NNDMarch18UpliftingWishesBalloonShaker


I started out by making my own clouds stencil using the Sky Borders die by Newton’s Nook.  I inked up my Neenah Solar White card stock measuring 4 1/4 by 5 1/2 with my handmade stencil with Broken China distress oxide ink and my ink blending tool to create the sky.  I also colored the hills with my Cracked Pistachio distress oxide ink.  I used my copic marker to create the grass.


I stamped my bunny and butterflies images using the Bitty Bunnies stamp set and colored them in with my copic markers.  I die-cut the images with the coordinating dies.


I die-cut the colored background using the balloon shaker die.  I colored my card base with my Worn Lipstick and Fossilized Amber distress oxide inks to create a colorful balloon.


On a piece of heat resistant acetate sheet, I stamped my sentiment using versamark ink and heat embossed it with my white embossing powder.  I adhered the acetate sheet onto the die-cut piece to create my shaker balloon and added the butterflies and the hearts.  I used the sparkling clear sequins as my shaker element.  Here’s my card:


NNDUpliftingWishes1


IMG_7466


For my second card, I used the Llama from the Llama Delivery stamp set and die cut the image using the coordinating die.  This Llama was released before the holidays last year but you can also use this set for a birthday card.


I wanted the balloon to be the focal point on this card.  I inked up a piece of white card stock with my Tattered Rose distress oxide ink and die cut it with the balloon shaker die.  I also die-cut different colors of card stock using the confetti die from this new set as my shaker element.   This balloon shaker die set is so much fun and a must-have!


IMG_7338


Here’s my second card.  Isn’t she a cutie patootie with that big balloon?  This card is so simple but I love how it turned out.


NNDUpliftingWishes2


IMG_7467


Which one is your favorite?  I hope you got inspired today.  I also listed and linked the supplies I used below.  Have a wonderful day!


Would you like to win the “Uplifting Wishes” Stamp Set?  This stamp set will be given away to ONE lucky winner!


Here’s how to win:


Comment on the NND blog and Design Team blogs (see list below)!  The winner will be chosen at random from the collective reveal posts.  Make sure to check out each of their blogs and comment for your chance to win.  You will not know which blog has been chosen so the more you comment on the better your chances are of winning! You have until Thursday, March 15th, at 9pm EST to comment  — winners will be announced on the blog post on Friday, March 16th.


Check out all the awesome Design Team Blogs below to enter:

Newton’s Nook Designs

Amanda Bodine

Holly Endress

Ellen Haxelmans

Larissa Heskett

Samantha Mann

Juliana Michaels

Naki Rager

Maria Russell

Jennifer Timko

Tatiana Trafimovich

———-SUPPLIES———-


NND March Release – Holding Happiness Stamp Set and dies with 2 new stencils

NNDReleaseIconMarch18


I get super excited each month as we start our reveals of the new stamp set, dies and stencils by Newton’s Nook Designs.  You also have a chance to win each stamp set during release week so check out the details I have indicated at the end of this blog post.  [Just a little important note:  I know some of you had difficulties finding the comments section.  If you would like to leave a comment to participate in the giveaway, the “comments section” will only be ever visible when a single post on Word Press is being viewed. Please click on this particular blog post and you will be able to leave a comment below.  Thank you!]  


Today, the design team is showcasing the Holding Happiness stamp set and coordinating dies with the Bubbly and Confetti stencils.   I know I probably say this every month but you are all going to love this month’s stamps, dies and stencils.

NNDMarch18HoldingHappiness


For my first card,  I started by using my small sponge dauber and different inks to color my Bristol smooth white card stock and create a colorful background.  I also stamped my images with my memento tuxedo black ink on Neenah solar white card stock and colored them in with my copic markers.  I die-cut the images using the coordinating dies.


Using a scallop border die from my stash, I die-cut two pieces of yellow card stock.  Since this card is meant for a birthday, I wanted to create a very happy and colorful card using pinks, blues and yellows.

 
To finish my design, I stamped my sentiment using my Versamark ink onto a piece of black card stock and heat-embossed it with white embossing powder.  Here is the first card:

NNDHoldingHappiness2


Here’s a close-up:


IMG_7455


For my second card, I wanted the colorful balloons to pop and be the center of attention so I decided to go for a white on white background.  I die-cut 3 pieces of 100 lb. Neenah Classic Index card stock using my Hexagon dies.   I colored the images using my Copic markers.    Here is the second card:


NNDHoldingHappiness1


Here’s a close-up:


IMG_7456


Would you like to win the “Holding Happiness” Stamp Set?  This stamp set will be given away to ONE lucky winner!


Here’s how to win:


Comment on the NND blog and Design Team blogs (see list below)!  The winner will be chosen at random from the collective reveal posts.  Make sure to check out each of their blogs and comment for your chance to win.  You will not know which blog has been chosen so the more you comment on the better your chances are of winning! You have until Thursday, March 15th, at 9pm EST to comment  — winners will be announced on the blog post on Friday, March 16th.


Check out all the awesome Design Team Blogs below to enter:

Newton’s Nook Designs

Amanda Bodine

Holly Endress

Ellen Haxelmans

Larissa Heskett

Samantha Mann

Juliana Michaels

Naki Rager

Maria Russell

Jennifer Timko

Tatiana Trafimovich

———-SUPPLIES———-


Patriotic Card with Everyday Brush Strokes Stamp by Kat Scrappiness

The time has finally come and Kat Scrappiness has just released the Everyday Brush Strokes stamp set!  I was looking forward to showcase this set because it is just simply beautiful.  You can create a lot of projects with this set.  You can even use it to decorate your planner pages, traveler’s journals, scrapbook layout and project life.  The possibilities are endless.
For my projects, I used the Everyday Brush Strokes stamp set, the Cross-stitched Rectangle dies by Kat Scrappiness and a bunch of other supplies available at the shop.  I also listed and linked the supplies below.

I have a process video for you today at the end of this blog post.  Here are photos of the cards I’ve made using this set.

KatScrapBrushStrokeFlag

KatScrapBrushStroke1

KatScrapBrushStroke2

KatScrapBrushStroke3

Here’s the process video:

I hope you got inspired day!  Have an amazing week!

———–SUPPLIES———–


A Day at the Beach Penpal Flipbook – Sun Drenched Paper Pad Collection

Maria Russell CircleHello my crafty friends!  I hope you’re all having a great day so far. I am back to share with you my process on how I made this Flip Book for my pen pal in Australia.  She loves the beach and the Sun Drenched 12×12 Paper Pad collection, the Embrace Today Stick-on Pockets with the Carole Shiber Polka-Dotted Soft Pink and Honeydew washi tape would be perfect for this project.


I have a process video below to walk you through my process.  Here are some photos of the finished book.


Sundrenched Flipbook1


Here’s what’s inside the flip book:


PHSundrenched2


Process Video:


Paper House Productions Supplies: 12×12 Sun Drenched Paper Pad Collection, Embrace Today Stick On Pockets, Carole Shiber Soft Pink and Honey Dew Washi Tape.

Love You to the Moon & Back Scrapbook Layout

Hello my crafty friends!  I am super excited to share my project today.  Mother’s Day is fast-approaching and I wanted to create a scrapbook page layout, showcasing the Large Alpha dies, the “Love You to the Moon & Back” script sentiment dies by Kat Scrappiness, plus other supplies available at the shop.

I started by inking my 12 x 12  white card stock with my ink blending tool and my Worn Lipstick and Fossilized Amber distress oxides.    I spritzed my background with water and dabbed it with my paper towel.  I love the look of distress backgrounds especially on white card stock.

IMG_7253

I matted my mom’s photograph on Gina K Designs Black Card Stock.  I also stamped my flowers and leaves using the Lawn Fawn Fab Flowers 4 x 6 stamp set.  I die-cut my images using the Lawn Fawn Fab Flowers dies.

IMG_7254

Using the Large Alphabet Dies, I die-cut the letters M-O-M on Gina K Designs Black Card Stock.   I adhered the die-cut pieces onto my layout using my Nuvo Deluxe Adhesive, lining it up with my T-square ruler to make sure that they are evenly spaced and perfectly aligned.

IMG_7255

I adhered my mom’s photograph onto my layout.  To finish my design, I added the rest of my embellishments.  Here is my layout:

KatScrapMomLayout

Here’s a little close-up!  Isn’t she beautiful?!  My mom is an amazing, strong, beautiful person, inside and out.  She has taught me how to become independent, and be able to do things that I couldn’t even believe it’s possible.  I am such a lucky person to have a mom like mine.  I love her to the moon and back!

KatScrapMomLayout2

I hope you like my project today and got inspired.  I have listed and linked the supplies I used below.  Don’t forget to use my coupon code “MARIA10” for 10% off of your order at Kat Scrappiness.  Have a wonderful day and happy crafting!

—————-SUPPLIES————–


Bitty Bunnies Spring Card

Ahh! Spring is almost here and I am ready for all things “pastel”, haha!  I am back today to share with you a Spring card, showcasing the Bitty Bunnies stamp set and coordinating dies, with some squeezed lemonade, shaded lilac and tattered rose distress oxide inks.

I have a process video for you today so I will keep this blog post short.  I hope you got inspired.  The supplies I used are listed and linked below. Have a wonderful day!

Here’s my card:

NNDBittyBunnies03

Here’s a close-up:

NNDBittyBunnies04

The process video:

————SUPPLIES————-


Newton’s Nook DT Birthday Blog Hop

NNDSurprise Birthday Blog Hop


Today is a super special day, we’re so glad you’re joining us!  All of the Newton’s Nook Designs DT members have gotten together to throw a surprise birthday blog hop for Jennifer, the owner, illustrator and all around wonderful person behind Newton’s Nook!
We are so honored to get to work with Jennifer, and we all just love her so much and wanted everyone to celebrate her birthday with you!   Jennifer, we hope you have the happiest birthday ever!  


For my simple card below, I am showcasing the Newton Loves Cake stamp set and coordinating dies with the Baked From Scratch stamp set.  I love mixing and matching stamp sets to create my cards.


IMG_6969


I started out by stamping my images onto Neenah solar white card stock and colored the images in with my Copic markers.  I die-cut my storybook window die with another 110 lb. white card stock.


I used the Tumbling Hearts stencil to ink-up my card panel.  I adhered my storybook window onto my card base, then used foam adhesives to adhere my colored images.  I finished my design by adding glossy accents to the candles, the collar and the little hearts.  Here’s my card:

NNDBdayBH1


Since I colored more than one image, I decided to make another card.  Here’s my second one:


NNDBdayBH

Would you like to win the a $25 gift certificate to the NND store?  You could be the ONE lucky winner!


Here’s how to win:

Comment on the NND blog and Design Team blogs (see list below) with a birthday message for Jennifer!  The winner will be chosen at random from the collective posts. Make sure to check out each of their blogs and comment for your chance to win. You will not know which blog has been chosen so the more you comment on the better your chances are of winning! You have until Sunday, February 18th at 9pm EST to comment  — winners will be announced on the blog post on Monday, February 19th.


Check out all the awesome Design Team Blogs below to enter: