Clean & Simple Cards with SomeBunny – CAS-ual Fridays Stamps

Hello everyone!  Maria here with you today and I am super excited to share my very first post as a member of the CAS-ual Fridays Ink Squad.  It is definitely a dream come true for me!  I have always admired the talented girls on the Ink Squad and when I received the good news that I made it on the team, I was happy and terrified at the same time!  I hope I will be able to inspire you in this amazing journey and get creative with me.

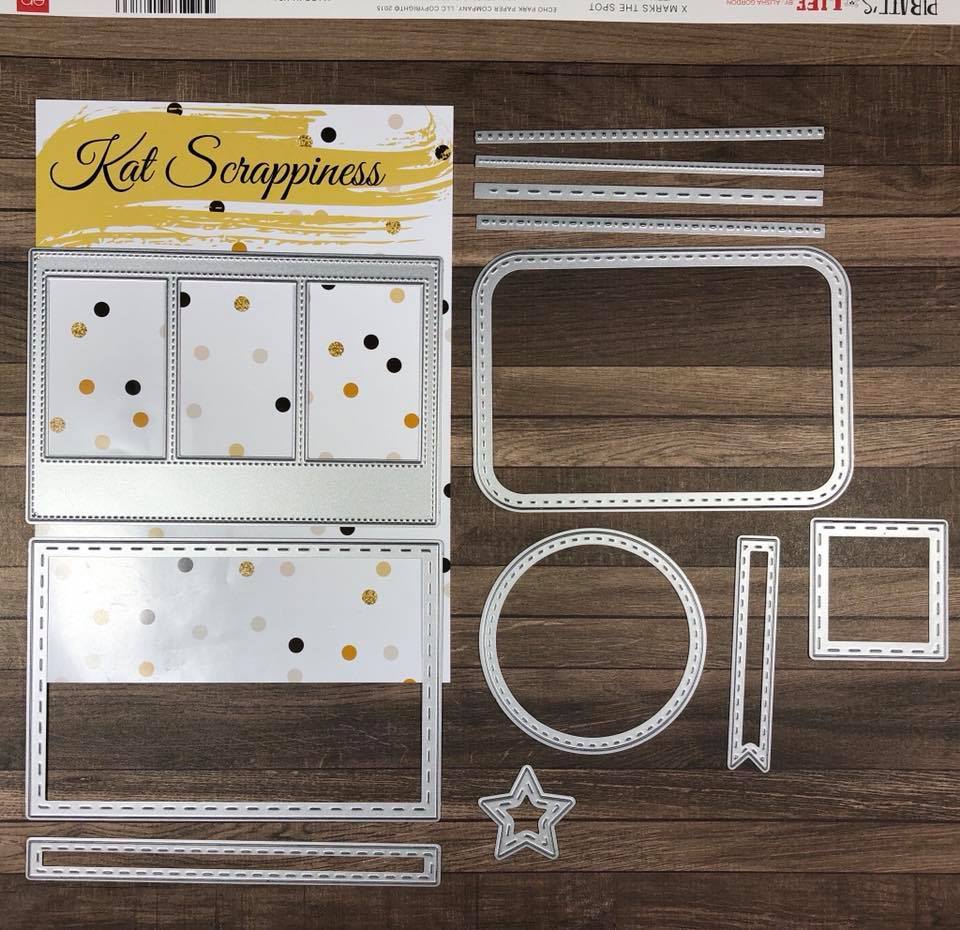
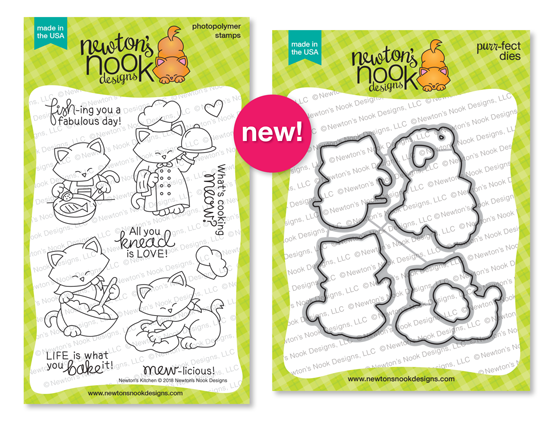
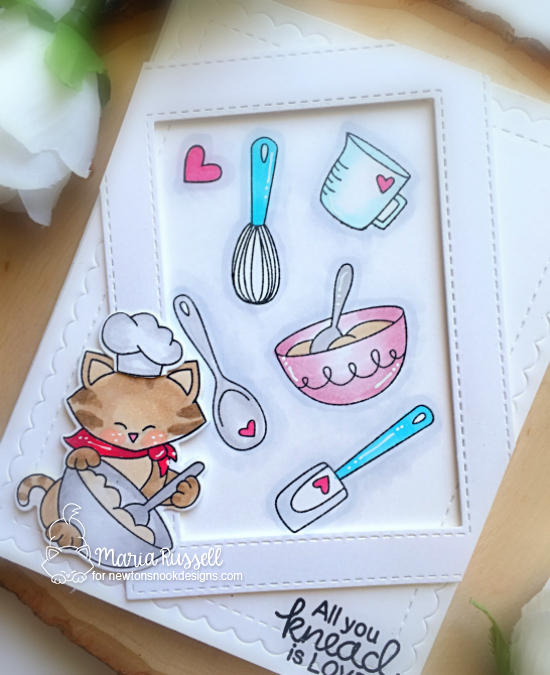
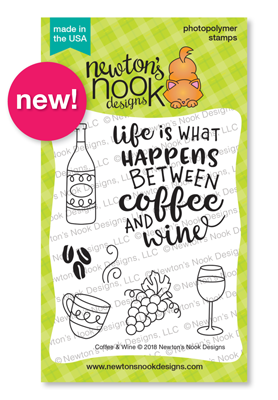
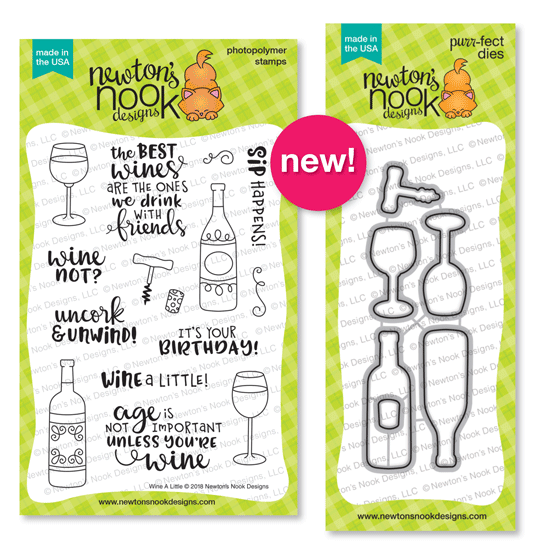
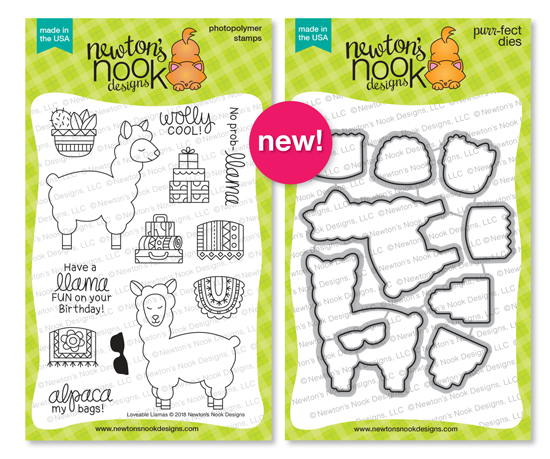
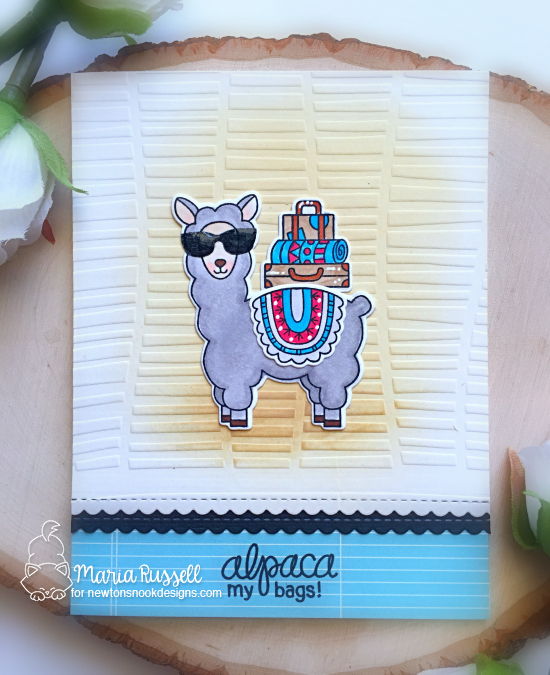
For today’s project, I am showcasing the SomeBunny stamp set with the Bunny Fri-Dies, and the Best Day Fri-Dies.

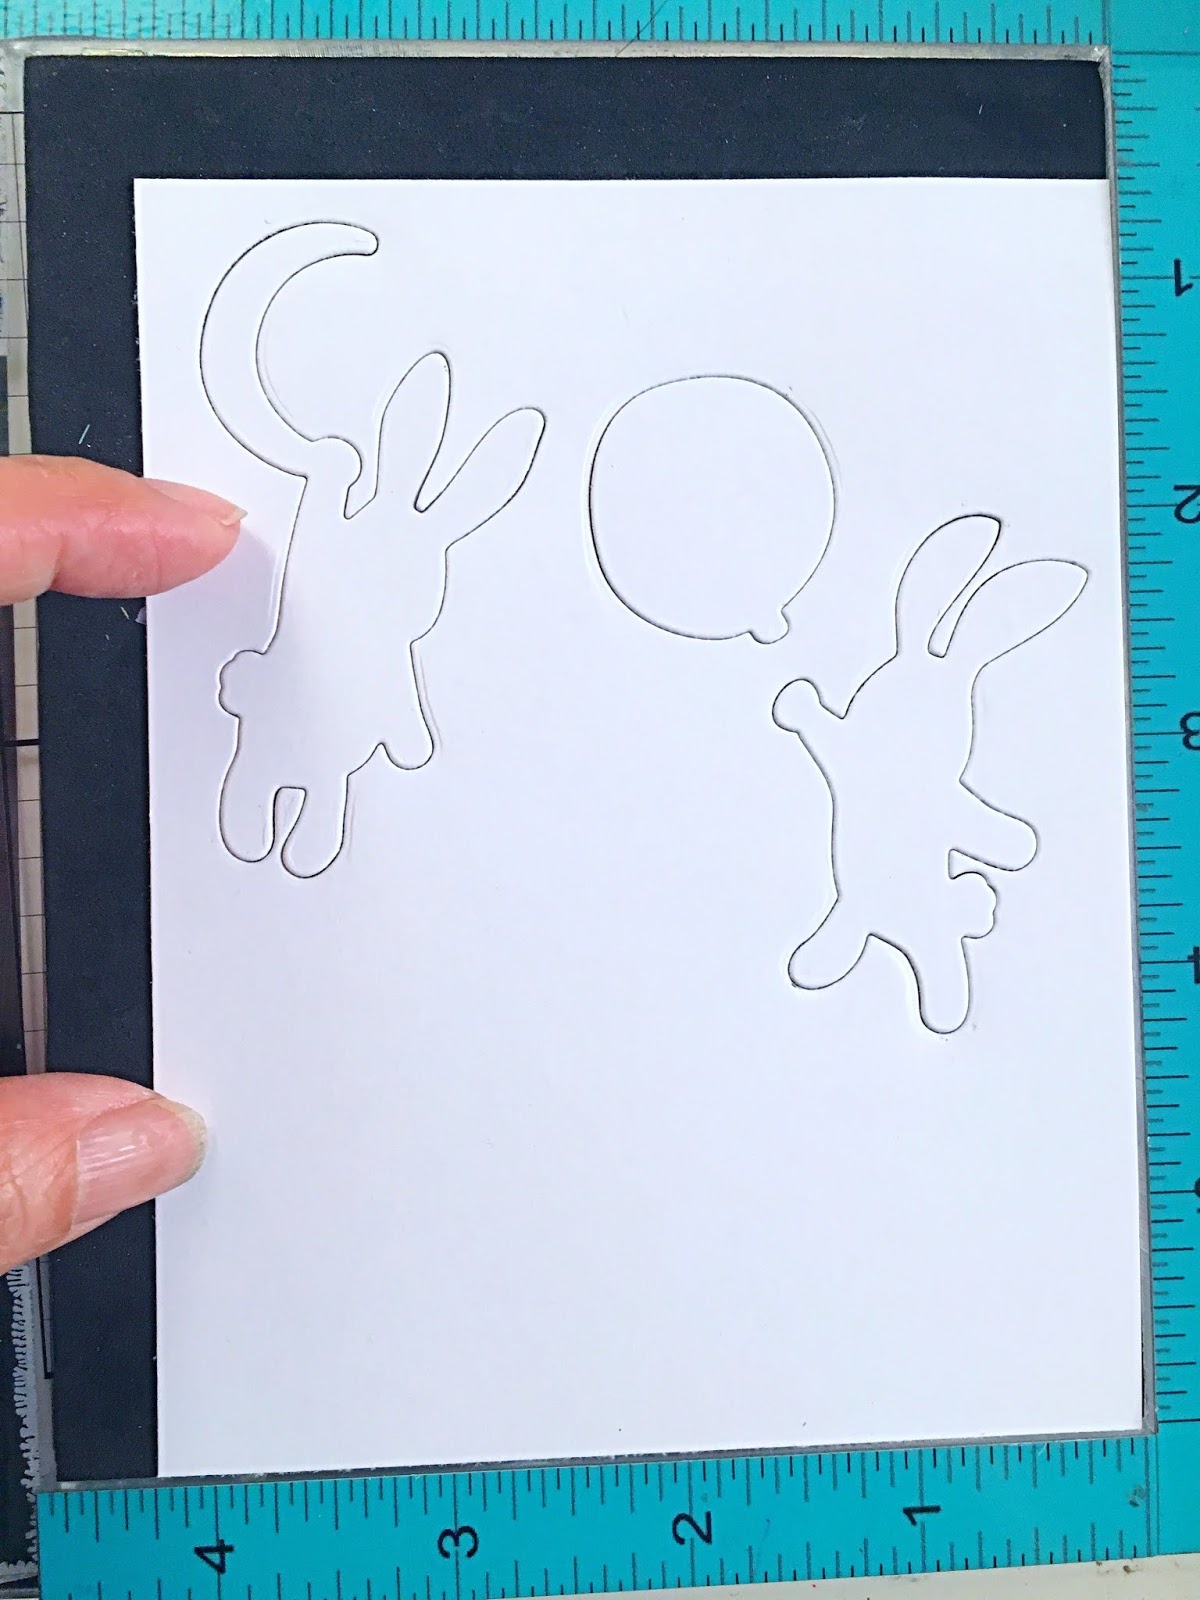
I started out by die-cutting the two bunnies on some Neenah Solar White Card Stock.  I placed the die-cuts back on the negative piece and lined-up my images, and held it in place with low-tack tape.   I used my stamping tool to stamp the images using Memento Tuxedo black ink.  I colored the images in with my Copic markers.

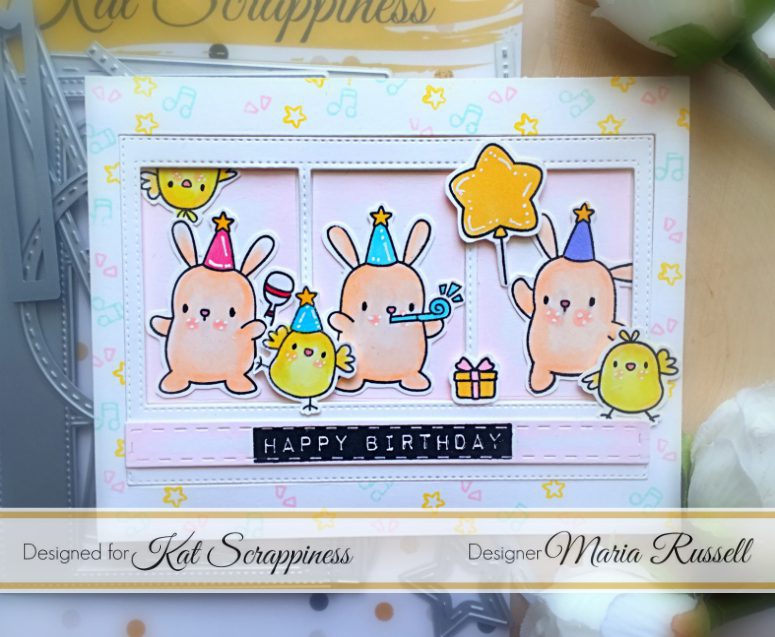
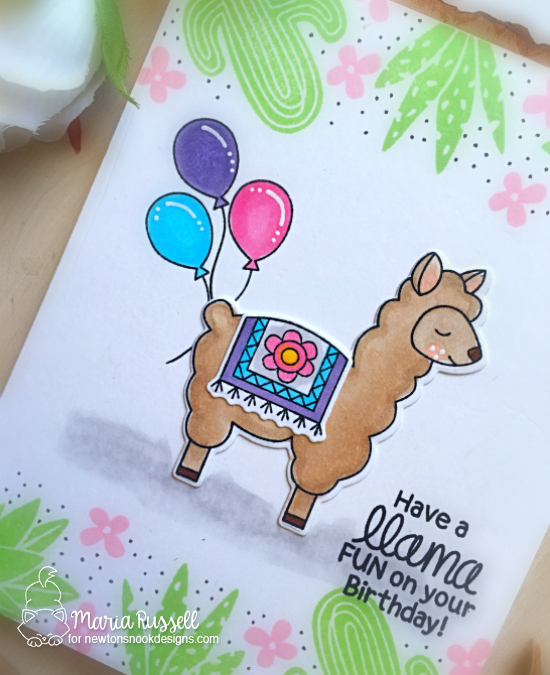
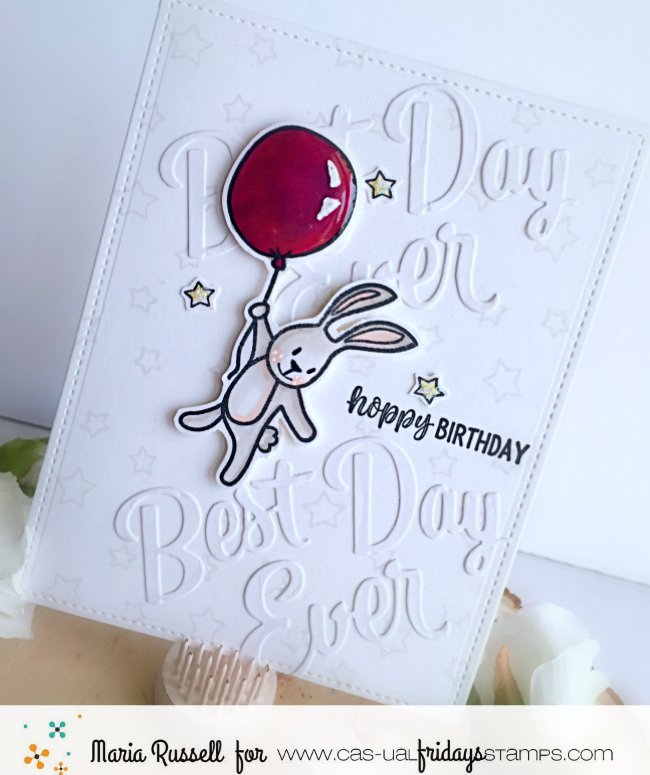
For my first project, I wanted to make a birthday card using the adorable Bunny holding a balloon.  I cut another piece of some white card stock and stamped the little stars using some light gray ink.  I wanted the stars on my background to look like watermark so that these images wouldn’t overwhelm the whole card design.  I also die-cut the “Best Day Ever” using the dies and adhered these pieces onto my card panel with my Nuvo Liquid adhesive.

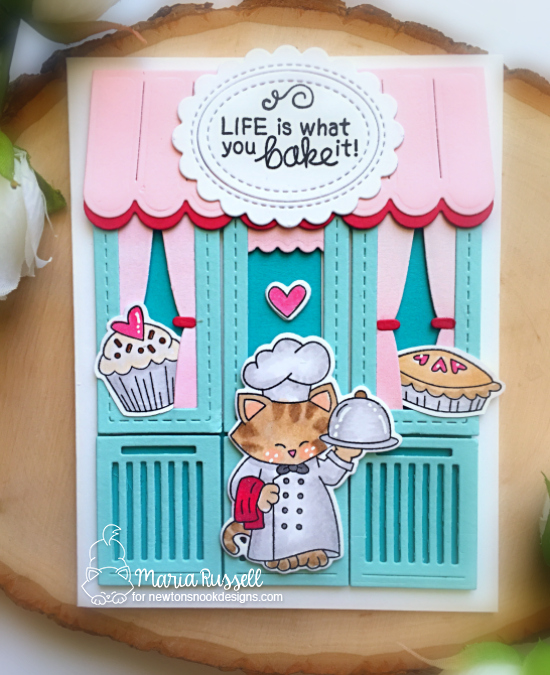
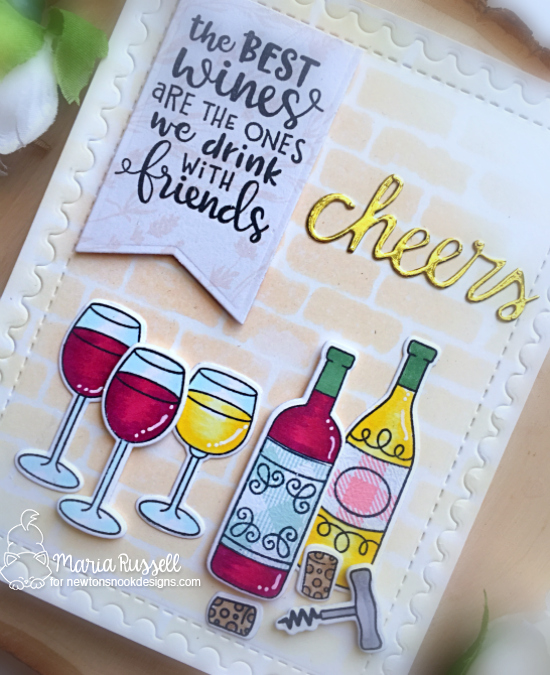
To finish my design, I adhered my little bunny with some foam tape, and added Glossy Accents to the balloon.  Here is my first card:


I love the simplicity of this birthday card.  Here’s another look:

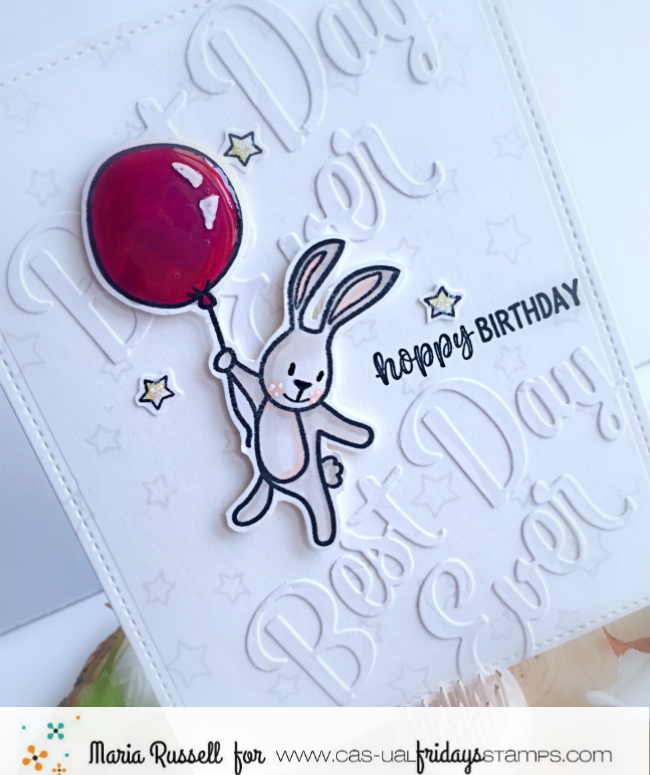
I really love the white-on-white background and the glossy accents on the balloon just gave it a little something extra!

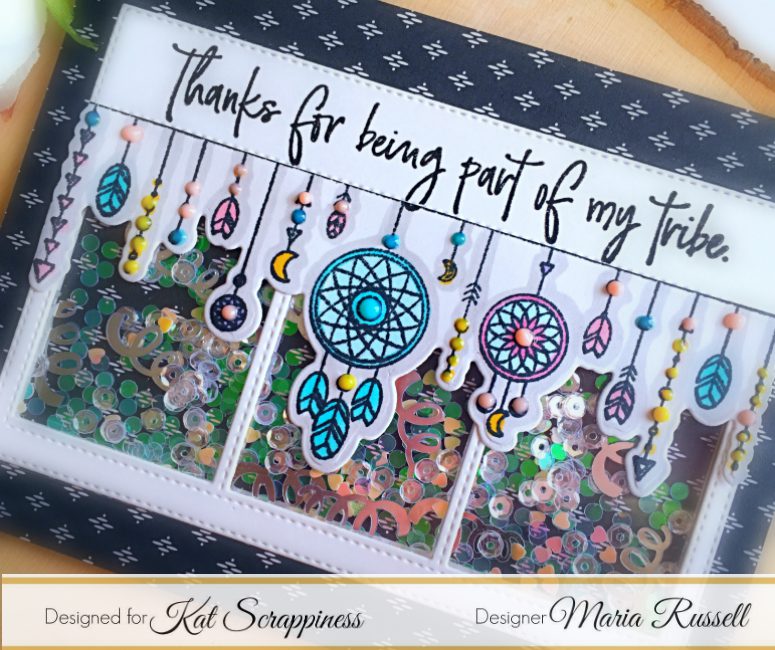
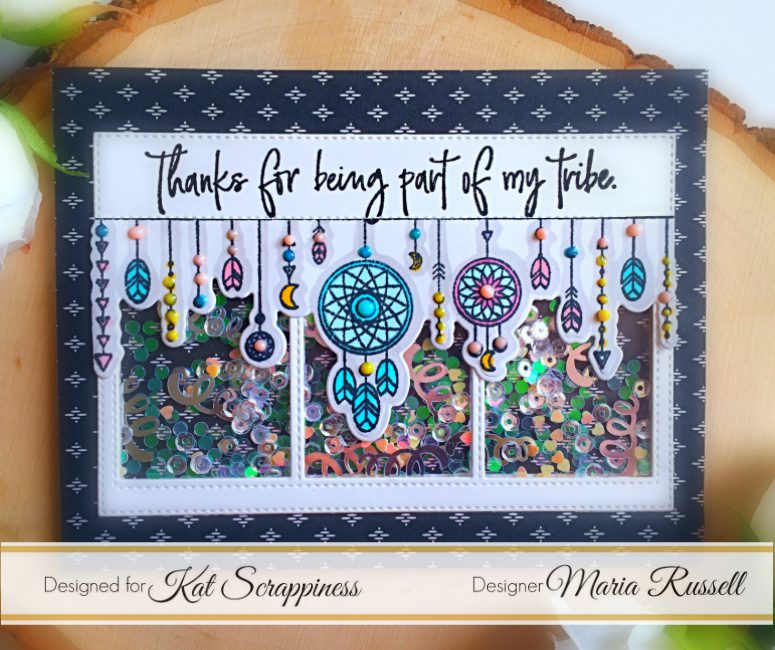
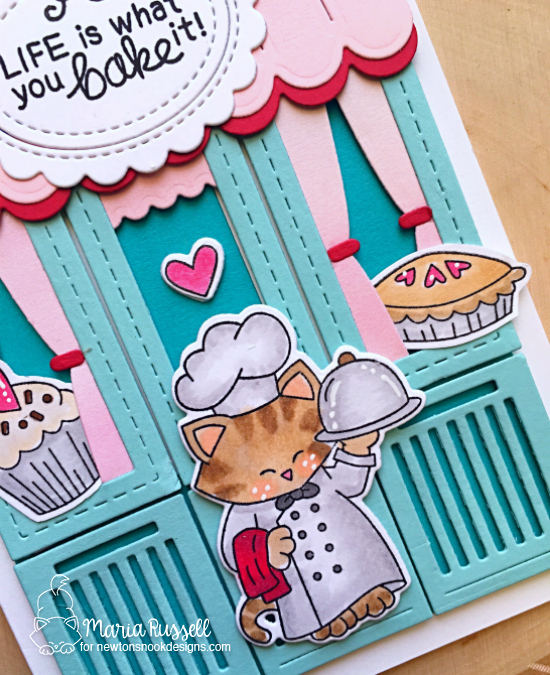
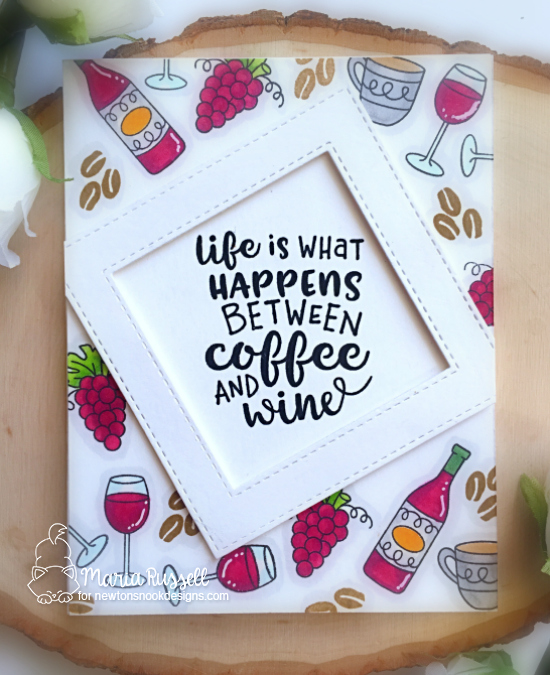
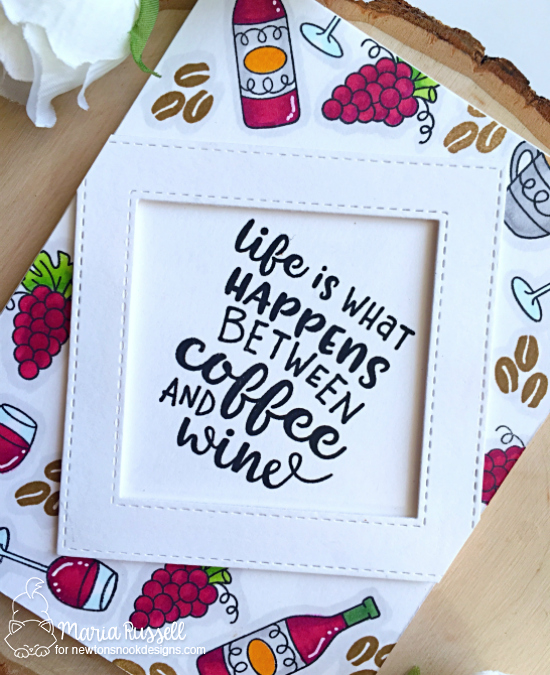
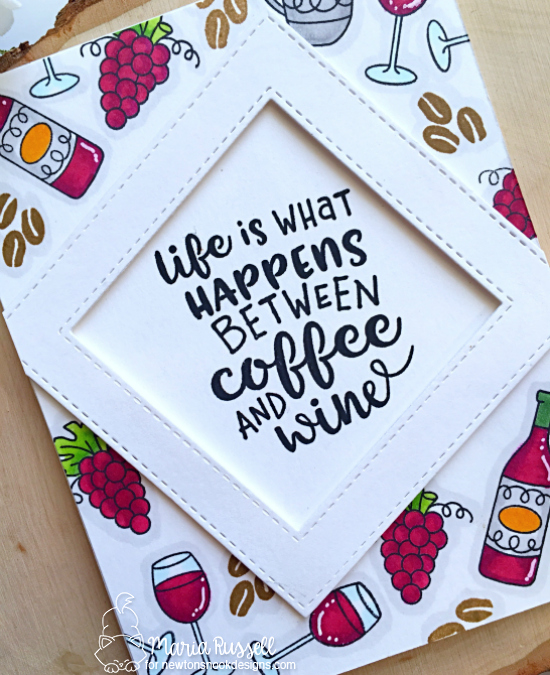
For my second card, I did the same technique by stamping the little stars on my card panel with the same light gray ink.  I die-cut another piece of some white card stock to create the frame for my cute little bunny.  I stamped the sentiment onto the frame, and adhered this piece on my background panel with some foam adhesive.

To finish my design, I stamped 3 little stars next to the bunny with some light blue ink and added Stardust Stickles to the moon.  Here is my second card:

I am in-love with this stamp set.

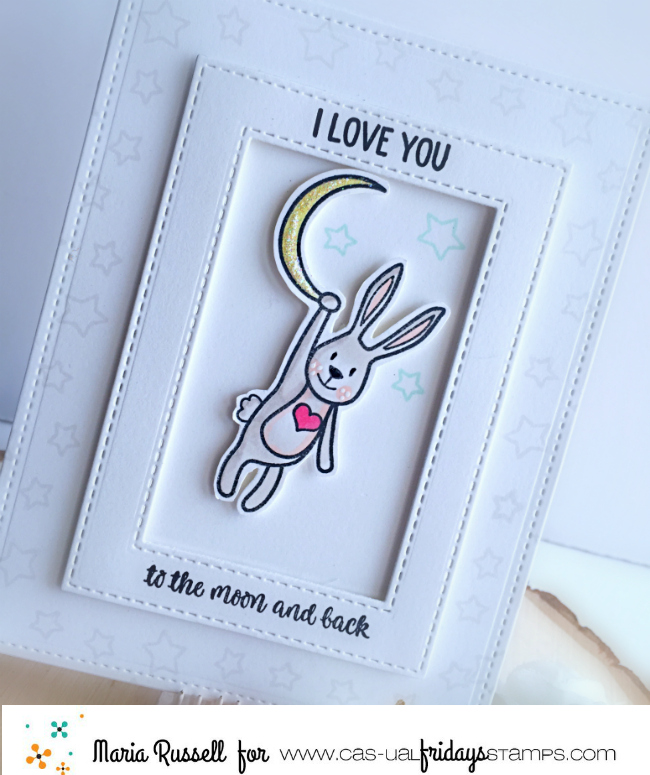
The stardust stickles added a little touch of whimsy to the design.

I hope I have given you some inspiration today to create some clean and simple cards.  Please don’t forget to use my coupon code below for 15% off your order at the shop.  Isn’t this the best day ever?

Thanks for stopping by and happy crafting!

Crafter’s Essentials 1 Die Set by Kat Scrappiness

Hello my crafty friends! I hope you are all having a great week so far! Maria here with you today sharing some cards, showcasing the new Crafter’s Essentials 1 die set and a lot of products available at the shop.  This Crafter’s Essentials 1die-set is a must-have!  This set contains 12 steel-rule dies that you can use for all of your paper crafting projects!  Here’s what it looks like:

For my first card today, I stamped some images on some white card stock with my Lawn Fawn Jet black ink using my Tim Holtz Stamping Platform tool.  I colored the images in with my Copic markers and die-cut them using the coordinating dies.

I also die-cut another piece of white card stock using the storybook die from the set.  I wanted to create a birthday card.  I stamped the small images on the card stock and assembled my card.

I really love how this card turned out.  There are so many possibilities using this Crafter’s Essentials 1 die-set.  I also love all of the stitching details! Here another look:


For my second card below I wanted to use some new sequin and confetti mixes from the Shop and some Nuvo crystal drops.  I also used the new My Tribe stamp set by Honey Bee Stamps.   Here’s my shaker card:

This shaker card is actually going to a friend of mine who is also crazy about crafting!  I am so thankful that she is a part of my tribe!

I hope you got inspired today.  The Crafter’s Essentials 1die set is sold out at the moment but more are coming in the next 7 days or so.  You can RESERVE the dies so you don’t miss out again.  The supplies I used are listed and linked below.  Have an amazing day and happy crafting!

————-SUPPLIES————-


Newton’s Nook Designs June Release – Newton’s Kitchen

NNDJune18ReleaseIcon

It is the last day of the May reveals by Newton’s Nook Designs  and we have saved the best for last!  Don’t forget to check out the details I have indicated at the end of this blog post for a chance to win the stamp set being revealed each day.  [Just a little important note:  I know some of you had difficulties finding the comments section.  If you would like to leave a comment to participate in the giveaway, the “comments section” will only be ever visible when a single post on Word Press is being viewed. Please click on this particular blog post and you will be able to leave a comment below.  Thank you!]  

For today’s project, the design team is showcasing Newton’s Kitchen stamp set with the coordinating dies.  I absolutely ADORE this stamp set!

NNDJune18_NewtonsKitchen

I stamped my images on some smooth white card stock and colored them in with my Copic markers.  I die-cut the images using the coordinating dies.  For every stamp release, I color images more than I need and save the ones I didn’t use for another project later on.

I wanted to create a cute scene for Chef Newton here so I die-cut some pieces of colored card stock using a die from my stash.  I adhered the die-cut pieces onto my card stock, and added Chef Newton in the middle.  Here is Newton’s bakeshop:

NNDNewton'sKitchen

To finish my design, I added the giant cupcake and apple pie from the Love A La Carte stamp set (retired).

NNDNewton'sKitchen1A

I stamped the sentiment on some die-cut panel and adhered it on my card.  Here’s another look:

NNDNewton'sKitchen1B

I have another card that I made using this set, but I also mixed it with the Made From Scratch stamp set, with the Frames and Flags die.

NNDNewton'sKitchen2

I absolutely LOVE mixing and matching stamp sets by Newton’s Nook. Here’s another look:

NNDNewton'sKitchen2B

Would you like to win the “Newton’s Kitchen” Stamp Set?  This stamp set will be given away to ONE lucky winner!

Here’s how to win:

Comment on the NND blog and Design Team blogs (see list below)! The winner will be chosen at random from the collective reveal posts. Make sure to check out each of their blogs and comment for your chance to win. You will not know which blog has been chosen so the more you comment on the better your chances are of winning! You have until Thursday June 21st at 9pm EST to comment  — winners will be announced on the blog post on Friday, June 22nd.

Check out all the awesome Design Team Blogs below to enter:

Newton’s Nook Designs

Amanda Bodine

Holly Endress

Ellen Haxelmans

Larissa Heskett

Samantha Mann

Juliana Michaels

Naki Rager

Maria Russell

Jennifer Timko

Tatiana Trafimovich

———-SUPPLIES———-


Newton’s Nook Designs June Release – Coffee & Wine and Wine A Little

NNDJune18ReleaseIcon

It is the third day of the June reveals by Newton’s Nook Designs.   Are you loving what you’re seeing so far?  Don’t forget to check out the details I have indicated at the end of this blog post for a chance to win the stamp set being revealed each day.  [Just a little important note:  I know some of you had difficulties finding the comments section.  If you would like to leave a comment to participate in the giveaway, the “comments section” will only be ever visible when a single post on Word Press is being viewed. Please click on this particular blog post and you will be able to leave a comment below.  Thank you!]  

Today, the design team is showcasing two stamp sets – Wine A Little stamp set and coordinating dies with the Coffee & Wine stamp set.   I LOVE WINE so of course I love both stamp sets!  This may be my favorite thus far although it is really tough to pick a fave since they’re all AMAZING!

NNDJune18_Coffee&Wine

NNDJune18_WineALittle

For my first card, I stamped the images from the Wine & Coffee stamp set on some Neenah solar white card stock and colored them in with my Copic markers.  I purposely didn’t stamp the middle of the card because I wanted the focal point to be the sentiment.    If you read my Designer’s Nook series email this week, I did a similar design to my card but I love how this one turned out.  Even though the focal point is the sentiment, I love the colored images on the background.

NNDCoffee&Wine1

Isn’t it true that life is what happens between coffee and wine?

NNDCoffee&Wine1B

I added some highlights to the stamped images with my C1 Copic marker to give it more dimension.  Here’s another look:

NNDCoffee&Wine1A

For my second card, I colored my background with another stencil from my stash.  I dry-embossed the card stock with the Postage die from the Framework Die set.

I stamped the images on some smooth white card stock and colored them with my Copic markers.  I die-cut the images using the coordinating dies.  I adhered the images on my colored background panel.

I stamped the sentiment on a die-cut banner from the Frames and Flags die set.  I die-cut the “Cheers” script sentiment using a die from the Cocktail Mixer coordinating dies.

NNDWIneALittle1

Don’t you just love the gold details on the “Cheers” script sentiment?

NNDWineALittle1A

It is so true that the best wines are the ones we drink with loved ones and friends.  Here’s another look:

NNDWineALittle1B

Would you like to win the “Wine A Little” or “Coffee and Wine” Stamp Set?  Each stamp set will be given away to ONE lucky winner!

Here’s how to win:

Comment on the NND blog and Design Team blogs (see list below)! The winner will be chosen at random from the collective reveal posts. Make sure to check out each of their blogs and comment for your chance to win. You will not know which blog has been chosen so the more you comment on the better your chances are of winning! You have until Thursday June 21st at 9pm EST to comment  — winners will be announced on the blog post on Friday, June 22nd.

Check out all the awesome Design Team Blogs below to enter:

Newton’s Nook Designs

Amanda Bodine

Holly Endress

Ellen Haxelmans

Larissa Heskett

Samantha Mann

Juliana Michaels

Naki Rager

Maria Russell

Jennifer Timko

Tatiana Trafimovich

———-SUPPLIES———-


Newton’s Nook Designs June Release – Loveable Llamas

NNDJune18ReleaseIcon

It is the second day of the June reveals by Newton’s Nook Designs.   I hope you were able to check out yesterday’s reveal.  You have a chance to win each stamp set during release week so check out the details I have indicated at the end of this blog post.  [Just a little important note:  I know some of you had difficulties finding the comments section.  If you would like to leave a comment to participate in the giveaway, the “comments section” will only be ever visible when a single post on Word Press is being viewed. Please click on this particular blog post and you will be able to leave a comment below.  Thank you!]  

For our projects today, the design team is showcasing the Loveable Llamas stamp set and coordinating dies.  I was super excited when I saw this stamp set because there are two Llamas in different poses and some accessories to dress them up.  I LOVE THE SUNGLASSES!  Here’s what the stamp set look like:

NNDJune18_LoveableLlamas

I started out by stamping my images on some smooth white card stock and colored them in with my Copic markers.  I die-cut the images using the coordinating dies.

I wanted to add the cacti images from the Cultivated Cacti stamp set.  I stamped them on some white card stock with green and pink inks.  I added some dot details using the Faber Castell black pen.

I stamped the balloons from the Playful Pandas stamp set (revealed yesterday).  I colored them in with my Copic markers, and added some white dots using my Sakura Gellyroll Pen.  I adhered the Llama on top.  Here’s the card:

NNDLoveableLlamas1

I think the cacti images went perfectly well with the Llama.  I also added some shadows under the Llama using my C2 and C0 Copic markers.

NNDLoveableLlamas1A

Here’s another look:

NNDLoveableLlamas1B

For my second card, I dry-embossed some white card stock using the new Serene Stripes stencil (revealed yesterday) with my embossing pad.  I colored the background with some distress oxide inks.

NNDLoveableLLamas2

Isn’t he adorable?  I added the sunglasses and covered it with glossy accents to make it look realistic.  He’s so groovy!  Here’s a little close-up:

NNDLoveableLlmas2A

Would you like to win the “Loveable Llamas” Stamp Set?  This stamp set will be given away to ONE lucky winner!

Here’s how to win:

Comment on the NND blog and Design Team blogs (see list below)! The winner will be chosen at random from the collective reveal posts. Make sure to check out each of their blogs and comment for your chance to win. You will not know which blog has been chosen so the more you comment on the better your chances are of winning! You have until Thursday June 21st at 9pm EST to comment  — winners will be announced on the blog post on Friday, June 22nd.

Check out all the awesome Design Team Blogs below to enter:

Newton’s Nook Designs

Amanda Bodine

Holly Endress

Ellen Haxelmans

Larissa Heskett

Samantha Mann

Juliana Michaels

Naki Rager

Maria Russell

Jennifer Timko

Tatiana Trafimovich

———-SUPPLIES———-


Newton’s Nook Designs June Release – Playful Pandas

NNDJune18ReleaseIcon

I get super excited each month as we start our reveals of the new stencils, stamp set and dies by Newton’s Nook Designs.   You also have a chance to win each stamp set during release week so check out the details I have indicated at the end of this blog post.  [Just a little important note:  I know some of you had difficulties finding the comments section.  If you would like to leave a comment to participate in the giveaway, the “comments section” will only be ever visible when a single post on Word Press is being viewed. Please click on this particular blog post and you will be able to leave a comment below.  Thank you!]  

For our first reveal day, the design team is showcasing the two new stencils called Serene Stripes and Sunscape, with the Playful Pandas stamp set and coordinating dies.  Here’s what they looks like:

NNDJune18_Stencils

NNDJune18_PlayfulPandas

I know this sounds redundant but each reveal month, I am just blown away by the talented Jennifer Jackson.   It seems that every month, it just gets better and better!

For my first card, I stamped the images on some white card stock with my Tim Holtz stamp platform and memento tuxedo black ink.  I colored the images in with my Copic markers.  This did not take a long time since Pandas are generally black and white, but I highlighted them with some light gray Copic marker to give it more dimension.  I die-cut the Pandas and bamboo with the coordinating dies.

I cut an A2 size piece of Bristol smooth white card stock and colored my background using the new Sunscape stencil, with my mini ink blending tool.  I used Picked Raspberry and Tattered Rose distress Oxide Inks.   I die-cut the card stock with a die from my stash.  I adhered the acetate sheet and added foam adhesive to create my well for my shaker card.

I added some sparkling clear sequins by Kat Scrappiness, and adhered my card base onto the shaker to secure my shaker elements.  I die-cut some mint green card stock using the Sky borders die.  I wanted to make it look like grassy hills.  I adhered the hills on top of the acetate, and glued the pandas and bamboo as well.  To finish my design, I stamped the sentiment “Pada-monium” on my card.  Here’s what it looks like:

NNDPlayfulPandas2

Don’t you just love those little pandas?  They are adorable!

NNDPlayfulPandas2A

I love the colors that I used on this card.  The pandas are so cute and I love the new Sunscape stencil.  Here’s another close-up:

NNDPlayfulPandas2B

For my second card, I wanted to make a different design by adding the pandas in the middle of the card.

I colored some white card stock using the Serene stripes stencil with Lucky Clover distress oxide ink and my mini-ink blending tool.  I die-cut another piece of some white card stock using a border die from my stash, and adhered these two pieces with foam adhesive.  I finished my design by adhering the pandas, balloons and bamboo in the middle of the card.  Here’s the card:

NNDPlayfulPandas1

I added some white dots to the cheeks, balloons and also the bamboo.  Here’s a little close-up:

NNDPlayfulPandas1B

Would you like to win the “Playful Pandas” Stamp Set?  This stamp set will be given away to ONE lucky winner!

Here’s how to win:

Comment on the NND blog and Design Team blogs (see list below)! The winner will be chosen at random from the collective reveal posts. Make sure to check out each of their blogs and comment for your chance to win. You will not know which blog has been chosen so the more you comment on the better your chances are of winning! You have until Thursday June 21st at 9pm EST to comment  — winners will be announced on the blog post on Friday, June 22nd.

Check out all the awesome Design Team Blogs below to enter:

Newton’s Nook Designs

Amanda Bodine

Holly Endress

Ellen Haxelmans

Larissa Heskett

Samantha Mann

Juliana Michaels

Naki Rager

Maria Russell

Jennifer Timko

Tatiana Trafimovich

———-SUPPLIES———-


Just Chicken-In Card – New Die at Kat Scrappiness

Hello my crafty peeps!  I am super excited to share this post because today, we are launching a new die by Kat Scrappiness called Wood Grain Framed Diamond Wire Background Die.  This die is designed by Kathleen herself and it is AMAZING!  It gives a nice wood grain-embossed details on the die-cut.  Here’s what it looks like:

IMG_8538

I stamped my images on Neenah solar white card stock with my Lawn Fawn Jet Black ink and colored them in with my Copic markers.  I fuzzy-cut the images using my precision cut scissors.

I used some older dies by Lawn Fawn to die-cut the grass hills and the picket fence.

I die-cut some silver foiled card stock using the new die.  I also used another light tan card stock to die-cut the same piece so I can layer them together.  For the second piece, I cut the wires using my scissors, and adhered this piece onto the silver foiled card stock.  I adhered an acetate sheet to this piece, then added foam adhesive to create my little well for my shaker card.

I cut an A2 size card stock for my card base.  I used the Sunburst Layering Stencils by Honeybee Stamps (also available at the shop) to color my card base.  I used a clouds stencil die to add the clouds.

I added the Walking on Sunshine sequin mix inside the well and adhered my card base on top to create my shaker card.  I adhered the chicken and the little chicks onto the foreground.

To finish my design, I die-cut some white card stock using the Stitched Flag Dies and stamped the sentiment.  I added this piece to my card with a pink bow.

KatScrapChickenWire1A

I love, love, love this new die!  I love that it also embosses the die-cut.  This die will also be great to create some layers, or do an inlaid technique.  The possibilities are endless!

KatScrapChickenWire1B

You guys should also check out the new sequin mixes at the shop.  This Walking on Sunshine sequin mix is so cheerful and the colors are so vibrant!  I chose this mix to make it look like corn kernels 🙂

KatScrapChickenWire1

Please check out the new products available now at www.katscrappiness.com.   This new die is a must-have!  I hope you like my shaker card and wishing you all a wonderful day!  Happy crafting!

————-SUPPLIES—————-


Gone Fishing’ Scrapbook Layout

I hope everyone’s having a great week.  Maria here on the blog with you today!  I am sharing a scrapbook layout, showcasing the Great Outdoors Fishing Paper Crafting Kit with I’d Rather be Fishing 3D stickers.  I have always wanted to use this Kit but never had a chance until now.


Here’s what I got to play with.  This Great Outdoors Fishing Paper Crafting Kit is a must-have!  It also comes with a 12×12 sticker sheet!


IMG_8415


I started out by printing my photos using my Canon Selphy Photo Printer.  I love this printer so much and I think every scrapbooker should own one.


IMG_8417


I chose the paper that I wanted to use for my layout and started planning where I wanted my photos to go.  I always do this step first every time I work on a scrapbook layout before I start adhering them onto the paper.  This gives me time to adjust them and plan on what embellishments I needed to finish my designs.


IMG_8416


I matted my photos with black card stock and adhered them to my layout.


IMG_8418


I started adding the embellishments to my layout and added the alphabet stickers that are included in the Great Outdoors Fishing Paper Crafting Kit.


IMG_8419


I think a scrapbook layout should always tell a story.  Without it, it’s just a photo album!  I always like to write the story with my own handwriting as it gives it a more personal touch.  Hopefully my children will be taking care of these books when I’m gone, and they will be able to pass it on to my future grandchildren.


PHPGoneFishin1A


Did I mention I love the stickers from the I’d Rather Be Fishing 3D Stickers?   That little fish looks so realistic!


PHPGoneFishin1C


I absolutely LOVE the alphabet stickers that are included in the kit.  The title made a bold statement on my layout.

PHPGoneFishin1D


Here’s the whole layout:


PHPGoneFishin1


I hope you guys enjoyed and got inspired today.  Please visit http://www.paperhouseproductions.com to check out all the supplies I used and listed below.  Have a wonderful day!


SUPPLIES:  The Great Outdoors Paper Crafting Kit and I’d Rather Be Fishing 3D Stickers

(We’re) Made For Each Other – M.F.E.O. with Ghost Inlaid Technique

Hello Kat Scrappiness fans! I hope you are all having a great week so far.  I’m back on the blog today sharing with you this cute card, featuring the Punny Snacks stamp set, the Condensed Lower Case Alpha Dies and the new Stitched Scalloped Rectangle Dies.  I love the new scalloped dies so much.

I don’t know about you, but I like to keep a stash of “just-because” cards to give to family and friends.  I love the “Ghost Inlaid Technique” that I added to this card using the Condensed Lowercase Alphabet Dies and even though it looks complicated, it really isn’t.  I have a process video for you all today (linked below) so I will keep this blog post short.

Here’s what the card looks like.  I added some cute girly, eyelashes to the soda image on the left side.

KatScrapMFEO1B

Also added some black polka dots to the whole background to finish it off.  I LOVE the cute little smiley faces from the Punny Snack stamp set.  They are adorable!

KatScrapMFEO1A

This M.F.E.O. Quote is one of my favorite scenes from the movie, Sleepless in Seattle.  I thought it was really funny!

KatScrapMFEO1

Here’s the YouTube process video if you would like to see how I made the card:

I hope I have given you some inspiration today.  Please visit www.katscrappiness.com today the supplies I used.  They’re also listed and linked below.  Have a wonderful day!

————–SUPPLIES—————-