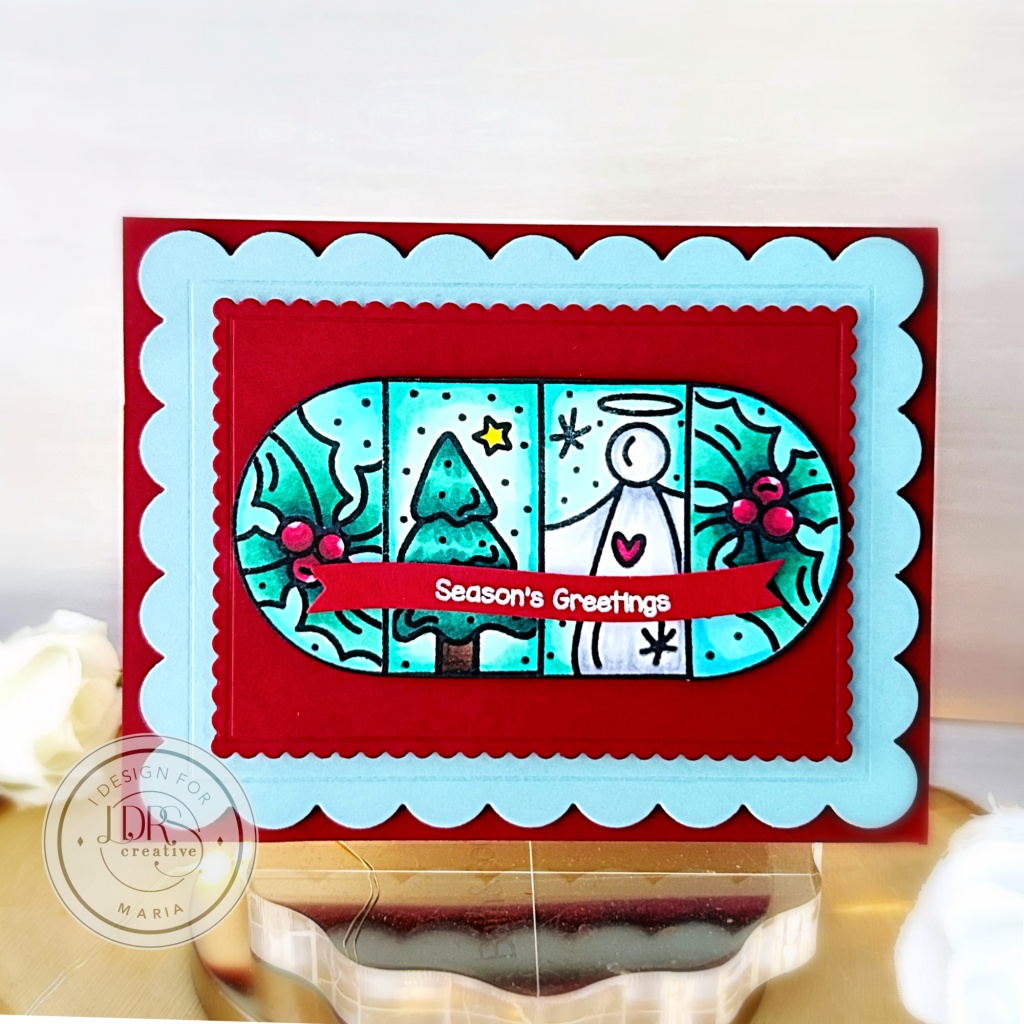
Hello LDRS Creative fans! I am so glad to share this easy, yet classy Christmas card, showcasing the Christmas Puzzle Stamps and Stencil Bundle. Pairing these sets would allow you to mix and match some festive images to create unique cards!
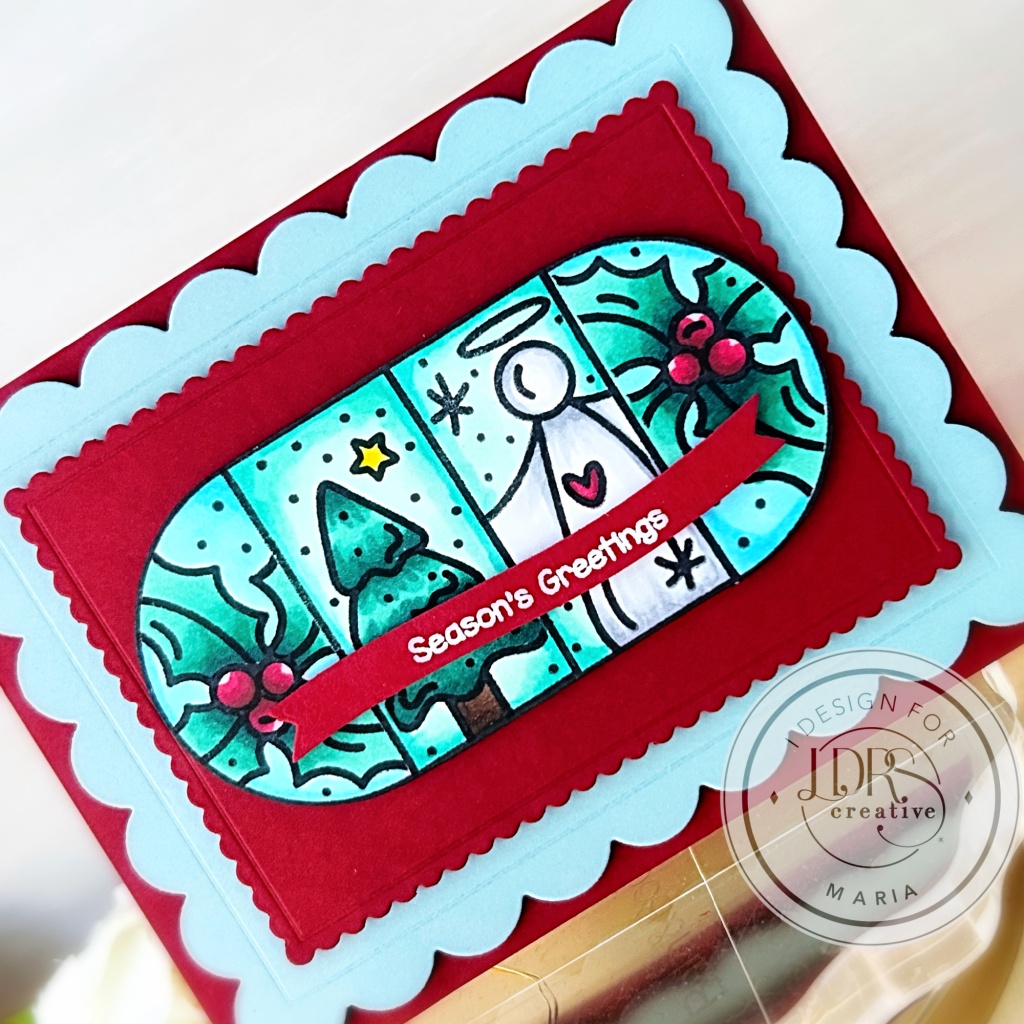
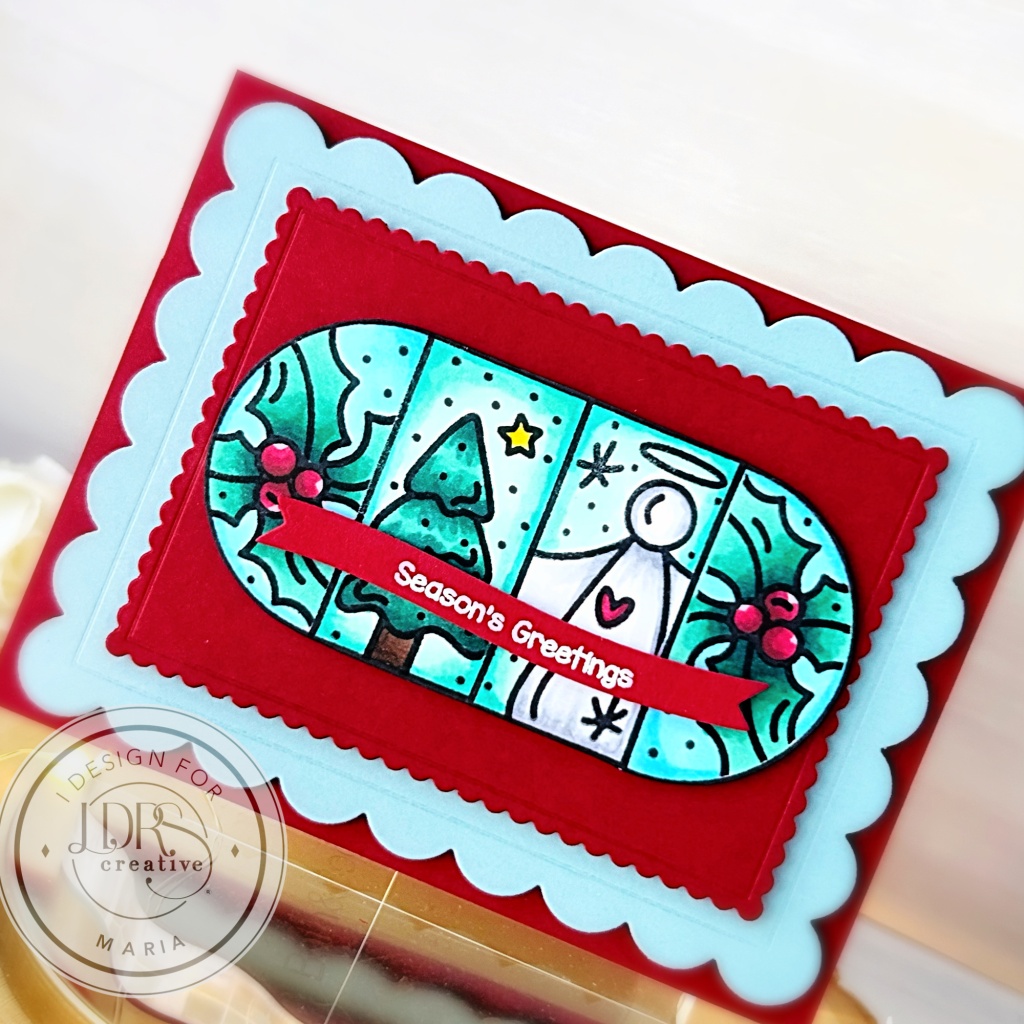
Next, I die-cut the red and blue card stock using the Mixed Scallop Rectangle dies and foam-mounted each piece on some A2-size notecard. I also foam-mounted the focal image to make it stand out and added a sentiment from the Christmas wishes stamp set to finish the card design. Here’s another look at the card:
I hope you like my project today and that you found the instructions simple to follow. Thanks for stopping by, and happy crafting!
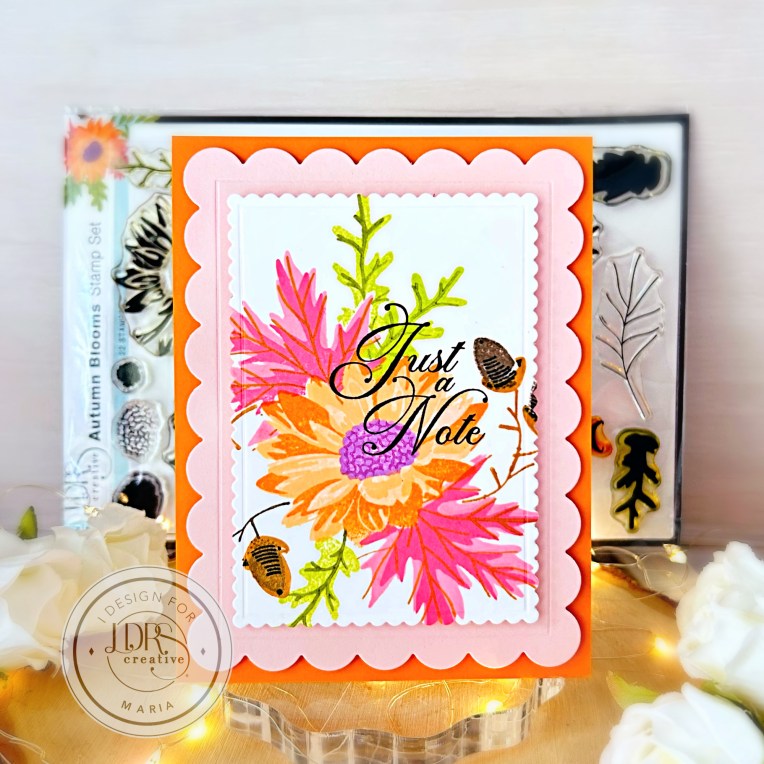
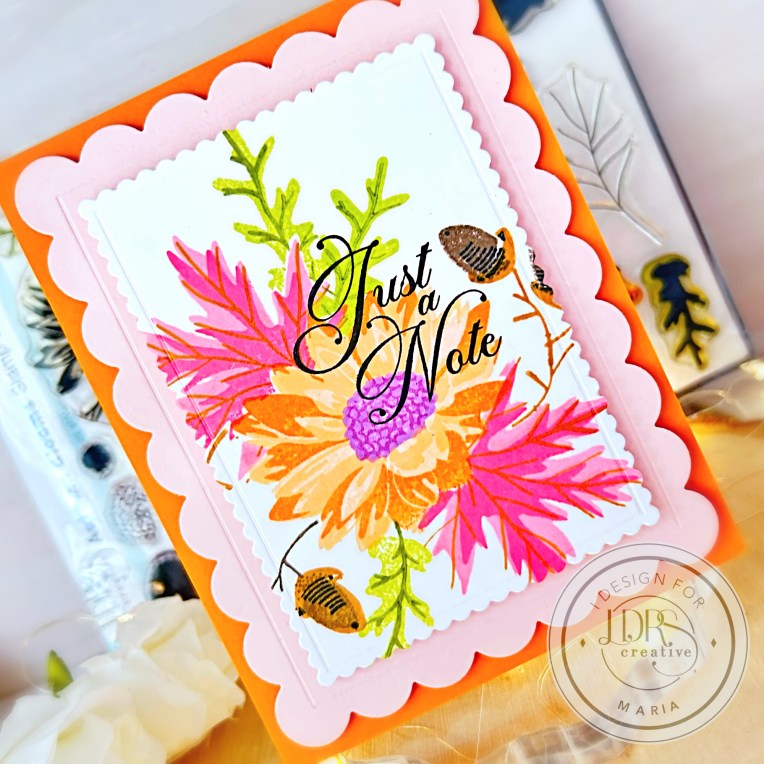
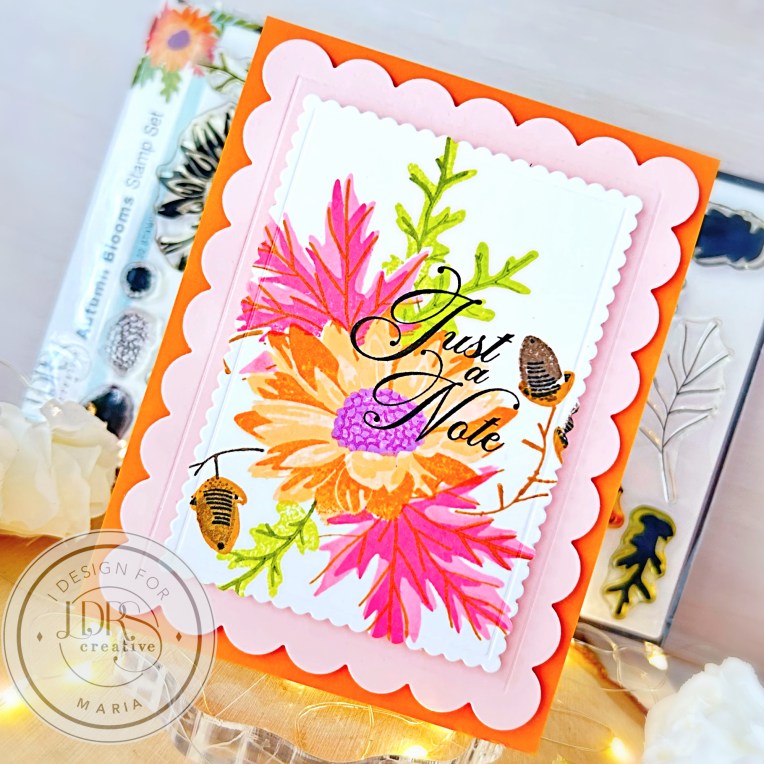
Hello LDRS Creative fans! It’s been very gloomy the last couple of days here in Florida, [before and] after hurricane Milton. I am just so grateful that the property damage was very minimal and we didn’t lose any power! I needed to create something colorful to cheer me up, so I grabbed the Autumn Blooms Stamp and Stencil Bundle.
Now comes the fun part of assembling the card! I used the second die from the Mixed Scallop Rectangle Die set and the largest die with some pink cardstock to cut out the main image. I enjoy layering these two! I added dimension by foam-mounting the focal image onto the pink scallop with foam adhesive.
Next, I added orange card stock to a white card base and foam-mounted the pink scallop on top for dimension.
I completed the card design by stamping the sentiment with Raven Hybrid ink from the Floral Swag Stamp Set. Here’s another look at the finished card:
I hope you enjoy this card and found the instructions easy to follow. The supplies used are linked in this post. Thanks for visiting and happy crafting!
Remove the stencil and the masking tape, and leave this panel to dry for about half an hour.
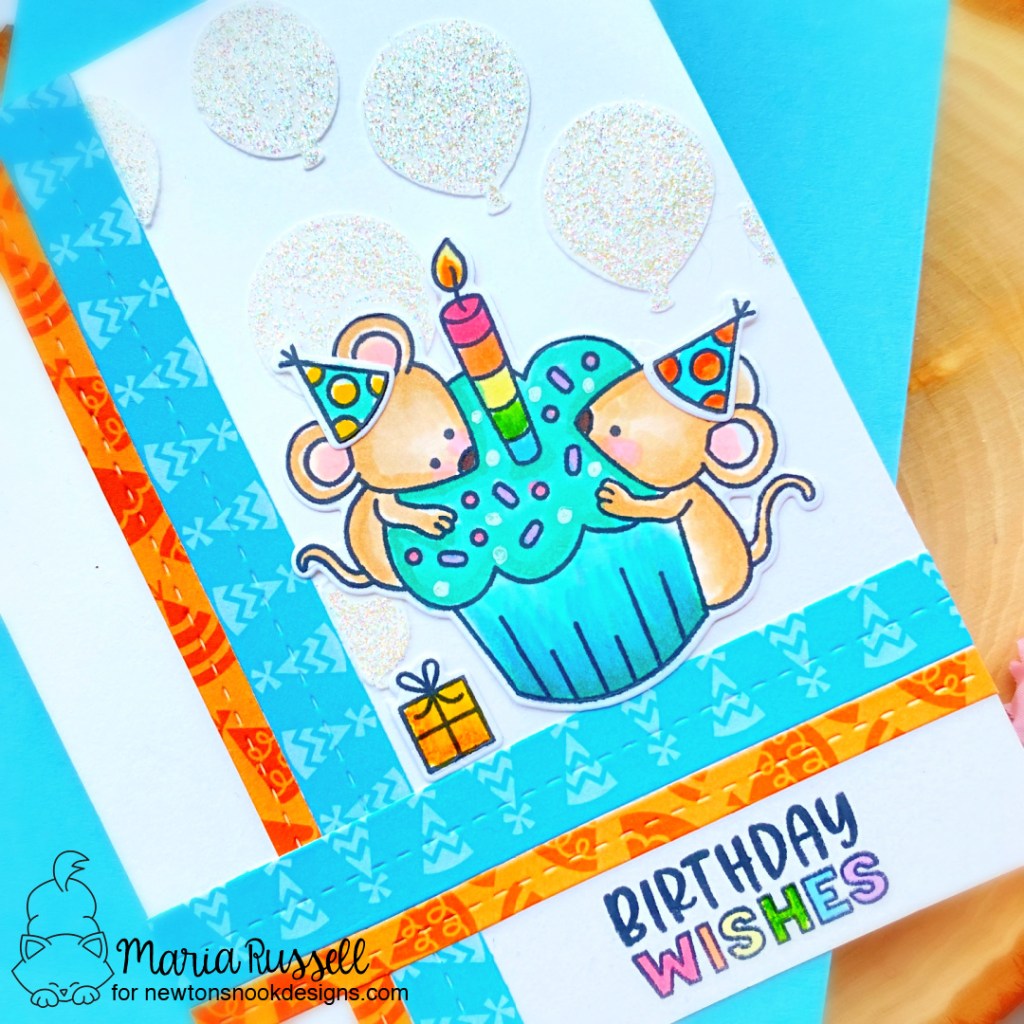
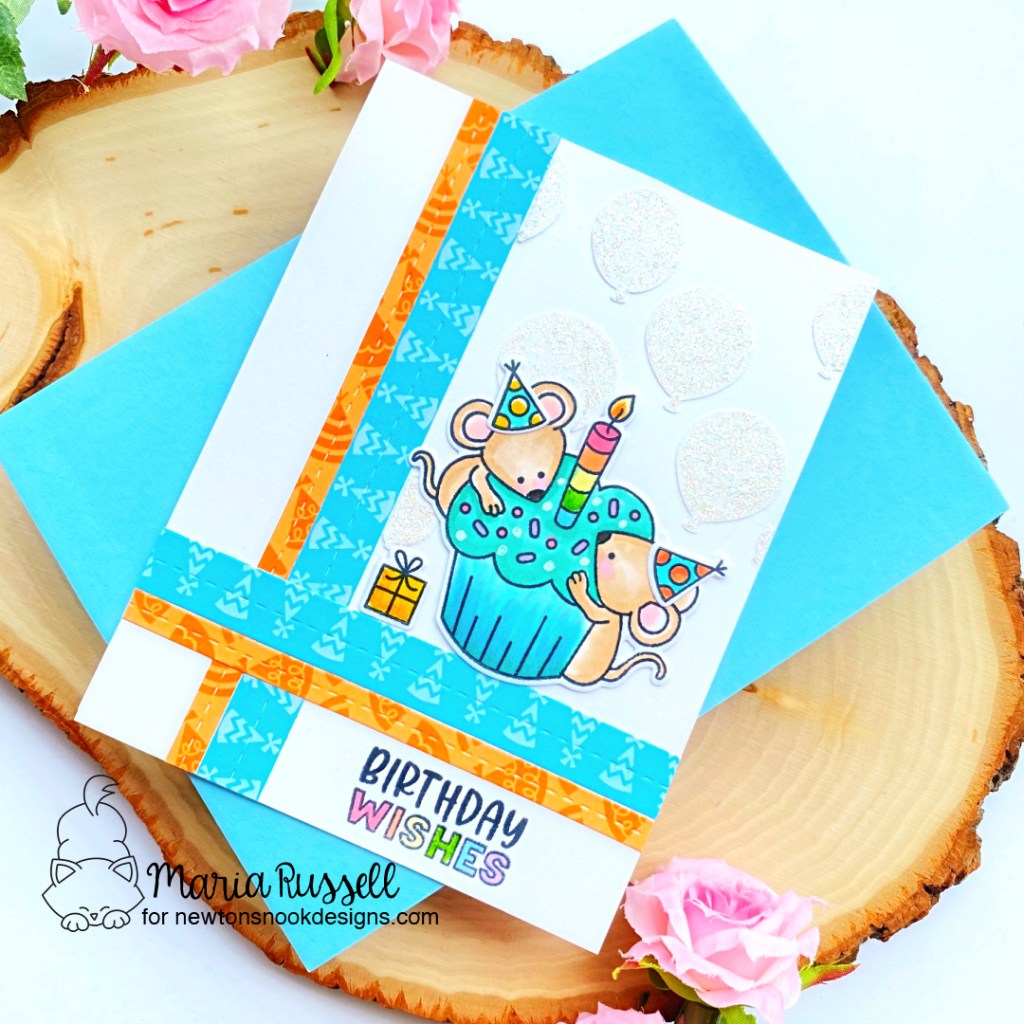
Adhere the colored images on the card with liquid glue.
Finish the card design by stamping the sentiment and color the word “wishes” using alcohol markers.
Here’s another look at the finished card:
This card is super simple and you can easily mass-produce this design to have some birthday cards in your stash.
I hope you like this project and got inspired. Below, you will find links to the supplies used to create this project(s). Where available, I use compensated affiliate links at no extra cost to you. Your support helps me to keep bringing you new projects and inspiration. Thank you for stopping by, and have an amazing day!
It’s the final Day of the Countdown to Confetti January Release by Reverse Confetti! The whole gang is here to show you all the amazing projects we’ve put together to encourage you to shop! Remember, all of the products are now available today!
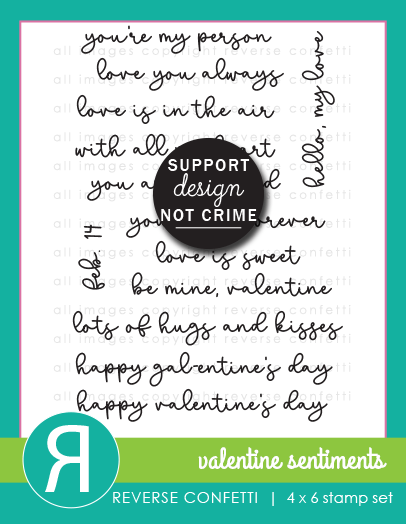
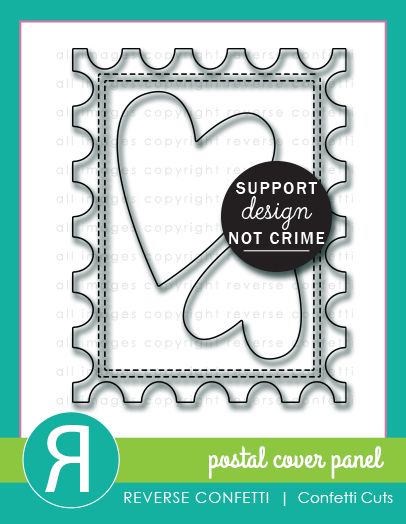
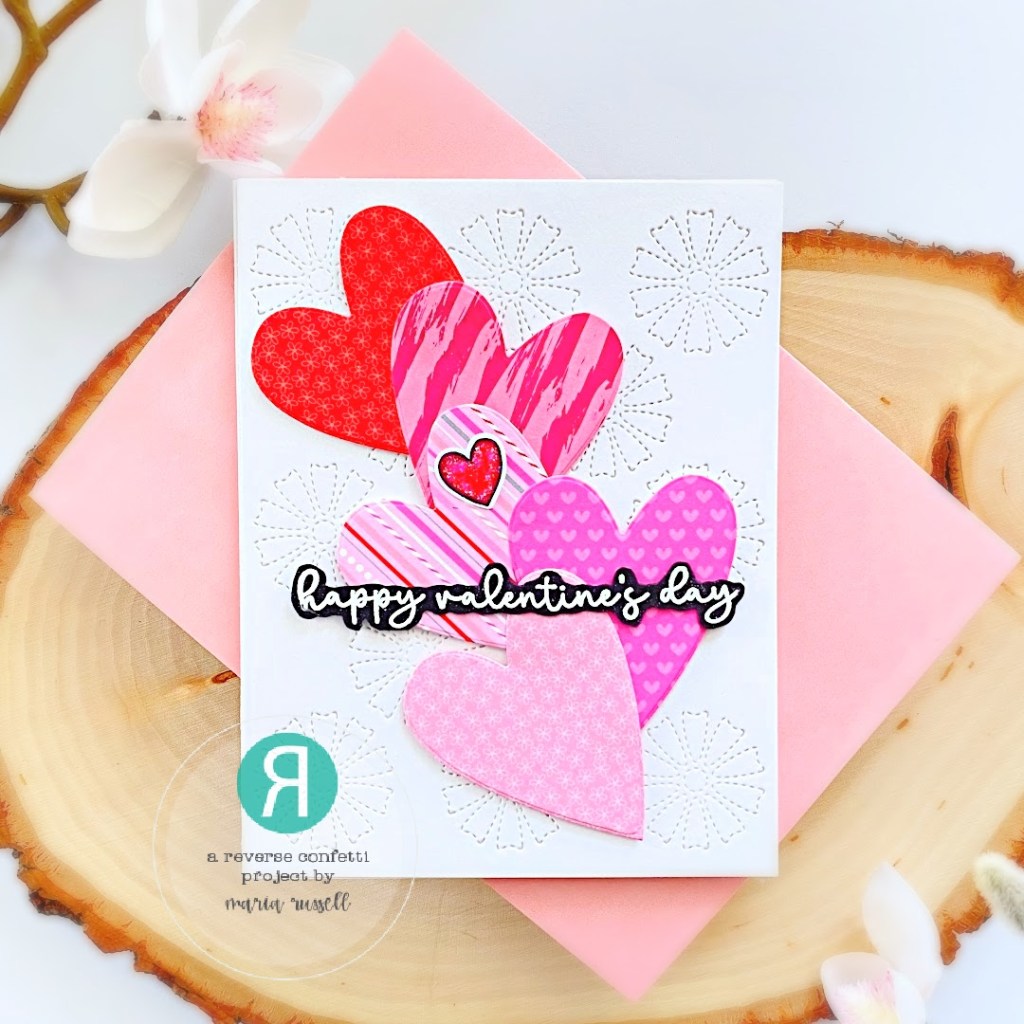
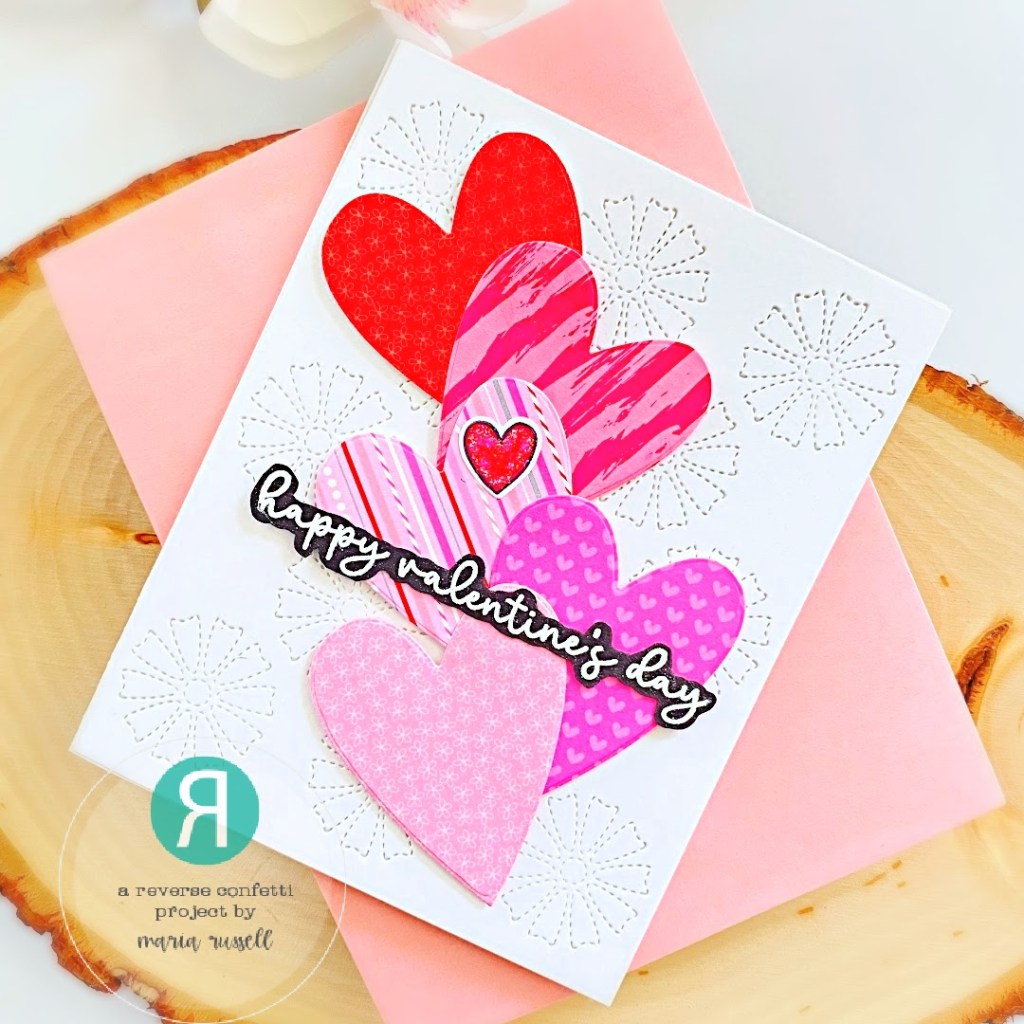
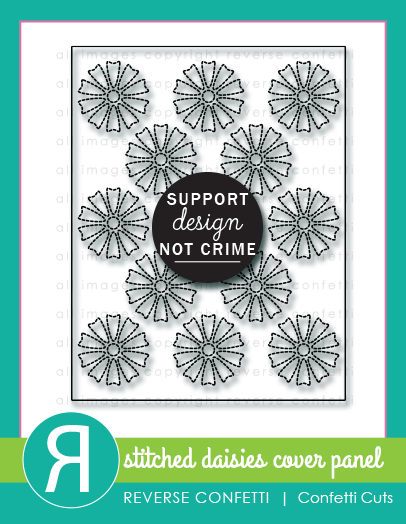
For my projects below, I used the Stitched Daisies Cover Panel, the hearts from the Postal Cover Panel, and the sentiment from the Valentine Sentiments stamp set.
Sometimes, simplicity is the key to a beautiful card. I die-cut the background panel using the Stitched Daisies Cover Panel Die and adhered on a white A2-size notecard. I die-cut the hearts using the medium heart die from the Postal Cover Panel die set on different colors of pattern paper. I layered the hearts and foam-mounted all of them onto the card.
The sentiment was stamped on some black card stock with VersaMark Ink. I sprinkled some white embossing powder and heat-set with my heating tool. I adhered the sentiment with foam and liquid adhesive.
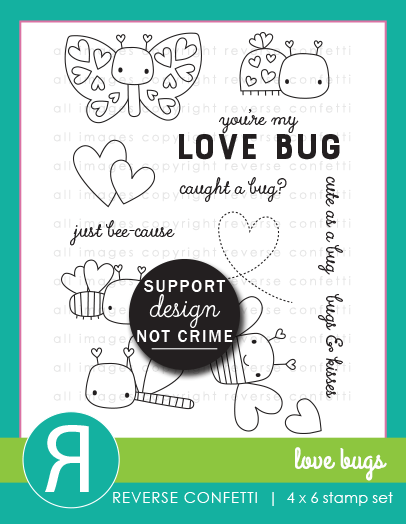
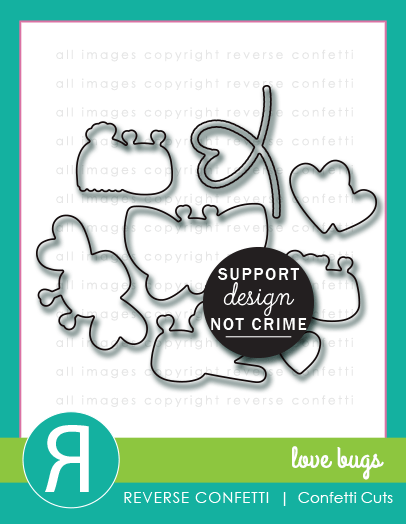
I finished my design by adding another heart from the Love Bugs stamp set and covered with Stickles.
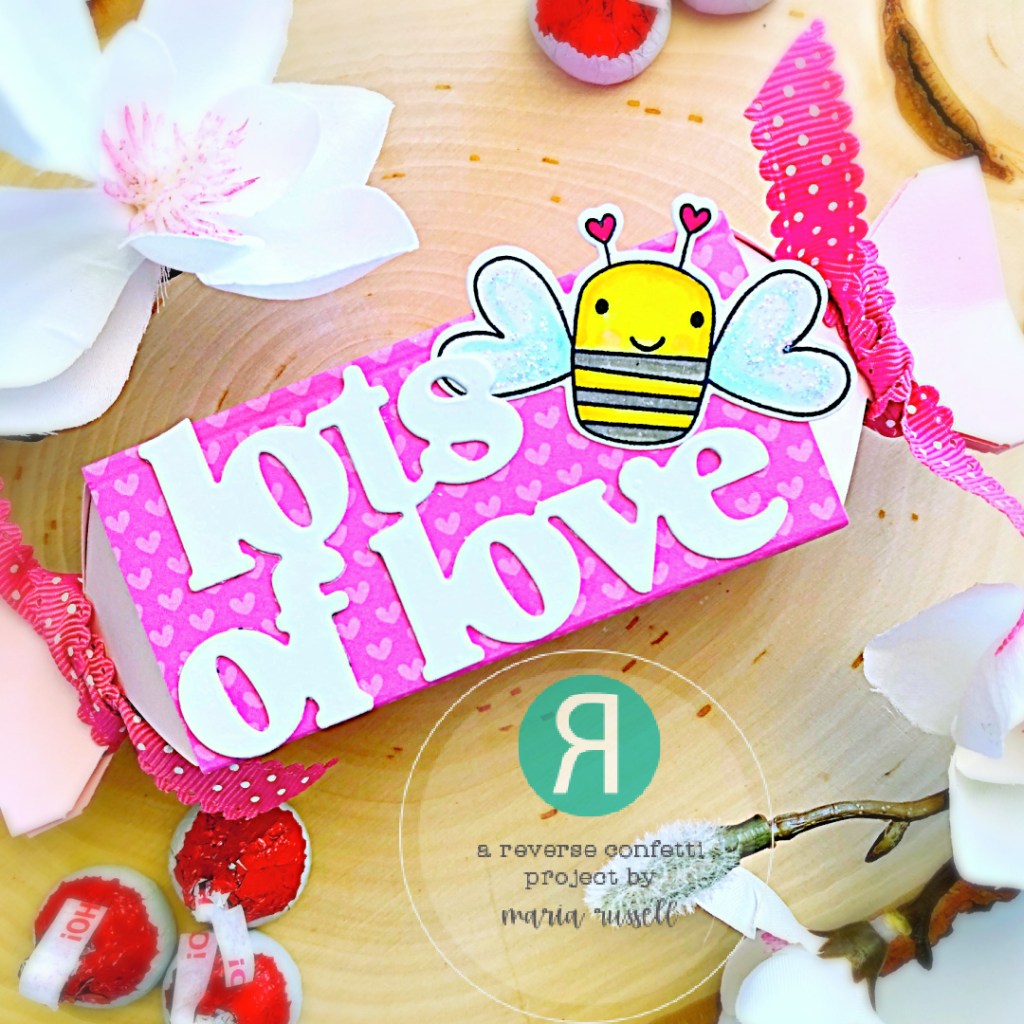
To go with this beautiful card, I decided to make a little treat box using a Punchboard from the collection. I filled it with some Hershey’s Kisses and closed both ends with some pink ribbon.
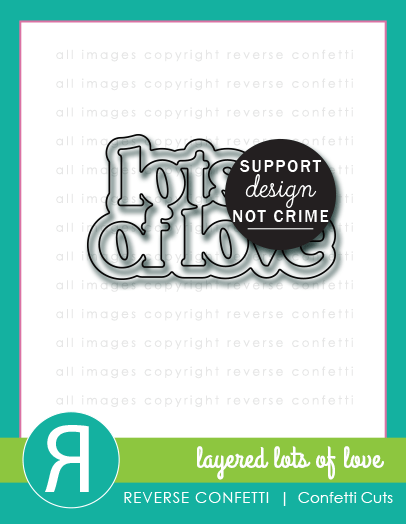
I added the die-cut sentiment using the Layered Lots of Love die set and adhered on the treat box with liquid glue. I finished this treat box by adding the cute little honeybee. Here are both projects again:
I hope you got inspired and like my projects this week! Hop along with us and see all the amazing projects prepared by the entire team!
It’s Day 3 of the Countdown to Confetti January Release by Reverse Confetti and we have more amazing products to show you! Remember, all of the products you will see during the reveals will be available on January 8th.
Don’t forget to leave a comment each day during reveal week here on the blog and on the Reverse Confetti FaceBook group for a chance to win the gift certificate.
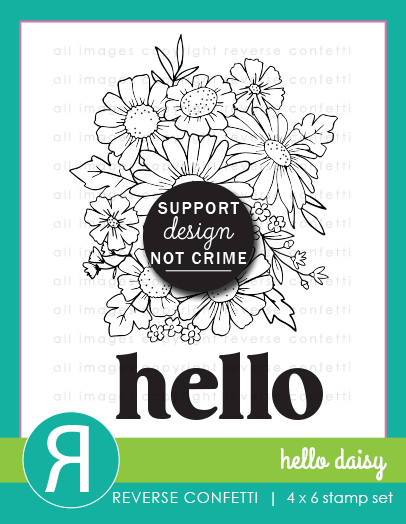
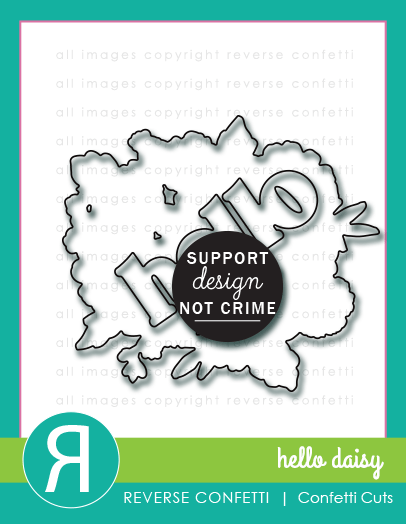
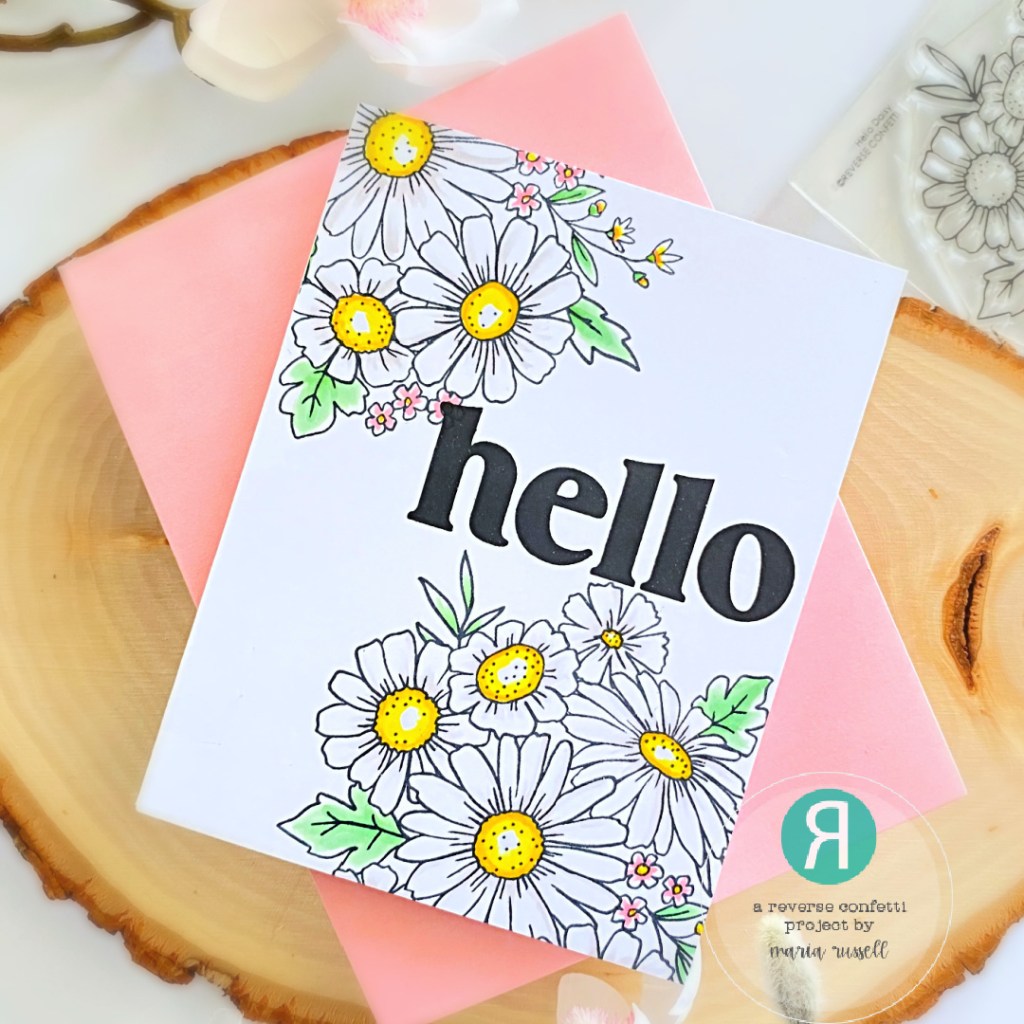
For today’s sneak peek, we are showcasing the Hello Daisy Stamp Set and Dies.
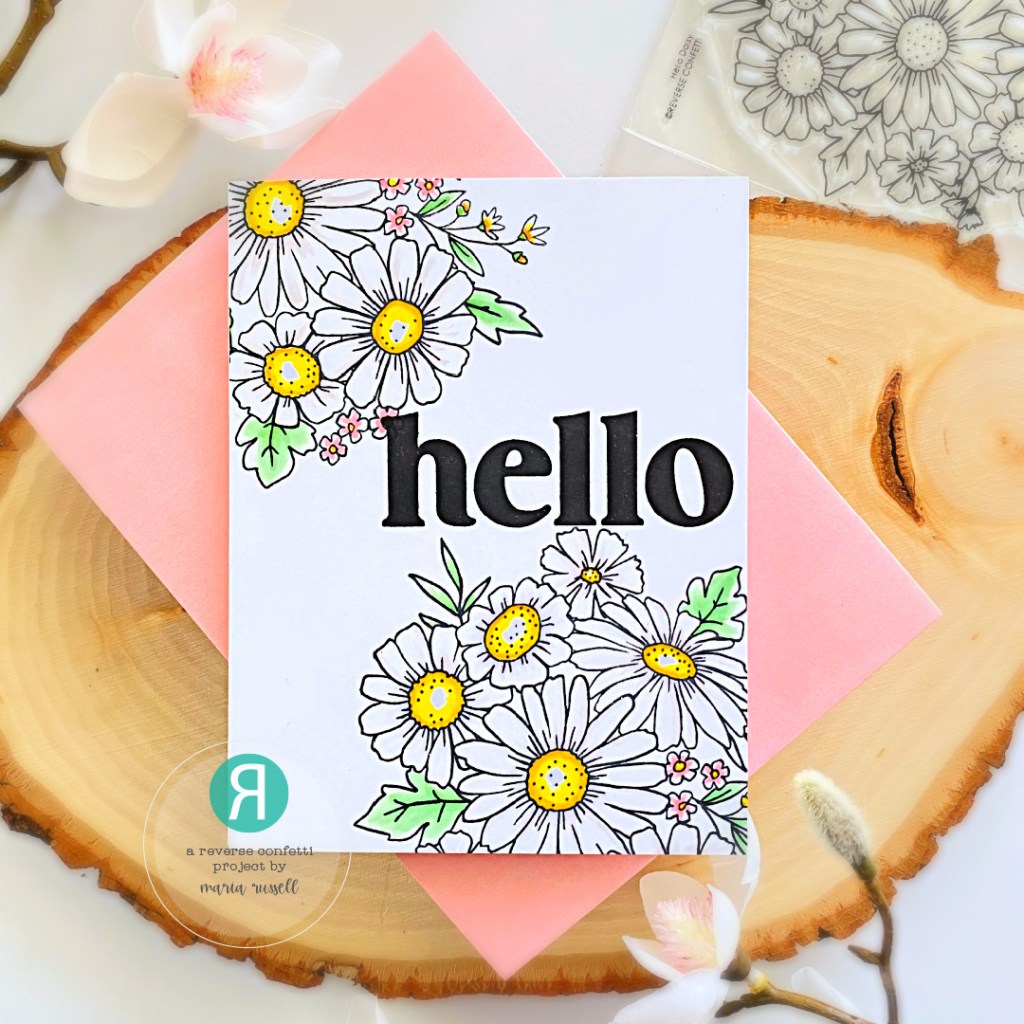
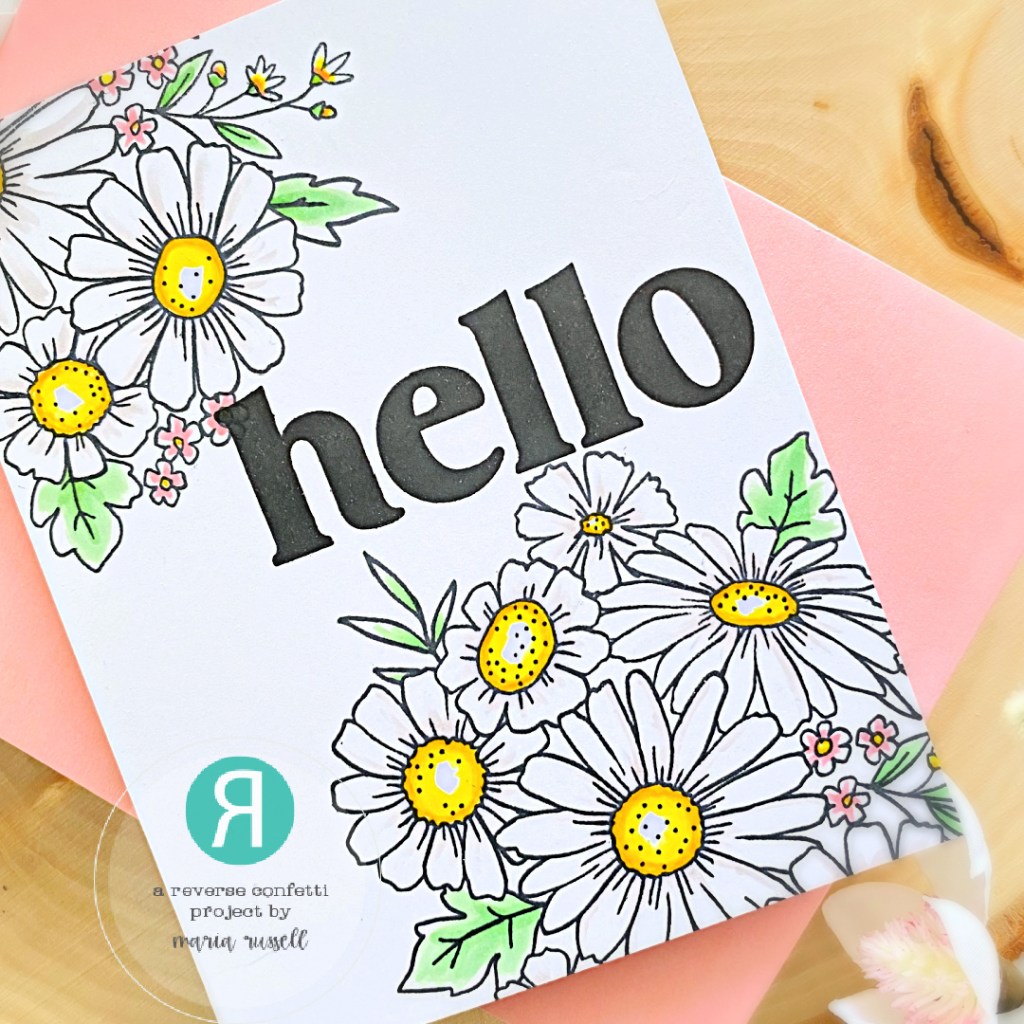
I am honestly 100% fan of daisies! They just remind me of happy days and sunshine! I didn’t think that this card below will need anything else because the images speak for themselves, don’t you think? You can easily mass-produce the card I have below for a little “hello, I love you-just-because” kind of thing!
I started by stamping the images in with Memento Tuxedo Black Ink on some Express-It blending card stock. I colored the images in with my Spectrum Noir alcohol markers. I adhered the panel on some A2-size notecard.
I stamped the sentiment “hello” a few times with some Versafine ink to get a good impression to make sure it stands out. Other than that, I didn’t think it needed anything else because the images just speak for themselves, don’t you think?
I hope you got inspired as much as I did! Don’t forget to check our tomorrow’s post fo the finale and get more inspiration from the whole team. Hop along with us for a chance to win the gift certificate. Check out the rest of the inspiration below:
It’s Day 2 of the Countdown to Confetti January Release by Reverse Confetti and we have more amazing products to show you! Remember, all of the products you will see during the reveals will be available on January 8th.
Don’t forget to leave a comment each day during reveal week here on the blog and on the Reverse Confetti FaceBook group for a chance to win the gift certificate.
For today’s sneak peek, we are showcasing the Poppies stamp set and coordinating dies.
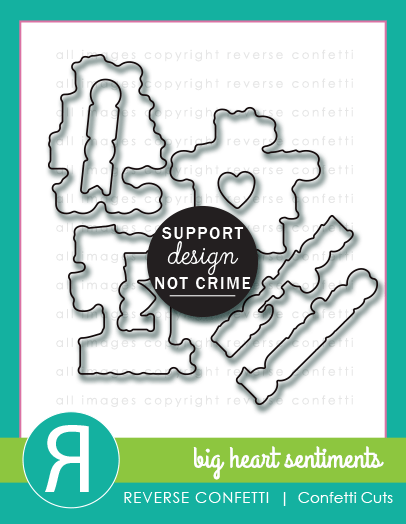
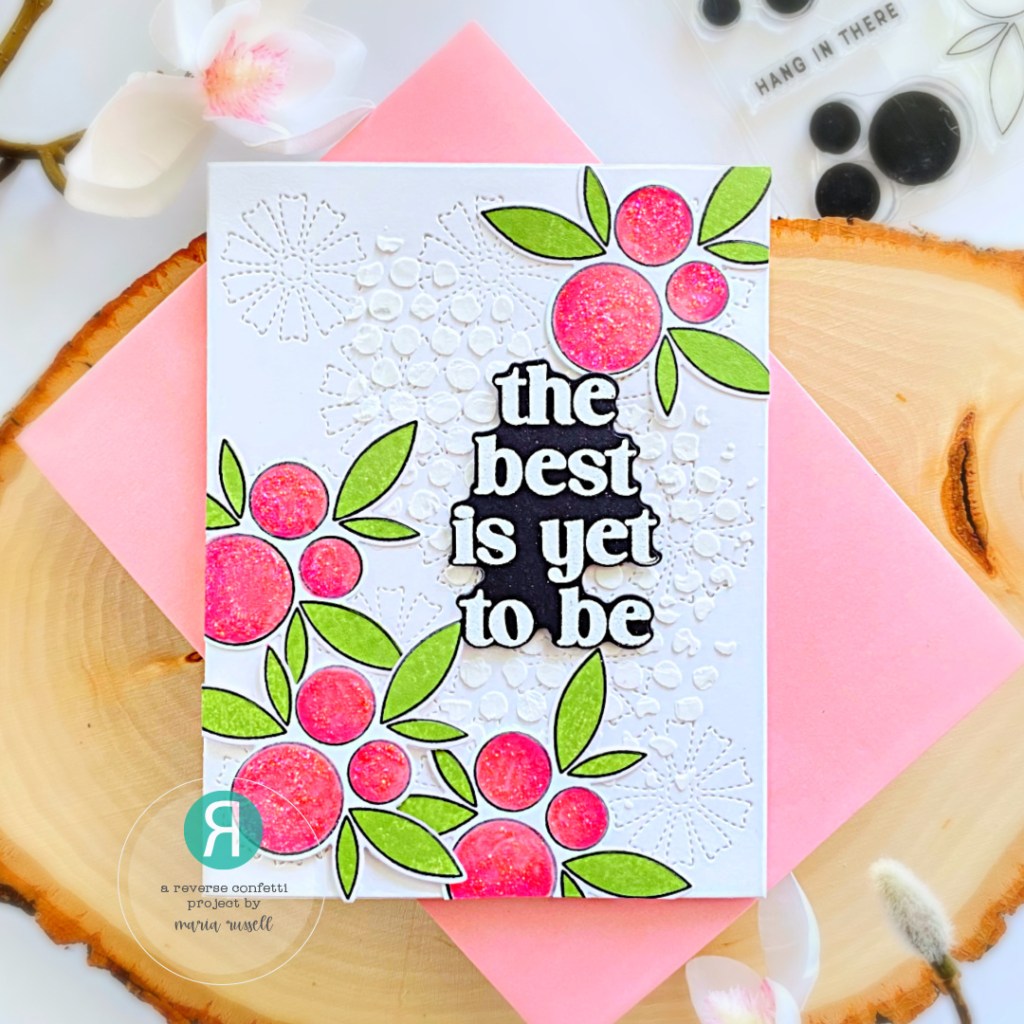
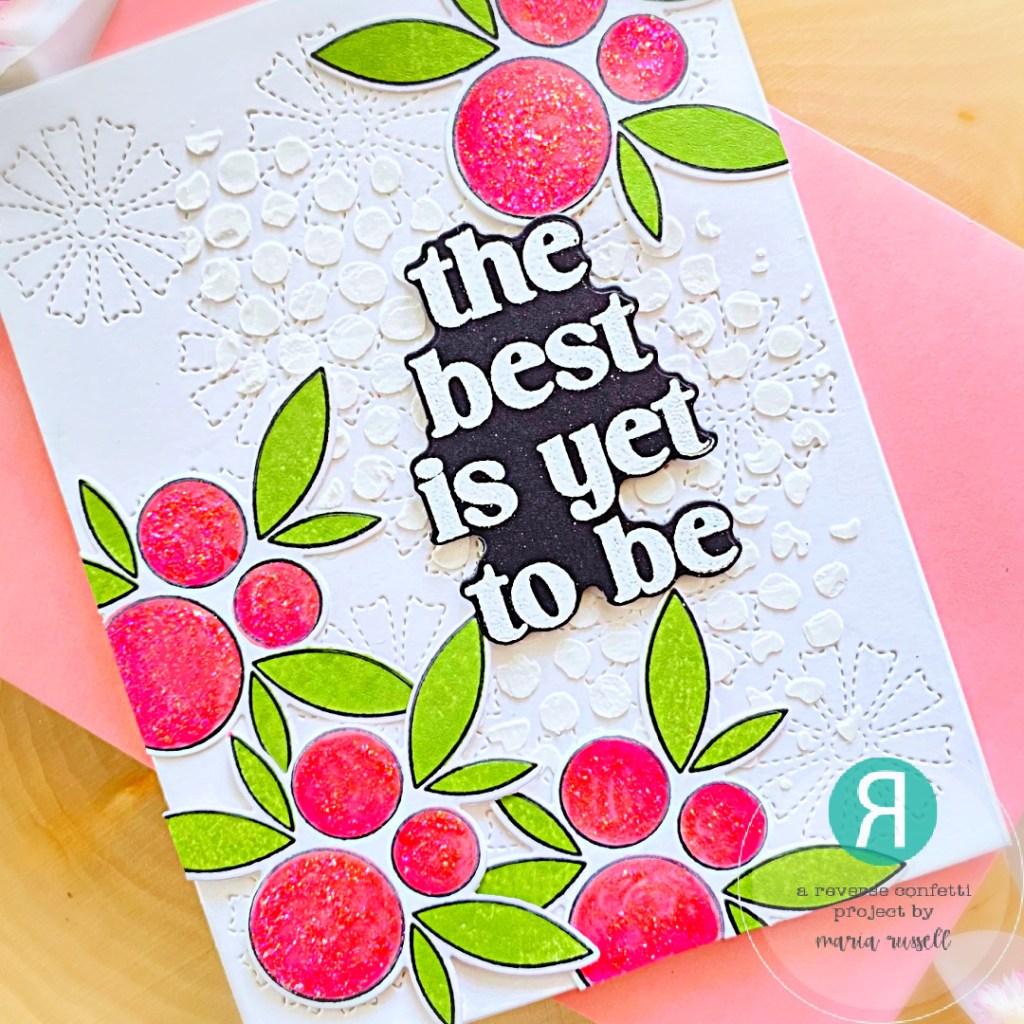
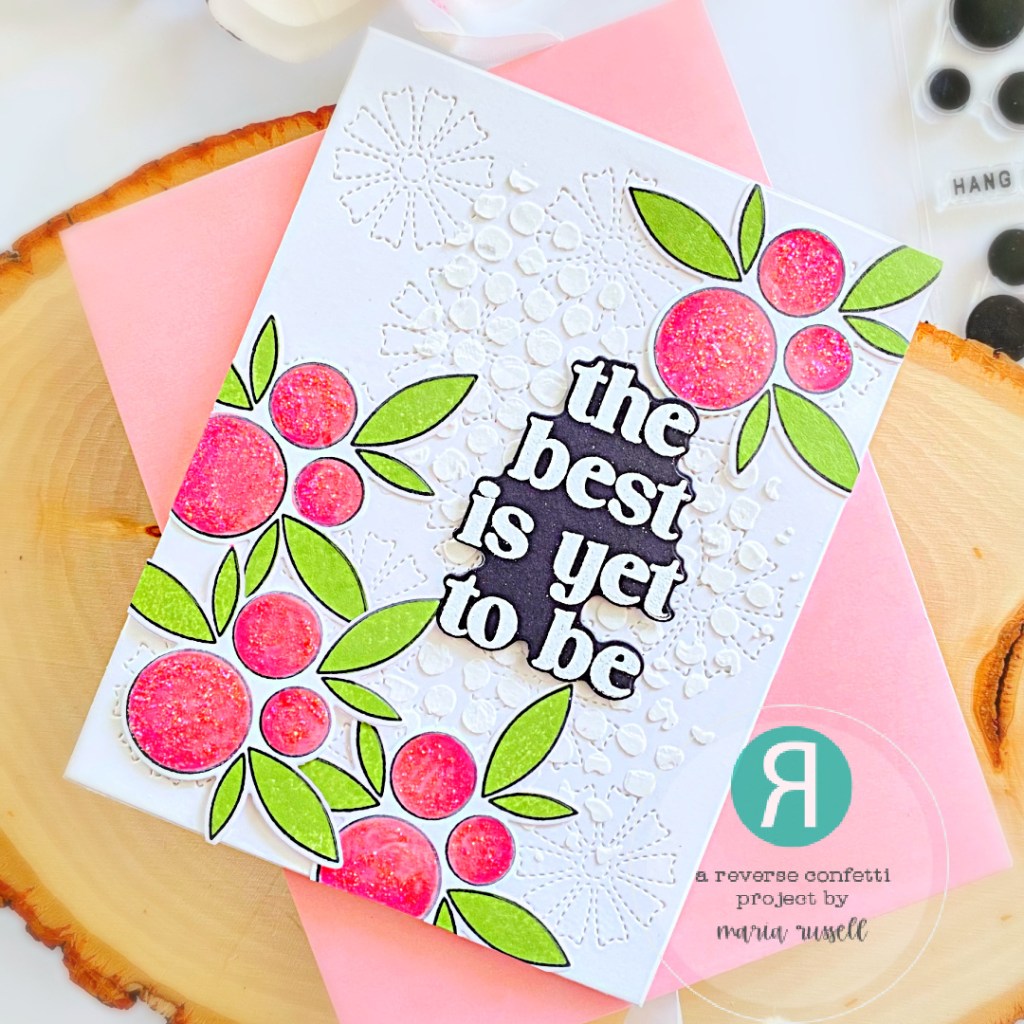
For my project today, I also used the Stitched Daisies Cover Panel and the Big Hearts Sentiments Stamp Set & Dies.
I started by stamping the images on some Express-It Blending card stock with Memento Tuxedo Black Ink. I used different shades of quick-dry dye inks in pink and green to add color. What I love about this stamp set is you don’t really need to use other mediums to color them in but I used my Spectrum Noir alcohol markers to create some depth and dimension to the images. I die-cut the images using the coordinating die.
Next, I die-cut the background panel using the Stitched Daisies Cover Panel with some Neenah Solar White Card Stock. I used a stencil from my stash and applied some texture paste for added texture and interest. I let this panel dry for about half an hour, then adhered on some A2-size notecard. I adhered the colored images on the card with either foam or liquid glue.
I stamped the sentiment with VersaMark ink on some black card stock and sprinkled some white embossing powder, then heat-set with my heating tool. I used the coordinating die to cut it out and foam-mounted the sentiment on the card for added dimension. Lastly, I applied stickles to the images for more interest to finish the design. Here’s another look:
Be sure to hop along with the rest of the team today! Comment along the way for your chance to win a Reverse Confetti gift certificate and don’t forget to check the Reverse Confetti FaceBook Group and leave a comment there as well! I hope you will come back tomorrow to see more of the new release!
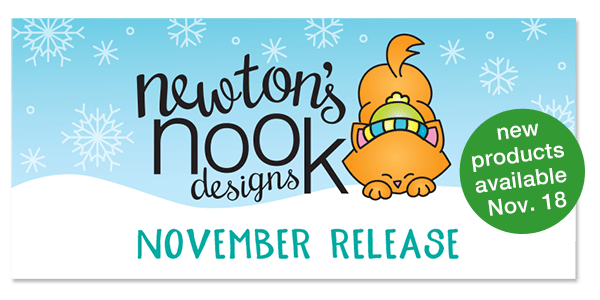
It’s the last day of the reveals by Newton’s Nook Designs and we are featuring three products today. If you haven’t hopped along with us yet, now is a great time to catch up. You have a chance to win the stamp set being revealed each day so please read through ’til the end of the blog post to find out more info. [Just a little important note: I know some of you had difficulties finding the comments section. If you would like to leave a comment to participate in the giveaway, the “comments section” will only be ever visible when a single post on WordPress is being viewed. Please click on this particular blog post and you will be able to leave a comment below. Thank you!]
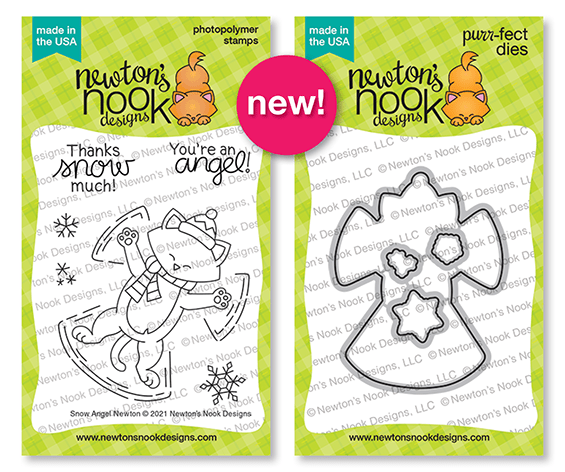
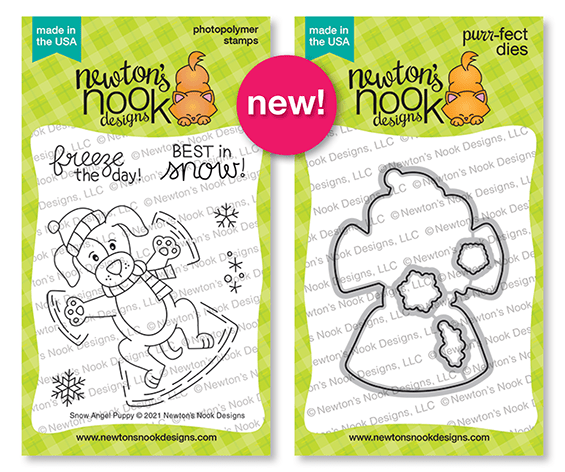
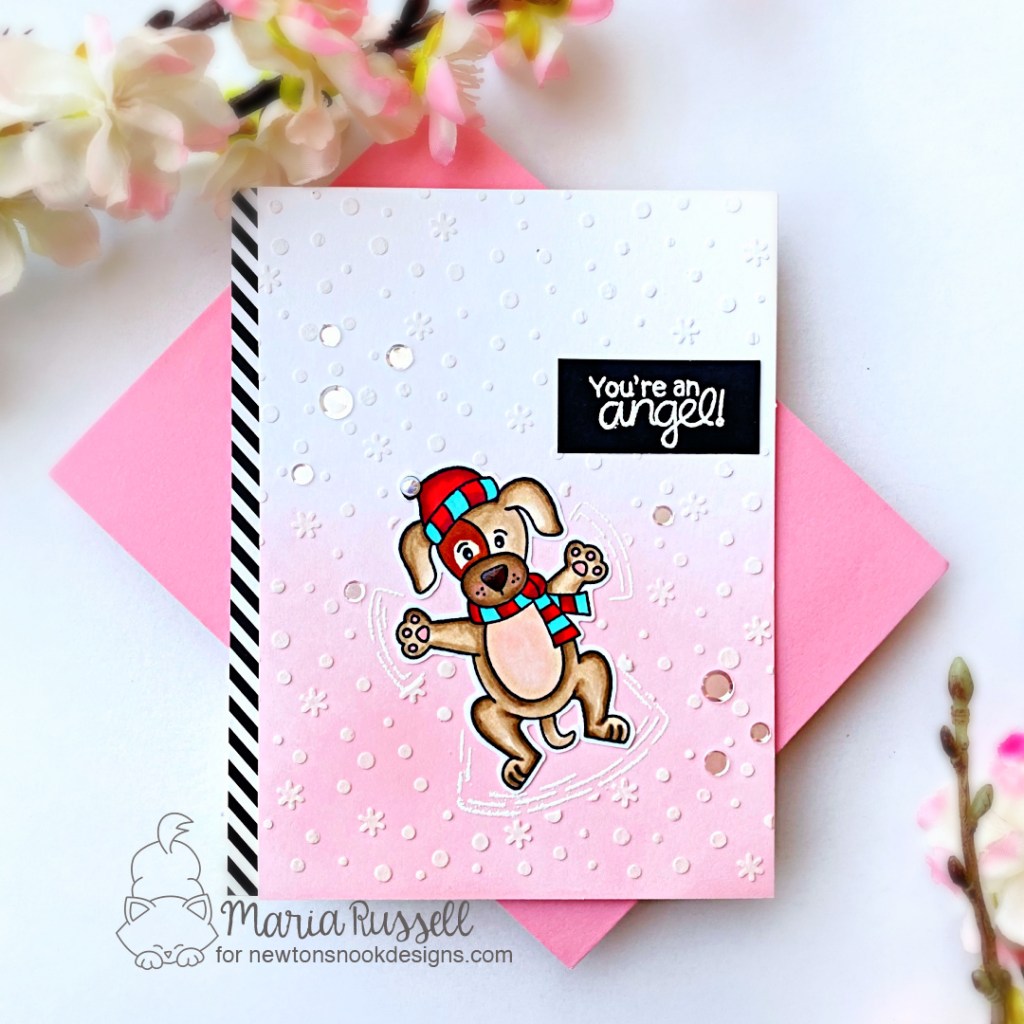
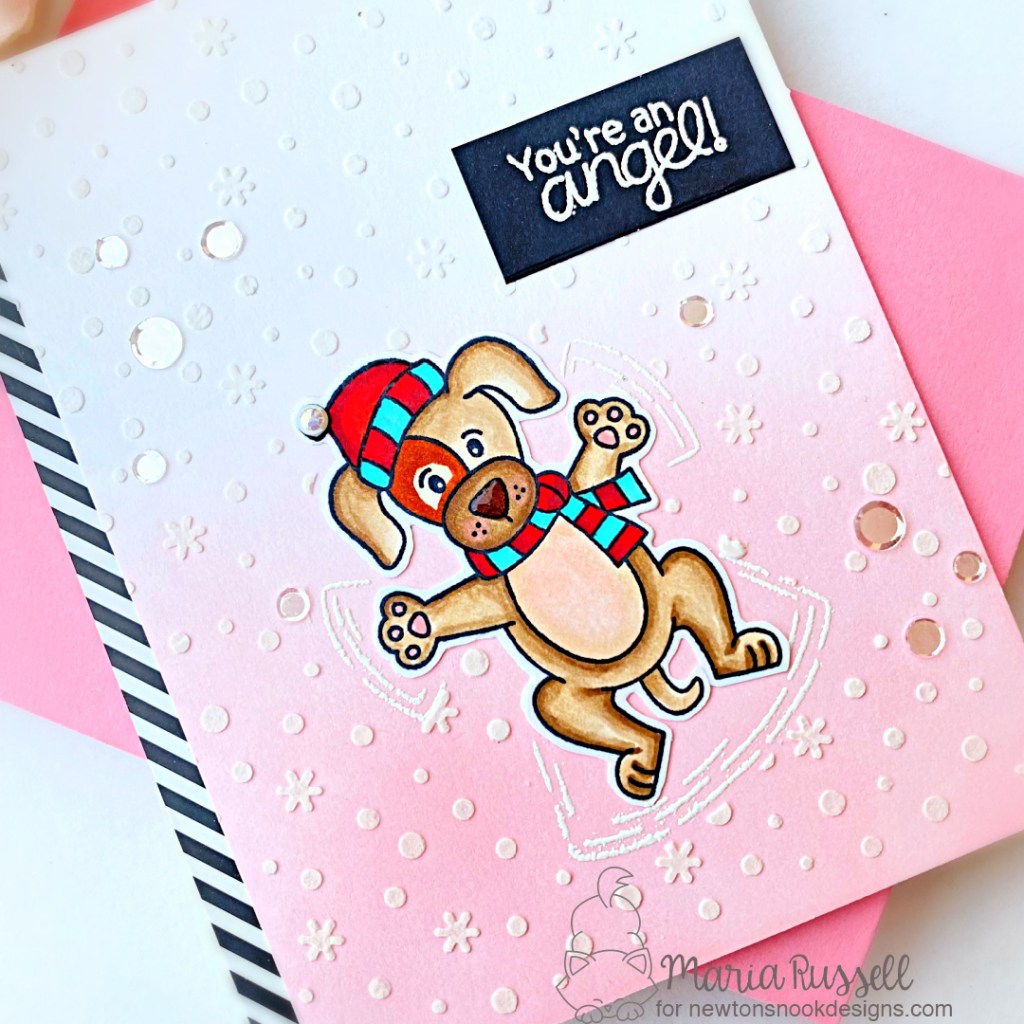
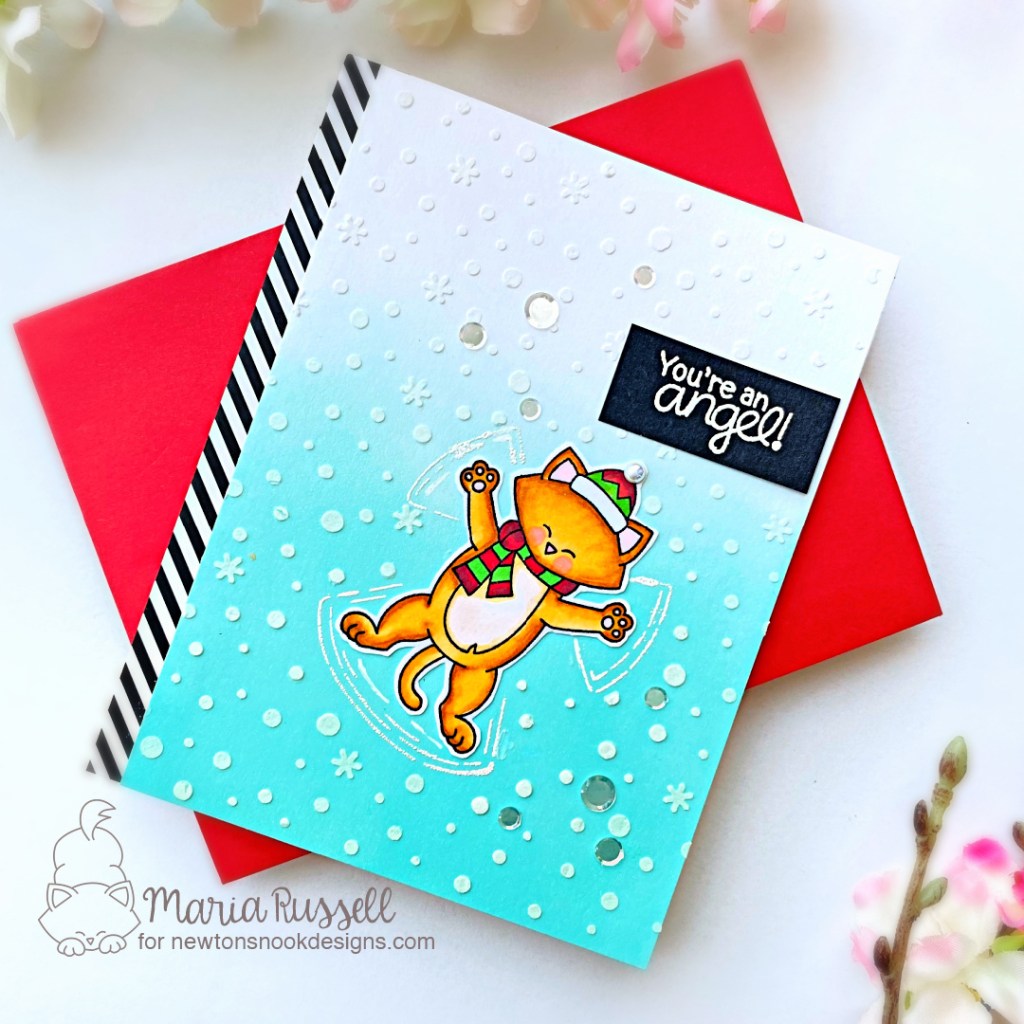
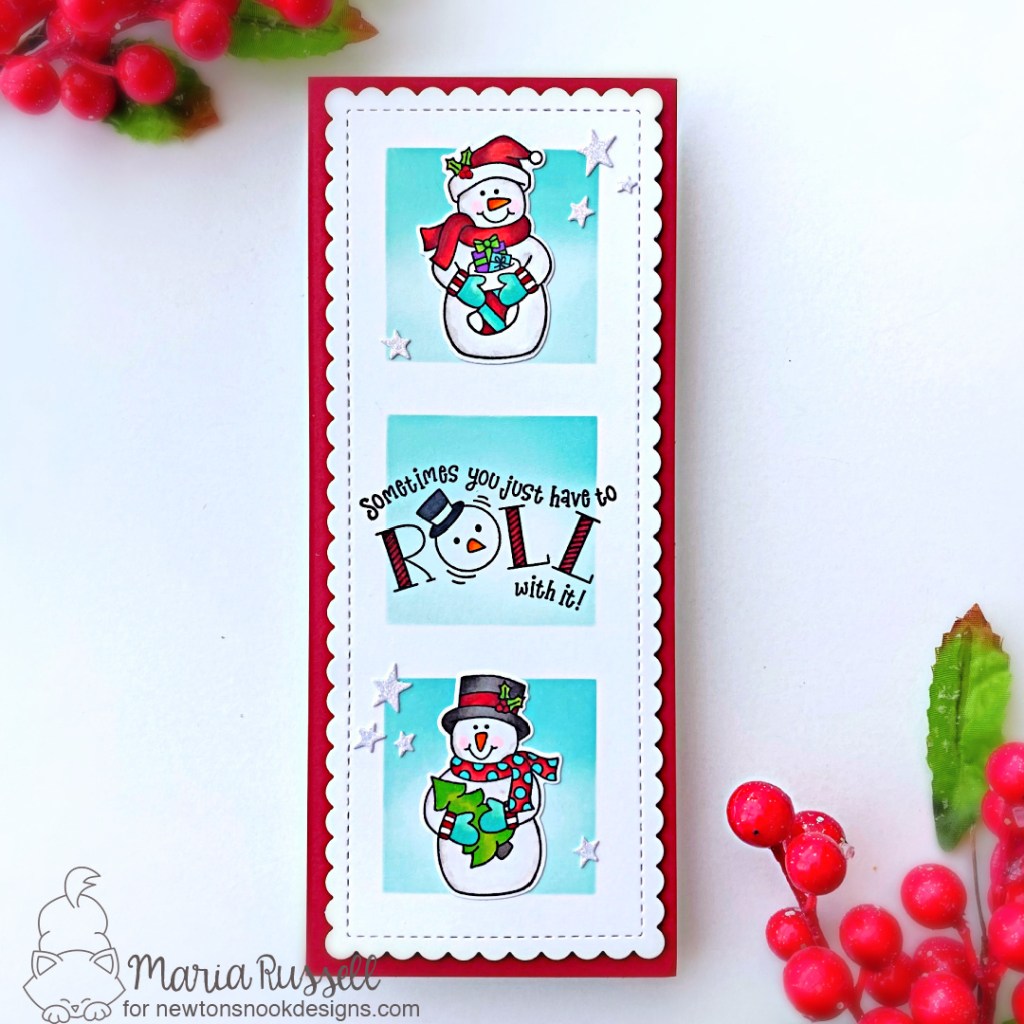
For Day 3, we are showcasing the Snow Angel Newton Stamp Set and Dies, Snow Angel Puppy Stamp Set and dies and the Roll With It Stamp Set.
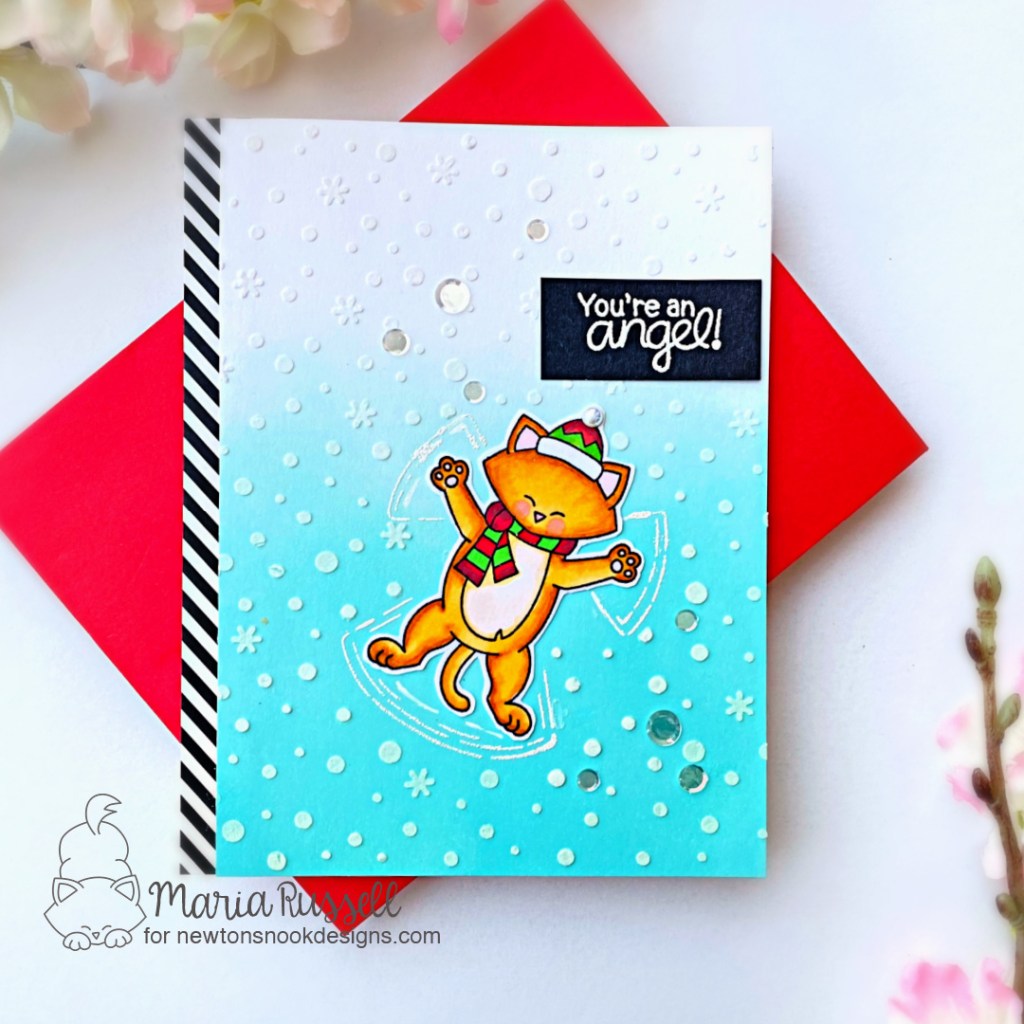
The first and second card samples are completely the same design. I started by stamping both images from the Snow Angel Newton and Snow Angel Puppy on some Neenah Solar white Card Stock. I colored the images in with alcohol markers and die-cut using the coordinating die. I did use my precision snips to cut out the “wings”.
Next, I ink-blended two panels (measuring 4 x 5 1/4) of Bristol Smooth white card stock with Salvaged Patina (for the blue card) and Kitsch Flamingo (for the pink card. I stamped the images on both panels with Versamark ink and embossed the image with white embossing powder and heat-set with my heating tool. I used the coordinating die and die-cut some masking paper to mask off the images. Since I was planning to add texture paste to the ink-blended backgrounds, I didn’t want the image covered with paste.
I used the Petite Snow stencil and texture paste for added texture to the background. Using Therm-O-Web’s Stencil Pal made it easier to spread the paste evenly on both panels. I removed the mask and set both card panels aside to let it dry for half an hour.
I adhered the colored images on the card with liquid glue. I also stamped the sentiment on black card stock with Versamark ink and heat-set with the heating tool, then adhered on the panel with liquid glue.
Lastly, I added the black & white stripes pattern paper on two A2-size notecards, then added the focal panel with liquid glue.
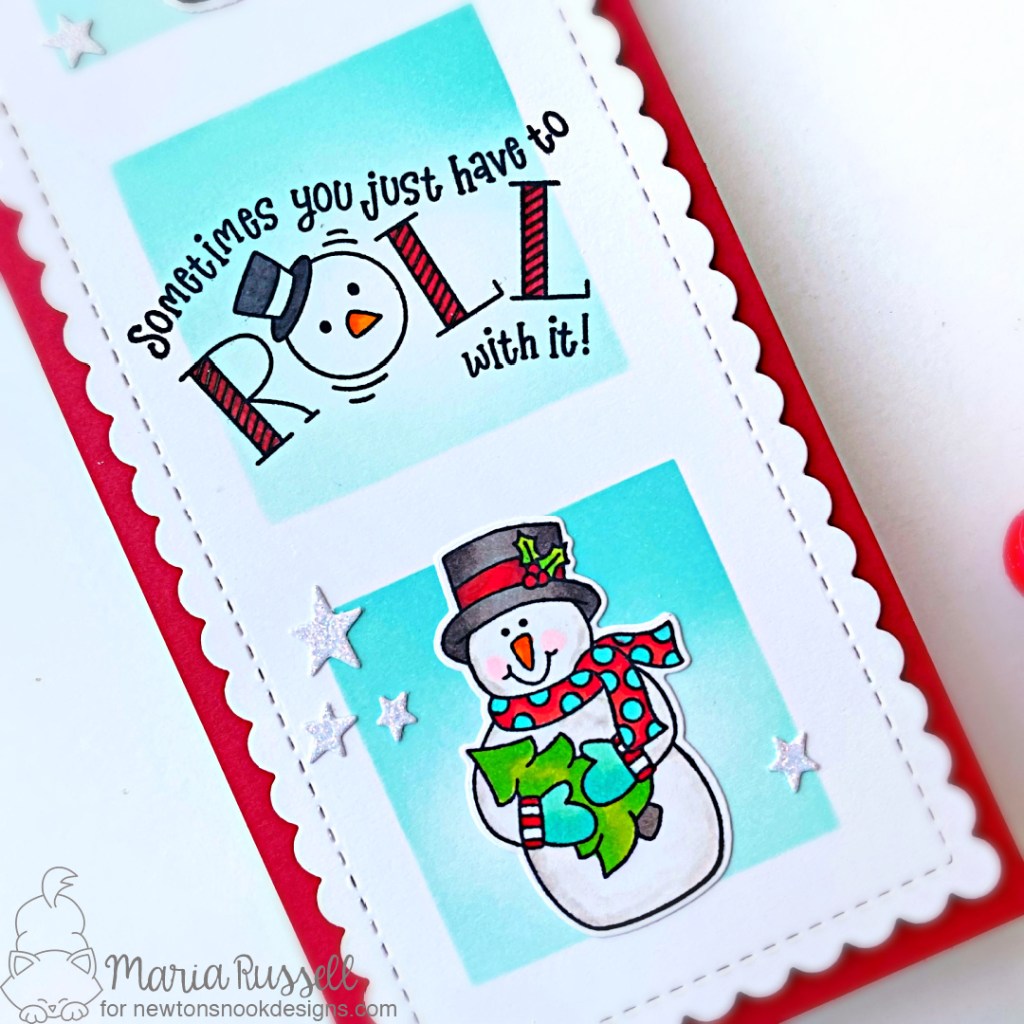
For my next card, I repeated the same steps above for stamping and die-cutting using the images from Snow Much Cheer.
I foam-mounted the focal panel on some Red Slimline card base measuring 8 1/2 by 3 1/2. I adhered the images on the card and stamped the sentiment in t he middle square with Memento Tuxedo black ink. I colored the letters and the snowman’s head with alcohol markers.
I finished my card design by adding some glittered stars. I love how this card turned out!
So there you have it folks! If you hopped along with us throughout this week, I’d LOVE to hear what your favorites are! I hope you have been inspired by the design team all week long! The products will be available tomorrow so grab your favorites first thing before they sell out!
Would you like to win the “Snow Angel Newton ” or the “Snow Angel Puppy” Stamp Set? We will choose ONE lucky winner for each stamp set!
Here’s how to win: Comment on the NND blog and Design Team blogs (see list below)! Thewinner will be chosen at random from the collective reveal posts. Make sure to check out each of their blogs and comment for your chance to win. You will not know which blog has been chosen so the more you comment on the better your chances are of winning! You have until Wednesday November 17th at 9pm ET to comment — winners will be announced on the blog post on Thursday, November 18th.
Check out all the awesome Design Team Blogs below to enter:
It’s the last day of the reveals by Newton’s Nook Designs and we are featuring three products today. If you haven’t hopped along with us yet, now is a great time to catch up. You have a chance to win the stamp set being revealed each day so please read through ’til the end of the blog post to find out more info. [Just a little important note: I know some of you had difficulties finding the comments section. If you would like to leave a comment to participate in the giveaway, the “comments section” will only be ever visible when a single post on WordPress is being viewed. Please click on this particular blog post and you will be able to leave a comment below. Thank you!]
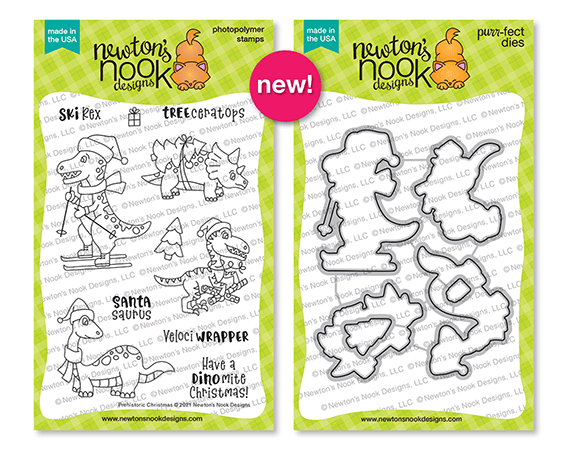
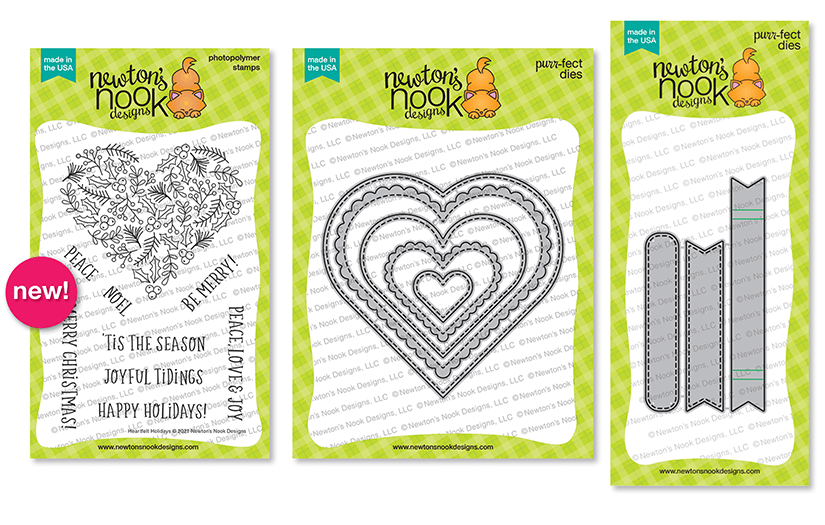
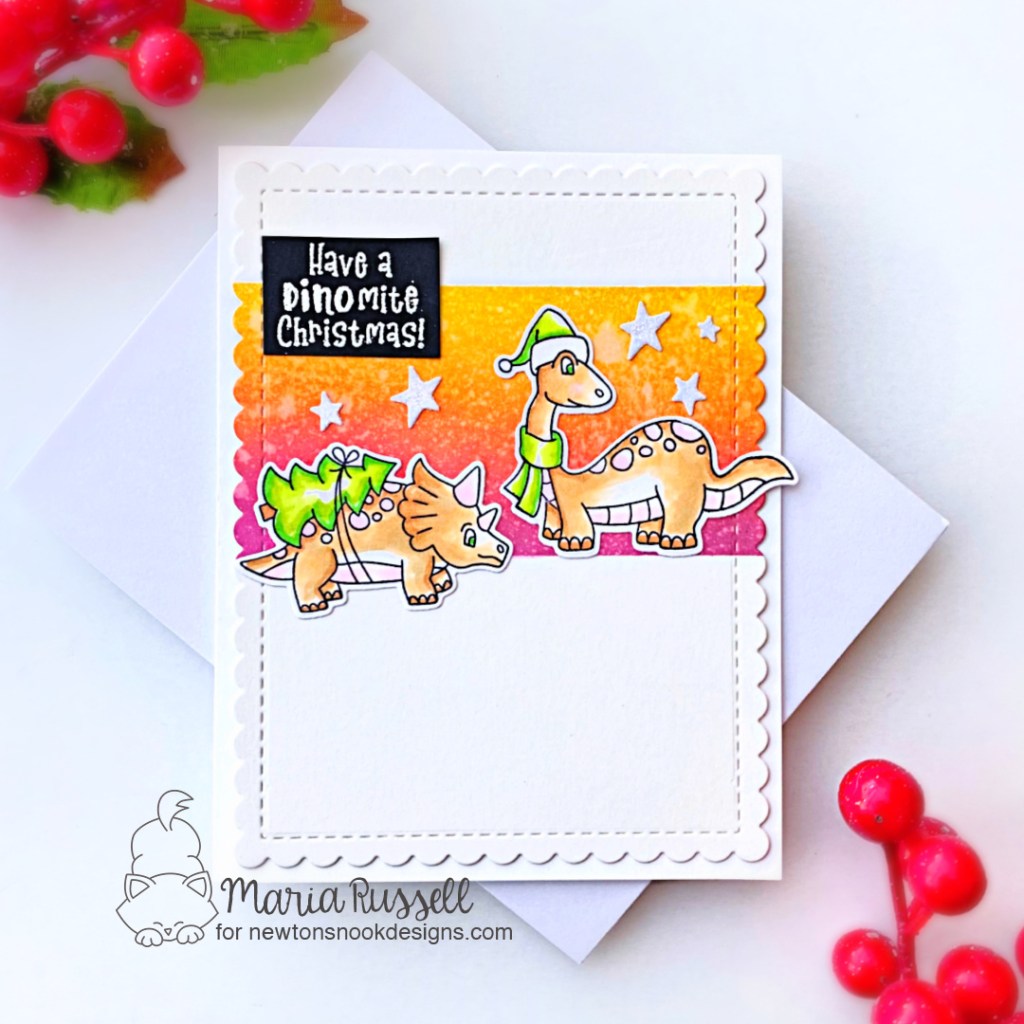
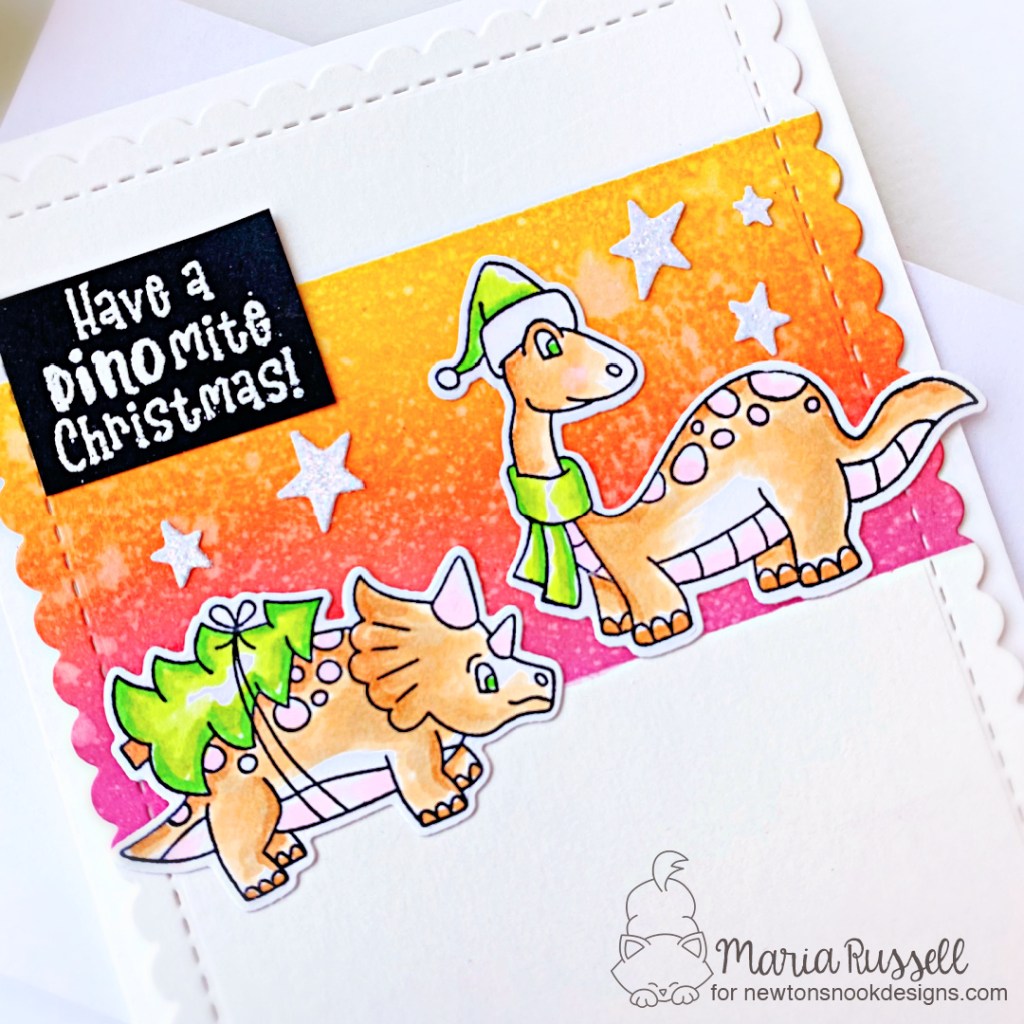
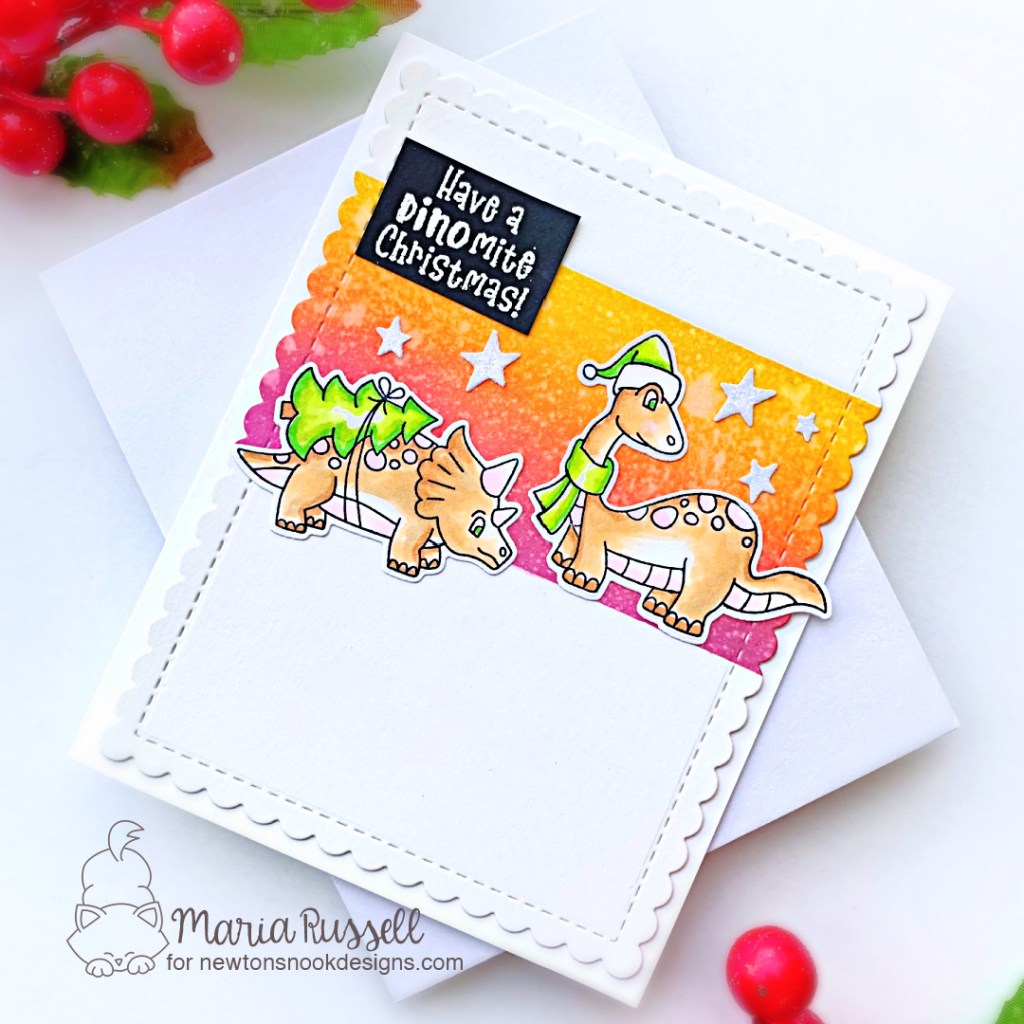
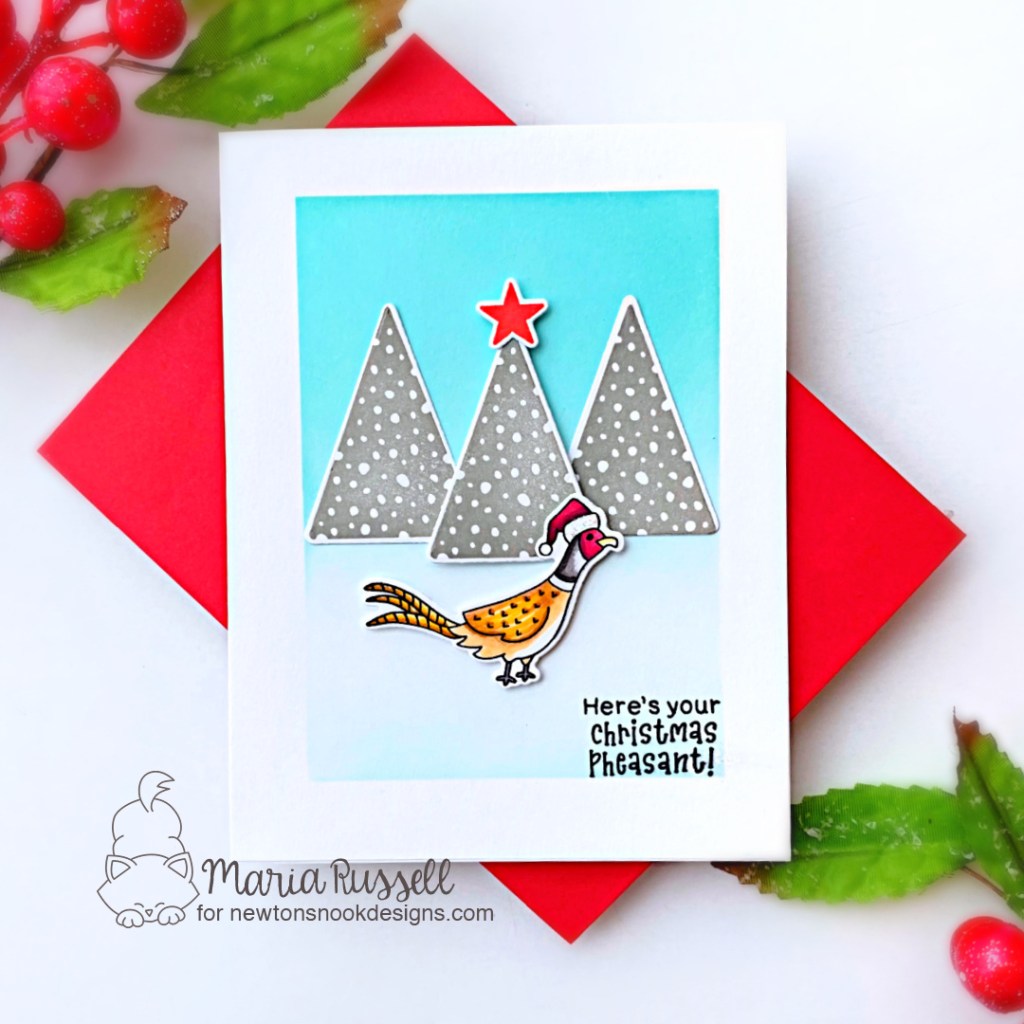
For Day 4, we are showcasing the Prehistoric Christmas Stamp & Dies, Christmas Pheasant Stamp & Dies with the Heartfelt Holidays that coordinates with the previously released Heart Frames & Banner Trio Dies.
The first card is clean and simple. I die-cut the scallop frame from the Frames & Flags Die Set and used masking tape to mask off the card stock. I ink-blended this panel with some Seedless Preserves, Picked Raspberry, Carved Pumpkin and Mustard Seed distress oxide inks.
I sprayed the panel with water and picked up the excess with some paper towel, and adhered this on an A2-size white notecard.
Next, I stamped the images on some Neenah solar white card stock and colored the images in with alcohol markers. I used the coordinating die to cut them out. I added the images on the card using liquid glue. I finished the design by adding the sentiment, and glittery stars to give it a whimsical touch.
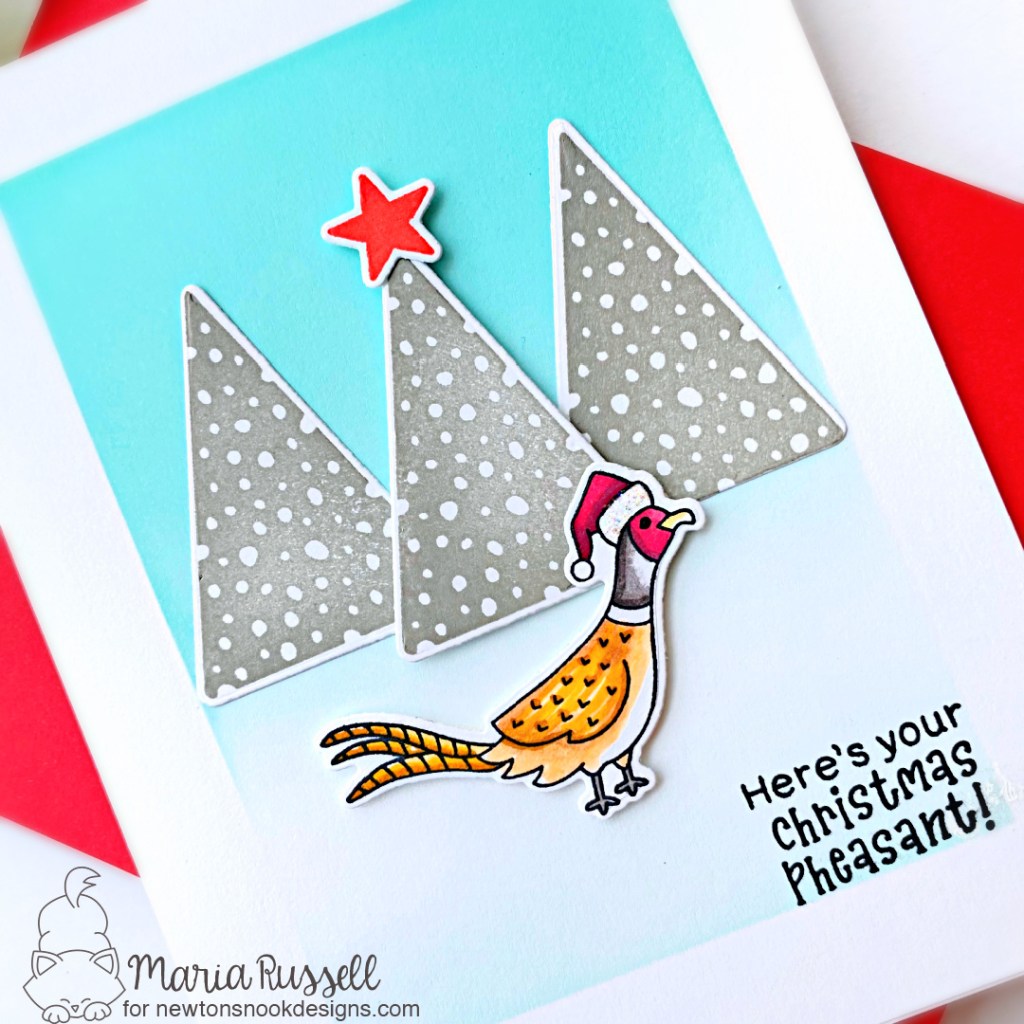
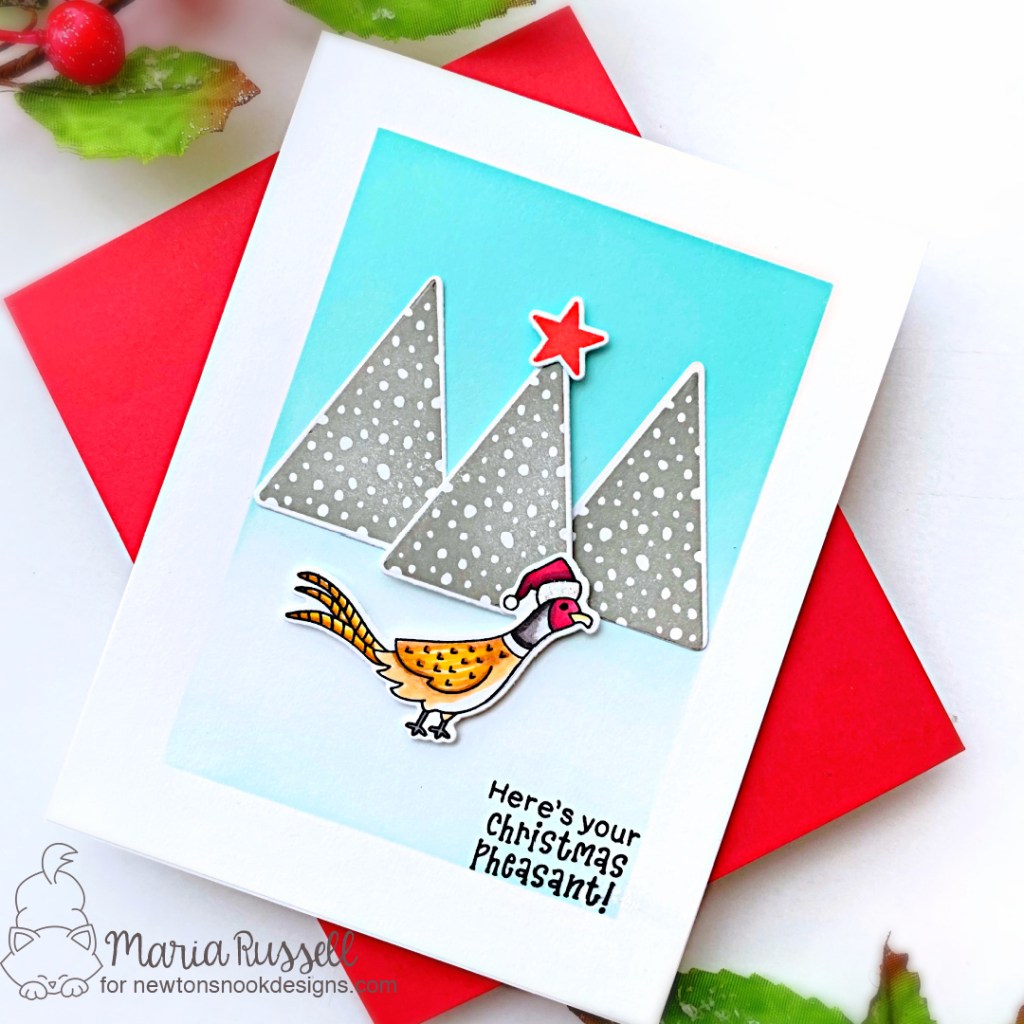
I am starting to really LOVE creating clean and simple card so the next project is another easy one. A one-layer card is a the way to go!
I basically repeated the steps that I did above with the ink-blending and coloring the images. I also stamped the trees from the Festive Forest Stamp Set and used the coordinating dies to cut them out.
I popped-up the first tree with foam adhesive and added the other two with liquid glue. I also foam-mounted the focal image to make it stand out, finishing the design by stamping the sentiment with Versafine Onyx Black Ink.
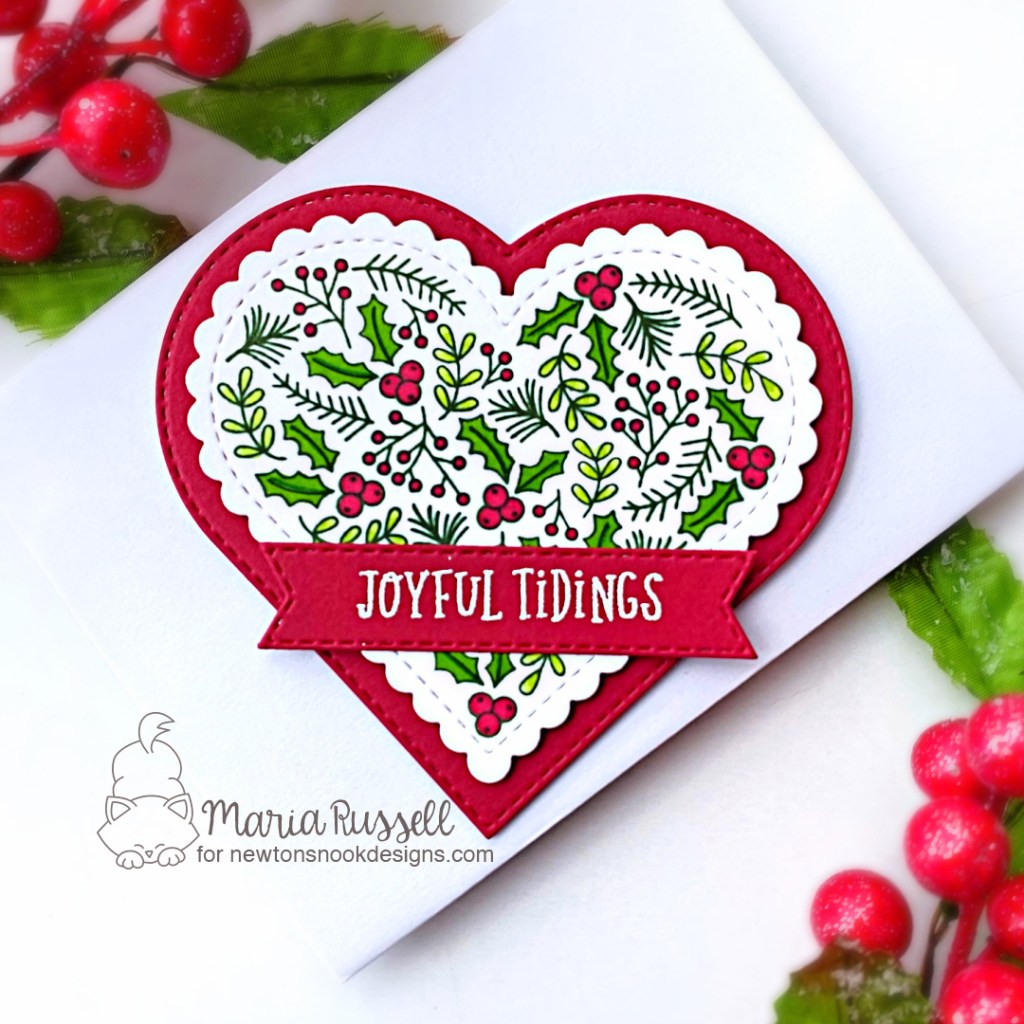
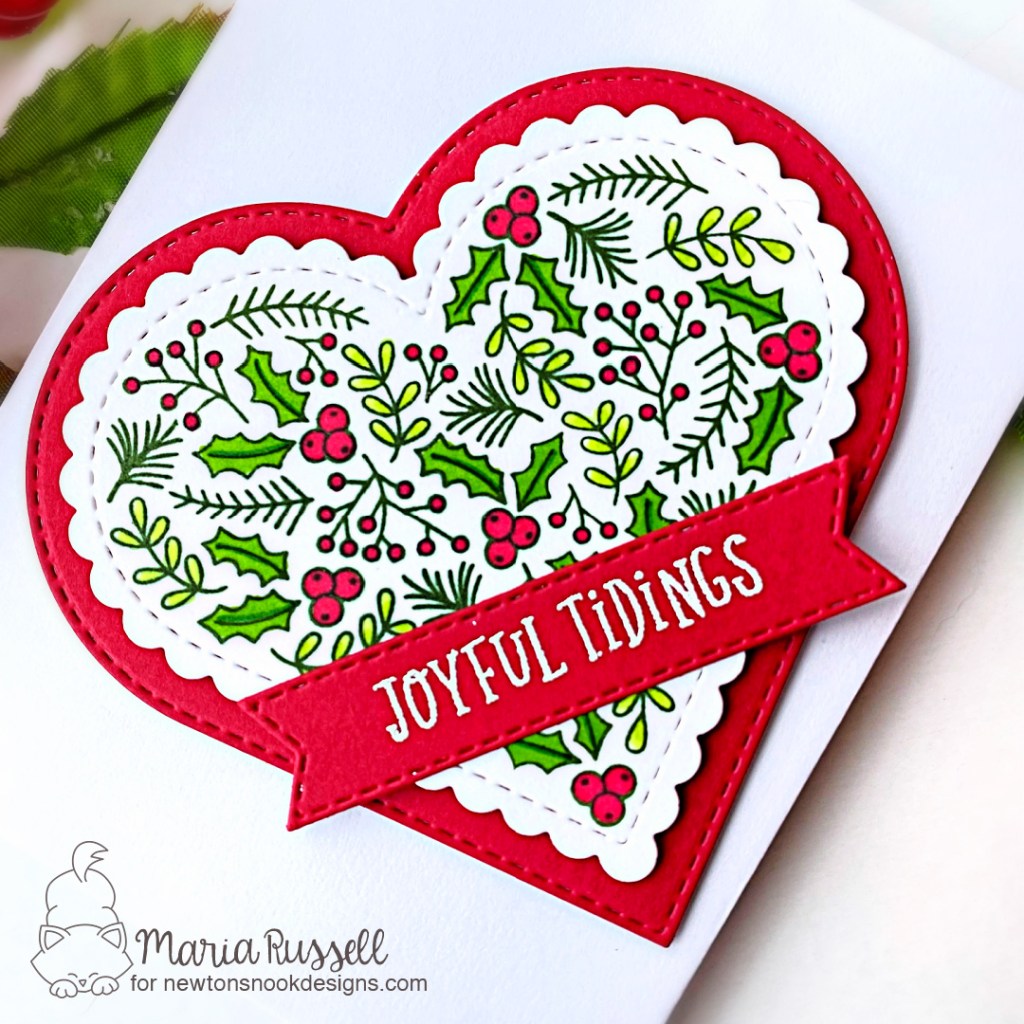
And last but not the least is the Heartfelt Holidays project. For all you coloring people out there, this is another must-have!
For a cohesive look, I only used some variations of green and red! Nothing too busy here! I just LOVE the simplicity of this stamp set and I am so happy that Newton’s Nook is adding more stamp set to match the Heart Frames Die Set.
I finished my card design by stamping the sentiment on some red card stock and used the Banner Trio Die Set to cut it out. I foam-mounted this onto the card for added dimension.
So there you have it folks! If you hopped along with us throughout this week, I’d LOVE to hear what your favorites are! I hope you have been inspired by the design team all week long! The products will be available tomorrow so grab your favorites first thing before they sell out!
Would you like to win the “Prehistoric Christmas” or the “Heartfelt Holidays” Stamp Set? We will choose ONE lucky winner for each stamp set!
Here’s how to win: Comment on the NND blog and Design Team blogs (see list below)! Thewinner will be chosen at random from the collective reveal posts. Make sure to check out each of their blogs and comment for your chance to win. You will not know which blog has been chosen so the more you comment on the better your chances are of winning! You have until Thursday, October 14th at 9pm ET to comment — winners will be announced on the blog post on Friday, October 15th.
Check out all the awesome Design Team Blogs below to enter:
It is the third day of the reveals by Newton’s Nook Designs. Were you able to hop along with us for the last two days? You have a chance to win the stamp set being revealed each day so please read through ’til the end of the blog post to find out more info. [Just a little important note: I know some of you had difficulties finding the comments section. If you would like to leave a comment to participate in the giveaway, the “comments section” will only be ever visible when a single post on WordPress is being viewed. Please click on this particular blog post and you will be able to leave a comment below. Thank you!]
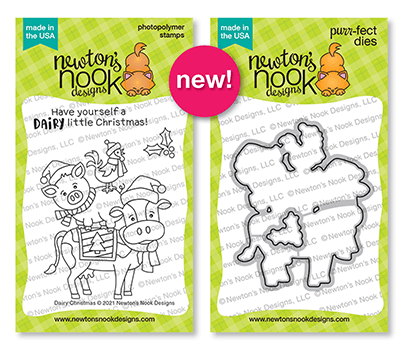
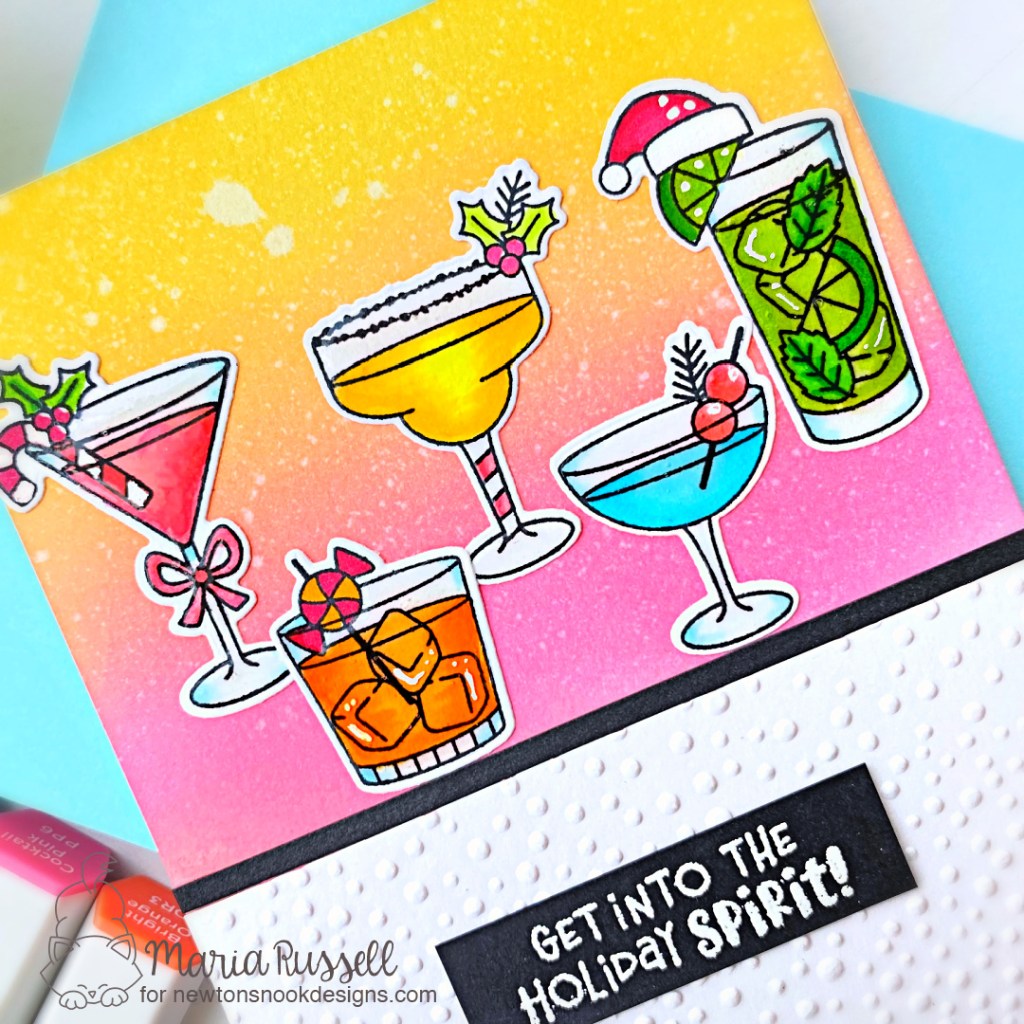
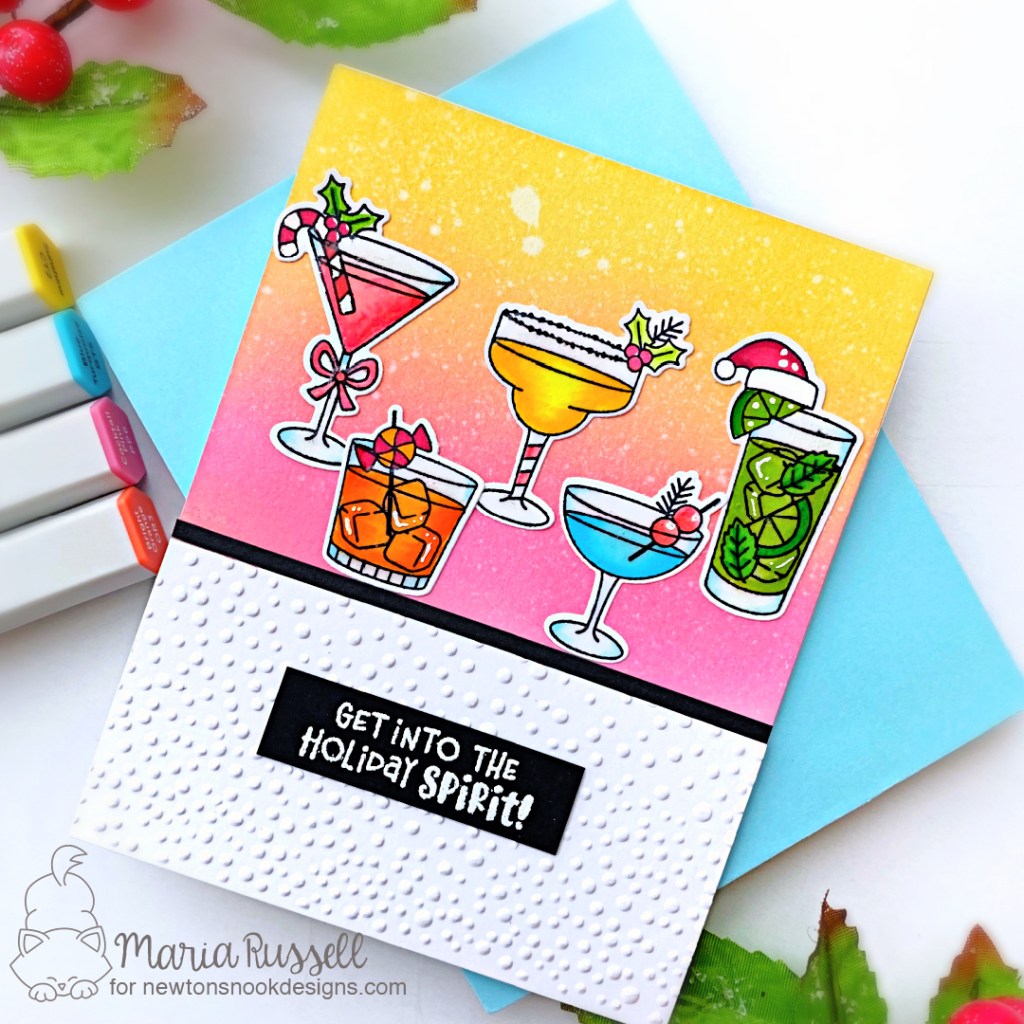
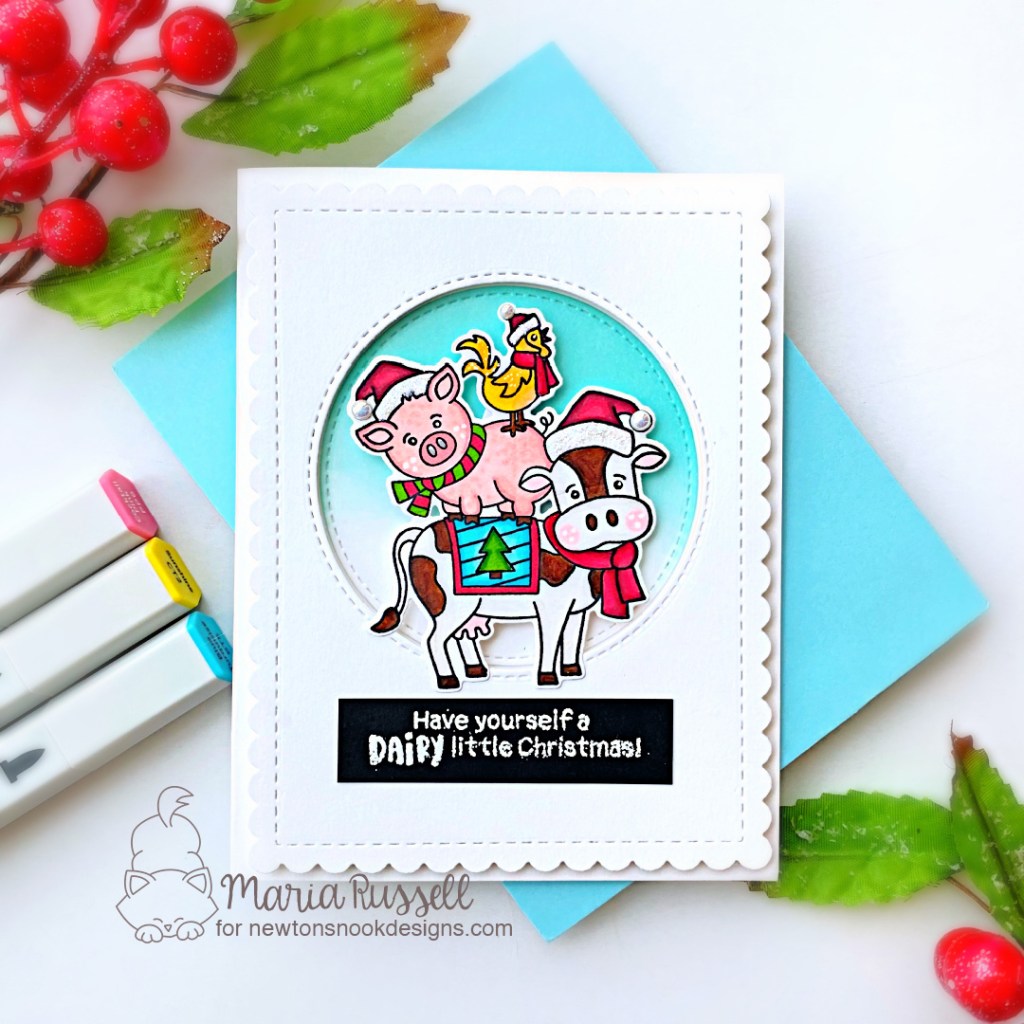
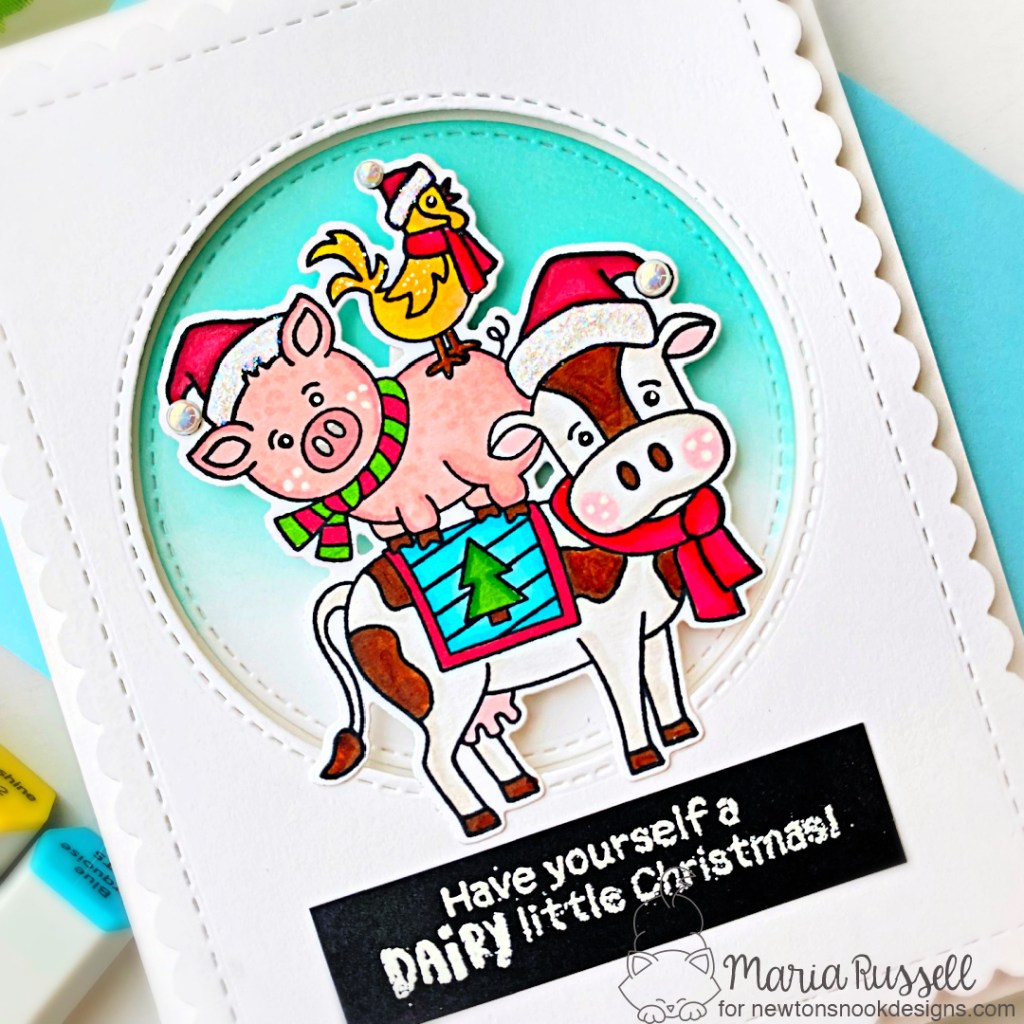
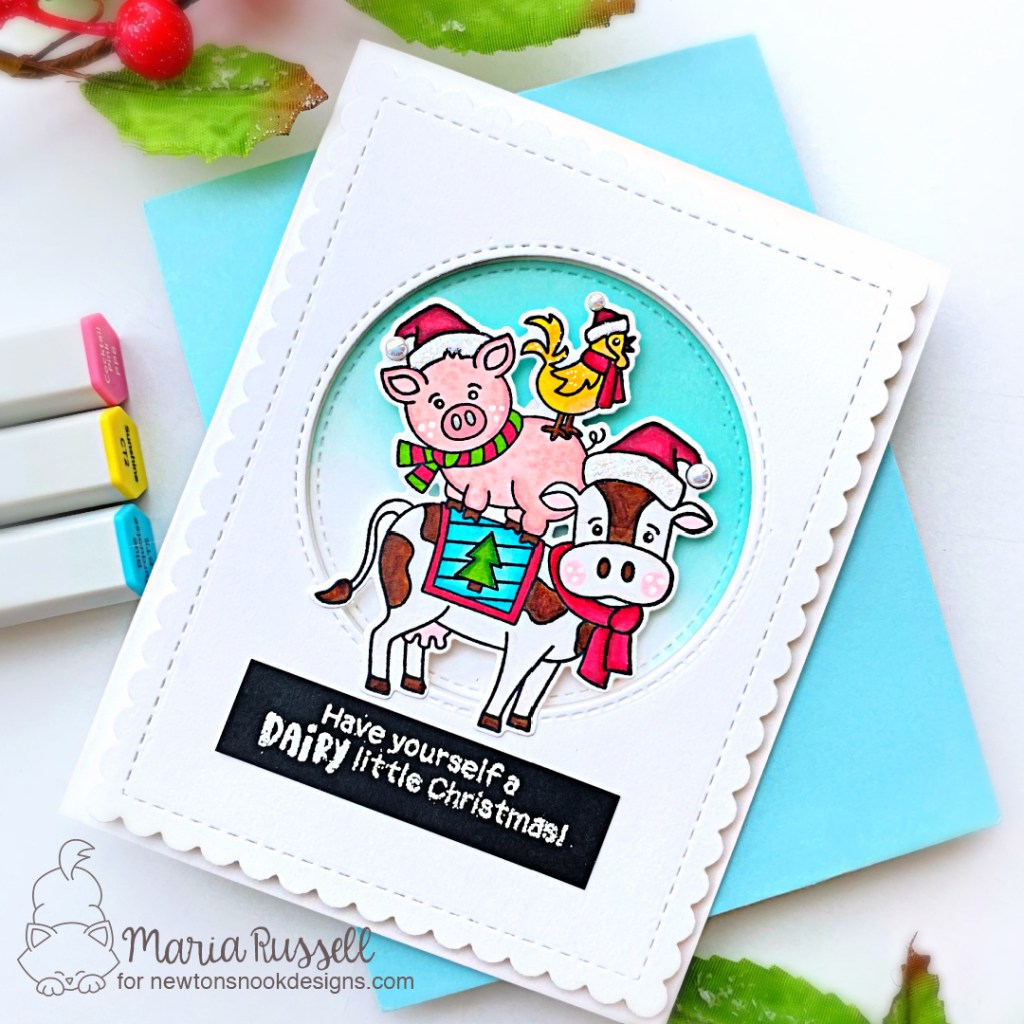
For Day 3, we are showcasing the Christmas Cocktails Stamp Set and Dies with the Dairy Christmas Stamp Set and Dies.
Let me just say that I can’t even pick a favorite product from this Holiday Release. I LOVE THEM ALL! I am sure the rest of the team would agree that we all got super inspired creating the projects we are showing you this week. This Christmas Cocktails stamp set is so ADORABLE it was hard for me to choose which ones to feature on my card.
I stamped the images on some Neenah solar white card stock and colored them in with my alcohol markers. I used the coordinating dies to cut the images out. I know you can really see it, but I added glossy accents to the images to make them look like real glass.
While I was waiting for the images to dry, I inked up the background panel with distress oxide inks. I wanted to have a warmer tone behind the glasses so I used Picked Raspberry, Carved Pumpkin and Mustard Seed inks. I sprayed the background with water and picked up the excess with some paper towel.
Next, I cut some Neenah solar white card stock and used embossing folder to dry-emboss this panel. I adhered this on an A2-size notecard and also added a strip of black card stock to ground the images.
I adhered the images on the card with liquid glue and finished my design by adding the sentiment that I stamped with Versamark ink on some black card stock.
For my second card, I decided to create a clean and simple design. I die-cut the scallop panel on some Neenah solar white card stock using the Scallop from the Frames & Flags Die Set. I also used a circle die to create the window, and ink-blended the positive cut with some Salvaged Patina Distress Oxide ink.
Next, I foam-mounted the scallop panel on some A2-size notecard and adhered the ink-blended circle die-cut. I stamped the images and colored them in with alcohol markers. I used teh coordinating die to cut it out.
I foam-mounted the focal image for added dimension and finished my design by stamping the sentiment on some black card stock and heat-setting with my heating tool. Easy, peasy for this one!
Would you like to win the “Christmas Cocktails” or the “Dairy Christmas” Stamp Set? We will choose ONE lucky winner for each stamp set!
Here’s how to win: Comment on the NND blog and Design Team blogs (see list below)! Thewinner will be chosen at random from the collective reveal posts. Make sure to check out each of their blogs and comment for your chance to win. You will not know which blog has been chosen so the more you comment on the better your chances are of winning! You have until Thursday, October 14th at 9pm ET to comment — winners will be announced on the blog post on Friday, October 15th.
Check out all the awesome Design Team Blogs below to enter: