Prepare the background by ink-blending a panel of Bristol Smooth White Card Stock measuring 4 1/4 x 5 1/2 inches with Scattered Straw, Cracked Pistachio and Peacock Feathers Distress Oxide Inks using small ink blending tools. Adhere this panel on some A2-size notecard.
Die-cut the pink frame using the Layered Balloons Coverplate Die on some 110 lb. Neenah Solar White Card Stock. Adhere this frame on the ink-blended panel with foam adhesive for added dimension.
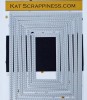
Use the Laminator and Deco Foil Toner Sheets with Deco Foil Transfer Sheet in Shattered Glass to foil this panel.
Use the balloon dies from the Layered Balloons Coverplate Die to die-cut the balloons. Foam-mount the pieces on the card panel for added dimension.
Foam-mount the frame on the card for added dimension.
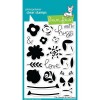
Die cut the words “Happy Birthday” using the Happy Birthday Word Die with Shadow on some Black and white card stock. Adhere them together with liquid glue.
Finish the card design by adhering the sentiment on the card.
I hope you like this simple birthday card today. Below, you will find links to the supplies used to create this project(s). Where available, I use compensated affiliate links at no extra cost to you. Your support helps me to keep bringing you new projects and inspiration. Thank you for stopping by, and have an amazing day!
Maria here on the blog with you and I hope everyone’s looking forward to the weekend!
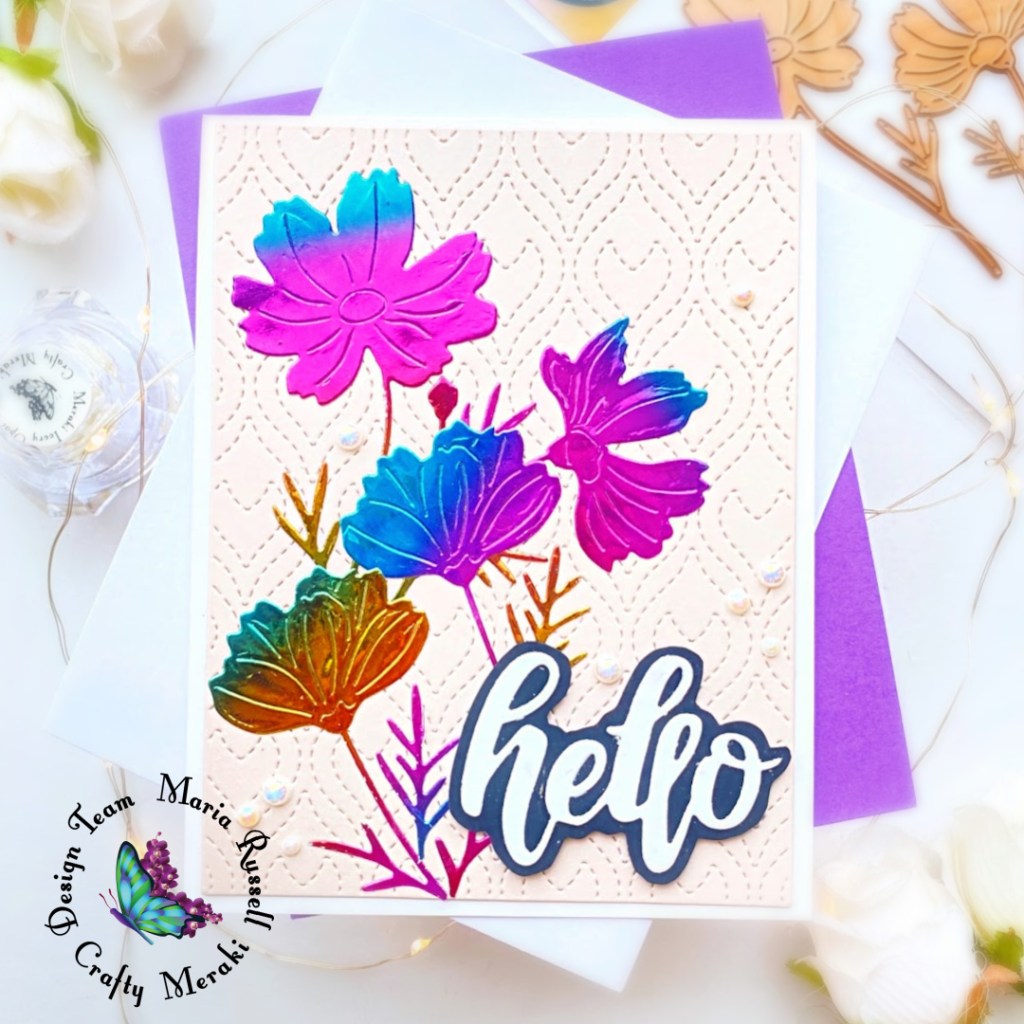
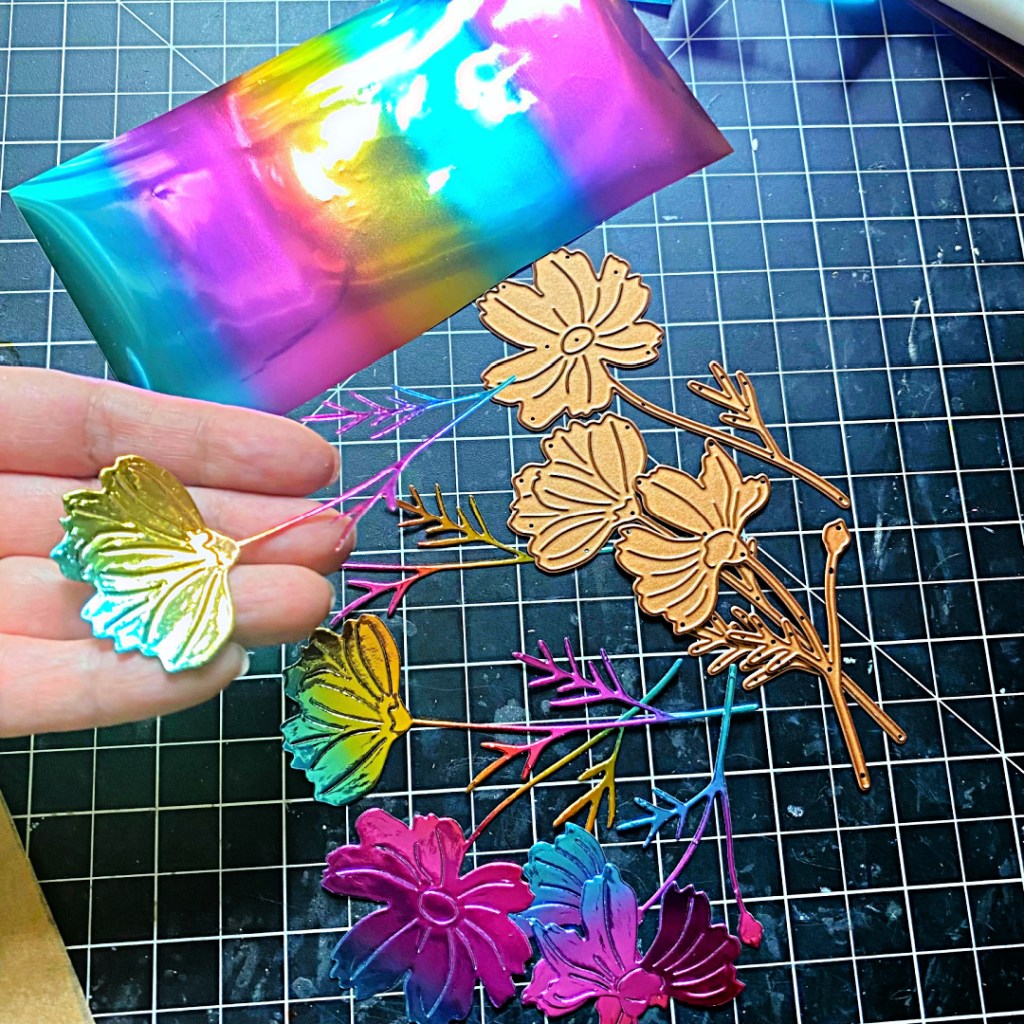
Have you ever looked at your beautiful dies and thought “I really need to make these die-cuts extra special!” so instead of ink-blending them, I thought I’d do some foiling and make them extra sparkly!
I started by cutting some DecoFoil Toner Sheets measuring 8 1/2 by 5 1/2 inches and also cut DecoFoil Transfer Sheet in Mystic Rainbow. I placed the foil on top of the toner sheet and run it through my laminator.
Next, I die-cut the foiled panel a few times using the Mila Meraki Flora Para-Dies. The photos can’t even justify how beautiful they really look in person!
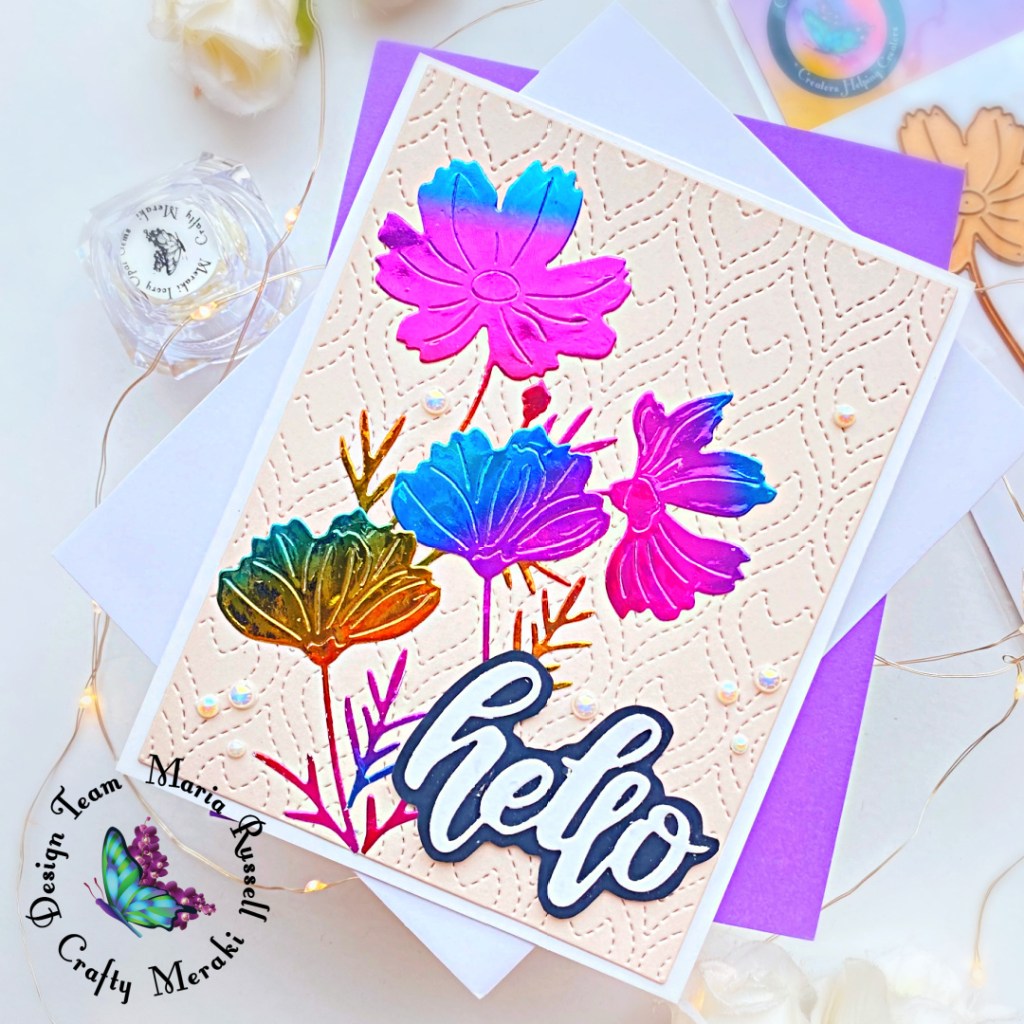
I die-cut the background panel using the CM Pagoni Mania Background A2 Para-Dies with some Creamy Rose Card Stock. I adhered this panel on some A2-size, top-folding notecard. I also die-cut the word “hello” using a die from my collection.
I adhered the foiled flowers onto the focal panel with liquid glue and foam-mounted the “hello” sentiment for added dimension. I finished the card design by adhering some CM Ivory Opal Gems for added texture and interest. Here’s another look at the card:
I hope you like this card today as much as I do. Check out the new and exclusive Crafty Meraki Dies available now at the shop. Below, you will find links to the supplies used to create this project(s). Where available, I use compensated affiliate links at no extra cost to you. Your support helps me to keep bringing you new projects and inspiration. Thank you for stopping by, and have an amazing day!
Welcome to Therm-O-Web and Newton’s Nook Designs collaboration. This week, NND and TOW are partnering for a fabulous inspiration week! All week long, both design teams will be sharing ways to add use Therm O Web products with Newton’s Nook Designs stamps! There are prizes too! Read all the way to the end of this post to find out how you can win!
Today is the last day of the collaboration so I figured I’ll share two projects to give you more inspiration! I used A LOT of products from both companies!
The background was created by applying Deco-Foil Transfer Gel Duo with the Petite Clouds Stencil on some blue card stock. I spread the gel evenly with the help of (one of my favorite tool) the Stencil Pal. I set this panel aside to let it dry for about half an hour.
Once the gel turns translucent, you are ready to do the flock transfer. Since I used the Deco-Foil Transfer Gel Duo, you can either run this panel through your laminator, or use your die-cutting machine. In this instance, I used my laminator. I put the panel inside my transfer sheet and cut a piece of the Deco-Foil Transfer Flock in White Latte (fussy side down). I run it through my laminator to transfer the flock. I love how the small clouds look so fluffy and realistic because of the flock sheet.
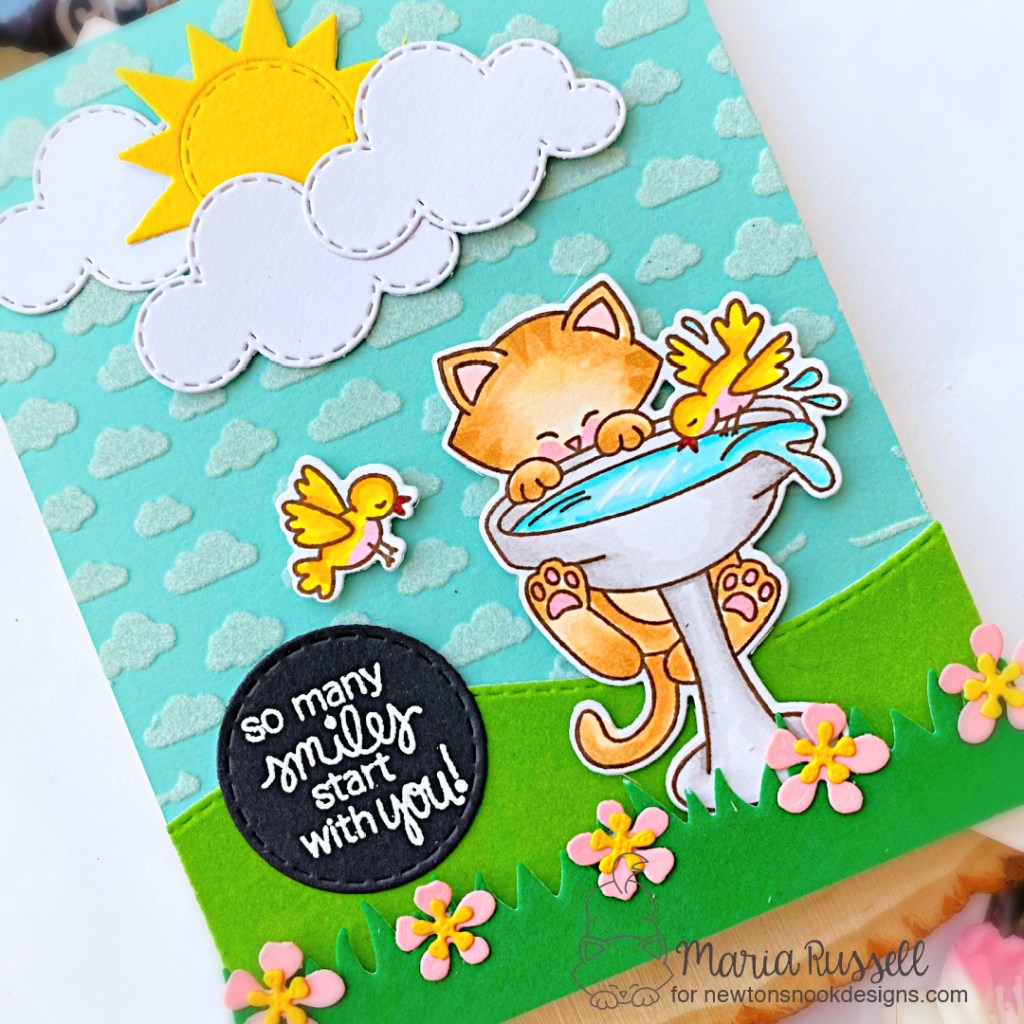
Next, I stamped the images from Newton’s Birdbath stamp set on some Neenah solar white card stock and colored them in with alcohol markers. I used the coordinating die to cut them out.
I die-cut the rest of the components together using the dies and flock transfer sheets (mentioned above) to and started building my scene. I like having a bit of a dimension on my cards so I used the iCraft 3d Foam Adhesives on the grass panel, clouds and sun. I also had some cute flowers that I’ve already die-cut from a previous project so I adhered them onto the card for added interest.
The last piece to add is the sentiment. I stamped it on some black card stock with Versamark ink and sprinkled some white embossing powder. I used my heating tool to heat-set, then die-cut using the smallest die from the Circle Frames Die set. I adhered the sentiment using the tape runner.
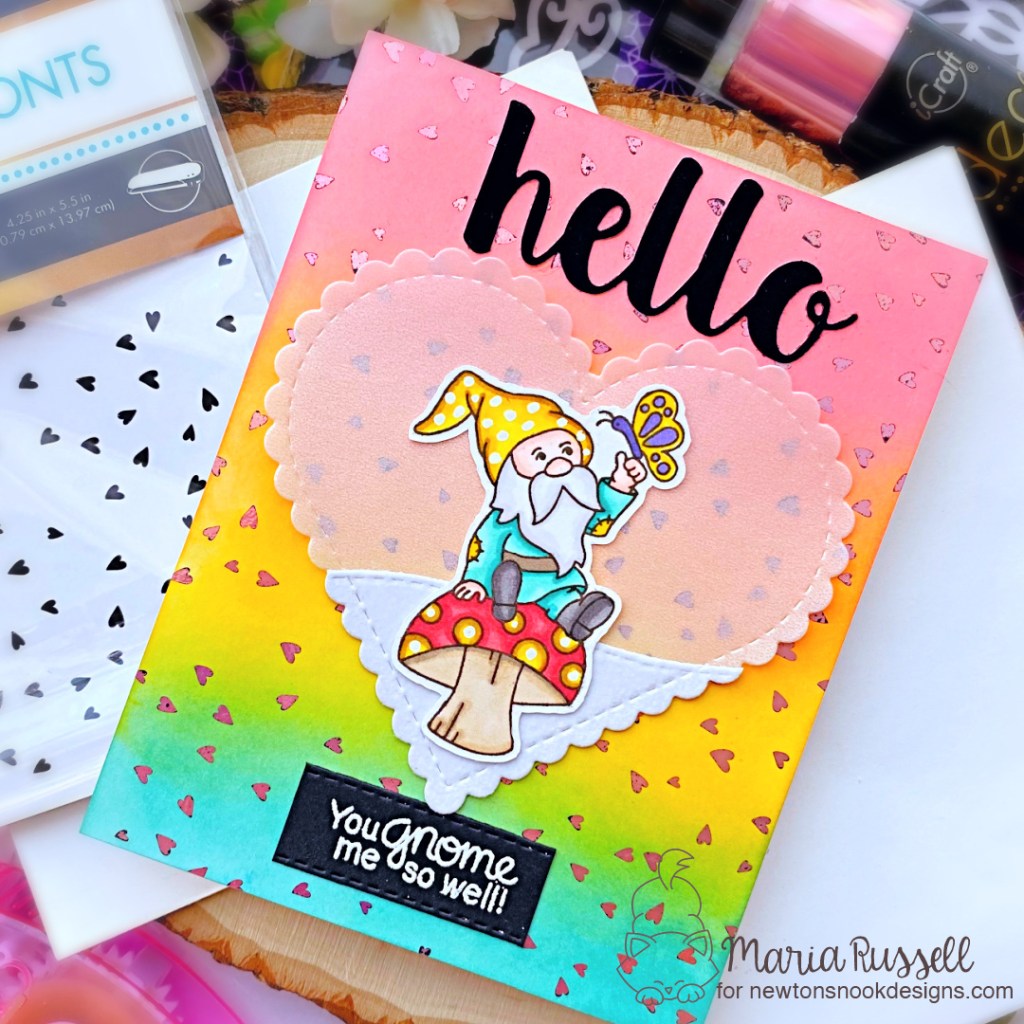
The word “hello” was die-cut using a die from my collection and the Deco Foil Flock Transfer Sheet in Black Velvet. With a colorful background such as this card, I wanted the sentiments to stand out!
I finished my card design by using my white gel pen and drew some dots to the Gnome’s hat for added interest. Here’s another look:
Which one is your favorite -> Newton’s Birdbath or the cute Garden Gnome? I hope you like both cards because I love how they turned out. The supplies I use are also listed and linked below in case you are interested.
NOW HERE IS THE BEST PART! Would you like to win a $40 store credit from Therm O Web or Newton’s Nook Designs? Visit the Newton’s Nook Designs blog and the Therm O Web Blog for a chance to win! Both companies will be giving away a prize this week! Make sure to check out their blog posts for the announcement of the lucky winners!
Thanks for stopping by my blog today and happy foiling and stamping!
I am super excited to share today’s post because I am guest-designing for Therm-O-Web! I was approached by the beautiful Julia Sandvoss and she had sent me some awesome Therm-O-Web (“TOW”) products to try. Let me just say…. WOW! I am completely blown away by these products! Stay tuned in the next few weeks as I will have some process videos of some of the products that I got to play with, including my new favorite, the Deco Foil Metallix Gel.
Before I proceed with my projects, I’d like to take this opportunity to thank Julia Sandvoss and Therm-O-Web for sending me all the wonderful products that I got to play with today , and will be using in the next few weeks! You guys are amazing and I love your products!
Here’s a step-by-step instruction on how I made my first card:
Stamp the images on Neenah solar white card stock and color them in with Spectrum Noir alcohol markers. Die-cut the images using the coordinating dies and Die cut an A2 size piece of some blue card stock.
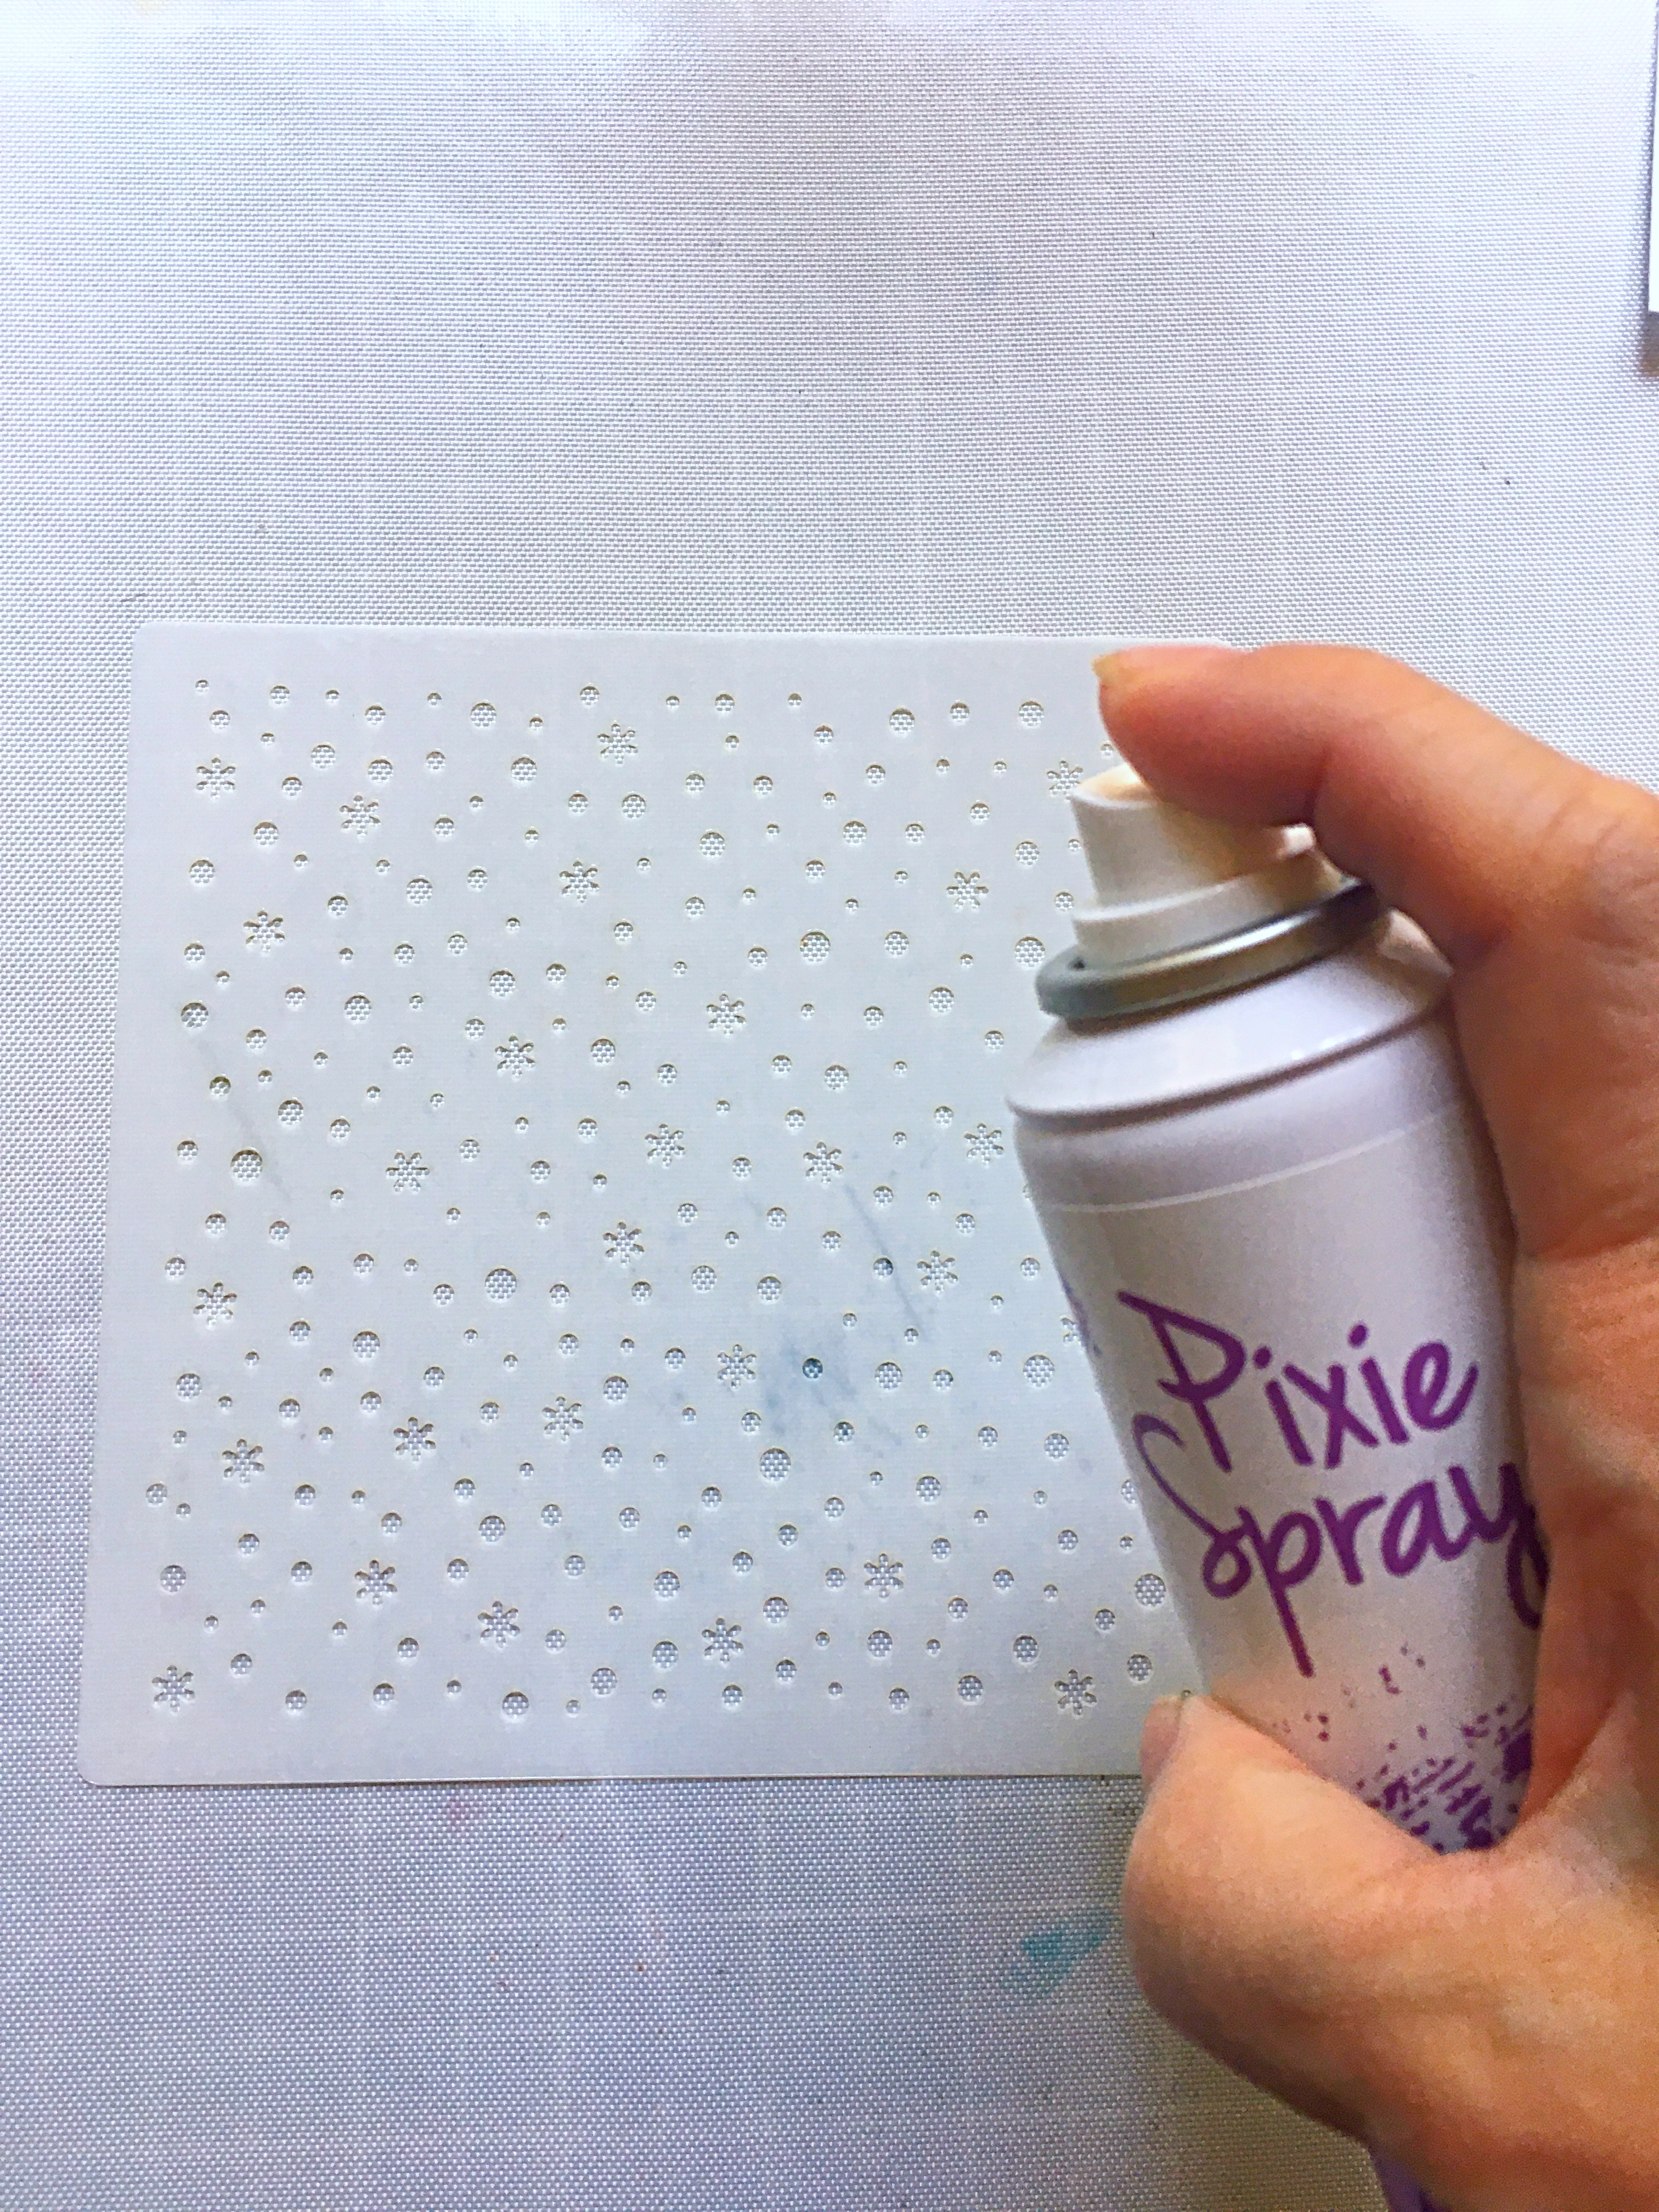
Use some Pixie Spray to spray the back of the stencil so that it doesn’t shift while you’re working on your project. This pixie spray is a must-have for any stamper!). I don’t think I can live without this anymore. It makes stenciling so much easier.
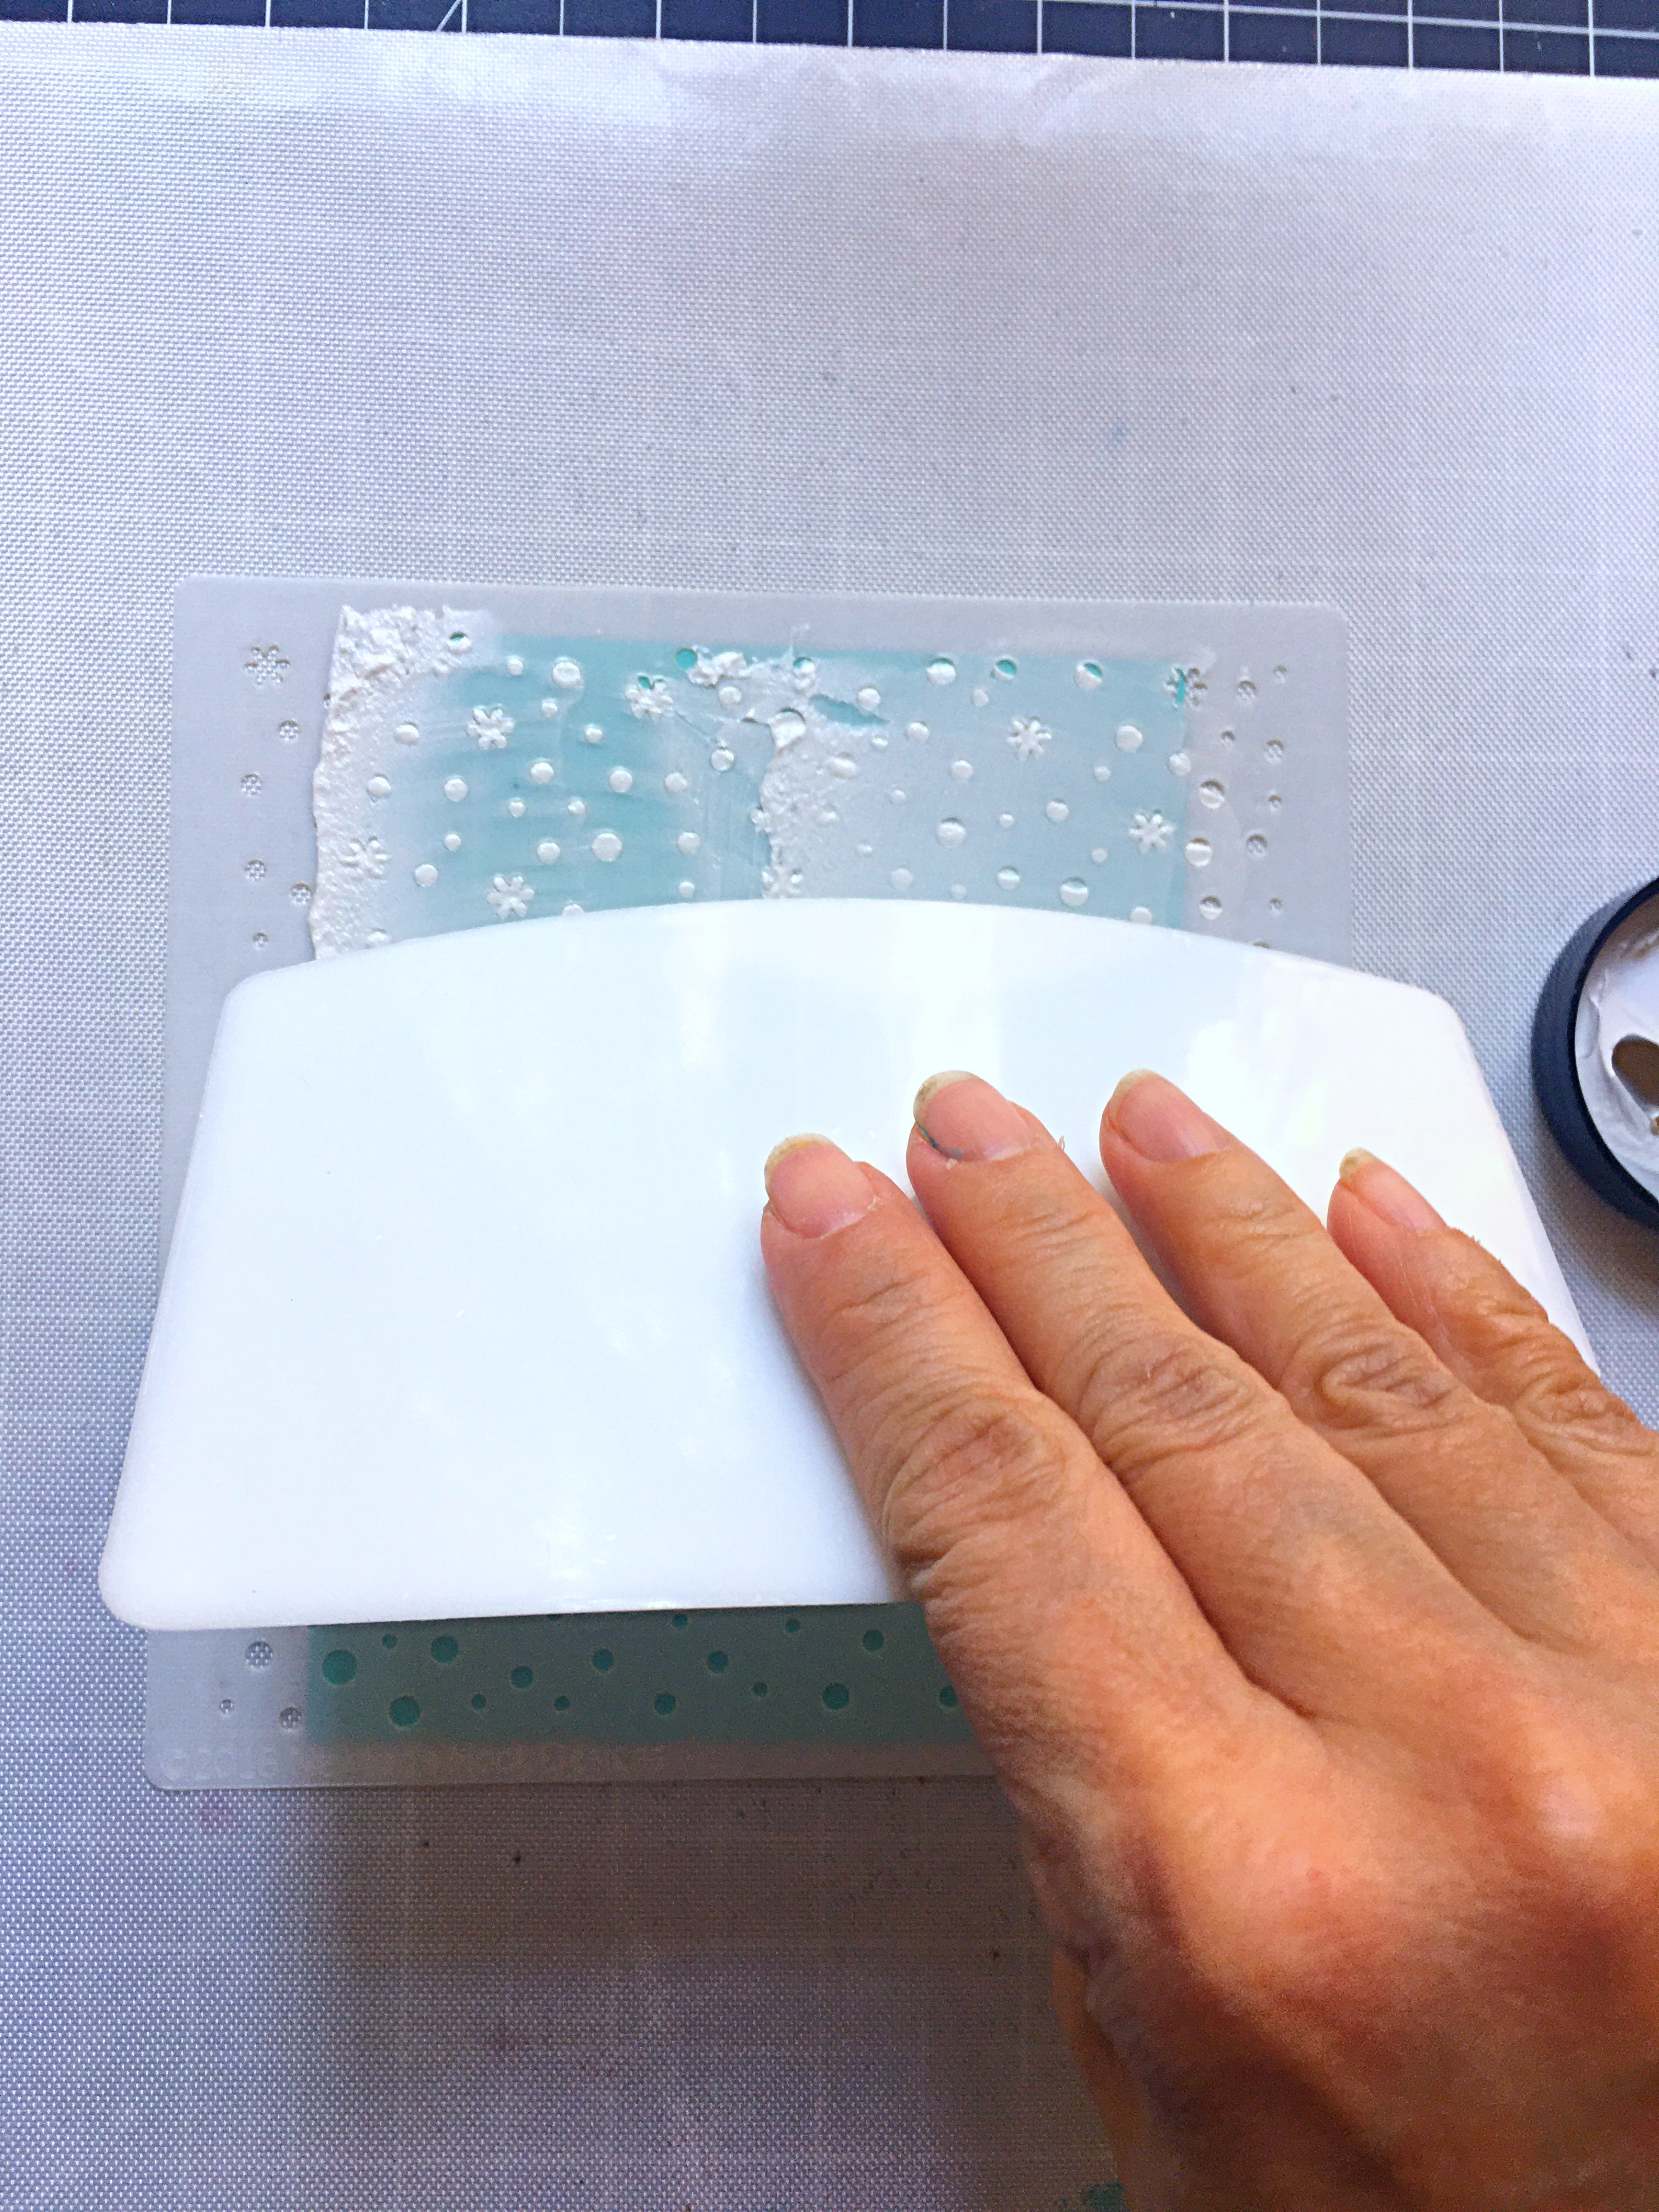
Use a palette knife to apply some Deco Foil Metallix Gel on the Stencil Pal.
By doing so, the gel will be applied to your project smoothly; and you will be able to put the excess gel back in the pot.
Apply the gel on your project.
This is what it looks like when you take the stencil off. The Stencil Pal applied an even coating on my project! This is also the first time I used the Deco Foil Metallix Gel in White Pearl. I am so impress with the creamy and soft consistency of the gel. I will be buying more for sure!
Die-cut the rest of the elements needed to assemble the card. Stamp the sentiment on the banner strip using some Lawn Fawn Lobster ink.
Here’s my first card:
I wish you can see this card in person. The Deco Foil Metallix Gel in White Pearl is so shiny and I really love the added texture and dimension it gave my card. This card is also going to be shared as my entry to the Fall/Winter Coffee Lovers Blog Hop. Here’s a closer look:
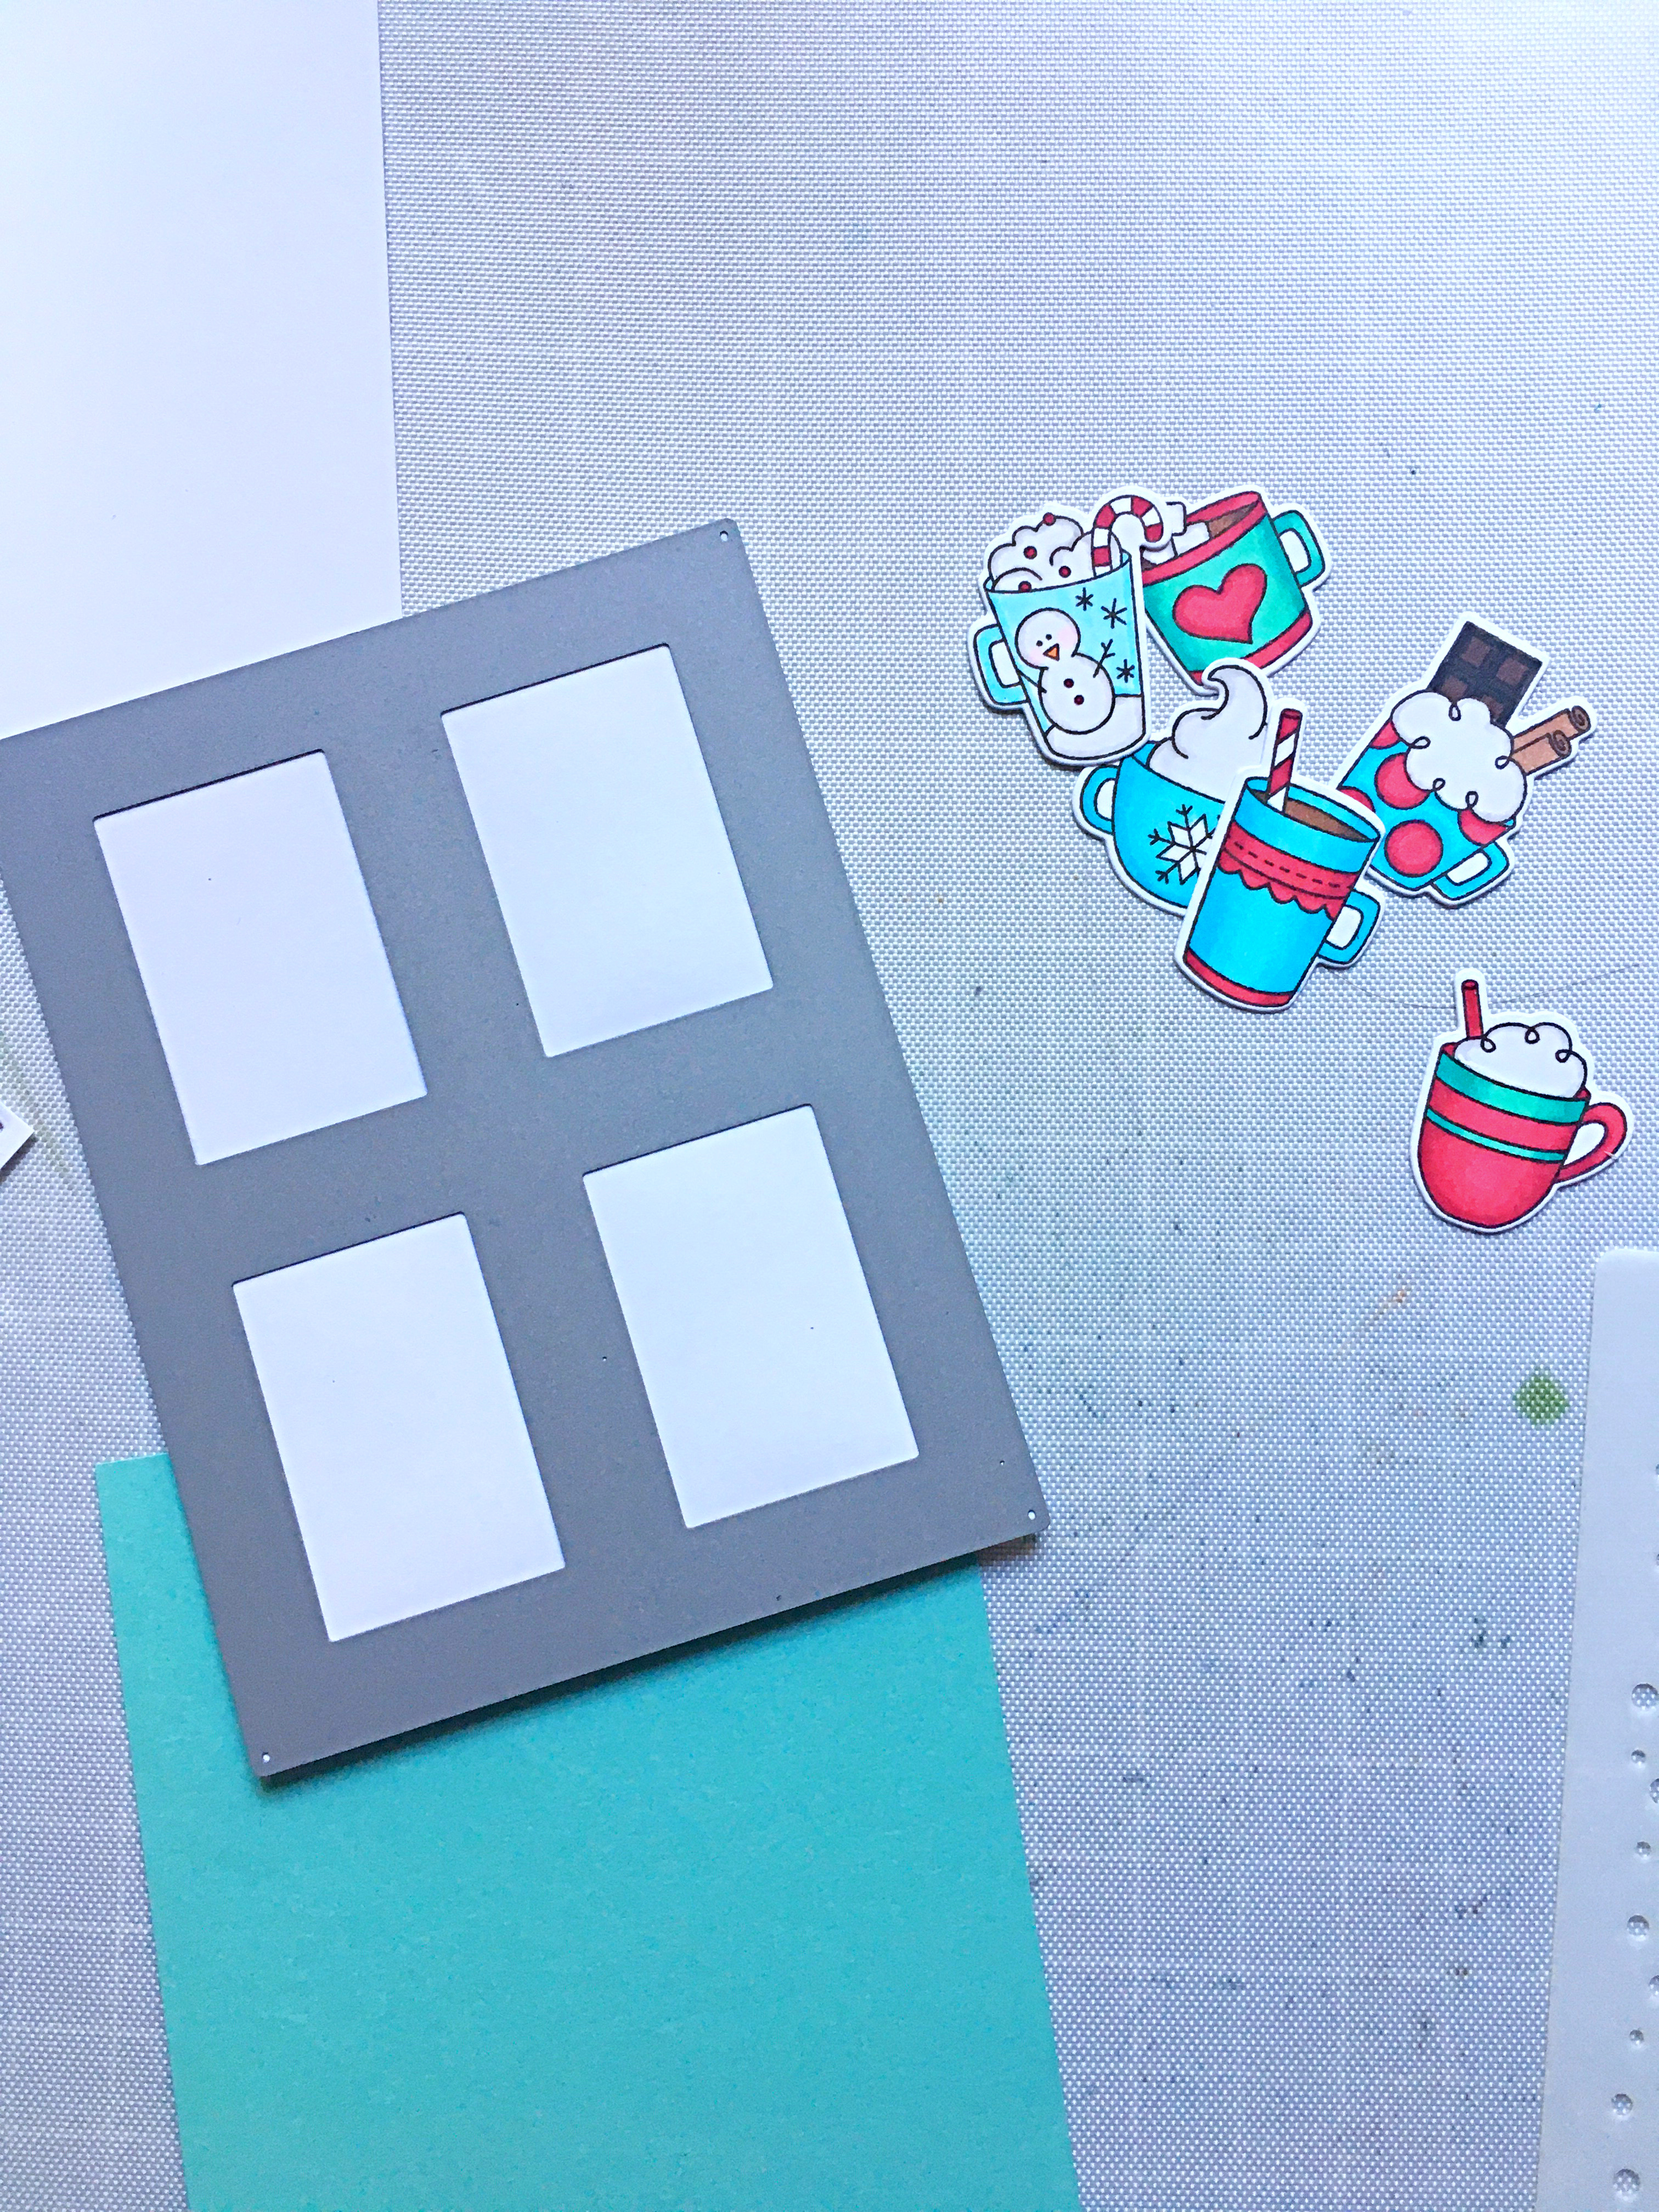
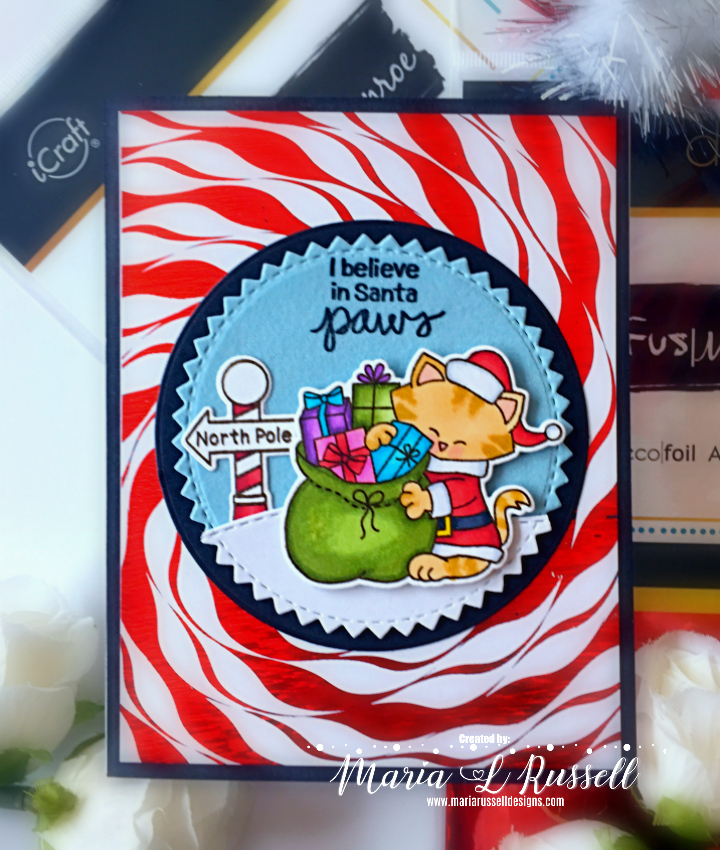
Stamp the images on some Neenah solar white card stock. Color the images in with Alcohol markers and die-cut using the coordinating dies.
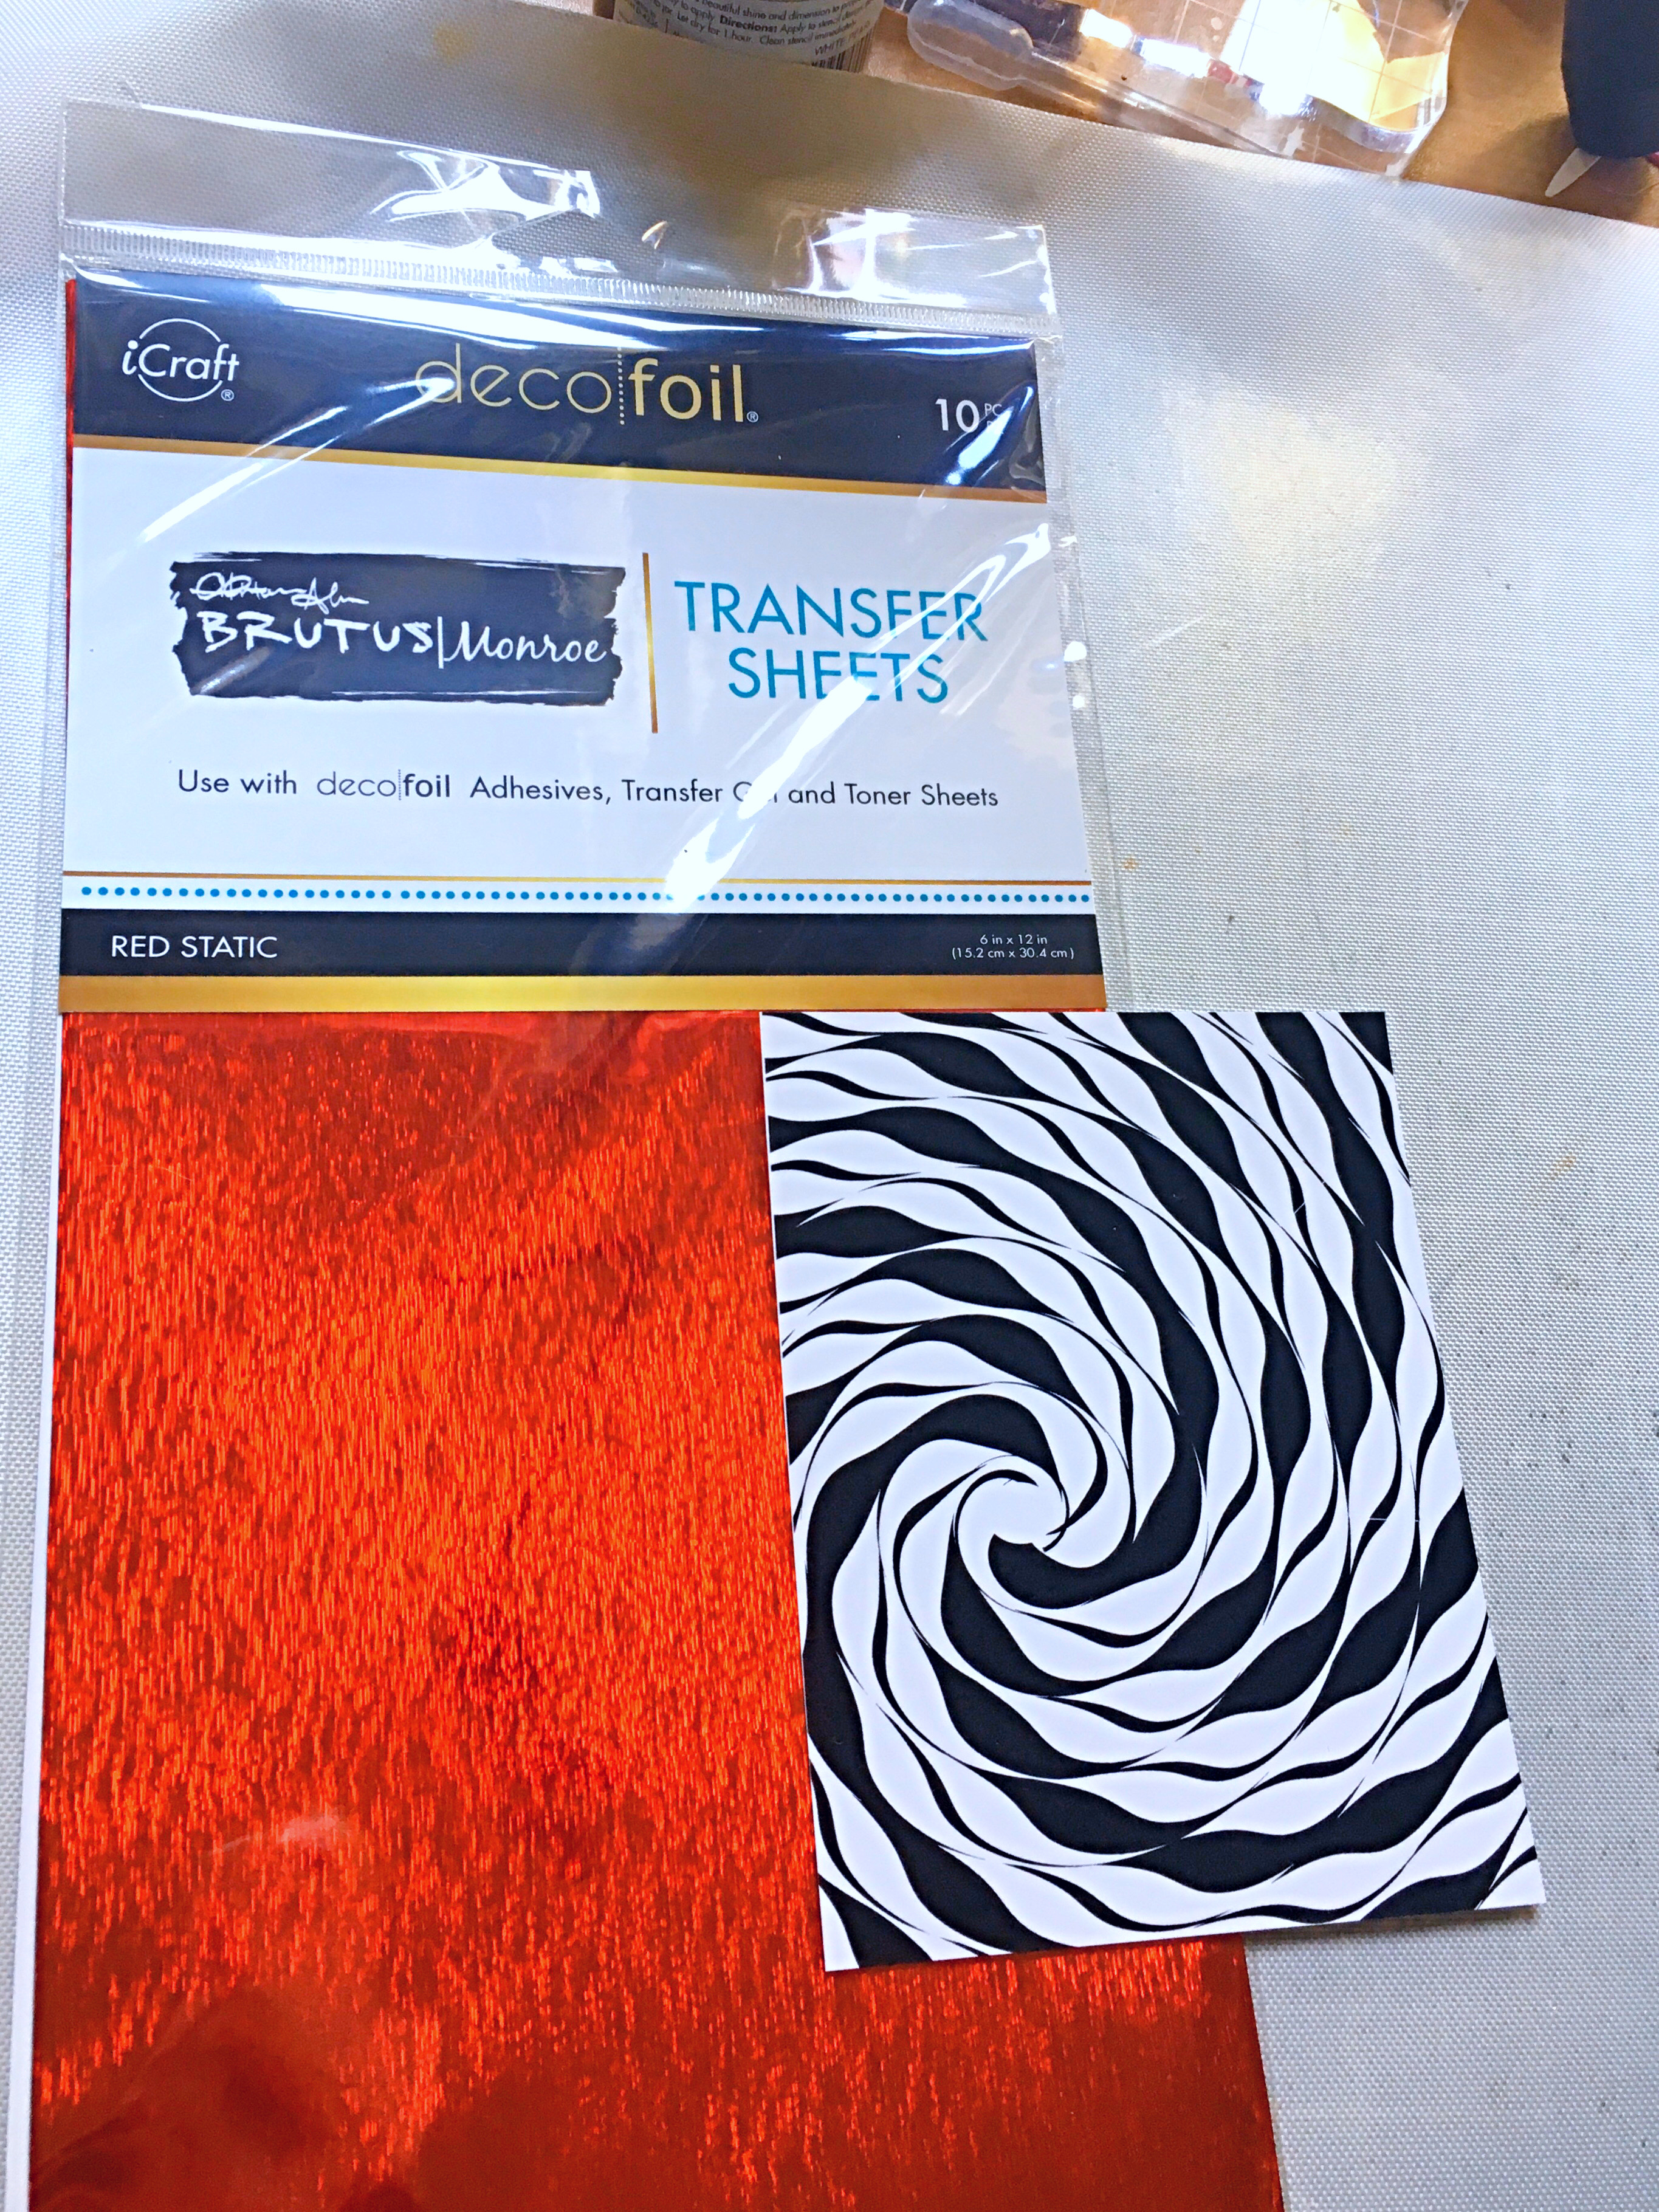
Cut an A2 size piece of the designer toner sheet. I also cut the Deco Foil Transfer Sheet in Red Static, just slightly bigger than the toner sheet.
Insert the pieces together inside your transfer sheet and run it through your laminator.
Here’s what it looks like when you remove the foil. I just LOVE seeing this process:
Die-cut the rest of the elements needed for the card. I used the new Flock Transfer Sheet in Blue Sky. These new flock transfer sheets are a must-have for any paper crafter. You can easily die-cut it, stamp on it, use adhesive sheets to transfer the flock to your card stock, or you can emboss it. Wow! they are truly amazing!
Assemble the card.
Finish the design by stamping the sentiment directly onto the flock transfer sheet.
Here’s my second card:
I absolutely LOVE the added texture of the Deco Foil Flock Transfer sheet! Here’s a closer look:
As mentioned earlier, please stay tuned for some process videos of Therm-O-Web projects that I will be sharing in the next few weeks on my YoUTube channel and on this blog. I hope you like my projects today. The supplies I used are listed and linked below. I hope you have a wonderful day and happy crafting!