Patriotic Card with Everyday Brush Strokes Stamp by Kat Scrappiness

The time has finally come and Kat Scrappiness has just released the Everyday Brush Strokes stamp set!  I was looking forward to showcase this set because it is just simply beautiful.  You can create a lot of projects with this set.  You can even use it to decorate your planner pages, traveler’s journals, scrapbook layout and project life.  The possibilities are endless.
For my projects, I used the Everyday Brush Strokes stamp set, the Cross-stitched Rectangle dies by Kat Scrappiness and a bunch of other supplies available at the shop.  I also listed and linked the supplies below.

I have a process video for you today at the end of this blog post.  Here are photos of the cards I’ve made using this set.

KatScrapBrushStrokeFlag

KatScrapBrushStroke1

KatScrapBrushStroke2

KatScrapBrushStroke3

Here’s the process video:

I hope you got inspired day!  Have an amazing week!

———–SUPPLIES———–


Newton’s Nook DT Birthday Blog Hop

NNDSurprise Birthday Blog Hop


Today is a super special day, we’re so glad you’re joining us!  All of the Newton’s Nook Designs DT members have gotten together to throw a surprise birthday blog hop for Jennifer, the owner, illustrator and all around wonderful person behind Newton’s Nook!
We are so honored to get to work with Jennifer, and we all just love her so much and wanted everyone to celebrate her birthday with you!   Jennifer, we hope you have the happiest birthday ever!  


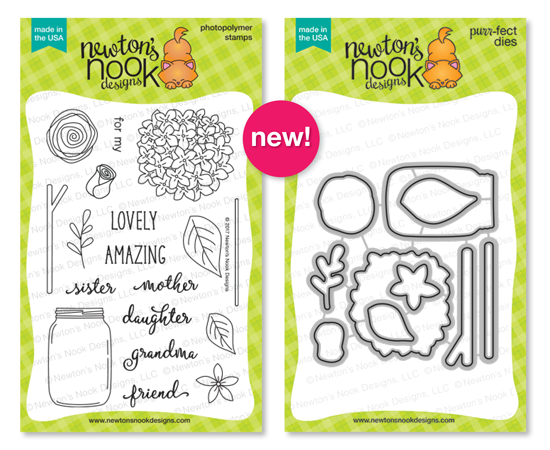
For my simple card below, I am showcasing the Newton Loves Cake stamp set and coordinating dies with the Baked From Scratch stamp set.  I love mixing and matching stamp sets to create my cards.


IMG_6969


I started out by stamping my images onto Neenah solar white card stock and colored the images in with my Copic markers.  I die-cut my storybook window die with another 110 lb. white card stock.


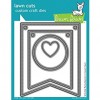
I used the Tumbling Hearts stencil to ink-up my card panel.  I adhered my storybook window onto my card base, then used foam adhesives to adhere my colored images.  I finished my design by adding glossy accents to the candles, the collar and the little hearts.  Here’s my card:

NNDBdayBH1


Since I colored more than one image, I decided to make another card.  Here’s my second one:


NNDBdayBH

Would you like to win the a $25 gift certificate to the NND store?  You could be the ONE lucky winner!


Here’s how to win:

Comment on the NND blog and Design Team blogs (see list below) with a birthday message for Jennifer!  The winner will be chosen at random from the collective posts. Make sure to check out each of their blogs and comment for your chance to win. You will not know which blog has been chosen so the more you comment on the better your chances are of winning! You have until Sunday, February 18th at 9pm EST to comment  — winners will be announced on the blog post on Monday, February 19th.


Check out all the awesome Design Team Blogs below to enter:


Waterless Snow Globe with Xyron

Hello everyone! I hope you’re all excited and getting ready for Christmas. In my case, I haven’t even put up the tree just yet. I was traveling for my daughter’s graduation and just came back yesterday. The children are finally home and we have started decorating the house today.

One of our family traditions over the holidays is to create a handmade ornament or Christmas décor. A few years ago, we made this cute “waterless” snow globe using a recycled candle jar and it turned out so cute, I wanted to create another one this year. Here’s what we made last year:

IMG_6337

For this year’s snow globe, I bought a shatterproof water globe from the craft store. I started out by die-cutting my little houses on DCWV 80 lb. card stock with my Magnolia Doohickey house die. I assembled the house using my favorite Xyron mega runner adhesive. I also die-cut a circle to cover the bottom of the lid.

IMG_6324

I adhered my little house on the lid, and added some embellishments to my scene. First I added the red bow to the house, and then adhered the pine tree and the reindeer on the lid. I also added the little light bulb.

IMG_6329

IMG_6339.jpg

To finish the design, I added some fake snow and iridescent confetti to the jar and closed the lid. You can add as many or as little snow as you’d like.

It is so much fun to keep shaking this waterless snow globe. Here’s a close-up look:

XyronSnowGlobe1

XyronSnowGlobe2

XyronSnowGlobe3

I hope you like my project today and got inspired to create your very own waterless snow globes. These are also great to give as gifts or start your family tradition by making your own ornaments/Christmas décor this year. Have a wonderful day!

———SUPPLIES——-

[Affiliate links provided.]

Easy Thanksgiving Crafts with Xyron

I hope you are all having a great week so far.  All week long, the Xyron Design Team will be sharing easy Fall/Thanksgiving projects on the Xyron Facebook group.  For my projects today, I am making a bunch of treat bags to give to my guests for Thanksgiving.  I also made some place card holders and decorated a bunch of LED candles to decorate my table.


If you don’t have the supplies to create the treat bag, you can definitely buy some bags from the dollar store or craft stores, and decorate them with silk fall leaves or any other fall-themed embellishments, and fill them with surprise treats for your guests.


I started out by die-cutting some American Crafts card stock using my Mama Elephant Treat Bag die.  To decorate the bag, I die-cut the pumpkin with the Mama Elephant pumpkin add-on dies.  For my sentiment, I die-cut the “Thank You” script using my Kat Scrappiness Thank you script die.


XyronThanksgiving1


I assembled the bag using my Xyron Mega Runner.  I also used the mega runner to adhere the pumpkin.  To make things easier, I used my Xyron sticker maker to adhere the tiny pieces that goes with the pumpkin, as well as the Thank You Script sentiment.  I filled my bag with some treats.


IMG_5966IMG_5967


Here’s the treat bag:


XyronThanksgiving2


Since I have some leftover leaves that I die-cut from a previous project, I decided to make some place card holders, that will hold the utensils and a note pad for my guests to write what they are thankful for this year.  Here’s what it looks like:


XyronThanksgiving3


I also decorated some LED candles to decorate my table, using my Xyron sticker maker and Mega Runner.


XyronThanksgiving4


Newton’s Nook Designs April Release – Simply Relative

NND_ReleaseIconApril17

Hello stampers and crafters!  It is the third day of the April release at Newton’s Nook Designs.    You also have a chance to win each stamp set during release week so check out the details I have indicated at the end of this blog post. [Just a little important note:  I know some of you had difficulties finding the comments section.  If you would like to leave a comment to participate in the giveaway, the “comments section” will only be ever visible when a single post on WordPress is being viewed. Please click on this particular blog post and you will be able to leave a comment below.  Thank you for understanding and I apologize for the confusion.]

For today’s card, I am showcasing the new Simply Relative stamp set.  Since the set only contains words, I used the images from yesterday’s stamp release called Lovely Blooms.  This Simply Relative stamp set is so versatile you can use it all-year round.   This stamp set will be available for purchase on Friday, April 14, at 8:00 a.m. CST.

NND20170403_SimplyRelativePKG

NND_17April_LovelyBlooms

I stamped the roses, leaves and mason jar images from the lovely blooms stamp set, with my memento tuxedo black ink.  Using my Copic multi-liner, I drew the little branches inside the mason jar.   I colored my images with my Copic markers.  I then used my precision cut scissors to fuzzy-cut the image.   I wanted edge-to-edge adhesive to this image so that it adheres well to my card front so I used my Creative Station Lite.

IMG_4652

Here’s my card:

NNDSimplyRelative

Would you like to win the “Simply Relative” Stamp Set? This set will be given away to ONE lucky winner!  Here’s how to win:

Comment on the NND blog and Design Team blogs (see list below)! The winner will be chosen at random from the collective reveal posts. Make sure to check out each of their blogs and comment for your chance to win. You will not know which blog has been chosen so the more you comment on the better your chances are of winning!  You have until Thursday, April 13th at 9pm CST to comment — winners will be announced on the blog post on Friday, April 14th.


Check out all the awesome Design Team Blogs below to enter the giveaway:

Newton’s Nook Designs

Amanda Bodine

Holly Endress

Ellen Haxelmans

Larissa Heskett

Samantha Mann

Juliana Michaels

Naki Rager

Maria Russell (you are here)

Jennifer Timko

Tatiana Trafimovich

 ———SUPPLIES———-

Simple D.I.Y. Easter Banner

Hello crafters and stampers!  I am super excited to share with you today this simple D.I.Y. Easter Banner to decorate your home.  This is very easy to put together and you can create multiples to decorate your mantle or any room in your house.


I am showcasing the Easter peeps dies and Happy Easter Script sentiment dies by Kat Scrappiness and the Dogwood Flower Wreath die by Gina Marie Designs.  They are all available at the shop.  Here’s the photo:


IMG_4593


I will keep this blog post short because I have a process video for you below.  I have also listed and linked the supplies I have used.  I hope you like it and got inspired.  Happy crafting!


————SUPPLIES————–

Halloween Cards & Frankie Treat Box

I am back today to share with you some Halloween projects that I made using a bunch of dies and card-making supplies from KatScrappiness.Com.

October has always been my favorite time of the year to start my crafting for Halloween, Thanksgiving and Christmas. With the days getting shorter, I want to keep myself busy and create hand-made projects to give as gifts.

The first vellum LED tea light card with the skeleton was actually made a few days ago, as I wanted to display it on top of my mantle with the rest of my Halloween D.I.Y.’s.

final-6

The second card is my favorite. When I first saw this Cheery Lynn Designs Witch’s skirt die at KatScrappiness, I immediately thought of this design for a card. I thought it is pretty hilarious!


final-5


For the sake of time, I am going to keep this blog post short and show you the process video for the Witch’s Skirt/Cauldron Card and the cute Frankie Pillow Treat Box.

I hope you like the projects. Have an amazing day!

Supplies Used:

MFT Stamps ~ Grateful For You

I am back today to share with you a card that I made as my third and final entry for the MFT Stamps 2016 Card Design Superstar.   It has been a wonderful, scary and intimidating experience thus far. As I write this blog post, there are almost 400 entries! Scary, huh?
Today’s card is a simple thank you card for my best friend, who lives in Washington, D.C. I am a little sad that we are not going to be able to spend Thanksgiving together again this year. I made this card to let her know that she means so much to me, and I am grateful to have her in my life!


img_2161
Grateful For You – Card Design by Maria Russell


I started out by stamping the images on Neenah solar white card stock using MFT stamps Black Licorice hybrid ink. I used Copic markers to color the images. Since I didn’t have the coordinating dies, I had to fuzzy cut all of the images using my precision scissors.


For my card scene, I had to think outside the box again to create a larger window for my critters so I decided to use the gift box cover up die. I think it turned out perfectly.


For the awning, I used the new Stitched Scallop Basic Edges. I love these dies so much it cuts like butter!


Here is the complete list of the supplies I’ve used for the card. They are all from MFT Stamps.


Happy Hedgehogs

Harvest Buddies

Grateful For You stamp set and coordinating die-namics

Die-namics Stitched Scallop Basic Edges

Die-namics Gift Box Cover Up

Sweet Celebration 6×6 Paper Pad (from the birthday card kit)


To finish off the card, I used my black gel pen to give the eyes more dimension, my white gel pen to highlight the cheeks and the leaves, and also used glossy accents on the acorns.


Wish me luck and thank you for stopping by!