craft projects
D.I.Y. ~ Lighted Branch With Paper Flowers ~ A Spring Project
2 Valentine Box Cards ~ 1 Card Stock (Tutorial)
This is a very easy tutorial to follow to create 2 box cards out of one 8 ½ x 11 card stock:
Materials Used:
One cardstock (8 ½ x 11) cut in half measuring 5 ½ x 8 1/2
2 pieces – Designer Series paper – cut at 1 ¾ X 5 ¼
6 pieces – Designer Series paper – cut at 1 ¾ X 2 ½
3 pieces – card stock cut at 3 X 1 ¼ (these pieces will go in the middle of your box card to hold the embellishments
Optional ~ 3 pieces of card stock cut at 2 inches wide using a decorative die or deco punch
Acetate sheets
Stickers and other ephemeras to decorate your box card
Double-sided tape or Tombow Glue
Mini Glue Dots
Valentine Shaker Card
Magical Fairy Door – A Shabby Chic Christmas Project
I wanted to give my little niece a nice Christmas present and since she’s 6 and believes in fairies (she loves Tinkerbell), I decided to make this project.
Materials
Wooden Door (purchased from Hobby Lobby)
Wooden Light Fixtures (Purchased from Sa Crafters)
Rose Buds (purchased from Wild Orchid Crafts)
Cherry Blossoms (also from Wild Orchid crafts)
White Gesso
White Titanium Acrylic Paint
Pink Hydrangea Acrylic Paint
Light Beige Acrylic Paint
Paint Brush
Stardust Stickles
Flat-back Pearl Trim (from my stash)
Pink Rose Trim (purchased from Hobby Lobby)
Pink Seam Binding Ribbon (purchased from Amazon.Com)
Tim Holtz Apothecary Jars (bought from Hobby Lobby)
I hope I somehow inspired you to create a special handmade gift for your daughter, niece, granddaughter or a friend’s daughter and I am sure something as beautiful as this will make a little girl very happy.
Screen/Panel Card
I am so happy to be chosen as one of the many talented monthly contributors for Diecut Crazy Magazine and this screen panel card below, is my first project submission. Our theme for the month of July is “Summer”. I have to admit that I was just a bit perplexed. I didn’t have any stamp sets with a summer theme. The majority of my dies are for Halloween, fall, Christmas and spring. I had to look back at some of my past projects and for some reason I couldn’t find any inspiration that would perfectly describe summer.


In my opinion, summer is all about spending quality time with my husband and kids, traveling around, barbecues, loving the longer daylight, playing with pinwheels, kites, picking flowers, bird-watching and just generally enjoying the great outdoors! So I decided to capture these moments and showcase it through this Screen/Panel Card. The sentiment that I used for this card is exactly what summer is all about ~ it doesn’t have to be perfect to be WONDERFUL!
Supplies and Tools I used:
Screen/Panel Card – 6 x 12 Card Stock (on the 12-inch side, score at 3 inches, 6 and 9). This will create the screen.
All Four Panels (Card Stock)
Bottom Layer: 2 3/4″ x 4 1/2″
Middle Layer: 2 1/2″ x 4 1/4″
Top Layer: 2 1/4″ x 4″
Stamp Sets – Perfect Pennants Stamp set, For the Birds Stamp set, Sweetie Pie Stamp set
Pinwheel sizzlit die
Decorative Punch (I used this punch to create the “legs” of the screen)
Petite petals punch
Banner Punch
Spellbinders Cherry Blossom Die
Fanciful Wings embosslits
Banners Framelits Dies
Grass Die (taken from the Garden Bench Pop it Ups Die)
Rhinestones
Brown Embossing Powder
Copic Markers
Bahama Breeze Memento Ink
Victorian Velvet Distress Ink
Xyron Sticker Maker (I used this to adhere the branch and grass die cuts to my project ~ it makes my life a lot easier!)
Glue dots and stampin dimensionals
Blog: http://www.mariarusselldesigns.wordpress.com
Facebook: http://www.facebook.com/mariarusselldesigns
YouTube Channel: http://www.youtube.com/rprmlr772
Treat Basket For Your Little Ghouls & Goblins
This is a cute little project that you guys can make for your kids; or give as gifts to adults. I was trying to use up the Halloween designer series paper that I acquired over the summer. I will be making a lot of these cute little baskets to give to my daughter’s friends at school, and some of her teachers.
The materials I used are:
Card Stock – cut a 6 x 6
Designer Series Paper – you need 6 pieces measuring 1 7/8 x 1 7/8
Basket handle (Wisteria Wonder card stock) – 1 piece cut at 3/4 inch X 8 inches
Decorative paper (spiderweb) basic black card stock cut at – 1 inch. by 8 inches
Decorative Scallop circle card stock punched at 2 inches
Witch stamped on 1 1/2 inch. circle
Halloween Hello Stamp Set – Stampin Up – Item No. 131721
Decorative Label Punch – Stampin Up – Item No. 120907
Sticky Strip
Adhesive
You should put Hershey’s kisses or Chocolate covered raisins to make it look like “witch poop”. The sentiment reads:
THEIR BROOMS FLY SO FAST
THEY DIP AND THEY SWOOP
BUT IF THEY GET SCARED
THEY LEAVE YOU WITCH POOP!
HAPPY CRAFTING!
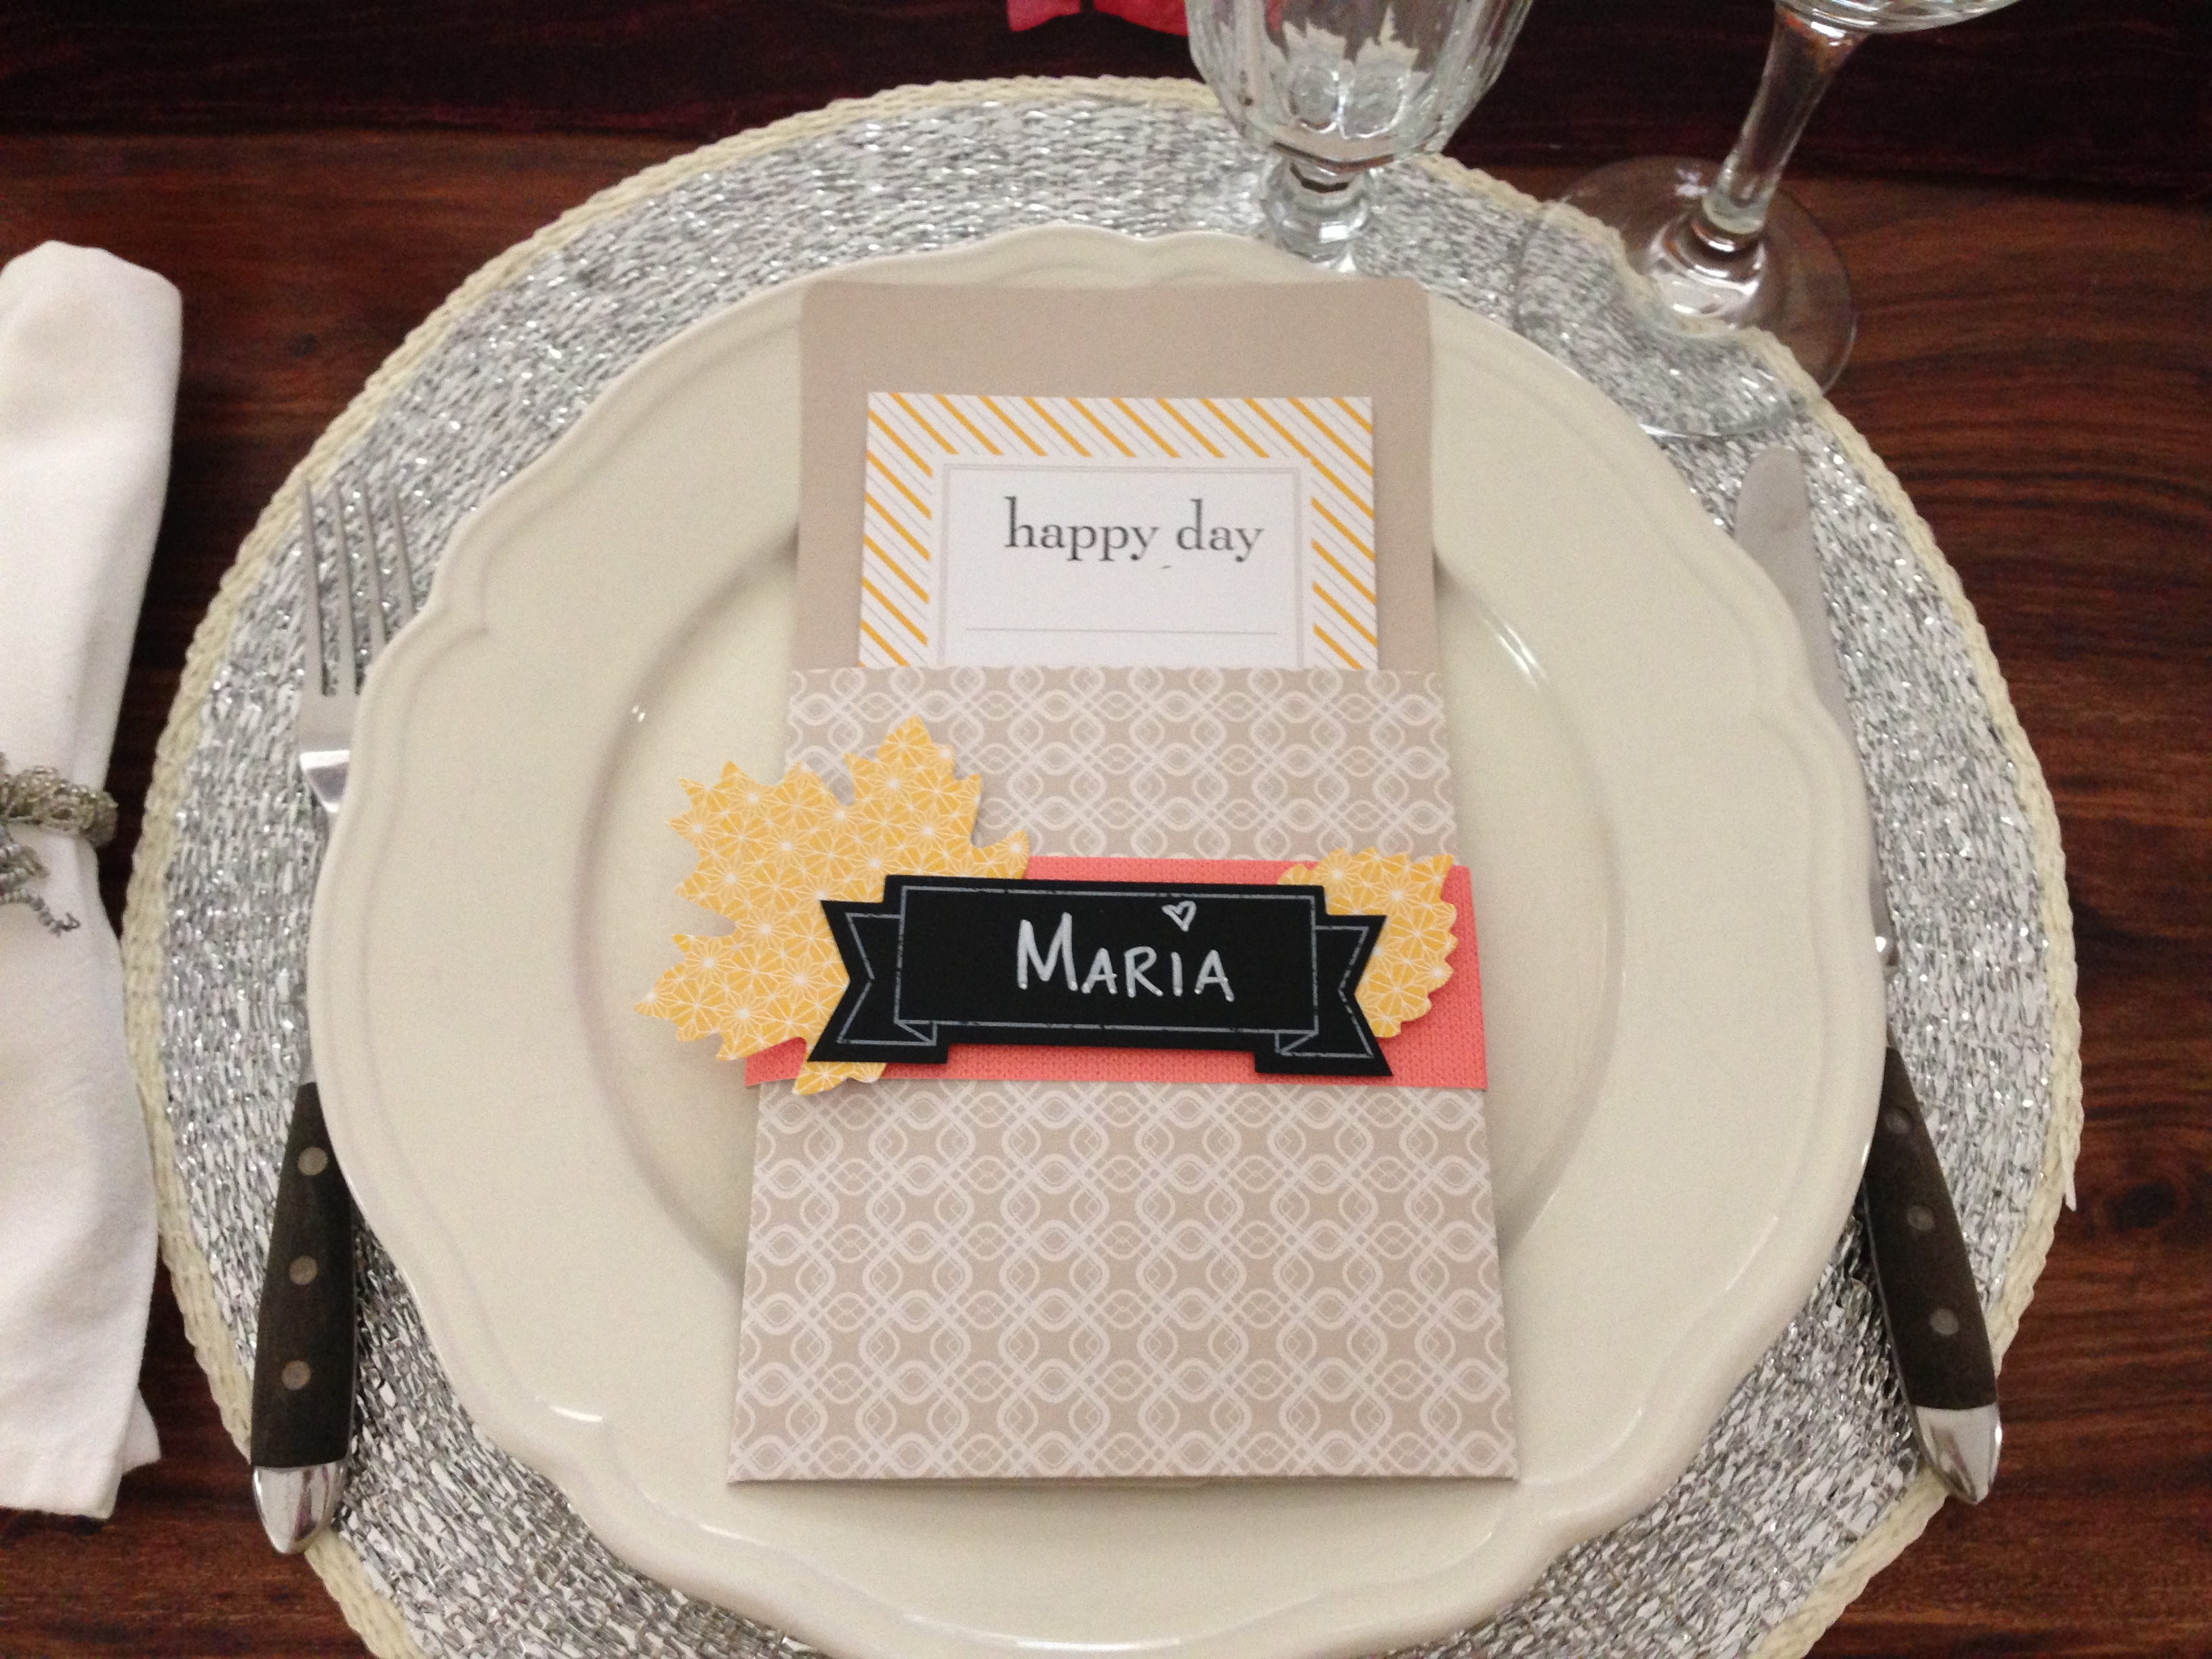
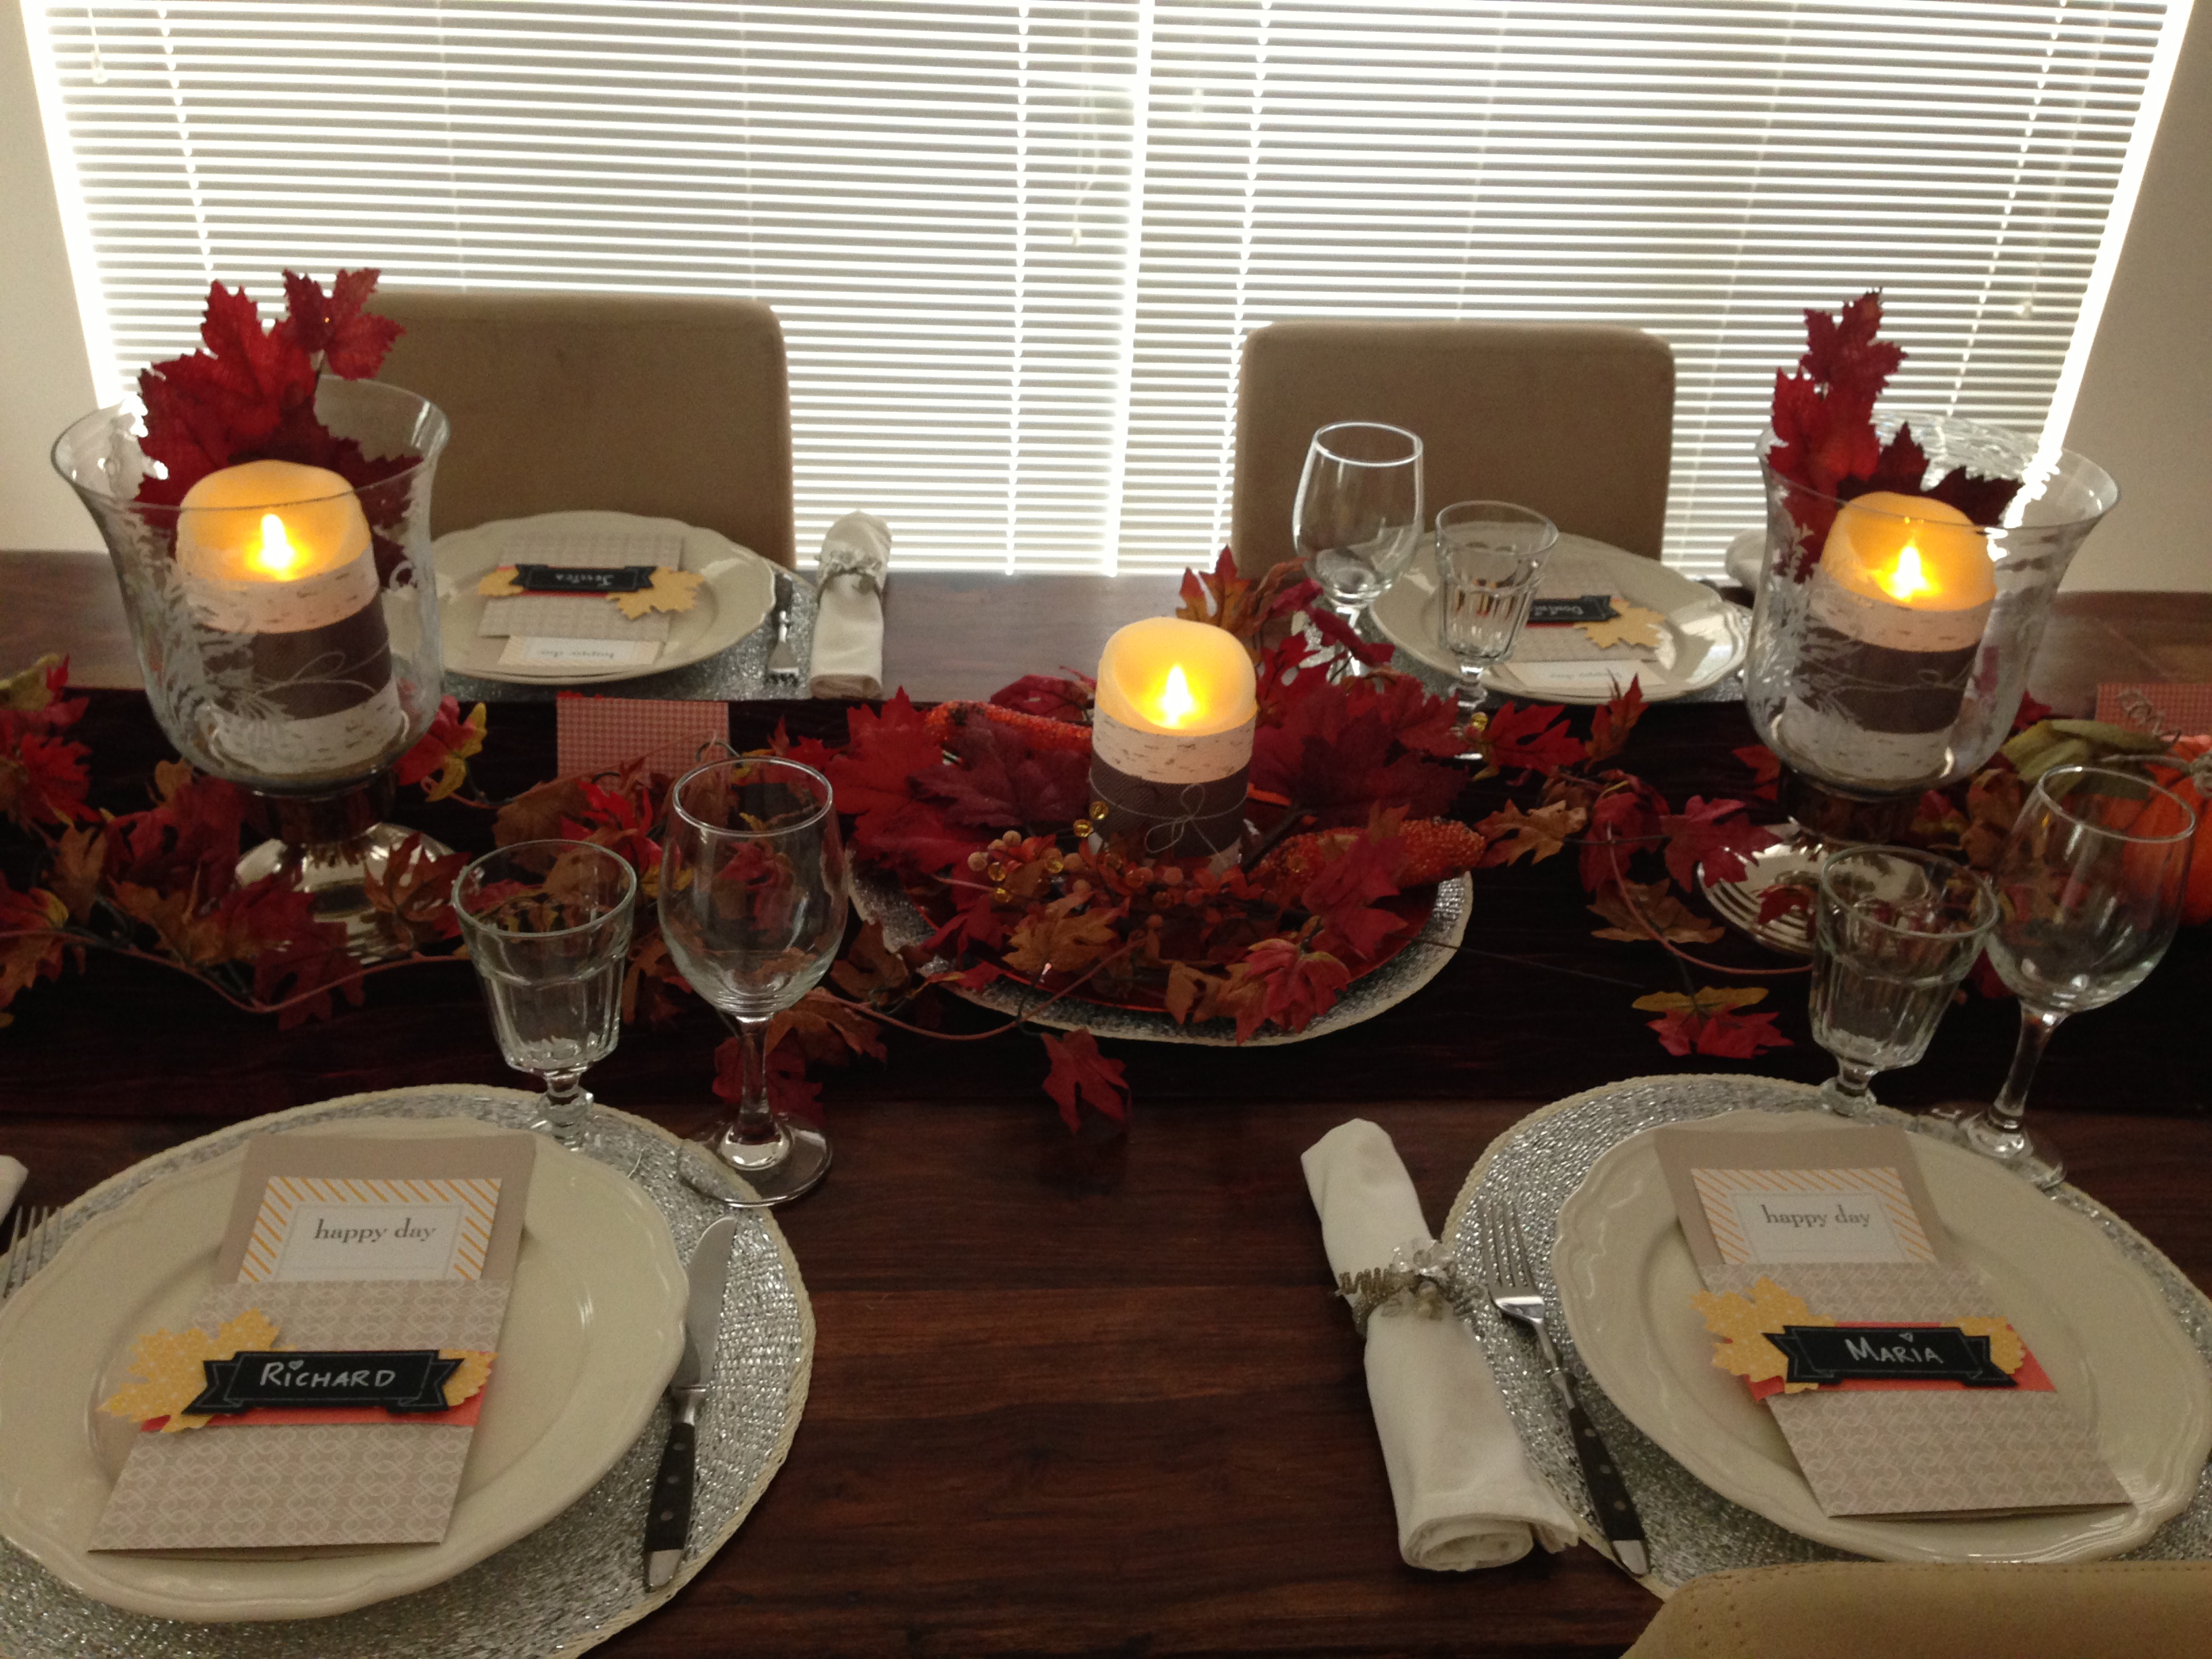
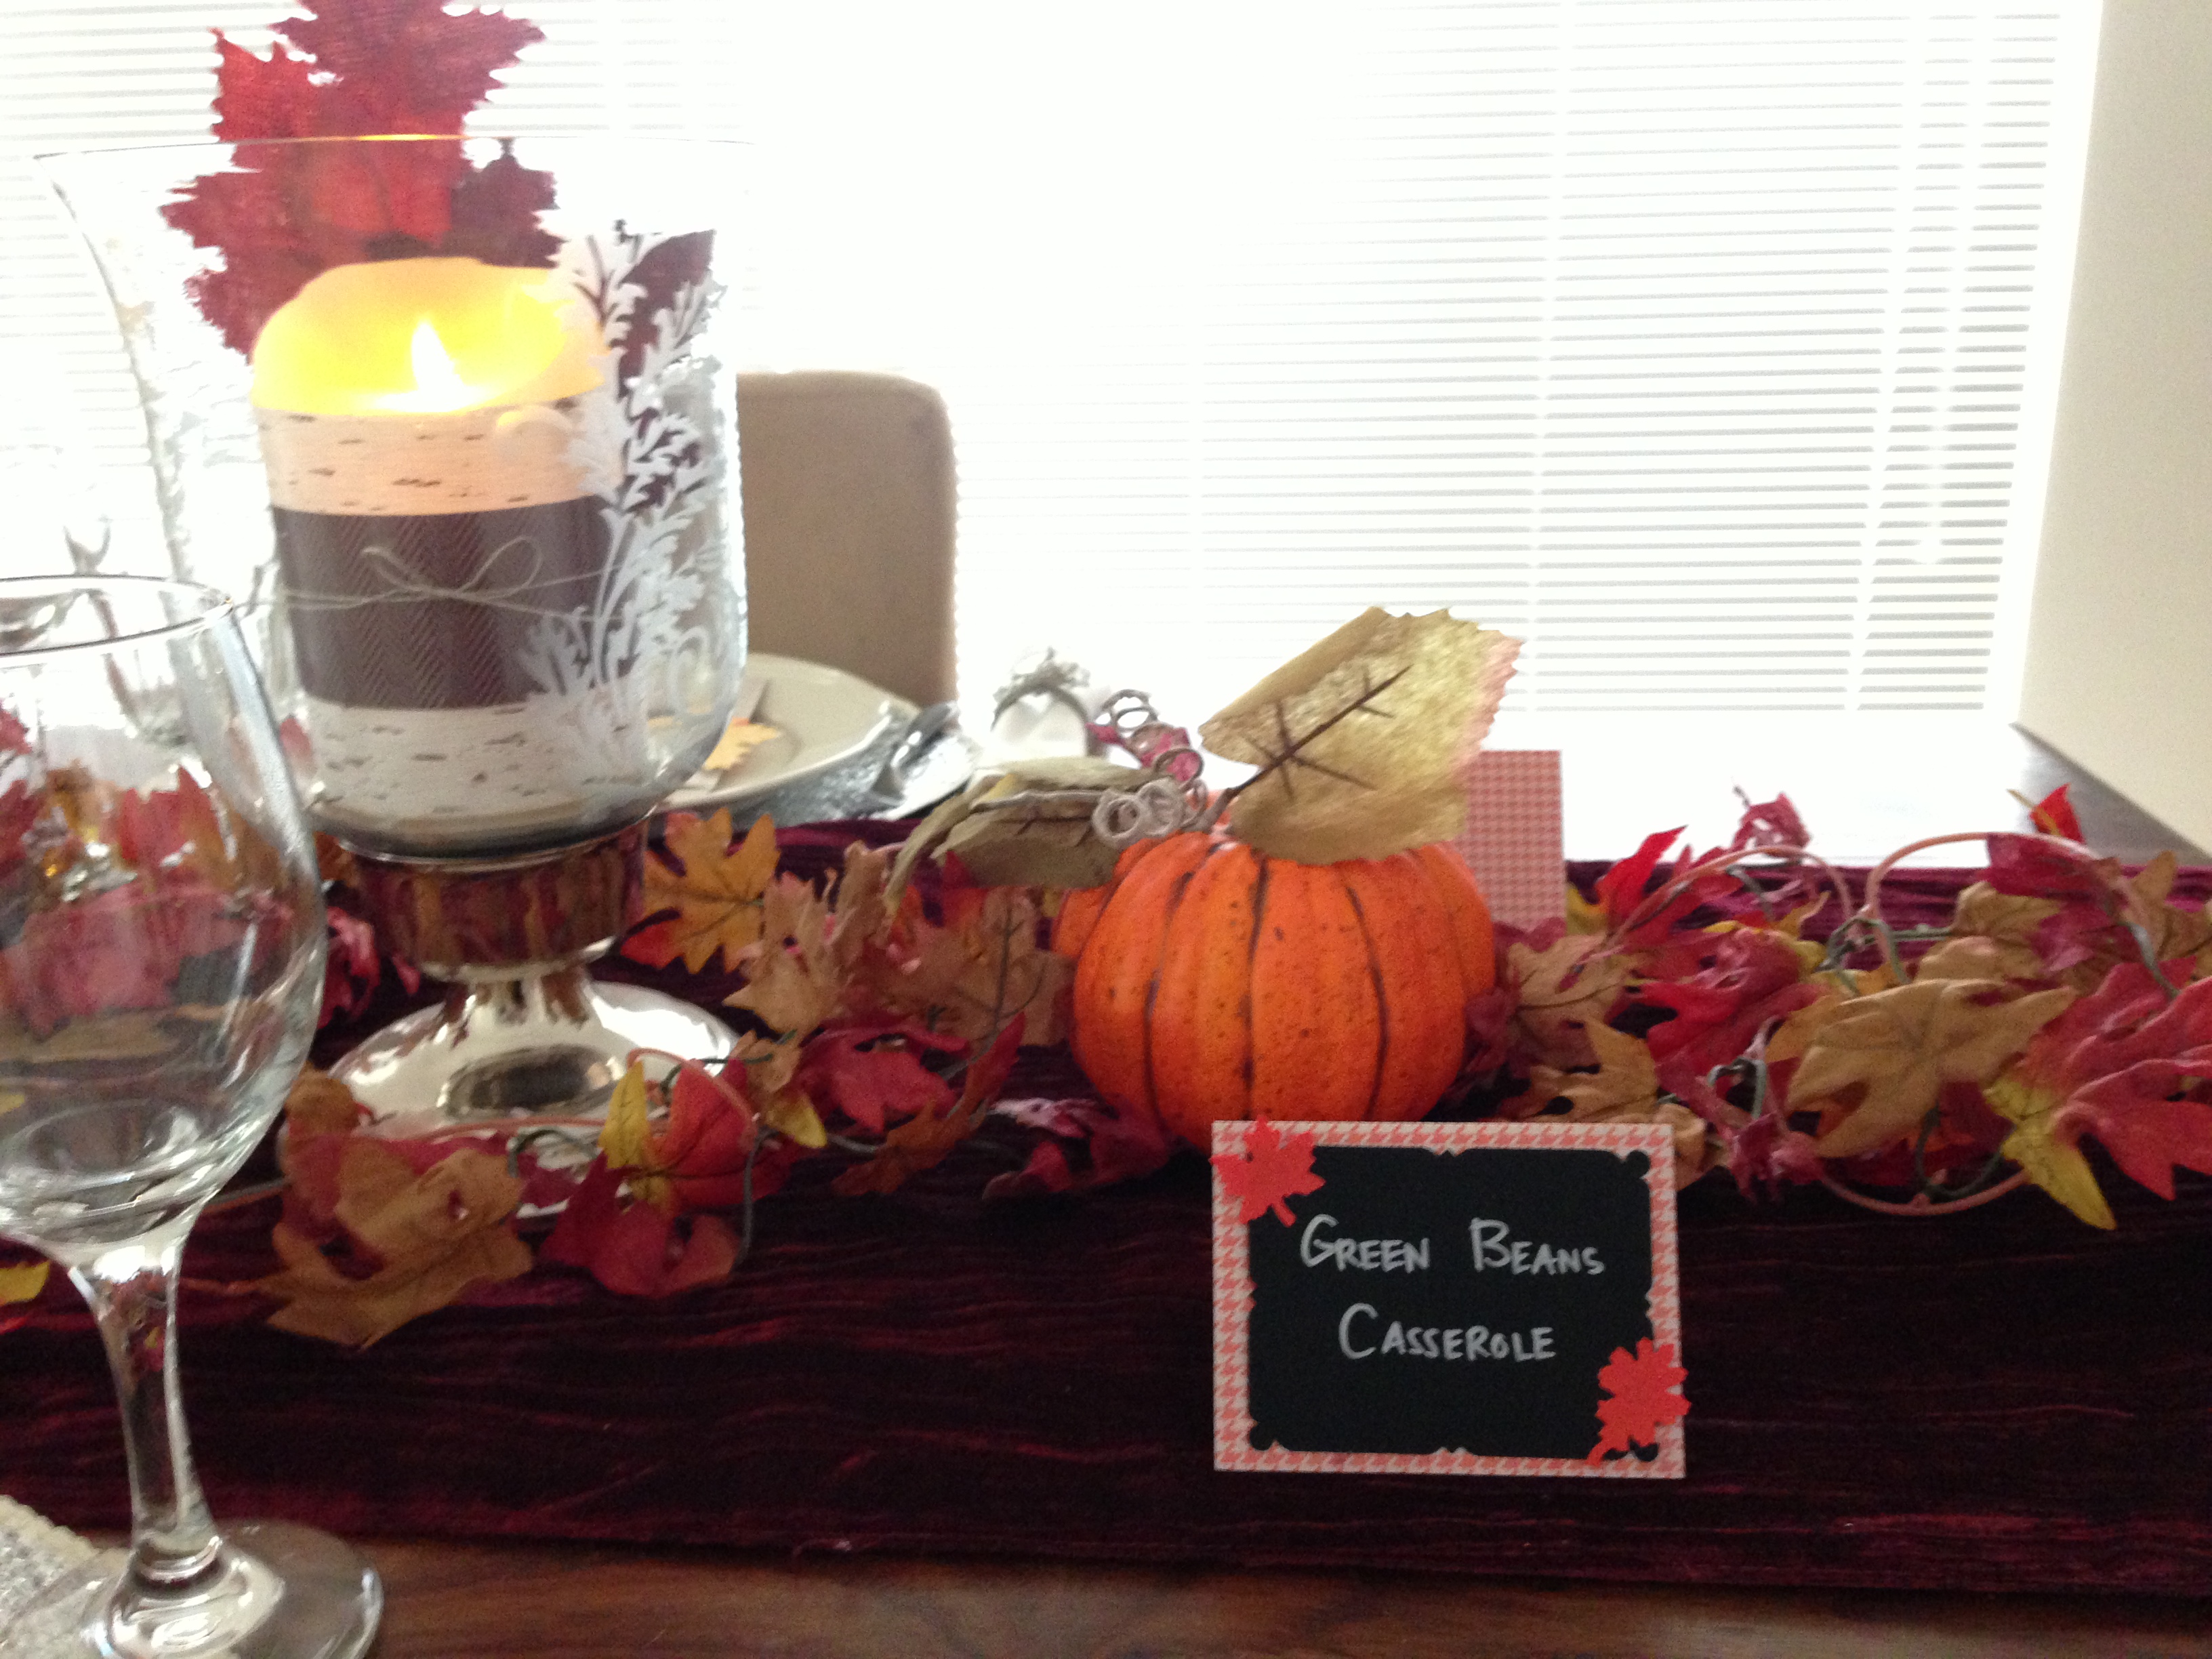
Fall – My favorite Season
Fall – My Favorite Season
I don’t know about you guys, but once the month of September comes, I feel so excited to decorate my home. I go to different craft stores to not only get my supplies, but also to check out some inspiration and ideas.
Recently, I became an Independent Demonstrator for Stampin Up! I was really inspired by the many people who continually share their ideas online, or get together at their home to do some crafting. When I joined, I was gifted with a kit – The Thankful Tablescape Simply Created Kit. I was not only impressed with the quality of products that Stampin Up has to offer for crafters like me, but also the “interior decorator” side of me became intrigued. I didn’t realize that Stampin Up also has a home décor line. Not a lot – but if you use your imagination, there are so many possibilities and endless crafting projects to do. Needless to say I really love the kit. I posted this YouTube video on my channel, but I also took photos for this Blog.