I just absolutely adore MFT Stamps! There is a new color challenge # 57 at the Blog and everyone should use: Smooth White, Chili Powder, Cement Gray, and Gravel Gray. I love this color combination and I knew I just had to participate.
One of my favorite stamps right now is the Beast Friends stamp set by MFT. This adorable Yeti is so cute and perfect for winter-themed cards and scrapbook layouts. Combining my love for this stamp set and the color challenge, here is my card:
Isn’t he adorable? I will have a process video for this card in a few days. I hope you like it and have an amazing day!
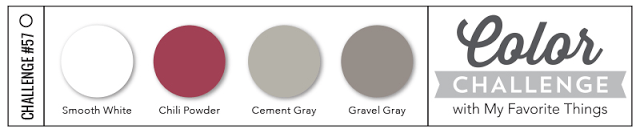
This is my second blog post for today and I apologize for that. It just so happens that today, we are launching two new beautiful stamp sets by www.jessicalynnoriginal.com, called “Operation Snowball Brentwood” and “Once Upon a Fairy Tale Brentwood”. These two new stamp sets are probably my favorite drawings by Jessica, thus far. I have created two samples for each stamp set.
Once Upon a Fairy Tale Brentwood:
Operation Snowball Brentwood:
The supplies are listed and linked below. Have a great weekend!
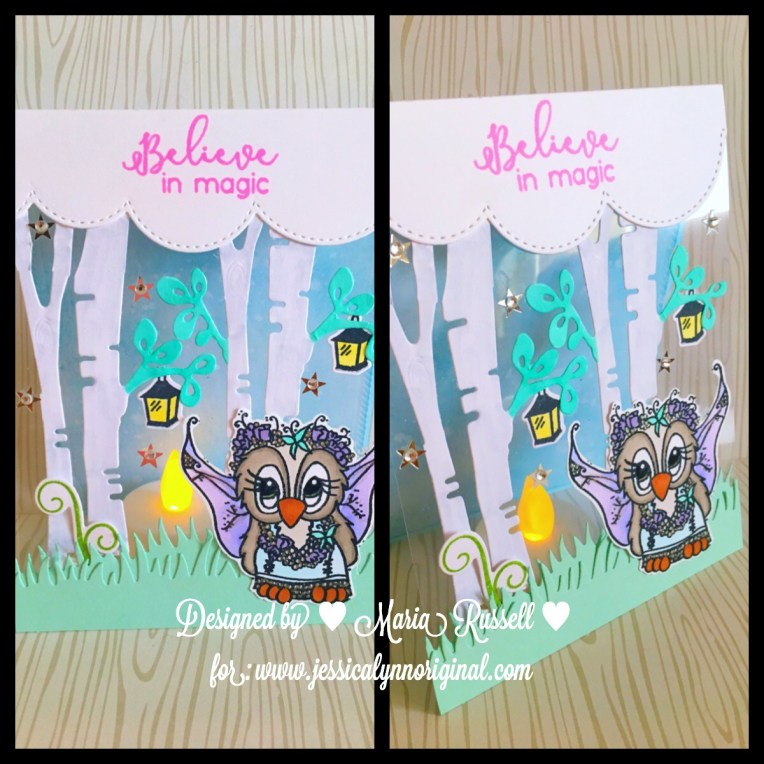
Hello stampers and crafters! I’m back today to share with you two fall cards that I have designed, showcasing Lawn Fawn Winter Sparrows, KatScrappiness Double-Stitched Circle Frames Dies and other products available at the shop.
The winter sparrows stamp set is actually meant for Christmas or Winter-themed cards but if you have been following me for awhile, you know that I like to stretch my stamps and use them for different seasons.
I am going to keep this blog post short because I am sharing a process video on how I made the cards. Which one is your favorite?
The supplies I have used will be listed and linked below. Have an amazing day!
I am back today to share with you my design team projects for Not2ShabbyShop showcasing the Autumn Splendor stamp set and dies, and fishtail banner II dies by Sunny Studio stamps. I LOVE this stamp set! It is so easy to stamp and layer, they are amazing!
Here are the cards and tags. I have also shared a process video if you’d like to see how I made them.
I finally had the chance to sit down, turn on my music, light some candles and start creating a card that is just simply for a friend, and not design-team related.
I recently ordered these cute Angel stamp set by Sunny Studio and I couldn’t wait to play with them. I had this design idea in my head for quite sometime now and decided to create a see-through card. Here’s a step-by-step instruction below. It seems like a lot of work but I promise you, it’s really easy!
Cut the white card-base at 4 ¼ by 11 and score at 5 ½.
Trim the front panel at 4 ½, leaving the front of the card with an inch.
Cut an acetate sheet measuring to 4 ¼ by 5 ½
Adhere the acetate sheet behind the 1-inch flap. This will create the window part of the card.
Using the leftover card stock that I just trimmed from the front card-panel, I used my Clouds border die to cut 3 different clouds pieces to create my “clouds”.
Using my sponge, I distressed the clouds with Tim Holtz Spun Sugar and Shaded Lilac distressed inks. I wanted the card to have a unique pink and purple color.
I then adhered the clouds on the front panel of the card. One cloud on top, and two at the bottom.
I cut another white card stock measuring 4 1/8 by 5 3/8. Using my sponge again, I distressed the card stock with the same colors that I used for my clouds.
I adhered this card stock on the inside of my card (I wanted to use the same colors that I used for my clouds for the inside of the card).
Using my Memento Tuxedo Black Ink, I stamped the angels, cloud and lantern images on Neenah solar white card stock.
I used my Copic markers to color the images.
Using the coordinating dies for the angels, I die-cut the images with my big shot machine.
I used my ATG tape runner to adhere the Angels on the front panel.
I used my mini-glue dots to adhere the lantern on the Angels’ hands.
Using my Ranger Multi-Medium Matte adhesive, I adhered the little purple star sequins by Kat Scrappiness to decorate my card further.
I stamped the sentiment inside the card, using my Lawn Fawn Hippo Ink.
Here are the photos of the finished card. I inserted an LED tea light so that my friend can also use this to display in her craft room.
I really love how this card turned out. Would you give it a try? I would love to see your version of my design.
The supplies I have used are listed and linked below. Thanks so much for stopping by and have an amazing day!
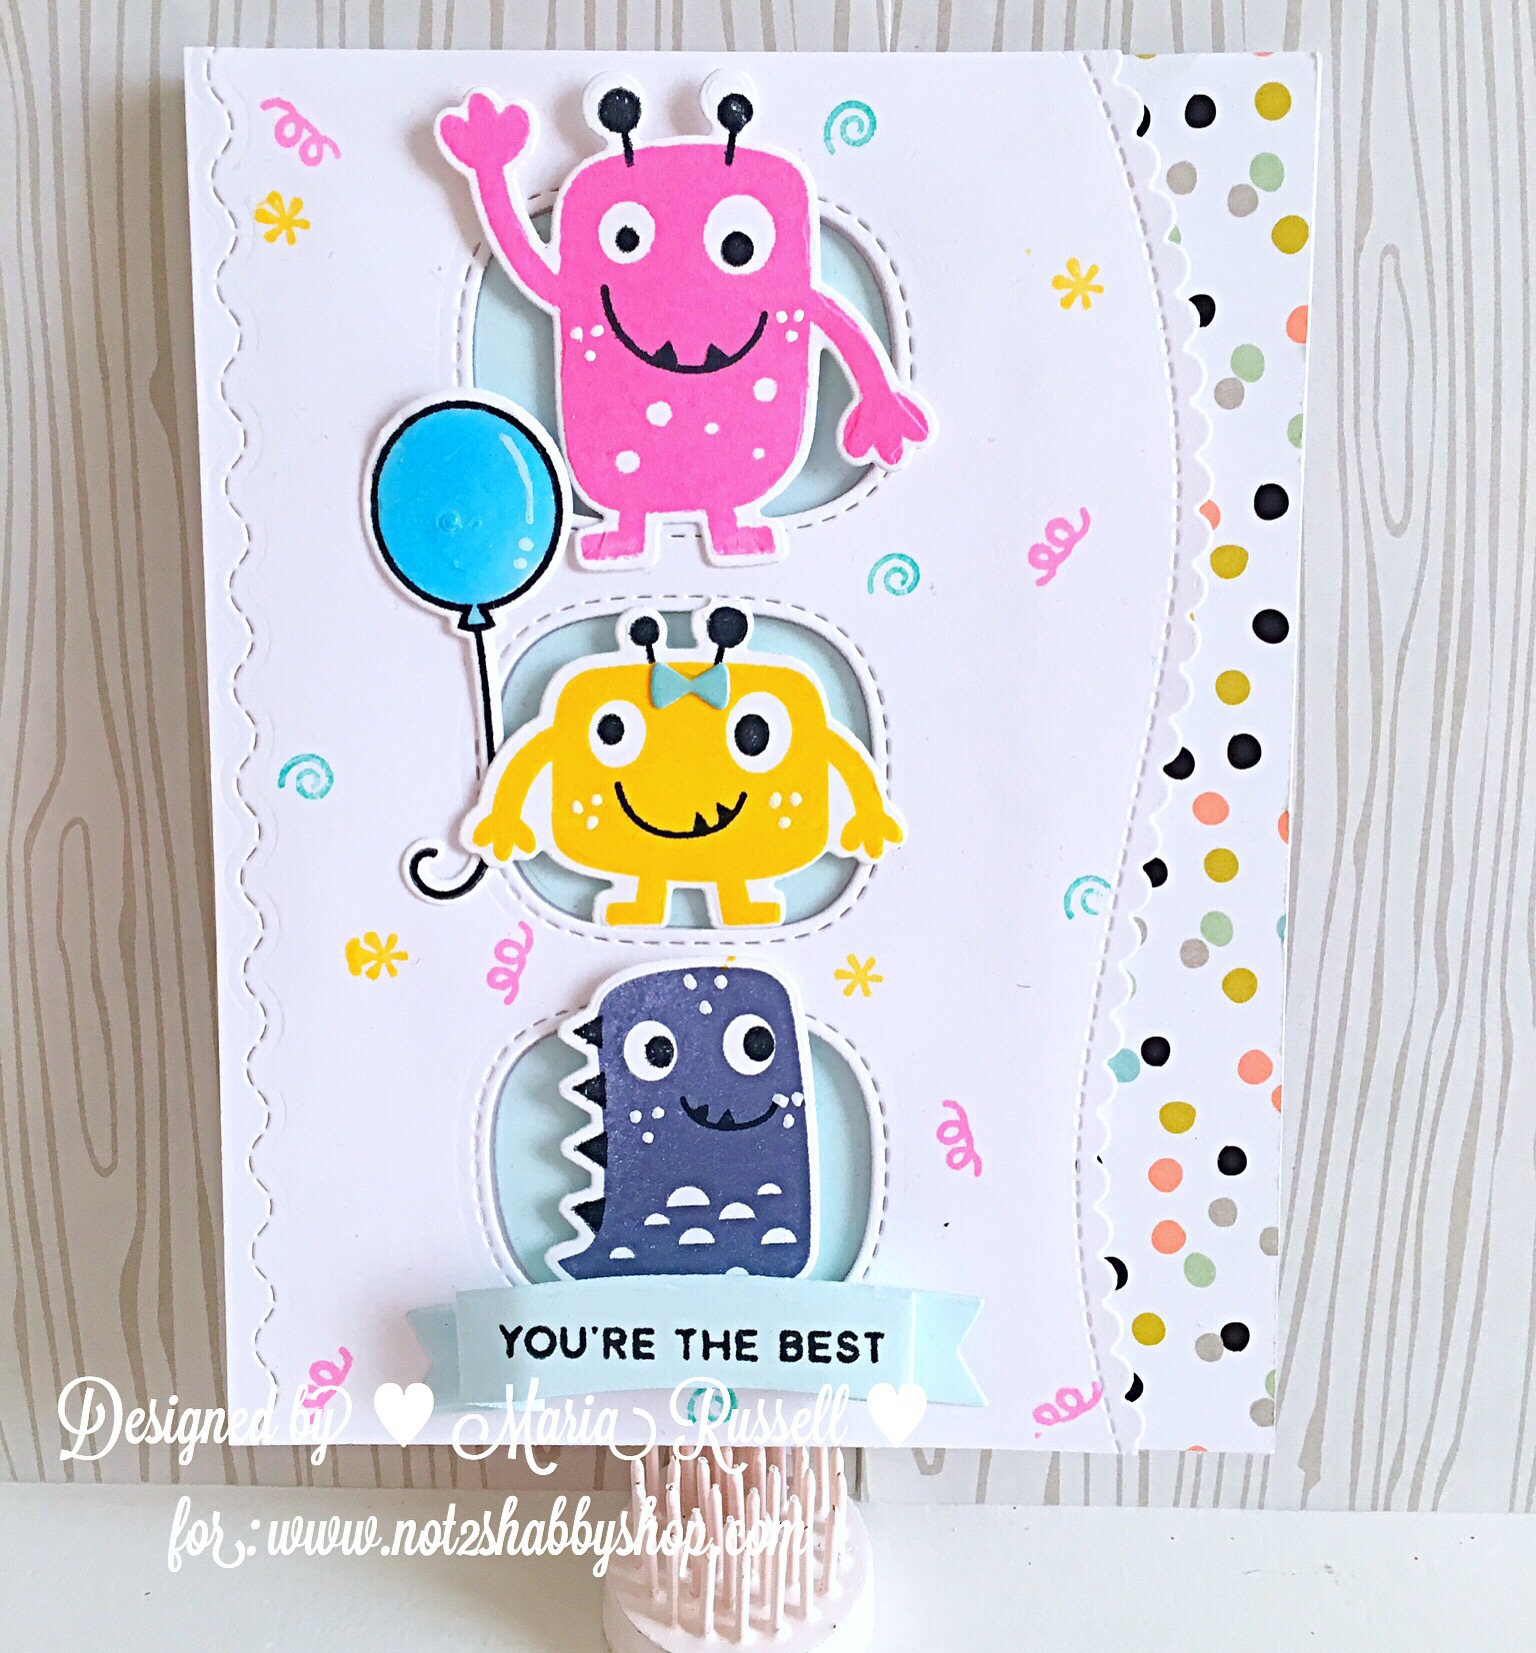
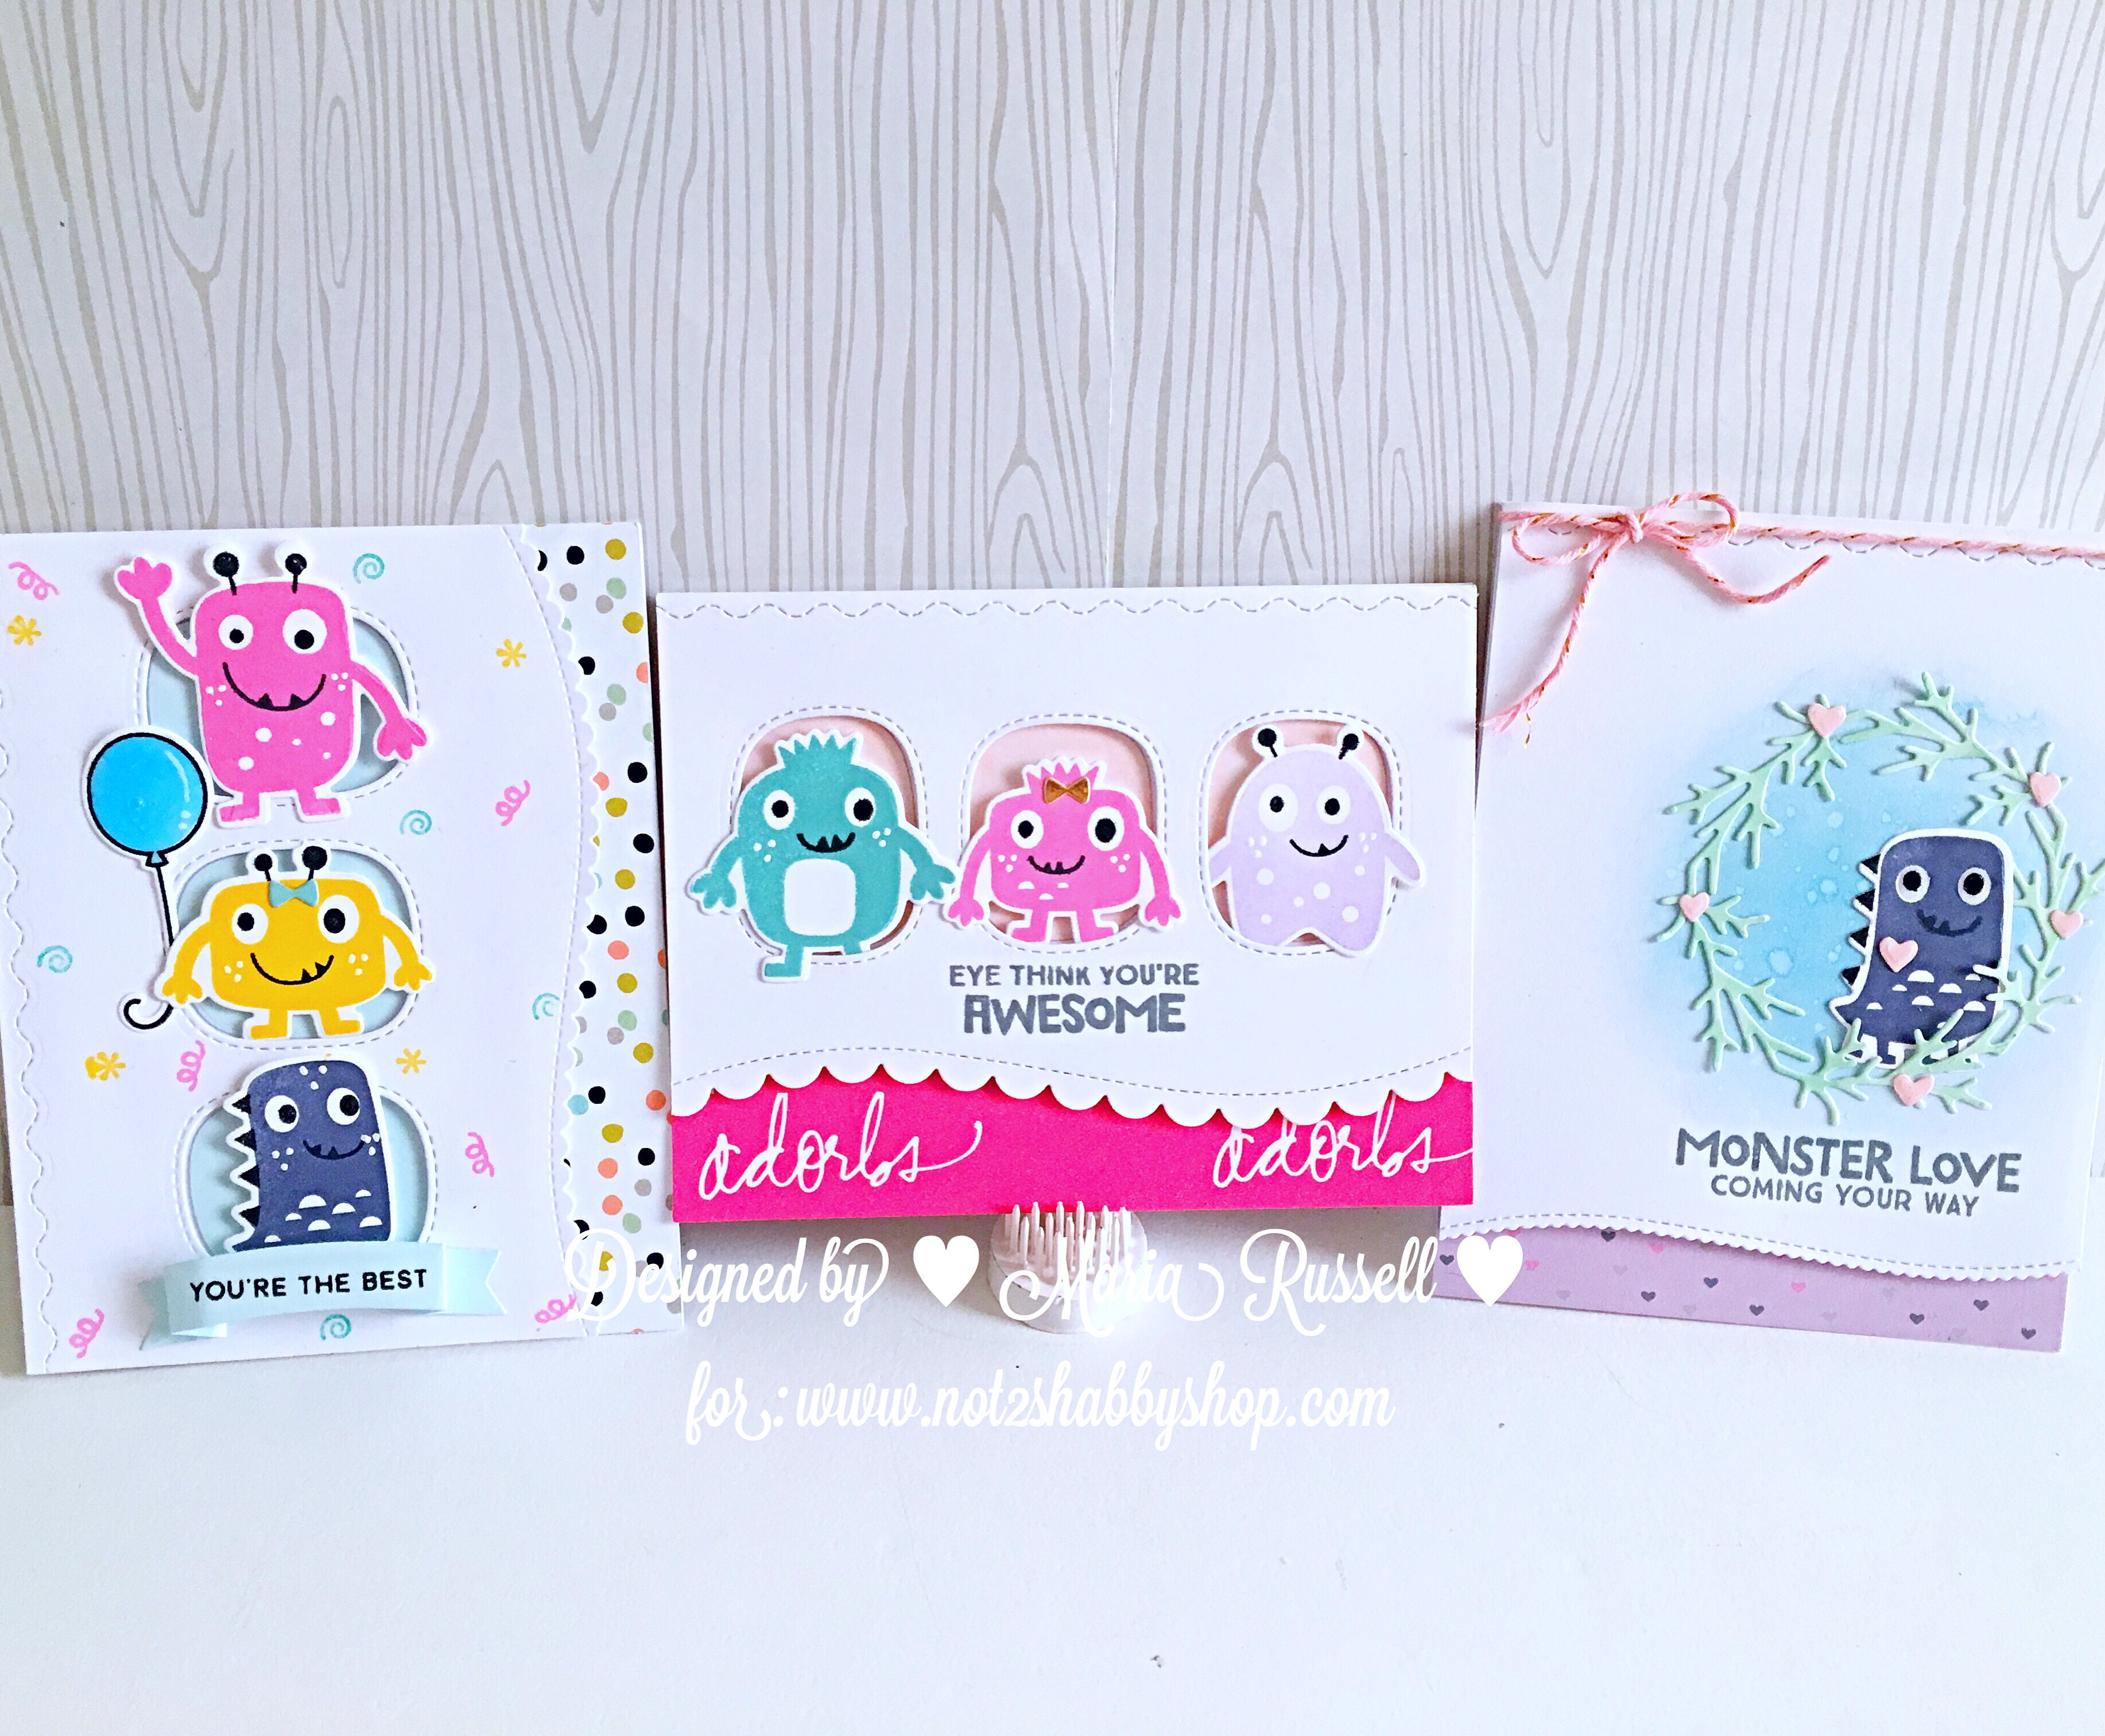
I am not ready to give up making Halloween projects just yet so I figured this week is my last chance to create more cards and a tag. I’m back today to share with you my design team projects for Not2ShabbyShop, showcasing MFT Stamps Monster Love stamp set and dies.
Below is the photo and I have shared a process video for one of the cards. I have also listed and linked the supplies below. Have an amazing day!
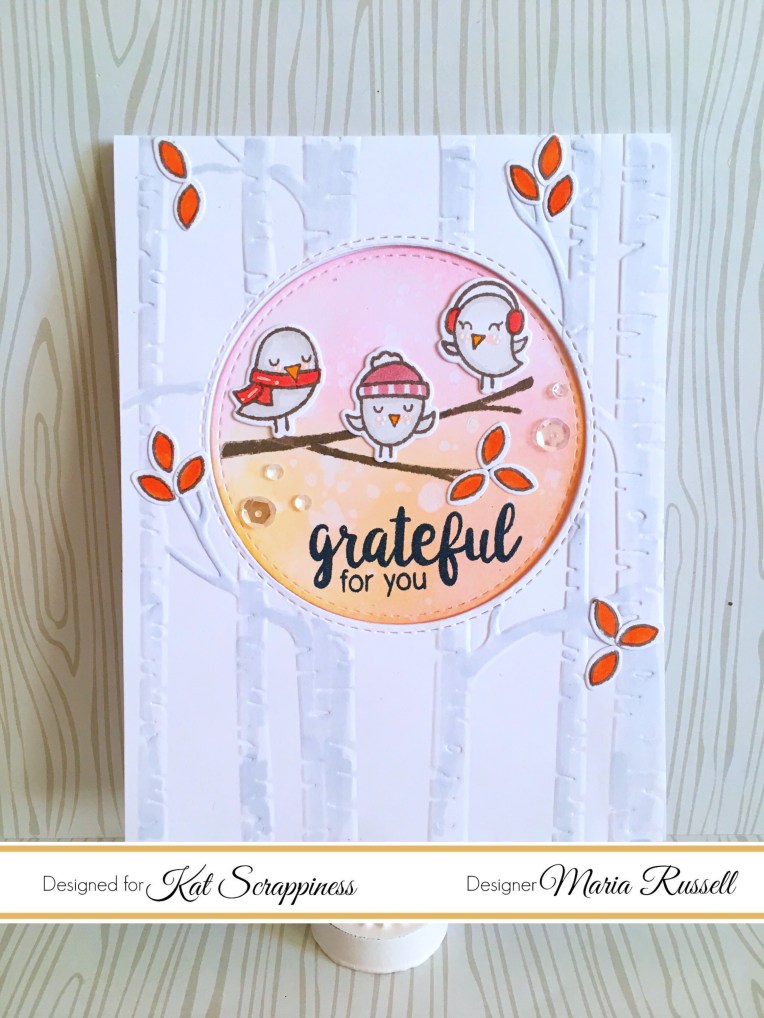
Even though I’m not ready for Christmas yet, I can’t help but get excited about playing with this new stamp set by MFT Stamps called Beast Friends. These Yeti images are so adorable!
I shared a YouTube video on how I created the first card if you’d like to check it out.
The second project is just an addition since I’ve already colored a few of those adorable Yetis. I wanted to create a cute Christmas tag. What do you think? Are you “Yeti” for Christmas?
I am back today to share with you a card that I made as my third and final entry for the MFT Stamps 2016 Card Design Superstar. It has been a wonderful, scary and intimidating experience thus far. As I write this blog post, there are almost 400 entries! Scary, huh?
Today’s card is a simple thank you card for my best friend, who lives in Washington, D.C. I am a little sad that we are not going to be able to spend Thanksgiving together again this year. I made this card to let her know that she means so much to me, and I am grateful to have her in my life!
Grateful For You – Card Design by Maria Russell
I started out by stamping the images on Neenah solar white card stock using MFT stamps Black Licorice hybrid ink. I used Copic markers to color the images. Since I didn’t have the coordinating dies, I had to fuzzy cut all of the images using my precision scissors.
For my card scene, I had to think outside the box again to create a larger window for my critters so I decided to use the gift box cover up die. I think it turned out perfectly.
Sweet Celebration 6×6 Paper Pad (from the birthday card kit)
To finish off the card, I used my black gel pen to give the eyes more dimension, my white gel pen to highlight the cheeks and the leaves, and also used glossy accents on the acorns.
I am completely obsessed with MFT Stamps lately so when I was asked by Jamie of not2ShabbyShop to pick the stamps I wanted for my design team package for September, I naturally picked a cute stamp from MFT called “Monster Love”. What’s not to love? They are so easy to stamp and with a stamping tool, you can easily achieve perfect results each time.
I originally filmed a process video for the cards but with a vertigo attack recently, I accidentally deleted the footage! I still shared them on my recent YouTube video though if you’d like to see it.
Here are the 3 cards that I designed showcasing the stamp set. I also used my all-time favorite Tag Builder Blueprints No. 5.
I hope I have given you some inspiration today! Have an amazing day!