Inky Paws Challenge #41 – Newton’s Nook Designs

There’s a new Inky Paws Challenge on the blog (http://www.inkypawschallenge.com) and this time it is a color challenge, using Mint, Light Pink, Yellow and White. I absolutely adore pastel colors so I decided to participate in this challenge!

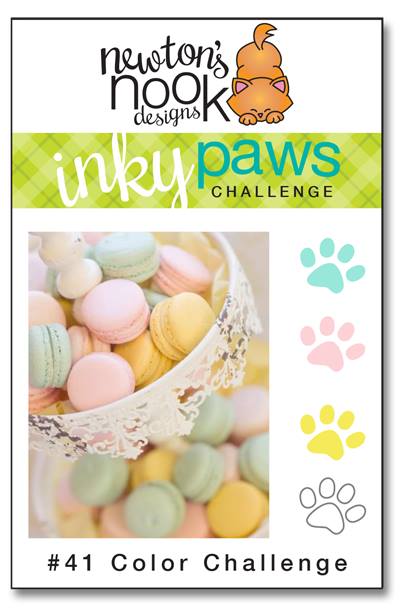
Here is the inspiration photo:

nndinkypaws41

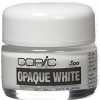
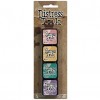
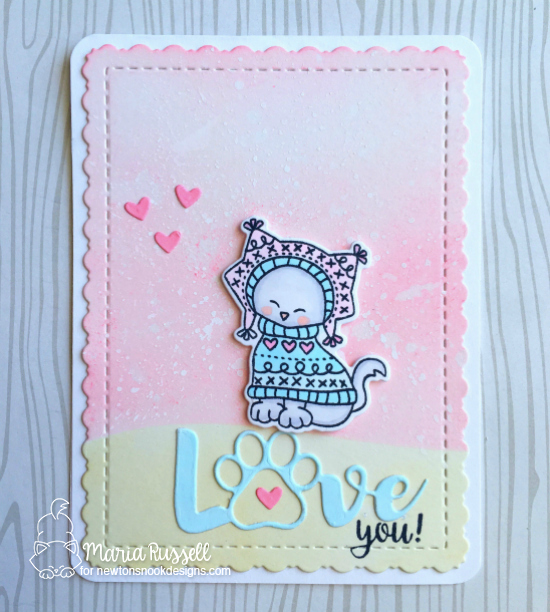
I started out by die-cutting my Neenah Solar White card stock and distressed my background using Spun Sugar and Scattered Straw distress inks.  I splattered white paint all over my background using my white opaque paint.

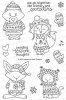
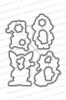
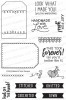
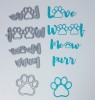
I stamped my image showcasing NND’s Sweater Weather stamp set and colored her in with my Copic markers.  Using the same mint Copic marker, I colored my card stock and used my “love” script die to die-cut the pet sentiment, and stamped “you” from the tag sampler stamp set.

I used my Xyron sticker maker to adhere the “love” sentiment on my card.  I always use my sticker maker to adhere intricate dies.

Here is my card:

nndinkypaws41a

For more information about the color challenge, please visit http://www.inkypawschallenge.com. You have two weeks to join.  Winner will get a $10 gift code for the Newton’s Nook Designs shop.

The supplies that I have used for today’s card are listed and linked below if you are interested. Have an amazing day!

———SUPPLIES———-

Kissing Birds Shaker Card

Hello crafty peeps! I am back for Craftin Desert Divas and today, I am sharing with you this adorable kissing birds shaker card.

I started out by printing the kissing birds digital stamp by CDD with Neenah solar white card stock on my laser printer.  I wanted this image to pop so I adjusted the size to make it slightly bigger.  I fuzzy-cut the image with my cutter-bee precision scissors  and set it aside.  I stamped my card panel with some images from another CDD stamp and distressed the background with my spun sugar distress ink.

To create the sentiment, I used the Flag Banner dies and stamped “Love You” showcasing the Elegant brush script stamp set.  This set is a must-have for any stamper.

To create the shaker part of the card, I die-cut the tag using my Banner Dies from CDD with my doodlebug paper, with the acetate sheet and foam adhesive.  For my shaker element, I used my new favorite, shimmer sequins also available at the shop.  They are so sparkly and beautiful!  I also added the red and white twine to finish the design. Here is my card.

cddfebruarymoodboard2

I hope you all got inspired today.  The supplies I have used are listed and linked below if you’re interested. Please do join us on the CDD Facebook Gallery page.  We have a challenge every month that you can participate in and you can win some amazing prizes.  Here is the link: https://www.facebook.com/groups/1428163220758119/

——-SUPPLIES——-

(Affiliate links may have been used at no additional cost to you)

Newton’s Nook Designs January Reveal Plus a Process Video

Here is the whole reveal for the January Stamps and Dies by Newton’s Nook Designs, plus a process video for one of the cards. I hope you get inspired.

Have a great weekend!


Newton’s Nook Designs January Release Day 1 – Woodland Duo

nnd_releasejan17


Hello stampers and crafters.  I’m super excited to share this blog post as today is release day (Day 1) at Newton’s Nook Designs.  I have created a Valentine’s Day card, showcasing the new Woodland Duos stamp set. This stamp set coordinates with the previously released, Darling Hearts Die set. You will absolutely love the images on this stamp set!


I started out by stamping my images on Neenah solar white card stock with my memento tuxedo black ink. I colored the images using my Copic markers, and die-cut my stamped images with its coordinating dies.   I wanted to do some inlaid technique to show off the beautiful images in one card without the bulk.


For my card below, I decided to use the foxes and the raccoons, with one of the small hearts included in the set. (I have made another card with the Owl images, which I will later share on a different post with a process video.)


nnd_darling-duo2


I finished off the design by using three different patterned papers, and added the tiny red bow. What do you guys think? I hope you like it as much as I do. This stamp set will be available for purchase on January 20 at 8:00 a.m. CST.


20170101_woodlandduos_pkg


Would you like to win this “Woodland Duos” stamp set?  This set will be given away to ONE lucky winner.


Here’s how to win: 


Comment on the NND blog and Design Team blogs (see list below)!  The winner will be chosen at random from the collective reveal posts. Make sure to check out each of their blogs and comment for your chance to win. You will not know which blog has been chosen so the more you comment on the better your chances are of winning!  You have until Thursday January 19th at 9pm CST to comment  — winners will be announced on the Newton’s Nook Designs blog post on Friday, January 20th.


Check out all the awesome Design Team Blogs below to enter:


Newton’s Nook Designs

Amanda Bodine

Holly Endress

Ellen Haxelmans

Larissa Heskett

Samantha Mann

Juliana Michaels

Naki Rager

Maria Russell (you’re here)

Jennifer Timko

Tatiana Trafimovich


It Would Stink If We Weren’t Friends

Hello and Happy 2017 everyone! This is my first design team post for the year for Kat Scrappiness and today I am sharing a card, showcasing the Little Stinker stamp set by Neat & Tangled, the Stitched-Rope Nested Rectangle dies and a bunch of other supplies available at the shop.

I apologize if I will not have a process video for you today because I still didn’t get my voice back. I currently have bronchitis and laryngitis, and I am still trying to get rid of this flu. It has been a few weeks now and it is starting to bum me out. Anyway, I have taken some step-by-step photos of my project so I will try and walk you through it.

I started out by stamping the image on Inkadinkado Masking Paper, and fuzzy-cut it with my honeybee scissors. Since this is a one-layer card, I will be using my mask to cover the image.


img_3345


I die-cut my card panel using the stitched rope nested die on Neenah solar white card stock. I then used my mask to cover the Little Stinker image so I can distress the background with my distress inks. I also cut a mask for my grass hill with the masking paper. I used Spun Sugar and Evergreen bough to distress my background. Once I was satisfied with the color combination, I used my paintbrush to splatter some water on my card panel. Distress ink reacts on water and it really gives a cool effect.
img_3346 img_3347 img_3348


I peeled the mask that was covering the skunk, and started coloring the image with my Copic markers. I used T0, T2 and T4 for my skunk. I also used R00 for the cheeks and the little sign that was being held by the little skunk. I stamped the sentiment on the sign using my Memento Tuxedo black ink.


Since this is a Valentine’s Day card, I felt that I needed to add some hearts. I had an older stamp set from my stash with splattered hearts images and I thought this would be perfect for my card. I used the same mask to cover my skunk again, and stamped the front panel of the card with the heart stamp. It turned out really beautiful!


To finish off the design of the card, and with the help of my favorite tool, the Crystal Katana, I  adhered a tiny red heart on the sign, and covered the heart with glossy accents. I love how the card turned out! I hope you love it too and got inspired today.


img_3349


Here is the final design:


img_3350


The supplies I have used are listed and linked below if you are interested to purchase them.  Have a wonderful day!

———SUPPLIES————

Every Year I Fall For You

I am super excited to share this post today because it is my first post as a design team member for Newton’s Nook Designs (“NND”).

Since Valentine’s Day is just around the corner, I decided to start my projects early.  I wasn’t really sure in the beginning what images I wanted to use for the card so I had stamped out a couple of NND images on Neenah solar white card stock, using my stamping tool and colored the images using my Copic markers. I ended up not using the other images I colored and I have set it aside for a future project in mind. I die-cut the images with my die-cutting machine using the coordinating dies.


img_3315


For my card, I am showcasing the “What A Hoot stamp set and What A Hoot Die Set” and for my sentiment, I used “Fall-ing For You stamp set“. I did a little bit of masking so that I only use the words “every year, I fall for you”. I think it turned out perfectly!


img_3326


Here is the card. The supplies I have used are listed and linked below. I hope you like my card and somehow got inspired to create something beautiful today.  For cute stamp set and dies, please visit http://www.newtonsnookdesigns.com, and share your creations with us on Instagram (using hashtags, #newtonsnookdesigns, #NND) or share it on NND’s Facebook Group (https://www.facebook.com/groups/NewtonsNookDesigns/).

Have an amazing day!


nnd_whatahoot_blog


———SUPPLIES————-

https://static.inlinkz.com/ppr.js

Holiday Spirits Christmas Card

Hello everyone! It’s Maria here with you today and I will be showcasing a lot of items from Kat Scrappiness. For my card, I have used the Avery Elle Holiday Spirits stamp set and Holiday Spirits Dies, with DCAM 8×8 Bricked Wall Stencil and Deck the Halls sequin Mix.

Here is the card:

img_2935

The process video below will not show any Copic coloring because I wanted to keep the video as short as possible. You will, however, see how I stenciled the background and assembled the card.


I hope you found the video helpful and got inspired today. The supplies I have used are listed and linked below. Happy holidays!

—–SUPPLIES—–

Winter Scene Christmas Card

Is everyone ready for Christmas? To tell you the truth, I’m not. This year, I am way behind the shopping and all the other things that I need to do before Christmas. The only thing I was able to do last weekend was to at least take the fall décor down and put the Christmas décor up. I am waiting for my kids to arrive so we can all decorate the tree. But enough about my procrastination!

I was listening to some Christmas music today and got inspired to create this Winter Scene Christmas card, showcasing the Winter House Scene Die and Merry Christmas script die by Gina Marie Designs, available at Kat Scrappiness. This die is a must-have! You can easily mass-produce the card below. I promise you, it’s really easy. Please watch the process video below to see how I made the card.

final-23

Here’s the process video:


I hope you got inspired today. Supplies are listed and linked below in case you are interested to purchase them.

Have a wonderful day!


Dear Santa Christmas Cards

Hello stampers and crafters! I am back today and I am sharing two cards that I designed, showcasing the Dear Santa stamp set, the Kat Scrappiness Christmas Tree and Happy Holidays Dies and a whole lot of other supplies available for purchase at the shop.

Since I have just arrived a few hours ago from spending Thanksgiving with my family, I will not have a process video for you today for these two cards. However, these cards are pretty simple and can be mass-produced.

For the first card, I started out by stamping a bunch of the cat images, the ball of yarn, and the presents on Neenah Solar White card stock, using memento tuxedo black ink. I colored the image using my Copic markers. I also die-cut the Christmas tree using the Doodlebug “Here Comes Santa Claus” patterned paper, then adhering the pieces together with my favorite Tombow liquid adhesive.

img_2724

I wanted a white-on-white background to make my images pop but I didn’t want my card panel to look flat, so I decided to use my Taylored Expressions Twinkling Holiday embossing folder. Embossing the card stock gave it more of a dimension. I adhered all of my pieces together using my liquid adhesive and Scotch foam tape, and finished the card design with a cute Lawn Fawn tag that says “Define Naughty!” with my Lawn Fawn Peppermint twine.

img_2725

Here is the first card:

final-16

For the second card, I didn’t want to use traditional Christmas colors. I colored my cat image with light grays and pink Copic markers. I used a patterned paper from Pinkfresh Studio 6×6 paper pad to die-cut the front panel of my card.

Using my blending foam, I distressed my white card stock with Spun Sugar distressed ink and blended it until the colors matched the pink twine. I die-cut the sentiment using Kat Scrappiness Happy Holidays Script die. I LOVE THIS DIE! It cuts like butter! I then adhered all of my pieces to the front panel of my card using my liquid adhesive. I finished the design with my pink and gold twine, and White Diamonds Sequins by Kat Scrappiness. I think the card turned out simple yet classy!

final-17

I hope you like both cards and got inspired today. I promise to have a process video for my next design team project.

I have listed and linked all the supplies that I have used below in case you’re interested to purchase them.

Have an amazing day!

———-SUPPLIES———–

https://static.inlinkz.com/ppr.js