Christmas Tags with Kat Scrappiness Naughty Stamp Set and Die

Hello everyone.  This is my second post for the day.  Happy Thanksgiving!  Kat Scrappiness is also having a Black Friday/Cyber Monday sale at the shop so take advantage and place your order using the coupon code XMAS2017 for 15% off.

KatScrapBlackFri2017

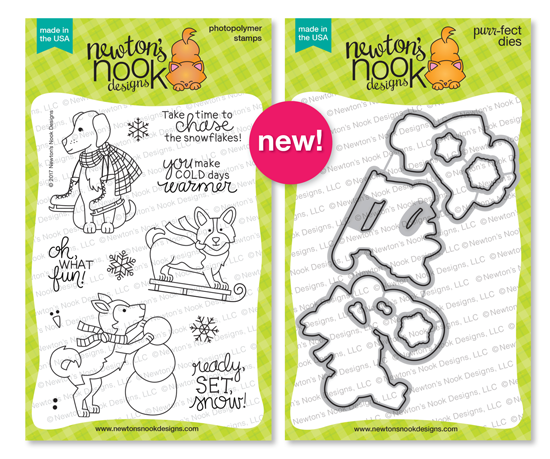
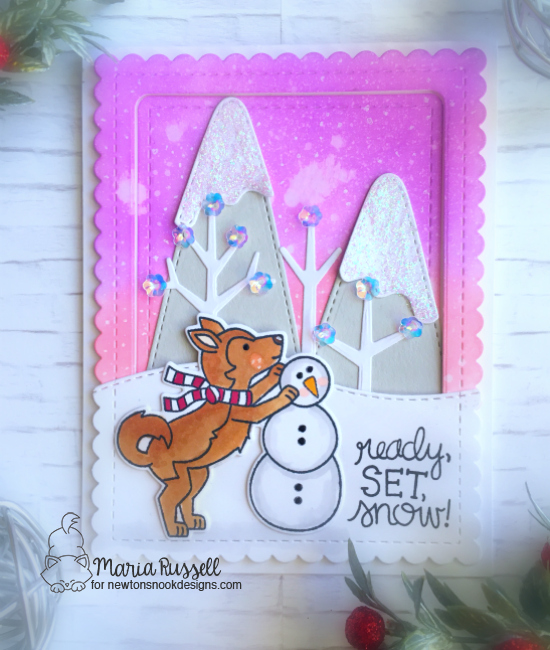
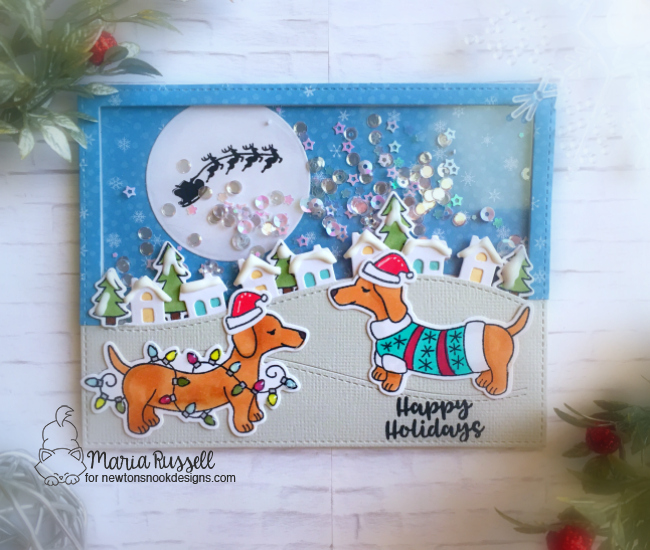
I am sharing some cute tags today showcasing the Kat Scrappiness Naughty stamp set and die, with the Gerda Steiner Peeking Friends stamp set, Stitched Scalloped Nesting Tag Dies and Pop-Out die, plus a bunch of other supplies available at the shop.

I stamped my images on Neenah solar white card stock with my memento tuxedo black ink using my Tim Holtz Stamp Platform.  I colored my images in with Copic markers.   Since I didn’t have the die for the Gerda Steiner stamp set, I fuzzy-cut them with my scissors.  I also die-cut the naughty sentiment die on black card stock twice.

I die-cut 4 tags using the stitched scalloped nesting tag dies on white card stock, as well as 4 tags with the Doodblebug Christmas patterned paper.  I used the pop-out die to die-cut the window on the patterned paper.  I adhered the images first on the white card stock, and then adhered the patterned paper on top.  To finish my design, I stamped the sentiment on black card stock for two of the tags with VersaMark ink and heat-embossed it with white embossing powder.

Here are my Christmas tags today:

KatScrapNaughtyTags

I hope you like my projects.  Please visit www.katscrappiness.com to shop for crafting supplies.  Have a great Thanksgiving!
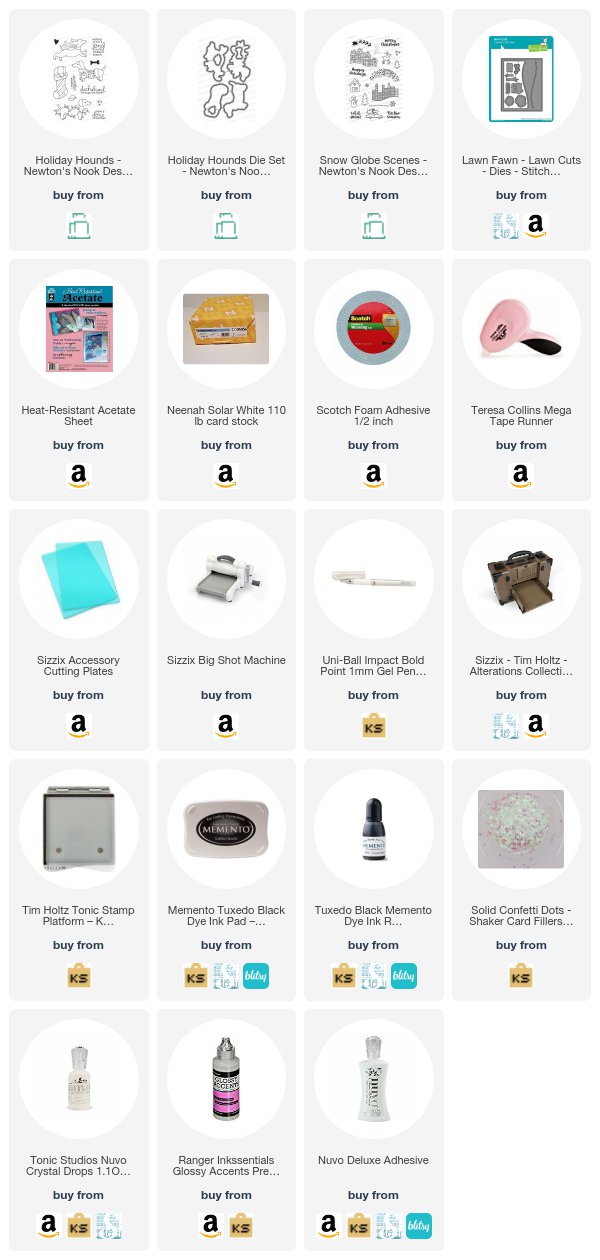
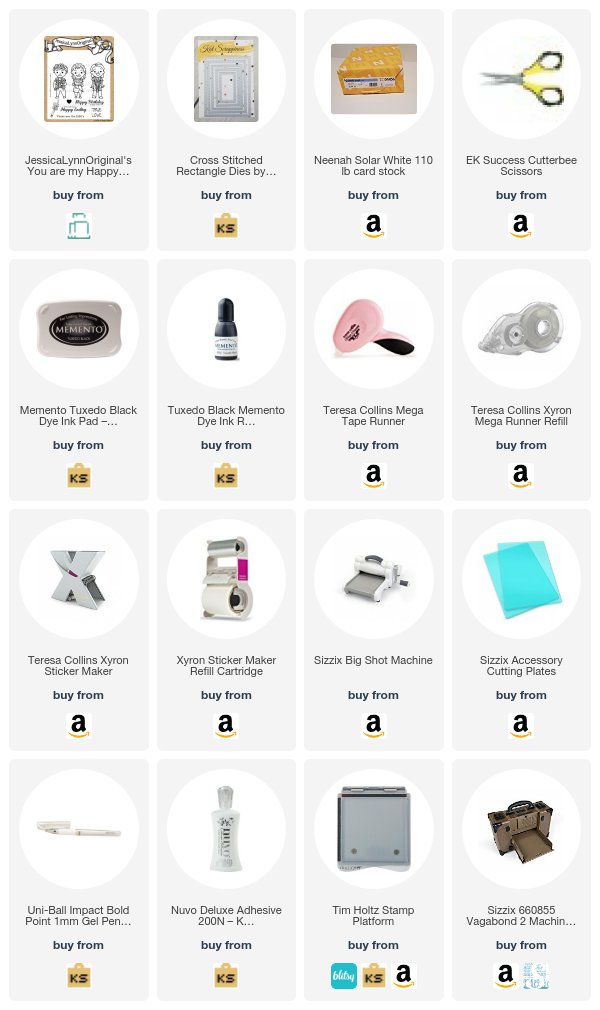
———–SUPPLIES———


You’re Never Too Old to Dream and Miracles Take Time by Jessica Lynn Original

Hello my crafty friends.  Happy Thanksgiving to those of you celebrating this very special occasion.  I am back today to share with you some cards that I made showcasing the new stamp sets by Jessica Lynn Original called You’re Never Too Old to Dream and Miracles Take time.

I started out by stamping all of my images on Neenah solar white card stock using my stamping platform and memento tuxedo black ink.  I colored my images in with Copic markers and used my Brother Scan N Cut2 machine to die-cut the images.  I also used my Distress Oxide Inks to color my background with my mini ink blending tools.

Here are my cards for the You’re Never Too Old to Dream.  I made two:

JLOTangled1

JLOTangled2

Two cards showcasing the Miracles Take Time stamp set:

JLOCinderella1

JLOCinderella2

These stamp sets are available for purchase today at www.jessicalynnoriginal.com.   Please visit the links below to see the rest of the design team’s projects.  Happy Thanksgiving!

Jessica Lynn Original

Lisa Reynolds Bzibziak

Maria Russell (you are here)

Carolyn Ellenberg Labille

Tasha RJ

Kelli Horger

Jeannie Ellis

——–SUPPLIES——-

NND November Release – Day 3 – Llama Delivery and Newton’s Candy Cane

NNDReleaseIcon_NOV17

It is the last day of the November release by Newton’s Nook Designs and today, the design team is showcasing the Llama Delivery stamp set and coordinating dies with the Newton’s Candy Cane stamp set and coordinating dies.  You also have a chance to win each stamp set during release week so check out the details I have indicated at the end of this blog post. [Just a little important note:  I know some of you had difficulties finding the comments section.  If you would like to leave a comment to participate in the giveaway, the “comments section” will only be ever visible when a single post on Word Press is being viewed. Please click on this particular blog post and you will be able to leave a comment below.  Thank you for understanding and I apologize for the confusion.]

The November release will be available for purchase on Friday, November 24th.  You should also take advantage of the Black Friday sale.

NNDBlackFridaySale

Here’s what the stamp and dies look like:

I stamped all of my images from both sets on Neenah Solar white card stock and colored them in with my Copic markers.  For my Llama cards, I kept it pretty simple. I also distressed my background with Worn Lipstick and Cracked Pistachio distress oxide inks.  Here are the cards:

NNDLlama

NNDLlama2

For the Newton’s Candy Cane set, I wanted to create a fun shaker card and used the double-sided adhesive from Newton’s Nook and the new acetate sheets.  I also used sequins by Kat Scrappiness.  Here’s my shaker card:

NNDNewtonCandyCane

I hope you got inspired this week and love the projects we all shared.  Would you like to win the “Llama Delivery” or the “Newton’s Candy CaneStamp Set?  Each of these stamp sets will be given away to ONE lucky winner!

Here’s how to win:

Comment on the NND blog and Design Team blogs (see list below)!  The winner will be chosen at random from the collective reveal posts. Make sure to check out each of their blogs and comment for your chance to win. You will not know which blog has been chosen so the more you comment on the better your chances are of winning!  You have until Wednesday November 22nd at 9pm CST to comment  — winners will be announced on the blog post on Friday, November 24th..

Check out all the awesome Design Team Blogs below to enter:

Newton’s Nook Designs
Amanda Bodine
Holly Endress
Ellen Haxelmans
Larissa Heskett
Samantha Mann
Juliana Michaels
Naki Rager
Maria Russell (you are here)
Jennifer Timko
Tatiana Trafimovich

————-SUPPLIES———–<

NND November Release – Day 2 – Winter Woofs

NNDReleaseIcon_NOV17

It is the second day of the November release by Newton’s Nook Designs and today, the design team is showcasing the Winter Woofs stamp set and coordinating dies.  You also have a chance to win each stamp set during release week so check out the details I have indicated at the end of this blog post. [Just a little important note:  I know some of you had difficulties finding the comments section.  If you would like to leave a comment to participate in the giveaway, the “comments section” will only be ever visible when a single post on Word Press is being viewed. Please click on this particular blog post and you will be able to leave a comment below.  Thank you for understanding and I apologize for the confusion.]

Here’s what the Stamp set and dies look like:

NNDNOV17_WinterWoofs

I stamped my images on smooth white yardstick and colored them in with my Copic markers.  I die-cut the images with the coordinating dies.  I also die-cut another piece of Bristol smooth white card stock, using the Flags and Frames die.  I wanted to create a unique snowy background for my little dog.  I used my seedless preserve and piked raspberry distress oxide inks with my mini ink blending tool to create my snowy background.  I sprayed it with water using my distress sprayer, and dabbed it with my paper towel.  I also die-cut the rest of the elements that I need to create my scene.  To finish my design, I used Crystal stickles to add some glitter to the background.  I also used some iridescent floral sequins by Kat Scrappiness.  Here is my card:

NNDWinterWoofs

I hope you like my project.  Would you like to win the “Winter WoofsStamp Set?  Each of these stamp sets will be given away to ONE lucky winner!

Here’s how to win:

Comment on the NND blog and Design Team blogs (see list below)!  The winner will be chosen at random from the collective reveal posts. Make sure to check out each of their blogs and comment for your chance to win. You will not know which blog has been chosen so the more you comment on the better your chances are of winning!  You have until Wednesday November 22nd at 9pm CST to comment  — winners will be announced on the blog post on Friday, November 24th..

Check out all the awesome Design Team Blogs below to enter:

Newton’s Nook Designs
Amanda Bodine
Holly Endress
Ellen Haxelmans
Larissa Heskett
Samantha Mann
Juliana Michaels
Naki Rager
Maria Russell (you are here)
Jennifer Timko
Tatiana Trafimovich

————-SUPPLIES———–

NND November Release – Day 1 – Cup of Cocoa and Frozen Fellowship Card

NNDReleaseIcon_NOV17

It is the first day of the November release by Newton’s Nook Designs and we are showcasing a couple of stamps and dies for you.  The Cup of Cocoa stamp set and coordinating dies, with the Frozen Fellowship stamp set, as well as the amazing Fancy Edges tag die and the Frames and Flags Die.  You also have a chance to win each stamp set during release week so check out the details I have indicated at the end of this blog post.  [Just a little important note:  I know some of you had difficulties finding the comments section.  If you would like to leave a comment to participate in the giveaway, the “comments section” will only be ever visible when a single post on Word Press is being viewed. Please click on this particular blog post and you will be able to leave a comment below.  Thank you for understanding and I apologize for the confusion.]

For my projects today, I used both stamp sets and also the new stand-alone dies.  I JUST LOVE THEM! They are so versatile!  Here’s what they look like:

I started out by stamping my images on Neenah solar white card stock and colored them in with my Copic markers.  I die-cut the images with the coordinating dies.  I also die-cut the tags on 110 white card stock, as well as patterned paper.  I wanted to use the edge dies to create some added dimension and details to my tags.  Here are the tags:

NNDHotCocoa

For my card, I stamped the image on Neenah solar white and decided to just color one snowman.  I wanted him to stand out from the rest of the image.  I also used the Frames and Flags die to die-cut a Bristol Smooth white card stock measuring 4 1/4 by 5 1/2.  I colored my card front  with my favorite Broken China Distress Oxide Ink using my blending tool.  I spritzed it with water and dabbed it with my paper towel.  I adhered the image to the colored background.  I also heat embossed my sentiment to finish my design.  Here’s what the card looks like:

NNDFrozenFellowship

I hope you got inspired this week and love the projects we all shared.  Would you like to win the “Cup of Cocoa” or the “Frozen Fellowship” Stamp Set?  Each of these stamp sets will be given away to ONE lucky winner!

Here’s how to win:

Comment on the NND blog and Design Team blogs (see list below)!  The winner will be chosen at random from the collective reveal posts. Make sure to check out each of their blogs and comment for your chance to win. You will not know which blog has been chosen so the more you comment on the better your chances are of winning!  You have until Wednesday November 22nd at 9pm CST to comment  — winners will be announced on the blog post on Friday, November 24th..

Check out all the awesome Design Team Blogs below to enter:

Newton’s Nook Designs
Amanda Bodine
Holly Endress
Ellen Haxelmans
Larissa Heskett
Samantha Mann
Juliana Michaels
Naki Rager
Maria Russell (you are here)
Jennifer Timko
Tatiana Trafimovich

————-SUPPLIES———–


Simple Inlaid Christmas Cards

Hello my crafty friends!  I hope you are all having a great week so far. I’m back today with some simple inlaid Christmas Cards that you can easily mass-produce, showcasing the new Woodlands Reindeer Die, Double Stitched Rectangle Dies and a bunch of other supplies available at Kat Scrappiness.

I have a process video for you all today so I will keep this blog post short.  Here are the photos, and the video is also linked below.  I have also listed and linked the supplies I used.  Have a great week!

KatScrapReindeer1KatScrapReindeer2KatScrapReindeer3

Video:

————-SUPPLIES———–


Doxies Happy Holidays with Newton’s Nook

Hello my crafty peeps!  I hope you are having a great week so far.  I am back today for Newton’s Nook showcasing a cute older stamp set called Holiday Hounds, mixing it up with Snow Globe Scenes stamp set.  I love that you can mix and match these stamp sets to create some cute cards.

I started out by stamping the doxies and the trees with my memento tuxedo black ink on neenah solar white card stock.  I colored my images in with my Copic markers and run it through my die-cutting machine with the coordinating dies.  I die-cut the rest of the elements that I needed to create my scene using different dies from my collection.

I wanted to create a fun card today so I decided to make a shaker card.  I adhered my “sky” background to my card base first, then adhered the acetate sheets to my frame, and added foam adhesives.

IMG_6019

I die-cut a circle card stock and colored it with my Copic markers to create some shading for the moon, then stamped the flying Santa and reindeers from the Snow Globe Scenes stamp set.  I adhered the moon to the front panel.

IMG_6020

I added my favorite sequin mixes from Kat Scrappiness for my shaker elements, and adhered my frame to the card panel.  I finished my design by adding Nuvo white Crystal drops to the houses and trees, and glossy accents to the lightbulbs.

IMG_6018

Here is the card:

NNDDoxiesXmas

I hope you got inspired today to create cute holiday shaker cards.  I have listed and linked the supplies I used in case you are interested.  Have an amazing day!

—————-SUPPLIES—————

You Are My Happy Ending by Jessica Lynn Original

JLOHappyEndingGraphic


Today I am showcasing a new stamp set by www.jessicalynnoriginal.com called You Are My Happy Ending Pirate Kids 4 x 4 stamp set.  Here’s what the stamp set looks like:

JLOHEnding

Since I didn’t receive the physical stamp set in time for the launch, I had to work on the digital images.  I printed them off on neenah solar white card stock with my laser printer, and colored the images in with my Copic markers.  I fuzzy-cut the images with my precision cut scissors and set them aside. I stamped other images from stamp sets that I had from my collection to decorate my front panel.   Here’s my card today:

JLOHappyEndingcard

I hope you got inspired today.  Please visit www.jessicalynnoriginal.com for more cute stamps and product inspiration.  If you also would like to check the other DT projects, please click on the link below. Have a great weekend!


Jessica Lynn Original

Lisa Reynolds Bzibziak

Maria Russell (you are here)

Jeanie Ellis

Tasha RJ

Kelli Horger

Carolyn Ellenberg LaBille

 ————SUPPLIES———-


Easy Thanksgiving Crafts with Xyron

I hope you are all having a great week so far.  All week long, the Xyron Design Team will be sharing easy Fall/Thanksgiving projects on the Xyron Facebook group.  For my projects today, I am making a bunch of treat bags to give to my guests for Thanksgiving.  I also made some place card holders and decorated a bunch of LED candles to decorate my table.


If you don’t have the supplies to create the treat bag, you can definitely buy some bags from the dollar store or craft stores, and decorate them with silk fall leaves or any other fall-themed embellishments, and fill them with surprise treats for your guests.


I started out by die-cutting some American Crafts card stock using my Mama Elephant Treat Bag die.  To decorate the bag, I die-cut the pumpkin with the Mama Elephant pumpkin add-on dies.  For my sentiment, I die-cut the “Thank You” script using my Kat Scrappiness Thank you script die.


XyronThanksgiving1


I assembled the bag using my Xyron Mega Runner.  I also used the mega runner to adhere the pumpkin.  To make things easier, I used my Xyron sticker maker to adhere the tiny pieces that goes with the pumpkin, as well as the Thank You Script sentiment.  I filled my bag with some treats.


IMG_5966IMG_5967


Here’s the treat bag:


XyronThanksgiving2


Since I have some leftover leaves that I die-cut from a previous project, I decided to make some place card holders, that will hold the utensils and a note pad for my guests to write what they are thankful for this year.  Here’s what it looks like:


XyronThanksgiving3


I also decorated some LED candles to decorate my table, using my Xyron sticker maker and Mega Runner.


XyronThanksgiving4