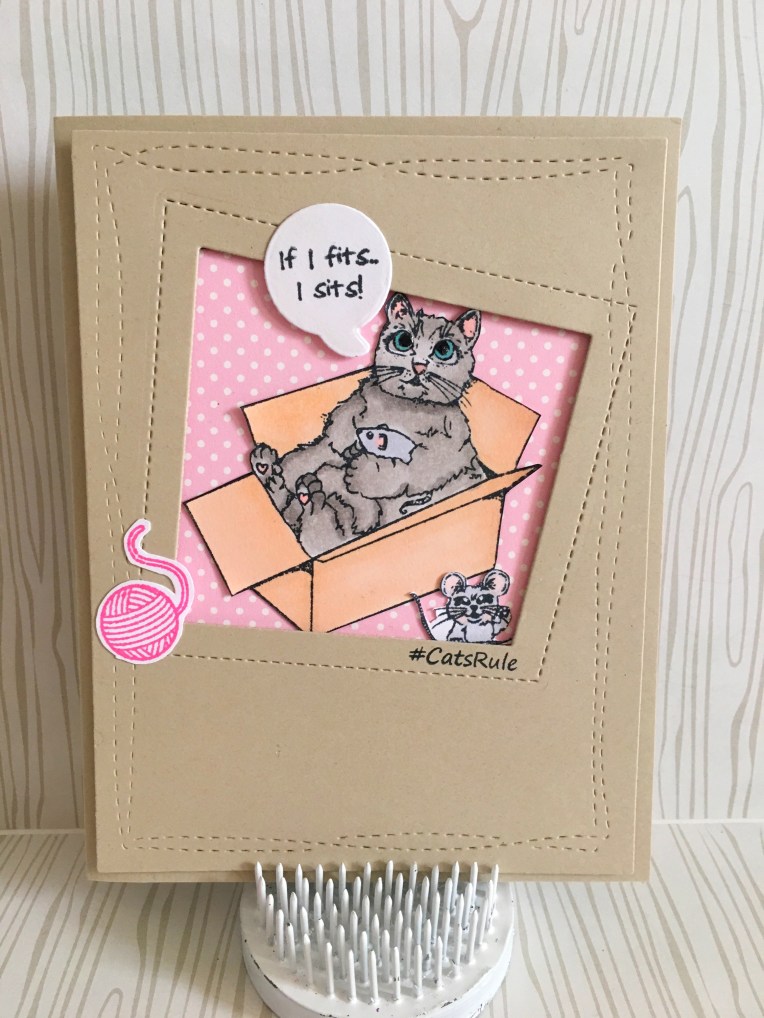
I finally had the time to sit down and write this Blog post. I am so excited to share with you all today the release of this new stamp set called “The Love of a Cat” by http://www.jessicalynnoriginal.com. This stamp set is filled with cute images but my favorite one is the cat sitting inside the box (photo below). Isn’t she adorable?
I have a persian cat named Chloe, and the image below looks like her. Chloe is now 13 years old and loves to sleep almost all day long. She is my constant companion when I create cards and scrapbook layouts in my craft room. There is something about a sleeping cat right next to me that keeps me calm, especially on days where I just can’t get creative. Chloe has certainly left a paw print on my heart.
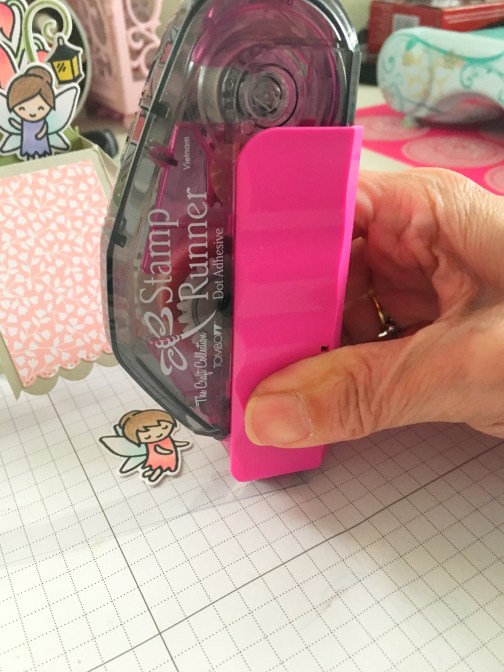
I recently ordered some very cute stamp sets from Lawn Fawn and I have been dying to play around with them before I travel in the next few days. I also received the new Tombow Dot Runner Adhesive. I have never used this adhesive before so I thought this Blog post will also serve as a review on how the adhesive worked.
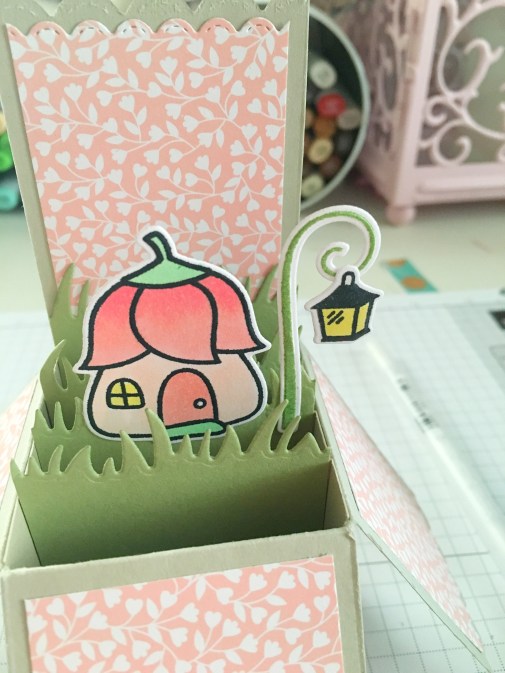
I first stamped my images and colored them using my markers. I then lined up my images with the coordinating dies and run it through my die-cutting machine. Since I have made hundreds of these box cards, that you see on the photo below, I was able to put the box together in less than a minute, because I even have the dimensions memorized. (Note to self, I need to get a life) I know that sounds really weird but it’s true! I wanted to create a cute scene for my fairies and so I also had to die-cut some grass to create my garden.
I used the Tombow Dot Stamp Runner for the first time to adhere all of my die-cut pieces and let me just tell you, I just fell in love with this adhesive. It was sliding through so smoothly on the card stock and I didn’t have any issues at all! Since it is also a dot-adhesive, I was able to reposition my die-cut pieces without tearing the paper but once you press it on, it adheres really well.
Now comes the part where I have to use an acetate sheet to make one of my fairies look like she’s floating in the air. I normally use a mini-glue dot for this task but I decided to use the “stamp runner”. Holding it down and stamping it to the acetate, I was able to put enough adhesive to adhere my fairy.
I think the photos are self-explanatory so I will leave you all to enjoy looking at the photos. Overall, I’M IN LOVE WITH THE TOMBOW DOT RUNNER ADHESIVE! I can say that this is now my all-time favorite tape runner and will purchase more in the future.
I hope you like this project and have an amazing day!
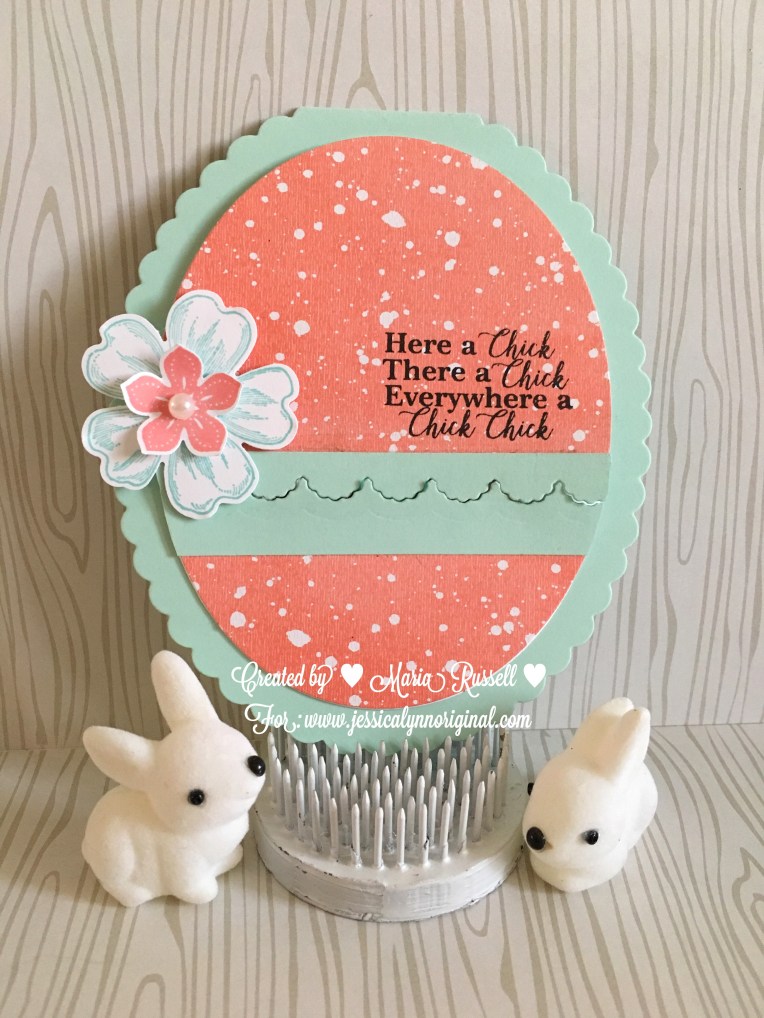
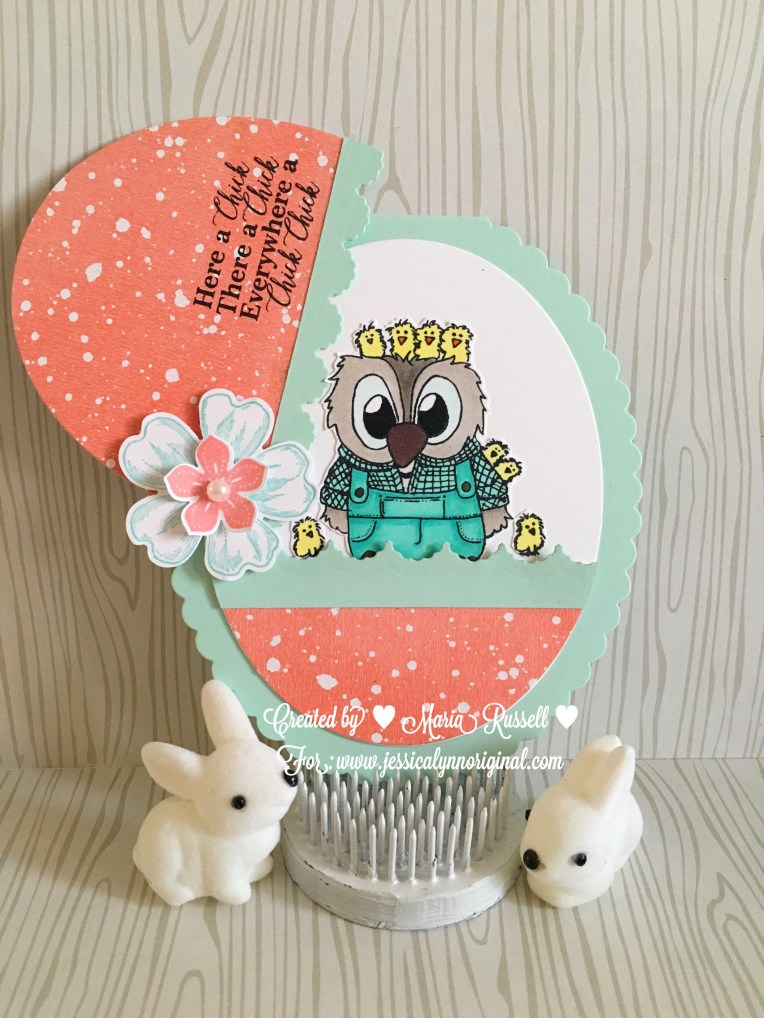
Todays marks the day that we launch this cute Easter/Spring stamp set from www.jessicalynnoriginal.com called Brentwood Spring chicken. While there are no specific deals with this stamp set, Jessica is offering a “free shipping” code today for members of JLO’s Facebook group called JLOcraftcreateshare. She is always giving away stamp sets and announcing deals and specials so I encourage you all to join this Facebook group. Here is the link (https://www.facebook.com/groups/JLOcraftcreateshare/)
I am the second person on this hop and if you came from Jessica’s Blog, you’re in the right place. The next person after me, is Jeanette (http://www.creativeplayischeaperthantherapy.blogspot.com). Please give her some love by checking the beautiful cards that she created for this event. We love to hear from you, and we love to know your opinion.
I love spring! I love spring colors and so the first card that you see here is one of my favorite. I have made a similar card to this a year ago and posted the video tutorial on my YouTube channel. I love making interactive cards and the colors I used on this blended so well. To go with this card, I created the small treat bag to house some Easter treats! What do you think?
If you’ve been following me for a while, you know that I like to stretch my stamps and dies and one example is the card below. I used the image to create a Father’s Day card.
I hope you like what I created and have an amazing weekend!
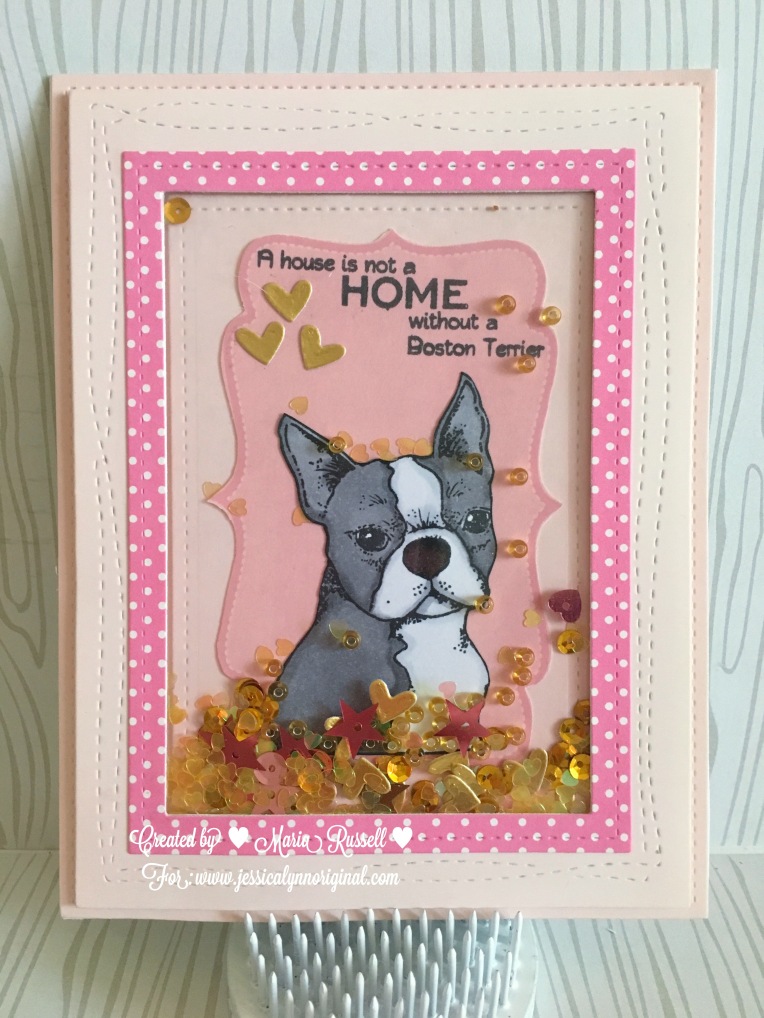
It has been a crazy busy week for me but I am so excited because today marks the official release day of www.jessicalynnoriginal.com’s Boston terrier stamp set. I have no words to describe how adorable this whole set is. Jessica even included some images to decorate his hat and use it for different holidays. My favorite out of all the images is the big dog image with the hat. I think he’s so adorable! I highlighted his monocle using glossy accents, and fuzzy-cut the shamrock to give him a classy hat accessory. It’s a funny card!
Here are the 3 card samples that I created using the stamp set.
If you’d like to see the other cards that were created by the other DT members, please head on over to Jessica’s blog: http://jessicalynnoriginalstamps.blogspot.com/ I hope I have given you some amazing ideas and have a great weekend!
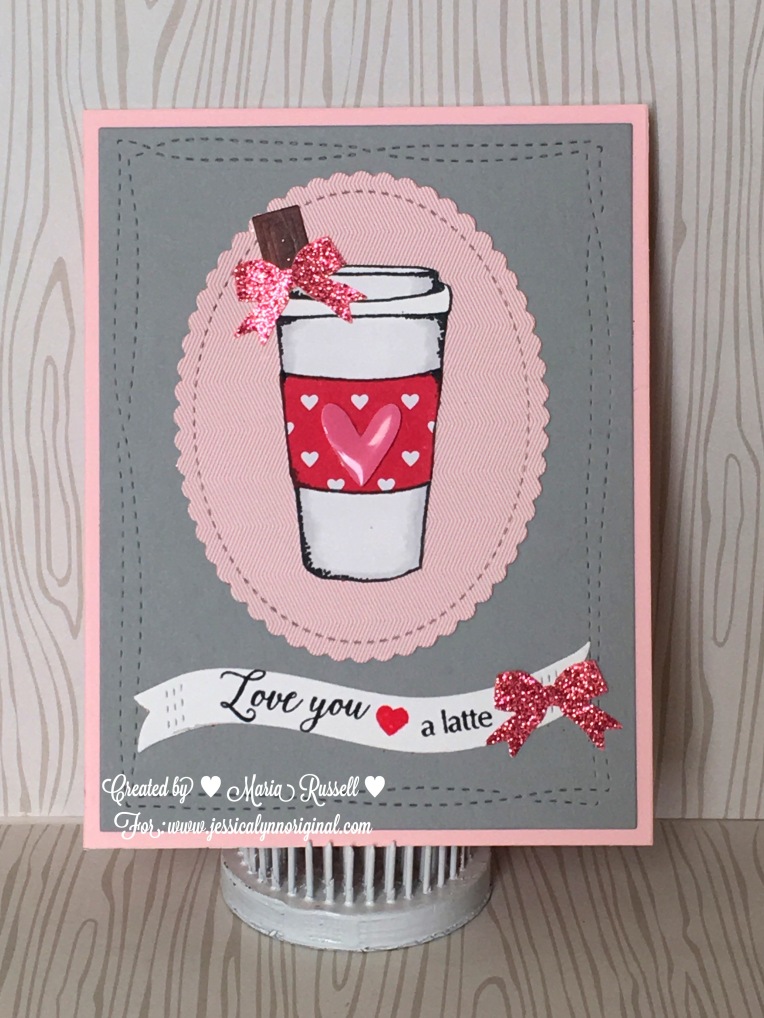
The day has finally arrived to introduce to you, two brand new sets from Jessica Lynn Original stamps ~ Jam & Coffee Rubber Stamp and the new All Season Planner Stamps. These two stamp sets can be purchased as a bundle at a discounted price, plus free shipping, We only have 30 sets so if you like them, please go to Jessica’s online store or click on this link before you miss this deal: http://www.jessicalynnoriginal.com/february-bundle-deal-calendar-planner-jam-and-coffee-rubber-stamp-set/
I am the last person on this blog hop. I hope we inspired you today to start creating with JLO stamps.
Here are the photos of the cards I made and a YouTube video link so you all can see the planner stamps as well. Have a great Valentine’s weekend!
I was browsing through Pretty Pink Posh’s Facebook page today and came across a Valentine’s Card challenge. I got so excited because I love Pretty Pink Posh! If you guys would like to participate, please check out Pretty Pink Posh’s blog. Here is the link to the challenge: http://www.prettypinkposh.com/2016/02/valentine-challenge.html
And here is the inspiration photo from her very talented Design Team:
When my kids were a lot younger, I always tell them “I love You More Than the Stars in the Sky” before I kiss them good night and put them to bed. This card reminds me of those moments! This card will go to my daughter.
I love the Pretty Pink Posh Scallop Die. This is an exclusive die that you can purchase only from their website. The sequins and the new confetti are so beautiful; it’s to die for! I wanted to use my all-time favorite sparkling clear, Watermelon, and Blush sequins, mixed with the new stars confetti. The colors mixed together are so amazing!
Here is the card:
Card Created by Maria Russell for Pretty Pink Posh Valentine Card Challenge
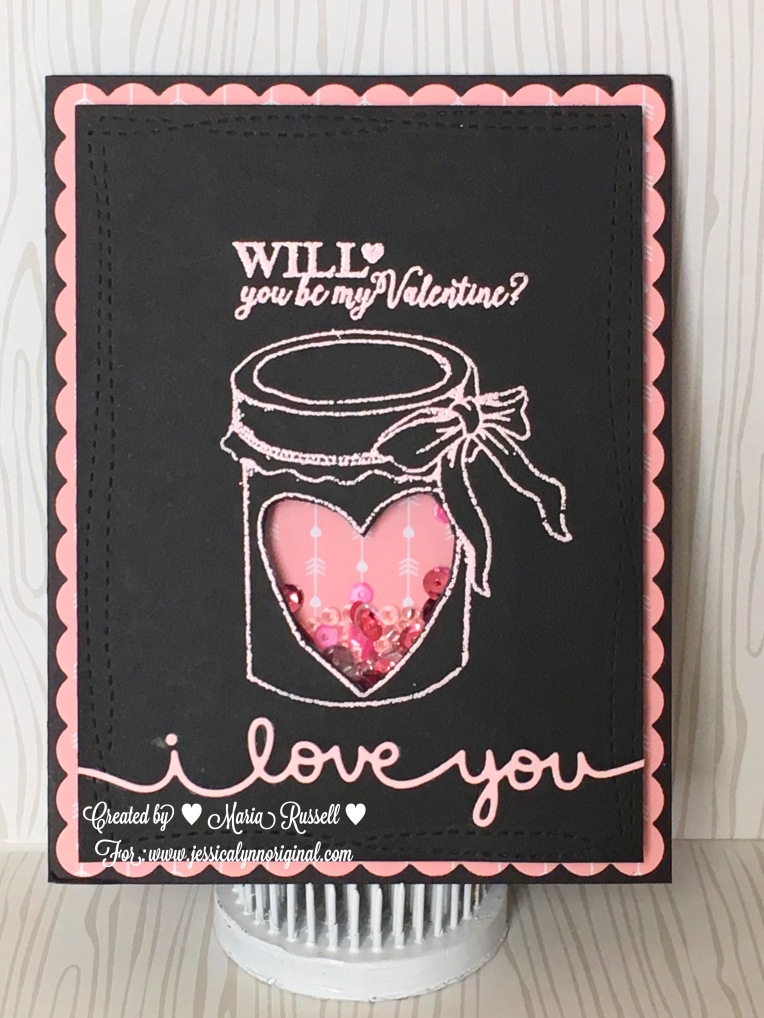
As you all know, Valentine’s Day is on Sunday, and I needed to make a cute treat holder to house my husband’s favorite chocolates. I have an empty Mason jar but I wanted to amp it up a little and spray paint it to create a cute heart design in the front. I could have used stickers to decorate the jar but I wanted something more “handmade”.
I didn’t have any masking paper so I decided to die-cut the heart using my heart die, and used Tombow Removable adhesive to create my “mask” before spray-painting the Mason jar.
I was so impressed with how well the adhesive held on to the glass jar. I gave the jar two coats of paint and it didn’t budge at all. When I removed the “mask”, I got a really nice impression of the heart. The die-cut mask is still sticky enough that I can use it for another project. Just simply amazing!
I also made a heart rosette and a tag to go with my treat jar. After I assembled the heart rosette using hot glue, I used Tombow permanent adhesive to attach the small heart to decorate the front of the rosette. Attaching the rosette to the tag using the permanent adhesive, I thought it needed a little bit more. I then proceeded to die-cut the “love” script sentiment using one of my dies, and attached it to the tag using my all-time favorite, Tombow mono liquid glue. The tip of this glue is perfect to use for intricate dies like the one that you see on the photo.
This was a very quick and inexpensive project to make for Valentine’s Day. I hope you like this simple project and have an amazing day!