I am thrilled to finally be able to post photos of this new stamp set by Jessica Lynn Original called Rock Lobster. I love Brentwood, but don’t you just love that little smiley fish? It’s so adorable! Jessica is such a talented artist and a wonderful person; I am so proud to be a member of her design team.
Below you will find a photo of the stamp set. I think this will be a great addition to your collection. Just like the rest of Jessica’s stamps, this is made of high quality photo polymer material. You don’t have to be a skilled stamper to use this set.
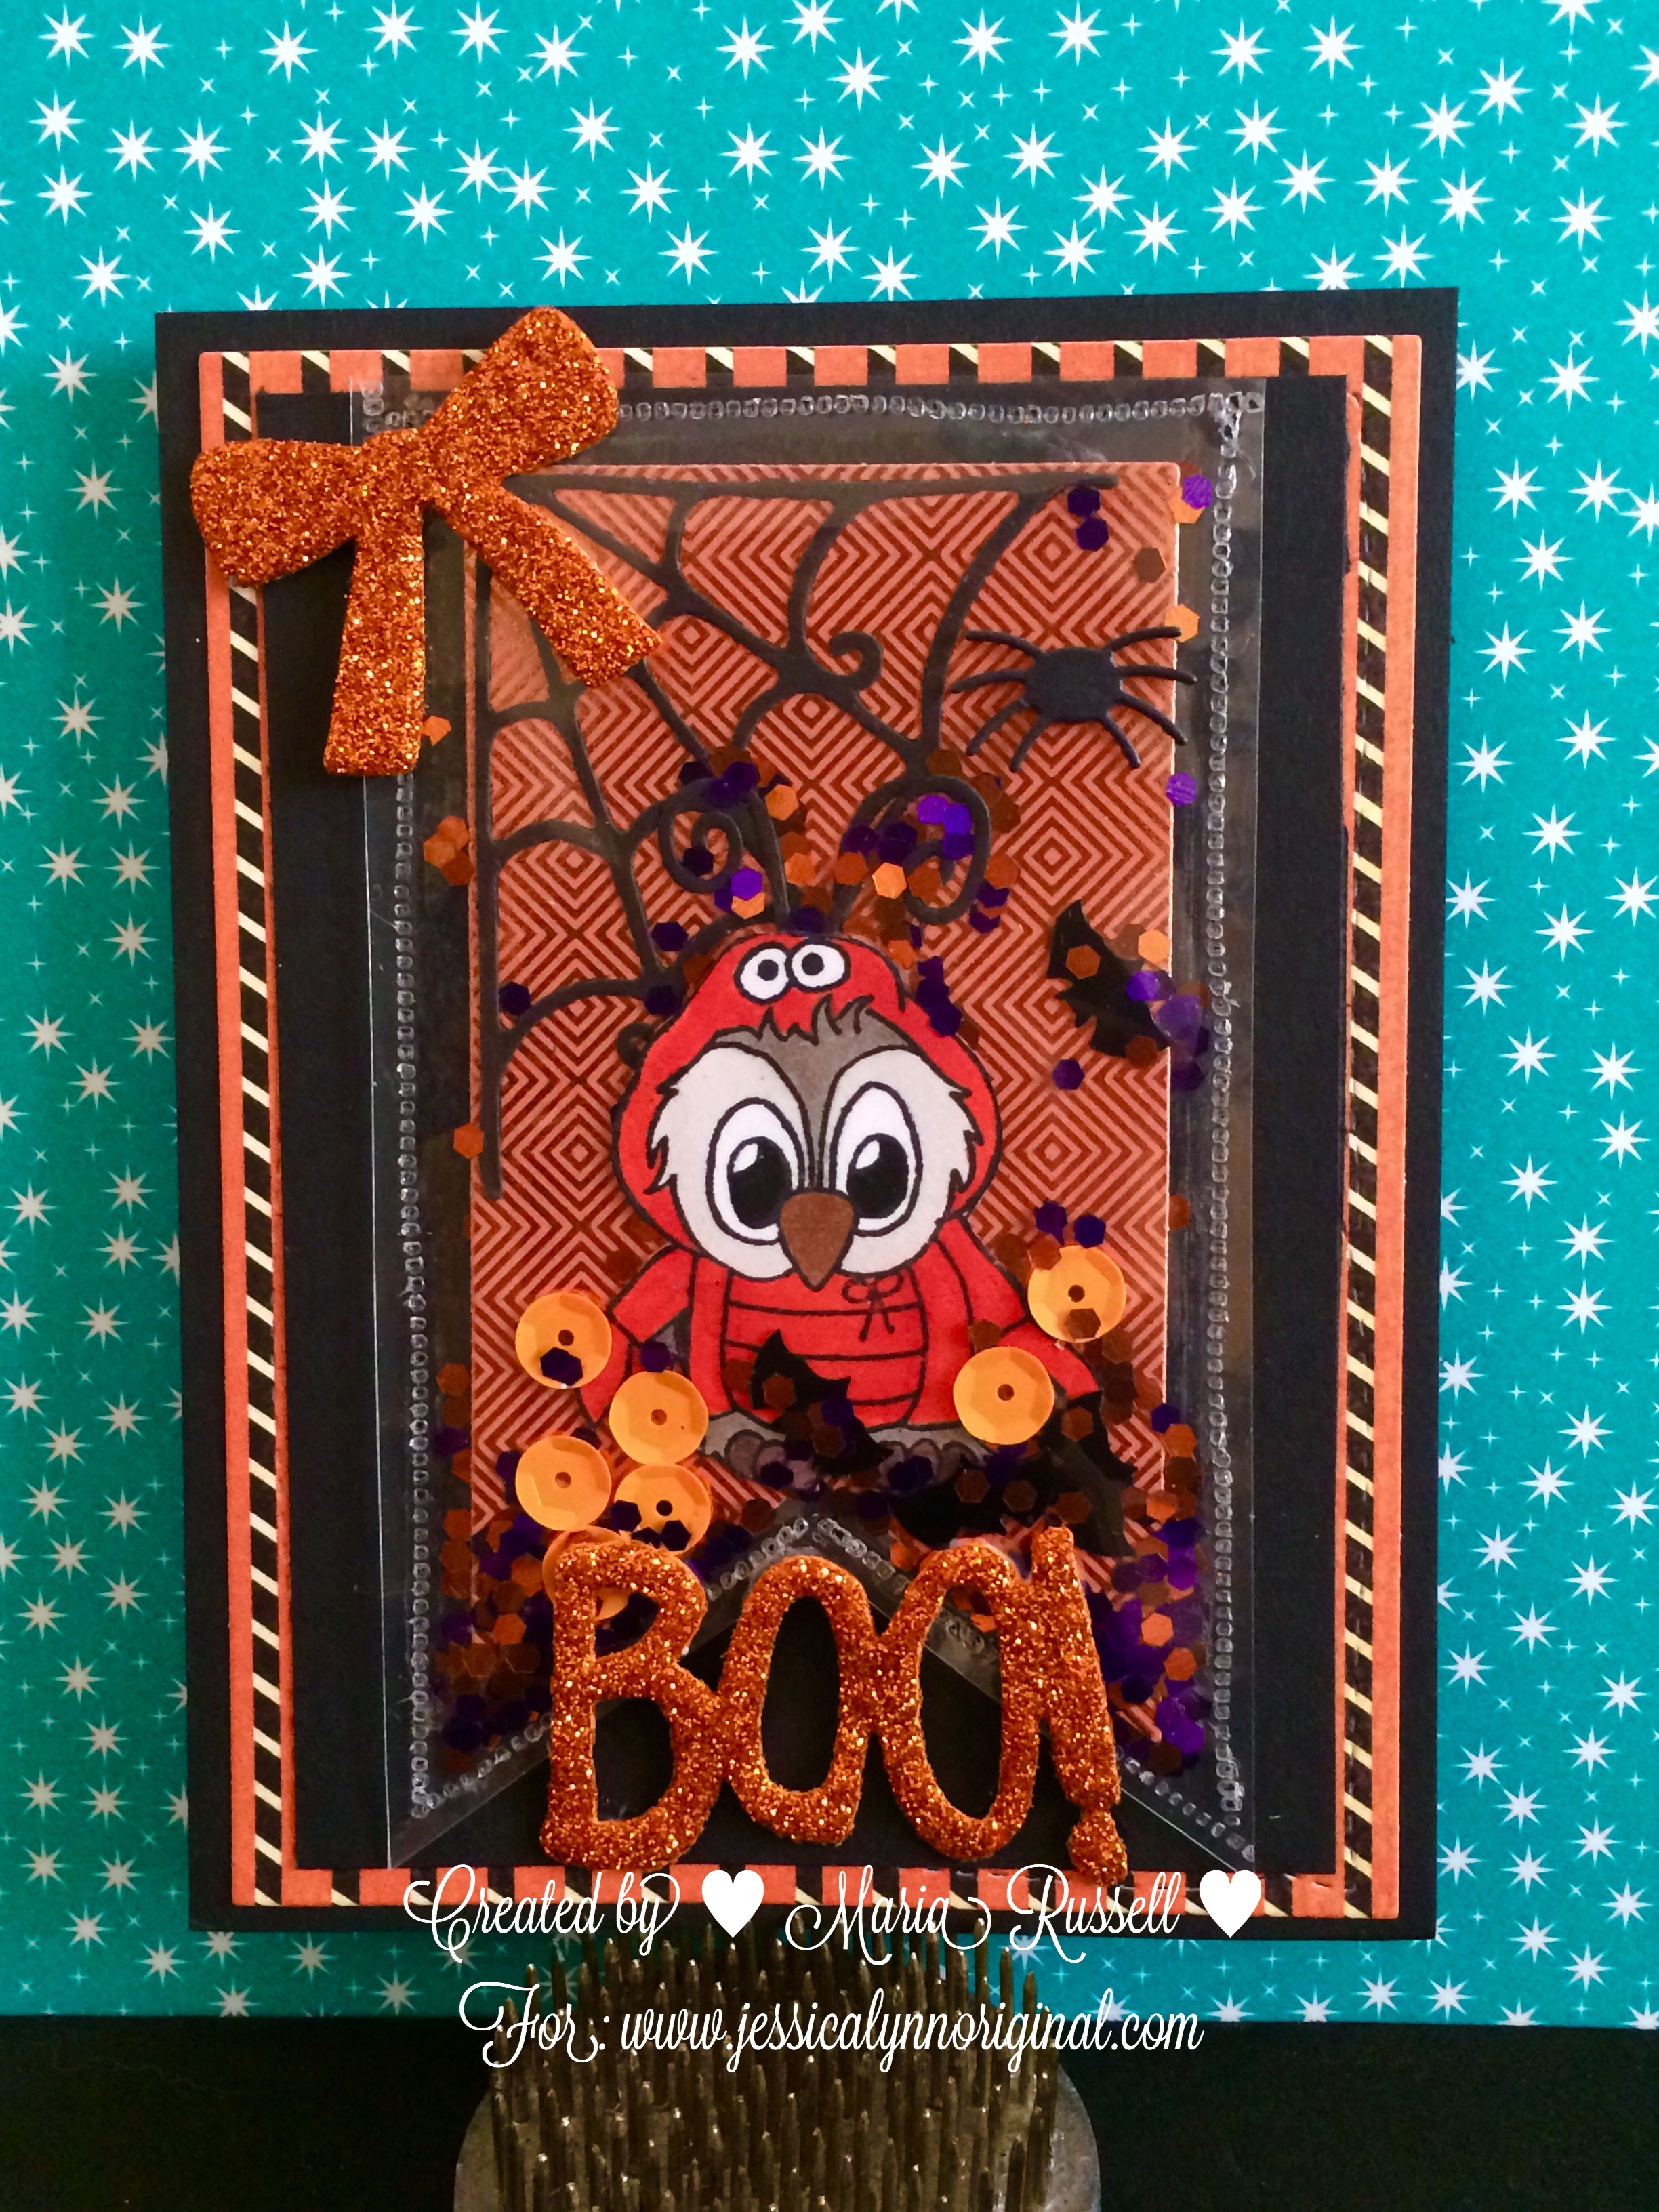
Since today is Halloween, I wanted to create a Halloween card. I have always believed that you can use any stamp set for any occasion, with just a little imagination. I always liked stretching my stamps and dies. Since Brentwood is already dressed up as a lobster for Halloween, I figured he needed some confetti to go along and celebrate my favorite holiday! I also used my We Are Memory Keepers Fuse tool for the first time to create a flat shaker. Note to self: next time, do not touch the fuse tool with your fingers to check it it’s hot enough! Ouch!
The next card is one of my all time favorites! I think everything just worked and blended together beautifully. I love the colors on this card. I used my Avery Elle Wonky Stitched rectangle die to create the frame for my shaker card. I used a combination of blue, iridescent and white sequins and seed beads for my shaker elements. A video tutorial will be posted soon on my YouTube channel so please stay tuned for that.
I hope you like what I’ve created. Please don’t forget to go to www.jessicalynnoriginal.com to grab this stamp set. Happy Halloween!
One of the reasons why I love jet lag is the fact that when I am wide-awake at 3:00 a.m., I can make some really strong coffee, go to my craft room and work on my cards in peace. Everything is just so peaceful at dawn. It really helps my creativity. The only downside is I am already fading by 4:00 p.m.
The card below turned out to be so stinkin’ cute! To be honest, I didn’t picture this card to look like it does now because I changed my mind quite a few times while I was creating it. I wanted to fuzzy-cut the image but I was worried about the Antennae. I decided in the end to cut it out and replaced it with a die-cut piece using a butterfly die. I almost gave up at one point, but decided to keep going until I was happy with the results.
Gray card stock – cut at 8 ½ by 5 ½ scored at 4/14
Pink Card stock – cut at 5 ¼ by 4, also used some to diecut the flowers
Beige Card Stock (for the Deco Label in the front of the card)
Green Card Stock – to diecut the grass die
Honeycomb Die
Deco Labels Die
Spellbinders Banner Die
Magnolia Doohickey Grass and flower die and butterfly die from Le Jardin Collection Vol. 4
Copic Markers – W0, W1, W3, W7
Copic Markers – E77
Copic Marker – B00
Copic Marker – R11, toned down with Copic Blending Ink 00
Memento Tuxedo Black Ink Pad
Glossy Accents
Scotch Foam Adhesive
Ranger Multi-medium matte adhesive
I hope you like this card. Please note that Jessica was kind enough to offer a 10% discount for all of my YouTube subscribers, Instagram followers and Blog followers. If you are interested to purchase her amazing stamps, please go to http://www.jessicalynnoriginal.com and use code: save10. This code is valid until September 1, 2015.
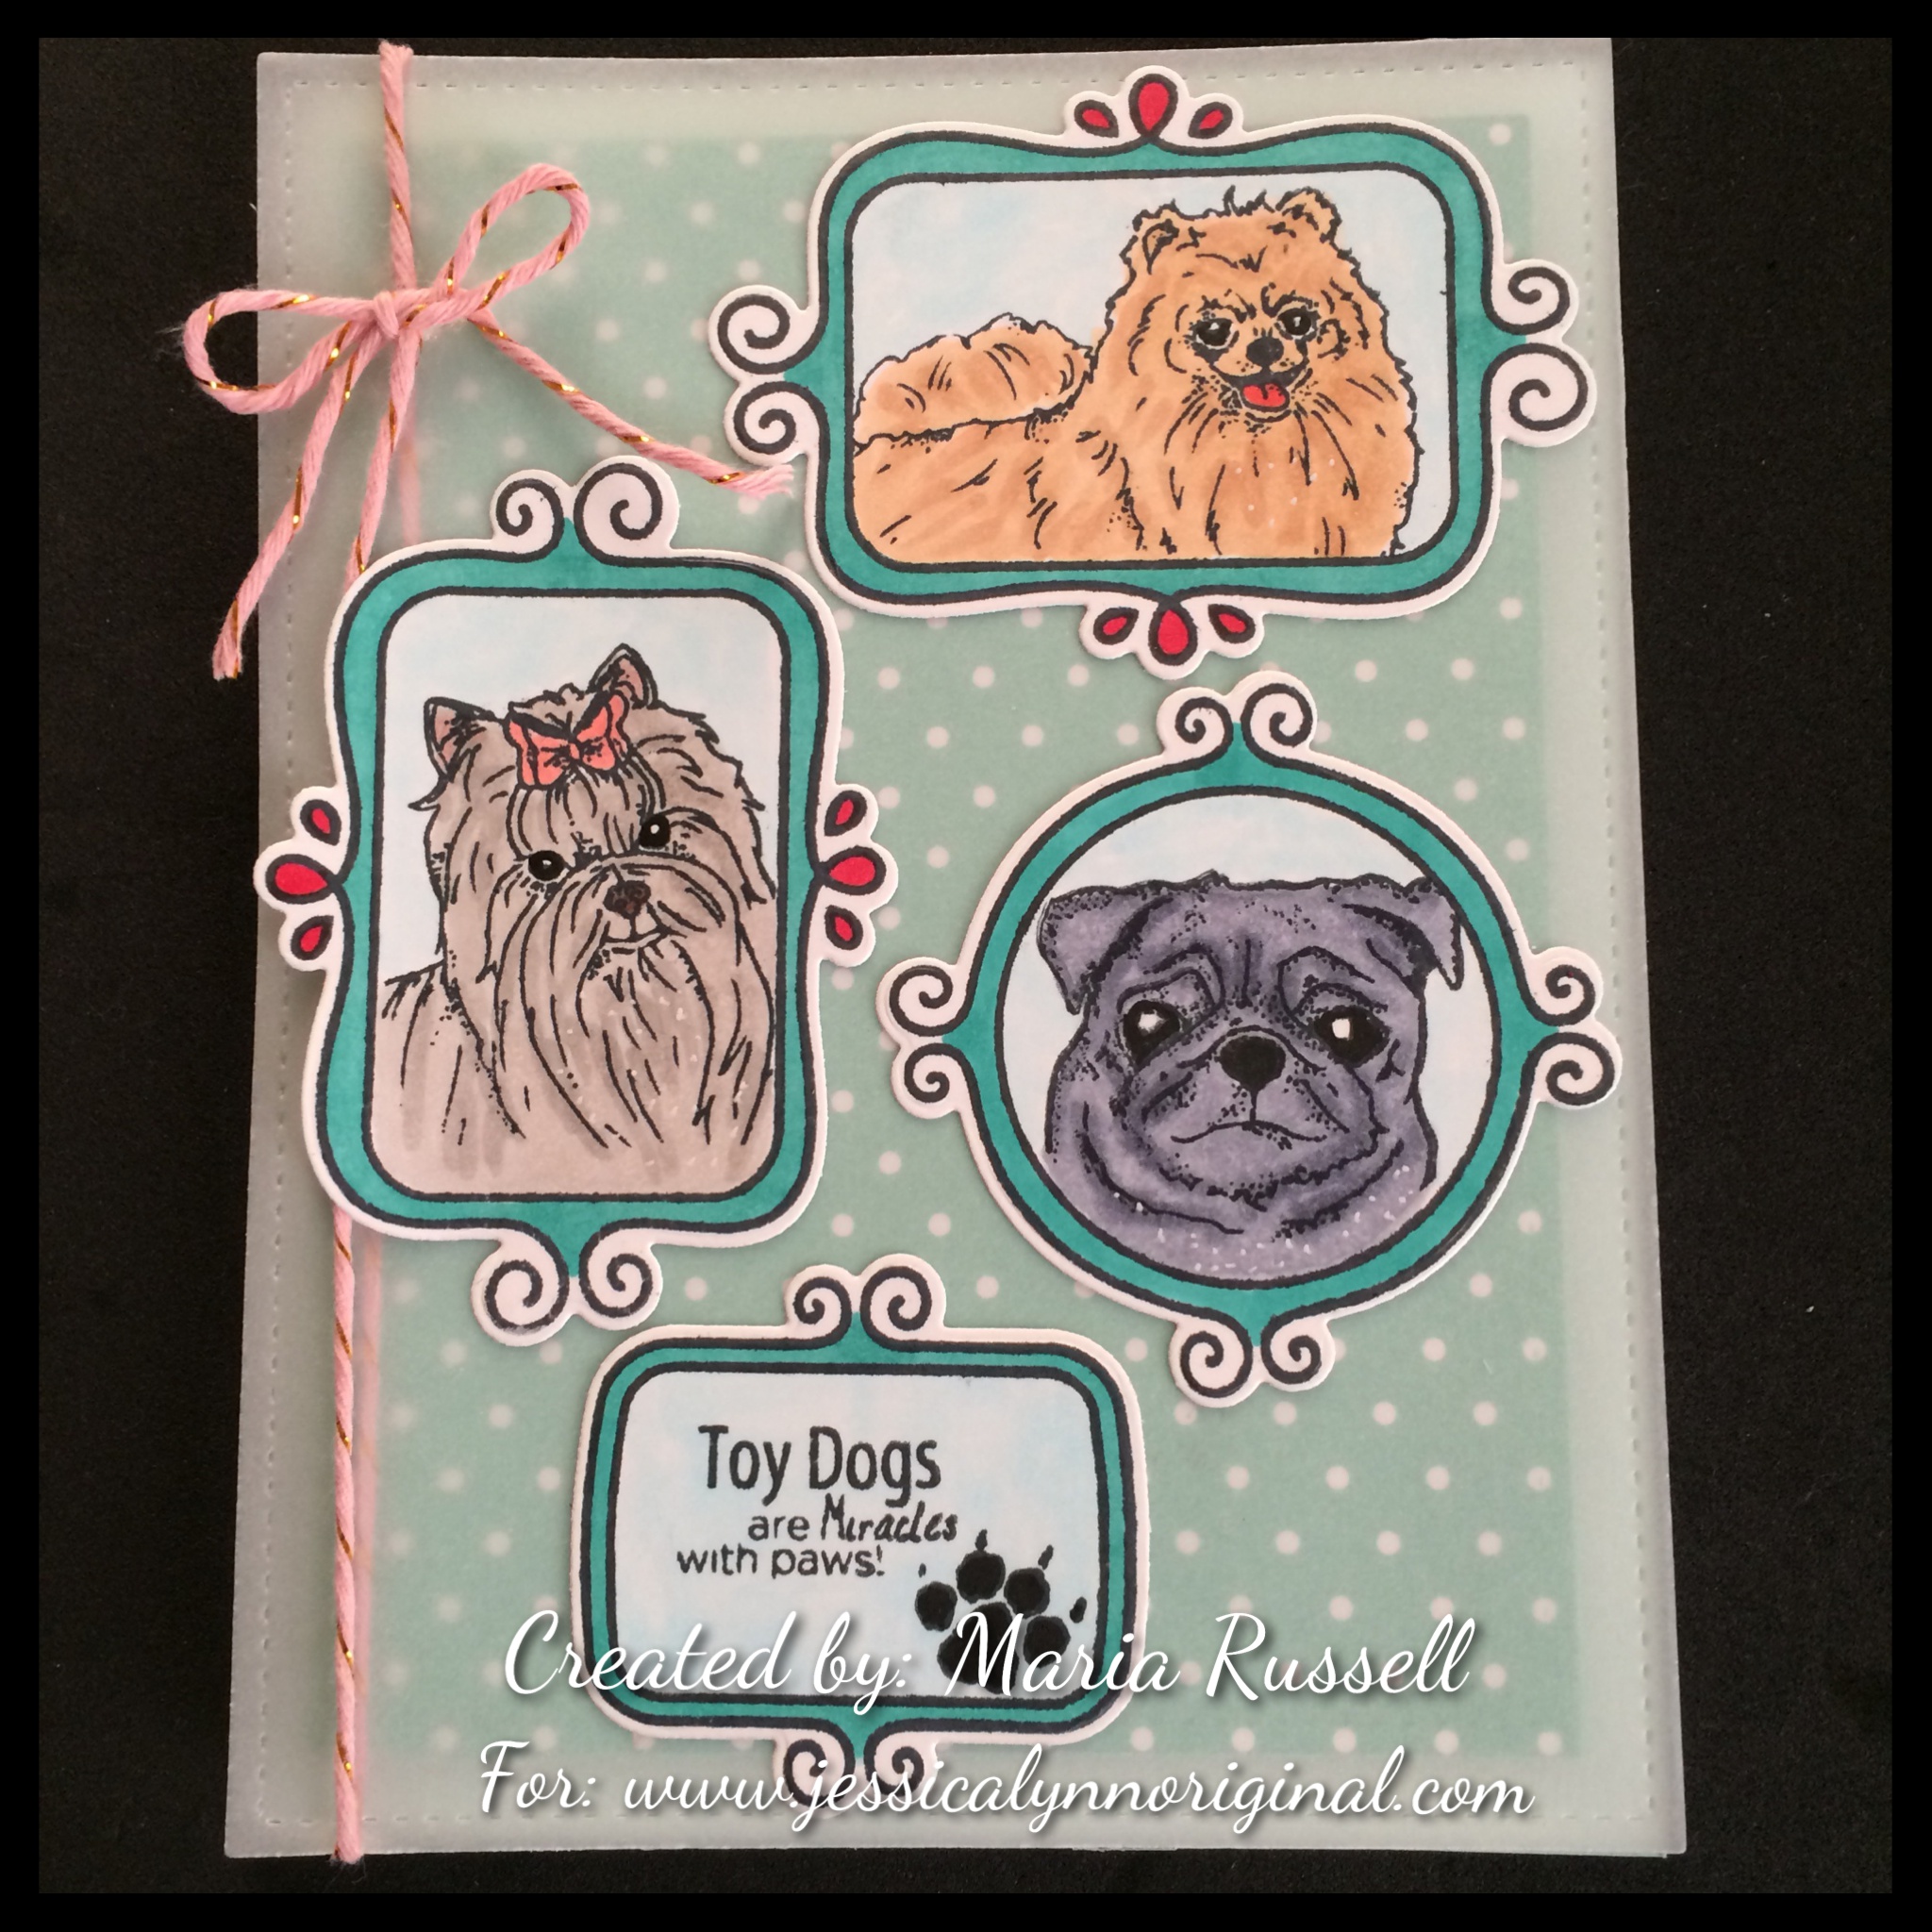
I am really excited to share today’s blog post. We are launching two wonderful new stamp sets at Jessica Lynn Original called “Toy and Working Breed”. I have always loved dogs! I grew up with them and I can’t imagine not having a dog in my life. They are amazing, loving, funny, faithful – truly a man’s best friend!
The toy breed stamp set is very special to me. The Chihuahua image that Jessica has for this set had a striking resemblance to my beloved pet, Chi-Chi. Chi-Chi was my constant companion and I took her everywhere with me. She was very stylish and had outfits for every occasion. She was super spoiled! I lost Chi-Chi in 2013 and I was really sad for a long time that I still couldn’t bring myself to getting another Chihuahua.
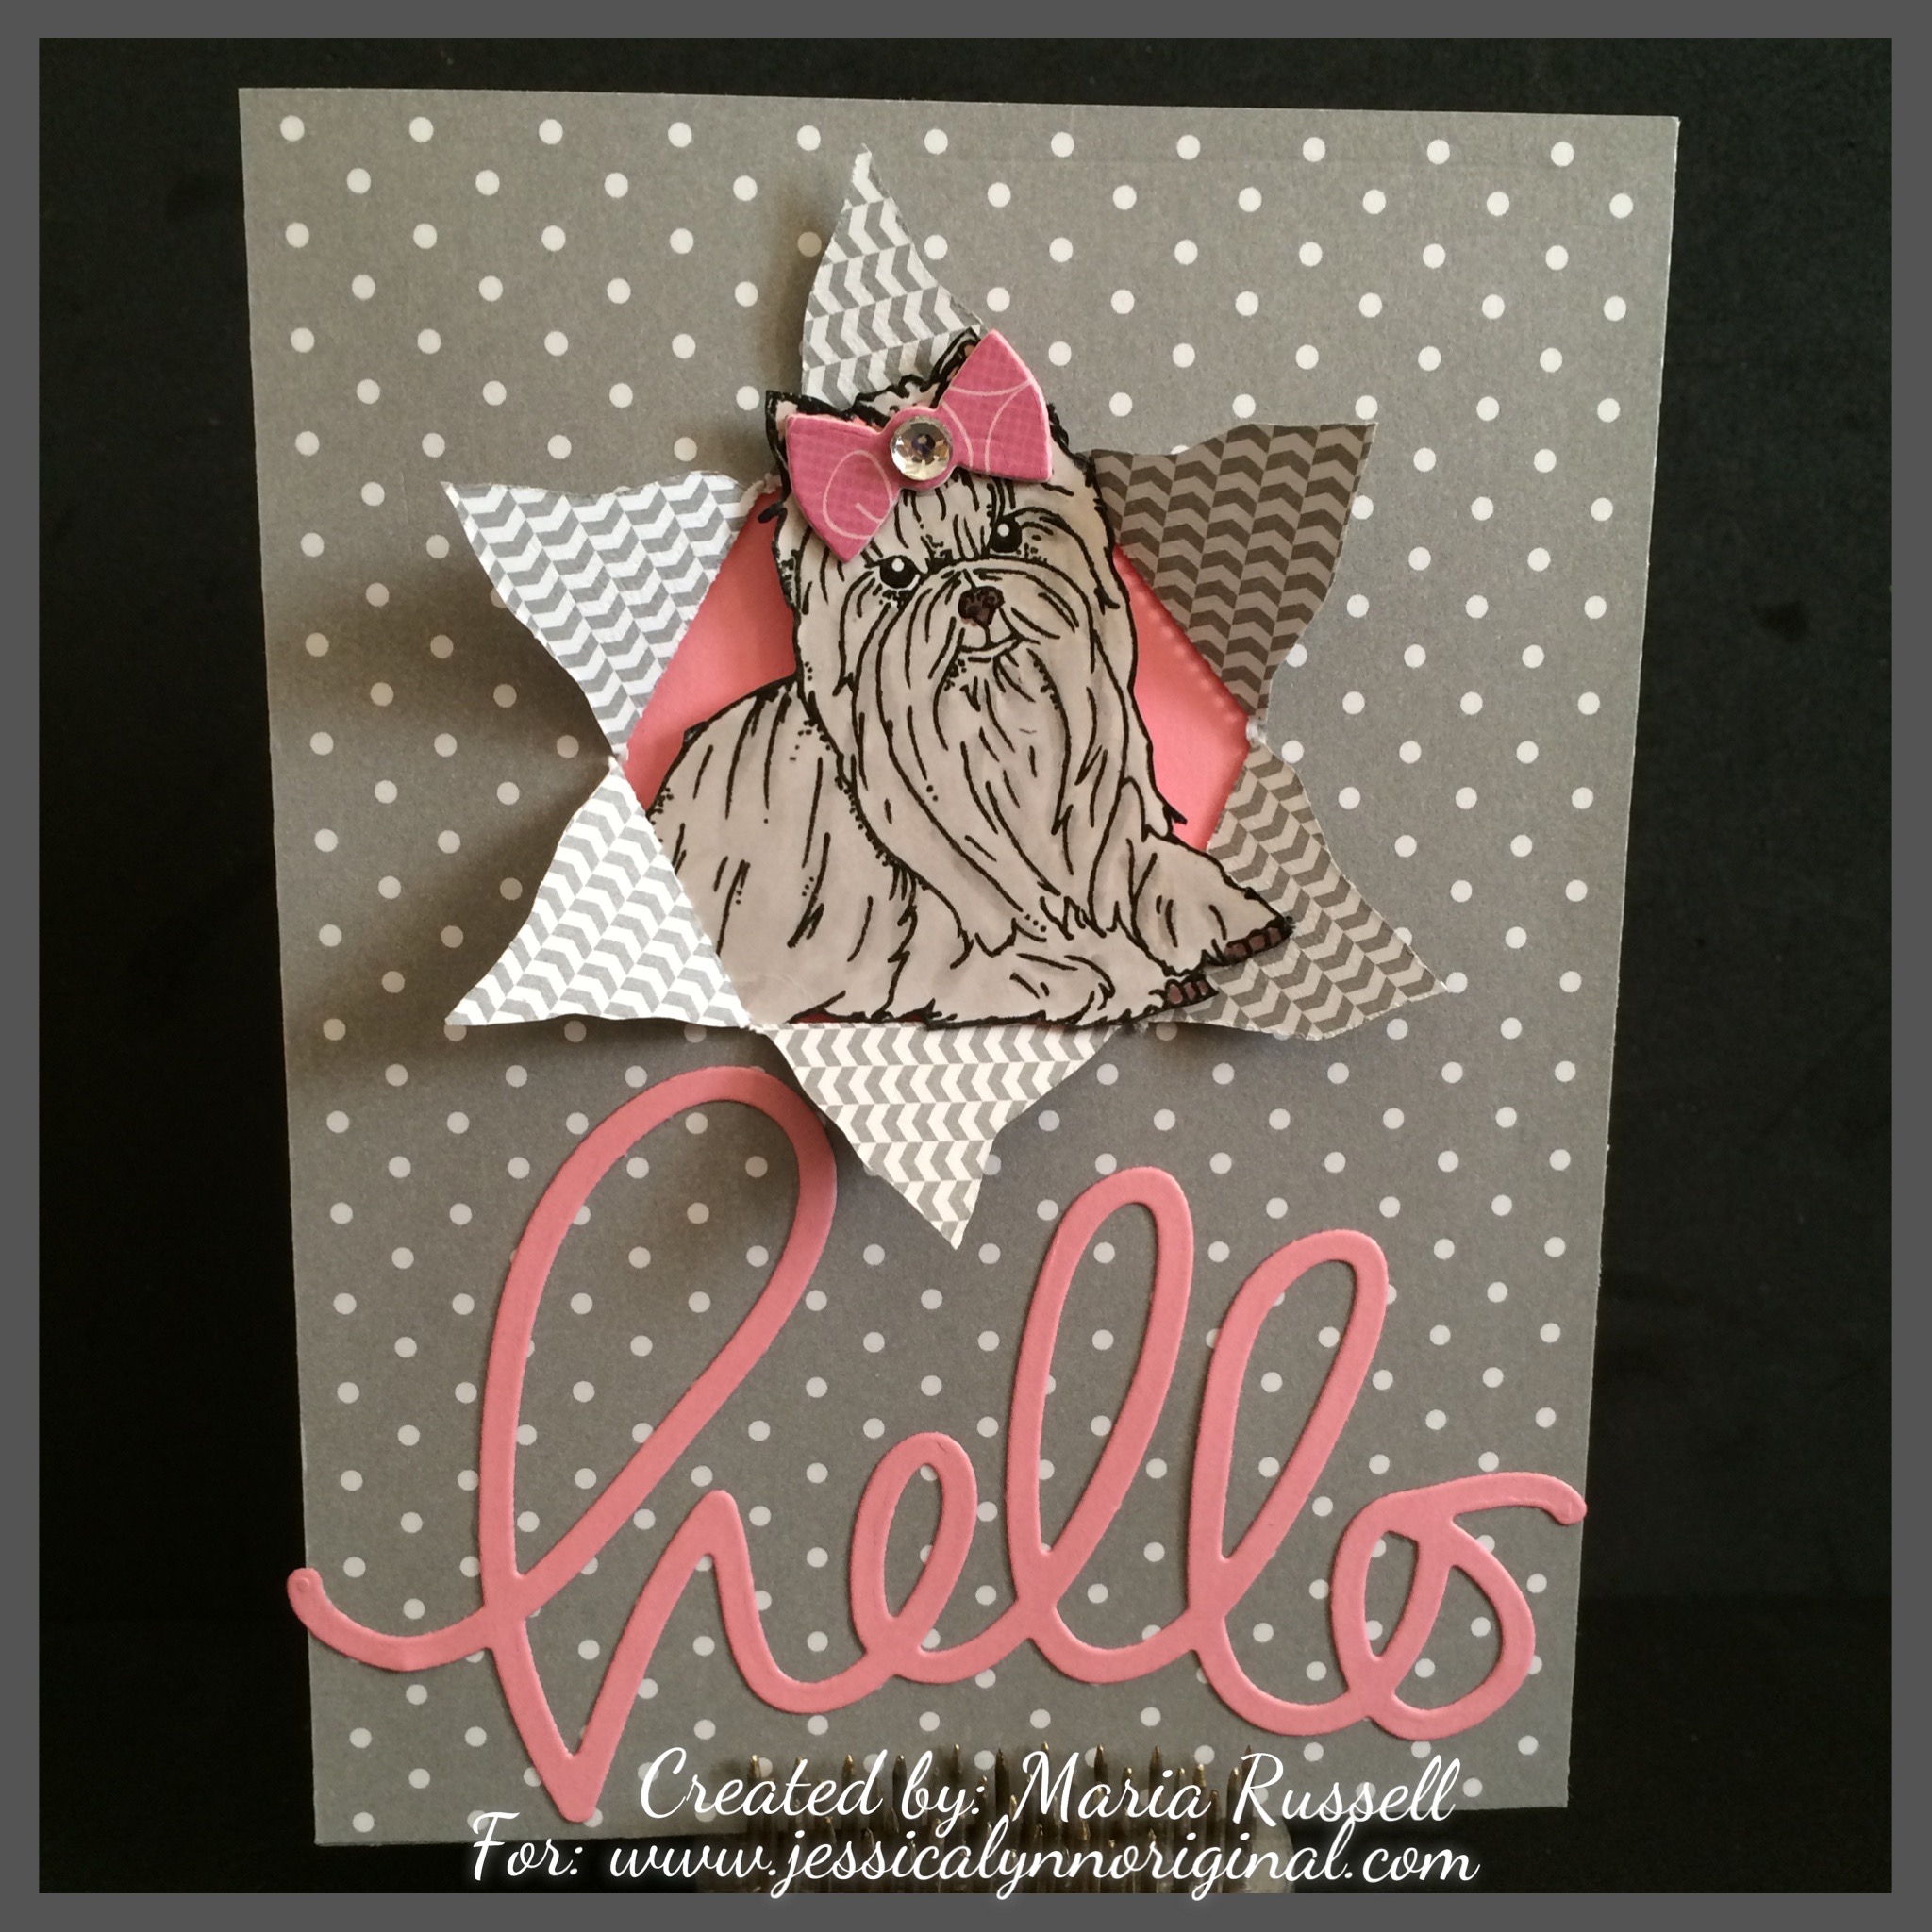
When I first received the stamp set, I really had a hard time trying to think about card designs. I’ve always loved stamping, but I’ve never had stamp images that are so life-like, it was honestly hard to get creative. I am a novice with Copic markers so it was really hard for me to color the images and make it look realistic.
I decided to stamp and color a couple of the images on white card stock. I then fuzzy-cut the images and gathered my card supplies but when it came to putting the card together I was just stumped! I made one mistake after another. I just couldn’t get creative! I left it alone for a few days and decided to look at Chi-Chi’s old photographs! For some reason, I had a light-bulb moment and got my crafty mojo back. I started with a simple card below, but then since I had all the other images already cut and colored, the ideas just kept coming. I guess it’s obvious since this is the very first time I actually have 4 card samples and one Doggie Treat bag for the launch. You can tell I had so much fun playing around with the stamp images, I used a lot of my dies to “dress-up” the dogs.
I am not going to list all of the dies that I used for the cards because I would like to eventually post a YouTube video showing you how I made some of the cards, as well as the doggie treat bag.
Today’s card features this versatile stamp set called True Love. This stamp set is perfect for a Just-Because card, Wedding, Valentine’s Day or Anniversary. This stamp set is great alone, or used with the other cute Brentwood Owl stamps or just about any other stamps you can pair it with. The possibilities are endless!
If you came here from Jeanette’s blog, then you’re in the right place.
I used the digital version of this True Love stamp set. I didn’t receive my stamps in time before this blog hop, because I live overseas (at least 10 months out of the year!). I am a novice when it comes to digital stamps so I couldn’t get the size right! I had to call my friend in Canada to help me figure it out. Her advice was to just use what I have printed so far and make it work. Such a great advice! I decided to just use my imagination and have fun. I really did! In fact, I had so much fun I got carried away!
Supply List:
True Love Stamp Set (I used the Banner image and resized it so I can fit Ruby inside)
Ruby and a Martini Stamp Set (I cut-out the martini glass)
Memento Tuxedo Black Ink
Copic Markers to color the banner, Ruby and the ladybug
Sahara Sand Card Stock
Sahara Sand Stamp Pad
Wood Stamp for the background
Grass Die
Flower Punches
Bow Punch
Stylus to give the flowers some dimension
Glossy Accents to make Ruby’s eyes pop
Rhinestones and Pearl
Adhesive (also used foam adhesive to pop Ruby up)
This first card below is super detailed. I used my punches and other dies to create a scene for Ruby, the Owl. I stamped my sahara sand card base with the woodgrain stamp using sahara sand ink for a tone-on-tone look. I stamped Ruby using my Memento Tuxedo Black Ink and colored her using my Copics. I also used glossy accents to make her eyes pop. The photo didn’t do justice on how beautiful the colors really are. I then colored the banner image also using my Copics, but the ink smudged a little on the pink flower images. It must have been because of my inkjet printer or because I didn’t have any Copic-friendly card stock. This was challenging! To fix this problem, I decided to add punched flowers to create more dimension. I think it turned out so beautiful!
The second card is very simple, but creates a huge impact in my opinion. I just love the sentiments that Jessica has included in this stamp set. I wanted to highlight it in a way that it stands out! Sometimes less is more!
I gathered all of my card stock and cut the pieces using the dies to create my scene for the sentiment. Once I had everything laid out, I dry-embossed my card base using the Brick wall TIEF. I positioned the sentiment on the die-cut window piece and purposely covered the word “love” in the beginning of the sentiment, so I can use the LOVE die-cut piece that I highlighted with Diamond Stickles to make it pop.
I adhered the picket fence, and then proceeded to adhere the window, followed by the planter and the flowers. I thought it needed some sort of greenery so I decided to die-cut the leaf flourish and adhered it to the card. What do guys think? Do you like the first or the second card?
PRIZES!!!!!! Leave a comment on each blog on the hop and be eligible to win a $10 gift certificate to Jessicalynnoriginal.com!
This is a very cute, easy and inexpensive project to make that will last from Halloween to Thanksgiving. Your children or grandchildren will love this. You can also make this is a centerpiece for your table or your office.