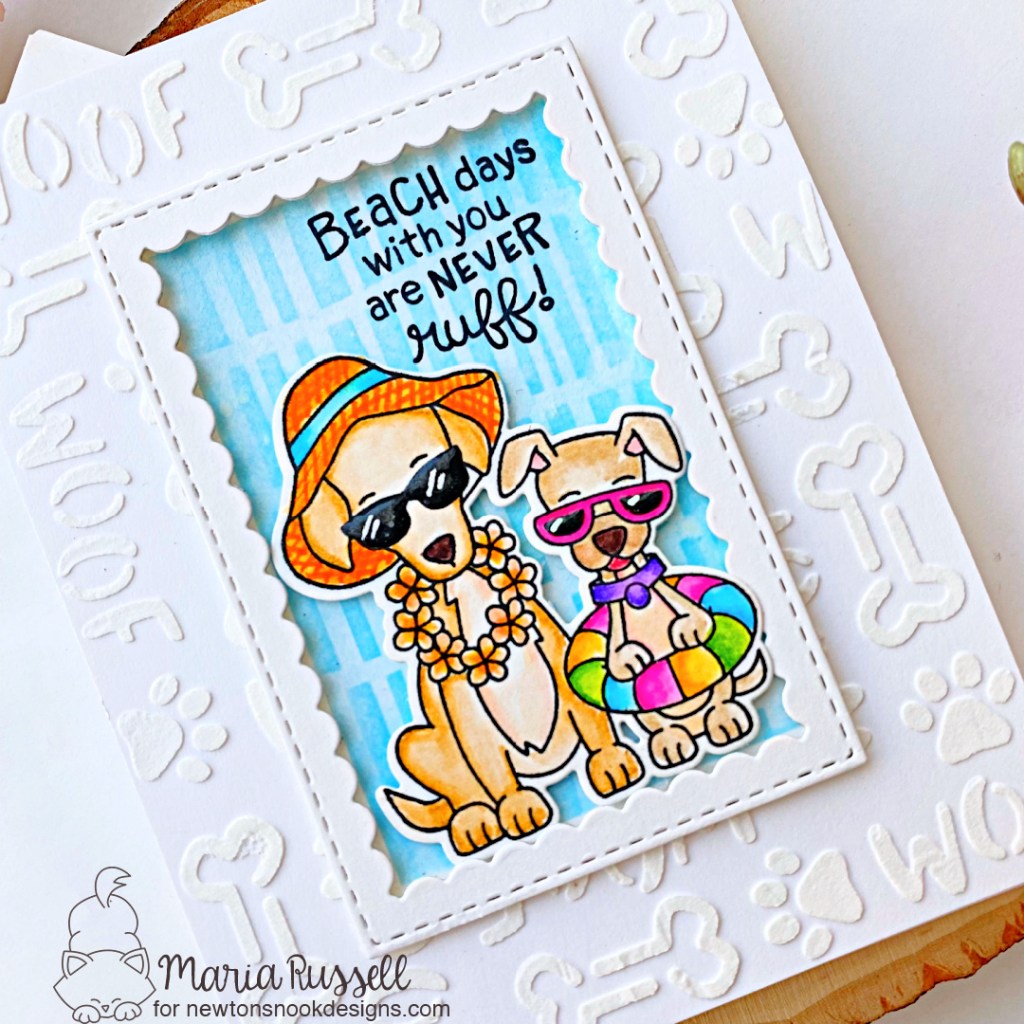
Hello Newton’s Nook Designs fans! I hope you’re having a wonderful week so far! Who is excited for the 4th of July weekend? That is my inspiration for today’s post.
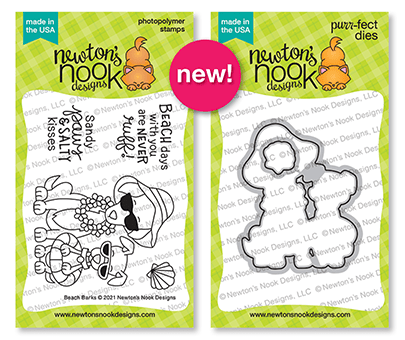
I am back today to share with you this 4th of July card, showcasing products from the June release called Newton’s 4th of July stamp set & dies, along with the Fireworks stencil.
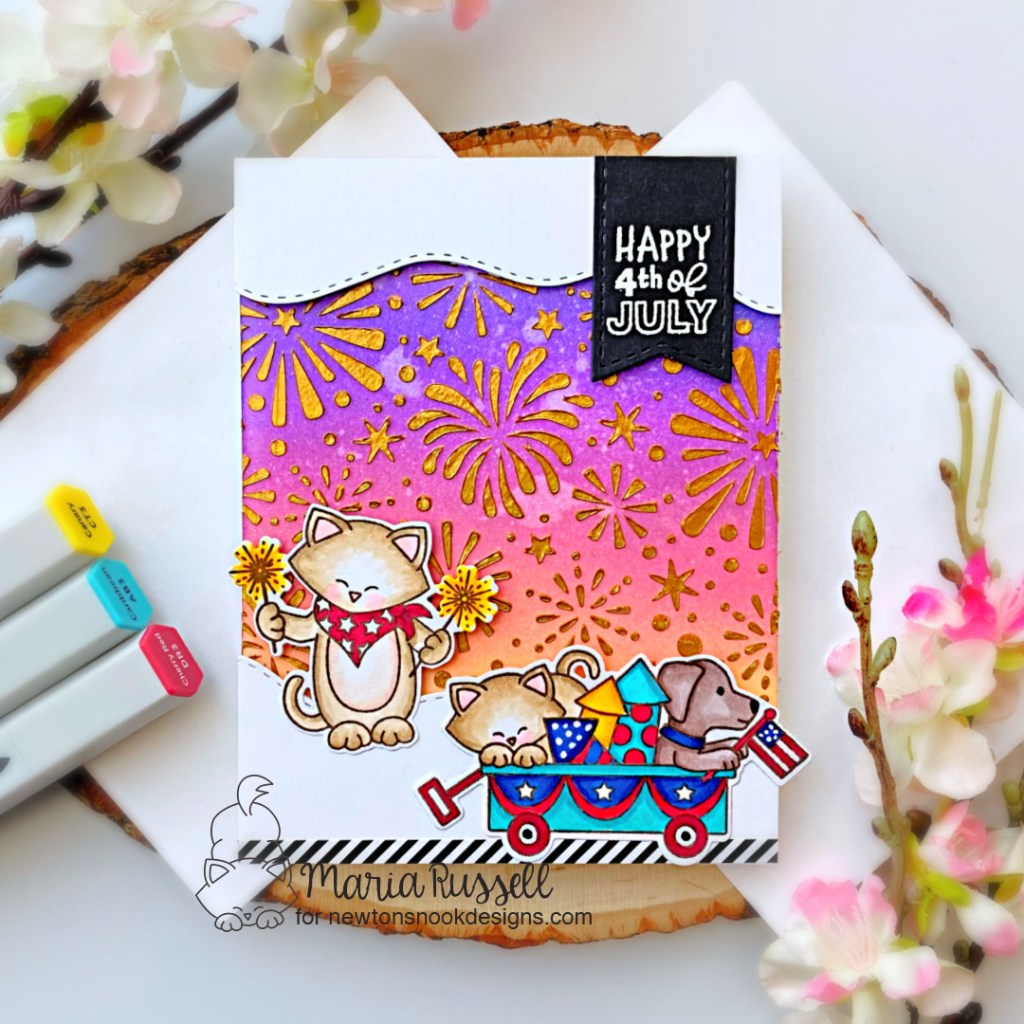
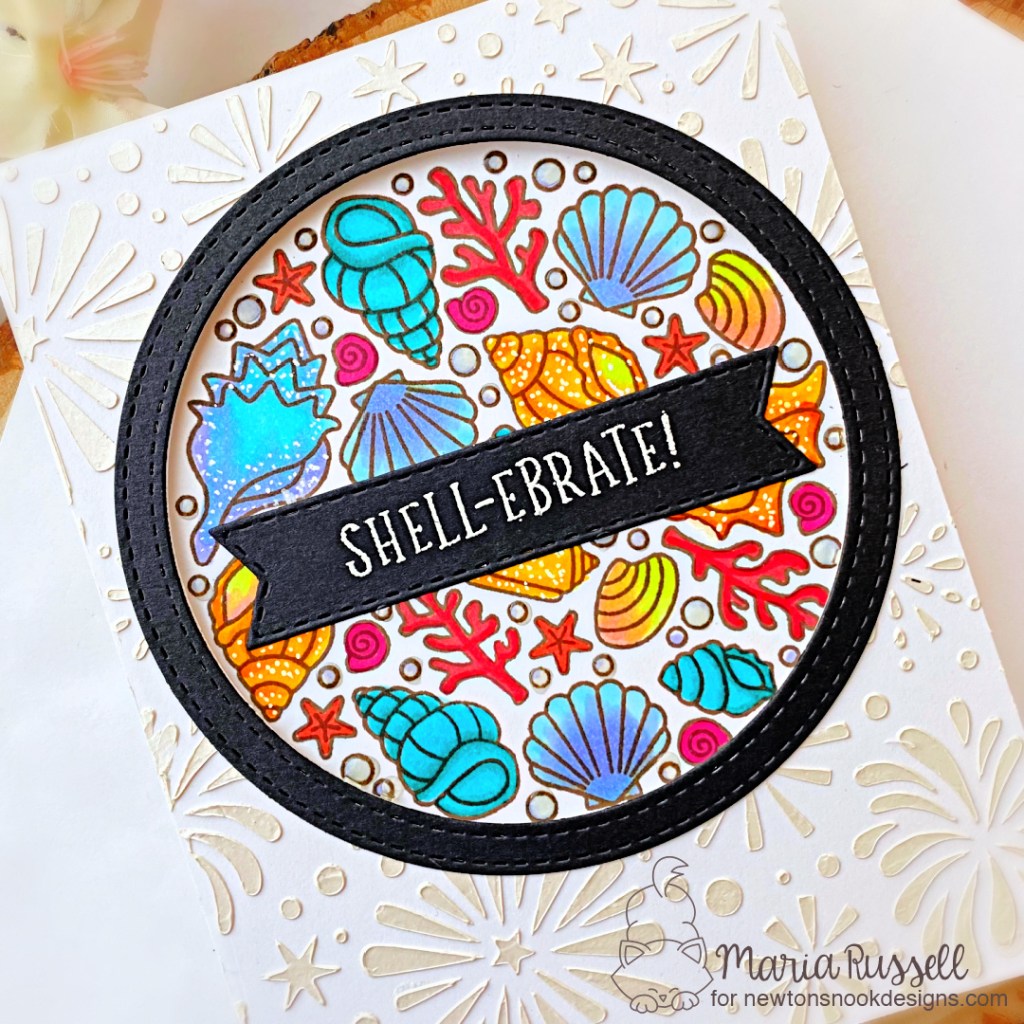
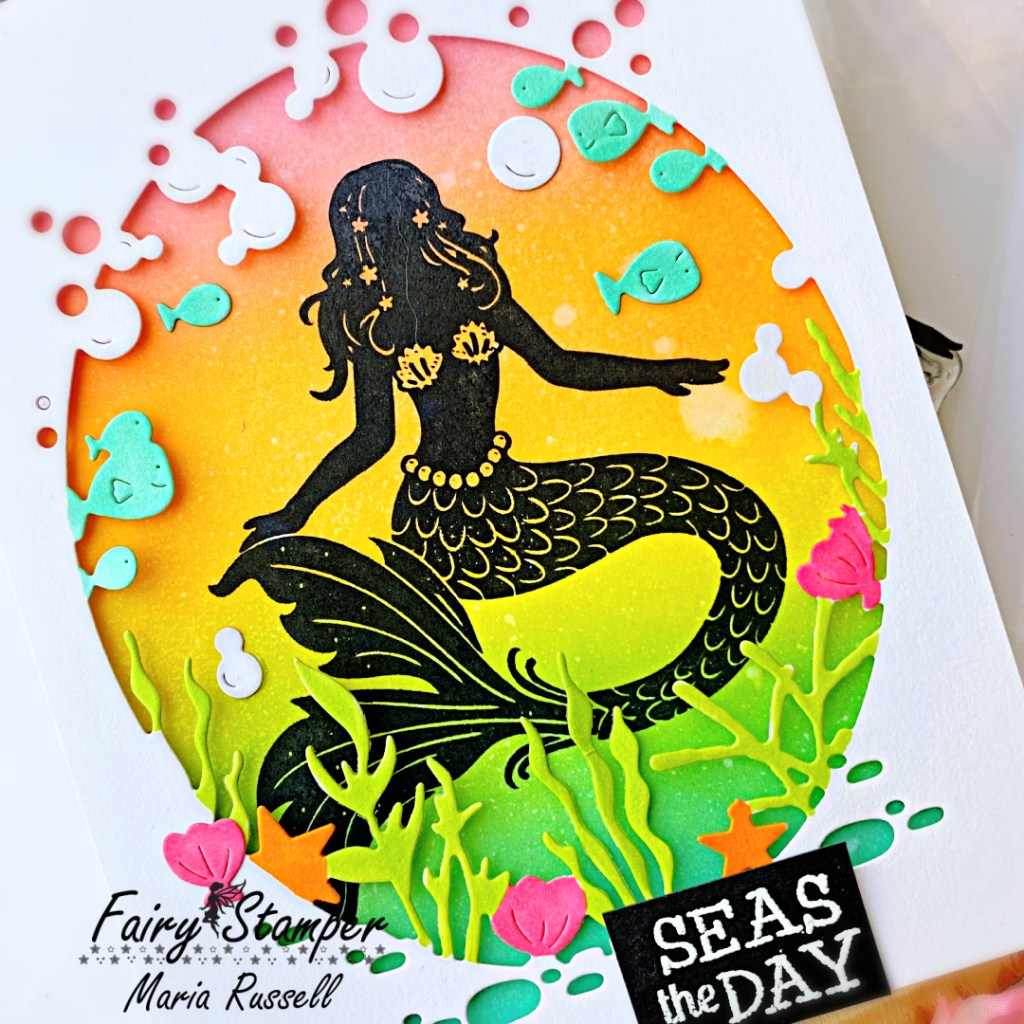
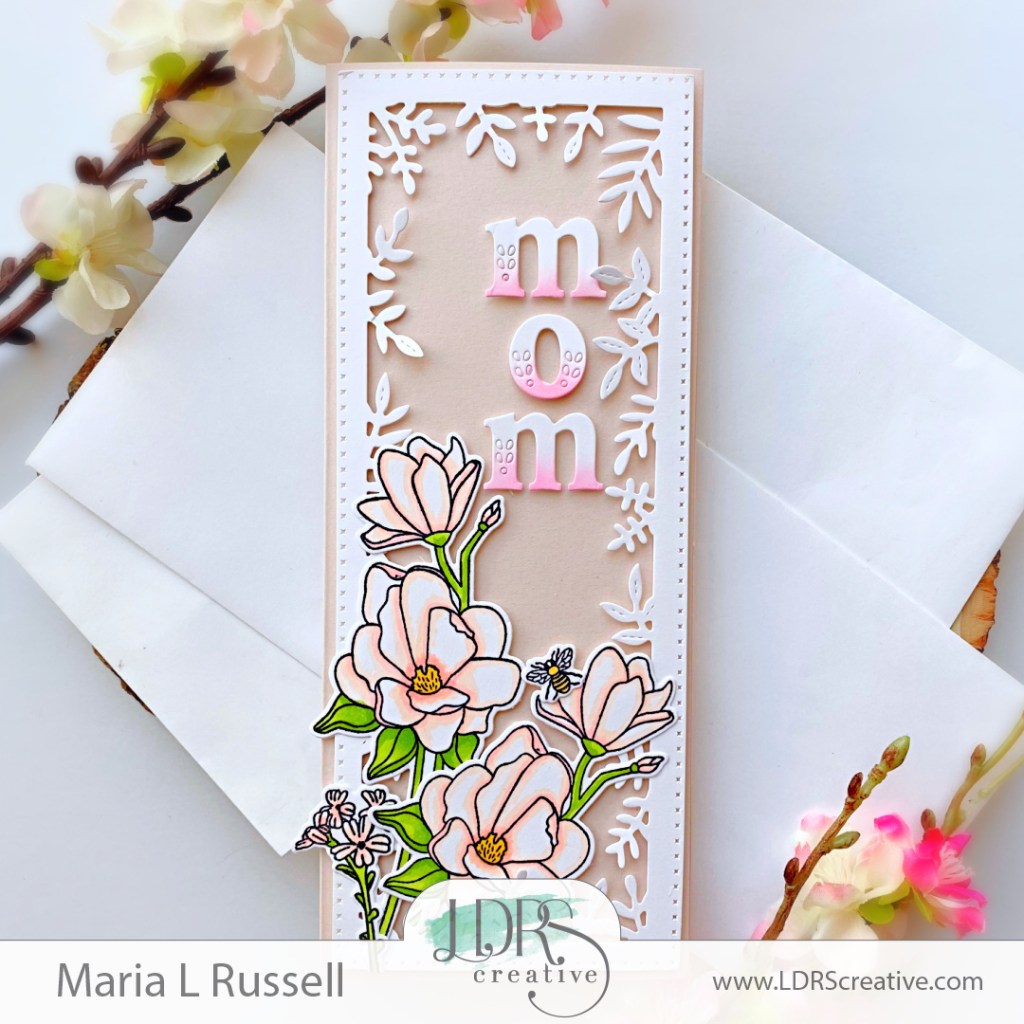
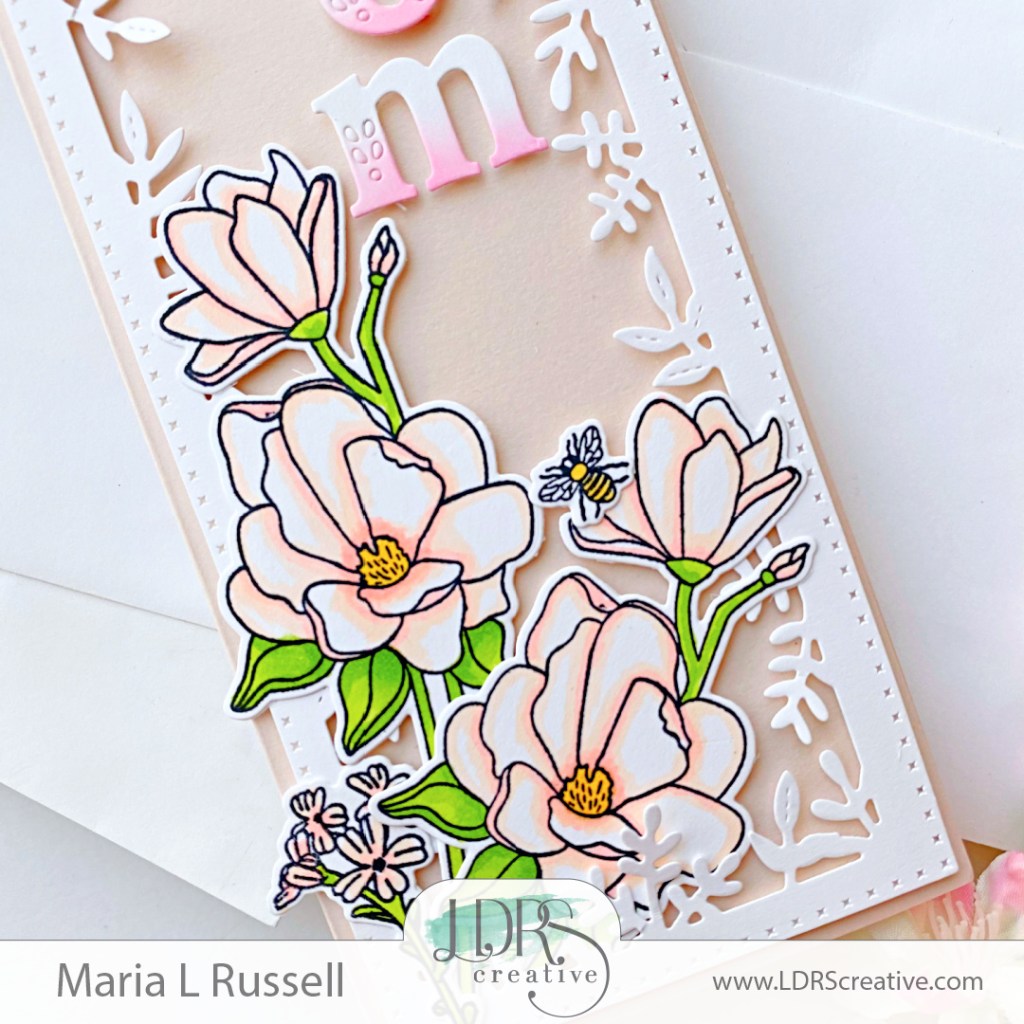
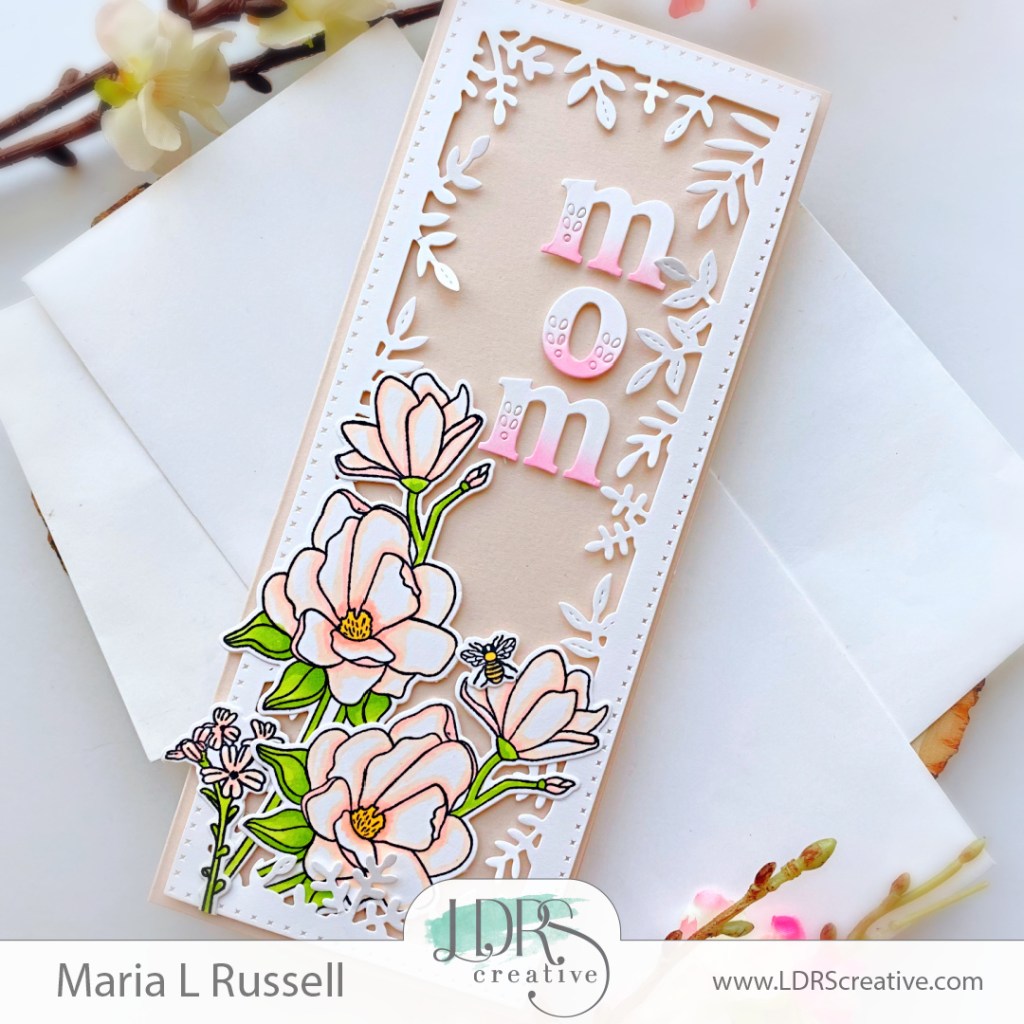
To make the card, I started by stamping my images on some Neenah solar white card stock and colored the images in with Spectrum Noir Illustrator markers and Copic markers. I used the coordinating dies to cut them all out.
The colorful background was made by ink-blending some Bristol smooth white card stock with my favorite Distress oxide blends –> Faded Jeans, Wilted Violet, Picked Raspberry and Dried Marigold. I didn’t bother to color the bottom of the card stock since I knew they will be covered anyway. I sprayed this with water and picked up the excess with paper towel.

Next, I used the Fireworks stencil and Therm O Web Metallix Gel in Gold to add texture to my ink-blended background. The gel was evenly spread on teh card stock with the help of TOW Stencil Pal. I set this panel aside to let it dry for about half an hour, before adhering to an A2 size notecard.
I used the Sea Border Die Set to die-cut two strips of white card stock and foam mounted both pieces onto my card.
I cut a strip of black & white pattern paper and adhered at the bottom with liquid glue. I also adhered both images on the card using both liquid & foam adhesive for added dimension.
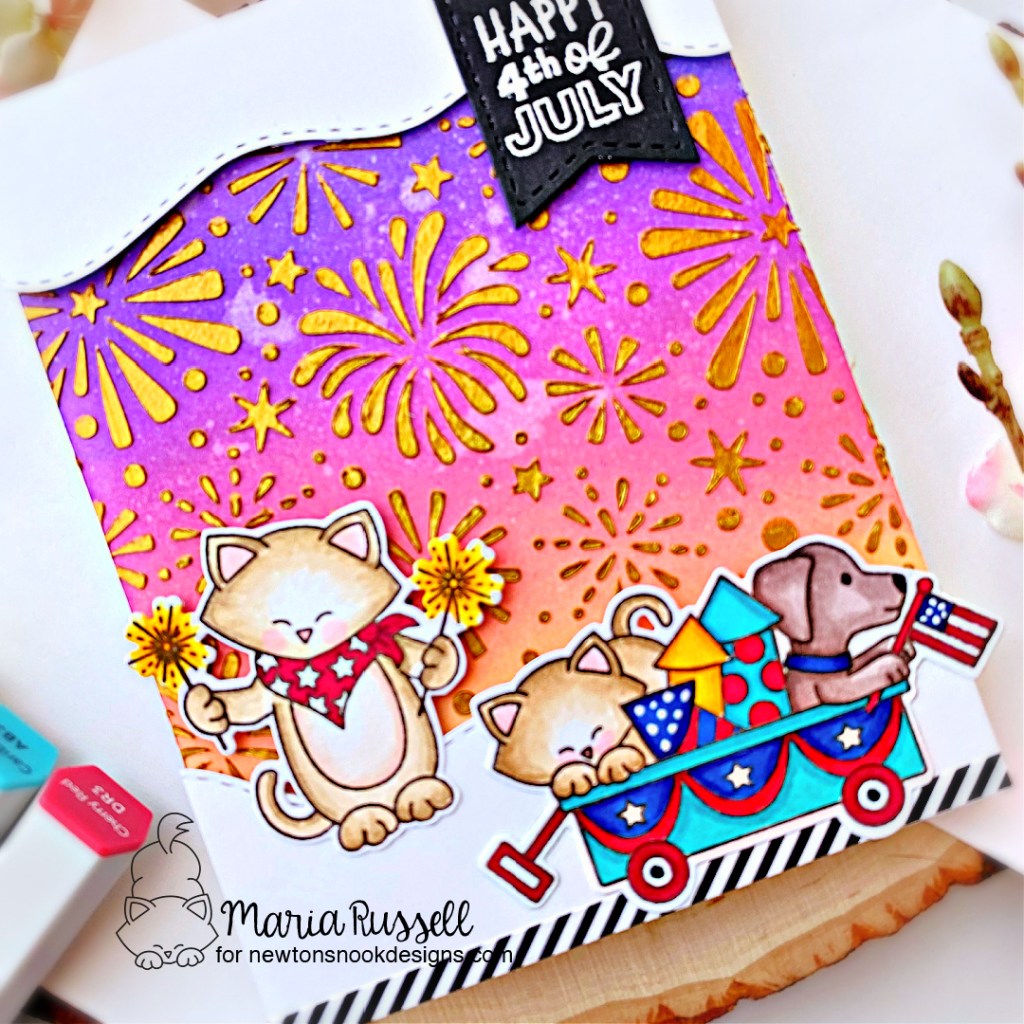
Lastly, I stamped the sentiment on some black card stock that was die-cut using one of the dies from the Frames & Flags Die set. I foam mounted this onto my card to give it stability. Here’s another look:
I hope you like card today. The supplies I use are listed and linked below. Thanks for stopping by and have an amazing day!
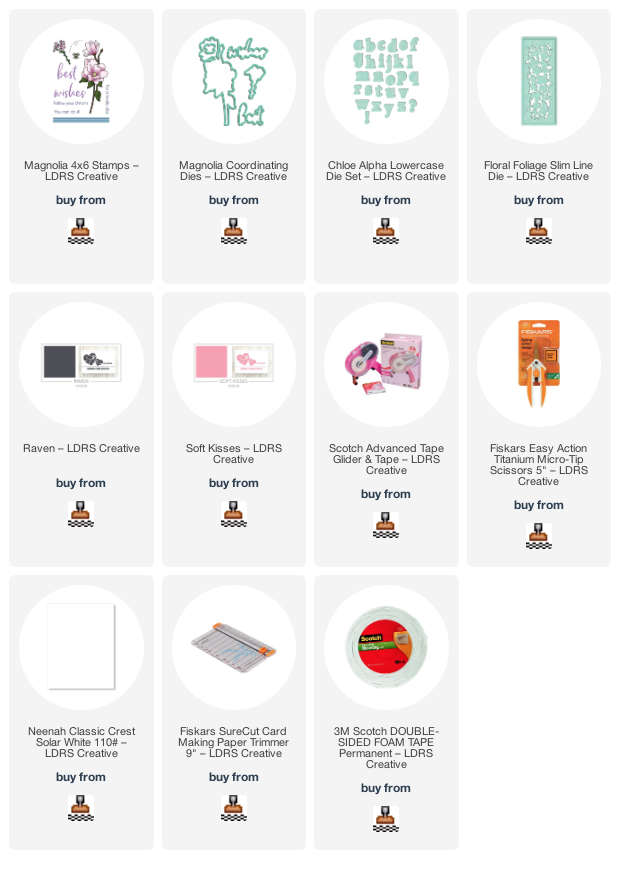
———SUPPLIES——–