World Card Making Day Challenge

Today is World Card Making Day and KatScrappiness is celebrating with a SALE (begins today and ends on October 3rd), inspiration projects from the entire design team and card-making challenge with tons of prizes from our sponsors mentioned below. Please head on over to www.katscprappinessblog.com for more details about the challenge and design team inspiration projects.


Here’s a look at our list of sponsors!


  • Craftin Desert Divas
  • Creative Vision Stamps
  • Die Cuts & More
  • Fleurette Bloom Stamps
  • Gina K Designs
  • Gina Marie Designs
  • Honeybee Stamps
  • Jessica Lynn Originals
  • Jambalaya’s Stubby Stampers
  • Kat Scrappiness
  • The Ton


For the sake of time, I will not have a step-by-step instruction on how I made the cards.  The supplies I’ve used will be listed and linked below.


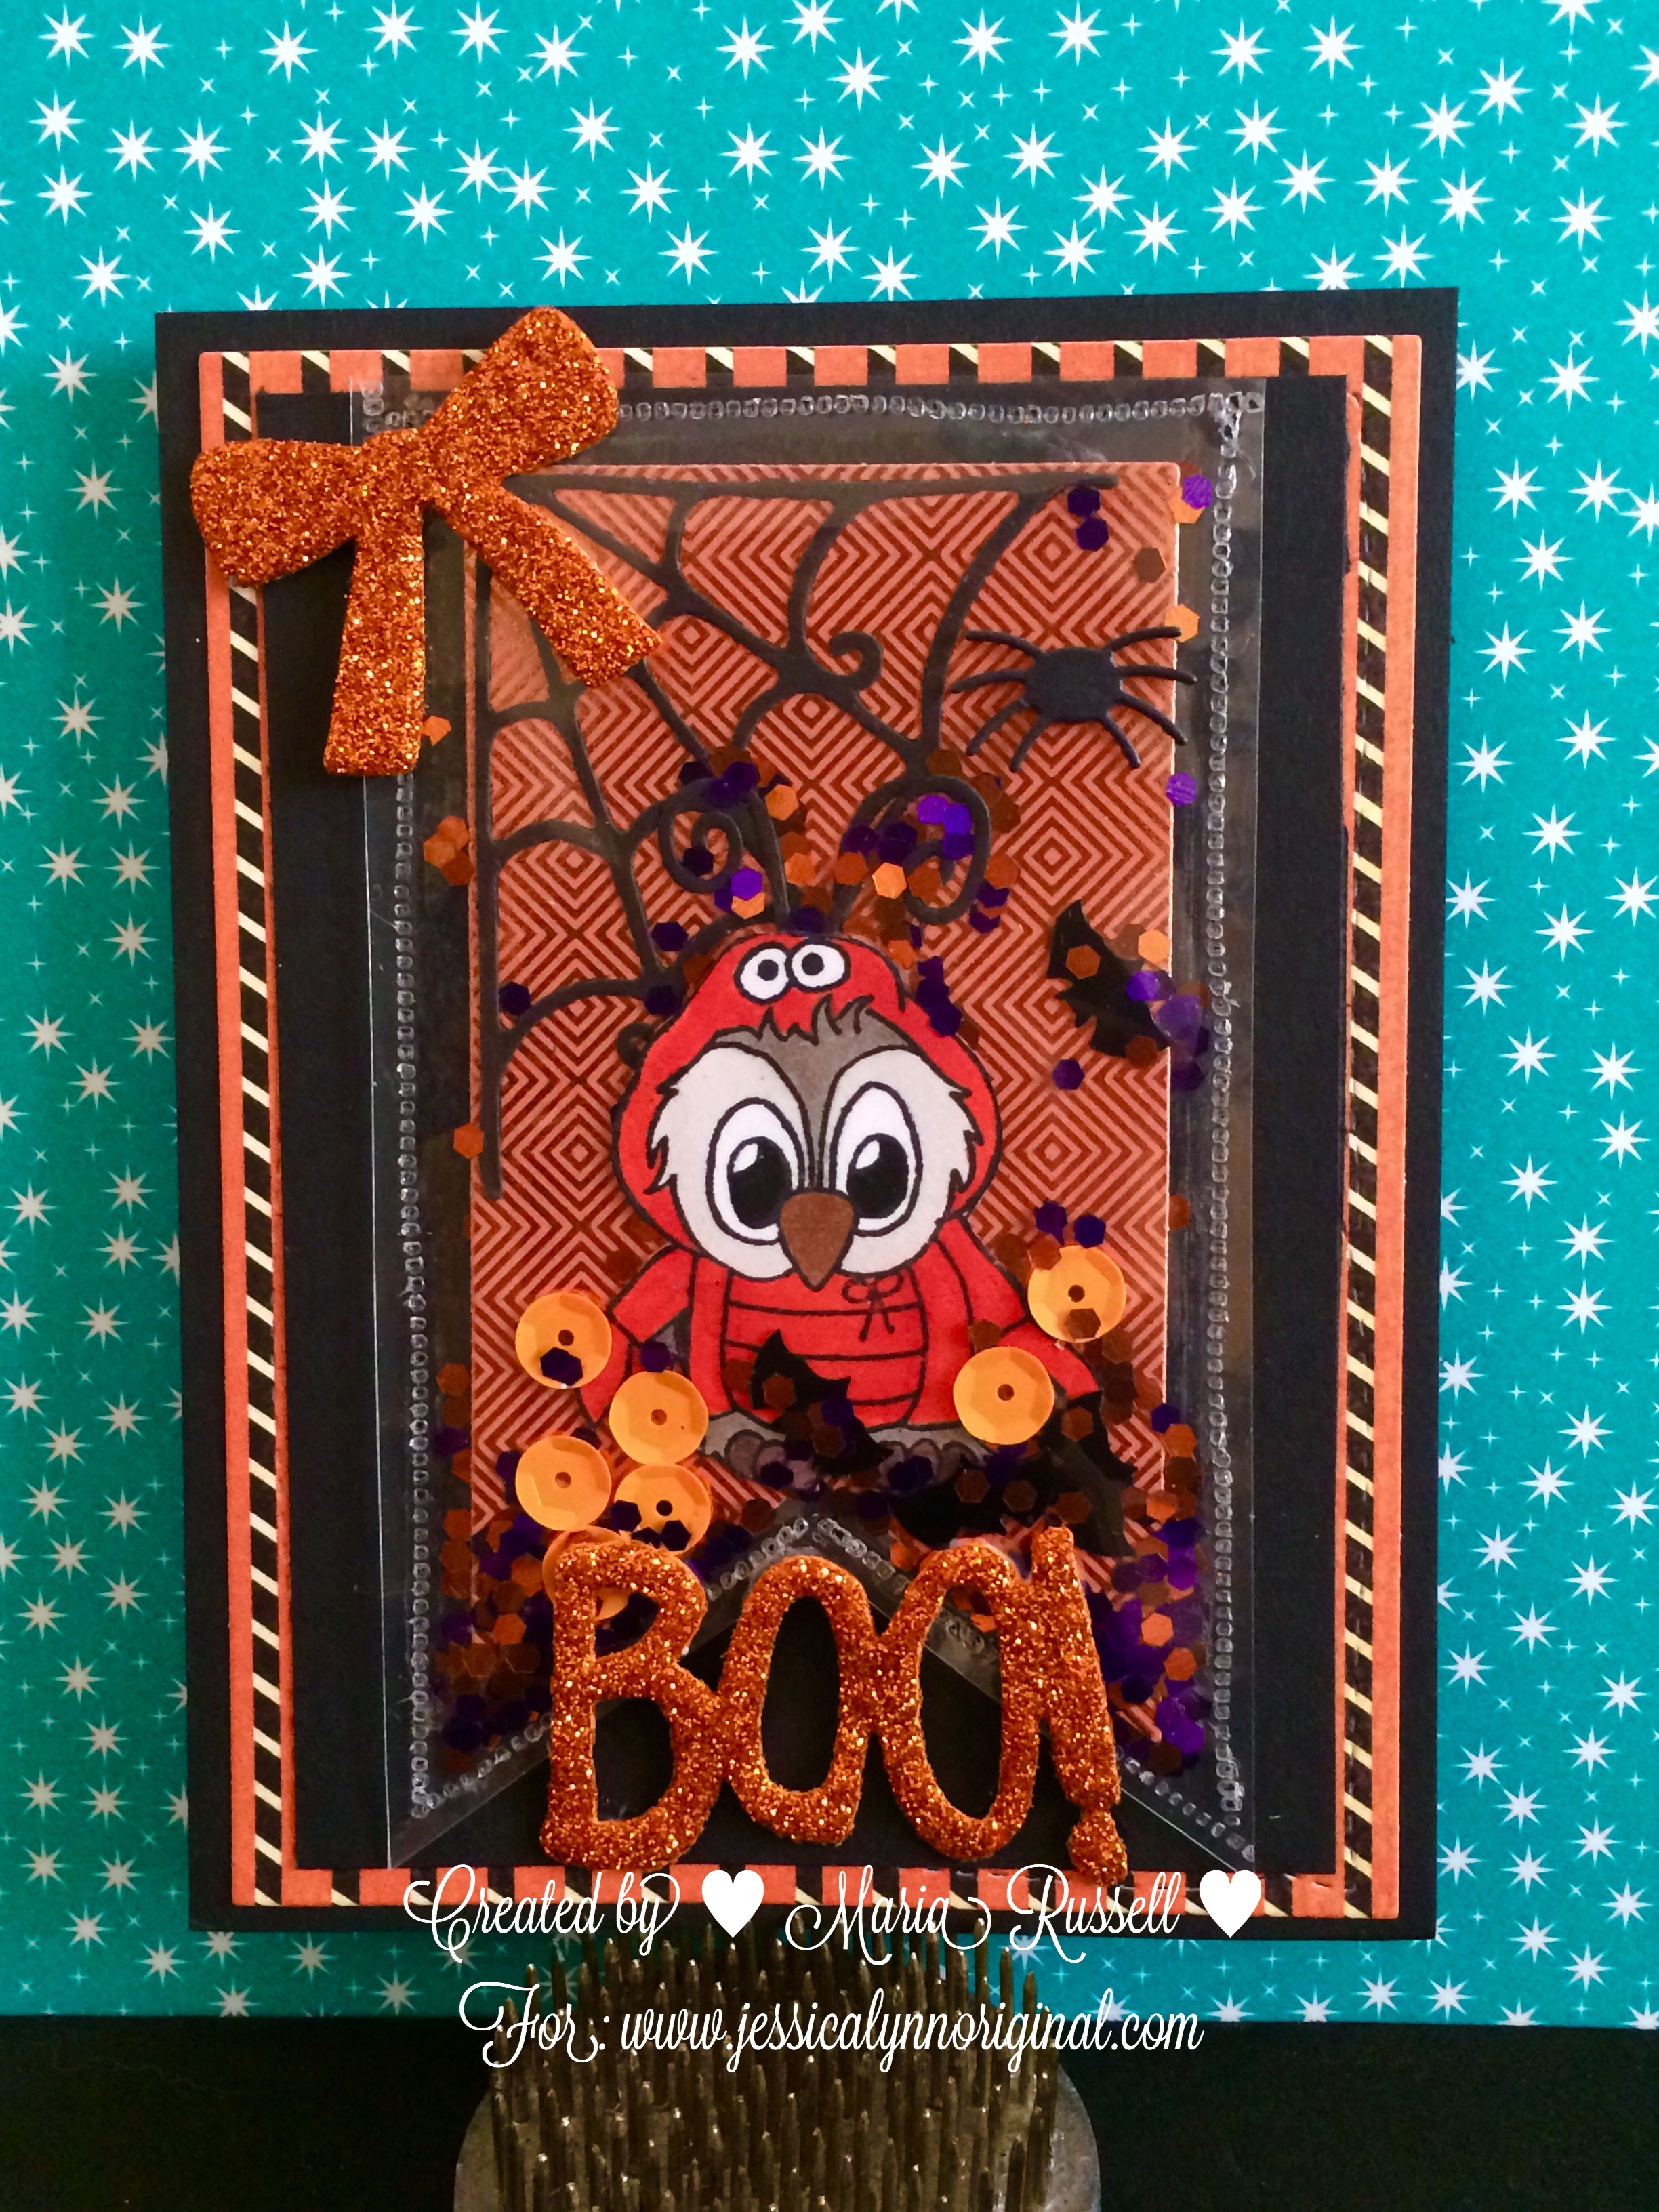
The first one is a fun Halloween card showcasing the KatScrappiness Stitched Rectangle Stacks and Lawn Fawn’s So Stinkin’ Cute Stamp Set.  I also used the Gina Marie Designs Background Tree.   For the witch’s broom, I used an older Lawn Fawn stamp called ” Critters in Costume”. The background paper is by Doodlebug.


img_2209


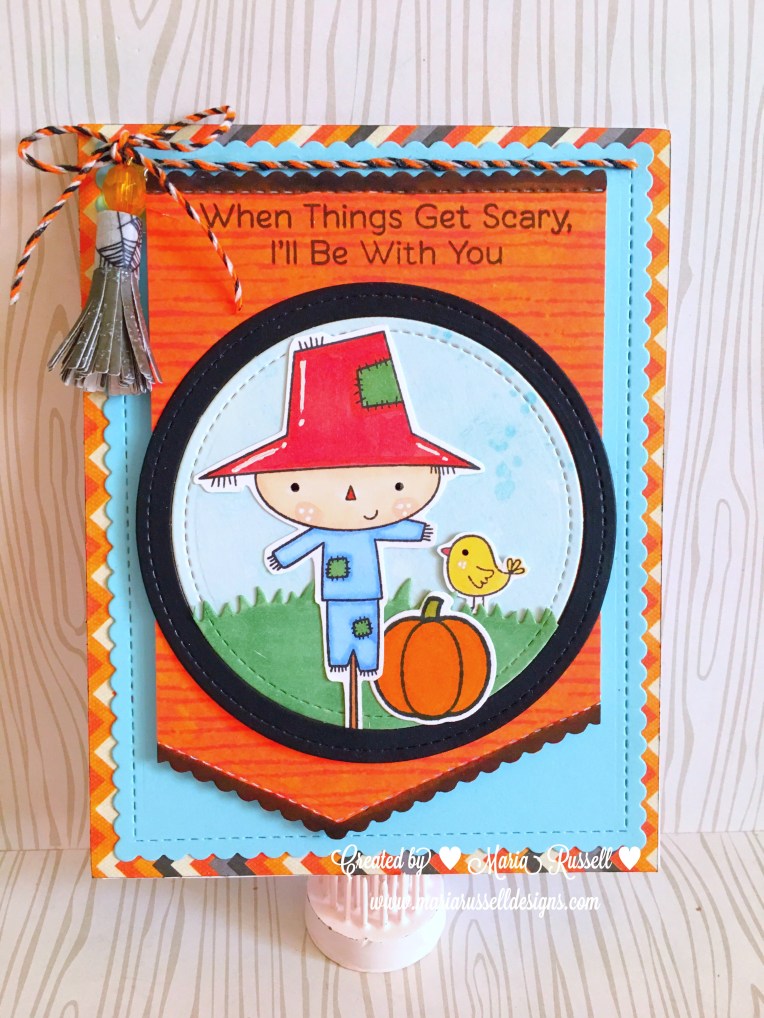
The Thanksgiving card below showcases the amazing embossed mini-rope stackable dies by KatScrappiness.  Kat’s dies are very inexpensive and they’re all made here in the USA.  I also used Lawn Fawn’s Cutie Pie stamp set and die with an older LF set called Snow Day.


img_2208


Join us and celebrate World Card Making day!  Shop your favorite products at http://www.katscrappiness.com/?aff=21 and use the coupon code: MAKECARDS2016. This coupon code is only valid from October 1-3, 2016.


Thanks for stopping by. Have an amazing weekend!


Interested in the products I used?  To make them easy for you to find, I have listed them below.  [Disclosure:  I am affiliated with KatScrappiness online store.   When you click on my links and make a purchase, I receive a small commission (at no additional cost to you!).  Your purchases help keep my blog running and I thank you for the support! 


MFT Stamps – Sketch Challenge # 299

I’m back today with a fall card showcasing the new Fall Friends stamp set by MFT Stamps.  The card below is my entry for the current sketch challenge no. 299.   For more information or if you would like to join the challenge,  please click on this link http://www.cardchallenges.com/2016/09/wednesday-sketch-challenge-sketch-299.html Here is my rendition for sketch 299:


img_2176


Here are the supplies I’ve used:


MFT Stamps Fall Friends Stamp Set

MFT Stamps Harvest Buddies stamp set

Die-namics Stitched Basic Scallop Edges

Die-namics Mini Fringe (the tassel)


I hope you all have an amazing day!  Happy crafting!


The Greeting Farm-Peek-A-Boo

My design team projects for this week showcasing the Peek-A-Boo stamp set by The Greeting Farm. Process video below for one of the cards if you’re interested:


Rock Lobster Stamp Set by JessicaLynnOriginal

I am thrilled to finally be able to post photos of this new stamp set by Jessica Lynn Original called Rock Lobster. I love Brentwood, but don’t you just love that little smiley fish? It’s so adorable! Jessica is such a talented artist and a wonderful person; I am so proud to be a member of her design team.

Below you will find a photo of the stamp set. I think this will be a great addition to your collection. Just like the rest of Jessica’s stamps, this is made of high quality photo polymer material. You don’t have to be a skilled stamper to use this set.

IMG_8927

Since today is Halloween, I wanted to create a Halloween card. I have always believed that you can use any stamp set for any occasion, with just a little imagination. I always liked stretching my stamps and dies. Since Brentwood is already dressed up as a lobster for Halloween, I figured he needed some confetti to go along and celebrate my favorite holiday! I also used my We Are Memory Keepers Fuse tool for the first time to create a flat shaker. Note to self: next time, do not touch the fuse tool with your fingers to check it it’s hot enough! Ouch!

IMG_8899

The next card is one of my all time favorites! I think everything just worked and blended together beautifully. I love the colors on this card. I used my Avery Elle Wonky Stitched rectangle die to create the frame for my shaker card. I used a combination of blue, iridescent and white sequins and seed beads for my shaker elements. A video tutorial will be posted soon on my YouTube channel so please stay tuned for that.

IMG_8889

I hope you like what I’ve created. Please don’t forget to go to www.jessicalynnoriginal.com to grab this stamp set.  Happy Halloween!

Digi Weekend Celebration at JLO Stamps

Are you aware of how amazing digi stamps are? This is the weekend for you to find out. Digis are quick, resizable and take up no space in your craft room. You can print as many images as you want to add to your handmade cards, scrapbooks, project life, pocket letters, etc.

For this weekend only, all digital stamps at JessicaLynnOriginal.com are on sale for $1.00. If you have wanted to try digis, this is the perfect time to do it. Please follow along the hop to see some of the amazing work our design team has put together to show you how versatile these stamps truly are.

If you’ve come from Jeanette’s Blog, you’re in the right place!

The first two cards you see are made for a new baby boy and a baby girl.  I have used the baby giraffe digi stamp to create these two simple cards.

IMG_8455

The second card is one of my favorite digi stamps from JLO. It’s Brentwood as Mad Hatter. Of course I had to create an Alice In Wonderland themed card. I spent quite a few hours die-cutting the pieces to create a cute scene for this card. I know this is a bit much for some but I love spending a lot of time making my cards. To me, they’re little pieces of artwork!

IMG_8457

Last but not the least, is my favorite out of all the cards I made today! It’s a Halloween-themed card and yes, it’s a fun shaker card. I used Brentwood Owl and dressed him/her as a warlock/witch. I dry-embossed the “moon” and included die-cut bats, orange sequins and seed beads for my shaker element. I love making shaker cards. Do you like this one too?

IMG_8456

Please don’t forget to go http://www.jessicalynnoriginal.com to download your digis for $1.00 each – this weekend only!!  Here’s the link: http://www.jessicalynnoriginal.com/digital-stamps-download-now/

The next person is Sharon Rogers.  She is an amazing carmaker/designer from Australia.  Please check out her amazing designs: http://sharonshowcase.blogspot.com

Have a great weekend, and happy crafting!

No-Carve Pumpkin Centerpiece from Halloween to Thanksgiving

This is a very cute, easy and inexpensive project to make that will last from Halloween to Thanksgiving.   Your children or grandchildren will love this. You can also make this is a centerpiece for your table or your office.

Materials Used:

1 Glass Bowl

Battery-operated String Lights (bought from Ikea)

Orange Tulle

Wire

Tim Holtz Bewitching Hour Die

Black Felt

Broom (bought from Hobby Lobby)

Fall Silk Leaves

Glue Dots

Black Ribbon


Please follow me on:

My Blog: http://www.mariarusselldesigns.wordpress.com

My Stampin Up online store: http://mariarusselldesigns.stampinup.net

My Instagram: http://www.instagram.com/rprmlr77

My Pinterest: http://www.pinterest.com/rprmlr77

Facebook: http://www.facebook.com/mariarusselldesigns

Easy Side Step Card Tutorial

This is a very easy tutorial to follow to create a simple Side Step Card. Using an A2 size card (5 ½ by 8 ½)

  1. On the 5 ½ side of the card stock (portrait), line it up on your trimmer on the 3 inches mark.
  2. Using your side ruler, cut the cardstock using your trimming blade from the 1 inch mark up to 6 ½ inches down.
  3. Turn your cardstock clockwise (now we are on the 81/2 inch side), start scoring up to the cut line. Score at 2”, 4”, 5 ¼”, 6 ½” and 7 ½”
  4. Turn your cardstock on the other side, and score at 4 ¼”
  5. Fold your card stock as shown the video.

Please follow me on:

My Blog: http://www.mariarusselldesigns.wordpress.com

My Stampin Up online store: http://mariarusselldesigns.stampinup.net

My Instagram: http://www.instagram.com/rprmlr77

My Pinterest: http://www.pinterest.com/rprmlr77

Facebook: http://www.facebook.com/mariarusselldesigns

Witch’s Spell Books

Alter some paper-mache books that you can get from a craft store and turn them into a Spooky Witch’s Spell Book! Decorate it with some cheap items found at the Dollar Tree and other inexpensive items that you can get from the craft store. This will be a perfect weekend project with your kids, or grand kids. Just please make sure you do the hot-gluing 🙂

Materials Used:

3 Paper Mache Books (bought from Michael’s)
Mod Podge
Immortal Love paper stack from DCWV
Hot glue gun and hot glue sticks
Black silk Roses (Dollar Tree)
Eyelash Trim (my own collection)
Tattered Angels Glimmer Mist (to make the flowers stand out)
Red Roses (20mm~I think from Wild Orchid Crafts)
Creepy Cloth (Dollar Tree)
Tim Holtz Distress Crackle Paint (Clear)
Tim Holtz Ornate Frame
Chipboard and Card Stock
Black Acrylic Paint
Gunmetal Acrylic Paint
Tim Holtz Book corners
Creepy Skeleton Hand (Michael’s)
Plastic Rat (Dollar Tree)
Plastic skull with hands (Dollar Tree)
Skull Cameo (Hobby Lobby)