Happy Thanksgiving with Newton’s Nook

Hello again Newton’s Nook fans!  Did you manage to hop along with the team last week for the September product release?  They are available at the shop now.  Which one was your favorite?  To be honest, I can’t really pick one!

NNDSEPT18_ALL_550

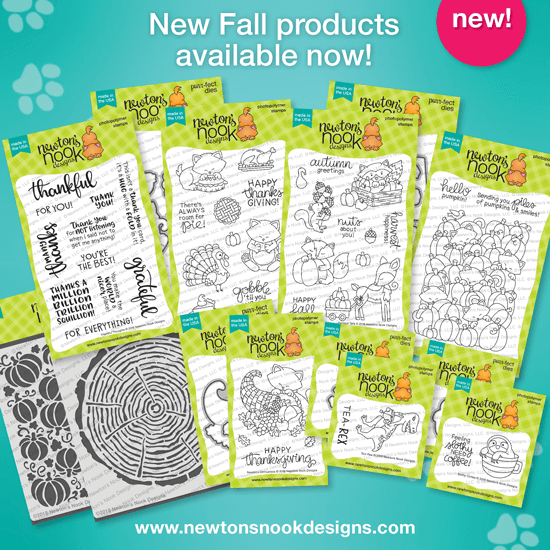
For my project today, I am showcasing the Newton’s Thanksgiving stamp set and coordinating dies.

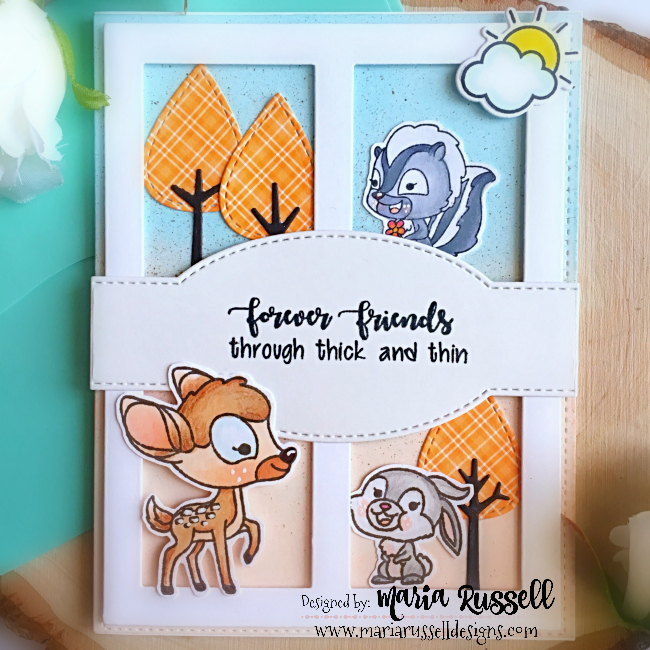
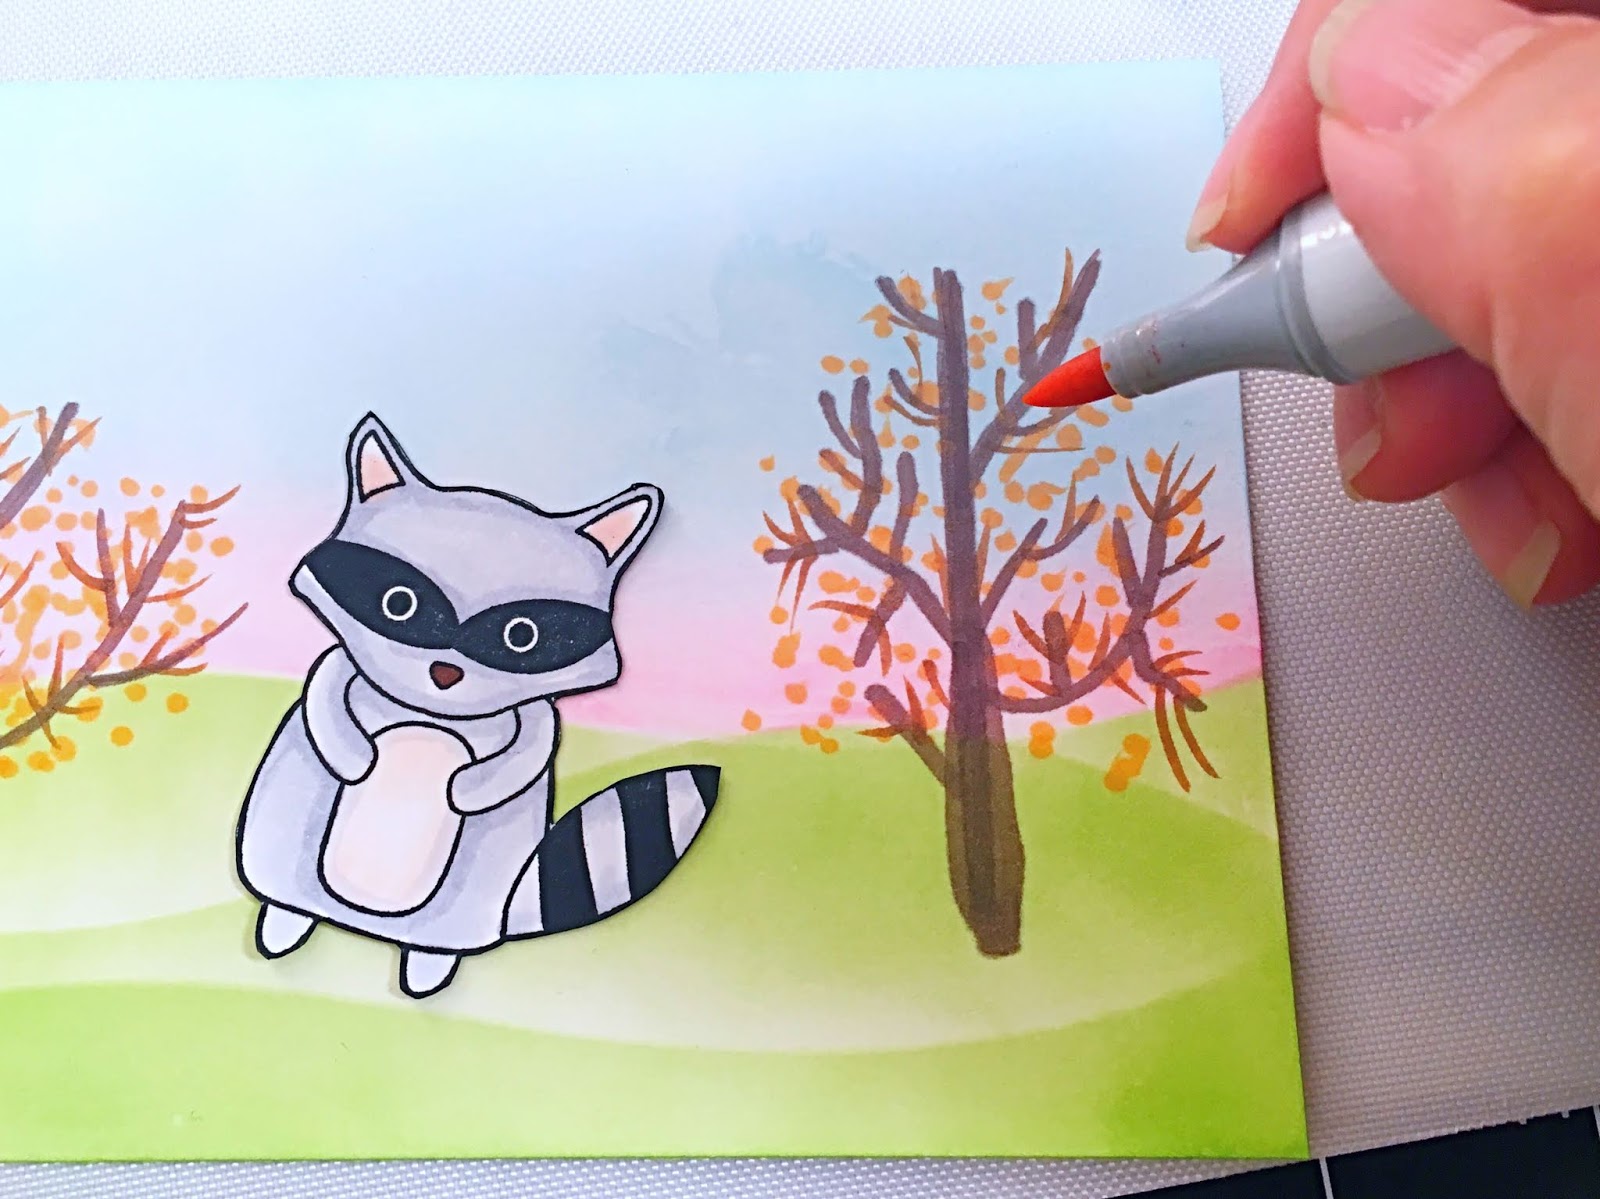
Since this card is all about Thanksgiving, I wanted to create a fall scene today.  I started by stamping the image on some smooth white card stock and colored it in with my Copic markers.   I will also be inking up my Bristol smooth white card stock with some distress oxide inks.

IMG_9622

I inked up my background with Tumbled Glass and Tattered Rose distress oxide inks.  I have been LOVING this color-combo lately  for a fall sky.  I used vintage photo distress oxide to splatter some dots on my background, and blotted it dry with my paper towel.  I used a scallop die from my stash to cut a position of this card stock to create a little window.

IMG_9623

I adhered my colored background onto my card base and inlaid the frame.  I added some fun elements to create my fall scene.

NNDNewtonThanksgiving2A

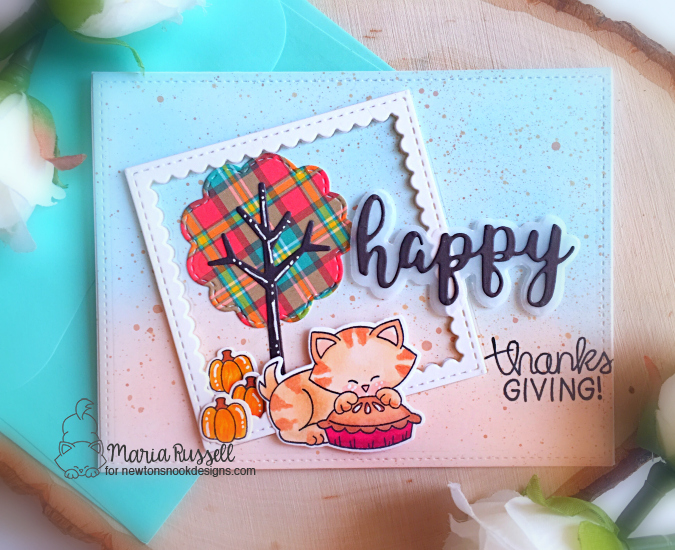
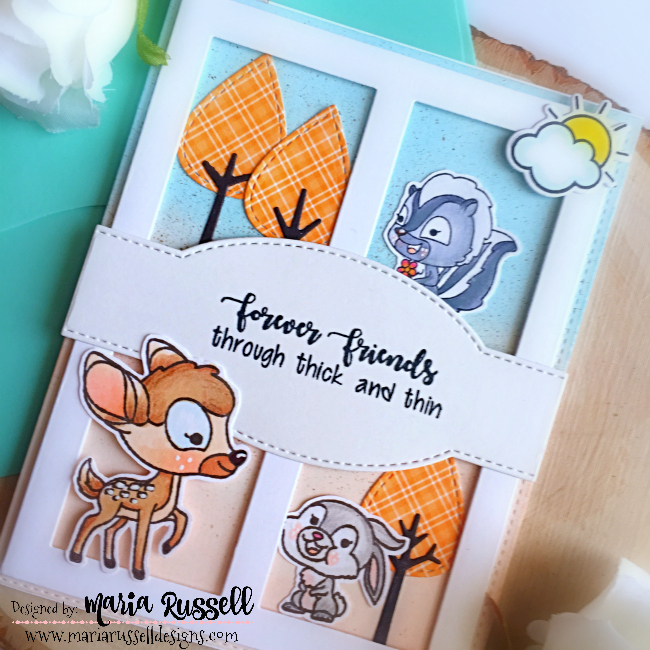
To finish my design, I added the “happy” sentiment from a die that I have from my stash with some foam adhesive.  Also used my white gel pen to add some interest to the card.  Here’s a close-up:

NNDNewtonThanksgiving2B

I completely ADORE this stamp set.  If you haven’t picked it up yet, please visit the shop before they sell out.

NNDNewtonThanksgiving2C

I hope you like my card and got inspired.  The supplies I used are listed and linked below.  Happy crafting!
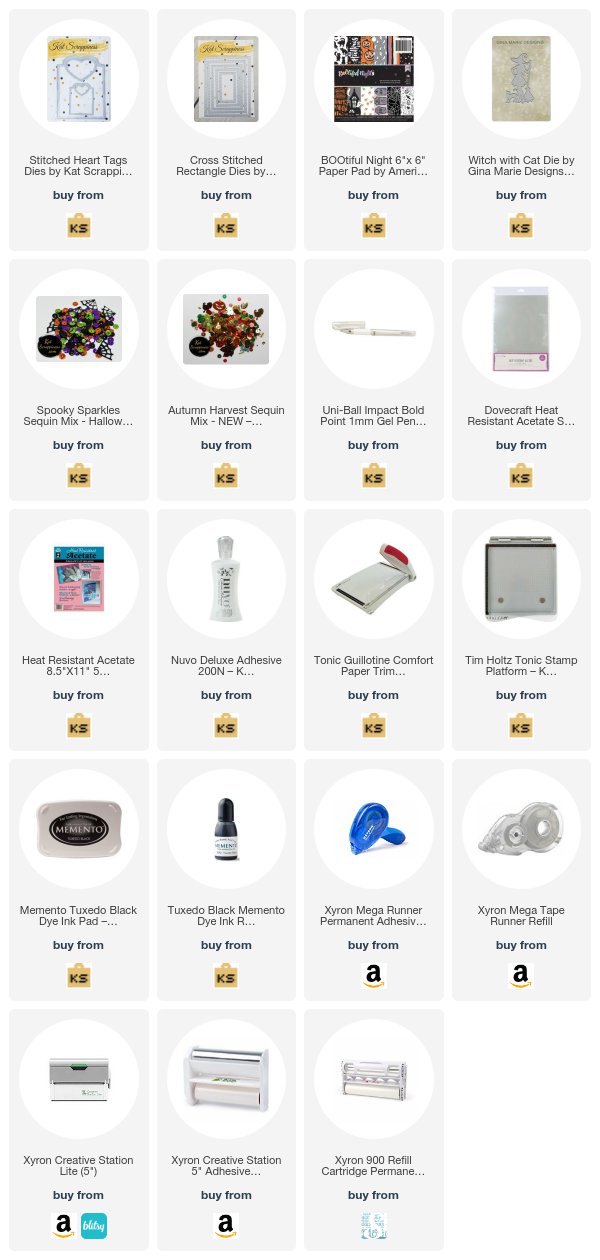
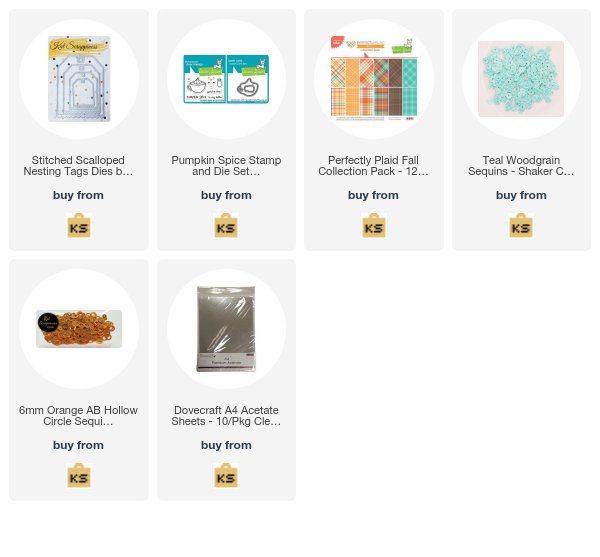
————-SUPPLIES————–


Forever Friends with Kindred Stamps

Maria here on the blog today with this cute fall card featuring the Forest Friends stamp set.  I absolutely adore the images on this set.  They are perfectly sized for an A2 size card.

To start, I stamped my images on some Neenah solar white card stock with Memento Rich Cocoa ink and colored them in with my Copic markers.  I fuzzy-cut the images with my precision scissors.

IMG_9606

I cut another A2 size piece of some Bristol smooth white card stock and inked it up with my distress oxide inks using my mini ink blending tools.  I used Tumbled Glass and Tattered Rose.  I smooshed my Vintage photo distress oxide ink onto an acrylic block, sprayed it with water and used my watercolor brush to spritz the color on my background.

IMG_9605

I die-cut the white frame, trees and the label die to start assembling my card.  I adhered the frame first with some foam adhesive.  I added the rest of the elements to decorate the card.  To finish my design, I stamped the sentiment onto my card.

KindredForestFriends1A

This Forest Friends stamp set is so versatile.  I think you can also use these images to create a cute Christmas card.  Here’s another look:

KindredForestFriends1B

I hope you like my card today.  Please visit Kindred Stamps to purchase the Forest Friends stamp set that I used today.  If you are also into pop-culture stamps, Kindred has a ton of them available at the shop.  Thanks for stopping by and have a nice day!

70df8-maria2brussell2bsignature2blogo

———SUPPLIES———

Missing You Sooo Much

Hello CAS-ual Fridays fans!  Are you getting excited for the fall season to start?  I just can’t wait for the cooler weather, pumpkin spice lattes, and fall scented candles!

For my card today, I’m showcasing the Bushy Tailed stamp set.

I started out by stamping my image on some Neenah solar white card stock and colored it in with my Copic markers.  I cut an A2 size piece of some Bristol smooth white card stock and inked up my background using some hills stencil from my stash, with some distress oxide inks.  I also used a clouds border stencil to create the sky.

To create my fall scene for my cute critter, I stepped out of my comfort zone and drew some tress and leaves in the background, using my Copic markers.  This is the first time I’ve ever drawn a scene from scratch.  I got so nervous I thought I was going to hurl, haha! (just kidding)  I think it turned out okay, I just need more practice.  After all this is “handmade” not Hallmark, right?

I added more depth by using different colors of Copic markers to create the leaves.

I used my cool gray Copic markers to add shadows and make it look more realistic.  I adhered my little critter and finished the design by stamping the sentiment.

Even though my drawing wasn’t perfect, I still love how this card turned out.

I think using different distress inks for my background added more depth and dimension to my card.

I hope you like my project today and got inspired.  Please don’t forget to use my coupon code (below) for 15% off your order at the shop.  Happy crafting!

I Put A Spell On You with Kindred Stamps

Hello Kindred Stamps fans!  I hope you are all having a great week so far.  Maria here with you and I am super excited to write my first blog post as a design team member of Kindred stamps.  I am so happy and honored to be working with these talented ladies and I hope you will also be inspired by my designs.   You will also find more of my work on my blog –> Maria Russell Designs.


For my project today, I am showcasing the Witch Sisters stamp set.  I love HALLOWEEN and if I can celebrate it all-year round, I definitely would.


I started by stamping my images on some Neenah Solar White Card Stock using Memento Tuxedo Black ink.  I colored my images in with my Copic markers and used by precision scissors to fuzzy cut the images.


I used an apartment die from my stash to die-cut the pieces I needed to create the “cottage” for my cute little witches.  I adhered the pieces onto a black card base and added the witches.


To finish my design, I fuzzy-cut a black cat image from the All Hallow’s Eve 6×6 paper pad collection by American Crafts.  I colored the cat’s eyes with my Green Copic marker.  I also stamped my sentiment on a scallop oval and added this piece on the awning.  Here’s my card:


I really love how this card turned out.  To add a little whimsical touch, I added some Stardust Stickles on the candle flame  Here’s another look:


I also added a small ghost on the sentiment:


I hope you got inspired today!  Please visit Kindred Stamps to purchase the Witch Sisters stamp set that I used today.  Have an amazing day and happy crafting!


Easy Thanksgiving Crafts with Xyron

I hope you are all having a great week so far.  All week long, the Xyron Design Team will be sharing easy Fall/Thanksgiving projects on the Xyron Facebook group.  For my projects today, I am making a bunch of treat bags to give to my guests for Thanksgiving.  I also made some place card holders and decorated a bunch of LED candles to decorate my table.


If you don’t have the supplies to create the treat bag, you can definitely buy some bags from the dollar store or craft stores, and decorate them with silk fall leaves or any other fall-themed embellishments, and fill them with surprise treats for your guests.


I started out by die-cutting some American Crafts card stock using my Mama Elephant Treat Bag die.  To decorate the bag, I die-cut the pumpkin with the Mama Elephant pumpkin add-on dies.  For my sentiment, I die-cut the “Thank You” script using my Kat Scrappiness Thank you script die.


XyronThanksgiving1


I assembled the bag using my Xyron Mega Runner.  I also used the mega runner to adhere the pumpkin.  To make things easier, I used my Xyron sticker maker to adhere the tiny pieces that goes with the pumpkin, as well as the Thank You Script sentiment.  I filled my bag with some treats.


IMG_5966IMG_5967


Here’s the treat bag:


XyronThanksgiving2


Since I have some leftover leaves that I die-cut from a previous project, I decided to make some place card holders, that will hold the utensils and a note pad for my guests to write what they are thankful for this year.  Here’s what it looks like:


XyronThanksgiving3


I also decorated some LED candles to decorate my table, using my Xyron sticker maker and Mega Runner.


XyronThanksgiving4


World Cardmaking Day Blog Hop with Kat Scrappiness

KatScrap Worldcardmaking Day Sale Image

Thank you so much for joining in on the World Cardmaking Day fun with KatScrappiness.com!  Today all of the designers are participating in a fun blog hop with their inspiration and take on the first Kat Scrappiness Mood Board Challenge!  There will be lots of prizes to be won and several chances to win. Make sure you comment on all the designers blog posts today for several chances to win and then make a card (or any project) inspired from our mood board and link up to the Kat Scrappiness blog before Monday October 9th for a chance at winning one of several prizes! All winners will be announced at the Kat Scrappiness blog on Tuesday October 10th, by Noon PST. Don’t forget you can get 15% off in the KatScrappiness.com shop today only! Use Code “IMAKECARDS” at checkout!

Here is the Mood Board that is a part of the challenge and what has inspired my projects today!

katScrap Worldcrdmking moodboard

For my card, I am showcasing products available at the shop.  The card that I created below is very simple and anyone can re-create it.  I know that some of you are just beginners, and don’t really have a lot of supplies.  I wanted to show you that you could create a beautiful card even with just using a patterned paper, and some die-cuts.

I started out by die-cutting my cute little witch using the Witch with Cat Die by Gina Marie Designs.   I also die-cut the Stitched Heart Tag Die and the Cross-Stitched Rectangle Dies for my card front.  I fuzzy-cut the tombstones and the Happy Halloween sentiment strip from the BOOtiful Night 6×6 Paper Pad by American Crafts.

I wanted a small shaker element on my card, without making it look too busy.  I used black fun-foam (instead of a foam adhesive) and run it through my Xyron Creative Station Lite with a Double Permanent Adhesive to create a sticker.  This will ensure that both sides of the fun foam will have edge-to-edge adhesive and your shaker elements will be completely secure!  I used some of my favorite Halloween sequin mixes, i.e. the Spooky Sparkles Sequin Mix and the Autumn Harvest sequin mix.   I adhered the tag on my card base.

To finish the design, I die-cut a stitched hill die from my stash, then adhered it onto the card front, with my cute little witch and the tombstones.  I stamped the spider web and the little spider using a stamp from Newton’s Nook Designs, and added some white dots with my Uni-ball Impact Bold Point White Gel Pen.

Here is the finished card and I hope you like it.

KatScrapWCMD17

I hope you have been inspired by my projects today! Below is the list of all the designers participating in the blog hop.

Kat Scrappiness Designers (Blog Hop Links)
Taniesa
Maria
Hannah
Heidi
Jess
Angeline

To go to the Kat Scrappiness Shop Click HERE and save 15% off your total purchase today (10/7/17) only!  To go to the Mood Board Challenge blog post click HERE and enter your card for a chance to win fabulous prizes!

————SUPPLIES————

Xyron and Paper Smooches Collaboration

Hello my crafty friends!  I am super excited because today, the Xyron Design Team is collaborating with Paper Smooches.  Thank you Paper Smooches for the goodies that you have sent us.


For my cards today, I am showcasing the Chubby Chums stamp set and the Bunny Card Die .  This set is so adorable!  Please visit www.papersmooches.com to purchase cute stamps and dies.


I started out by stamping my images on Neenah solar white card stock and colored the images in with my Copic markers.   I fuzzy-cut the images with my precision scissors.


IMG_5669


Halloween is fast-approaching and I wanted to show you that you can use any stamp set for pretty much any occasion.  I used a frame die from my stash for my little “chubbies” and used my favorite Xyron Mega Tape Runner to adhere it onto my card front.  I also used the tape runner to adhere the critters.


IMG_5671


Here’s the card:


XyronPaperSmooch1


Aren’t they adorable?  I added a cute witch’s hat to my Owl and a trick-or-treat bag to my cat.


Since I colored so many of the images I wanted to create a birthday card.  I used dies from my stash and to adhere the intricate bow on my card front, I used my Xyron 1.5 Inch Sticker Maker.  When I adhere intricate dies, I always use either my sticker maker or my Xyron Creative Station Lite.


IMG_5677


Here’s the birthday card:


XyronPaperSmooch2


Paper Smooches was very generous and also sent us the Bunny Card Die.  Here’s a little foldable treat bag that I made:


XyronPaperSmooch3


I hope you like my projects today.  Have a wonderful day!


Pumpkin Spice in my Latte

Hello my crafty friends.  I am up for Kat Scrappiness today to share with you a simple coffee-themed shaker tag, showcasing products available at the shop.

I started out by stamping my images using the Pumpkin Spice Stamp Set and Dies by Lawn Fawn on Neenah solar white with my Memento Tuxedo black ink.  I colored the images in with my Copic markers and die-cut them with its coordinating.

I wanted to create a cute shaker tag to use some new sequins from the shop, the Teal Woodgrain Flat and 6mm Orange AB Hallow Circle mix so I die-cut a medium tag using my Kat Scrappiness Stitched Scalloped Nesting Dies with the Lawn Fawn Perfectly Plaid Fall Collection Paper Pad.  I stamped my sentiment onto my tag, and assembled the shaker tag.

I hope you like my shaker tag.  I have also listed and linked the supplies I used below if you’re interested.  Please use my coupon code Maria10 for 10% off your order at the shop.  Have an amazing day!

KatScrapPumpkin1

Here’s a close-up:

KatScrapPumpkin2

———–SUPPLIES————-


Happy Haunting with MFT Stamps

MFT_Superstars2017_BlogBanner

The MFT 2017 Card Design Superstar is here and I am super excited to participate.  The card that you see below is my entry for the “Innovation Master” category.  I have always loved MFT Stamps and for today’s card, I am showcasing a lot of these stamps and dies.  The products I used will be listed below, and they are all available at www.mftstamps.com.


I started out by stamping my images on white card stock with the MFT Stamps Black Licorice Hybrid Ink and colored the images in with my Copic markers.  I thought the new Happy Haunting stamp set would be the perfect pair with the Frightful Friends stamp set (released by MFT Stamps last year).  I die-cut the images with the coordinating dies.


I die-cut all of the elements I needed for my scene. For the frame, I used the Die-namics Blueprints No. 32, the Die-namics Stitched Clouds Edges, and the Die-namics Birch Trees.


I die-cut an A2 size Vellum card stock because I wanted to create a see-through scene so that I can also use this card to display on my Halloween mantle. I wanted to use an LED tea-light to give a spooky glow behind Mr. and Mrs. Frankenstein. I love how this card turned out.


Here’s the card without the LED tea-light behind it.


MFTHappyHaunting2


Here’s the card with the LED Tea-Light on!  Don’t you just love the moon peaking from behind the clouds and birch trees?


MFTHappyHaunting1


Here’s a close-up of the card with the LED Tea-light.  It looks so good on my Halloween mantle display.


MFTHappyHaunting3


I hope you like my card.  Please visit http://www.mftstamps.com to purchase the products I have listed below.  Have an amazing day!


Happy Haunting Stamp Set

Happy haunting Die-namics

Frightful Friends Stamp Set

Frightful Friends Die-namics

Die-namics Blueprints No. 32

Die-namics Stitched Clouds Edges

Die-namics Birch Trees

Die-namics Hillside Grassy Hills

MFT Stamps Black Licorice Hybrid Ink