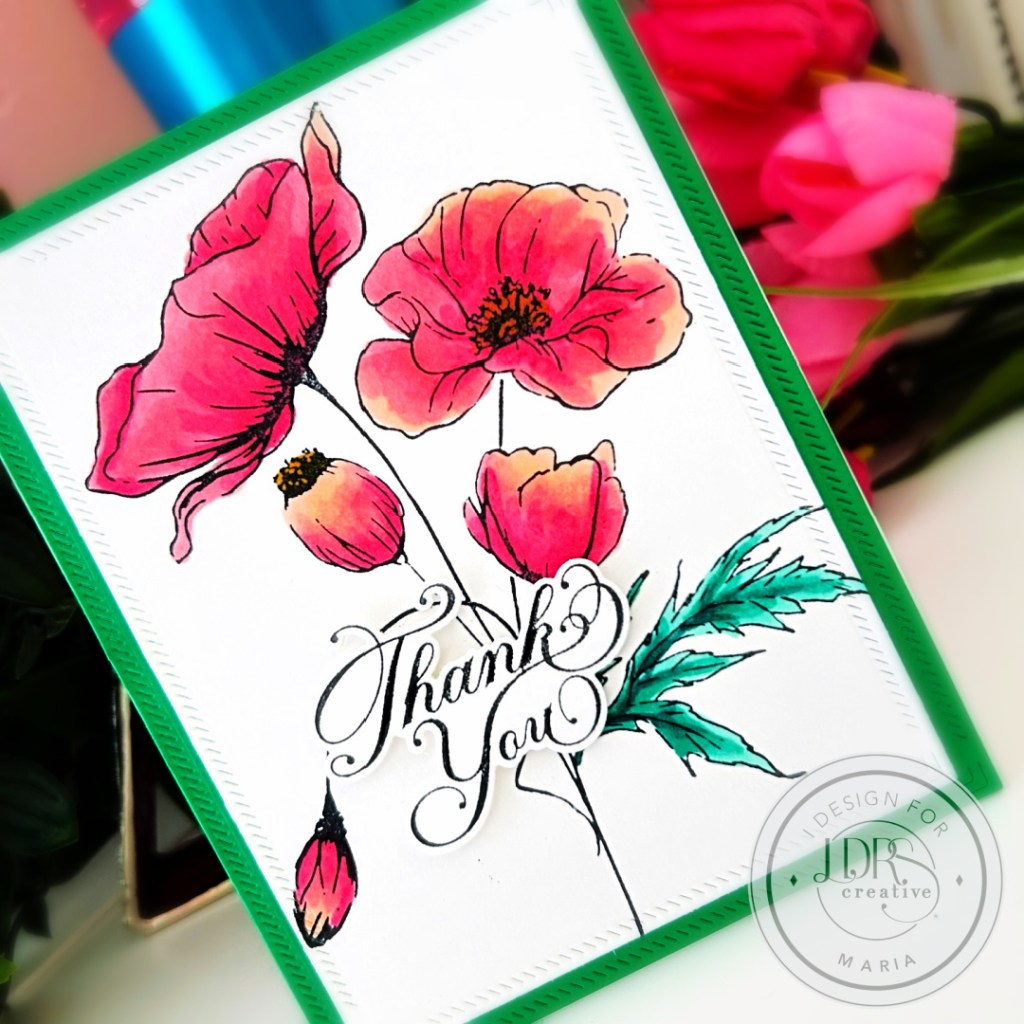
Hello LDRS Creative fans! It’s been very gloomy the last couple of days here in Florida, [before and] after hurricane Milton. I am just so grateful that the property damage was very minimal and we didn’t lose any power! I needed to create something colorful to cheer me up, so I grabbed the Autumn Blooms Stamp and Stencil Bundle.
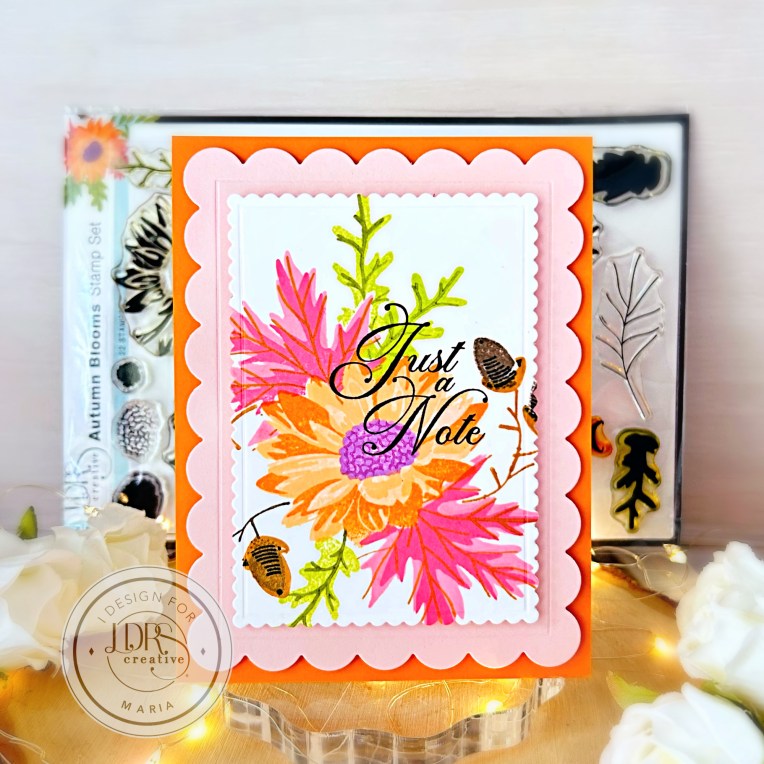
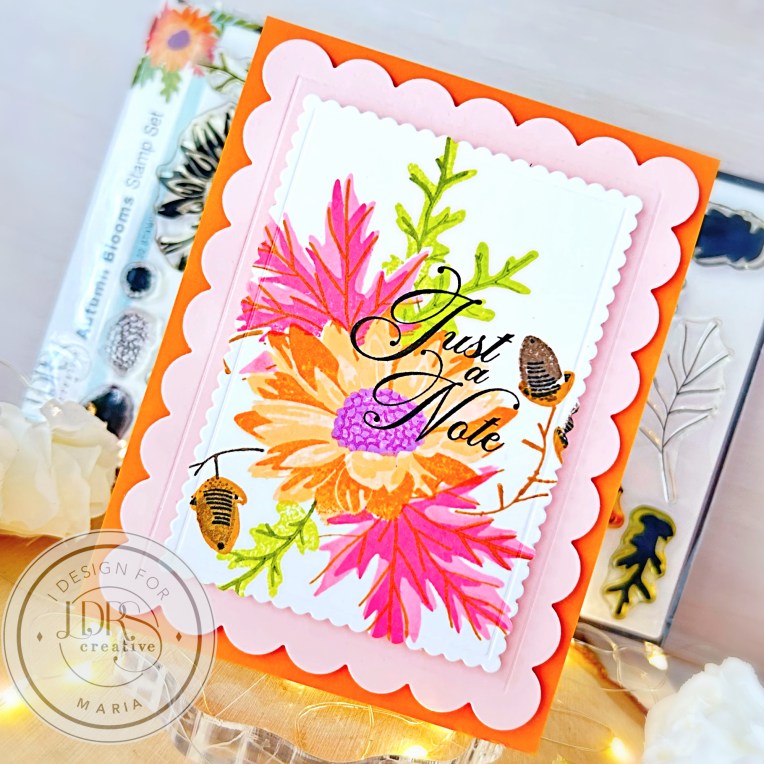
I began by stamping the flower in the foreground with Peachy Keen Hybrid Ink and then added Tangerine Dream, In Your Face Orange, La-la Lavender, and Boysenberry Blast. Next, I used the Autumn Blooms Mask Stencil to cover the flower while I worked on the background images!
The Autumn leaves were stamped with Pink Tutu, Lipstick Jungle, and Iced Tea Hybrid inks, then the acorn was added using Iced Tea and Coffee Bean. I stamped the leaves twice for balance, and then used Key-lime Pie and Olive Branch for the final touch.
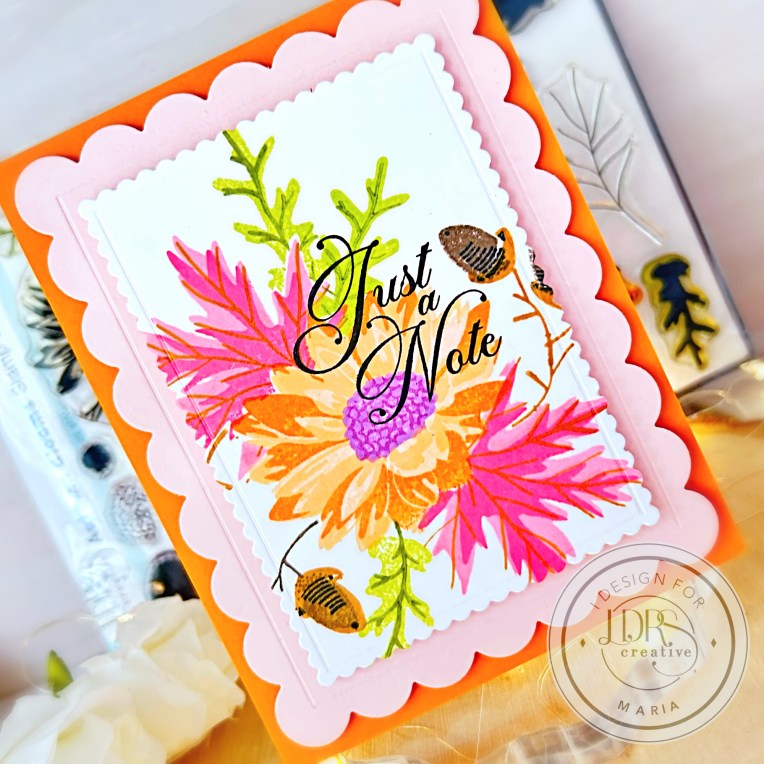
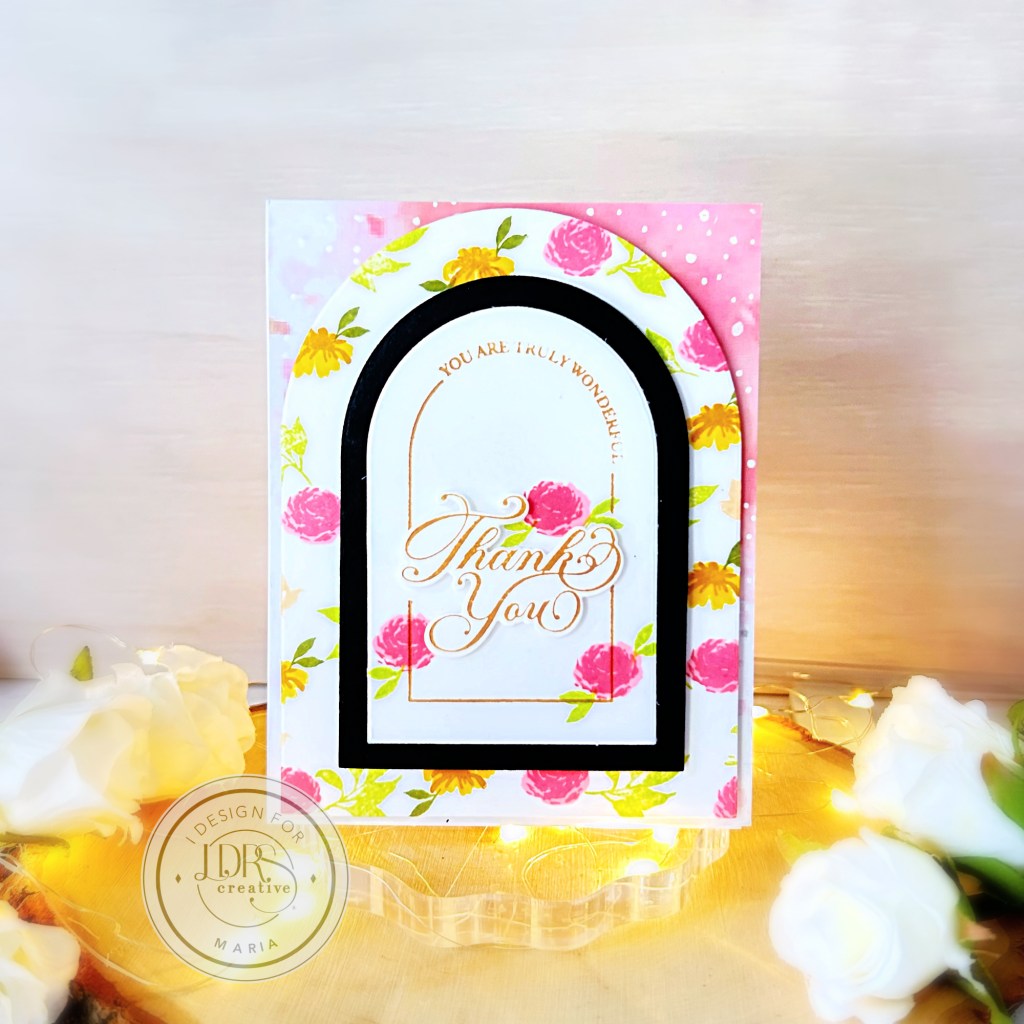
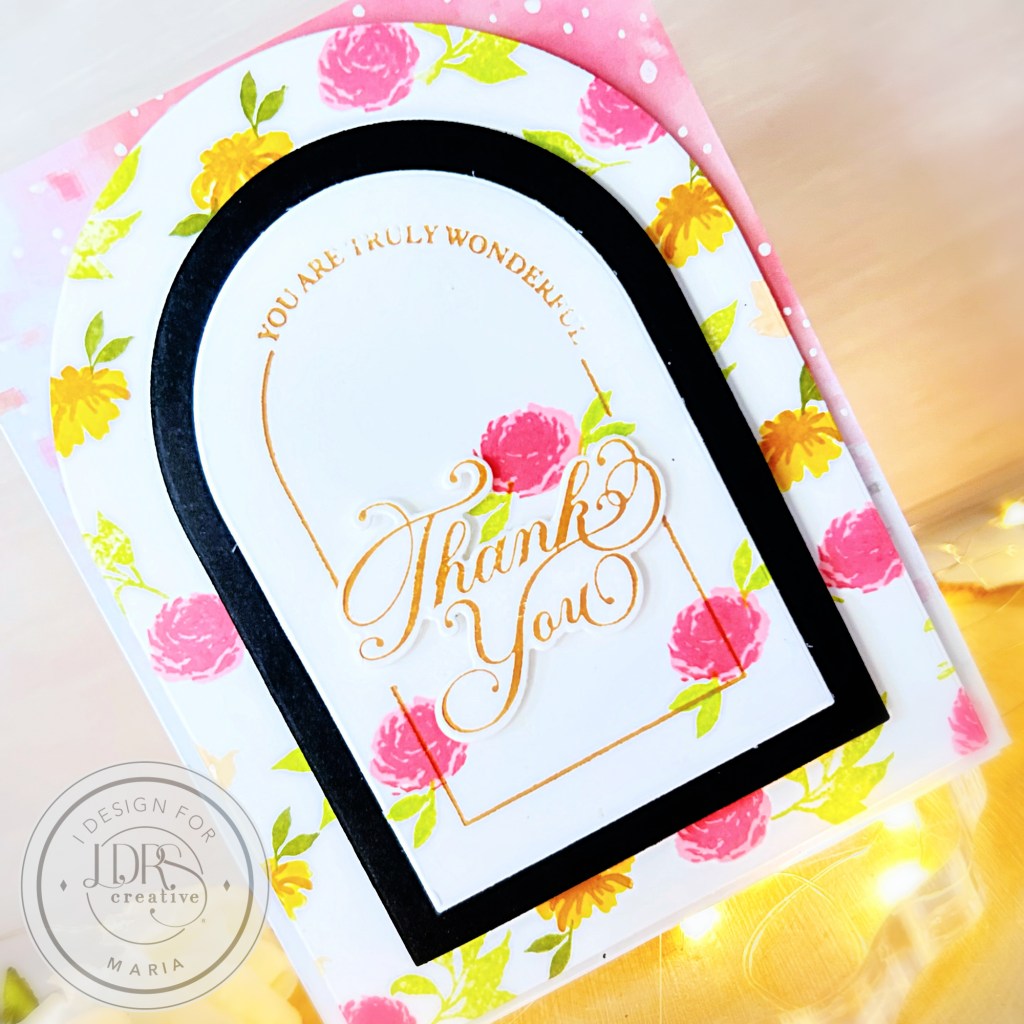
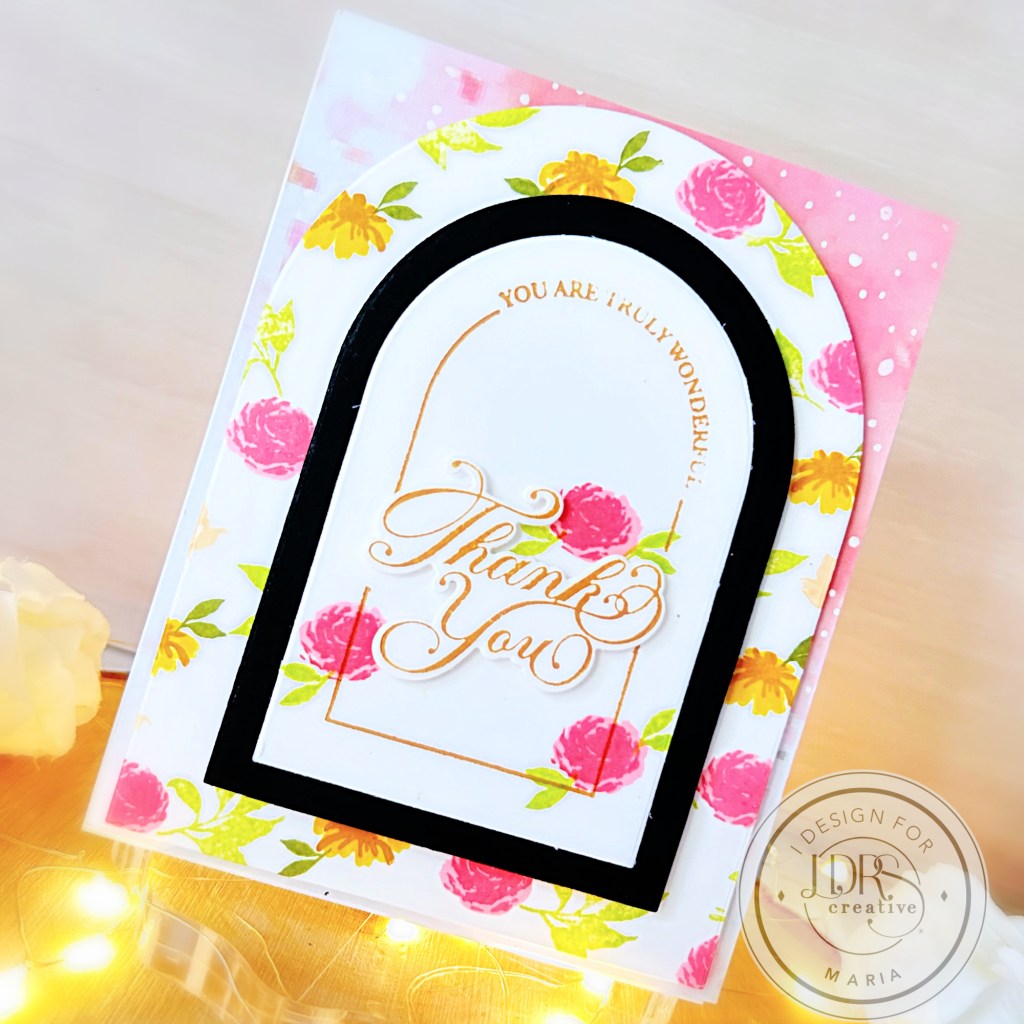
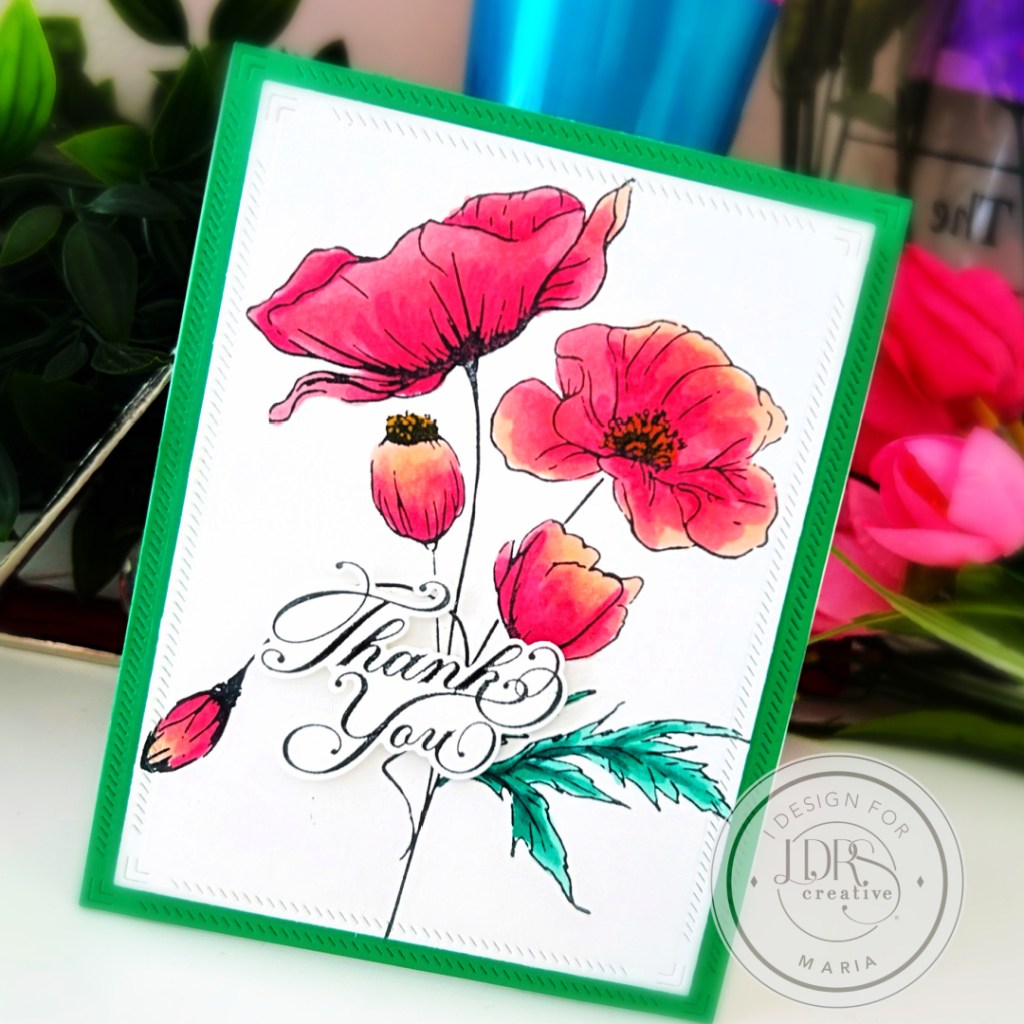
Now comes the fun part of assembling the card! I used the second die from the Mixed Scallop Rectangle Die set and the largest die with some pink cardstock to cut out the main image. I enjoy layering these two! I added dimension by foam-mounting the focal image onto the pink scallop with foam adhesive.
Next, I added orange card stock to a white card base and foam-mounted the pink scallop on top for dimension.
I completed the card design by stamping the sentiment with Raven Hybrid ink from the Floral Swag Stamp Set. Here’s another look at the finished card:
I hope you enjoy this card and found the instructions easy to follow. The supplies used are linked in this post. Thanks for visiting and happy crafting!