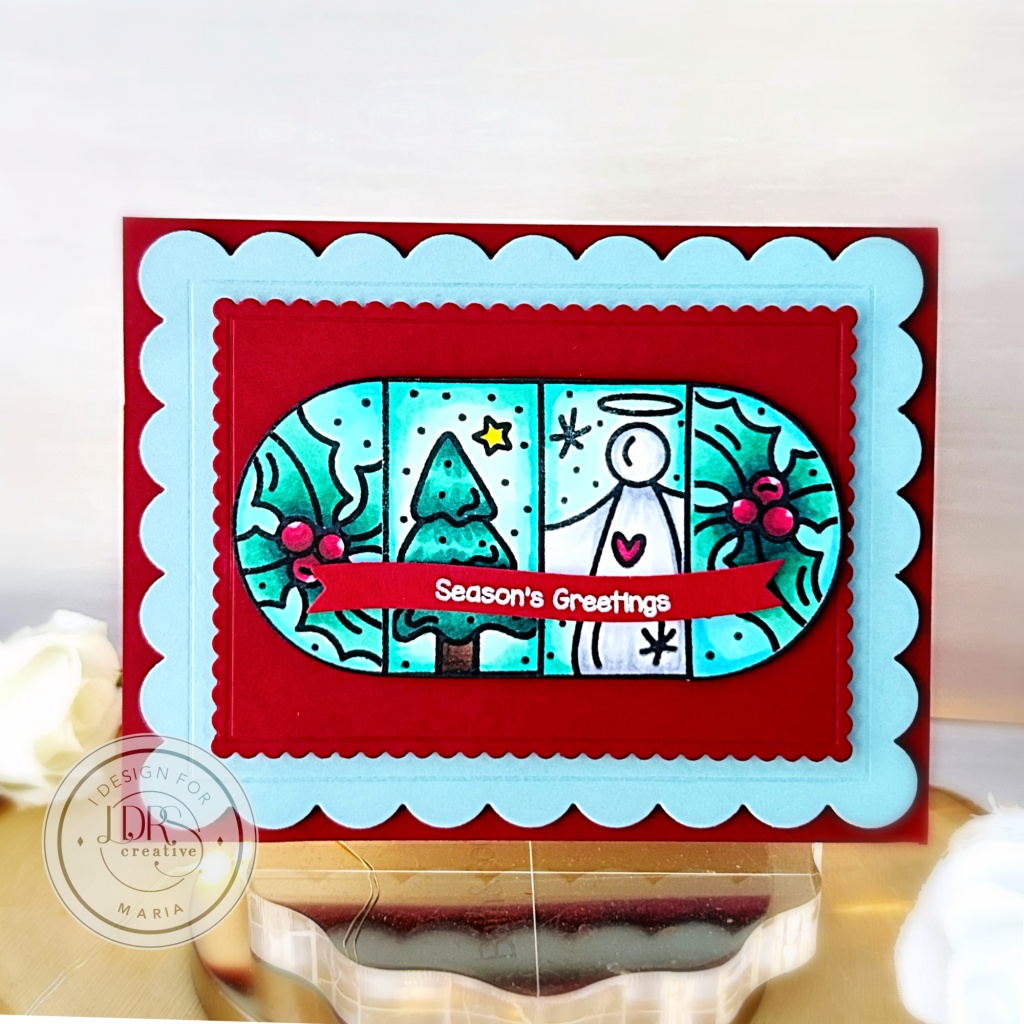
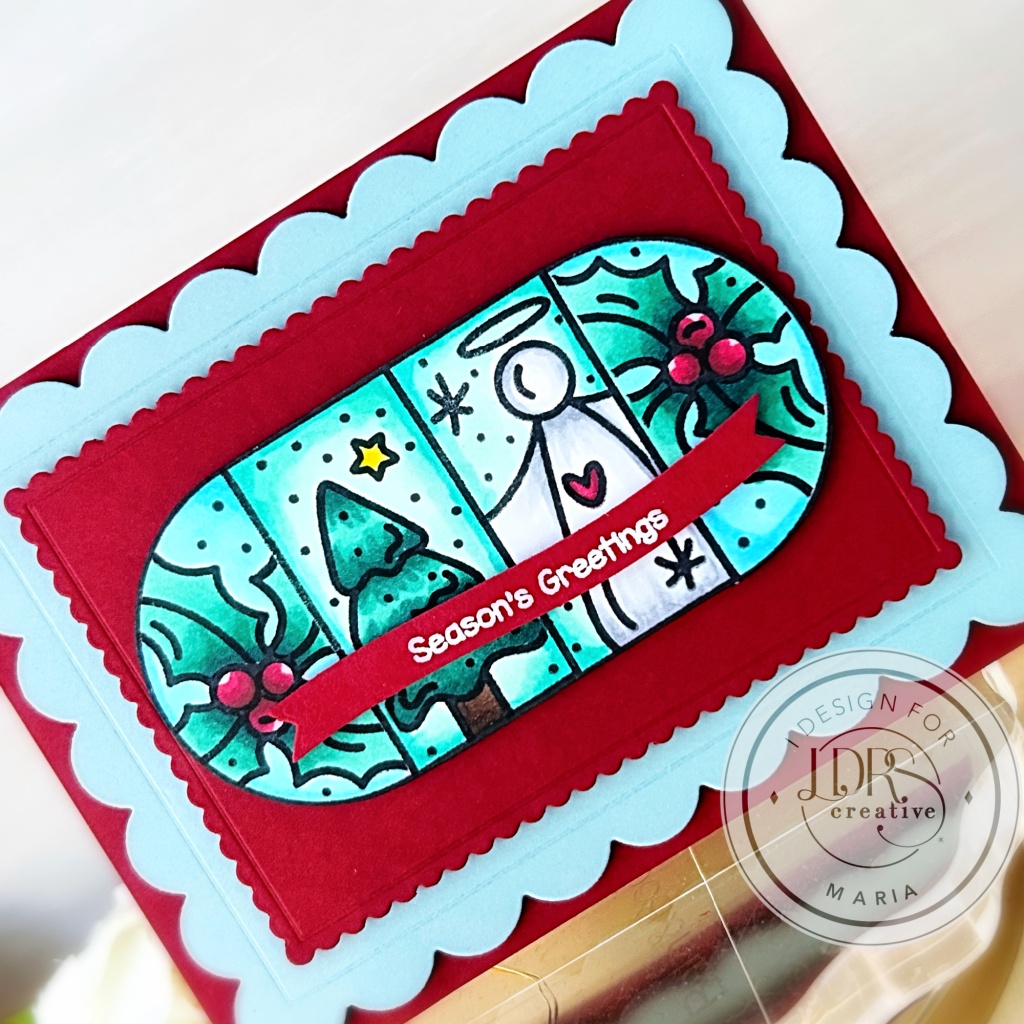
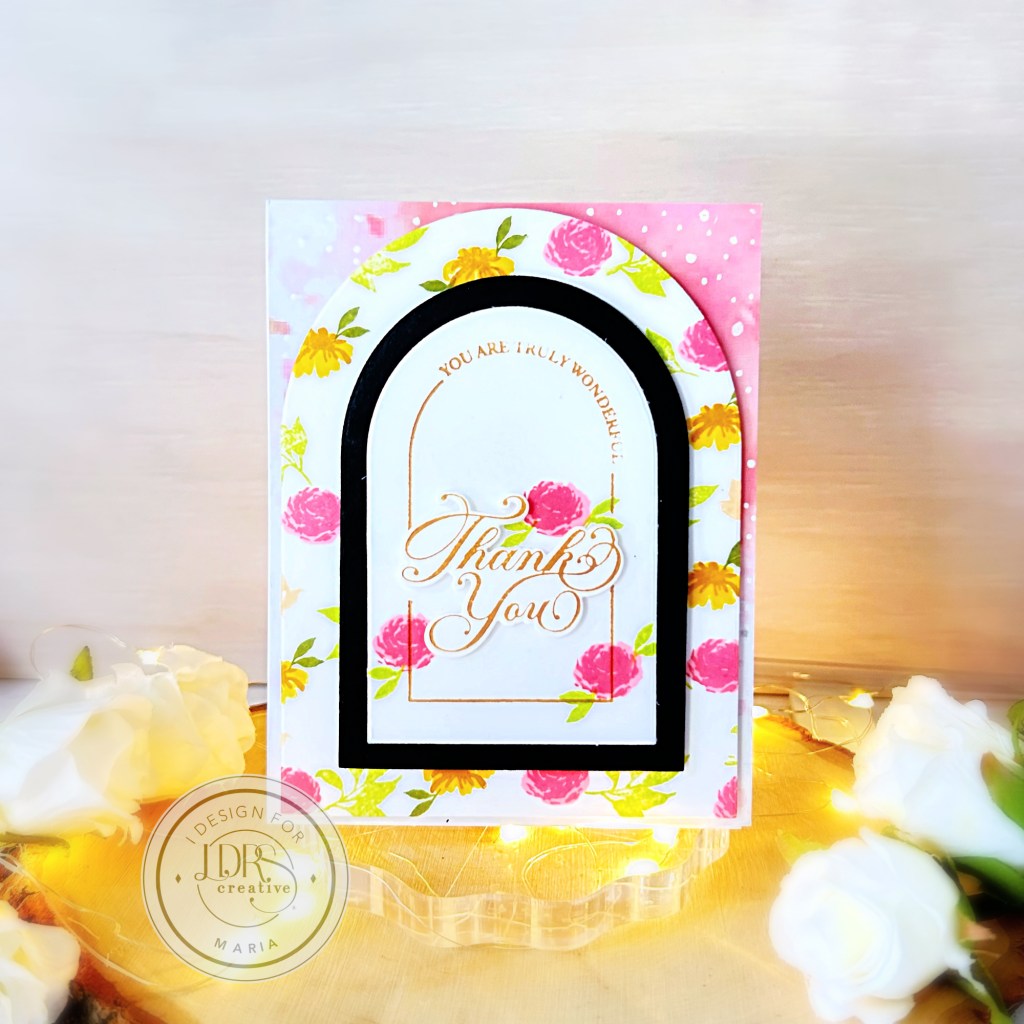
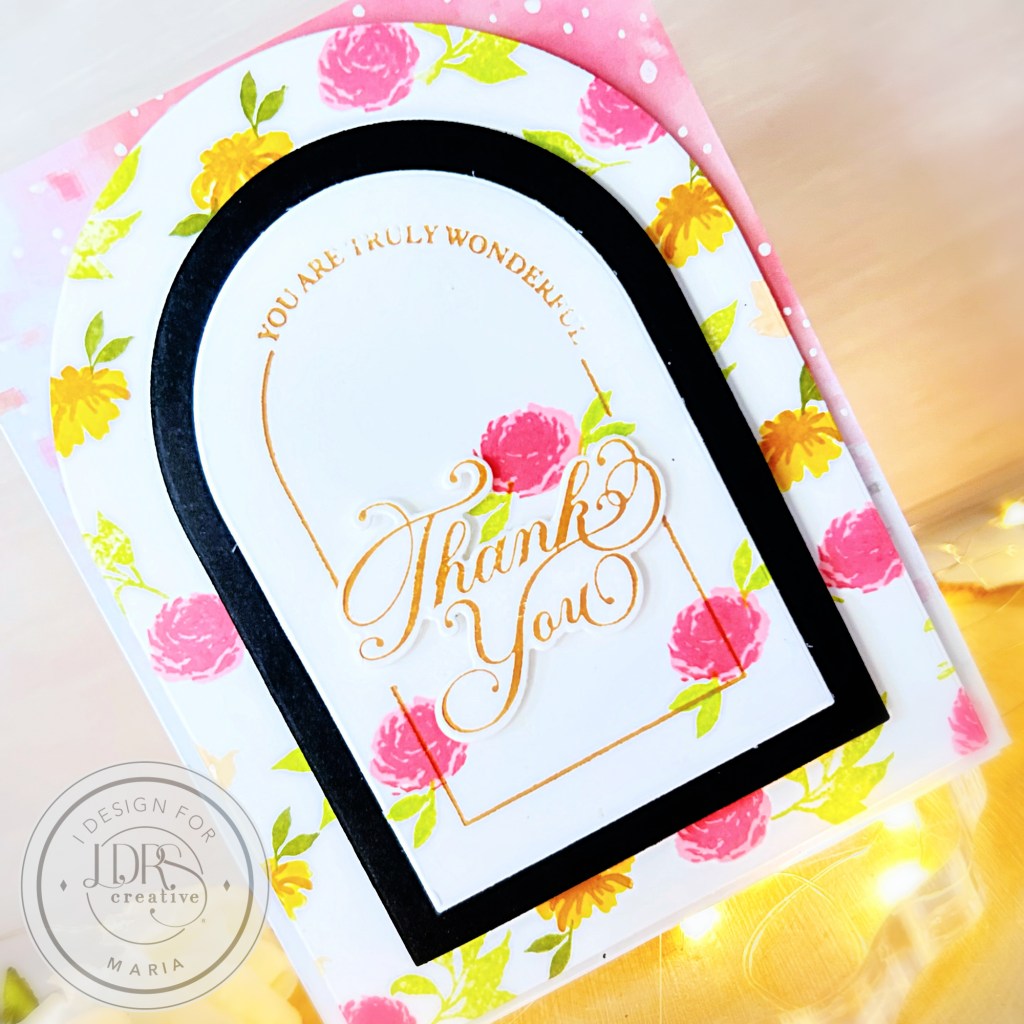
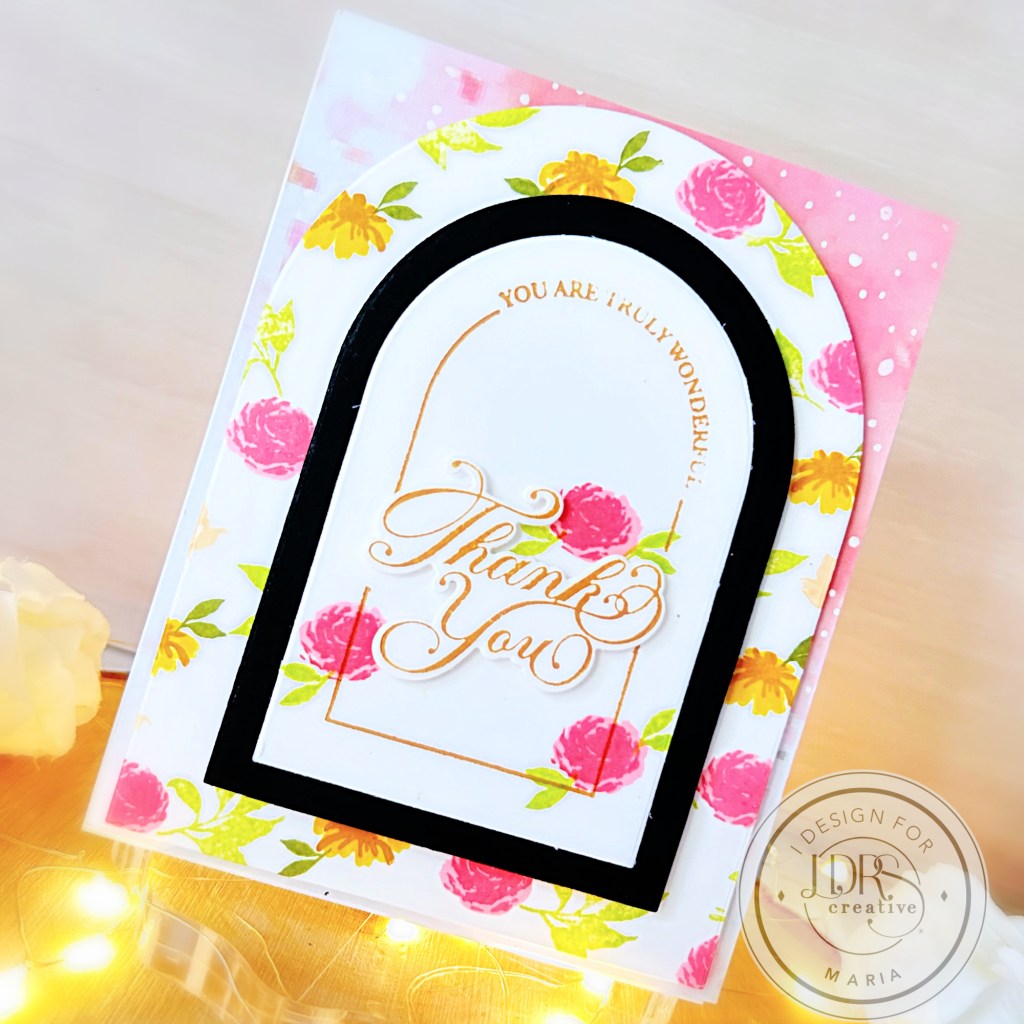
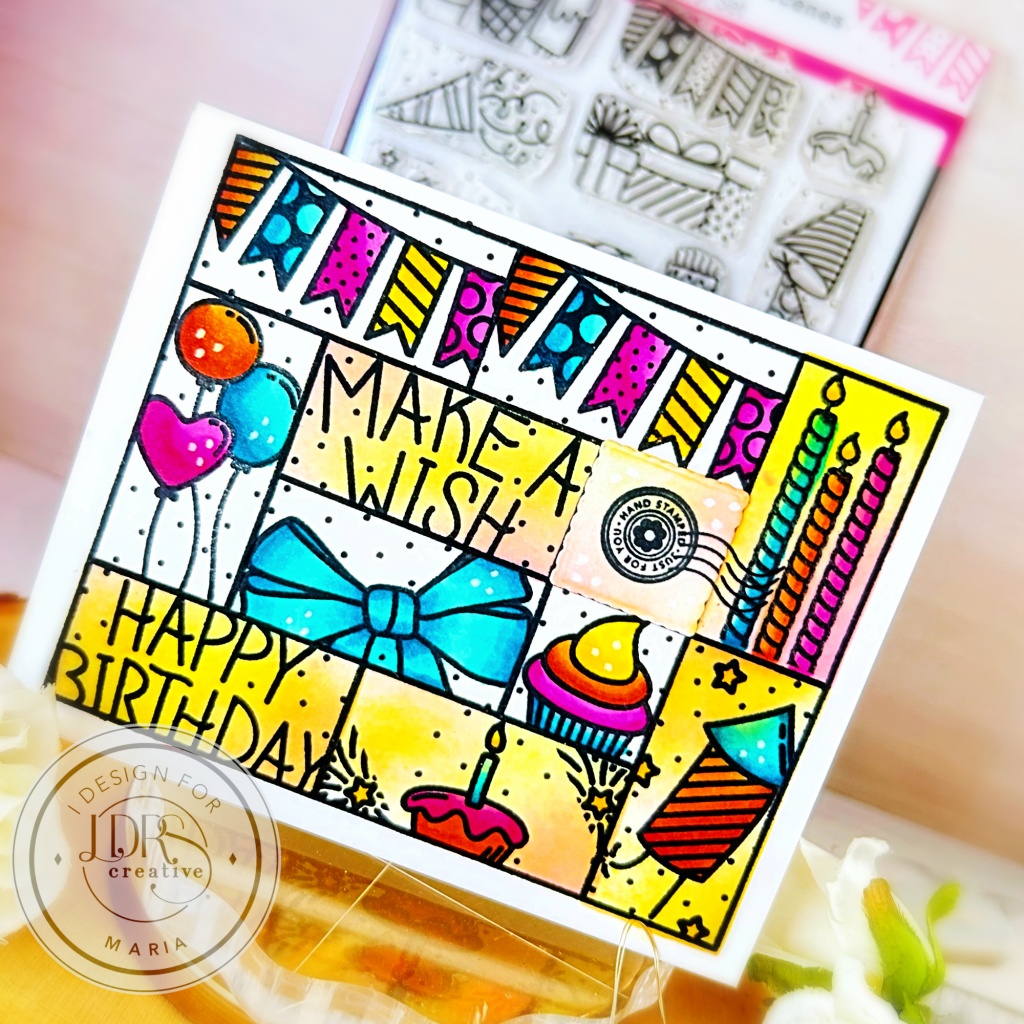
Hello everyone! I’m back with you today sharing this straightforward card, showcasing the beautiful Birthday Puzzle Scenes 6×8 Stamp Set the Puzzle Frames Stamp, and Puzzle Mask Stencil.
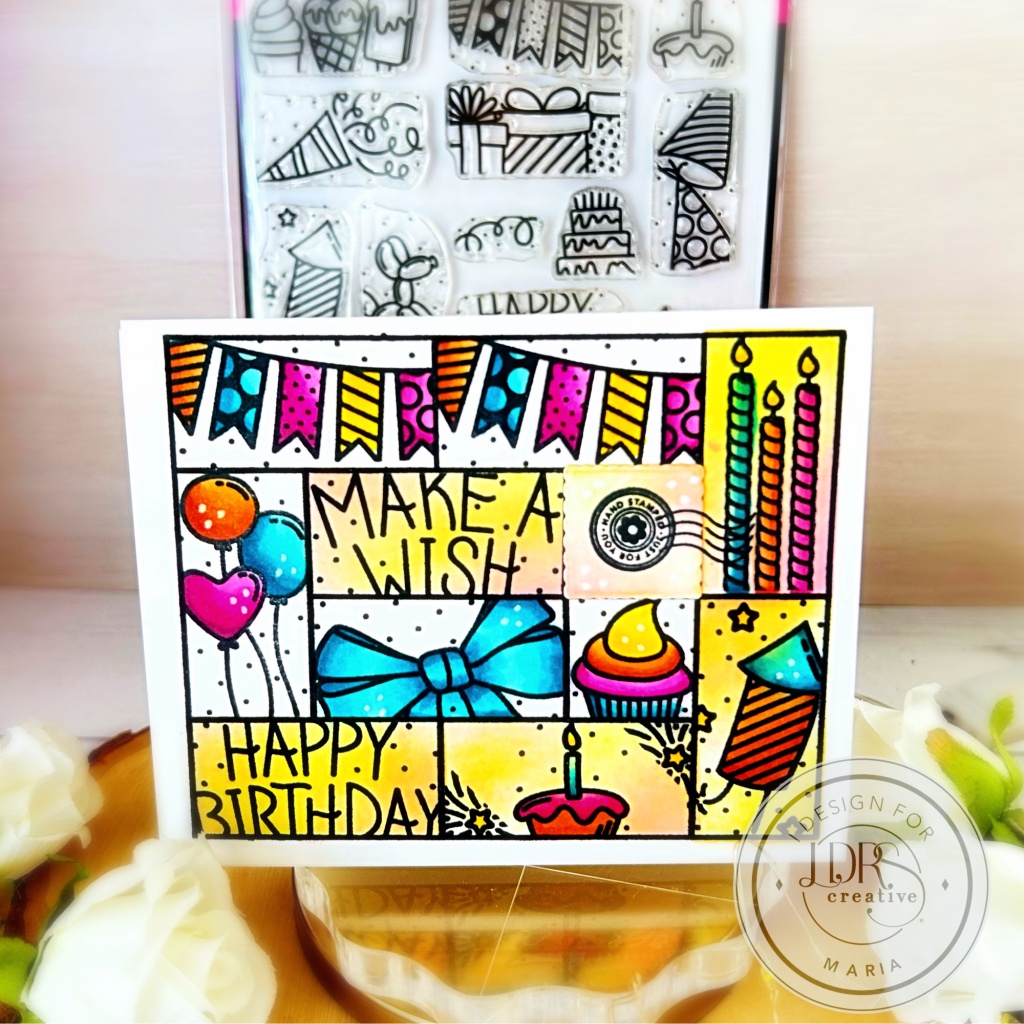
I began by stamping the Puzzle Frames Stamp on white cardstock with Raven Hybrid ink. Using the Birthday Puzzle Scenes 6×8 Stamp Set, I chose a few cute images and stamped each inside the block.
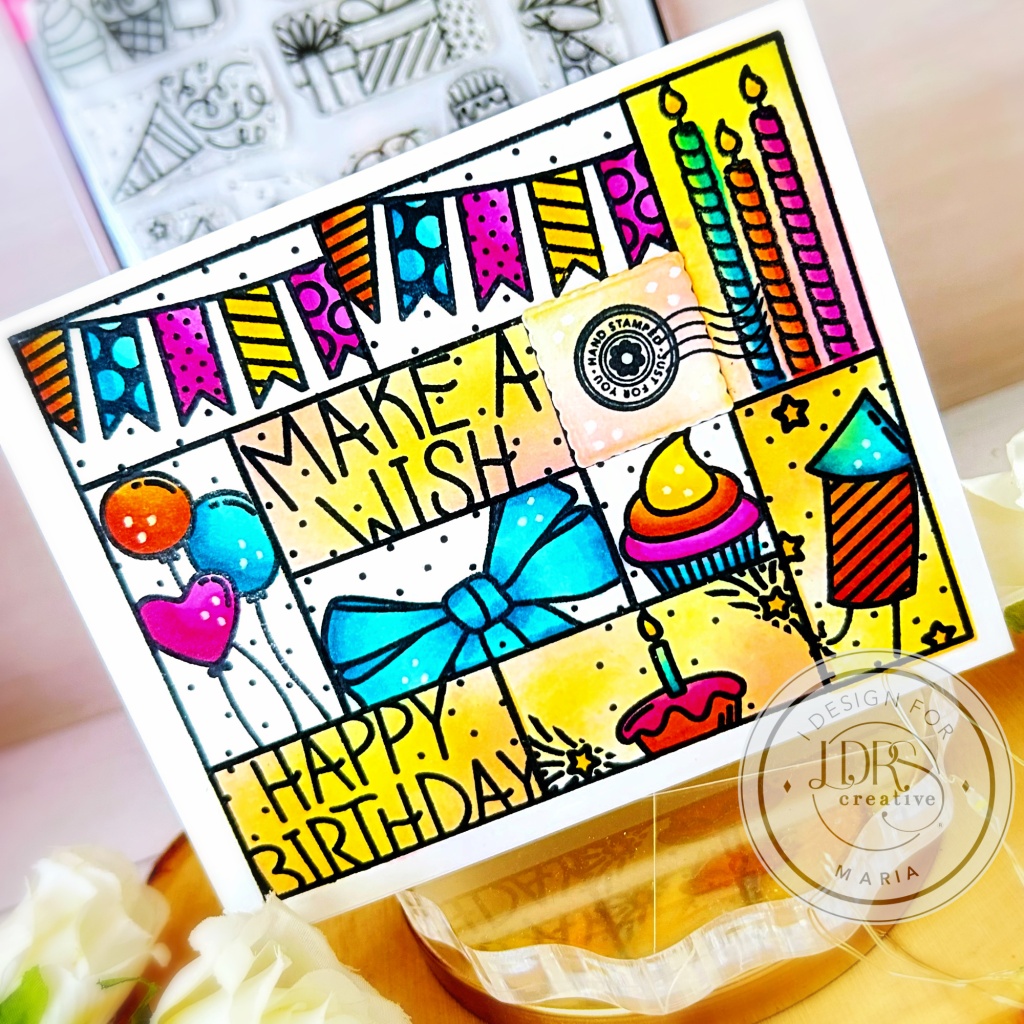
I wanted this birthday card to be very colorful so I chose bright blue, orange, yellow, and pink markers! I used the Puzzle Mask Stencil with a few blending brushes to add some color to the blocks. For reference, I used Pink Tutu and Banana Cream Pie hybrid inks.
The final step was to add a little “stamp” on the card. I die-cut the square using the Nested Postage Collage Die and stamped the image from the Here Comes The Sun Postage Collage Stamp Set.
I hope you like my project today. Thanks for stopping by, and happy crafting!